
When I sat down to design this dress, I had a clear vision in my head. I wanted something that felt like summer in wearable form, with a fitted silhouette that actually flatters, delicate fruit motifs that pop without overwhelming, and that perfect balance between sweet and sophisticated. The triangular cup bodice, the gathered skirt with its flirty ruffle, the coral accents against creamy cotton, those tiny crocheted strawberries scattered like little jewels.
Get the Ad-Free PDF Pattern
You can find the free pattern below, or you can purchase the ad-free printable PDF from my shop.
Get the Printable PDF →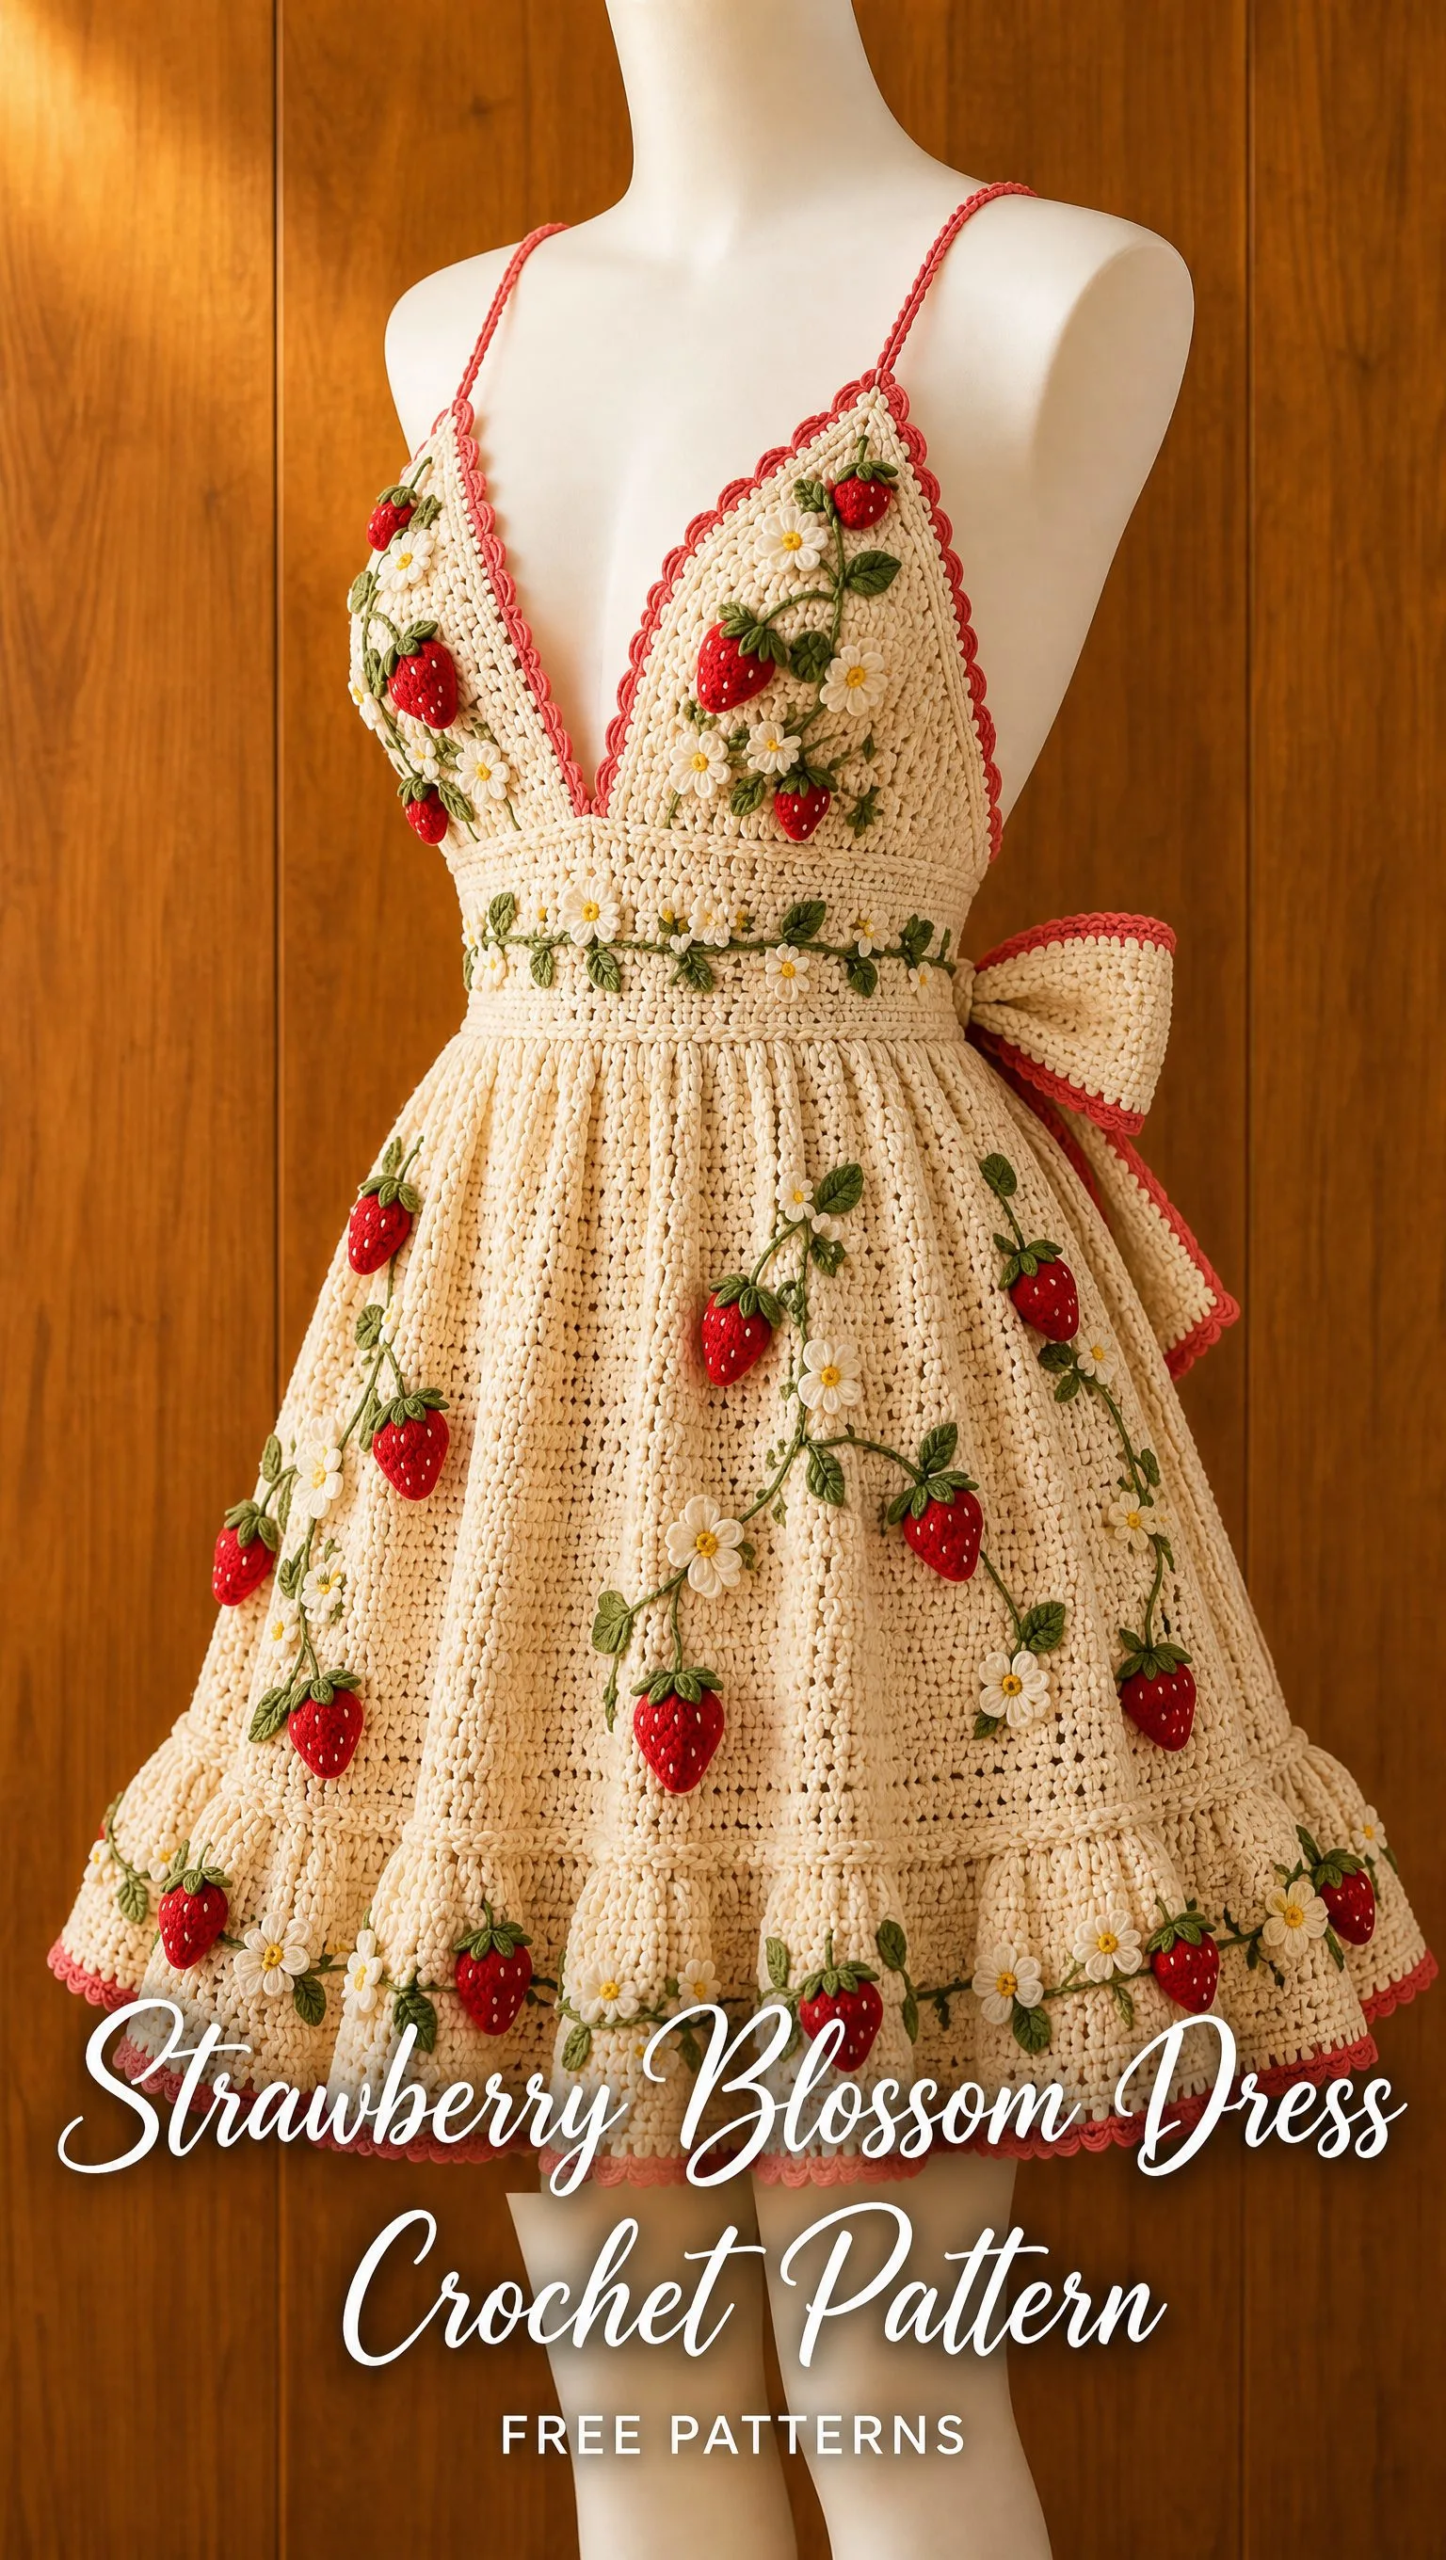
I spent hours tweaking the waistband height, adjusting the skirt fullness, and perfecting those applique placements. Every detail had to work together.
And honestly? I am SO pleased with how this turned out. This Strawberry Blossom Dress is exactly what I imagined, and I cannot wait to walk you through every single step.
About This Crochet Dress Pattern
This is an intermediate to advanced level project, but please do not let that scare you off if you are a confident beginner ready for a challenge. The construction is actually quite logical once you break it down. You will work the bodice cups separately, join them, add a fitted waistband, then build the gathered skirt with a sweet lower ruffle. The strawberry and blossom appliques are made individually and sewn on at the end.
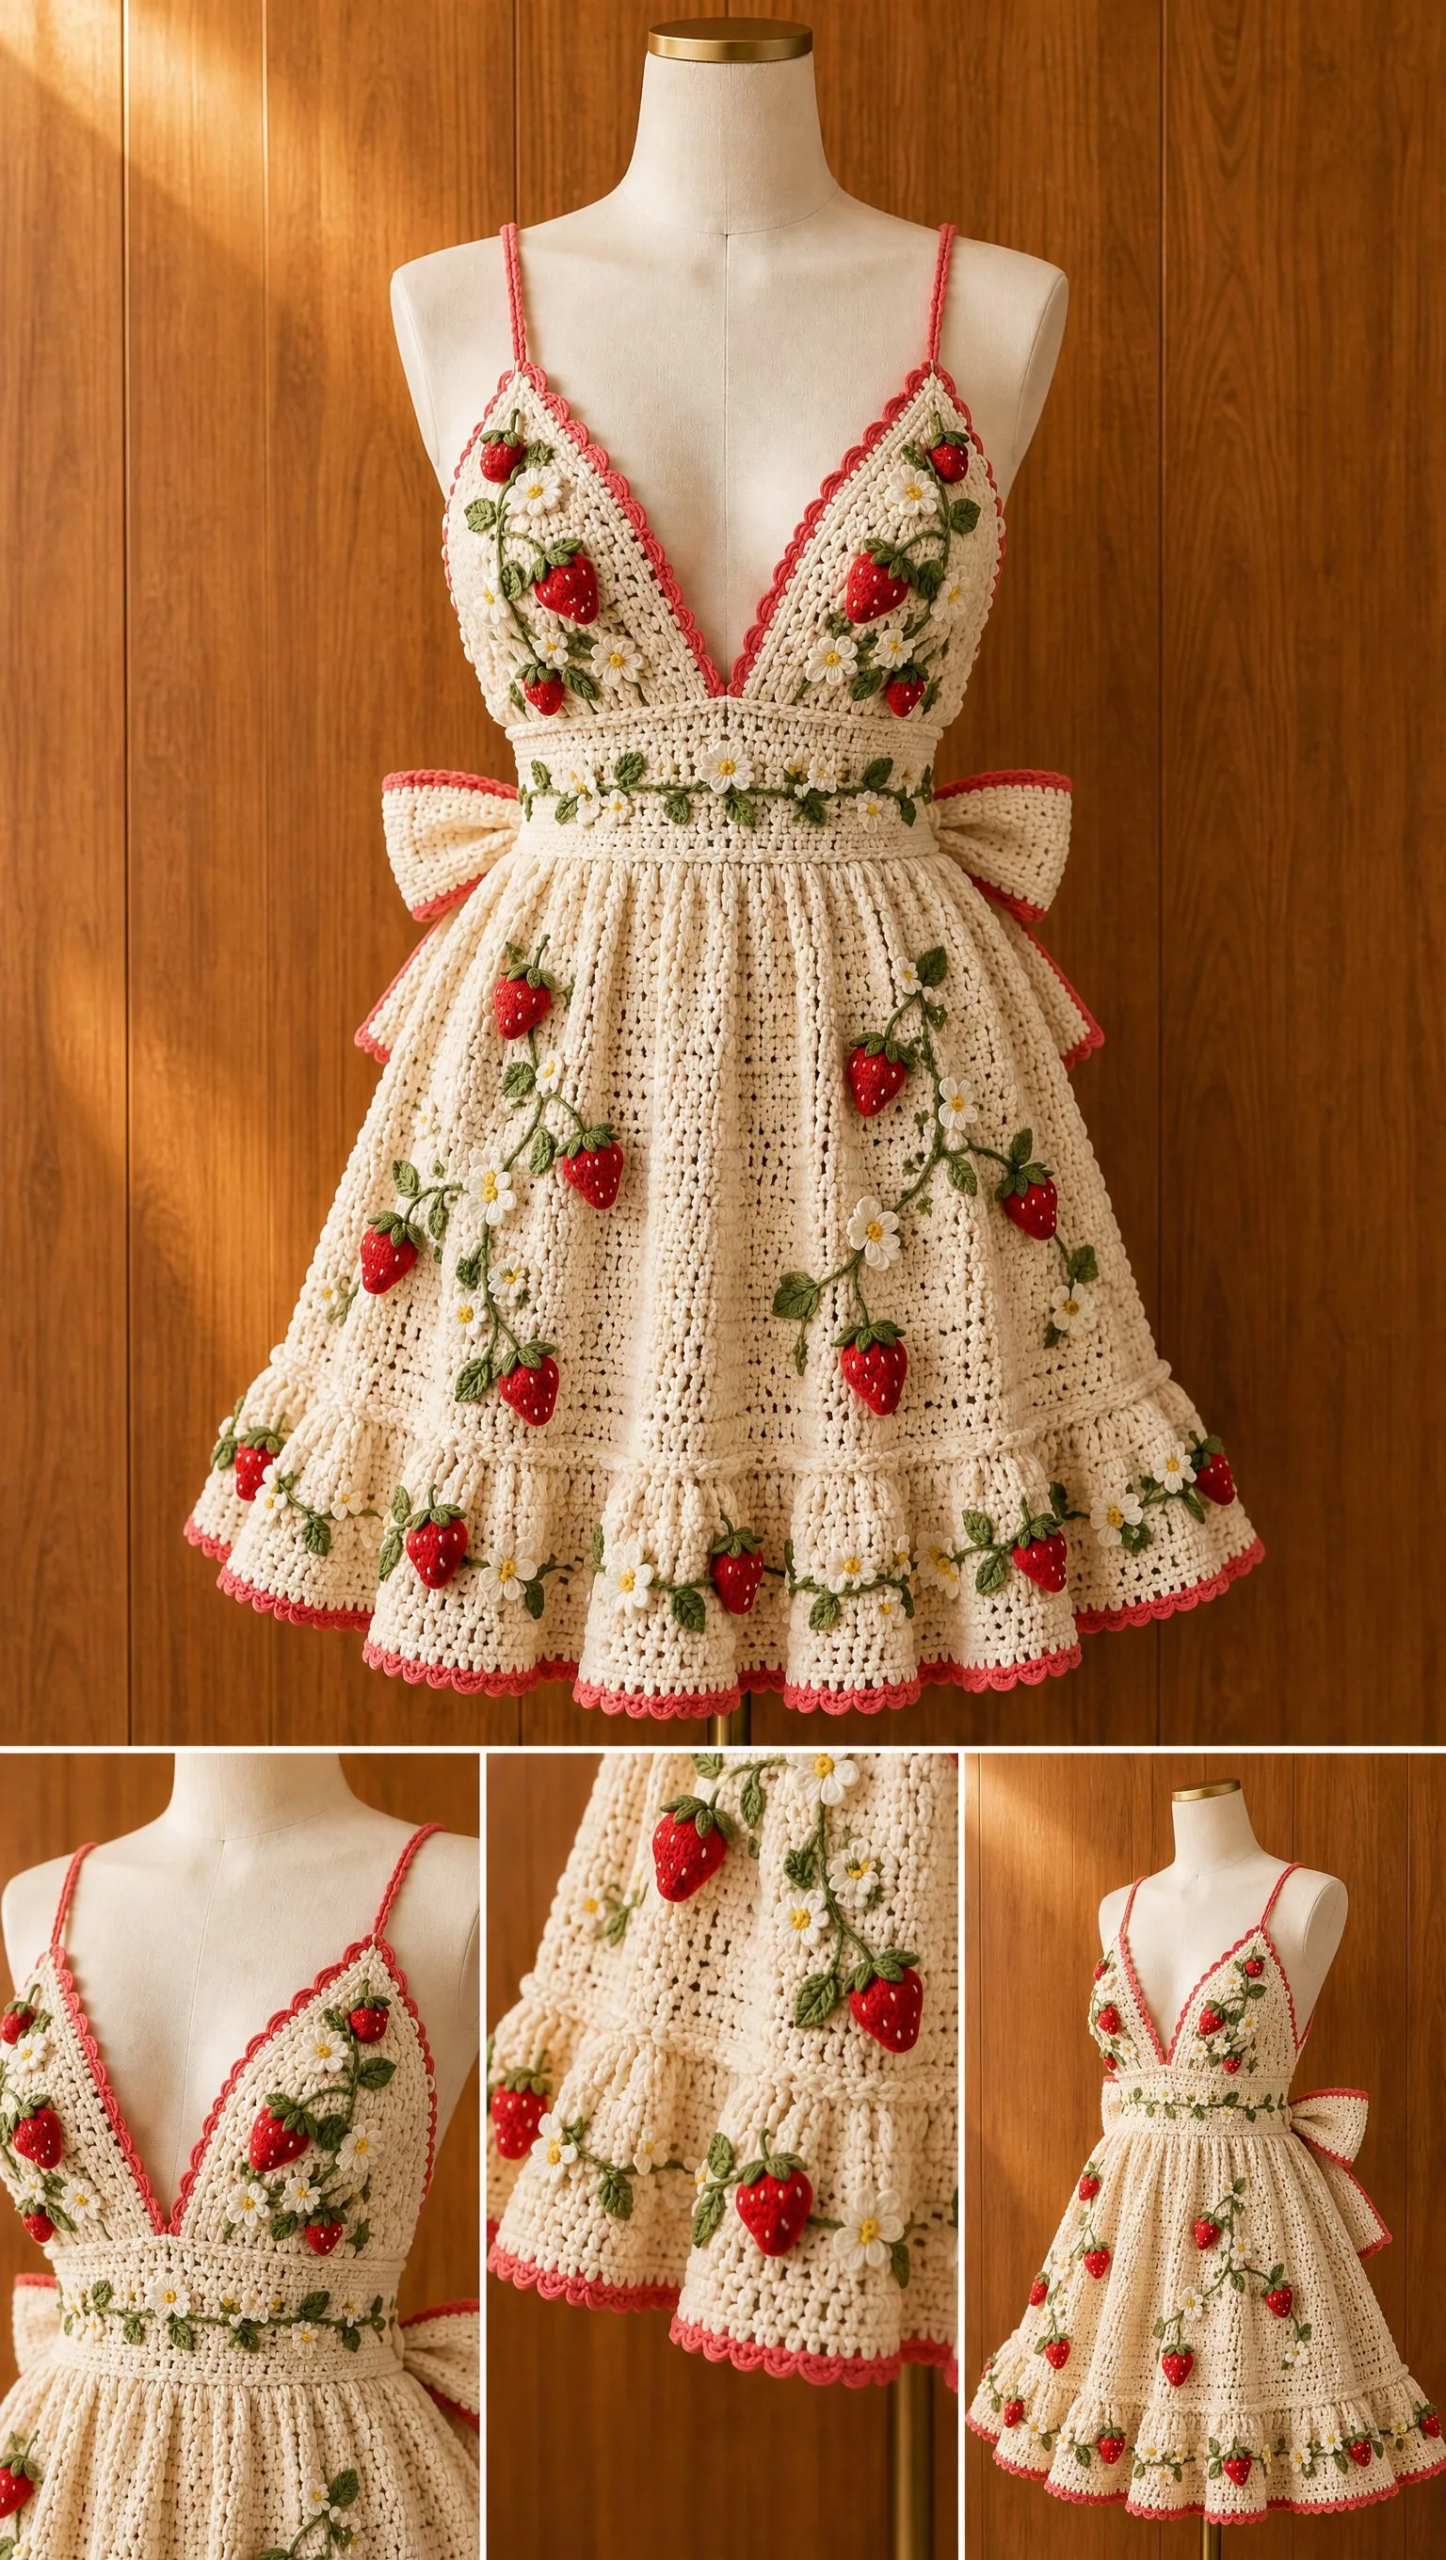
The finished dress features a deep V neckline, coral spaghetti straps, a surface crocheted vine detail across the waist, and decorative bows at the sides. It is designed for handmade fashion photography or special occasions, though honestly, I think it would be perfect for a summer garden party or beach vacation too.
Skill Level: Intermediate to Advanced
Garment Type: Adult crochet sundress
Style: Fitted bodice, triangular cups, gathered skirt, floral fruit applique detailing
Materials You Will Need
Gathering your supplies before you start makes the whole process so much smoother. Here is everything you need for this strawberry dress crochet pattern:
Yarn:
Tools:
Cotton yarn is essential here. It gives the dress structure, keeps it breathable for warm weather, and holds those crisp stitch definitions you see in the finished piece. I recommend a quality mercerized cotton for the smoothest finish.
Gauge
Approximately 20 single crochet (sc) stitches x 22 rows = 10 cm square
Take the time to check your gauge before starting. You want a firm but flexible fabric. If your swatch is too loose, the dress will stretch and sag. Too tight, and it will not have any drape. Adjust your hook size up or down until you hit that sweet spot.
To make a gauge swatch, chain 24 and work 26 rows of single crochet. Block it lightly, then measure the center 10 cm both horizontally and vertically.
Stitch Abbreviations
Let me walk you through every stitch abbreviation you will encounter in this pattern:
Construction Overview
Understanding how this dress comes together will help you visualize the process. The Strawberry Blossom Dress is made in sections:
1. Bodice cups, worked flat as triangles
2. Waistband, worked in the round
3. Gathered skirt, worked in the round with increases
4. Lower ruffle, added at the hem
5. Appliques, made separately and attached
6. Finishing details, including straps, bows, and blocking
You will start from the top and work your way down, adding the decorative elements last.
Bodice Pattern
Left and Right Triangle Cups
You will make two identical cups. Here is how to crochet each one:
Foundation: Chain 18 using your cream yarn.
Row 1: Single crochet (sc) across the chain. You should have 17 sc, not counting the turning chain.
Row 2: Chain 1, turn. Increase one stitch at each edge by working 2 sc in the first stitch and 2 sc in the last stitch.
Repeat increase rows until the cup reaches your desired bust coverage. The number of rows will depend on your size, but you are building a clean triangular shape. Keep your single crochet stitches compact and even throughout.
Once each cup reaches the right size, switch to your coral yarn and work a scalloped border around the entire edge of each cup. This creates that pretty coral trim you see in the finished dress.
Joining the Cups
Now you will connect your two triangles:
1. Place the cups with the V neckline centered, points meeting in the middle
2. Using your cream yarn, single crochet (sc) across the joining edge
3. Reinforce the center point with extra stitches to make sure it holds securely
This creates the signature deep V neckline of the bodice.
Straps
The straps are simple but important for fit:
1. Attach coral yarn at the outer corner of each cup
2. Chain until the strap reaches your shoulder placement, measuring as you go for accurate length
3. Single crochet (sc) back along the chain to create a solid strap
4. Sew securely to the back bodice
Make sure both straps are equal length. Nothing ruins a cute dress faster than uneven straps!
Waistband
The waistband creates structure and definition at the natural waist:
1. Work rounds of compact single crochet (sc) around the torso in cream yarn
2. Create an opaque fitted band approximately 8 to 10 cm tall
3. Keep your stitches tight and even for a smooth appearance
Once your waistband is complete, add a surface crochet green vine across the front. Surface crochet means you are working slip stitches on top of your finished fabric, creating a raised line that looks like a trailing vine. This is where some of your blossoms will attach later.
Skirt Pattern
The gathered skirt is where this dress really comes to life. That beautiful fullness and movement happens through strategic increases.
Attach yarn below the waistband.
Round 1: Increase evenly around the waist edge. This initial increase round creates the foundation for the gathered look.
Continue working single crochet (sc) rounds while increasing gradually for fullness. You are creating gathered shaping by adding controlled increases every few rounds. This builds volume slowly rather than all at once, which gives you a more natural, flattering drape.
Work until the skirt reaches your desired length, keeping those increases consistent.
Lower Ruffle
The lower ruffle adds that feminine, flirty finish at the hem:
1. At your desired skirt length, increase stitches around the final round
2. Work several rounds of soft shell or double crochet (dc) ruffle stitches
3. Finish with coral scallop edging to match the bodice trim
The ruffle should have noticeable volume and movement. If it feels too flat, add another increase round before your ruffle rows.
Strawberry Applique Pattern
These adorable little berries are what make this dress so special. You will make several and scatter them across the bodice and skirt.
Strawberry Body
Using red yarn:
1. Create a magic ring
2. Round 1: Work 6 single crochet (sc) into the ring, then pull the ring closed
3. Round 2: Increase around, working 2 sc in each stitch (12 sts)
4. Rounds 3 through 5: Single crochet (sc) evenly without increases
5. Shape slightly into a rounded berry by decreasing if needed
6. Fasten off and leave a tail for sewing
Once your berry is complete, use your pale ivory yarn to embroider seed stitches scattered across the surface. These tiny straight stitches mimic strawberry seeds and add so much realistic detail.
Strawberry Leaves
Using green yarn:
1. Create small pointed leaves using chains and slip stitches
2. Work ch 5, sl st in second chain from hook, sc, hdc, sc, sl st to create one leaf
3. Make a cluster of 3 to 5 tiny leaves
4. Attach at the top of each strawberry
Blossom Applique Pattern
The delicate white flowers complement the strawberries perfectly. They represent strawberry blossoms, which is where this dress gets its name!
Flower Petals
Using ivory yarn:
1. Create a magic ring
2. Work five evenly spaced petals using chain loops and double crochet (dc) clusters
3. For each petal: ch 3, work 2 dc into ring, ch 3, sl st into ring
4. Continue around until you have 5 petals
5. Pull the magic ring closed
Flower Center
Using yellow yarn, add a small stitched center to each blossom. You can either work a few French knots or simply embroider small straight stitches in the middle.
Arrangement
Now comes the fun part, placing your appliques!
Look at the reference images for guidance on applique density and placement. You want them to feel organic and flowing, like a real strawberry plant climbing across the dress.
Waist Bow
The decorative bows at each side of the waist add a charming finishing touch.
Make two cream bow loops:
1. Create a chain foundation
2. Work compact single crochet (sc) rows to create a rectangle
3. Add coral edging around the rectangle
4. Fold into a bow shape and create a center knot by wrapping yarn around the middle
5. Sew bow securely at the waistband sides
Position the bows at your hip points for the most flattering look.
Finishing Your Strawberry Blossom Dress
Almost there! These final steps make the difference between a good project and a stunning finished piece.
1. Weave in all ends invisibly using your yarn needle. Take your time here. Nothing ruins beautiful work like visible yarn tails.
2. Block the dress lightly to shape the V neckline and skirt flare. For cotton yarn, you can wet block by soaking briefly in cool water, gently squeezing out excess moisture, and laying flat to dry on a blocking mat. Pin the neckline and skirt hem to your desired shape.
3. Check all joins for strength. Gently tug at the cup joins, strap attachments, and waistband seams. Reinforce anything that feels loose.
4. Ensure appliques lie flat and fabric remains flexible. If any strawberries or flowers are puckering, adjust their attachment stitches.
Care Instructions
Your handmade dress deserves gentle care to stay beautiful:
Tips for Success
For the bodice: Try on as you go! Everyone’s bust is different, so checking the cup coverage as you increase will give you the best fit.
For the skirt: Count your stitches at the end of each round. Losing or gaining stitches will throw off your increases and create uneven fullness.
For the appliques: Make a few extra strawberries and flowers. It is easier to have options when arranging than to stop and make more.
For the straps: Consider making them adjustable by adding a small button closure at the back rather than sewing them permanently.
Finished Design Notes
The completed Strawberry Blossom Dress features a cream crochet base, coral accents, strawberry and blossom motifs, a fitted silhouette, and a softly flared skirt. It is suitable for handmade fashion photography, special occasions, summer events, or anywhere you want to feel absolutely lovely.
This crochet dress pattern creates something truly special. The combination of fitted bodice, gathered skirt, and hand placed appliques results in a wearable piece of art. Yes, it takes time and attention. Yes, some sections require patience. But when you slip it on and see yourself in the mirror? Worth every single stitch.
I really hope you love making this Strawberry Blossom Dress as much as I loved designing it. If you give it a try, please save this pattern to your Pinterest boards so you can find it easily when you are ready to start. And I would absolutely love to see your finished dress! Drop a comment below or tag me on Instagram with your creation. Happy crocheting!
Want a Quick & Easy Printable Version?
Get a clean, beautifully formatted PDF of this pattern — easy to follow step by step, ready to print or save on any device. No scrolling, no distractions, just the pattern.
Get the Printable PDF →You Might Also Like
- Dusty Rose Romantic Bucket Bag Free Crochet Pattern
- Mint Green Summer Baby Romper Free Crochet Pattern
- Dusty Rose Bow Handbag Free Crochet Pattern
- Ocean Blue Gradient Crochet Dress Free Crochet Pattern
