
Crochet garments look intimidating. I hear it all the time. "I could never make something that fitted" or "Joining motifs sounds way too complicated for me." Here’s the truth: if you can work a half double crochet and follow a simple flower pattern, you can absolutely make this stunning halter top. The construction breaks down into manageable pieces that you work separately and then join together. No complicated shaping worked all at once. No confusing circular yoke math.
Get the Ad-Free PDF Pattern
You can find the free pattern below, or you can purchase the ad-free printable PDF from my shop.
Get the Printable PDF →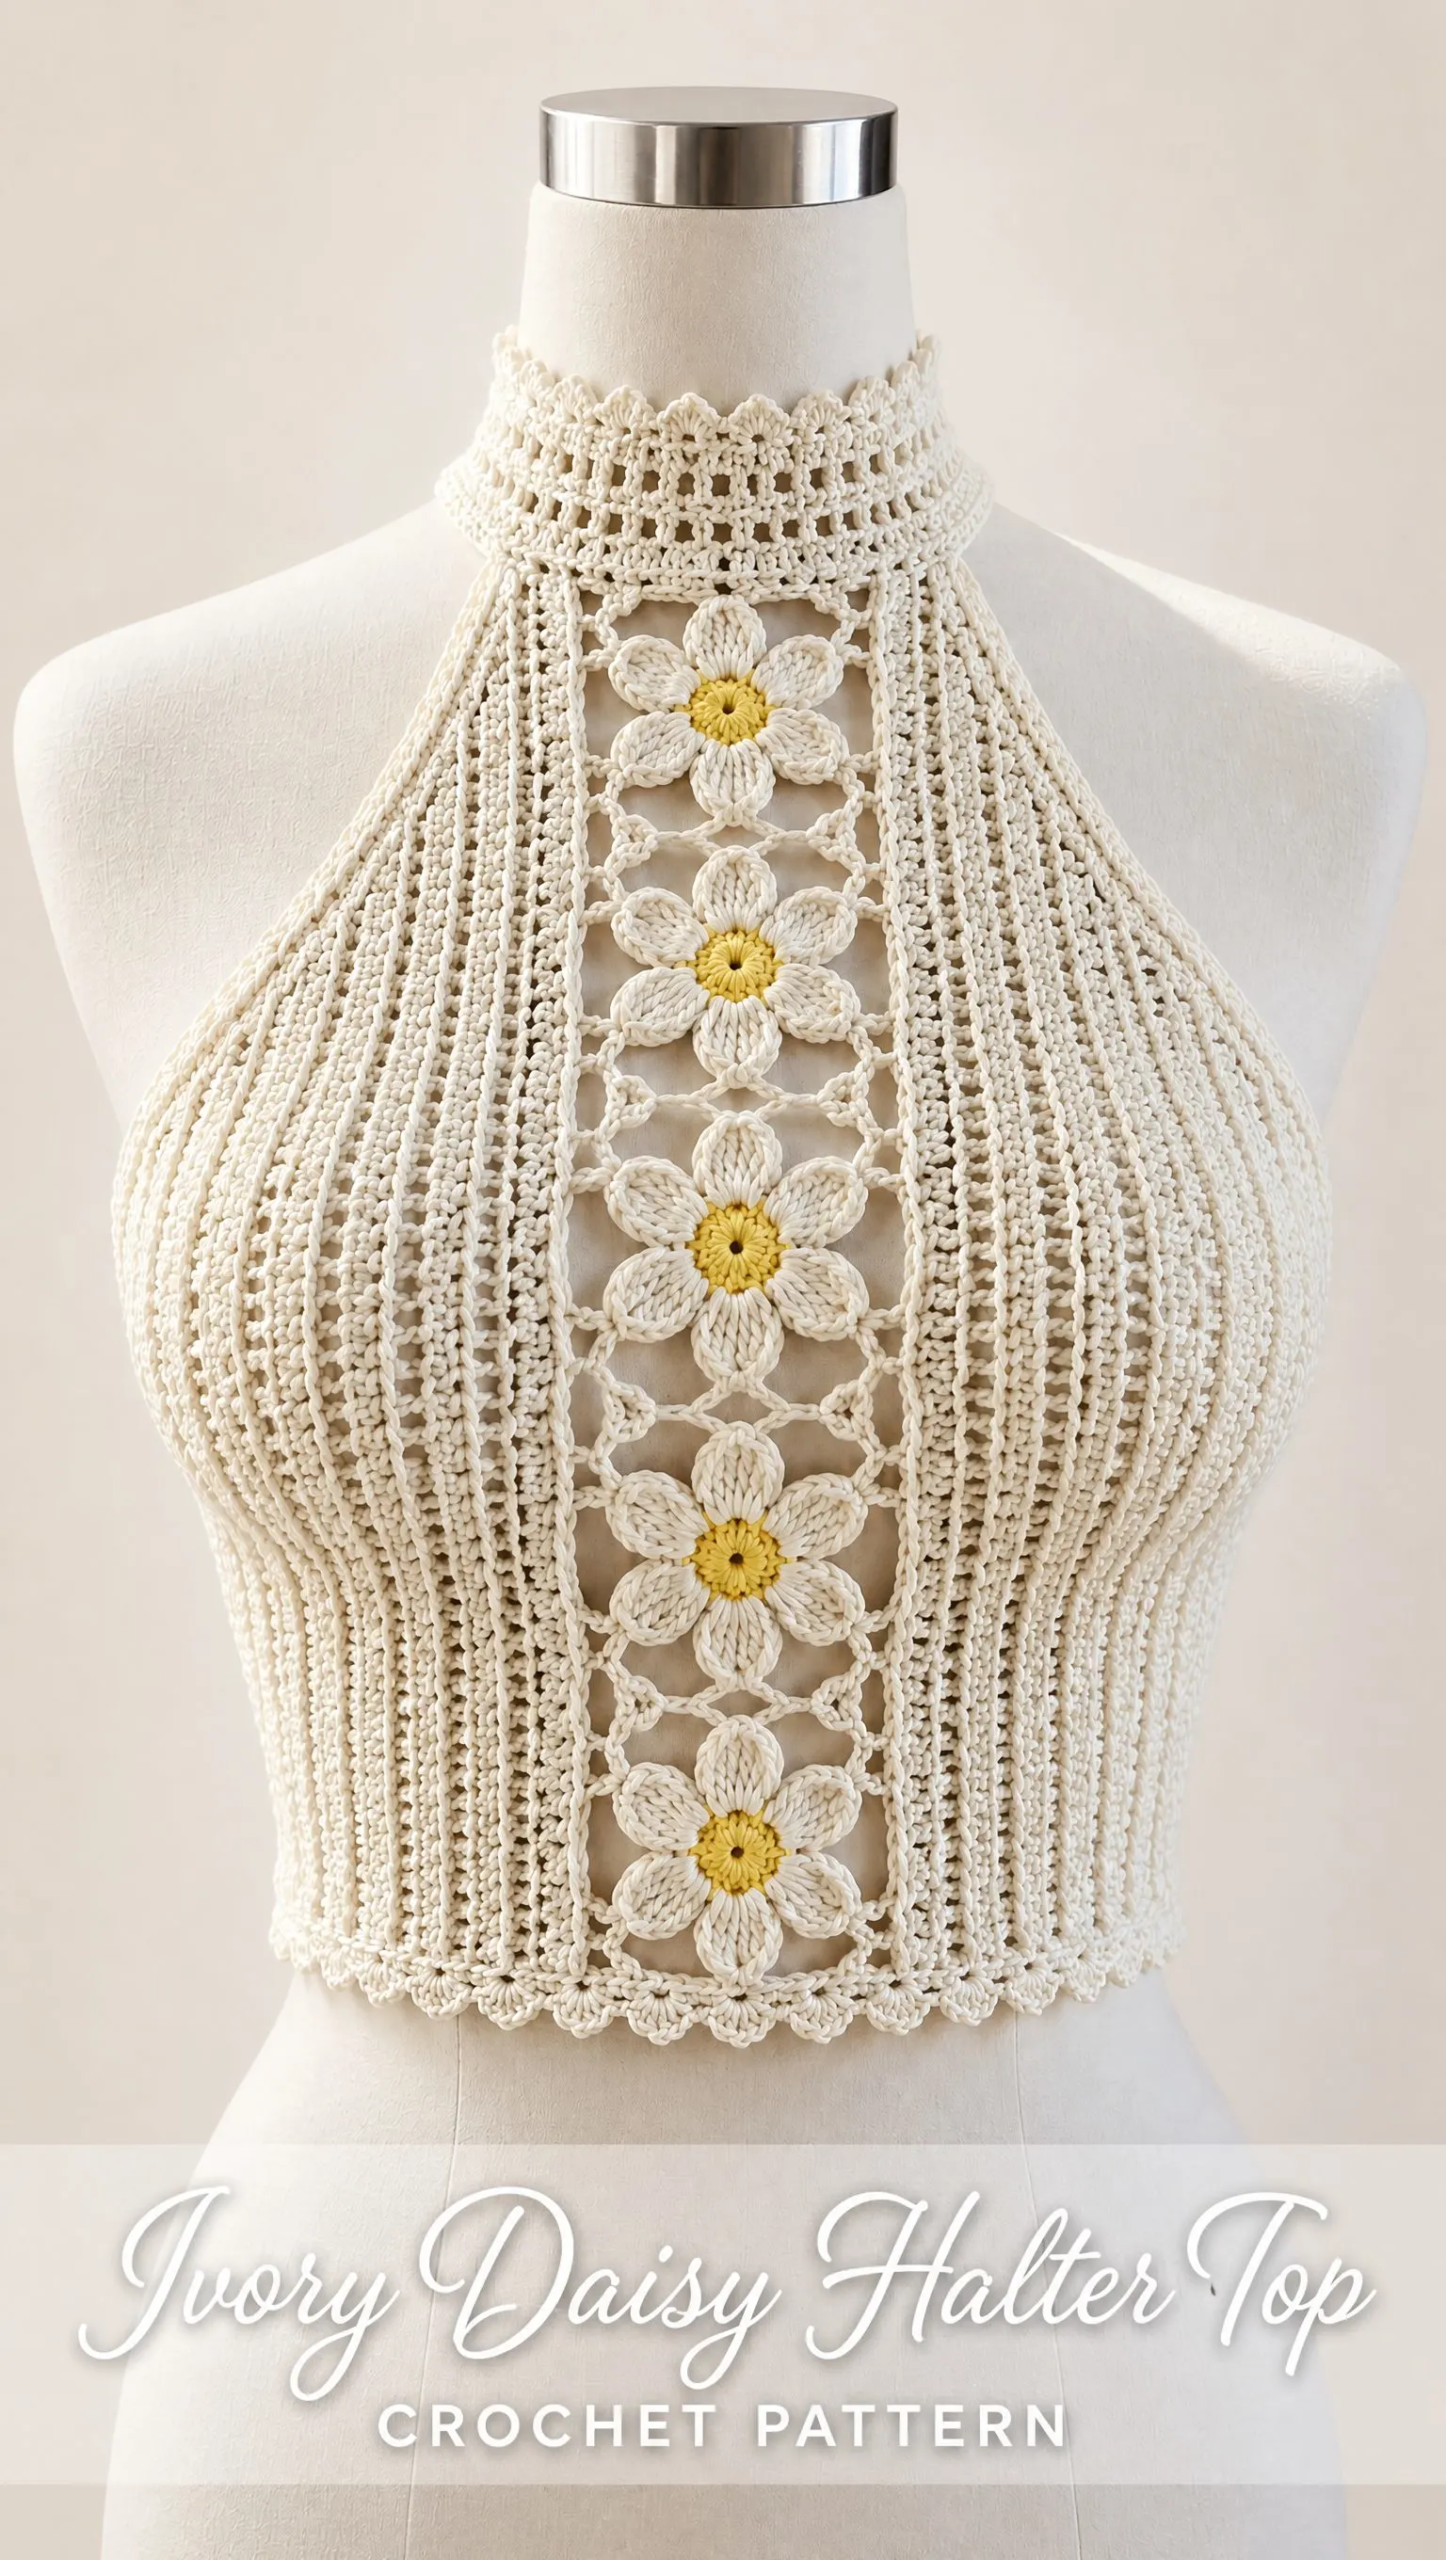
This Ivory Daisy Halter Top looks like something you’d find in a boutique window, but the techniques are surprisingly approachable. You’ll make flat ribbed panels, simple six-petal daisies, and then connect everything with basic single crochet joins. Each step builds on skills you likely already have.
Whether you’re an intermediate crocheter ready to try your first garment or someone who’s made tops before and wants a fresh summery project, this pattern meets you where you are. I’ll walk you through every section with clear explanations, stitch counts, and tips for getting that professional finish.
About This Pattern
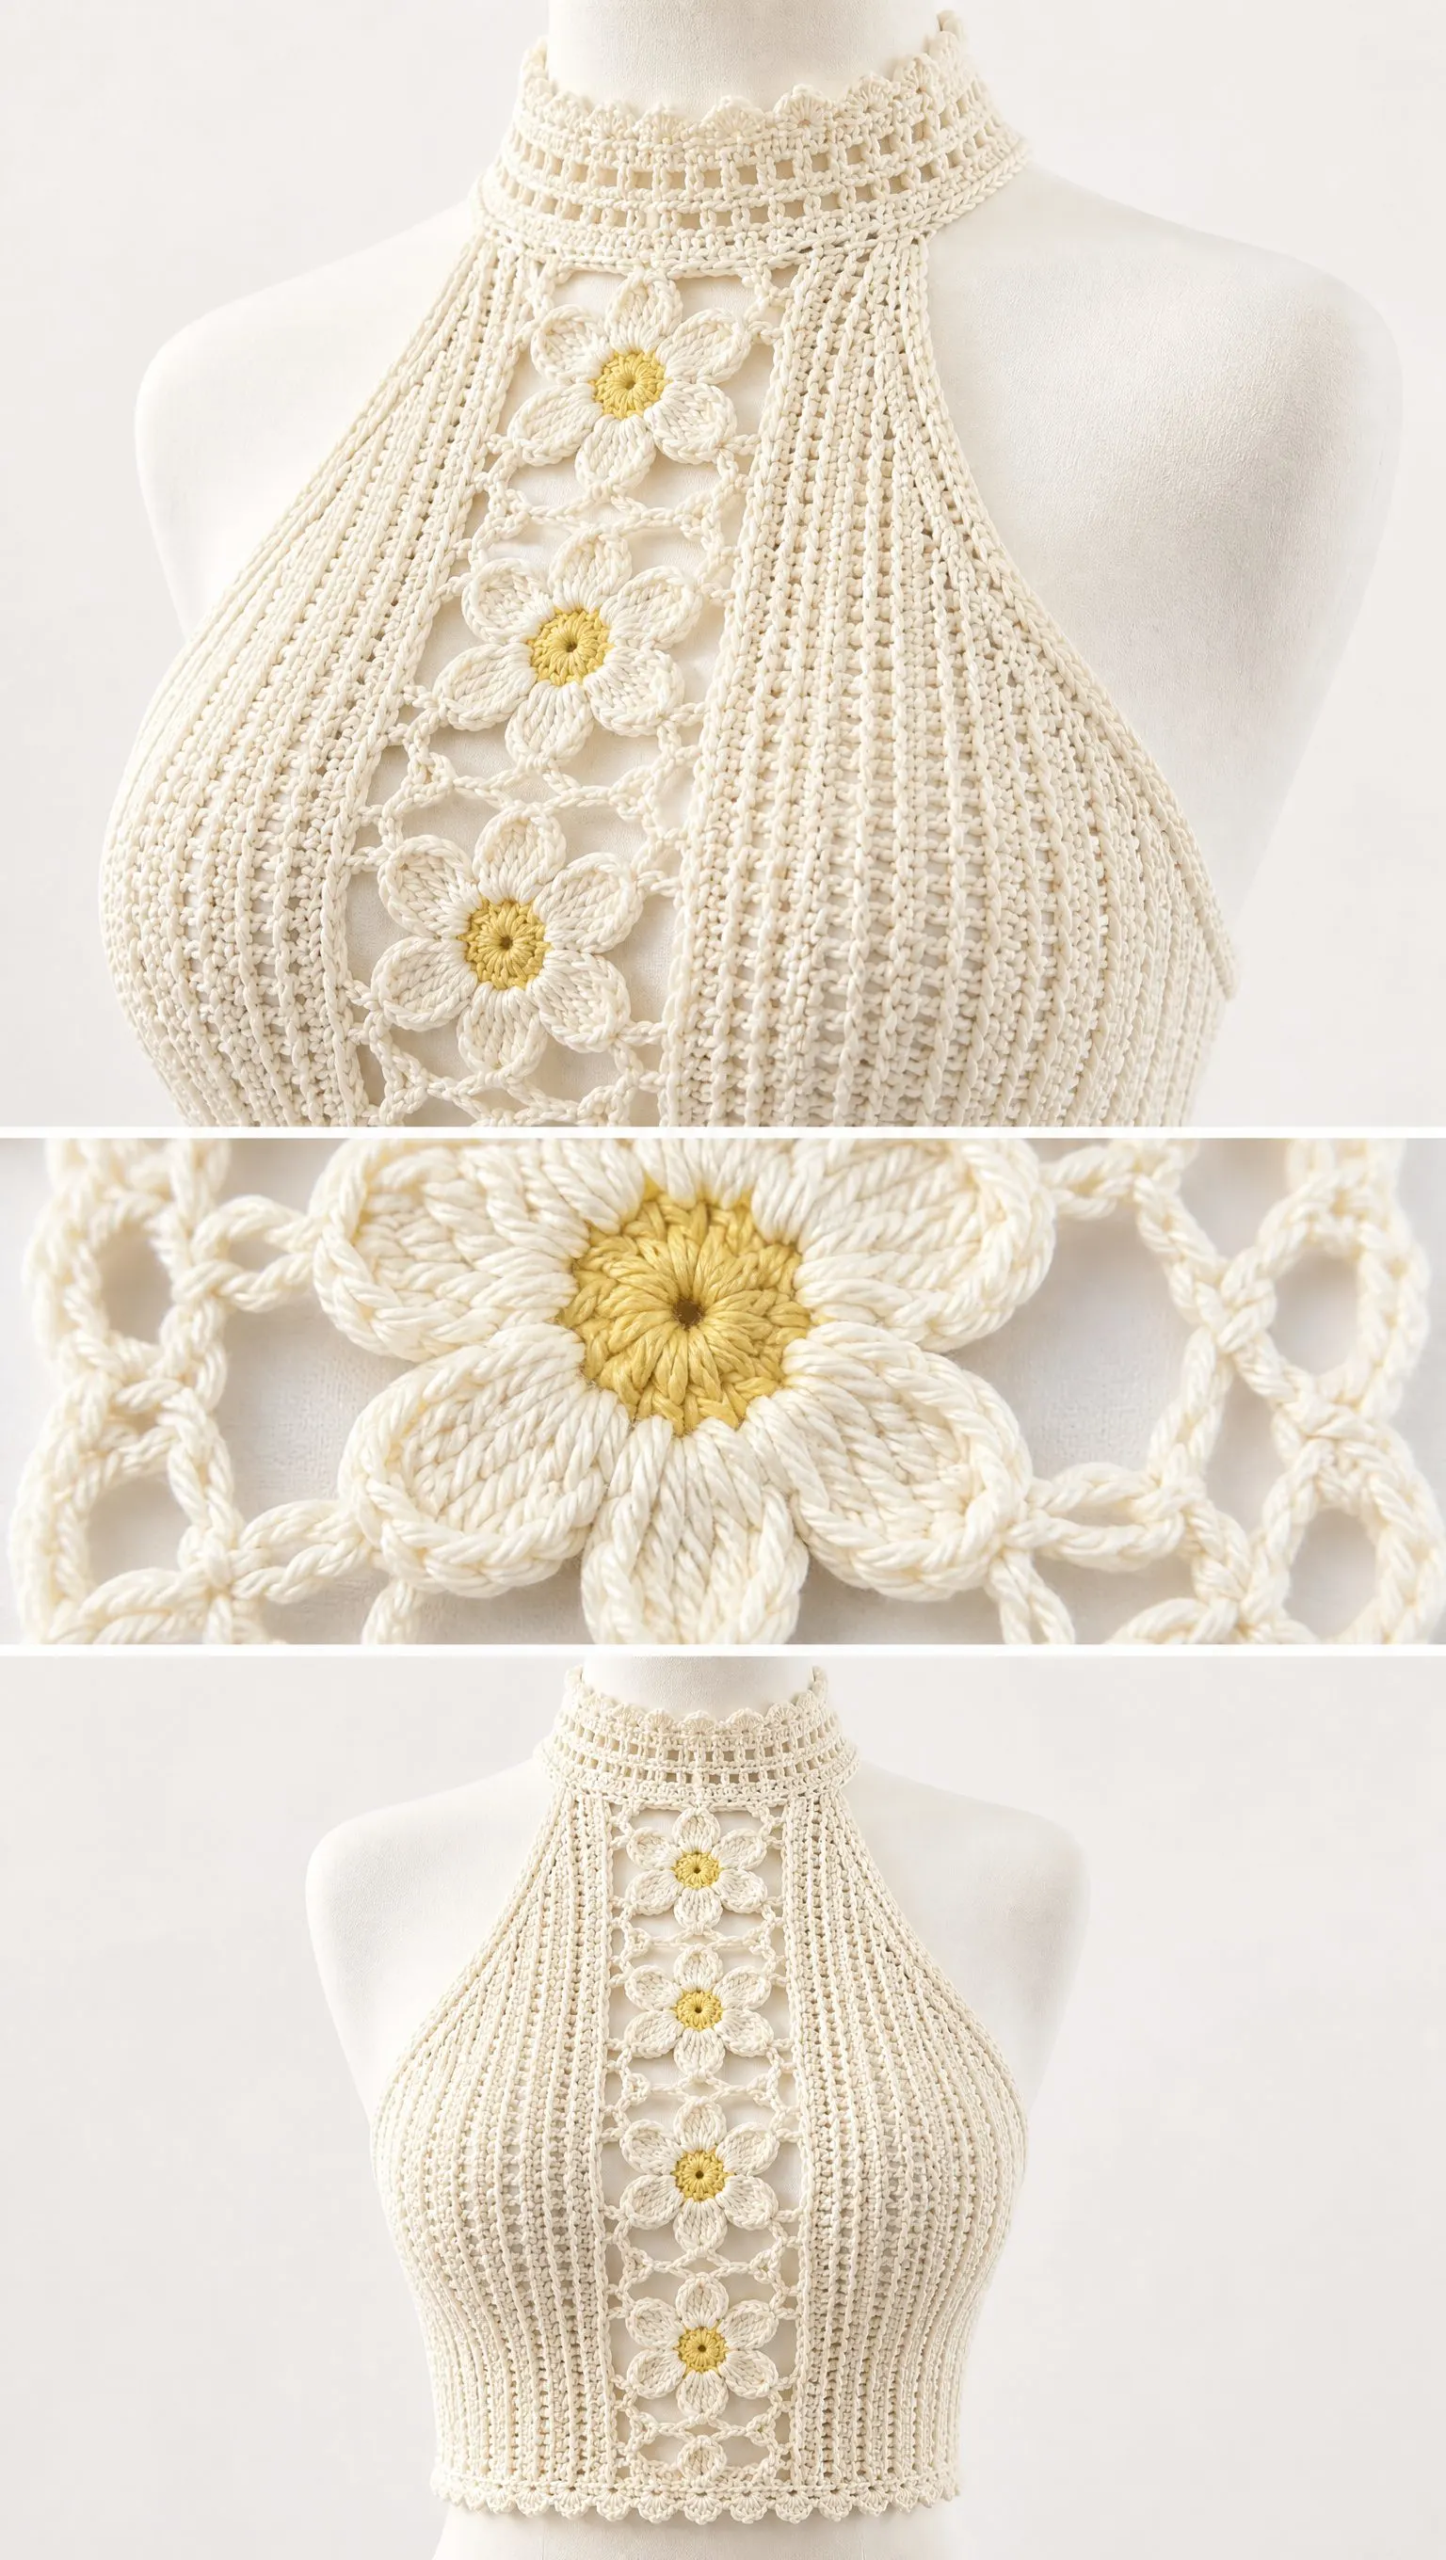
This fitted ivory cotton halter crop top features vertical half double crochet (hdc) ribbing on the side panels, a tall lace neck collar, and a central openwork panel made from linked six-petal daisy medallions. The design is lightweight, structured, and elegant with a vintage floral-inspired finish that’s perfect for warm weather layering.
The top is constructed in three main sections: left and right ribbed side panels, a central daisy lace strip, and a neck collar with finishing edges. This modular approach means you can work on pieces separately and check your progress as you go.
Skill Level
This pattern is rated Intermediate.
Skills required include working in rows, increasing and decreasing, creating lace spaces, joining motifs, shaping garments, and clean edging techniques. If you’ve never shaped a garment before, don’t worry. The bust shaping here is gradual and straightforward, with decreases spaced every few rows to create a natural curve.
Finished Sizes
This pattern includes four women’s adult sizes:
Finished length measures approximately 15-16 inches (38-41 cm) from neck to hem.
Materials You’ll Need
Yarn:
Tools:
Cotton yarn is essential for this project. It provides the structure needed for a fitted garment and blocks beautifully to open up those lace spaces. The butter yellow is just for the daisy centers, so you only need a small amount.
Gauge
20 half double crochet stitches x 14 rows = 4 x 4 inches (10 x 10 cm)
Gauge matters for garments! Take time to make a swatch before starting. If your swatch is too small, go up a hook size. If it’s too large, go down a hook size. Your finished top will fit much better if you match gauge.
Abbreviations
Before we dive into the pattern, let’s define all the stitches and terms you’ll encounter:
Construction Notes
Understanding how this top comes together will help you visualize your progress. The top is made in three sections:
1. Left and right ribbed side panels
2. Central daisy lace strip
3. Neck collar and finishing edges
You’ll work the side panels first, then create and connect your daisy motifs, join everything together, and finish with the collar and edging details.
Step-by-Step Pattern Instructions
Section 1: Side Ribbed Panels
Make two identical panels.
Foundation:
Ch 42.
Row 1:
Hdc in second chain from hook and across. Turn. (41 sts)
Row 2:
Ch 1, hdc in each stitch across working in the back loop only. Turn.
Repeat Row 2 until the panel measures approximately 7 inches (18 cm).
Working in the back loop only creates that beautiful vertical ribbing texture you see in the finished top. This technique makes the fabric stretchy horizontally, which helps the top hug your curves comfortably.
Shape the Bust:
Decrease one stitch at each outer edge every 3 rows until the upper halter shaping is achieved. Continue until the panel follows the bust curve.
To decrease, simply skip the first stitch after your turning chain and stop one stitch before the end of the row. This gradual shaping creates the fitted silhouette.
Repeat for the second panel. Make sure both panels match in size and row count before moving on.
Section 2: Daisy Motifs
Make 5 six-petal daisies.
These sweet flowers are the star of the show! Each one starts with a butter yellow center and finishes with ivory petals.
Flower Center:
Using butter yellow yarn:
Create a magic ring (also called a magic circle or adjustable ring).
Round 1:
Work 6 sc into ring. Join with sl st to first sc. (6 sts)
Round 2:
Work 2 sc in each stitch around. Join with sl st. (12 sts)
Petals:
Fasten off butter yellow and attach ivory yarn.
For each petal:
Ch 3, work 2 dc, ch 3, sl st into the same stitch.
Repeat around for six petals. You’ll work into every other stitch from your center round, creating six evenly spaced petals.
Flatten petals gently while blocking. This helps them lie flat and makes joining much easier.
Section 3: Connecting the Daisy Strip
Now comes the fun part of connecting your individual flowers into one cohesive panel.
Arrange five daisies vertically in a column.
Join with ivory chain loops:
Attach yarn between petals of the first flower.
Create diamond spaces using:
Ch 5, sl st into next flower point.
Continue until all flowers form one connected openwork panel.
The chain-5 loops create those pretty diamond-shaped spaces between the flowers. Take your time with this step and make sure the tension is even throughout. You want the strip to lie flat without bunching or stretching.
Section 4: Joining Front Sections
Place the daisy strip between the two ribbed side panels.
Attach using sc joins along both sides of the floral panel. Work through both the edge of the ribbed panel and the outer chain loops of the daisy strip simultaneously.
Ensure the center panel remains open and airy. Don’t pull your joins too tight, or you’ll distort the lacework. The goal is a secure connection that still allows the openwork pattern to shine.
Section 5: Halter Neck Collar
Join yarn at the neckline.
Round 1:
Sc evenly around neckline edge. Join.
Count your stitches at the end of this round. You’ll want an even number for the lace pattern to work correctly.
Round 2:
Hdc in each stitch around. Join.
Rounds 3-5:
Work lace pattern:
Ch 2, skip 1 stitch, sc in next stitch.
Repeat around. Join at end of each round.
Finish with picot edging:
Sc, ch 3, sl st into first chain (this creates the picot bump), sc.
Repeat around the top edge of the collar.
The picot edging adds that delicate scalloped finish you see along the neckline. It’s a small detail that makes a big visual impact.
Section 6: Armhole Edging
Work one round of firm sc around each armhole.
Keep tension tight for structure. This edging prevents the armholes from stretching out with wear and gives the top a polished, finished look.
Section 7: Lower Hem
Work one round sc around the entire bottom edge.
Mini Shell Border:
Skip 2 stitches, work 5 dc in next stitch (this creates the shell), skip 2 stitches, sc in next stitch.
Repeat around hem.
The shell border adds a feminine scalloped edge that echoes the curves of the daisy petals. Make sure you have a stitch count divisible by 6 before starting the shells. If not, adjust your sc round by adding or skipping a stitch at an inconspicuous spot.
Section 8: Blocking and Finishing
Lightly wet block the garment. Soak it in cool water with a drop of wool wash or gentle detergent, then squeeze out excess water with a towel. Never wring cotton yarn, as it can distort the stitches.
Shape the daisy petals flat. Use your fingers or blocking pins to gently coax each petal into position.
Stretch lace spaces evenly. Pin out the diamond shapes between daisies so they’re uniform in size.
Allow to dry completely. This may take 24-48 hours depending on humidity. Patience here pays off with a beautifully finished garment.
Care Instructions
Your finished top will last for years with proper care:
Troubleshooting Tips
If the top stretches:
Use a smaller hook or reinforce edges with an additional round of tight single crochet.
If flowers curl:
Block petals flat and adjust your tension. Curling usually means you’re crocheting too tightly. Try relaxing your grip on the next flower.
If the neckline feels loose:
Add an extra tightening round of sc before starting the lace pattern. You can also use a smaller hook just for the collar section.
Tips for Success
Work a gauge swatch. I know, I know. Nobody loves swatching. But for a fitted garment like this, it really matters. Spend 20 minutes on a swatch now to avoid ripping out hours of work later.
Block your daisies before joining. It’s much easier to connect flat, properly shaped flowers than to wrestle with curly ones.
Count your stitches. Especially on the side panels. Losing or gaining stitches will throw off your shaping.
Try it on as you go. Once you’ve joined the front sections, hold the piece up to your body. Does it look like it will fit? Now is the time to make adjustments.
Take photos of your progress. Not only is it satisfying to look back on, but it also helps you remember what you did if you need to make a second panel match.
Final Thoughts on the Ivory Daisy Halter Top Crochet Pattern
This halter top is the kind of project that looks impressive displayed on a hanger or mannequin, but don’t let that intimidate you. Every complex-looking element breaks down into simple, manageable steps. Ribbed panels are just rows of hdc in the back loop. Daisies are just circles with chain-loop petals. Joining is just single crochet through two layers.
You’ve got this.
The finished Ivory Daisy Halter Top works beautifully over a simple camisole or bralette for everyday summer wear. It also makes a stunning layering piece for festivals, beach days, or special occasions. The cotton construction means it stays cool and breathable even on the warmest days.
Whether you’re making this for yourself or as a gift for someone special, take your time and enjoy the process. There’s something deeply satisfying about watching those individual daisies come together into a wearable piece of art.
Thank you so much for choosing this pattern! I’d absolutely love to see your finished top. Tag me on Instagram or share a photo in our Facebook community. Seeing your creations genuinely makes my day.
If this pattern caught your eye, go ahead and save it to your Pinterest boards so you can find it when you’re ready to start. And if you do make this pretty daisy top, please drop a comment below. I love hearing how projects turn out and seeing the color combinations you choose!
Want a Quick & Easy Printable Version?
Get a clean, beautifully formatted PDF of this pattern — easy to follow step by step, ready to print or save on any device. No scrolling, no distractions, just the pattern.
Get the Printable PDF →You Might Also Like
- Mint Garden Baby Romper Set Free Crochet Pattern
- Sage Green Boho Poncho Free Crochet Pattern
- Ocean Blue Boho Crochet Beach Set Free Crochet Pattern
- Lavender Sprig Headband Crochet Pattern
