
I don’t know about you, but I have a serious weakness for bags that look like they belong in a cottage garden. Something about florals and soft purple tones just feels right, especially when the whole thing is handmade.
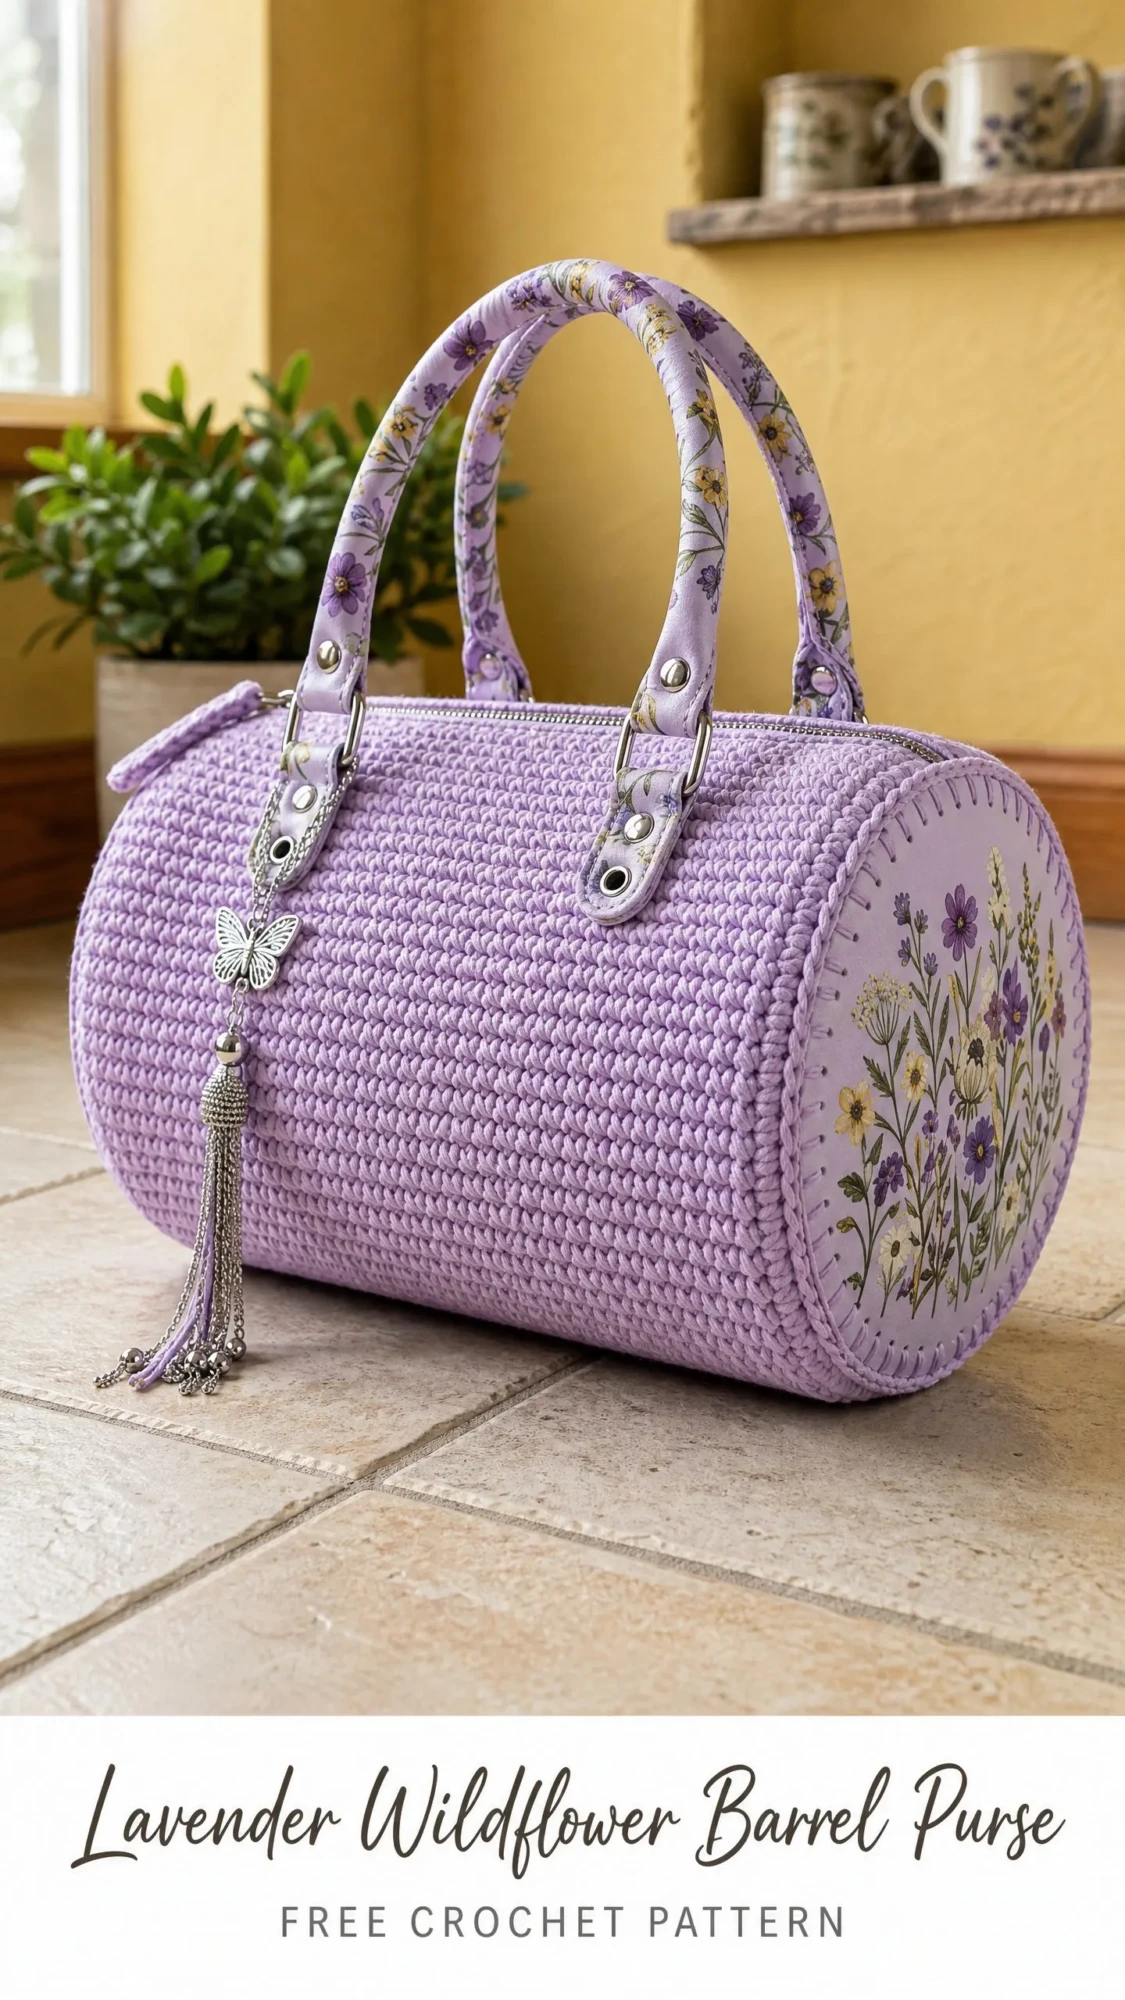
This barrel purse has been living rent-free in my head for weeks now. The cylindrical shape is so unexpected, the texture is satisfyingly dense, and those embroidered wildflower end caps? Absolute perfection.
If you’ve been searching for a crochet bag pattern that feels sophisticated without being fussy, this is the one. Let me walk you through every single step.
About This Lavender Barrel Purse Crochet Pattern
This gorgeous cylindrical handbag features a modified moss stitch (also called linen stitch or granite stitch) that creates the tight, woven-looking fabric you see in the photos. The construction is surprisingly straightforward once you understand the rhythm.
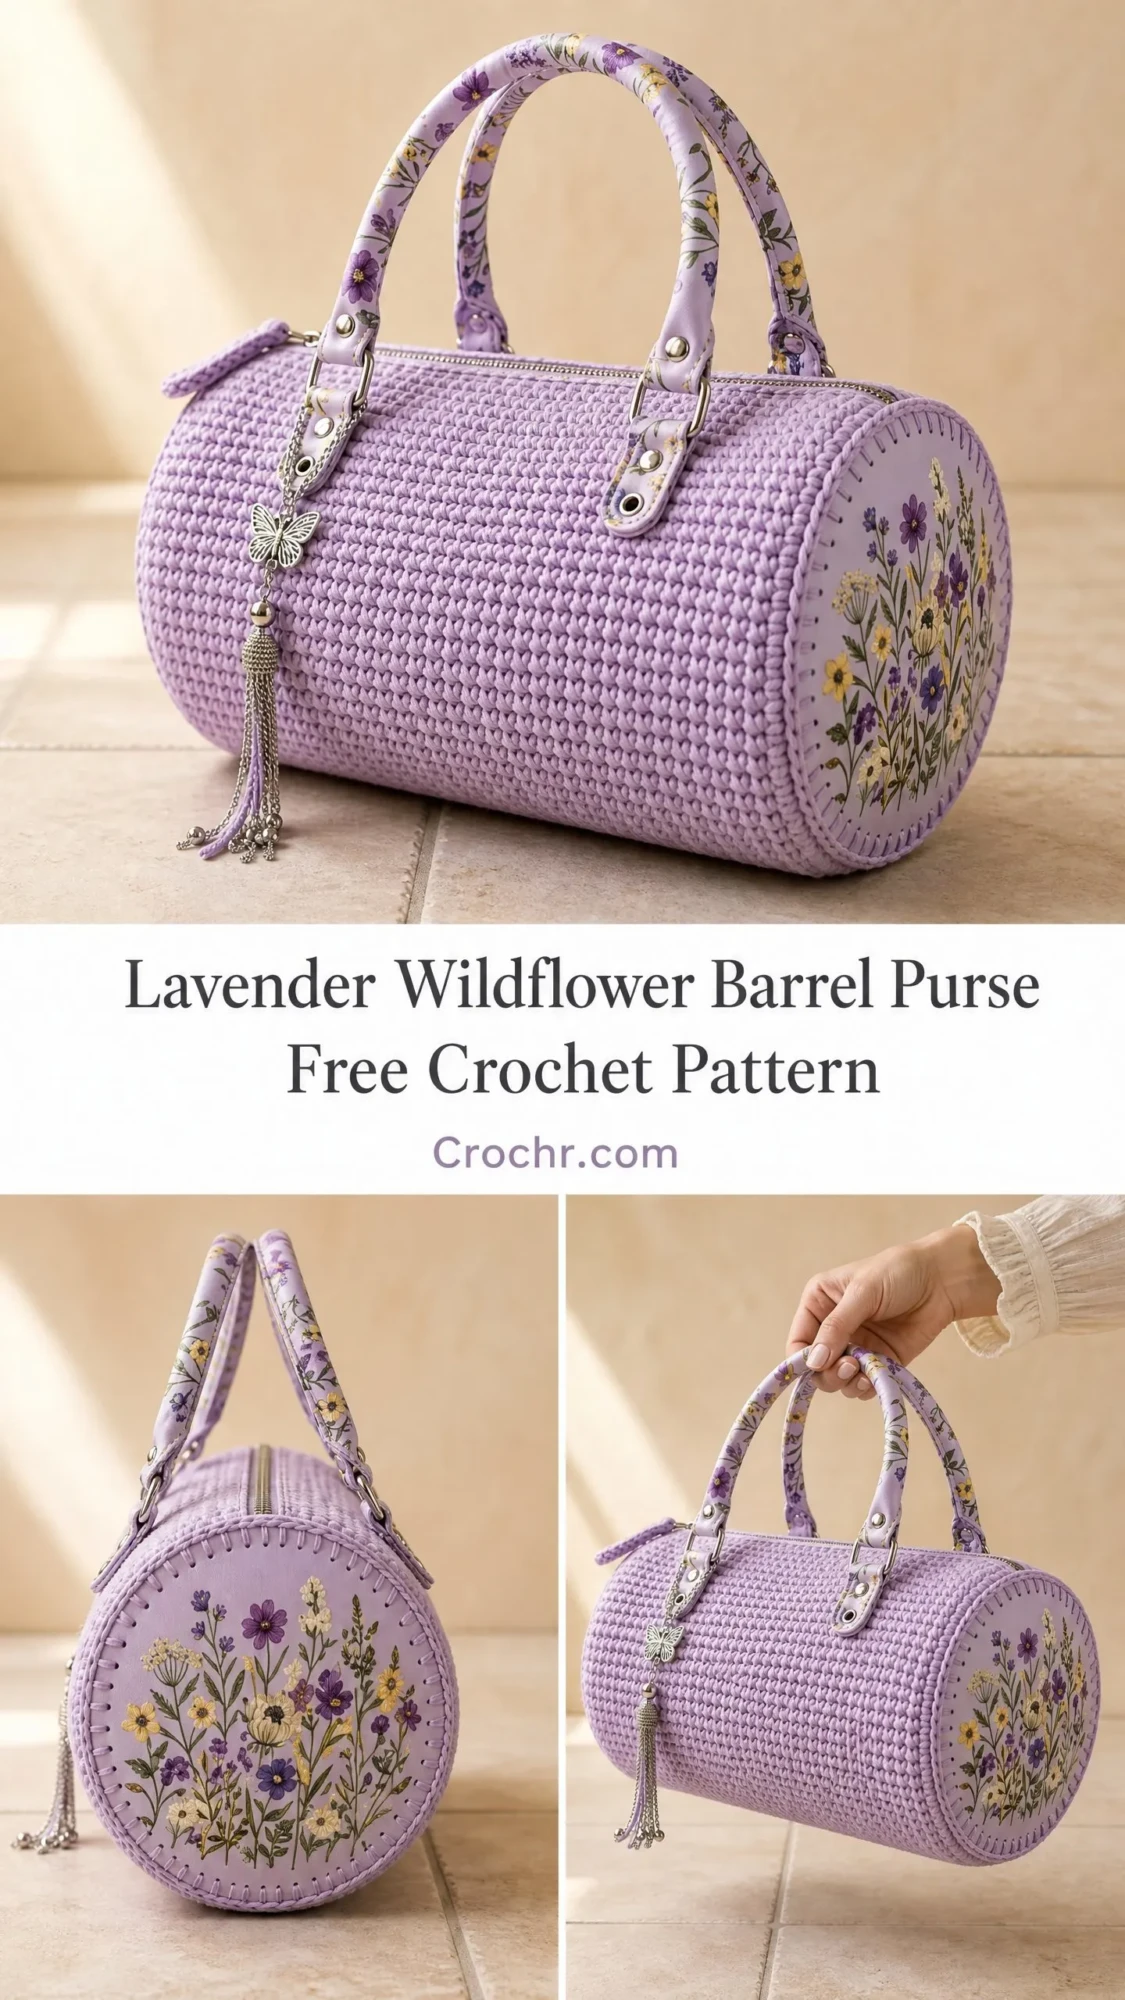
You’ll work the main body as a seamless tube in the round, then create two flat circular end caps separately. The end caps get embellished with either embroidered wildflower fabric panels or hand-stitched floral motifs. Add some floral-wrapped handles with silver hardware, a zipper closure, and a charming butterfly tassel, and you’ve got yourself a statement piece.
The finished bag measures approximately 12 inches long with a 5-inch diameter, making it the perfect size for everyday essentials. It sits horizontally like a classic doctor bag or Boston bag silhouette, just in cylinder form.
Skill Level
This pattern is rated Advanced Beginner to Intermediate. The stitch pattern itself is simple and meditative once you get going. The techniques that require a bit more confidence include working joined rounds, seaming circular pieces, and installing a zipper with hardware.
If you’ve completed at least one structured bag or accessory project before, you’ll feel right at home here.
Time Estimate
Plan for 10 to 16 hours total, depending on your finishing experience. The crochet body works up quickly once you establish your rhythm. Budget an extra 2 to 3 hours for all the finishing work, zipper installation, and embellishments.
Finished Measurements
These measurements reflect the bag in its resting position, lying on its side as designed.
Materials Needed
Yarn:
Hook:
Notions:
Yarn Suggestions
Option 1: Lion Brand 24/7 Cotton in Lavender. This 100 percent mercerized cotton is smooth, sturdy, and holds stitch definition beautifully.
Option 2: Paintbox Yarns Simply DK worked held double. This creates a worsted-weight equivalent with excellent stitch clarity.
Option 3: We Are Knitters The Petite Wool in a lavender colorway. If you prefer a softer hand, use a hook one size smaller to maintain gauge.
Substitution Note: Choose a yarn that is firm and smooth with minimal halo or texture. Avoid fuzzy or stretchy yarns. Cotton or cotton-acrylic blends work best for structured bags.
Gauge
18 stitches and 20 rows = 4 inches / 10 cm in linen stitch worked flat with US G-6 / 4.00 mm hook, after blocking.
Work a flat swatch of at least 5 by 5 inches, block it, and measure in the center away from edges. Gauge is critical for this project. Each 1-stitch-per-4-inch variation will shift the finished circumference by approximately 0.9 inch.
Abbreviations
Special Stitches
Linen Stitch In The Round
This creates a tight, woven-looking fabric perfect for bags. Because you don’t turn between rounds, all rounds are worked from the right side.
Rnd 1: Sc in first st, (ch 1, sk 1 st, sc in next st) around, end with ch 1, sk 1 st, sl st to first sc to join.
Rnd 2: Ch 1, sc in same st, (ch 1, sk ch-1 sp, sc in next sc) around, end ch 1, sk last ch-1 sp, sl st to first sc.
Repeat Rnd 2 for pattern. One single crochet (sc) plus one chain-1 space (ch-1 sp) counts as 2 stitches for counting purposes.
Magic Ring
Make an adjustable loop. Insert hook, yarn over, draw up a loop, chain 1 to secure. Work stitches into the ring, then pull the tail to close the center hole. This gives you a nice tight center on your circles.
Whipstitch Seam
Hold two pieces with wrong sides together. Insert tapestry needle through one stitch on each piece simultaneously, draw yarn through. Continue around through corresponding stitches. For this bag, hold pieces with right sides together when seaming so the ridge stays inside.
Pattern Notes
1. The bag body is a seamless tube worked in the round using linen stitch.
2. For a stiffer bag, work at a tighter gauge or add a fabric lining. A simple lining dramatically improves durability and shape retention.
3. End caps can be decorated two ways: apply pre-printed floral fabric circles, or embroider wildflower motifs directly onto the crocheted caps.
4. The zipper runs along the top length of the barrel.
5. All stitch counts refer to sc stitches only. Chain-1 spaces are implied.
6. Join each round with a slip stitch to the first sc unless otherwise instructed. Do not turn between rounds.
7. Place a stitch marker in the first sc of each round to track round beginnings.
8. Weave in ends as you go. Cotton ends can loosen, so weave each tail at least 1 inch in two directions.
Step by Step Instructions
Section 1: Main Body Tube
The body is crocheted as a tube by working a foundation chain, joining into a ring, and continuing in rounds.
Foundation Chain: With MC and G-6 hook, ch 73. Sl st to first ch (being careful not to twist) to form a ring.
Rnd 1 (Setup): Ch 1, sc in same ch, (ch 1, sk 1 ch, sc in next ch) around, end ch 1, sk last ch, sl st to first sc. (36 sc, 36 ch-1 spaces, 72 working positions total)
Checkpoint: Your ring should measure approximately 16 inches in circumference. Lay flat and measure across the diameter. It should be approximately 5 inches.
Rnd 2: Ch 1, sc in same st as joining, (ch 1, sk ch-1 sp, sc in next sc) around, ch 1, sk last ch-1 sp, sl st to first sc. (36 sc)
Rnds 3-61: Repeat Rnd 2 until body measures 12 inches from foundation chain.
At gauge of 20 rows per 4 inches, you need 60 total rounds.
Fasten off and weave in ends.
Checkpoint: The tube should measure 12 inches long and 5 inches in diameter when laid flat. The linen stitch texture should appear as a tight, woven grid.
Section 2: End Caps (Make 2)
Each end cap is a flat circle worked in sc with increases to maintain flatness.
Magic Ring: Make a magic ring.
Rnd 1: Ch 1, work 6 sc into ring. Pull tail to close. Sl st to first sc. (6 sc)
Rnd 2: Ch 1, 2 sc in each st around. Sl st to first sc. (12 sc)
Rnd 3: Ch 1, (sc in next st, 2 sc in next st) around. Sl st to first sc. (18 sc)
Rnd 4: Ch 1, (sc in next 2 sts, 2 sc in next st) around. Sl st to first sc. (24 sc)
Rnd 5: Ch 1, (sc in next 3 sts, 2 sc in next st) around. Sl st to first sc. (30 sc)
Rnd 6: Ch 1, (sc in next 4 sts, 2 sc in next st) around. Sl st to first sc. (36 sc)
Rnd 7: Ch 1, sc in each st around. Sl st to first sc. (36 sc) (plain round)
Rnd 8: Ch 1, (sc in next 5 sts, 2 sc in next st) around. Sl st to first sc. (42 sc)
Rnd 9: Ch 1, sc in each st around. Sl st to first sc. (42 sc) (plain round)
Rnd 10: Ch 1, (sc in next 6 sts, 2 sc in next st) around. Sl st to first sc. (48 sc)
Rnd 11: Ch 1, sc in each st around. Sl st to first sc. (48 sc) (plain round)
Rnd 12: Ch 1, (sc in next 7 sts, 2 sc in next st) around. Sl st to first sc. (54 sc)
Rnd 13: Ch 1, sc in each st around. Sl st to first sc. (54 sc) (plain round)
Rnd 14: Ch 1, (sc in next 8 sts, 2 sc in next st) around. Sl st to first sc. (60 sc)
Rnd 15: Ch 1, sc in each st around. Sl st to first sc. (60 sc) (plain round)
Rnd 16: Ch 1, (sc in next 9 sts, 2 sc in next st) around. Sl st to first sc. (66 sc)
Rnd 17: Ch 1, sc in each st around. Sl st to first sc. (66 sc) (plain round)
Rnd 18: Ch 1, (sc in next 10 sts, 2 sc in next st) around. Sl st to first sc. (72 sc)
Fasten off first cap. Leave second cap attached if joining immediately.
Checkpoint: Each cap should lie flat without cupping or ruffling. Diameter should measure approximately 5 inches.
Section 3: Joining End Caps to Tube
With RS facing outward on both pieces, align one end cap to one open end of the tube. The 72 stitches should match up. Pin in place at four equally spaced points.
Using a tapestry needle and MC, whipstitch around the full circumference, joining corresponding stitches. Work through both loops of each stitch on both pieces.
Repeat for second end cap on opposite end.
Checkpoint: The bag should now be a complete closed barrel shape with no gaps at seams.
Section 4: Zipper Installation
Position a 10-inch zipper centered along the top of the tube, spanning the length between the end caps. Leave approximately 1 inch of crochet at each end beyond the zipper stops.
Using a sewing needle and matching thread, pin the zipper tape to the inside of the crochet fabric with the zipper pull on the outside. Hand-sew using a backstitch along both sides. Keep stitches small so they don’t show on the right side.
Attach the silver chain tassel to the zipper pull using a jump ring. Attach the butterfly charm to the tassel chain.
Section 5: Handle Attachment
Mark the top of the tube at two points, each approximately 3 inches from center top, on each side of the zipper. These are your handle attachment points.
At each marked point, pierce a small hole through the crochet fabric or use an existing ch-1 space. Insert a rivet or Chicago screw through the crochet layer. Thread the D-ring onto the rivet bracket, then close the rivet from inside.
Thread handle tabs through the D-rings before closing rivets, or use lobster clasps for removable handles.
Checkpoint: Tug each handle firmly. Rivets should not pull through. Reinforce with faux leather squares if needed.
Section 6: Optional Lining
Cut one rectangle of coordinating fabric: 13 inches wide by 16.5 inches long. Sew short ends together to form a tube. Cut two circles 5.5 inches in diameter. Sew circles to each open end, right sides together, leaving a 2-inch gap for turning. Turn right side out, press. Slip lining inside crochet barrel. Hand-stitch gap closed. Whipstitch lining to bag along zipper tape.
Size Customization Tips
To make longer: Add stitches to foundation chain in multiples of 2. Each additional 2 stitches adds approximately 0.44 inch. Use a longer zipper.
To make wider: Add more rounds to end caps and increase tube circumference proportionally. For each additional 1 inch of diameter, add approximately 4.5 stitches to tube circumference.
To make smaller (clutch size): Reduce foundation chain to 42 stitches. Adjust end caps to finish at 48 sc. Use a 7-inch zipper.
Finishing and Blocking
Wet block the crochet body before assembling. Submerge in cool water, gently squeeze out excess, roll in a towel, then reshape to measurements. Allow to dry completely flat.
For end cap embellishment with fabric, press fabric with iron, back with fusible interfacing, and cut to 4.75 inches diameter. Center on cap and whipstitch around perimeter.
For embroidered end caps, use satin stitch for petals and leaves, lazy daisy stitch for small flowers, stem stitch for stems, and French knots for flower centers.
Care Instructions
Hand wash in cool water with gentle detergent. Press out excess water without wringing. Reshape and lay flat to dry. Do not machine wash or tumble dry. Store stuffed with tissue paper to maintain barrel shape.
Final Thoughts on This Barrel Purse Crochet Tutorial
This lavender wildflower barrel purse is one of those projects that looks incredibly impressive but is honestly just a matter of patience and rhythm. The linen stitch becomes almost meditative after a few rounds, and watching that beautiful textured fabric grow is so satisfying.
The finishing details really make this bag special. Those floral handles, the butterfly charm, the embroidered end caps. Every element works together to create something that feels custom and high-end.
Whether you make this for yourself or as a gift for someone who appreciates handmade beauty, I think you’ll be proud of the result. Take your time with the hardware and zipper installation. Those finishing touches are what elevate this from "nice bag" to "where did you get that?!"
Thank you so much for choosing this pattern for your next project. I truly appreciate you being here! If you make this bag, I would absolutely love to see it. Tag me on Instagram or share a photo in my Facebook group. Seeing your finished projects is genuinely the best part of sharing patterns.
If this crochet pattern is calling your name, go ahead and pin it to your Pinterest boards so you can find it when you’re ready to start. And please drop a comment below if you make one. I love hearing how your projects turn out!
You Might Also Like
- Ocean Blue Boho Crochet Beach Set Free Crochet Pattern
- Dusty Rose Pink Tassel Crossbody Free Crochet Pattern
- Sunset Coral Textured Crochet Dress Free Pattern
- Coastal Blue Granny Square Tote Bag Free Crochet Pattern
