
A handmade belt is one of those accessories that elevates every outfit while showing off your crochet skills. This romantic lace belt works up beautifully in a soft dusty rose shade, making it perfect for pairing with flowy dresses, high-waisted jeans, or even a simple cardigan.
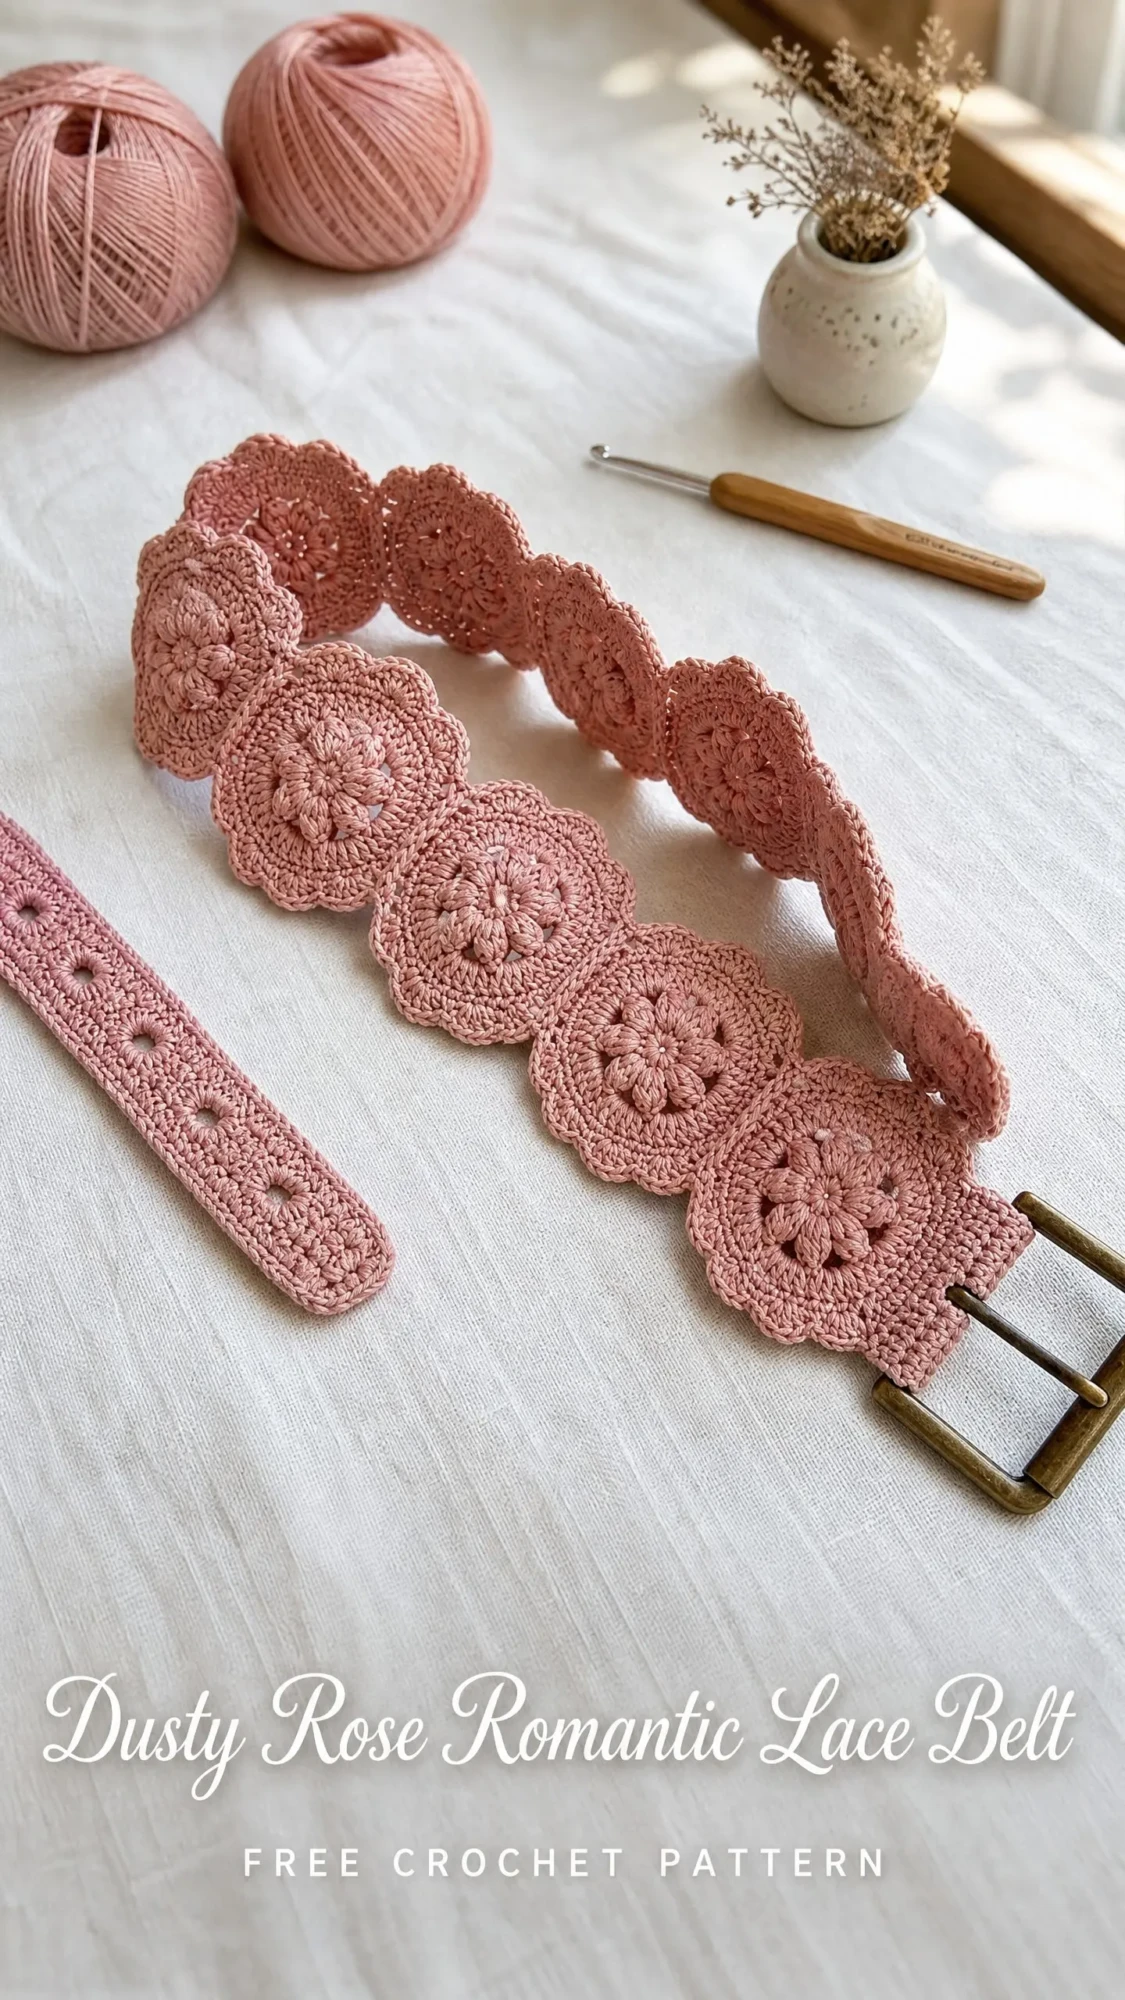
The construction uses joined floral motifs arranged in a brick-lay pattern, creating a wide statement piece that looks far more complicated than it actually is. If you can work basic stitches in the round and follow a simple joining method, you can absolutely make this belt.
Whether you are treating yourself or creating a thoughtful handmade gift, this project works up in about 8 to 12 hours and uses approximately 250 to 300 yards of cotton thread or lightweight yarn. Let me walk you through everything you need to know.
Why You Will Love This Crochet Belt Pattern
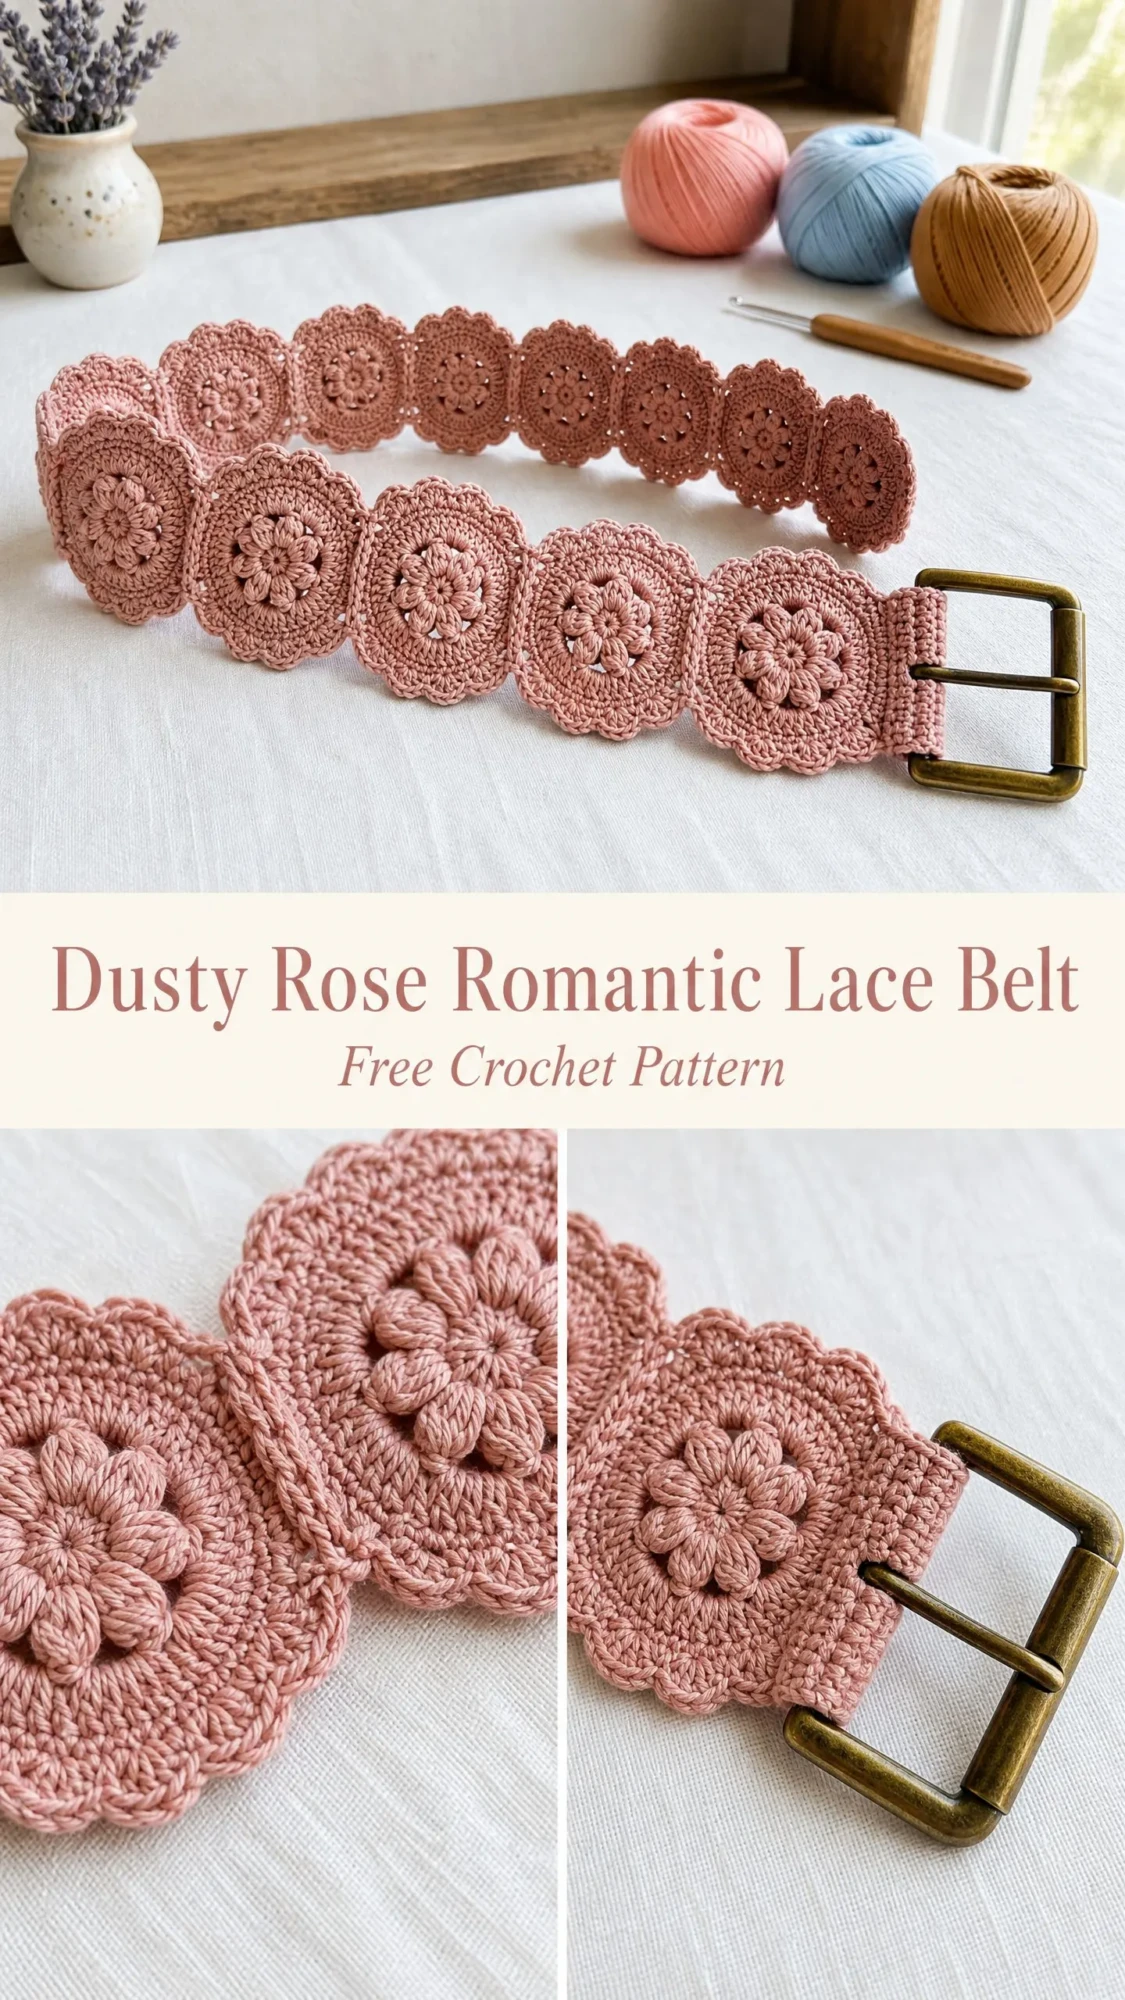
This belt hits the sweet spot between bohemian charm and practical wearability. The two-row construction of circular motifs creates a substantial width of approximately 3.25 inches, making it a true statement piece rather than a dainty accent. Each individual motif features a raised popcorn stitch center surrounded by open lacework and finished with pretty scalloped edges.
The join as you go method means minimal sewing at the end. You connect each motif to its neighbors as you work the final round, which keeps everything aligned and saves you from a tedious finishing session with your yarn needle.
The dusty rose color shown in the photos gives the belt a romantic, vintage feel, but you could easily work this pattern in cream for a bridal accessory, black for an edgier look, or any color that matches your wardrobe. The cotton fiber holds its shape beautifully after blocking and feels comfortable against your skin all day long.
Materials You Will Need
Yarn: Size 10 crochet cotton thread or lightweight DK weight cotton in dusty rose, approximately 250 to 300 yards (230 to 275 meters)
Recommended yarn options:
Hook: US Size B-1 / 2.25 mm for thread or US Size D-3 / 3.25 mm for light DK cotton
Notions:
Important note about yarn choice: Stick with 100% cotton for this project. Cotton holds blocking beautifully and will not stretch out of shape with wear. Avoid acrylic or blended yarns because they will not maintain the crisp motif shape and may feel uncomfortable as a belt worn against your body.
Finished Measurements
The motif band spans roughly 29 inches and the plain buckle strap adds the remaining length.
Gauge
With Size 10 thread and B-1 hook: 1 motif equals 2 inches / 5 cm in diameter after blocking
With DK cotton and D-3 hook: 1 motif equals 2.25 inches / 5.7 cm in diameter after blocking
To check your gauge, make one complete motif through Round 4, block it flat, and measure across the widest point. Adjust your hook size up or down as needed. Consistency across all your motifs matters more than matching a specific stitch count per inch.
Skill Level
This pattern is rated intermediate. You should be comfortable working in the round, joining motifs as you go, and attaching hardware. The individual stitches are simple, but managing join placement and keeping motif alignment consistent requires attention to detail.
Abbreviations and Stitch Definitions
Before we dive in, let me walk you through every abbreviation used in this pattern:
Special Stitches Explained
Popcorn Stitch (pc)
This creates the beautiful raised texture in the center of each motif. Here is how to work it:
Work 5 dc all into the same stitch or space. Drop the loop from your hook without pulling it tight. Insert your hook from front to back through the top of the first dc of the group. Pick up the dropped loop and pull it through the top of that first dc. Chain 1 to close and lock the popcorn in place.
The result is a little bobble that pops forward and gives the motif center its dimensional flower look.
Picot
Chain 3, then work a slip stitch into the first chain you made. This creates a small decorative loop that can be added optionally to the outer scallop edges for extra detail.
Join As You Go (JAYG)
This technique connects motifs seamlessly without sewing. When working the final round of a new motif and the pattern indicates a joining point, drop down to the corresponding stitch or chain space on the adjacent completed motif and work a slip stitch into that stitch. Then return to your current motif and continue. The join is nearly invisible and structurally strong.
Pattern Notes Before You Begin
1. The belt is constructed from two horizontal rows of circular motifs. The bottom row is made first. Each top row motif is joined to the bottom row motifs during its final round using the JAYG method.
2. For a standard belt fitting a 26 to 30 inch waist, make 14 motifs for the bottom row and 13 motifs for the top row. The top row motifs sit offset, nestled between pairs of bottom row motifs, creating a brick-lay pattern.
3. The buckle strap is worked separately as a narrow rectangular strip, folded around the buckle bar, and sewn to one end of the completed motif band.
4. All rounds are worked on the right side unless noted. Do not turn unless instructed.
5. Fasten off and weave in ends after each motif before beginning the next.
6. Motif numbering system: Row 1 (bottom) has 14 motifs numbered 1 through 14 from right (buckle end) to left (tip end). Row 2 (top) has 13 motifs numbered A through M from right to left. Motif A sits between motifs 1 and 2, motif B sits between motifs 2 and 3, and so on.
7. Stitch counts appear in parentheses at the end of each round.
How to Customize the Size
To lengthen the belt: Add motifs in pairs. One to the bottom row and one to the top row adds approximately 2 inches of length. For a belt fitting a 32 to 36 inch waist, use 16 bottom motifs and 15 top motifs.
To make the belt narrower: Work only the bottom row of 14 motifs and skip the top row entirely. Join motifs side by side rather than offset. This creates a belt approximately 2 inches wide, perfect as a thinner accent belt.
To make the belt wider: Add a third row of 12 motifs below the bottom row using the same JAYG offset method. This creates a belt approximately 5 inches wide.
Step by Step Crochet Pattern Instructions
Section 1: Individual Motif
Work Motifs 1 through 14 (bottom row) first, each as a standalone motif. Then work Motifs A through M (top row), joining each to the bottom row during Round 4.
Starting: Magic ring or ch 4 and join with sl st to form a ring.
Round 1: Ch 1, work 8 sc into the ring. Join with sl st to first sc. (8 sc)
Round 2: Ch 3 (counts as first dc), work 4 more dc into the same st to form first popcorn. Ch 2. Work 5 dc into next st, drop loop, insert hook through top of first dc of group, pull loop through, ch 1 to close. Repeat from * 7 times total. Ch 2. Join with sl st to top of first popcorn. (8 popcorns, 8 ch-2 spaces)
Round 3: Sl st into first ch-2 sp. Ch 3 (counts as dc), work 2 dc into same ch-2 sp. Ch 2. Work 3 dc into next ch-2 sp, ch 2. Repeat from * 7 times. Join with sl st to top of beg ch-3. (8 groups of 3 dc, 8 ch-2 spaces) (24 dc total, 8 ch-2 spaces)
Round 4 (outer scallop round): Sl st into next dc, sl st into next dc, sl st into ch-2 sp. Ch 1. Into same ch-2 sp work: (sc, hdc, dc, dc, hdc, sc). Into next ch-2 sp work: (sc, hdc, dc, dc, hdc, sc). Repeat for all remaining 6 ch-2 spaces. Join with sl st to first sc. (8 scallops, 6 sts per scallop) (48 sts total)
Note: The two center dc stitches of each scallop are the joining points used for JAYG. When making a standalone motif, simply work the two dc normally. When making a top row motif that joins to bottom row motifs, use the JAYG method at those dc positions.
Fasten off and weave in ends.
Checkpoint: Each completed motif should measure approximately 2 inches in diameter. All 8 scallops should be even and lie flat. If the motif cups upward, your tension is too tight and you should go up a hook size. If it ruffles, go down a hook size.
Section 2: Joining Bottom Row Motifs (Motifs 1 through 14)
The bottom row motifs are joined side by side. You can use JAYG on the bottom row by joining each new motif to the previous one during Round 4.
To join bottom row motifs using JAYG during Round 4:
Complete Motif 1 fully as a standalone.
For Motif 2 and all subsequent bottom row motifs:
Work through Round 3 as written. Begin Round 4 as written until you reach the scallop that will touch Motif 1.
At the joining scallop: work sc, hdc, then instead of the first dc, sl st into the corresponding dc of Motif 1, return and work dc into current motif position, sl st into the second corresponding dc of Motif 1, return and work the second dc into current motif, then continue hdc, sc as normal.
Continue the rest of Round 4 on the current motif without joining.
Each bottom row motif joins to only one neighbor (the motif immediately to its right) at one scallop point, using 2 sl sts through the adjacent motif’s scallop center dc stitches.
Repeat for Motifs 3 through 14, always joining the new motif to the one immediately preceding it in the row.
Checkpoint: After completing all 14 bottom row motifs, you should have a straight horizontal strip of joined circular motifs approximately 28 inches long and 2 inches tall. The motifs should lie flat and the joins should be nearly invisible.
Section 3: Joining Top Row Motifs (Motifs A through M)
The 13 top row motifs are worked in offset position, each nestling between two bottom row motifs and joining to both during Round 4.
For each top row motif:
Work Rounds 1 through 3 exactly as written for a standalone motif.
Begin Round 4. Work the first three scallops without joining. On scallop 4 (the one that will contact the bottom row), use JAYG:
Work sc, hdc into the current ch-2 sp of the top motif. For the first joining dc, sl st into the upper-right dc of the corresponding scallop on the lower-left facing edge of the right-side bottom motif. Return and complete the dc in the top motif position.
For the second joining dc, sl st into the upper-left dc of the corresponding scallop on the lower-right facing edge of the left-side bottom motif. Return and complete the dc in the top motif position.
Work hdc, sc to close that scallop. Continue around, working the remaining scallops without joining.
Note on top-to-top joins: Adjacent top row motifs touch each other lightly at their upper edges. After all top row motifs are placed, you may use a yarn needle to tack these points together with 1 or 2 invisible stitches, or leave them unjoined for a more open look.
Checkpoint: After all 13 top row motifs are placed, the full motif band should measure approximately 29 inches long and approximately 3.25 inches wide. The band should lie flat with the staggered motif layout creating a solid lace fabric.
Section 4: Buckle Strap
The buckle strap is a narrow double-layered strip of single crochet worked separately and folded around the center bar of the buckle.
Foundation: Ch 9.
Row 1: Sc into 2nd ch from hook and in each ch across. Turn. (8 sc)
Rows 2 through 22: Ch 1, sc in each sc across. Turn. (8 sc per row)
After Row 22, do not fasten off.
Fold the strap in half lengthwise around the center bar of the buckle so the two short ends meet. The buckle sits within the fold. Hold the folded strap so the two open ends align.
Joining row: Work through both layers together, inserting the hook through the corresponding stitches of both layers and working 1 sc through both. Work 8 sc across, joining both layers. (8 sc)
Fasten off, leaving a 12 inch tail for sewing.
Checkpoint: The buckle strap should measure approximately 3 inches long when folded and approximately 0.75 inches wide. The buckle should sit snugly in the fold without excessive play.
Section 5: Attaching Buckle Strap to Motif Band
Hold the buckle strap assembly against the right short end of the motif band with the right side facing. The folded buckle end should point away from the band. The two raw joined layers of the strap should sit flush against the end of the motif band.
Using the long tail and a yarn needle, whipstitch the strap securely to the last motif in the bottom row and the last motif in the top row. Stitch through the scallop edge stitches of both motifs and through the edge of the strap. Work around all four sides of the strap end for maximum security. A belt buckle experiences significant tension, so reinforce with at least two full passes of stitching.
Weave in all ends securely.
Section 6: Tip End Finishing
At the left short end of the motif band (tip end), the natural scallop edge of the outermost motifs forms the belt tip. No additional shaping is needed.
Optional pointed tip: For a more pointed belt tip, use your yarn needle to tack the two outermost scallops of the final bottom and top motifs together so they form a mild point. This is purely aesthetic.
Optional adjustability loop: For an extra belt hole at the tip, attach yarn to any scallop point at the tip end and ch 12, sl st back to the same point to form a loop. Fasten off and weave in end. This loop can be used as an additional fastening option.
Blocking Instructions
Blocking is essential for this project. The motifs will not lie perfectly flat before blocking, and the full lace pattern will not open up without it.
Wet blocking method:
Submerge the completed belt in cool water and press gently to saturate. Do not wring or twist. Roll in a clean towel to remove excess water. Lay flat on a blocking board. Pin each motif at 8 points corresponding to the 8 scallop tips. Use a ruler or tape measure to keep rows straight and motif spacing even. Allow to dry completely, which takes 12 to 24 hours depending on humidity. Do not apply heat.
Once dry, remove pins. The belt should hold its shape permanently.
Avoid getting the buckle hardware wet if possible, though brief water contact will not damage it.
Care Instructions
Hand wash in cool water with a gentle soap. Do not machine wash or machine dry. Reshape and dry flat. Do not iron directly on the crochet. Steaming lightly from a distance of 2 to 3 inches is acceptable for refreshing the shape between washes. Store flat or loosely rolled, not folded, to prevent permanent crease marks across motifs.
Troubleshooting Tips for This Lace Belt Pattern
My motifs are cupping: Your tension is too tight. Try going up one hook size and work with a more relaxed grip.
My motifs are ruffling: Your tension is too loose. Try going down one hook size or consciously tighten your stitches.
The joins look uneven: Take your time with the JAYG method. Make sure you are inserting into the correct corresponding stitch on the adjacent motif before completing each joining slip stitch.
The belt is too short: Add motifs in pairs to extend the length. One bottom and one top motif adds approximately 2 inches.
The buckle feels loose: Your strap may be too wide for your buckle. Try using a smaller hook or fewer foundation chains to create a snugger fit around the center bar.
Final Thoughts on This Crochet Tutorial
This dusty rose romantic lace belt is the kind of project that looks impressive on a display but actually comes together quite methodically once you understand the motif construction. The popcorn stitch centers give beautiful texture, the scalloped edges add feminine detail, and the join as you go method keeps everything neat and aligned.
I hope you enjoy making this belt as much as I enjoyed designing it. It makes a wonderful gift for someone special or a beautiful treat for yourself. Cotton fiber means it will last for years with proper care, and the romantic vintage aesthetic works with so many different styles.
Thank you so much for choosing this pattern for your next project. I would absolutely love to see your finished belt, so please tag me on Instagram or share a photo in our Facebook group. Seeing your creations is honestly the best part of sharing patterns.
If you loved this crochet belt pattern, go ahead and pin it to your favorite Pinterest board so you can find it easily when you are ready to start. And if you make one, drop a comment below to let me know how it turned out. I read every single one and always love hearing from you!
You Might Also Like
- Mint Green Floral Crochet Backpack Free Pattern
- Orange Ginger Cat Velvet Bow Sweater Free Crochet Pattern
- Ocean Wave Butterfly Crochet Dress Free Pattern
- Lavender Purple Dreamy Lace Maxi Skirt Free Crochet Pattern
