
Last summer, I found myself wandering through a vintage clothing market, completely mesmerized by a 1970s crocheted top with the most dramatic bell sleeves I had ever seen. The woman selling it wanted far more than I could spend, but I snapped about twenty photos and thought, "I can figure this out." Six months of swatching, frogging, and late nights later, this pattern was born.
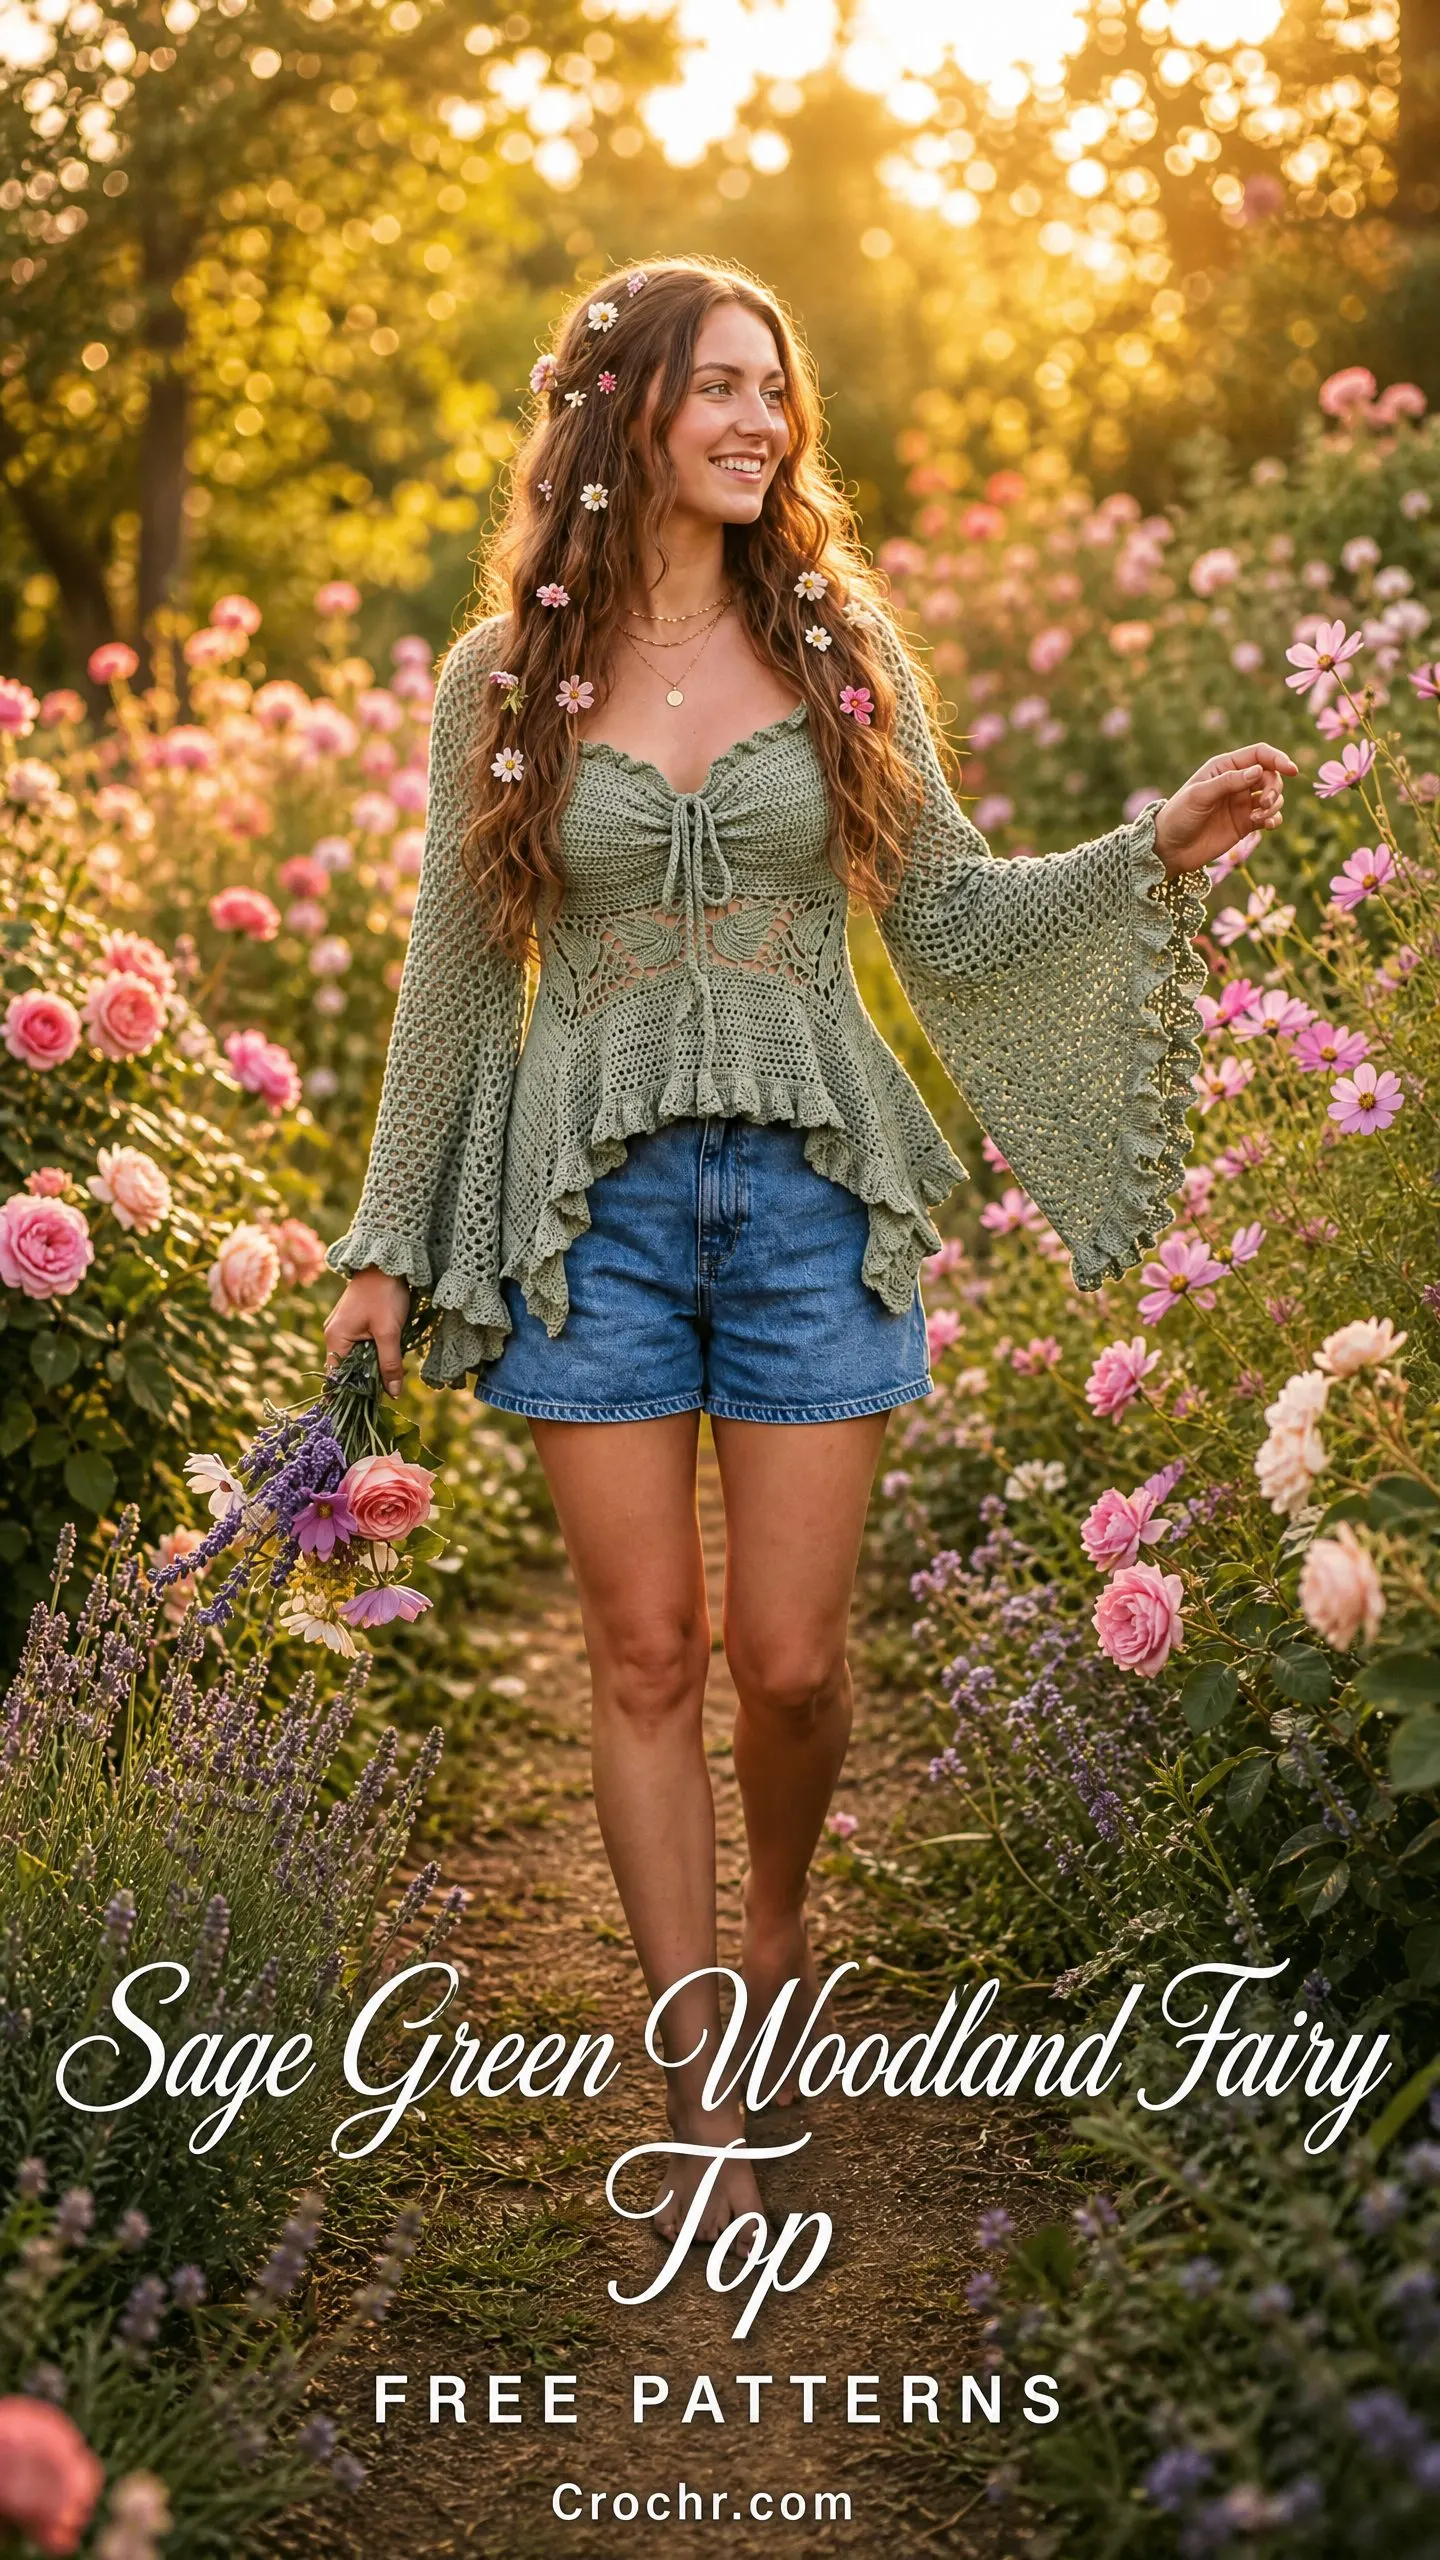
I wanted something that felt like it belonged in an enchanted forest. Something with movement and drama, but also structure and flattering fit. The kind of top that makes people stop you and ask, "Wait, did you MAKE that?"
This Sage Green Woodland Fairy Top combines everything I love about bohemian crochet: an open mesh body that catches the light, a decorative shell motif waist panel that creates visual interest at the smallest part of your torso, flowing bell sleeves that move like water, and a ruffled peplum hem that adds just the right amount of whimsy. Fair warning: this is an advanced project. But if you have completed several garments before and feel comfortable with shaping, multiple stitch textures, and seaming, you are absolutely ready for this.
About This Crochet Pattern
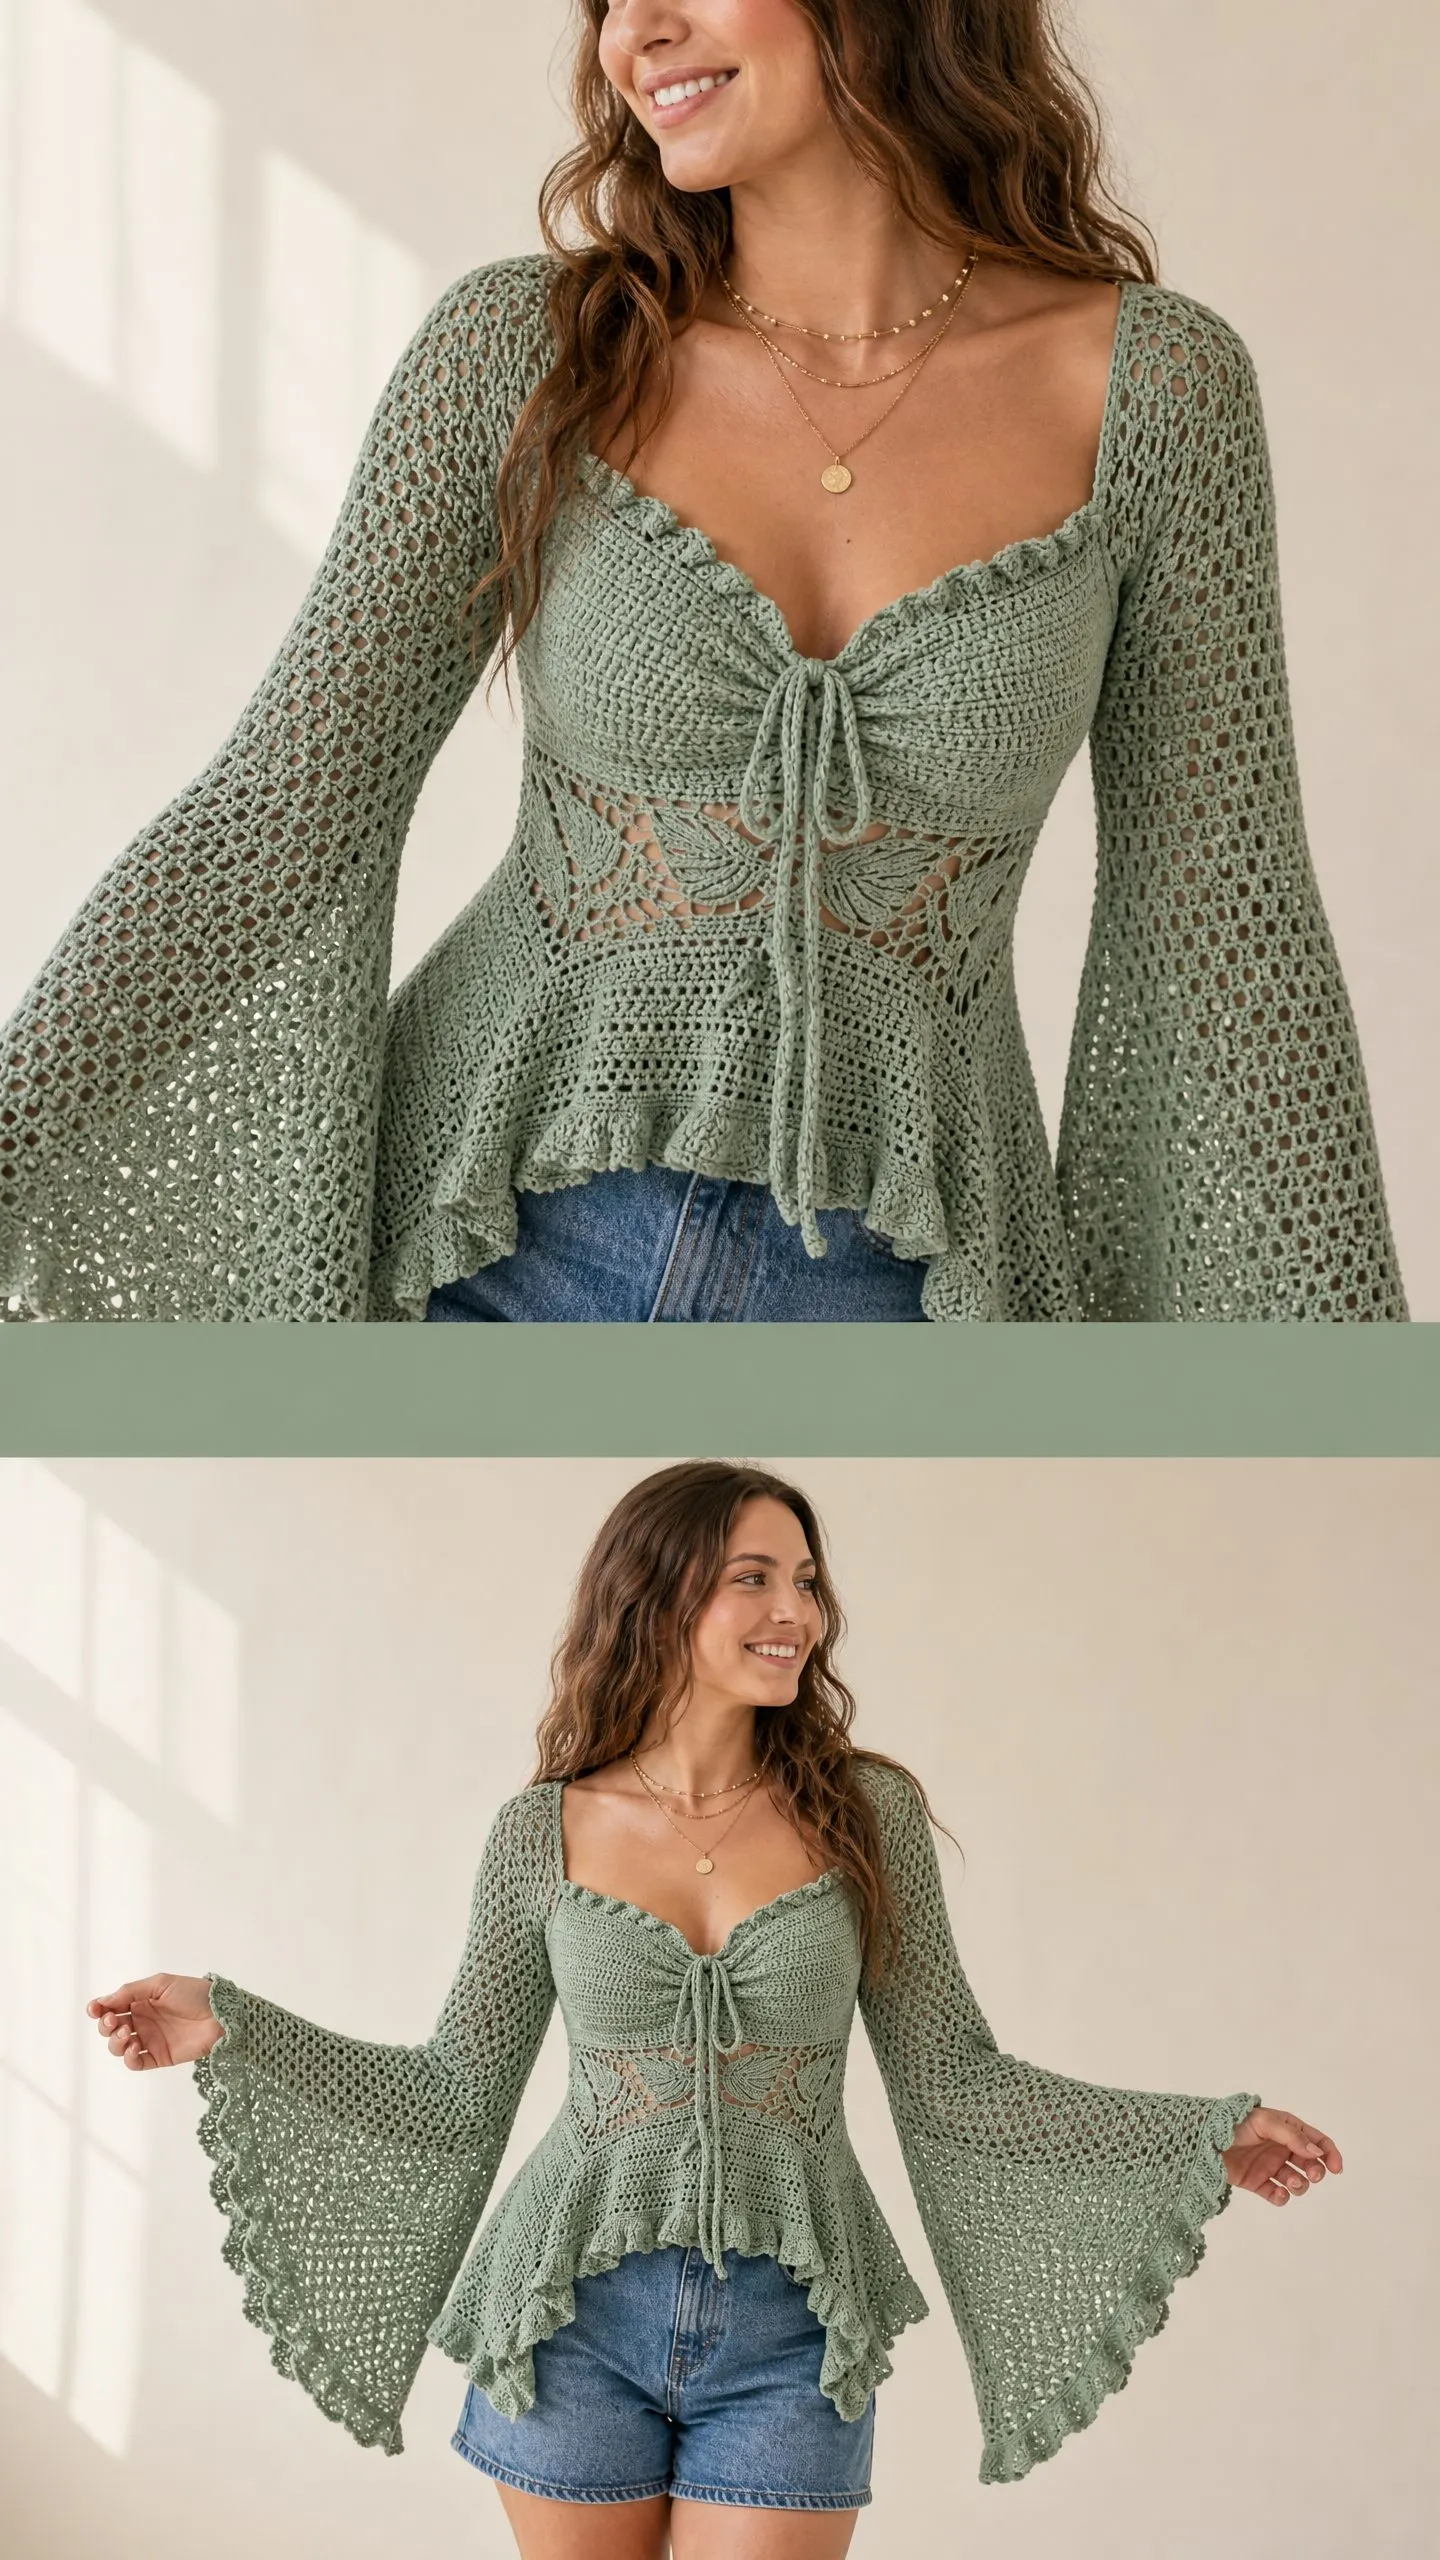
This fitted crochet top features a sweetheart neckline with a tie closure at center front, creating that romantic dip that flatters so many body types. The construction is straightforward once you understand the roadmap. You will work flat pieces, specifically a front bodice, back bodice, and two sleeves, then seam them together before adding the ruffle edging.
The magic of this design comes from layering textures. The main body uses an open mesh stitch pattern that creates a delicate, airy fabric. At the waist, a band of shell stitches mimics butterfly wings and draws the eye to your natural waistline. The bell sleeves achieve their dramatic flare through gradual increases rather than sudden shaping, which means the fabric flows naturally without bunching.
Expect this project to take between 30 and 45 hours depending on your experience level. I recommend working on it over several weeks rather than rushing through. This is the kind of project where taking your time shows in the finished piece.
Finished Measurements
This pattern includes five sizes from XS through XL. The design is intended to be worn with 1 to 2 inches of negative ease at the bust for that fitted look you see in the photos.
Size XS: Bust 32 inches, waist 26 inches, length 14 inches from shoulder to hem before the ruffle is added.
Size S: Bust 34 inches, waist 28 inches, length 14.5 inches.
Size M: Bust 36 inches, waist 30 inches, length 15 inches.
Size L: Bust 38 inches, waist 32 inches, length 15.5 inches.
Size XL: Bust 40 inches, waist 34 inches, length 16 inches.
Throughout this pattern, instructions are written for size S with changes for other sizes shown in parentheses in the format XS (S, M, L, XL). When only one number appears, it applies to all sizes.
Materials Needed
Yarn: You will need approximately 800 (900, 1000, 1100, 1200) yards of DK weight yarn (CYCA 3) in sage green. I recommend 100% cotton or a cotton blend for the best stitch definition in those mesh and shell sections.
Yarn Suggestions:
Lion Brand 24/7 Cotton in Sage works beautifully. This is 100% mercerized cotton with 186 yards per 3.5 ounce skein. You will need 5 (5, 6, 6, 7) skeins.
Paintbox Yarns Cotton DK in Grass Green or Spearmint is another excellent choice at 137 yards per 1.76 ounce skein. Plan for 6 (7, 8, 8, 9) skeins.
Drops Safran in Dusty Green offers a 50/50 cotton and viscose blend that adds subtle drape and a gentle sheen. At 175 yards per 1.76 ounce skein, you will need 5 (6, 6, 7, 7) skeins.
Hooks: US size E-4 (3.5 mm) for the body and motif sections. US size F-5 (3.75 mm) for the sleeves and ruffle sections.
Notions: Yarn needle for seaming, at least 8 stitch markers, scissors, rust-proof blocking pins, blocking board or foam mat, measuring tape, and two 18-inch lengths of matching ribbon or twisted cord for the front tie (or you can crochet a chain tie during finishing).
Gauge
Getting gauge right is critical for any garment, but especially for a fitted top like this one. A small difference over 4 inches becomes a very big difference across an entire bodice.
With your E-4 (3.5 mm) hook:
18 stitches and 20 rows equals 4 inches in single crochet (sc).
16 stitches and 8 rows equals 4 inches in mesh stitch pattern. One mesh repeat is 2 stitches wide and works over chain-1 spaces.
1 shell motif repeat (6 stitches) measures 1.5 inches wide.
If your swatch measures larger than gauge, switch to a smaller hook. If your swatch measures smaller, go up a hook size. Please do not skip this step.
Abbreviations and Stitch Definitions
Let me walk you through every abbreviation you will encounter. I have included plain-English definitions so you know exactly what each stitch involves.
ch = chain. Wrap yarn over hook and pull through the loop on your hook. This creates one chain.
sc = single crochet. Insert hook into stitch, yarn over and pull up a loop (2 loops on hook), yarn over and pull through both loops.
dc = double crochet. Yarn over, insert hook into stitch, yarn over and pull up a loop (3 loops on hook), yarn over and pull through 2 loops, yarn over and pull through remaining 2 loops.
hdc = half double crochet. Yarn over, insert hook, yarn over and pull up a loop (3 loops on hook), yarn over and pull through all 3 loops at once.
tr = treble crochet. Yarn over twice, insert hook, yarn over and pull up a loop (4 loops on hook), then yarn over and pull through 2 loops three times.
sl st = slip stitch. Insert hook, yarn over, pull through both the stitch and the loop on your hook in one motion.
sc2tog = single crochet two together. This is a decrease. Insert hook into first stitch and pull up a loop, insert hook into next stitch and pull up a loop (3 loops on hook), yarn over and pull through all 3 loops.
sk = skip. Pass over the indicated stitch without working into it.
ch-sp = chain space. The gap created by a chain in the previous row. You work into this space, not into the chain itself.
RS = right side. The side of your work that will face outward when worn.
WS = wrong side. The side that faces your body.
t-ch = turning chain. The chain(s) you make at the beginning of a row to bring your hook up to working height.
BLO = back loop only. Work into just the back loop of the stitch instead of under both loops.
Special Stitches
Mesh Stitch Pattern (worked flat over a multiple of 2 stitches plus 2 for foundation chain):
Row 1 (RS): Ch 1, sc in first st, (ch 1, sk 1 st, sc in next st) across, turn.
Row 2 (WS): Ch 1, sc in first st, (ch 1, sk ch-1 sp, sc in next sc) across, turn.
Repeat Row 2 for pattern. Each sc sits directly above a sc from the previous row. Each ch-1 sp sits above a ch-1 sp. Your stitch count stays constant throughout.
V-Stitch (V-st): Work (dc, ch 1, dc) all in the same stitch or space.
Shell Stitch: Work 5 dc all in the same stitch or space.
Picot Edge: Ch 3, sl st in first ch made. This forms a small decorative loop.
Ruffle Stitch: Work 3 dc in each stitch or space across.
Pattern Notes Before You Begin
Please read through all of these notes before picking up your hook. Understanding the construction will save you confusion later.
1. The top is constructed in four flat pieces: front bodice, back bodice, left sleeve, and right sleeve. Block all pieces before seaming.
2. Both the front and back bodices have three horizontal zones worked from top down: the neckline and shoulder area, the main mesh body, and the butterfly motif waist band. The ruffle attaches after seaming.
3. Sleeves are worked flat from cuff upward. The bell shape develops through increases spread throughout rather than at one point, then tapers at the sleeve cap.
4. The front bodice has a center front opening approximately 4 inches long secured by a tie at the top.
5. Ch 1 does NOT count as a stitch. Ch 3 DOES count as the first dc. Ch 4 counts as dc plus ch 1.
6. Stitch counts in parentheses at the end of each row refer to working stitch count for that piece, not including turning chains.
Instructions: Front Bodice
The front bodice has two separate "cups" that create the sweetheart neckline shape. You will work each cup separately, then join them.
Front Bodice Right Cup
Foundation: With E-4 hook, ch 24 (26, 28, 30, 32).
Row 1 (RS): Sc in 2nd ch from hook, (ch 1, sk 1 ch, sc in next ch) across, turn. (12 (13, 14, 15, 16) sc, 11 (12, 13, 14, 15) ch-1 sps = 23 (25, 27, 29, 31) mesh units)
For mesh stitch counting, count each sc and each ch-1 sp as one unit.
Row 2 (WS): Ch 1, sc in first sc, (ch 1, sk ch-1 sp, sc in next sc) across, turn. (23 (25, 27, 29, 31) mesh units)
Rows 3 through 10: Rep Row 2. (23 (25, 27, 29, 31) mesh units each row)
After Row 10, your right cup measures approximately 2 inches tall.
Sweetheart Shaping for Right Cup:
Row 11 (RS, shaping row): Ch 1, sc in first sc, (ch 1, sk ch-1 sp, sc in next sc) across to last 3 mesh units, sc2tog over next sc and ch-1 sp, sc in last sc, turn. (21 (23, 25, 27, 29) mesh units)
Row 12 (WS): Ch 1, sc in first sc, (ch 1, sk ch-1 sp, sc in next sc) across, turn. (21 (23, 25, 27, 29) mesh units)
Row 13 (RS, shaping row): Ch 1, sc in first sc, (ch 1, sk ch-1 sp, sc in next sc) across to last 3 mesh units, sc2tog over next sc and ch-1 sp, sc in last sc, turn. (19 (21, 23, 25, 27) mesh units)
Row 14 (WS): Ch 1, sc in first sc, (ch 1, sk ch-1 sp, sc in next sc) across, turn. (19 (21, 23, 25, 27) mesh units)
Fasten off. Place a stitch marker at the center-front edge (the decreased edge). Set this piece aside.
Front Bodice Left Cup
Foundation: With E-4 hook, ch 24 (26, 28, 30, 32).
Row 1 (RS): Sc in 2nd ch from hook, (ch 1, sk 1 ch, sc in next ch) across, turn. (23 (25, 27, 29, 31) mesh units)
Rows 2 through 10: Rep mesh stitch Row 2. (23 (25, 27, 29, 31) mesh units each row)
Sweetheart Shaping for Left Cup (mirror of right cup):
Row 11 (RS, shaping row): Ch 1, sc in first sc, sc2tog over next ch-1 sp and following sc, (ch 1, sk ch-1 sp, sc in next sc) across, turn. (21 (23, 25, 27, 29) mesh units)
Row 12 (WS): Rep mesh row. (21 (23, 25, 27, 29) mesh units)
Row 13 (RS, shaping row): Ch 1, sc in first sc, sc2tog over next ch-1 sp and following sc, (ch 1, sk ch-1 sp, sc in next sc) across, turn. (19 (21, 23, 25, 27) mesh units)
Row 14 (WS): Rep mesh row. (19 (21, 23, 25, 27) mesh units)
Do NOT fasten off. You will now join the cups.
Joining the Cups and Working the Front Bodice Main Body
Row 15 (RS, joining row): Ch 1, sc in first sc of left cup, (ch 1, sk ch-1 sp, sc in next sc) across left cup, ch 1, sc in first sc of right cup (pick up right cup with RS facing), (ch 1, sk ch-1 sp, sc in next sc) across right cup, turn. (39 (43, 47, 51, 55) mesh units)
The ch 1 between cups forms the center join. Your tie will attach here during finishing.
Row 16 (WS): Ch 1, sc in first sc, (ch 1, sk ch-1 sp, sc in next sc) across, turn. (39 (43, 47, 51, 55) mesh units)
Rows 17 through 28: Rep mesh row. (39 (43, 47, 51, 55) mesh units each row)
After Row 28, your front bodice main mesh section should measure approximately 6 inches from the join row. Total piece height from foundation should be approximately 8 inches.
Checkpoint: Measure from the foundation chain of the cups to the current row. This should be approximately 8 inches. If it differs significantly, adjust hook size, re-swatch, or add/subtract rows before continuing.
Front Bodice Waist Shaping
You will shape the waist by working sc2tog decreases every other row at each side edge over 6 rows.
Row 29 (RS, dec row): Ch 1, sc in first sc, sc2tog over next ch-1 sp and following sc, (ch 1, sk ch-1 sp, sc in next sc) across to last 3 units, sc2tog over next sc and ch-1 sp, sc in last sc, turn. (35 (39, 43, 47, 51) mesh units)
Row 30 (WS): Rep mesh row. (35 (39, 43, 47, 51) mesh units)
Row 31 (RS, dec row): Ch 1, sc in first sc, sc2tog over next ch-1 sp and following sc, (ch 1, sk ch-1 sp, sc in next sc) across to last 3 units, sc2tog over next sc and ch-1 sp, sc in last sc, turn. (31 (35, 39, 43, 47) mesh units)
Row 32 (WS): Rep mesh row. (31 (35, 39, 43, 47) mesh units)
Row 33 (RS, dec row): Ch 1, sc in first sc, sc2tog over next ch-1 sp and following sc, (ch 1, sk ch-1 sp, sc in next sc) across to last 3 units, sc2tog over next sc and ch-1 sp, sc in last sc, turn. (27 (31, 35, 39, 43) mesh units)
Row 34 (WS): Rep mesh row. (27 (31, 35, 39, 43) mesh units)
Front Waist Simplified Motif Band
This section creates the decorative butterfly/shell effect at your natural waistline. I am providing the simplified version that achieves the same beautiful visual effect while being more accessible.
Row 35 (RS, transition row): Ch 3 (counts as dc), dc in each st across, turn. (XS: 27, S: 31, M: 35, L: 39, XL: 43 dc)
Row 36 (WS): Ch 4 (counts as dc + ch 1), sk next dc, (dc in next dc, ch 1, sk 1 dc) across to last dc, dc in last dc, turn. This creates a mesh of dc and ch-1 sps. (XS: 14 dc-ch-sps, S: 16, M: 18, L: 20, XL: 22)
Row 37 (RS, shell row): Ch 3 (counts as dc), sk first ch-1 sp, (shell in next dc, sk ch-1 sp, sk 1 dc, sk ch-1 sp) across, ending dc in last st, turn. (XS: 4 shells, S: 5 shells, M: 6 shells, L: 6 shells, XL: 7 shells)
Row 38 (WS): Ch 1, sc in first dc, ch 2, (sc in center dc of each shell, ch 2) across to last dc, sc in last dc, turn.
Row 39 (RS): Ch 3 (counts as dc), 2 dc in first ch-2 sp, (sc in next sc, 5 dc in next ch-2 sp) across, ending sc in last sc, 3 dc in last ch-2 sp, dc in last dc, turn.
Row 40 (WS): Ch 1, sc in each dc and each sc across (work sc into each dc of shells and each sc), turn. (XS: 27 sc, S: 31 sc, M: 35 sc, L: 39 sc, XL: 43 sc)
Checkpoint: Your front bodice including the motif band should now measure approximately 12 inches from the foundation chain. Waist measurement should be approximately 13 (14, 15, 16, 17) inches wide.
Front Bodice Hem Flare
Row 41 (RS): Ch 3 (counts as dc), 2 dc in same st (inc made), dc across to last st, 3 dc in last st, turn. (XS: 31, S: 35, M: 39, L: 43, XL: 47 dc)
Row 42 (WS): Ch 3 (counts as dc), dc in each dc across, turn. (XS: 31, S: 35, M: 39, L: 43, XL: 47 dc)
Row 43 (RS): Ch 3 (counts as dc), 2 dc in same st, dc across to last st, 3 dc in last st, turn. (XS: 35, S: 39, M: 43, L: 47, XL: 51 dc)
Row 44 (WS): Ch 3 (counts as dc), dc in each dc across, turn. (XS: 35, S: 39, M: 43, L: 47, XL: 51 dc)
Fasten off front bodice. Weave in ends but do not trim until seaming is confirmed.
Instructions: Back Bodice
The back has a straight square neckline and is worked as one continuous flat piece from top down.
Foundation: With E-4 hook, ch 42 (46, 50, 54, 58).
Row 1 (RS): Sc in 2nd ch from hook, (ch 1, sk 1 ch, sc in next ch) across, turn. (41 (45, 49, 53, 57) mesh units)
Rows 2 through 14: Rep mesh stitch row. (41 (45, 49, 53, 57) mesh units each row)
After Row 14, your back bodice shoulder/yoke area is approximately 2.8 inches tall and matches the height of the front cups including the join row.
Back Bodice Main Mesh
Rows 15 through 28: Rep mesh stitch row. (41 (45, 49, 53, 57) mesh units each row)
Back Waist Shaping
Row 29 (RS, dec): Ch 1, sc in first sc, sc2tog over next ch-1 sp and sc, (ch 1, sk ch-1 sp, sc in next sc) across to last 3 units, sc2tog, sc in last sc, turn. (37 (41, 45, 49, 53) mesh units)
Row 30 (WS): Rep mesh row. (37 (41, 45, 49, 53) mesh units)
Row 31 (RS, dec): Same dec as Row 29. (33 (37, 41, 45, 49) mesh units)
Row 32 (WS): Rep mesh row. (33 (37, 41, 45, 49) mesh units)
Row 33 (RS, dec): Same dec. (29 (33, 37, 41, 45) mesh units)
Row 34 (WS): Rep mesh row. (29 (33, 37, 41, 45) mesh units)
Back Motif Band and Hem Flare
Work Rows 35 through 44 exactly as you did for the front bodice, substituting the back stitch counts:
Row 35: Ch 3, dc in each st across. (XS: 29, S: 33, M: 37, L: 41, XL: 45 dc)
Row 36 through Row 40: Work simplified waist motif band exactly as front, using back stitch counts. End Row 40 with: (XS: 29, S: 33, M: 37, L: 41, XL: 45 sc)
Row 41: Ch 3, 2 dc in first st, dc across to last st, 3 dc in last st. (XS: 33, S: 37, M: 41, L: 45, XL: 49 dc)
Row 42: Ch 3, dc across. (same counts as Row 41)
Row 43: Ch 3, 2 dc in first st, dc across to last st, 3 dc in last st. (XS: 37, S: 41, M: 45, L: 49, XL: 53 dc)
Row 44: Ch 3, dc across. (same counts as Row 43)
Fasten off back bodice.
Checkpoint: Back bodice from Row 1 to Row 44 should measure approximately 14 (14.5, 15, 15.5, 16) inches tall. Width at Row 1 (neckline) should be approximately 9 (10, 11, 12, 13) inches. Width at Row 33 (waist) should be approximately 6.5 (7.5, 8.5, 9.5, 10.5) inches.
Instructions: Sleeves (Make 2)
Sleeves are worked flat, beginning at the upper sleeve cap and working down to the bell cuff. The bell shape develops through consistent increases throughout.
The sleeve cap fits an armhole depth of 7 (7.5, 8, 8.5, 9) inches. Sleeve length from underarm to cuff edge (before ruffle) is approximately 22 inches for all sizes.
Sleeve Cap
Foundation: With E-4 hook, ch 28 (30, 32, 34, 36).
Row 1 (RS): Sc in 2nd ch from hook, (ch 1, sk 1, sc in next ch) across, turn. (27 (29, 31, 33, 35) mesh units)
Rows 2 through 4: Rep mesh row. (27 (29, 31, 33, 35) mesh units)
Cap Shaping Increase Rows:
Row 5 (RS): Ch 1, 2 sc in first sc, ch 1, (sc in next sc, ch 1) across, sc in last sc, ch 1, 2 sc in last sc, turn. (29 (31, 33, 35, 37) mesh units)
Row 6 (WS): Rep mesh row. (29 (31, 33, 35, 37) mesh units)
Row 7 (RS): Inc row same as Row 5. (31 (33, 35, 37, 39) mesh units)
Row 8 (WS): Rep mesh row. (31 (33, 35, 37, 39) mesh units)
Row 9 (RS): Inc row same as Row 5. (33 (35, 37, 39, 41) mesh units)
Row 10 (WS): Rep mesh row. (33 (35, 37, 39, 41) mesh units)
Sleeve Body with Bell Shaping
Rows 11 through 14: Rep mesh row. (33 (35, 37, 39, 41) mesh units)
Row 15 (RS, bell inc): Inc row. (35 (37, 39, 41, 43) mesh units)
Rows 16 through 18: Rep mesh row. (35 (37, 39, 41, 43) mesh units)
Row 19 (RS, bell inc): Inc row. (37 (39, 41, 43, 45) mesh units)
Rows 20 through 22: Rep mesh row. (37 (39, 41, 43, 45) mesh units)
Row 23 (RS, bell inc): Inc row. (39 (41, 43, 45, 47) mesh units)
Rows 24 through 26: Rep mesh row. (39 (41, 43, 45, 47) mesh units)
Row 27 (RS, bell inc): Inc row. (41 (43, 45, 47, 49) mesh units)
Rows 28 through 30: Rep mesh row. (41 (43, 45, 47, 49) mesh units)
Row 31 (RS, bell inc): Inc row. (43 (45, 47, 49, 51) mesh units)
Rows 32 through 34: Rep mesh row. (43 (45, 47, 49, 51) mesh units)
Row 35 (RS, bell inc): Inc row. (45 (47, 49, 51, 53) mesh units)
Rows 36 through 38: Rep mesh row. (45 (47, 49, 51, 53) mesh units)
Row 39 (RS, bell inc): Inc row. (47 (49, 51, 53, 55) mesh units)
Rows 40 through 42: Rep mesh row. (47 (49, 51, 53, 55) mesh units)
Row 43 (RS, bell inc): Inc row. (49 (51, 53, 55, 57) mesh units)
Rows 44 through 46: Rep mesh row. (49 (51, 53, 55, 57) mesh units)
Fasten off. Repeat for second sleeve.
Finishing and Assembly
Blocking
Before seaming, wet block all pieces. Soak each piece in lukewarm water for 15 to 20 minutes, gently squeeze out excess water (do not wring), and pin to measurements on your blocking mat. Allow to dry completely before handling.
Seaming
Using your yarn needle and matching yarn, seam shoulder seams first, leaving the neckline opening. Then seam side seams from underarm to hem. Finally, set in sleeves by pinning sleeve cap to armhole, easing as needed, and whipstitching in place.
Ruffle Edging
Switch to your F-5 (3.75 mm) hook. Join yarn at center back hem with RS facing.
Rnd 1: Ch 3 (counts as dc), work 2 dc in each st around entire hem edge, sl st to top of beginning ch 3 to join.
Rnd 2: Ch 3, dc in each dc around, sl st to join.
Rnd 3: Ch 1, (sc in next dc, picot, sc in next dc) around, sl st to join. Fasten off.
Repeat similar ruffle edging at sleeve cuffs.
Front Tie
Create a chain approximately 24 inches long, or thread your ribbon through the center front join. Secure with a few small stitches on the inside.
Neckline Edging
Join yarn at center back neckline. Work 1 round of sc evenly around entire neckline edge, working sc2tog at inner corners of sweetheart dip. On round 2, work (sc, picot, sc) evenly around for a delicate finish. Fasten off and weave in all remaining ends.
Tips for Success
Take breaks. This is a substantial project and rushing leads to mistakes.
Check your gauge often. Fabric can relax as you work, so compare your work to your original swatch periodically.
Try on as you go. Once you have seamed the bodice, try it on before adding sleeves to ensure the fit works for your body.
Embrace the process. This top is a showstopper when finished, and every stitch brings you closer to wearing something truly special.
I hope you love making this woodland fairy top as much as I loved designing it. If you create one, please save this pattern to your Pinterest boards so you can find it easily when you are ready to start. And if you do make it, I would absolutely love to see your finished piece in the comments below.
You Might Also Like
- Sage Green Boho Halter Dress Free Crochet Pattern
- Butter Yellow Summer Baby Set Free Crochet Pattern
- Sage Green Boho Ruffle Crochet Top Free Pattern
- Terracotta Boho Basket Bag with Black Fringe Free Crochet Pattern
