
ONE OF THE MOST STUNNING garments I have ever made with a crochet hook. Seriously. This flared mini dress looks like it walked straight off a runway, but I promise you can absolutely make it yourself.
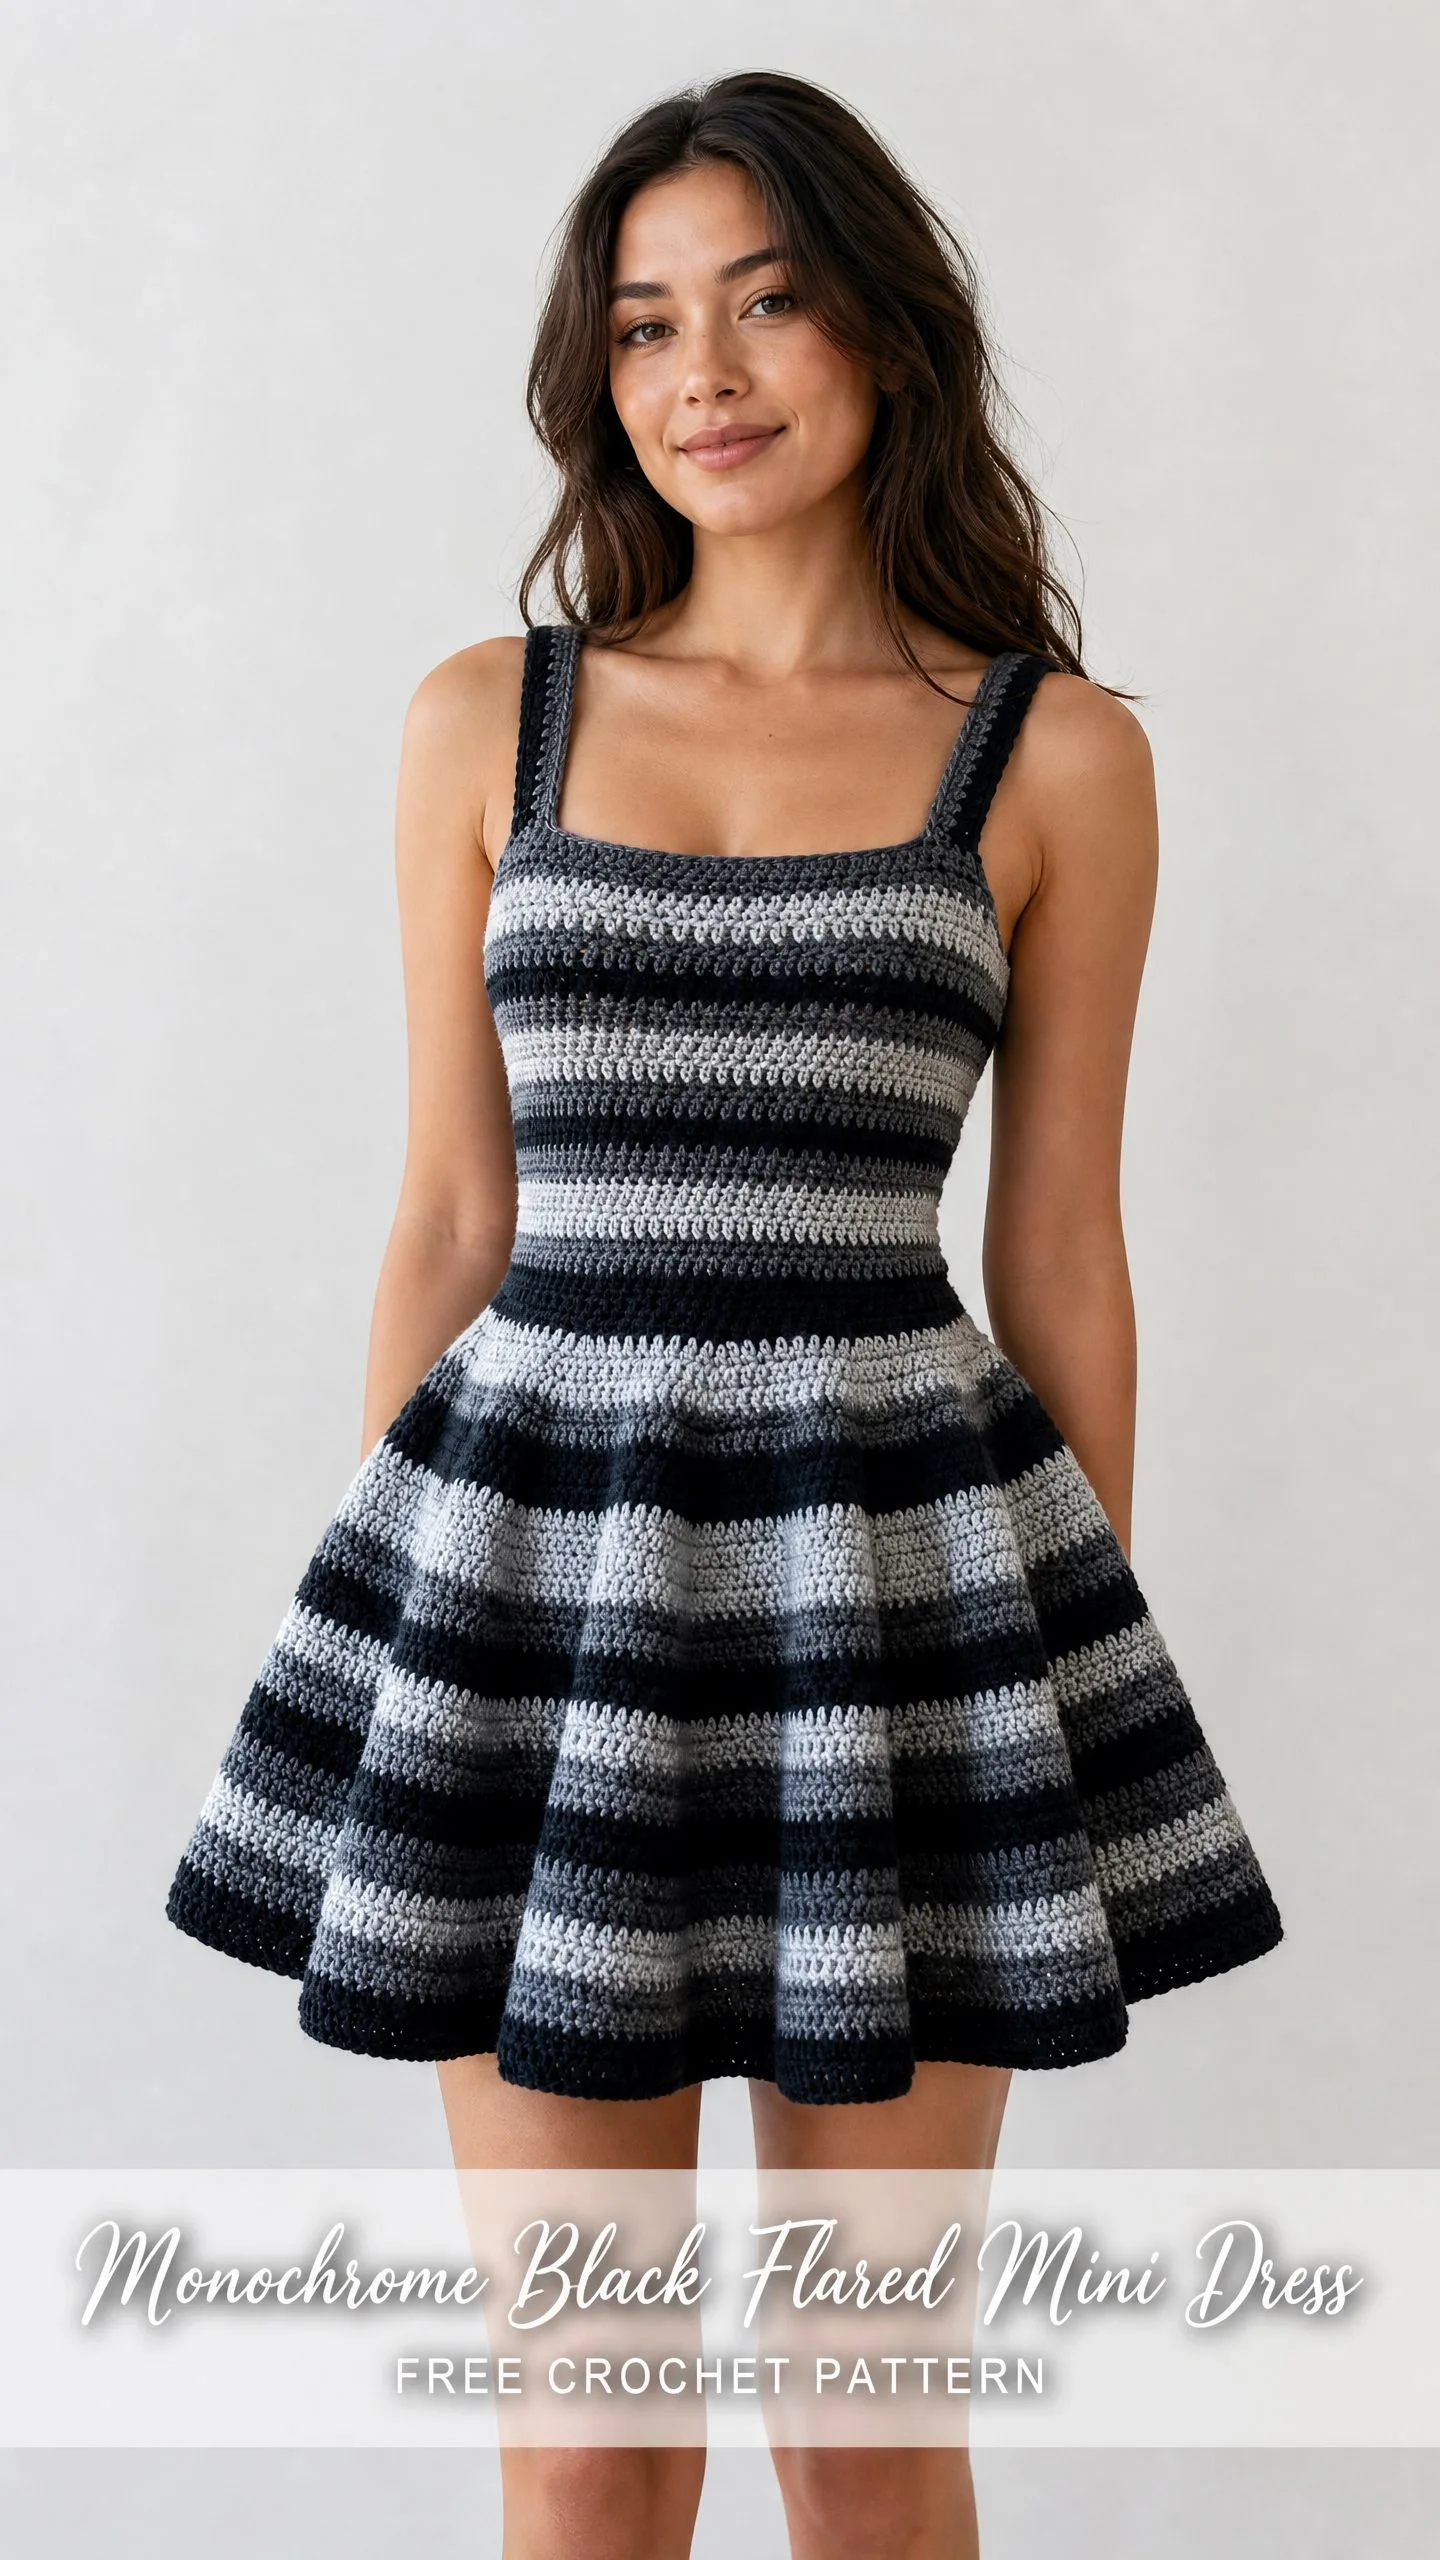
The construction is simpler than you think. A fitted bodice, spaghetti straps, and a dramatically flared skirt that swishes when you walk. All worked in single crochet. That is the only stitch you need to know. The magic comes from the stripe sequence and the strategic increases that create that gorgeous circle-skirt silhouette.
This is an intermediate project that will take around 25 to 40 hours, so settle in with your favorite podcast and prepare to create something truly head-turning. It makes an incredible gift for someone special, or honestly, treat yourself. You deserve a showstopper dress.
Why This Striped Crochet Dress Pattern Works
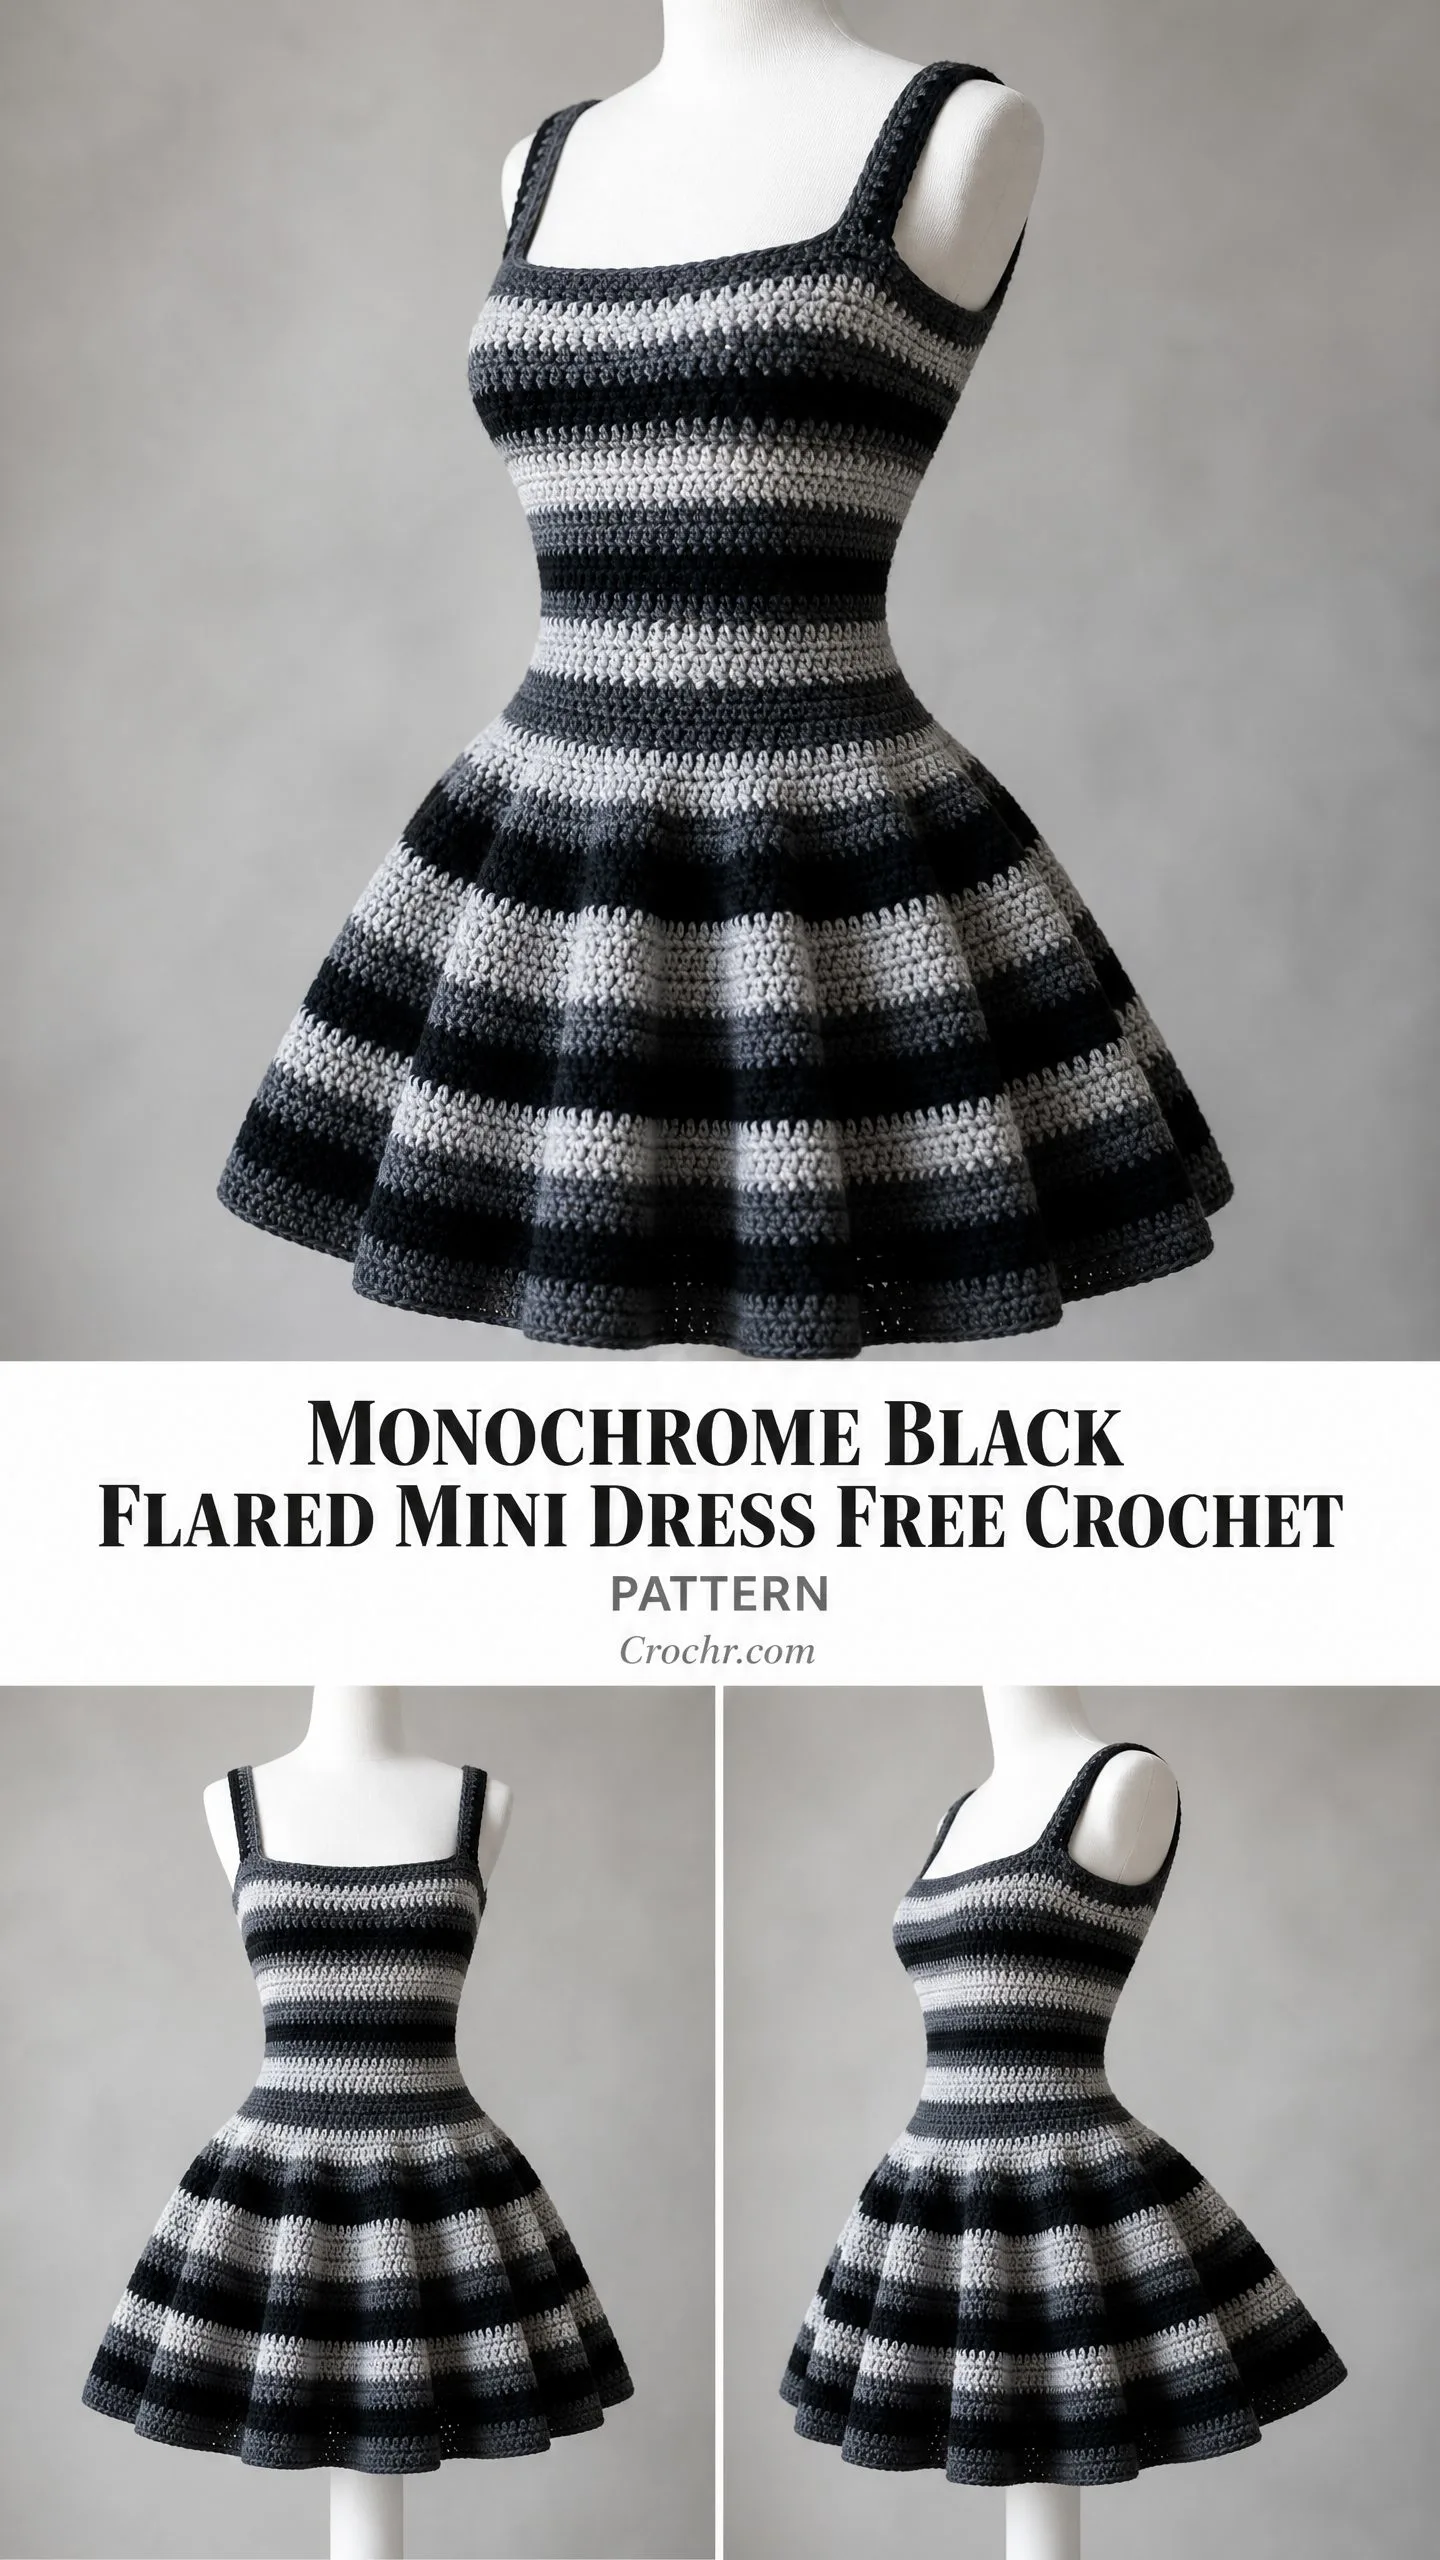
The secret to this dress is the five-shade gradient that flows from true black through charcoal, medium gray, light gray, and pale silver. These horizontal stripes create visual interest without overwhelming the silhouette. As the skirt flares outward, the stripe bands naturally widen, keeping everything proportional and polished.
The bodice fits close to the body with about 2 inches of negative ease at the bust. This creates that sleek, fitted look you see in the reference images. The square neckline and wide straps give it a classic tank silhouette that flatters most body types.
The skirt is where things get fun. You will work increases every other round at first, then every single round as you approach the hem. This creates progressively more dramatic flare toward the bottom. By the final round, your skirt circumference will measure approximately 90 inches. That is serious swish factor.
Materials You Will Need
Yarn: Sport weight yarn (CYCA 2) in five colors
| Color | Description | Yardage Needed |
|---|---|---|
| Color A | True Black | 350 yards / 320 meters |
| Color B | Charcoal Gray | 300 yards / 275 meters |
| Color C | Medium Gray | 300 yards / 275 meters |
| Color D | Light Gray | 250 yards / 230 meters |
| Color E | Off-White Gray / Pale Silver | 250 yards / 230 meters |
Total yarn needed: approximately 1,450 yards / 1,325 meters
Hook: US Size D/3 (3.25 mm) crochet hook
Notions: Tapestry needle, stitch markers (at least 4), scissors, rust-proof blocking pins, blocking board or foam mats, measuring tape
Yarn Suggestions
Paintbox Yarns Simply DK works beautifully for this project. It has excellent stitch definition and comes in all the neutral shades you need. Purchase 3 balls of Color A and 2 balls each of Colors B through E.
Lion Brand Yarn Pound of Love is another solid choice if you want value. The color range includes appropriate charcoal and gray tones.
WeCrochet Chroma Fingering held double brings fingering weight up to sport weight gauge and adds a subtle sheen. This option gives a slightly more luxurious finish.
Whatever you choose, stick with smooth, non-fuzzy yarn. Textured or bouclé yarns will hide your beautiful stripe definition. Acrylic or acrylic blend yarns work best because they hold the flared shape without going limp after washing.
Gauge (Do Not Skip This)
24 single crochet stitches and 26 rows = 4 inches / 10 cm worked flat in single crochet with a US D/3 (3.25 mm) hook, after blocking.
I know gauge swatches feel tedious. But this is a fitted garment. A difference of even one stitch per inch will throw off your measurements significantly. Work a swatch of at least 6 x 6 inches, wash it, block it the way you plan to block the dress, then measure.
If your gauge is off, adjust your hook size. Too many stitches per inch? Go up a hook size. Too few? Go down.
Finished Measurements
This pattern is written for Women’s Small/Medium:
If your measurements fall at the larger end of this range, work one hook size larger for the bodice only.
Abbreviations and Stitch Definitions
Let me walk you through every abbreviation you will encounter. I define them here so you can refer back anytime.
Special Techniques
Clean Color Change: Work your last single crochet in the current color until 2 loops remain on your hook. Drop the current color to the wrong side. Pick up the new color and draw it through both loops to complete the stitch. This gives you crisp, clean stripe transitions.
Slip Stitch Join: After the last stitch of a round, insert your hook into the first stitch of that same round, yarn over, and draw through both loops. This closes your round without adding extra stitches.
Pattern Notes Before You Begin
This dress is constructed in three main sections: straps, bodice, and skirt.
You will work the straps first as flat rectangles. Then you create separate front and back bodice panels worked flat from the top down. The straps attach to both panels. Side seams join everything into a tube. Finally, you pick up stitches around the waist and work the skirt in the round, increasing as you go.
Important: Your chain 1 at the beginning of each row does NOT count as a stitch. Always work your first single crochet into the first actual stitch.
Stripe sequence for the bodice (each stripe is 2 rows):
For the skirt, stripes start at 2 rounds each and expand to 4 rounds near the hem. Follow the round-by-round instructions exactly.
When working the skirt in the round, do not turn your work. Keep the right side facing you at all times.
Weave in your ends as you go rather than saving them all for the end. With this many color changes, you will thank yourself later.
Section 1: Straps (Make 2)
Using Color A and leaving a 12-inch tail for seaming later, chain 13.
Row 1 (WS): Sc in 2nd ch from hook and in each ch across. Turn. (12 sc)
Row 2 (RS): Ch 1, sc in each st across. Turn. (12 sc)
Repeat Row 2 until your strap measures 10 inches / 25 cm from the foundation chain. Change colors every 2 rows following your bodice stripe sequence.
After the final row, do not fasten off. Set the strap aside. Make a second strap exactly the same way.
Checkpoint: Each strap should measure 2 inches wide and 10 inches long.
Section 2: Front Bodice Panel
Using Color A, chain 103.
Row 1 (WS): Sc in 2nd ch from hook and in each ch across. Turn. (102 sc)
Rows 2 through 4: Ch 1, sc in each st across. Turn. (102 sc)
Change to Color B after Row 4.
Rows 5 and 6: Ch 1, sc in each st across. Turn. (102 sc)
Change to Color C.
Rows 7 and 8: Ch 1, sc in each st across. Turn. (102 sc)
Change to Color D.
Rows 9 and 10: Ch 1, sc in each st across. Turn. (102 sc)
Change to Color E.
Rows 11 and 12: Ch 1, sc in each st across. Turn. (102 sc)
Change to Color A.
Continue in established 2-row stripe sequence until piece measures 9 inches / 23 cm from foundation chain, ending after a WS row.
Bodice Waist Shaping
Now you will taper the waist with decreases.
Decrease Row 1 (RS): Ch 1, sc2tog over first 2 sts, sc across to last 2 sts, sc2tog. Turn. (100 sc)
Decrease Row 2 (WS): Ch 1, sc2tog over first 2 sts, sc across to last 2 sts, sc2tog. Turn. (98 sc)
Decrease Row 3 (RS): Ch 1, sc2tog over first 2 sts, sc across to last 2 sts, sc2tog. Turn. (96 sc)
Decrease Row 4 (WS): Ch 1, sc2tog over first 2 sts, sc across to last 2 sts, sc2tog. Turn. (94 sc)
Continue your color changes throughout the shaping rows.
Work 2 more rows even. (94 sc)
Fasten off. This is the bottom waist edge of your front panel.
Checkpoint: Front bodice measures approximately 17 inches wide at top, narrowing to 15.5 inches at waist, and approximately 9.5 inches tall.
Section 3: Back Bodice Panel
Work exactly as the front bodice panel. You should end with 94 sc at the waist.
Section 4: Attach Straps to Bodice Panels
Lay your front bodice panel flat with RS facing up. Position one strap at the left top edge and one at the right top edge. Each strap should align with the outermost 12 stitches of the bodice top.
Using your tapestry needle and a 12-inch tail of Color A, whipstitch each strap to the bodice top edge. Weave in ends.
Repeat on the back bodice panel, attaching the opposite ends of each strap.
Section 5: Join Side Seams
Align front and back panels with wrong sides facing out (right sides together). Using your tapestry needle and Color A, whipstitch or mattress stitch down each side edge.
Leave the waist edge open and leave the top neckline open. Turn right side out.
Your joined bodice now forms a tube with a square neckline opening.
Checkpoint: The waist circumference opening should measure approximately 31 inches around (94 sc front plus 94 sc back = 188 sts total).
Section 6: Skirt
This is where the magic happens. The skirt is worked in the round from the waist down.
Setup Round
With RS facing, attach Color A to any waist-edge stitch with a slip stitch. Place a stitch marker. Work 1 sc in each stitch around the entire waist edge. Join with sl st to first sc. (188 sc)
Understanding the Increase Structure
You will work increases in 8 evenly spaced panels around the skirt. Place markers to divide your work into 8 sections. On increase rounds, work an increase at each panel marker position (8 increases per increase round).
Skirt Stripe Sequence
Rounds 1 Through 16 (Increases Every Other Round)
Rnd 1: Sc in each st around. Join. (188 sc)
Rnd 2 (increase): Inc in first st, sc in next 22 sts, [inc in next st, sc in next 22 sts] rep around. Join. (196 sc)
Rnd 3: Sc in each st around. Join. (196 sc)
Rnd 4 (increase): [Sc 24, inc] 4 times, [sc 25, inc] 4 times. Join. (204 sc)
Rnd 5: Sc in each st around. Join. (204 sc)
Rnd 6 (increase): [Sc 24, inc] 4 times, [sc 25, inc] 4 times. Join. (212 sc)
Rnd 7: Sc in each st around. Join. (212 sc)
Rnd 8 (increase): [Sc 25, inc] 4 times, [sc 26, inc] 4 times. Join. (220 sc)
Rnd 9: Sc in each st around. Join. (220 sc)
Rnd 10 (increase): [Sc 26, inc] 4 times, [sc 27, inc] 4 times. Join. (228 sc)
Rnd 11: Sc in each st around. Join. (228 sc)
Rnd 12 (increase): [Sc 27, inc] 4 times, [sc 28, inc] 4 times. Join. (236 sc)
Rnd 13: Sc in each st around. Join. (236 sc)
Rnd 14 (increase): [Sc 28, inc] 4 times, [sc 29, inc] 4 times. Join. (244 sc)
Rnd 15: Sc in each st around. Join. (244 sc)
Rnd 16 (increase): [Sc 29, inc] 4 times, [sc 30, inc] 4 times. Join. (252 sc)
Rounds 17 Through 52 (Increases Every Round)
From here on, you increase every single round. This creates that dramatic flare toward the hem.
Rnd 17 (increase): [Sc 30, inc] 4 times, [sc 31, inc] 4 times. Join. (260 sc)
Rnd 18 (increase): [Sc 31, inc] 4 times, [sc 32, inc] 4 times. Join. (268 sc)
Rnd 19 (increase): [Sc 32, inc] 4 times, [sc 33, inc] 4 times. Join. (276 sc)
Rnd 20 (increase): [Sc 33, inc] 4 times, [sc 34, inc] 4 times. Join. (284 sc)
Rnd 21 (increase): [Sc 34, inc] 4 times, [sc 35, inc] 4 times. Join. (292 sc)
Rnd 22 (increase): [Sc 35, inc] 4 times, [sc 36, inc] 4 times. Join. (300 sc)
Rnd 23 (increase): [Sc 36, inc] 4 times, [sc 37, inc] 4 times. Join. (308 sc)
Rnd 24 (increase): [Sc 37, inc] 4 times, [sc 38, inc] 4 times. Join. (316 sc)
Rnd 25 (increase): [Sc 38, inc] 4 times, [sc 39, inc] 4 times. Join. (324 sc)
Rnd 26 (increase): [Sc 39, inc] 4 times, [sc 40, inc] 4 times. Join. (332 sc)
Rnd 27 (increase): [Sc 40, inc] 4 times, [sc 41, inc] 4 times. Join. (340 sc)
Rnd 28 (increase): [Sc 41, inc] 4 times, [sc 42, inc] 4 times. Join. (348 sc)
Rnd 29 (increase): [Sc 42, inc] 4 times, [sc 43, inc] 4 times. Join. (356 sc)
Rnd 30 (increase): [Sc 43, inc] 4 times, [sc 44, inc] 4 times. Join. (364 sc)
Rnd 31 (increase): [Sc 44, inc] 4 times, [sc 45, inc] 4 times. Join. (372 sc)
Rnd 32 (increase): [Sc 45, inc] 4 times, [sc 46, inc] 4 times. Join. (380 sc)
Rnd 33 (increase): [Sc 46, inc] 4 times, [sc 47, inc] 4 times. Join. (388 sc)
Rnd 34 (increase): [Sc 47, inc] 4 times, [sc 48, inc] 4 times. Join. (396 sc)
Rnd 35 (increase): [Sc 48, inc] 4 times, [sc 49, inc] 4 times. Join. (404 sc)
Rnd 36 (increase): [Sc 49, inc] 4 times, [sc 50, inc] 4 times. Join. (412 sc)
Rnd 37 (increase): [Sc 50, inc] 4 times, [sc 51, inc] 4 times. Join. (420 sc)
Rnd 38 (increase): [Sc 51, inc] 4 times, [sc 52, inc] 4 times. Join. (428 sc)
Rnd 39 (increase): [Sc 52, inc] 4 times, [sc 53, inc] 4 times. Join. (436 sc)
Rnd 40 (increase): [Sc 53, inc] 4 times, [sc 54, inc] 4 times. Join. (444 sc)
Rnd 41 (increase): [Sc 54, inc] 4 times, [sc 55, inc] 4 times. Join. (452 sc)
Rnd 42 (increase): [Sc 55, inc] 4 times, [sc 56, inc] 4 times. Join. (460 sc)
Rnd 43 (increase): [Sc 56, inc] 4 times, [sc 57, inc] 4 times. Join. (468 sc)
Rnd 44 (increase): [Sc 57, inc] 4 times, [sc 58, inc] 4 times. Join. (476 sc)
Rnd 45 (increase): [Sc 58, inc] 4 times, [sc 59, inc] 4 times. Join. (484 sc)
Rnd 46 (increase): [Sc 59, inc] 4 times, [sc 60, inc] 4 times. Join. (492 sc)
Rnd 47 (increase): [Sc 60, inc] 4 times, [sc 61, inc] 4 times. Join. (500 sc)
Rnd 48 (increase): [Sc 61, inc] 4 times, [sc 62, inc] 4 times. Join. (508 sc)
Rnd 49 (increase): [Sc 62, inc] 4 times, [sc 63, inc] 4 times. Join. (516 sc)
Rnd 50 (increase): [Sc 63, inc] 4 times, [sc 64, inc] 4 times. Join. (524 sc)
Rnd 51 (increase): [Sc 64, inc] 4 times, [sc 65, inc] 4 times. Join. (532 sc)
Rnd 52 (increase): [Sc 65, inc] 4 times, [sc 66, inc] 4 times. Join. (540 sc)
Fasten off. Weave in all remaining ends.
Checkpoint: Your skirt hem circumference should measure approximately 90 inches / 229 cm.
Adding Length (Optional)
If you want a longer skirt to reach the full 13 inches shown in the photos, continue working increase rounds following the established pattern. Add 8 stitches per round and keep your stripe sequence going. Each additional round adds approximately 0.15 inches of length.
Finishing Your Crochet Mini Dress
Block your completed dress for the best results. Wet blocking works well for acrylic yarns. Soak the dress in lukewarm water, gently squeeze out excess moisture, and lay flat on blocking mats. Pin the skirt into a circular shape and let it dry completely.
The dense single crochet fabric creates a structured garment that holds its shape beautifully. No closures are needed because the bodice stretches slightly over the hips for wearing.
Tips for Success
Track your rounds. With 52 skirt rounds plus all those bodice rows, it is easy to lose count. Use a row counter app or tally marks on paper.
Weave in ends as you go. Seriously. With five colors and constant changes, waiting until the end will feel overwhelming.
Try it on. After completing the bodice and before starting the skirt, try the tube on to check the fit. Adjust if needed.
Block your gauge swatch. Sport weight yarn can change significantly after washing. Know what your finished fabric will look like before committing to the whole dress.
Skill Level Considerations
This pattern is rated intermediate. The only stitch is single crochet, which most beginners know. The challenge comes from managing the stripe sequence, working in the round for the skirt, executing evenly spaced increases, and seaming the bodice pieces together.
If you have made a basic hat or worked any colorwork project, you have the skills for this dress. Take your time, trust the stitch counts, and you will end up with something stunning.
Thank you so much for choosing this pattern. I genuinely hope you love making this dress as much as I loved designing it. There is something incredibly satisfying about creating a wearable garment with your own hands.
If you make this monochrome flared mini dress, I would absolutely love to see it. Tag me on Instagram or share a photo on Facebook. Seeing your finished projects is the best part of my day.
Pin this crochet dress pattern to your Pinterest boards so you can find it when you are ready to start. And please drop a comment below if you give it a try. I would love to hear how it turns out for you!
You Might Also Like
- Sage Green Boho Halter Dress Free Crochet Pattern
- Terracotta Earthy Granny Square Backpack Crochet Pattern
- Cream Lace Bridal Barrel Bag Free Crochet Pattern
- Sunshine Yellow Dahlia Crochet Dress Free Crochet Pattern
