
I’ve been looking for the perfect geeky wearable project to add to my rotation, and this Jigglypuff crochet crop top is absolutely it. If you love character-inspired fashion that actually looks polished enough to wear out, you’re going to want to bookmark this one immediately.
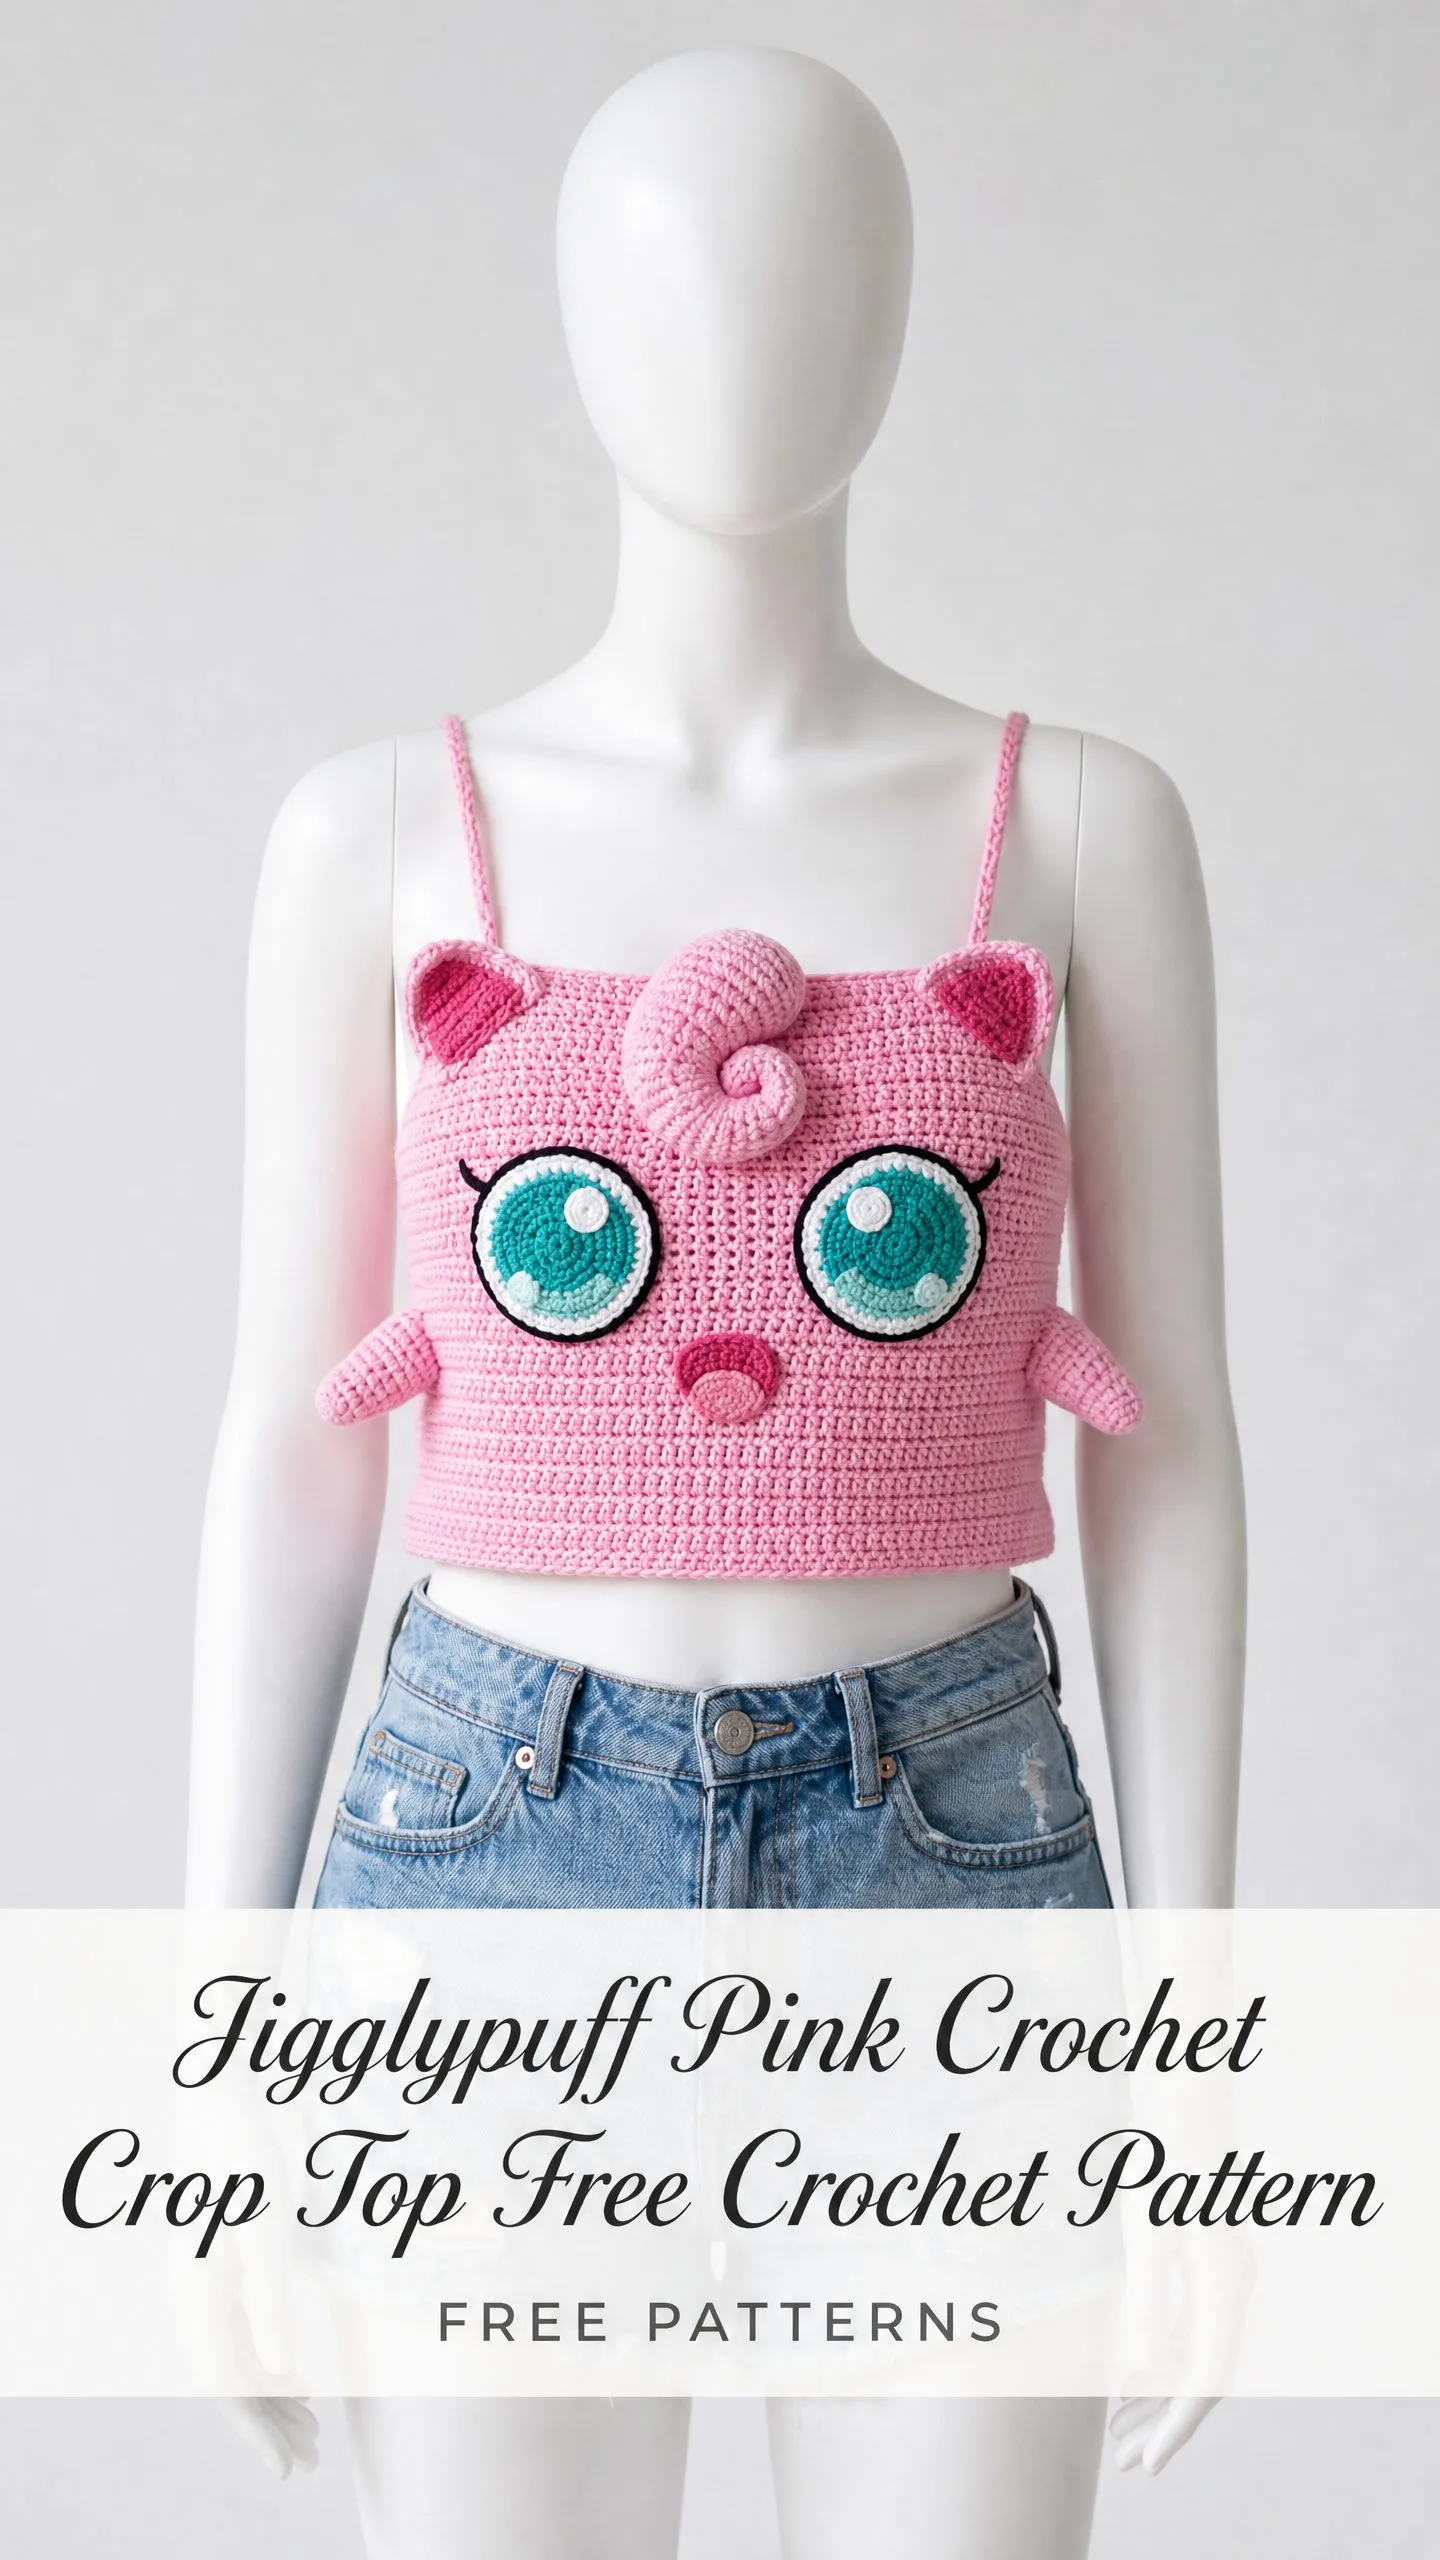
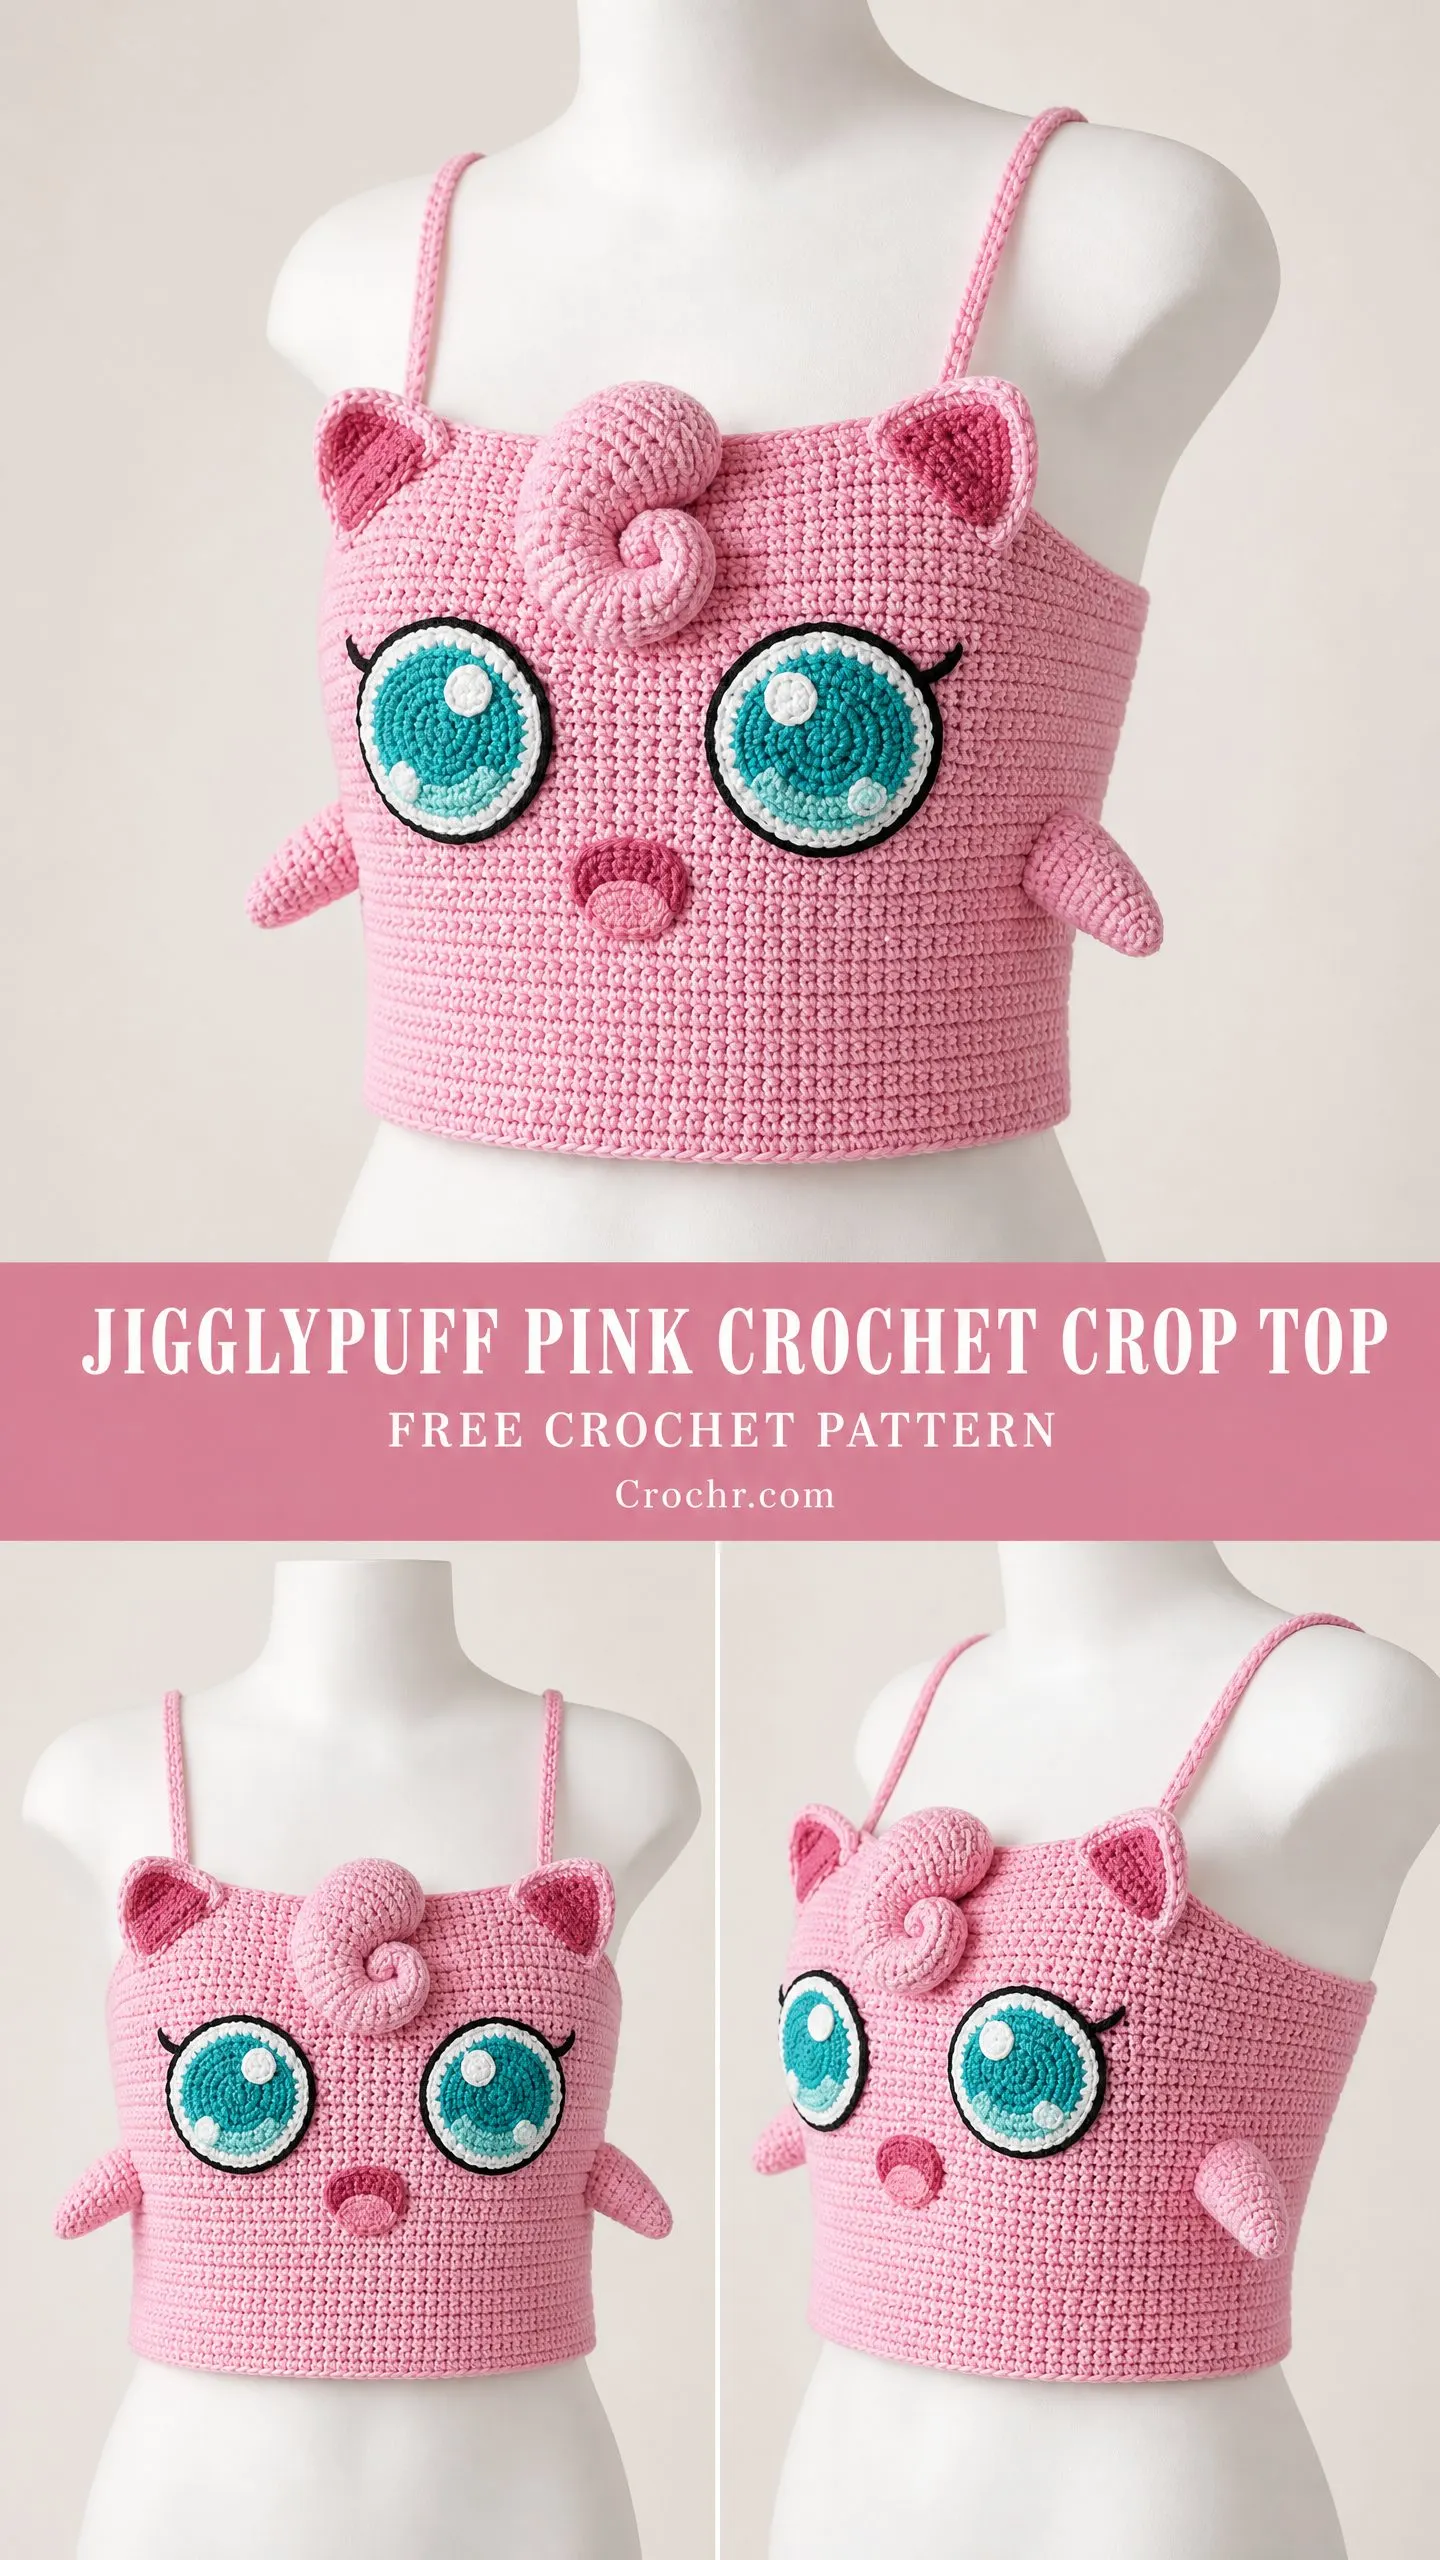
This pattern transforms everyone’s favorite pink balloon Pokémon into a fully wearable bralette-style top with dimensional appliqué eyes, a cute spiral curl, pointy little ears, and those adorable nubby arms sticking out from the sides. It’s giving main character energy at any convention, concert, or casual Friday.
The construction is smarter than it looks. You work the body in continuous rounds from the hem up, split for the front and back panels, then crochet all the face elements separately and sew them on at the end. It sounds like a lot, but I promise the pieces come together beautifully once you get going.
Why This Pattern Works So Well
This top uses single crochet almost exclusively for the main body. That means you get a dense, structured fabric that holds its shape without sagging. Perfect for a fitted garment that needs to look crisp and graphic.
The face appliqués are what really make this piece pop. Those big teal eyes with black outlines and white highlights? They’re layered flat circles stacked and stitched together. The technique is surprisingly simple once you understand the assembly order.
Skill level: Intermediate to Advanced. You should be comfortable working in continuous rounds, reading circular flat gauges, shaping a fitted bodice, and managing multiple separately crocheted dimensional elements. If that sounds intimidating, don’t panic. The pattern walks you through every single step.
Time estimate: Plan for approximately 18 to 25 hours spread across several sessions. The body works up faster than you’d expect, but the appliqués and finishing take time to do well.
Materials You’ll Need
Gather everything before you start. Nothing kills momentum like running out of yarn halfway through.
Yarn (Main Color, MC): Approximately 500 yards of worsted weight (weight 4) yarn in bubblegum pink
Yarn (Color A): Approximately 60 yards of worsted weight yarn in teal or seafoam green
Yarn (Color B): Approximately 25 yards of worsted weight yarn in bright white
Yarn (Color C): Approximately 15 yards of worsted weight yarn in black
Yarn (Color D): Approximately 10 yards of worsted weight yarn in deep rose or dark pink for the inner ears and mouth
Hook: US Size G-6 / 4.0 mm
Notions:
Yarn Suggestions
Lion Brand Vanna’s Choice in Dusty Rose or Pink Lemonade works beautifully here. The smooth matte finish shows single crochet texture cleanly, which is essential for the graphic character details.
Red Heart Super Saver in Pretty ‘n Pink is a budget-friendly option with excellent stitch definition and color consistency across dye lots.
Avoid fuzzy or textured yarns like chenille or boucle. They’ll obscure the stitch definition on the face appliqués and make your Jigglypuff look blurry instead of crisp.
Gauge (Don’t Skip This)
20 sc x 22 rows = 4 in x 4 in / 10 cm x 10 cm worked in single crochet in continuous rounds, after blocking.
For a garment this fitted, being even half a stitch per inch off will cause the top to fit incorrectly. Make a swatch. Wash and dry it the same way you plan to care for the finished garment. Then measure.
Finished Measurements
This pattern is written for a size Small (32 to 34 inch / 81 to 86 cm bust).
Abbreviations and Stitch Definitions
Let me break down every stitch you’ll use. If you’re newer to pattern reading, this section is your best friend.
ch: chain. Wrap yarn over hook, pull through loop on hook.
sl st: slip stitch. Insert hook, yarn over, pull through stitch and loop on hook in one motion.
sc: single crochet. Insert hook into stitch, yarn over, pull up a loop (2 loops on hook), yarn over, pull through both loops.
sc2tog: single crochet two together. This is a decrease. Insert hook into first stitch, yarn over, pull up a loop. Insert hook into next stitch, yarn over, pull up a loop. Yarn over, pull through all 3 loops on hook. You’ve turned 2 stitches into 1.
hdc: half double crochet. Yarn over, insert hook, yarn over, pull up a loop (3 loops on hook), yarn over, pull through all 3 loops.
dc: double crochet. Yarn over, insert hook, yarn over, pull up a loop (3 loops on hook), yarn over, pull through 2 loops (2 loops remain), yarn over, pull through remaining 2 loops.
inc: increase. Work 2 sc into the same stitch.
BLO: back loop only. Work into only the back loop of the stitch instead of both loops.
MR: magic ring. Create an adjustable loop, work stitches into it, then pull the tail to close the center hole.
pm: place marker
sm: slip marker
RS: right side (the pretty side that faces out)
WS: wrong side
st(s): stitch(es)
rnd(s): round(s)
Special Stitches
Surface Slip Stitch (for eye outlines)
With yarn held behind the work on the WS, insert hook from RS to WS through the fabric. Yarn over with the surface yarn, pull up a loop through to the RS. Insert hook into the next stitch along the desired path, yarn over, pull through both the fabric and the loop on hook. Continue along the outline. This creates a raised cord effect on the right side.
Reverse Single Crochet (Crab Stitch, optional for edging)
With RS facing, do NOT turn. Working right to left (backwards), insert hook into the next stitch to the right, yarn over, pull up a loop, yarn over, pull through both loops. This creates a twisted decorative edge.
Pattern Instructions
Body (worked in the round from hem to underarm)
Foundation: Using MC, ch 151. Being careful not to twist, sl st into the first ch to form a ring.
Rnd 1: Ch 1 (does not count as st here and throughout), sc in each ch around. Sl st to first sc to join. (150 sc)
Switch to working in continuous rounds from here. Place a stitch marker in the first stitch and move it up each round.
Rnd 2: Sc in each st around. (150 sc)
Rnd 3: Working in BLO, sc in each st around. (150 sc)
This BLO round creates a subtle turning ridge at the hem for a clean folded-look edge.
Rnds 4 through 8: Sc in each st around. (150 sc) 5 rounds total
Rnd 9 (first shaping decrease round): Sc in 23 sts, sc2tog, sc in 24 sts, sc2tog, sc in 24 sts, sc2tog, sc in 23 sts, sc2tog, sc in 24 sts, sc2tog, sc in 24 sts, sc2tog. (144 sc)
Rnds 10 through 14: Sc in each st around. (144 sc) 5 rounds
Rnd 15 (second shaping decrease round): Sc in 22 sts, sc2tog, sc in 22 sts, sc2tog, sc in 22 sts, sc2tog, sc in 22 sts, sc2tog, sc in 22 sts, sc2tog, sc in 22 sts, sc2tog. (138 sc)
Rnds 16 through 20: Sc in each st around. (138 sc) 5 rounds
Rnd 21 (third shaping decrease round): Sc in 21 sts, sc2tog, sc in 21 sts, sc2tog, sc in 21 sts, sc2tog, sc in 21 sts, sc2tog, sc in 21 sts, sc2tog, sc in 21 sts, sc2tog. (132 sc)
Rnds 22 through 26: Sc in each st around. (132 sc) 5 rounds
Rnd 27 (fourth shaping decrease round): Sc in 20 sts, sc2tog, sc in 20 sts, sc2tog, sc in 20 sts, sc2tog, sc in 20 sts, sc2tog, sc in 20 sts, sc2tog, sc in 20 sts, sc2tog. (126 sc)
Rnds 28 through 32: Sc in each st around. (126 sc) 5 rounds
Checkpoint: The body now measures approximately 6 inches from the hem fold ridge. Measure around the widest part. The circumference should be approximately 25.2 in / 64 cm. This is the waist-cinch zone.
Rnd 33 (first expansion round): Sc in 20 sts, inc, sc in 21 sts, inc, sc in 21 sts, inc, sc in 20 sts, inc, sc in 21 sts, inc, sc in 21 sts, inc. (132 sc)
Rnds 34 through 36: Sc in each st around. (132 sc) 3 rounds
Rnd 37 (second expansion round): Sc in 21 sts, inc, sc in 22 sts, inc, sc in 22 sts, inc, sc in 21 sts, inc, sc in 22 sts, inc, sc in 22 sts, inc. (138 sc)
Rnds 38 through 40: Sc in each st around. (138 sc) 3 rounds
Rnd 41 (third expansion round): Sc in 22 sts, inc, sc in 23 sts, inc, sc in 23 sts, inc, sc in 22 sts, inc, sc in 23 sts, inc, sc in 23 sts, inc. (144 sc)
Rnds 42 through 44: Sc in each st around. (144 sc) 3 rounds
Second Checkpoint: The body should measure approximately 9 in from the hem ridge. The bust circumference is approximately 28.8 in.
Dividing for Front and Back Panels
Place a stitch marker at the beginning of the round (right side seam) and count 72 stitches forward, placing a second marker (left side seam). The first 72 stitches form the BACK panel. The second 72 stitches form the FRONT panel. Work each panel separately in flat rows.
Back Panel (worked flat in rows)
Attach MC yarn to the first stitch of the back section.
Row 1 (RS): Ch 1, sc across 72 sts. Turn. (72 sc)
Rows 2 through 12: Ch 1, sc across. Turn. (72 sc) 11 rows
Row 13 (neckline shaping): Ch 1, sc in 18 sts. Turn, leaving remaining sts unworked. (18 sc)
You’re now working the right back strap attachment zone. The center 36 sts will be left open for the back neckline.
Rows 14 through 16: Ch 1, sc across 18 sts. Turn. (18 sc) 3 rows
Fasten off. Reattach yarn to the left back section (stitches 55 through 72).
Rows 14 through 16 (left side): Ch 1, sc across 18 sts. Turn. (18 sc) 3 rows
Fasten off.
Front Panel (worked flat in rows)
Attach MC yarn to the first stitch of the front section.
Row 1 (RS): Ch 1, sc across 72 sts. Turn. (72 sc)
Rows 2 through 16: Ch 1, sc across. Turn. (72 sc) 15 rows
The front panel is taller than the back to accommodate the dimensional face appliqués.
Row 17 (front neckline shaping): Ch 1, sc in 18 sts. Turn. (18 sc)
Rows 18 through 20: Ch 1, sc across 18 sts. Turn. (18 sc) 3 rows
Fasten off. Reattach yarn to the right front section (stitches 55 through 72).
Rows 18 through 20 (right side): Ch 1, sc across 18 sts. Turn. (18 sc) 3 rows
Fasten off.
Straps (make 2)
Using MC, ch 61.
Row 1: Sc in the second ch from hook, sc in each ch across. (60 sc)
Row 2: Ch 1, turn, sc across. (60 sc)
Fasten off, leaving a long tail for sewing.
Face Appliqués
Teal Iris (make 2)
Using Color A and MR.
Rnd 1: 6 sc into MR. Pull ring closed. (6 sc)
Rnd 2: Inc in each st around. (12 sc)
Rnd 3: (Sc in 1 st, inc in next st) rep around. (18 sc)
Rnd 4: (Sc in 2 sts, inc in next st) rep around. (24 sc)
Rnd 5: (Sc in 3 sts, inc in next st) rep around. (30 sc)
Rnd 6: (Sc in 4 sts, inc in next st) rep around. (36 sc)
Rnd 7: (Sc in 5 sts, inc in next st) rep around. (42 sc)
Sl st to close. Fasten off, leaving a long tail.
Black Outer Eye Ring (make 2)
Using Color C and MR.
Rnd 1: 6 sc into MR. (6 sc)
Rnd 2: Inc in each st around. (12 sc)
Rnd 3: (Sc in 1, inc) rep around. (18 sc)
Rnd 4: (Sc in 2, inc) rep around. (24 sc)
Rnd 5: (Sc in 3, inc) rep around. (30 sc)
Rnd 6: (Sc in 4, inc) rep around. (36 sc)
Rnd 7: (Sc in 5, inc) rep around. (42 sc)
Rnd 8: (Sc in 6, inc) rep around. (48 sc)
Sl st to close. Fasten off, leaving a long tail.
White Highlight Dots
Large highlight (make 2) using Color B and MR:
Rnd 1: 6 sc into MR. (6 sc)
Rnd 2: Inc in each st around. (12 sc)
Rnd 3: (Sc in 1, inc) rep around. (18 sc)
Sl st to close. Fasten off.
Small highlight (make 2) using Color B and MR:
Rnd 1: 6 sc into MR. (6 sc)
Rnd 2: Inc in each st around. (12 sc)
Sl st to close. Fasten off.
Eye Assembly
Center the teal iris on the black circle and pin. Using matching teal yarn, whipstitch the iris to the black circle around its entire perimeter. Position the large white highlight at the upper right of the iris and the small white highlight below it. Sew both in place.
Using Color C, work a surface slip stitch along the top arc of the assembled eye (approximately the top 40 percent of the circumference) to create a thick lash line.
Ears (make 2)
Outer Ear using MC:
Rnd 1: MR, 6 sc into ring. (6 sc)
Rnd 2: Inc in each st around. (12 sc)
Rnd 3: (Sc in 1, inc) rep around. (18 sc)
Rnd 4: (Sc in 2, inc) rep around. (24 sc)
Rnd 5: Sc in each st around. (24 sc)
Rnd 6: (Sc in 2, sc2tog) rep around. (18 sc)
Rnd 7: (Sc in 1, sc2tog) rep around. (12 sc)
Do not fasten off. Pinch the top of the ear so the two edges meet to form a pointed triangle shape. Sl st across the 6 pairs of stitches to close the point. Fasten off, leaving a tail.
Inner Ear using Color D:
Repeat Rnds 1 through 4 of the outer ear. (24 sc) Fasten off, leaving a tail.
Sew the inner ear circle centered onto the flat front face of the outer ear triangle.
Forehead Curl
Using MC, ch 30.
Row 1: Starting in the second ch from hook, sc in 4 sts, hdc in 5 sts, dc in 10 sts, dc 2 in next st, dc in 4 sts, hdc in 4 sts, sc in rem 5 sts. (30 sts worked)
Do not turn. Work along the opposite side of the foundation chain: sc in each ch along the bottom. (30 sc)
Sl st to join. Fasten off, leaving a long tail.
Roll the piece into a tight spiral starting from the narrow end (the sc end). Tack the coil in place with whipstitches through the layers. Add a small pinch of fiberfill if you want it to sit more dimensionally.
Arms / Nubs (make 4)
Using MC and MR.
Rnd 1: 6 sc into MR. (6 sc)
Rnd 2: Inc in each st around. (12 sc)
Rnds 3 through 6: Sc in each st around. (12 sc) 4 rounds
Add a small amount of fiberfill. (Sc2tog) rep around. (6 sc)
Fasten off, leaving a long tail. Draw the tail through the remaining 6 sts and pull tight to close.
Mouth
Using Color D and MR.
Rnd 1: 6 sc into MR. (6 sc)
Rnd 2: Inc in each st around. (12 sc)
Sl st to join. Fasten off, leaving a tail. Pinch into a slight oval. Using black yarn, embroider a small curved line across the top third of the oval.
Assembly and Finishing
Step 1: Seam the front and back panels. With RS facing out, align the side edges and whipstitch or mattress stitch together.
Step 2: Attach the straps. Pin each strap end to the corresponding shoulder tab. Try the top on to confirm length before sewing permanently.
Step 3 (optional): Work one round of reverse single crochet around the neckline and hem for a neat finish.
Step 4: Position and sew face appliqués. The eyes sit approximately 1.5 in down from the neckline with 1 in between them. The curl goes centered above the eyes. Ears attach at the upper corners. The mouth centers below the eyes. Arms attach at the side seams midway up.
Care Instructions
Hand wash in cool water with gentle soap. Do not wring. Press flat in a towel, reshape while damp, and lay flat to dry. Do not tumble dry or hang, as hanging will stretch the single crochet fabric.
Size Customization Tips
To increase by one full size toward a Medium, begin the foundation chain with 161 stitches. Adjust the shaping schedule to use 8 decreases evenly spaced instead of 6. Increase the front and back panel width from 72 sts to 77 sts each.
For length adjustments, add or subtract plain sc rounds between the waist shaping section without changing stitch counts. Each additional round adds approximately 0.18 in of length.
I really hope you enjoy making this Jigglypuff crop top as much as I enjoyed putting this pattern together. It’s one of those projects that gets better the more you work on it, and the finished piece is genuinely a showstopper.
If you make this top, I would absolutely love to see it. Tag me on Instagram or share your finished project photo on Facebook. Seeing your creations honestly makes my whole week.
Save this pattern to your Pinterest boards so you can find it easily when you’re ready to start. And if you give it a try, drop a comment below to let me know how it goes. I’m always here if you have questions along the way. Happy crocheting!
You Might Also Like
- Woodland Creatures Anklet Free Crochet Pattern
- Mint Garden Butterfly Baby Dress Free Crochet Pattern
- Terracotta Earthy Granny Square Backpack Crochet Pattern
- Blush Pink Diamond Lattice Mermaid Gown Free Crochet Pattern
