
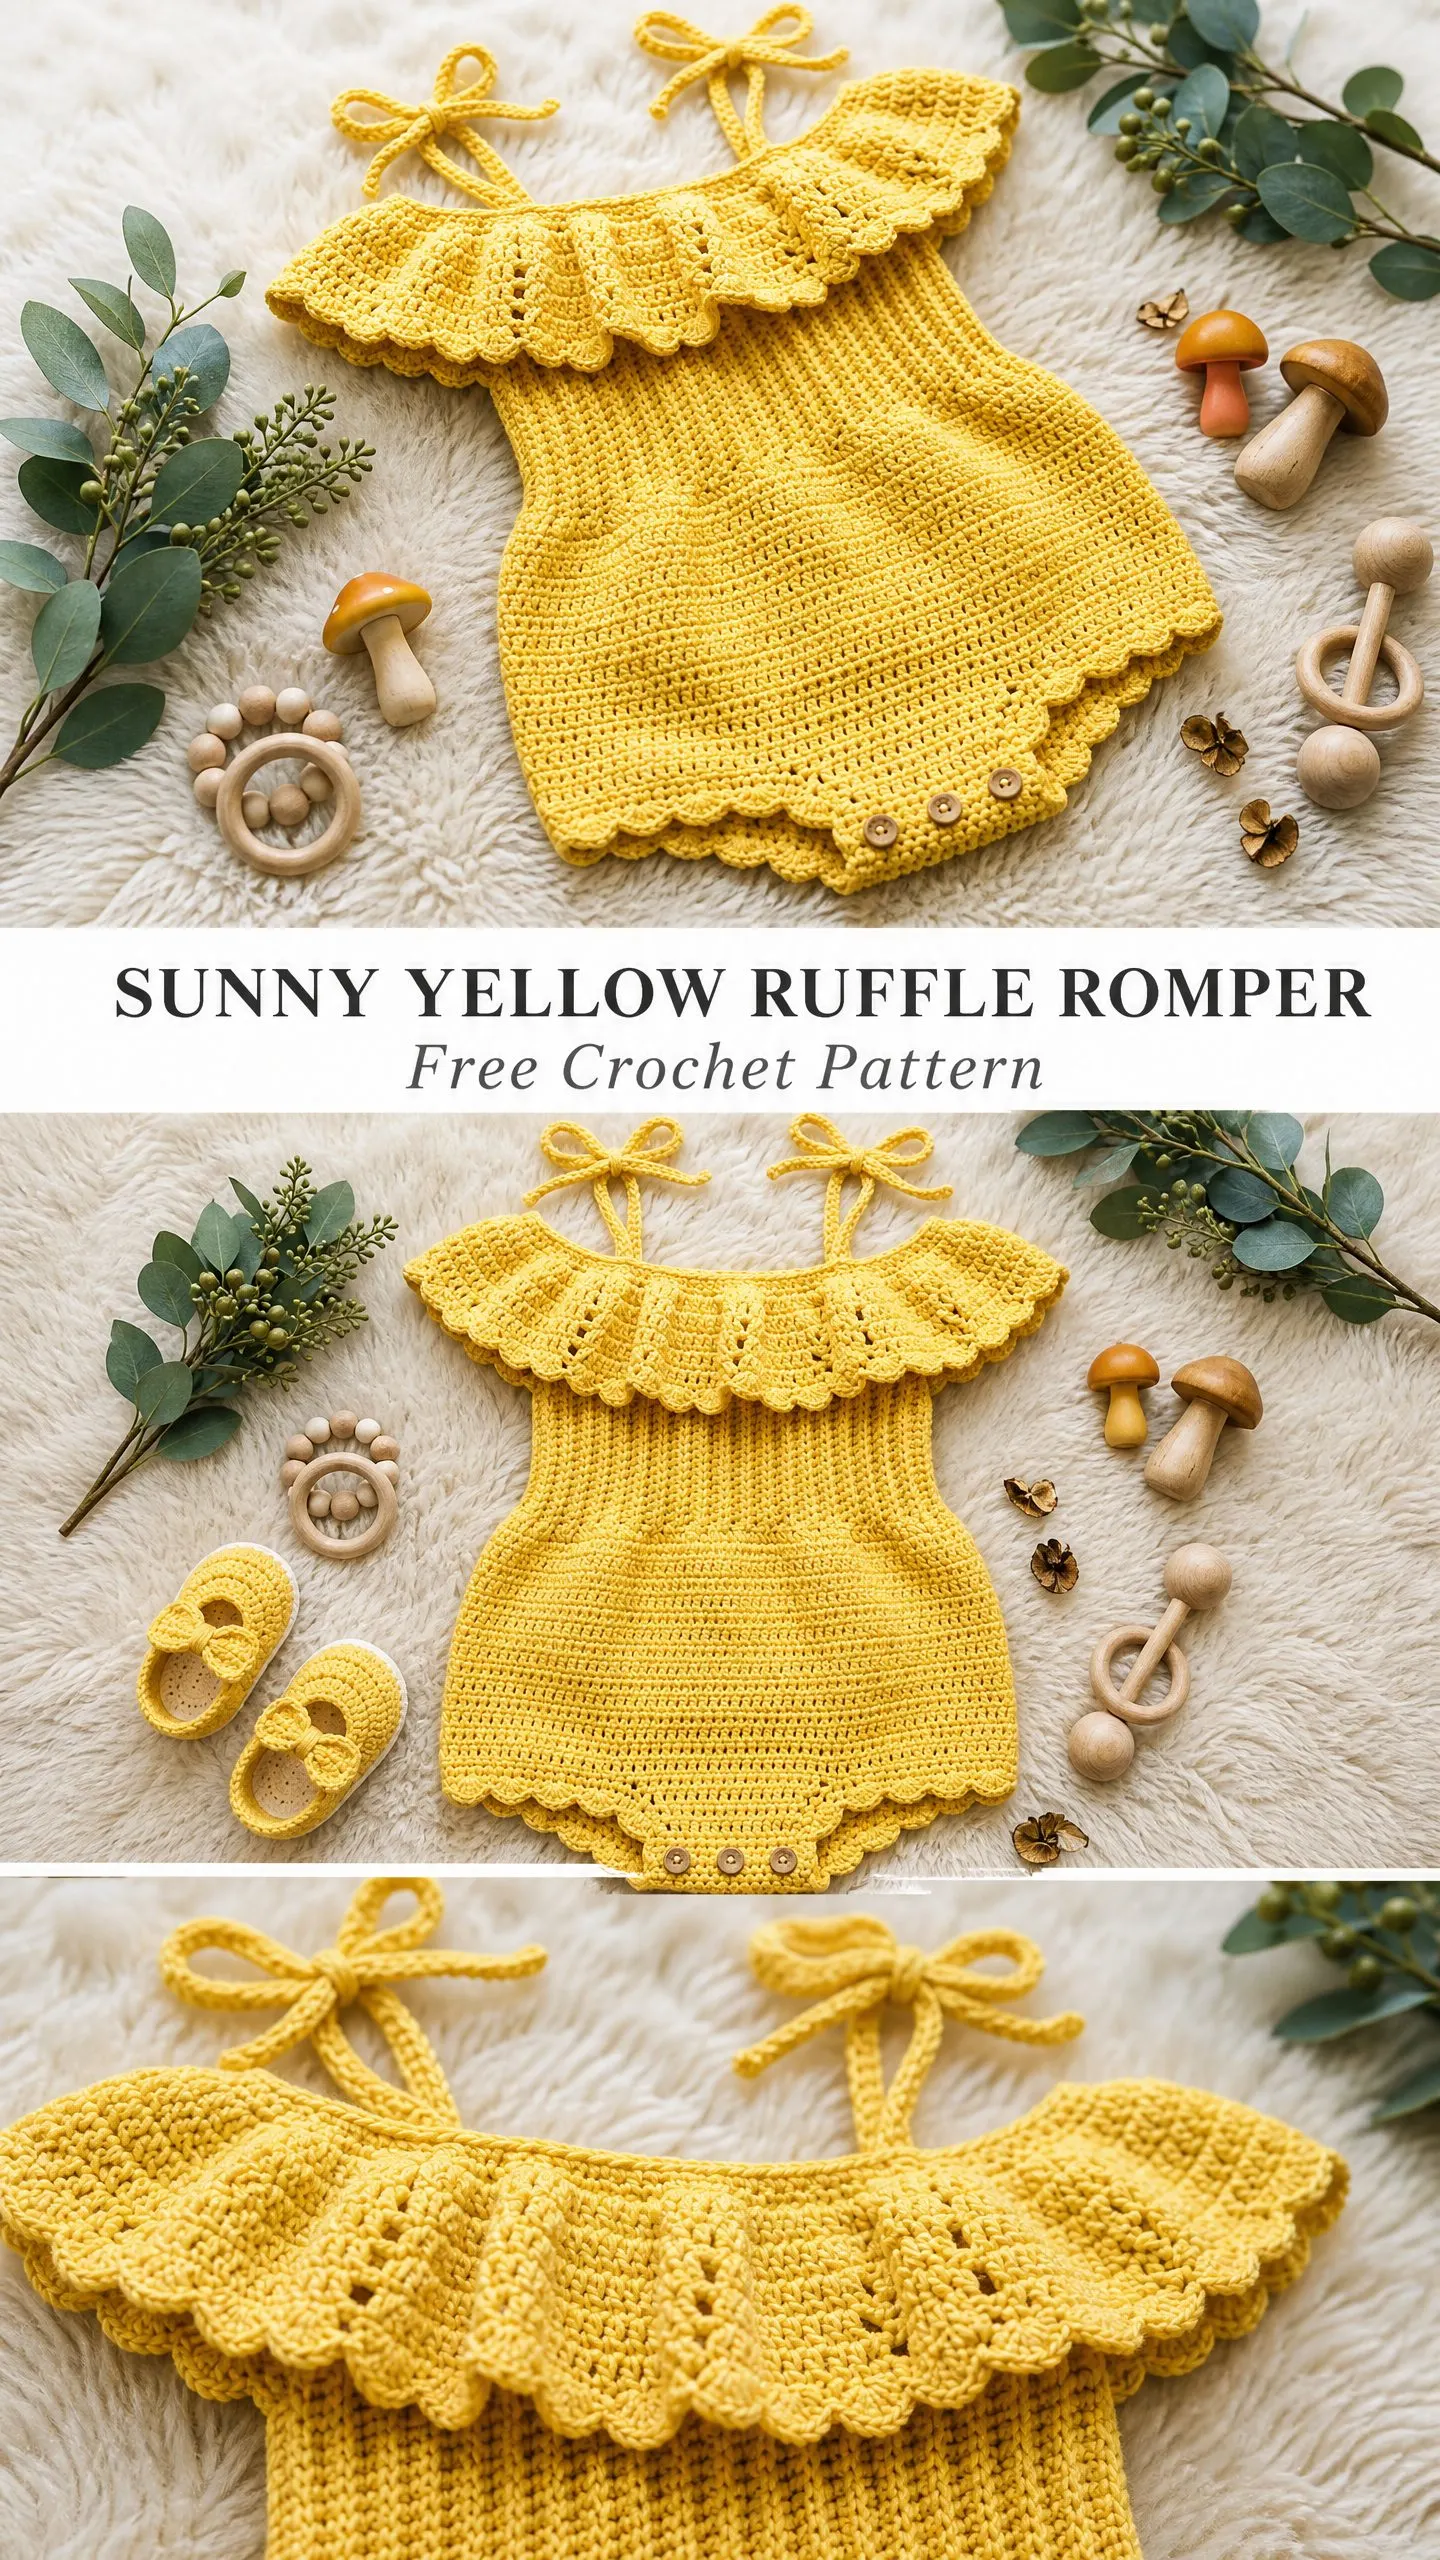
I’ve been looking for the perfect baby romper pattern for months, and this one has my whole heart. The ruffled collar, the sweet bubble silhouette, those tiny tie bows at the shoulders. It checks every box.
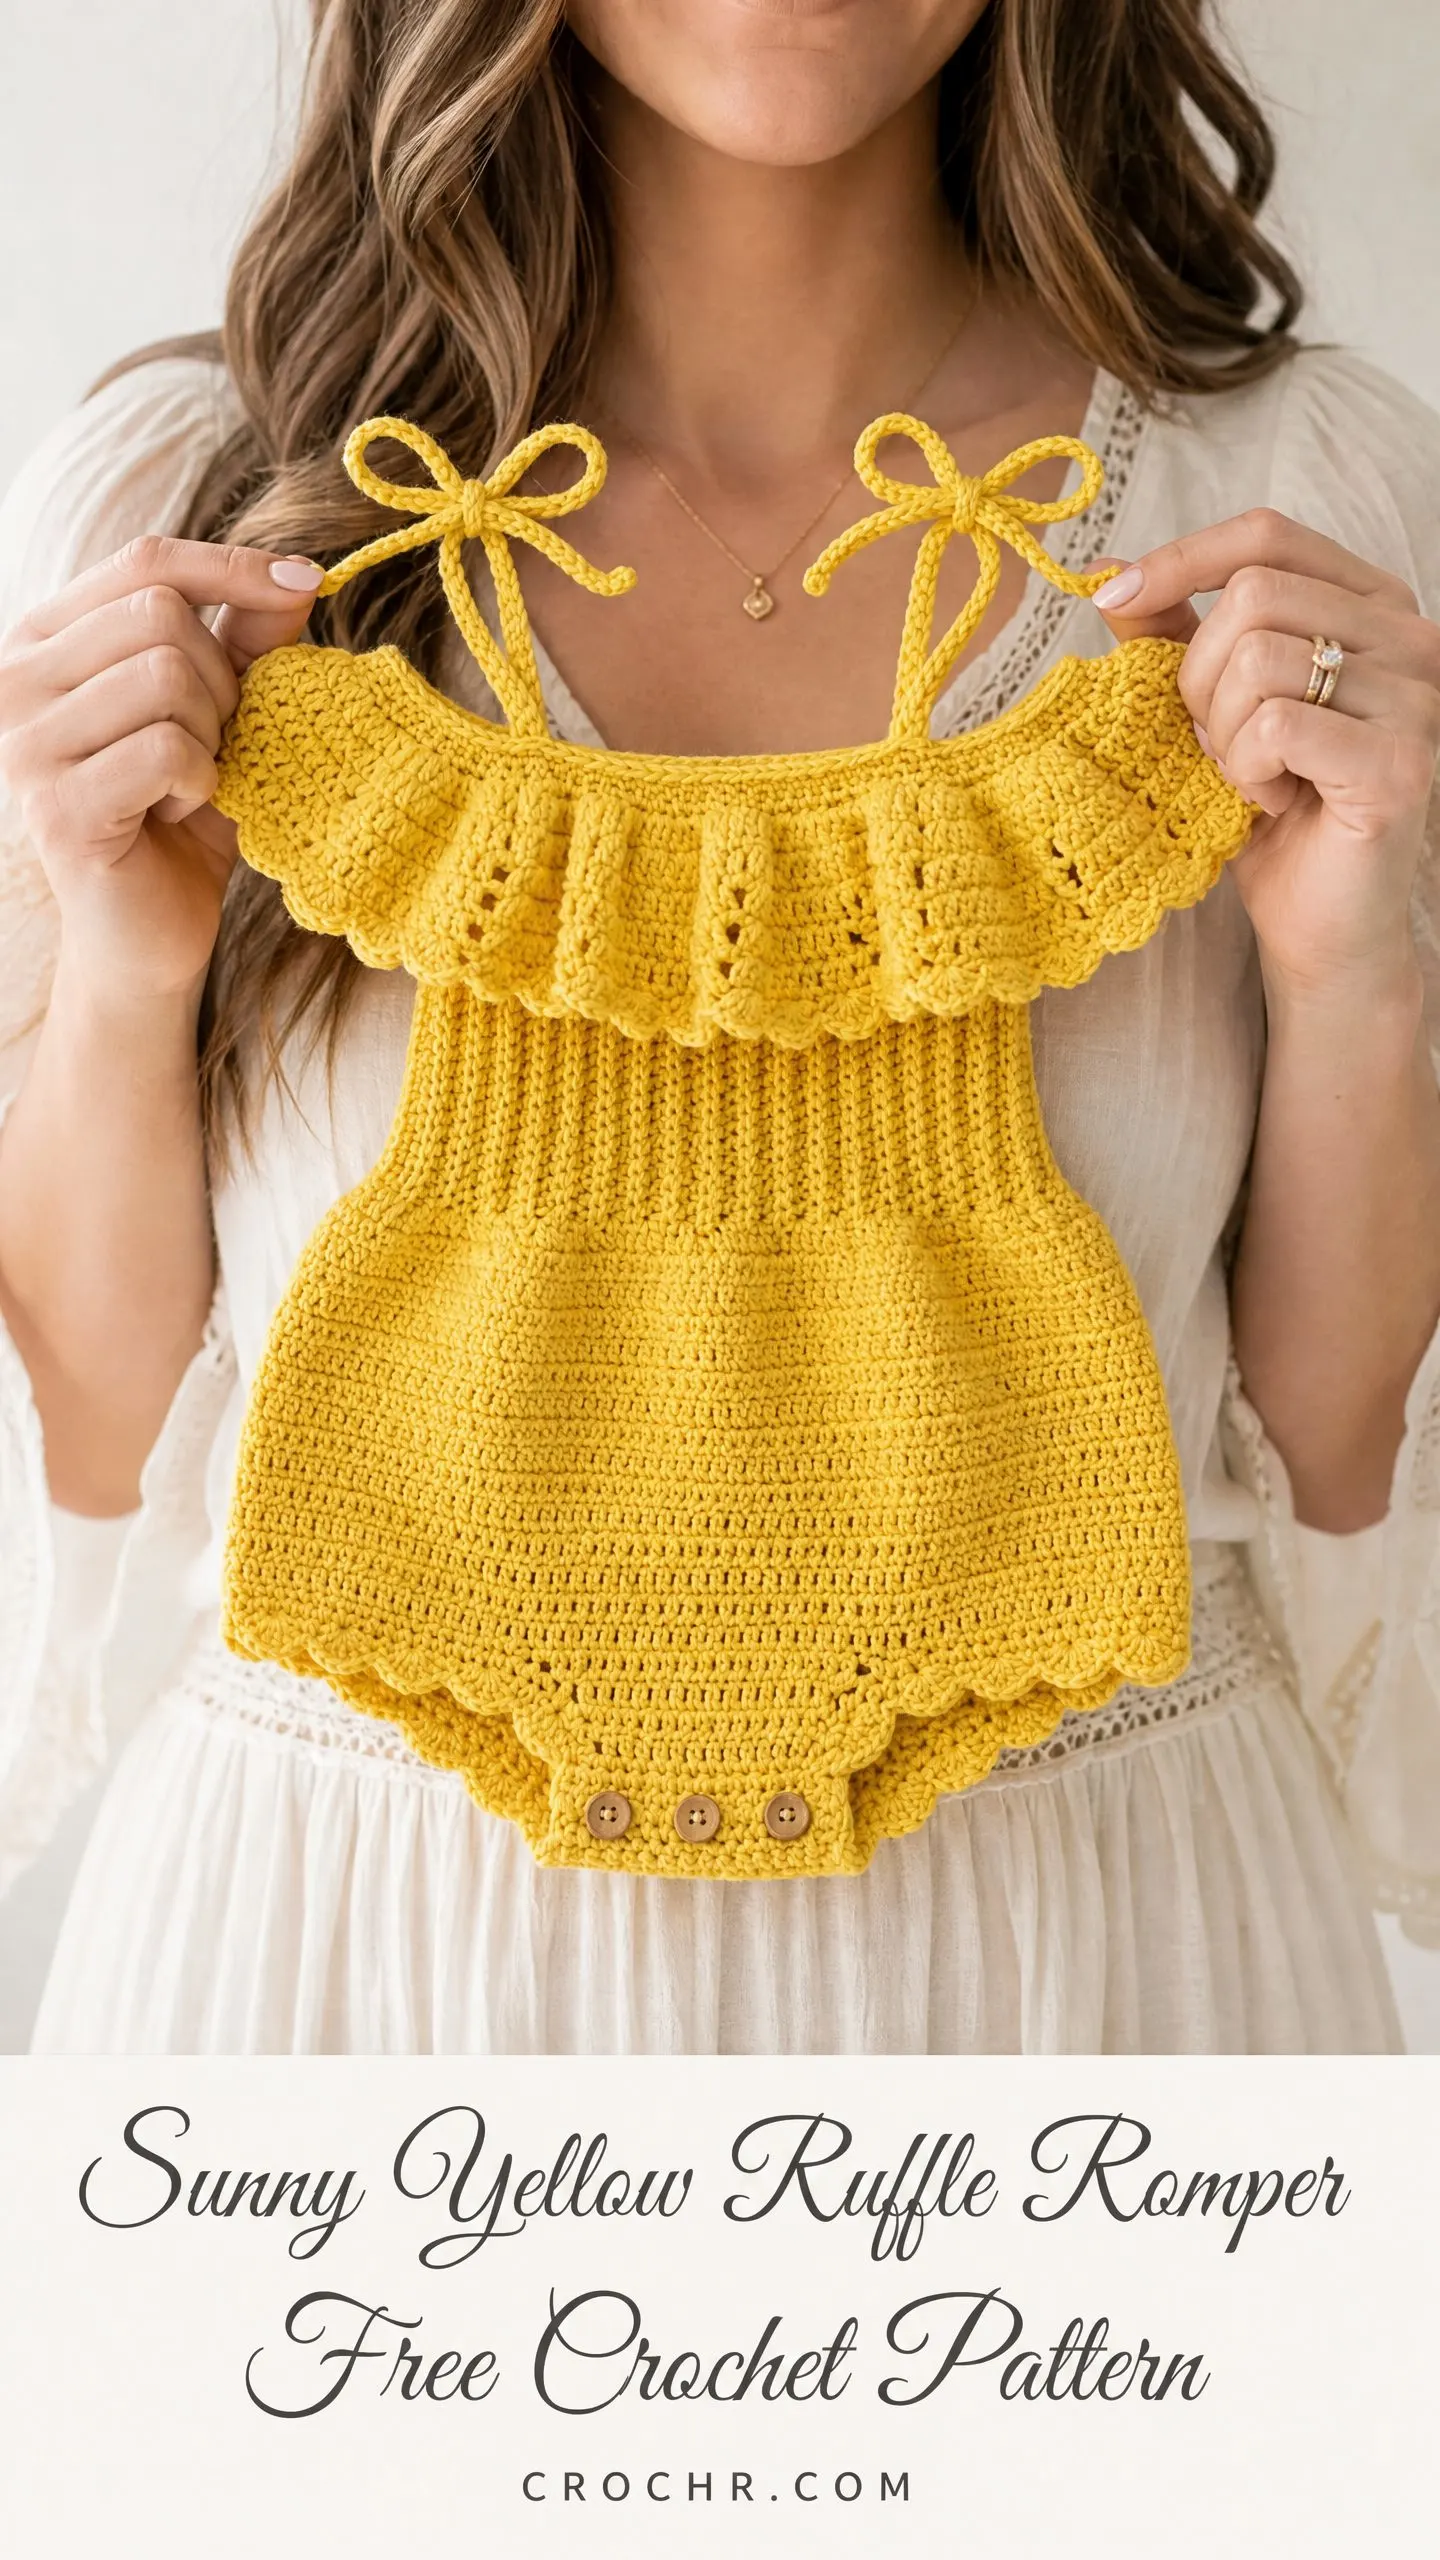
This is the kind of project that looks like it belongs in a boutique window but works up with stitches you already know. Single crochet forms the body. Double crochet fans create that dreamy ruffle. And the scalloped edges give it polish without complexity.
If you’ve got a baby shower coming up or just want to make something truly special, this is the pattern I’d hand you first.
What Makes This Romper So Special
This sunny yellow ruffle romper combines classic crochet techniques with a modern silhouette that photographs beautifully. The construction is clever but straightforward. You’ll work two flat panels for the front and back, seam them at the sides, then add all the gorgeous finishing details.
The bubble romper shape comes from simple increases and decreases at the hip section. Think of it like shaping a slight curve outward and then back in. That’s what gives the bottom that adorable rounded look that’s so flattering on little ones.
The off-the-shoulder ruffle collar is where the magic happens. You’ll pick up stitches around the neckline and work fans of double crochet into every single stitch. This multiplies your stitch count dramatically and creates that gathered, flowing ruffle that drapes so prettily.
Three buttons at the crotch make diaper changes easy. Because we’ve all been there, wrestling a fussy baby out of an adorable but impractical outfit.
Skill Level and Time Estimate
I’d call this an intermediate level project. If you’re comfortable with single crochet, basic increases and decreases, and picking up stitches along edges, you’ve got this. The ruffle technique might look fancy, but it’s really just working multiple stitches into the same base stitch over and over.
Beginners, don’t scroll past just yet. If you’ve completed a few dishcloths or a simple scarf and you’re ready to level up, this is a beautiful challenge. Take your time with the ruffle section and read through it twice before starting. You can absolutely do this.
Plan for 8 to 12 hours of work if you’re an experienced crocheter. Add extra time if you’re newer to garment construction or if you like to take breaks and admire your progress. I won’t judge. I do that constantly.
Materials You’ll Need
Gather these supplies before you start. There’s nothing worse than running out of yarn at 11 PM when you’re three rows from finishing.
Yarn: Approximately 200 yards for size 0 to 3 months, 230 yards for 3 to 6 months, or 270 yards for 6 to 12 months. Use light worsted weight or DK weight yarn, which is US weight 3. I recommend 100 percent cotton for breathability against baby skin.
Hook: US size E-4, which is 3.5 mm
Notions:
Yarn Suggestions That Work Beautifully
Lion Brand 24/7 Cotton in Buttercup or Lemon is my top pick. This mercerized cotton has gorgeous stitch definition and washes like a dream. You’ll find it at most craft stores.
Paintbox Yarns Simply DK in Banana Cream offers a lovely cotton-acrylic blend that’s soft but structured. Great yardage per skein too.
Hobbii Friends Cotton 8/4 in Lemon Yellow has a matte finish that photographs beautifully if you’re planning to gift or sell this piece.
Substitution note: Any DK or light worsted cotton yarn will work if it meets gauge. Avoid high acrylic content for young babies with sensitive skin. Cotton yarns vary wildly between brands, so always swatch first.
Gauge Information
20 stitches and 24 rows equals 4 inches in single crochet, worked flat, using the E-4 hook, after blocking.
I know gauge swatches feel tedious. But this is a fitted garment. Too loose and you’ll have a saggy romper. Too tight and it won’t fit over baby’s head. Take ten minutes to check your gauge. Your future self will thank you.
If your swatch is too big, go down a hook size. Too small? Go up.
Finished Measurements
Size 0 to 3 months: chest 14 inches, length 11 inches from shoulder ties to crotch, leg opening 8 inches around
Size 3 to 6 months: chest 15 inches, length 12 inches, leg opening 8.5 inches
Size 6 to 12 months: chest 16.5 inches, length 13 inches, leg opening 9.5 inches
The instructions below are written for size 0 to 3 months. Adjustments for larger sizes appear in parentheses as: 0 to 3 months (3 to 6 months, 6 to 12 months).
Abbreviations Used in This Pattern
Let me break down every abbreviation before we dive in. Bookmark this section for quick reference.
ch = chain: wrap yarn over hook and pull through the loop on your hook
sl st = slip stitch: insert hook, yarn over, pull through both the stitch and the loop on hook in one motion
sc = single crochet: insert hook, yarn over, pull up a loop (2 loops on hook), yarn over, pull through both loops
sc2tog = single crochet two together: this is a decrease that turns 2 stitches into 1
dc = double crochet: yarn over, insert hook, yarn over, pull up a loop (3 loops), yarn over, pull through 2 loops (2 loops remain), yarn over, pull through last 2 loops
hdc = half double crochet: yarn over, insert hook, yarn over, pull up a loop (3 loops), yarn over, pull through all 3 loops at once
st(s) = stitch or stitches
sk = skip
rep = repeat
RS = right side (the pretty side that faces out)
WS = wrong side
Special Stitches Explained
These techniques give the romper its distinctive look. Read through them before starting so they feel familiar when you encounter them.
Scallop Stitch Edge
This creates the pretty shell border on the leg openings and ruffle. Insert your hook into the indicated stitch and slip stitch. Chain 2. Work 4 double crochets into that same stitch. Slip stitch into the same stitch again. Skip 2 stitches. Repeat this sequence into the next stitch.
You’re making a little fan every 3 stitches. Your stitch count must be divisible by 3 for this to work evenly.
Ruffle Fan Stitch
This is what makes the collar so dreamy. You’ll work 6 double crochets into a single stitch. When you do this into every stitch around the neckline, it multiplies your fabric and creates that gathered, ruffled drape.
Picot
Chain 3, then slip stitch into the first chain you made. This creates a tiny decorative point that adds elegance to the scallop edges.
Button Loop
Chain 5, then slip stitch into the same stitch to form a loop. Simple and functional.
Pattern Notes Before You Begin
1. The front and back panels are nearly identical. The front gets button loops at the crotch during finishing. The back gets buttons sewn on.
2. Turning chains at the start of single crochet rows do NOT count as a stitch. Always work your first single crochet into the very first stitch below.
3. The ruffle collar is worked after you seam the body pieces together. You’ll pick up stitches around the entire neckline.
4. Place stitch markers at the beginning of rounds and move them up as you go.
5. When picking up stitches along a vertical edge, pick up 1 stitch per row end for even tension.
6. Each tie strap is about 14 inches long before tying. Make them long enough to form a bow with 3 inch tails on each side.
Step by Step Instructions
Front Panel
The front panel is worked flat from the crotch upward to the neckline.
Foundation chain: Ch 37 (39, 43).
Row 1 (WS): Sc into the 2nd ch from hook and each ch across. Turn. 36 (38, 42) sc
Row 2 (RS): Ch 1, sc across. Turn. 36 (38, 42) sc
Rows 3 through 10: Ch 1, sc across each row. Turn at the end of each row. 36 (38, 42) sc
Your piece now measures approximately 1.5 inches from the foundation.
Hip Increase Section (Rows 11 through 16)
This is where you create the bubble shape by gradually widening the fabric.
Row 11 (RS): Ch 1, 2 sc into the first st, sc across to last st, 2 sc into last st. Turn. 38 (40, 44) sc
Row 12: Ch 1, sc across. Turn. 38 (40, 44) sc
Row 13: Ch 1, 2 sc into the first st, sc across to last st, 2 sc into last st. Turn. 40 (42, 46) sc
Row 14: Ch 1, sc across. Turn. 40 (42, 46) sc
Row 15: Ch 1, 2 sc into the first st, sc across to last st, 2 sc into last st. Turn. 42 (44, 48) sc
Row 16: Ch 1, sc across. Turn. 42 (44, 48) sc
After Row 16, your panel measures approximately 2.5 inches from the foundation.
Hip Decrease Section (Rows 17 through 22)
Now you’ll bring the fabric back in to complete the bubble shape.
Row 17 (RS): Ch 1, sc2tog over first 2 sts, sc across to last 2 sts, sc2tog. Turn. 40 (42, 46) sc
Row 18: Ch 1, sc across. Turn. 40 (42, 46) sc
Row 19: Ch 1, sc2tog over first 2 sts, sc across to last 2 sts, sc2tog. Turn. 38 (40, 44) sc
Row 20: Ch 1, sc across. Turn. 38 (40, 44) sc
Row 21: Ch 1, sc2tog over first 2 sts, sc across to last 2 sts, sc2tog. Turn. 36 (38, 42) sc
Row 22: Ch 1, sc across. Turn. 36 (38, 42) sc
You’re back to your original stitch count. The bubble hip shaping is complete. Your piece measures approximately 3.5 inches from the foundation.
Bodice Section (Rows 23 through 50)
This is the straightforward part. Just single crochet rows with no shaping.
Rows 23 through 50: Ch 1, sc across each row. Turn at the end of each row. 36 (38, 42) sc per row
After Row 50, your bodice panel measures approximately 10.5 inches from the foundation.
Fasten off and weave in the tail end at the top edge only. Leave the foundation tail for seaming later.
Back Panel
Work exactly the same as the Front Panel, Rows 1 through 50, with all the same stitch counts.
Fasten off and weave in end.
Seaming the Body
Place the Front and Back panels together with right sides facing. Using your yarn needle and matching yarn, whip stitch or mattress stitch the side seams along the straight bodice section only. That’s rows 22 through 50 on each panel.
Leave the hip and crotch sections open. These become your leg openings on each side.
The side seams are approximately 7 inches long. The lower bubble sections remain open to create the two leg holes. The crotch bottom edges stay open for the button closure.
Turn the piece right side out.
Leg Opening Scallop Edging
Join yarn with a sl st at the top inside corner of the right leg opening.
Round 1: Sc evenly around the leg opening, picking up approximately 30 (33, 36) sts. Sl st to join to first sc. 30 (33, 36) sc
Round 2 (Scallop): Sl st into first st, ch 2, 4 dc into same st, sl st into same st, sk 2 sts. Rep from beginning of scallop sequence around. Sl st to join. 10 (11, 12) scallops
Fasten off and weave in ends. Repeat on the left leg opening.
Crotch Button Band (Front Panel)
Join yarn at the right corner of the front crotch edge.
Row 1: Sc evenly across the front crotch edge, picking up 1 st per ch of the foundation chain plus corner stitches. 36 (38, 42) sc Turn.
Row 2: Ch 1, sc across. Turn. 36 (38, 42) sc
Row 3 (Button Loop Row): Ch 1, sc 5 (5, 6), ch 5, sl st into same stitch (button loop made), sc 13 (14, 15), ch 5, sl st into same stitch (button loop made), sc 13 (14, 15), ch 5, sl st into same stitch (button loop made), sc across remaining sts. Turn. 3 button loops placed
Row 4: Ch 1, sc across, working 5 sc into each ch-5 button loop space to fill them. Turn. 36 (38, 42) sc
Fasten off and weave in ends.
Crotch Button Band (Back Panel)
Join yarn at the right corner of the back crotch edge.
Row 1: Sc evenly across the back crotch edge. 36 (38, 42) sc Turn.
Row 2: Ch 1, sc across. Turn. 36 (38, 42) sc
Row 3: Ch 1, sc across. Turn. 36 (38, 42) sc
Fasten off and weave in ends. Sew buttons onto this band aligned with the button loops on the front band.
Collar and Ruffle
This is the showstopper section. Take your time here.
With RS facing, join yarn with sl st at the left shoulder side seam point.
Foundation Round: Sc evenly around the entire upper neckline edge, picking up approximately 70 (74, 82) sts total. That’s about 35 (37, 41) sts across each of the front and back upper edges. Place a stitch marker at the beginning. Sl st to join to first sc. 70 (74, 82) sc
Ruffle Round 1: Ch 3 (counts as first dc), 5 dc into the same first st (first fan complete), 6 dc into each remaining st around. Sl st to the top of beg ch-3 to join. 420 (444, 492) dc total
Yes, you read that right. Working 6 dc into every stitch creates the gathered ruffle effect.
Ruffle Round 2: Ch 1, sl st into the first dc, sc into the next dc, hdc into the next dc, dc into the next dc, hdc into the next dc, sc into the next dc, sl st into the last dc of the fan. Rep across each fan. Sl st to join.
Ruffle Round 3 (Scallop Picot Edge): Sl st into first st, ch 2, 4 dc into same st, ch 3, sl st into first ch of ch-3 (picot made), sl st into same base st, sk 2 sts. Rep around. Sl st to join.
Fasten off and weave in ends.
Strap Ties (Make 4)
Chain 70 for each strap. That’s approximately 14 inches.
Sl st back along the chain for about 1 inch to reinforce the base end.
Attach two strap ties at the left shoulder, one on front and one on back. Attach two at the right shoulder the same way. Use your yarn needle to sew them securely through several stitches of the neckline fabric.
The front and back ties on each side tie together into a bow over the shoulder.
Waist Ruffle Hem Scallop (If Needed)
If your ruffle doesn’t naturally show a scalloped edge along the bottom where it meets the bodice, add this finishing round.
With RS facing, join yarn at the side seam along the base of the collar pickup row.
Working into the base of the foundation round sc stitches: sl st into first st, ch 2, 4 dc into same st, sl st into same st, sk 2. Rep around. Sl st to join.
Fasten off and weave in ends.
Finishing and Blocking
Wet block your finished romper by soaking it in cool water. Press out excess water with a towel. Never wring cotton, as it can stretch unevenly. Pin the piece flat to your blocking mat, opening up those scallop edges and laying the ruffle collar beautifully. Let it dry completely.
Weave in all remaining ends, going through at least an inch of fabric in two directions for security.
Sew your three buttons onto the back crotch band. Use doubled yarn or strong thread. Make sure they align perfectly with the front button loops.
Trim all yarn tails close to the fabric.
Care Instructions
Machine wash cold on gentle in a mesh laundry bag, or hand wash in cool water with baby-safe detergent. Lay flat to dry away from direct sunlight. Do not wring, tumble dry, or iron directly on the fabric.
Cotton softens beautifully with each wash. This romper will only get cozier over time.
Size Customization Tips
For sizes larger than 6 to 12 months: Add 4 stitches (2 per side) to the foundation chain for each size step up. Add 4 rows to the bodice section to increase length.
For longer torso length only: Add plain sc rows to the bodice section between Rows 23 and 50.
For larger leg openings: Add one more increase row and one more decrease row in the hip section.
For more or less ruffle: Change the fan from 6 dc to 7 dc (more ruffle) or 5 dc (less ruffle).
You Did It!
Thank you so much for making this romper with me. I hope every stitch brought you joy and that the lucky baby who wears it gets showered with compliments.
If you make this sunny yellow ruffle romper crochet pattern, I would absolutely love to see it. Tag me on Instagram or share a photo in my Facebook group. Seeing your finished projects is genuinely the best part of my day.
Save this pattern to your Pinterest boards so you can find it again when the next baby shower invitation arrives. And please drop a comment below if you have questions or just want to share how yours turned out. I read every single one.
Happy crocheting, friend.
You Might Also Like
- Sunset Peach and Coral Granny Square Blanket Free Crochet Pattern
- Sage Green Boho Crochet Lace Boots Free Pattern
- Sunset Orange Boho Crochet Ruffle Set Free Pattern
- Mint Breeze Summer Crochet Tank Free Pattern
