
Go dig through your yarn stash right now. I mean it. That beautiful butter yellow bulky weight you have been saving for something special? This is the project.
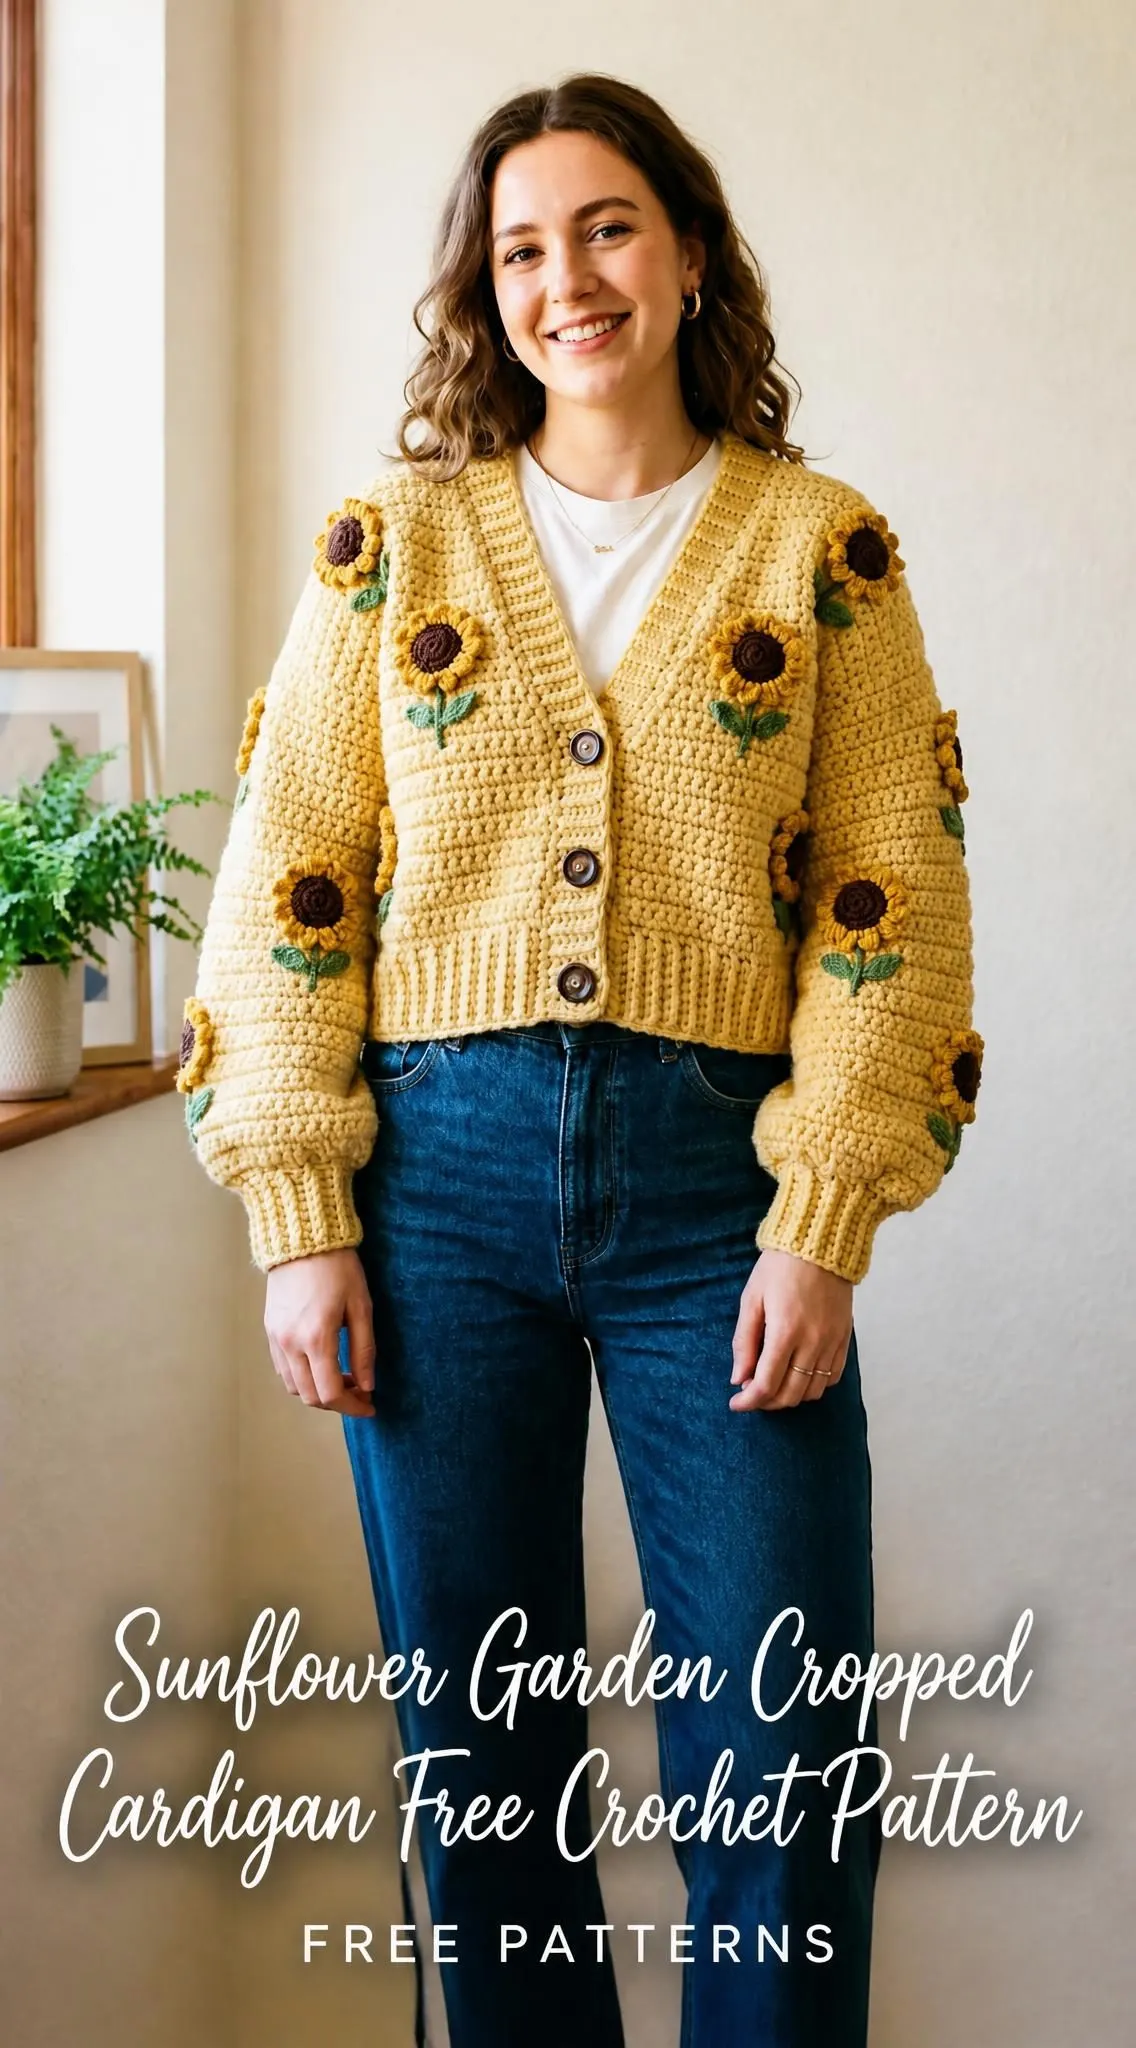
The Sunflower Garden Cropped Cardigan combines simple textured stitches with three-dimensional sunflower appliques for a statement piece that looks far more complicated than it actually is. The body uses a straightforward basket weave grid stitch worked in single crochet, alternating between front and back loops. The magic happens when you scatter those cheerful sunflower motifs across the finished fabric.
This is an intermediate project, so I will be honest with you. If you have never made a garment before, bookmark this one and tackle a simple top first. But if you have completed a couple of sweaters or cardigans and feel comfortable with basic shaping, you can absolutely handle this. The construction is logical and the pattern breaks everything into manageable pieces.
Why This Cardigan Works So Well
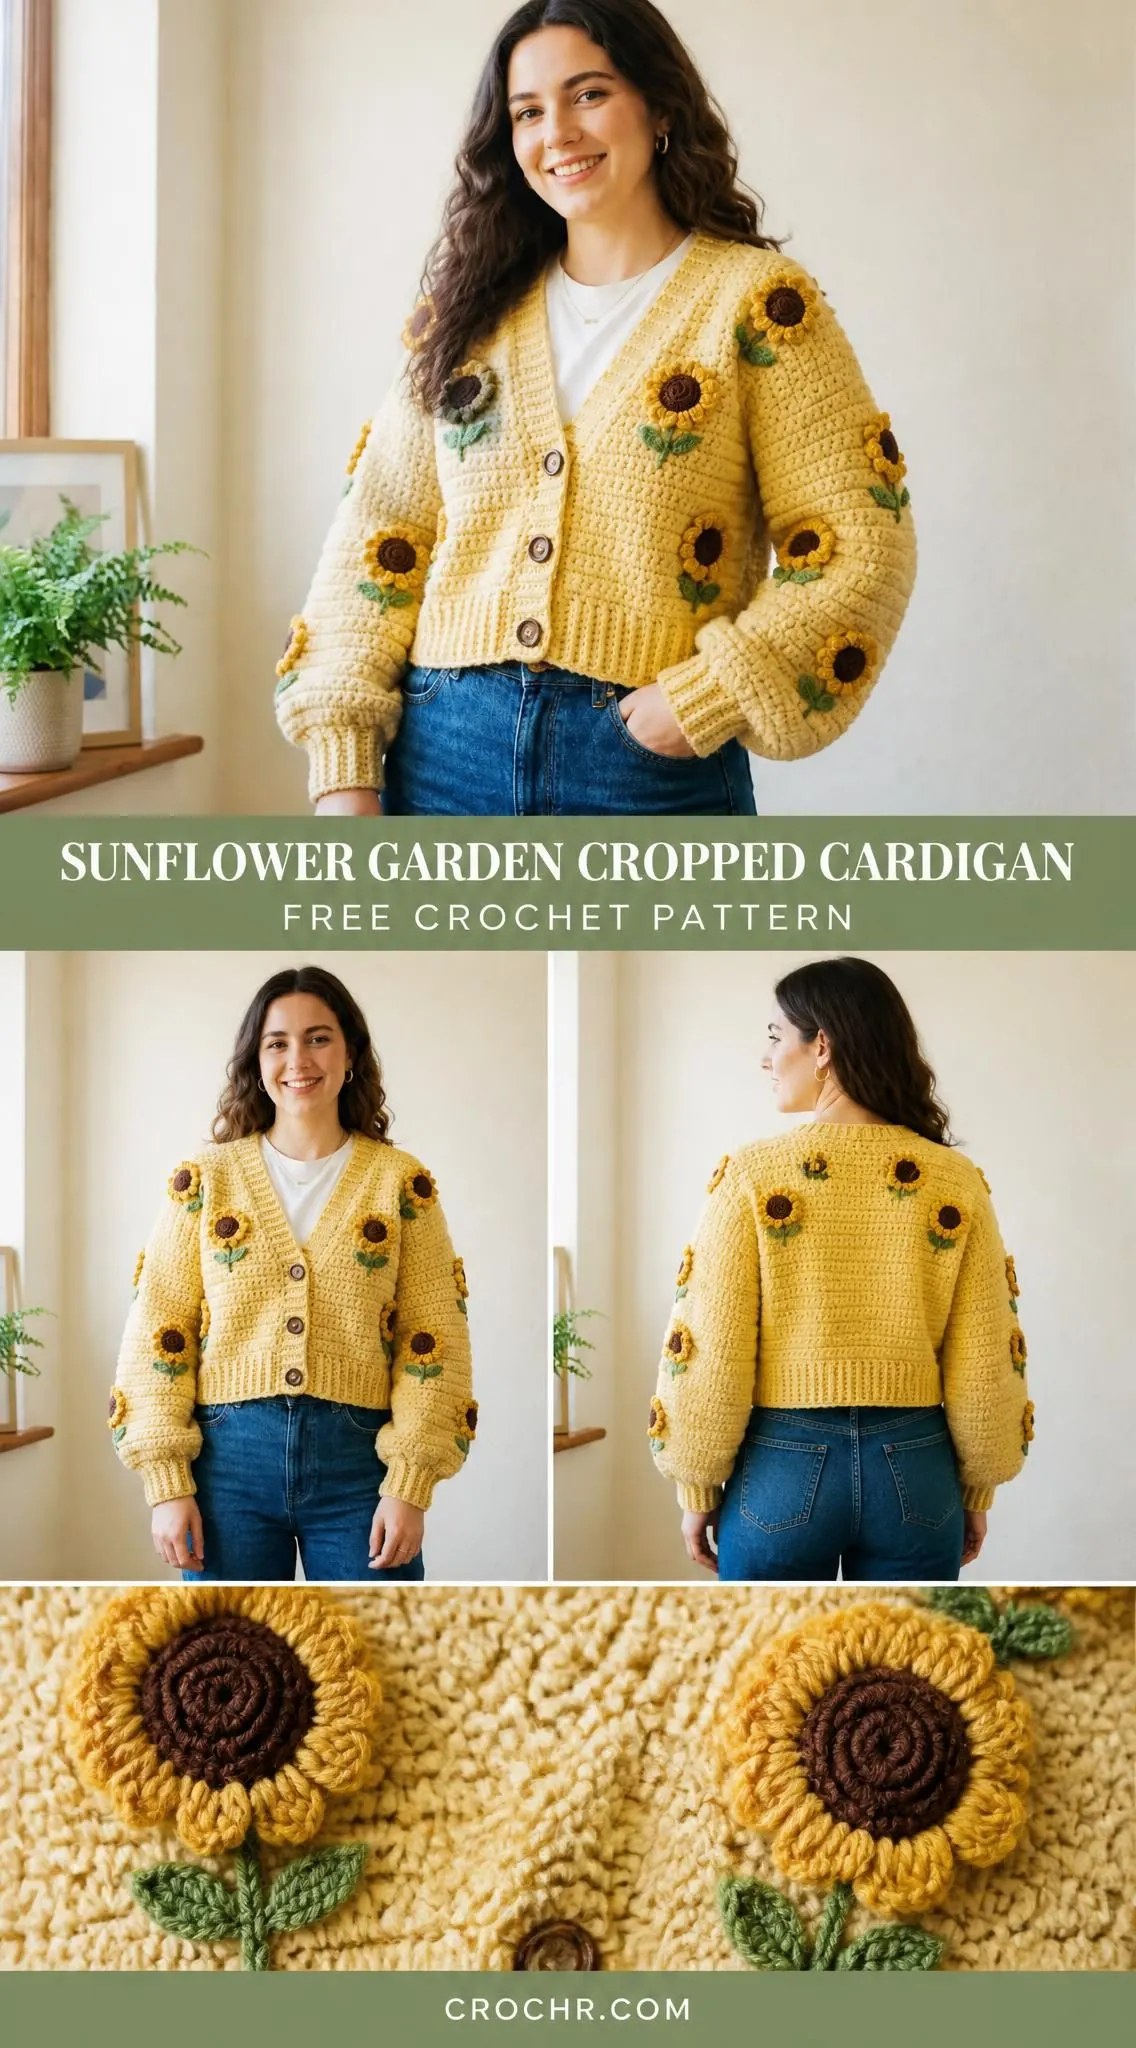
The oversized, cropped silhouette sits right at the natural waist, making it incredibly flattering and modern. Those voluminous balloon sleeves taper down to fitted ribbed cuffs, creating that cozy artisan look you see all over social media. The V-neckline keeps things classic, and four wooden buttons add the perfect finishing touch.
What I love most about this crochet pattern is how the textured body stitch creates visual interest without complicated techniques. You are basically working single crochet the entire time, just alternating which loop you work into. Once you get the rhythm, it becomes almost meditative.
The sunflowers are worked separately and sewn on at the end. This means you can arrange them exactly where you want them before committing. No pressure, no stress, just pin them in place and step back to admire your work before picking up that tapestry needle.
Materials You Will Need
Yarn: Bulky weight yarn (CYCA #5 Bulky), approximately 1,800 to 2,000 yards total
Hooks:
Notions:
Yarn Suggestions
Lion Brand Wool-Ease Thick and Quick works beautifully here. Note that this yarn runs slightly heavier (Super Bulky), so you will want to go up to a US Size K-10.5 / 6.5 mm hook and swatch carefully.
Paintbox Yarns Simply Chunky is a true bulky weight that hits gauge perfectly with the J-10 hook. Their color selection includes excellent butter yellows, deep golds, and browns.
Malabrigo Chunky produces a gorgeous halo and exceptional stitch definition if you want to splurge on pure merino wool. Just remember it requires gentle hand washing.
Gauge (Please Do Not Skip This)
With J-10 / 6.0 mm hook and Color A, in Basket Weave Grid Stitch:
14 stitches x 16 rows = 4 inches / 10 cm, measured after blocking.
I know gauge swatches feel tedious. But for a garment, they are absolutely essential. Even a small difference compounds across the full width of your cardigan. Swatch at least 6 x 6 inches before blocking, wash and block your swatch exactly as you plan to treat the finished piece, then measure.
With I-9 / 5.5 mm hook in ribbing (back loop only single crochet):
Approximately 14 stitches x 18 rows = 4 inches / 10 cm.
Finished Measurements
This pattern creates a relaxed, oversized medium-large:
Abbreviations
Special Stitches
Basket Weave Grid Stitch
This stitch creates the woven, grid-like texture across the body and sleeves. It works over a multiple of 2 stitches plus 1.
Foundation Row (WS): Work sc across in both loops. This establishes your stitch count.
Row 1 (RS): Ch 1, turn. Work 1 sc in BLO of first st, work 1 sc in FLO of next st. Alternate BLO and FLO across. End with 1 sc in BLO of last st.
Row 2 (WS): Ch 1, turn. Work 1 sc in FLO of first st, work 1 sc in BLO of next st. Alternate FLO and BLO across. End with 1 sc in FLO of last st.
Repeat Rows 1 and 2 throughout the pattern.
Important: The turning chain does NOT count as a stitch. Always begin each row in the first actual stitch.
Crochet Pattern Instructions
Back Panel
With J-10 / 6.0 mm hook and Color A, ch 76.
Foundation Row (WS): Sc in 2nd ch from hook and in each ch across. Turn. (75 sc)
Row 1 (RS): Ch 1, turn. (Sc in BLO of next st, sc in FLO of next st) across, ending sc in BLO of last st. (75 sc)
Row 2 (WS): Ch 1, turn. (Sc in FLO of next st, sc in BLO of next st) across, ending sc in FLO of last st. (75 sc)
Repeat Rows 1 and 2 until back measures approximately 9.5 inches / 24 cm from foundation edge, ending after a WS row. This is approximately 38 rows.
Checkpoint: Your piece should measure approximately 9.5 inches tall and 21.5 inches wide with 75 sc.
Armhole Shaping (Back)
Row 1 (RS): Sl st across first 5 sts. Ch 1, begin working in pattern in 6th st. Work in pattern across, leaving last 5 sts unworked. Turn. (65 sc)
Row 2 (WS): Ch 1, turn. Sc2tog in pattern over first 2 sts, work in pattern to last 2 sts, sc2tog. (63 sc)
Row 3 (RS): Ch 1, turn. Sc2tog over first 2 sts, work in pattern to last 2 sts, sc2tog. (61 sc)
Row 4 (WS): Ch 1, turn. Sc2tog over first 2 sts, work in pattern to last 2 sts, sc2tog. (59 sc)
Row 5 (RS): Ch 1, turn. Sc2tog over first 2 sts, work in pattern to last 2 sts, sc2tog. (57 sc)
Rows 6 through end: Work even in pattern with no decreases until armhole measures approximately 6.5 inches / 16.5 cm. This is approximately 26 rows after Row 5.
Shoulder and Neck Shaping (Back)
Final Row (RS): Ch 1, turn. Work in pattern across first 18 sts. Fasten off. Skip center 21 sts (back neck). Reattach yarn to next st, work in pattern across remaining 18 sts. Fasten off.
Set back aside.
Right Front Panel
With J-10 / 6.0 mm hook and Color A, ch 38.
Foundation Row (WS): Sc in 2nd ch from hook and in each ch across. Turn. (37 sc)
Work Basket Weave Grid Stitch as established.
Repeat pattern rows until front measures approximately 6 inches / 15 cm, ending after a WS row. This is approximately 24 rows.
V-Neck Shaping (Right Front)
Row 1 (RS): Ch 1, turn. Work in pattern to last 2 sts, sc2tog. (36 sc)
Row 2 (WS): Ch 1, turn. Work in pattern across. (36 sc)
Row 3 (RS): Ch 1, turn. Work in pattern to last 2 sts, sc2tog. (35 sc)
Row 4 (WS): Ch 1, turn. Work in pattern across. (35 sc)
Continue decreasing 1 stitch at neck edge on every RS row until 19 stitches remain.
Armhole Shaping (Right Front)
When front reaches 9.5 inches / 24 cm, work armhole shaping simultaneously with neck shaping.
Armhole Row 1 (RS): Sl st across first 5 sts at armhole edge. Ch 1, begin in 6th st. Work in pattern to last 2 sts (neck edge), sc2tog.
Decrease at armhole edge on next 4 WS rows by working sc2tog at the beginning of those rows.
Continue neck decreases every RS row until 19 sts remain and front height matches back. Fasten off.
Left Front Panel
Work as for Right Front Panel, reversing all shaping. Neck decreases are at the beginning of RS rows. Armhole shaping is at the beginning of WS rows.
Seaming Shoulders
Place right front and back with right sides together. Using tapestry needle and Color A, seam the right shoulder using mattress stitch. Repeat for left shoulder.
Sleeves (Make 2)
With J-10 / 6.0 mm hook and Color A, ch 52.
Foundation Row (WS): Sc in 2nd ch from hook and in each ch across. Turn. (51 sc)
Work Rows 1 through 6 even in pattern. (51 sc)
Row 7 (RS, dec row): Ch 1, turn. Sc2tog, work in pattern to last 2 sts, sc2tog. (49 sc)
Continue decreasing 1 stitch at each end every 6th row until 33 sts remain at Row 60.
Cuff Ribbing
Switch to I-9 / 5.5 mm hook.
Row 1 (WS): Ch 1, turn. Work sc in BLO of each st across. (33 sc)
Row 2 (RS): Ch 1, turn. Work sc in BLO of each st across. (33 sc)
Repeat until cuff measures 3 inches / 7.5 cm. Fasten off.
Seam sleeve along the long edge from cuff to upper arm.
Sleeve Cap Shaping
Reattach yarn at top of sleeve.
Cap Row 1 (RS): Sl st across first 5 sts. Ch 1, begin in 6th st. Work in pattern to last 5 sts, leave unworked. Turn. (41 sc)
Cap Rows 2 through 13: Ch 1, sc2tog, work in pattern to last 2 sts, sc2tog. Continue until 17 sts remain.
Cap Row 14 (WS): Sl st across all 17 sts. Fasten off.
Set sleeves into armholes, pinning evenly and sewing with mattress stitch.
Body Hem Ribbing
With I-9 / 5.5 mm hook and Color A, pick up and sc in BLO along the foundation edge of all three panels. Total: 149 sc.
Work sc in BLO for each row until ribbing measures 2 inches / 5 cm. Fasten off.
Button Bands
Pick up approximately 40 sc evenly along each front edge. Work sc in BLO ribbing for approximately 1.5 inches. Create 4 evenly spaced buttonholes on the right band by working ch 2, skip 2 sts at buttonhole positions.
Sunflower Appliques (Make 16 to 20)
With I-9 / 5.5 mm hook and Color C:
Rnd 1: MR, 6 sc into ring. (6 sc)
Rnd 2: 2 sc in each st around. (12 sc)
Rnd 3: (Sc in next st, 2 sc in next st) 6 times. (18 sc)
Rnd 4: (Sc in next 2 sts, 2 sc in next st) 6 times. (24 sc)
Sl st to join. Switch to Color B.
Rnd 5 (petals): (Ch 1, 4 dc in next st, ch 1, sl st in next st) 12 times. (12 petals)
Fasten off, leaving a long tail for sewing.
Stem and Leaves
With Color D, ch 8. Sl st in 2nd ch from hook, sl st in each ch across. (7 sl sts)
For each leaf: Ch 6, sc in 2nd ch from hook, hdc in next ch, dc in next ch, hdc in next ch, sc in last ch, sl st back into stem.
Make 2 leaves per stem, one on each side.
Finishing Your Sunflower Cardigan
Block all pieces before attaching sunflowers. Pin the sunflowers in a scattered, organic arrangement across the body and sleeves. The finished piece shows approximately 6 to 8 on the body and 4 to 5 per sleeve.
Sew buttons opposite buttonholes. Weave in all remaining ends.
Time Investment
Plan for 40 to 60 hours total. The sunflowers alone add roughly 6 to 10 hours, but they make excellent portable projects for waiting rooms or car rides.
I really hope you love making this sunflower cardigan as much as I loved designing it. If you found this crochet tutorial helpful, please save it to your Pinterest boards so you can find it easily when you are ready to start. And when you finish yours, I would absolutely love to see it! Drop a comment below or tag me on social media with your photos.
You Might Also Like
- Modern Monstera Crochet Plant for Home Office Desk
- Autumn Sunset Ombre Granny Square Cardigan Free Pattern
- Mint Green Rose Baby Romper Free Crochet Pattern
- Mermaid Tail Sparkle Baby Blanket Free Crochet Pattern
