
When I sat down to design this dress, I had a very specific vision in my head. I wanted cascading tiers that would swish and twirl when a little one spins around. I wanted a fitted bodice with beautiful texture that would photograph like a dream. And I wanted flutter sleeves that frame tiny shoulders without being fussy or complicated to construct.
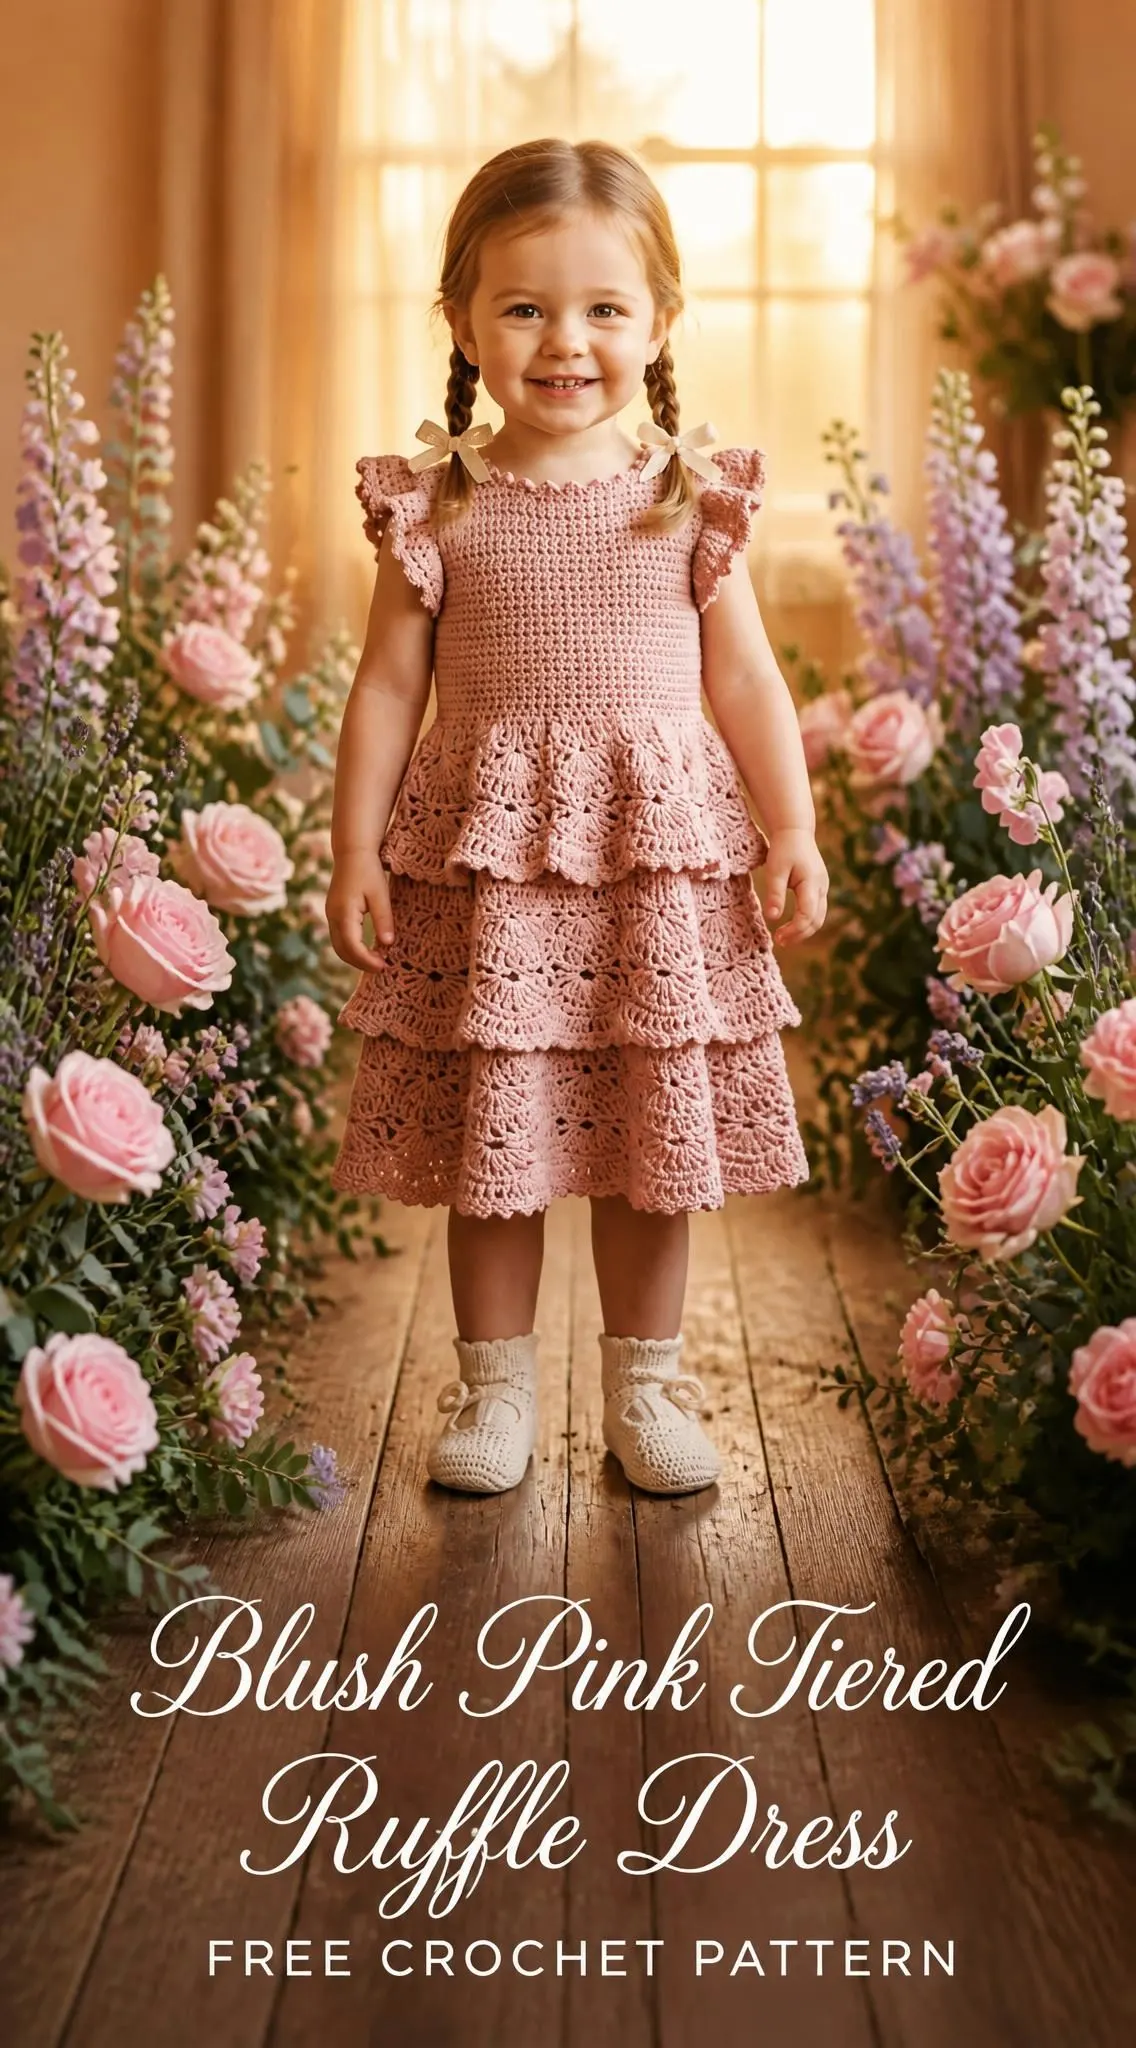
This pattern took me through countless swatches and three complete rewrites before I landed on exactly the right combination of stitches. The half double crochet back loop only ribbing on the bodice creates that subtle texture you see. The fan stitch lace on the tiers produces those gorgeous scalloped edges. Every single detail has been thought through and tested.
I am SO pleased with how this turned out. The way the three tiers cascade over each other, the way the sleeves ruffle just enough, the way those satin ribbon bows add the perfect finishing touch. This is the dress I would have wanted for my own daughter, and now you can make it too.
About This Crochet Pattern
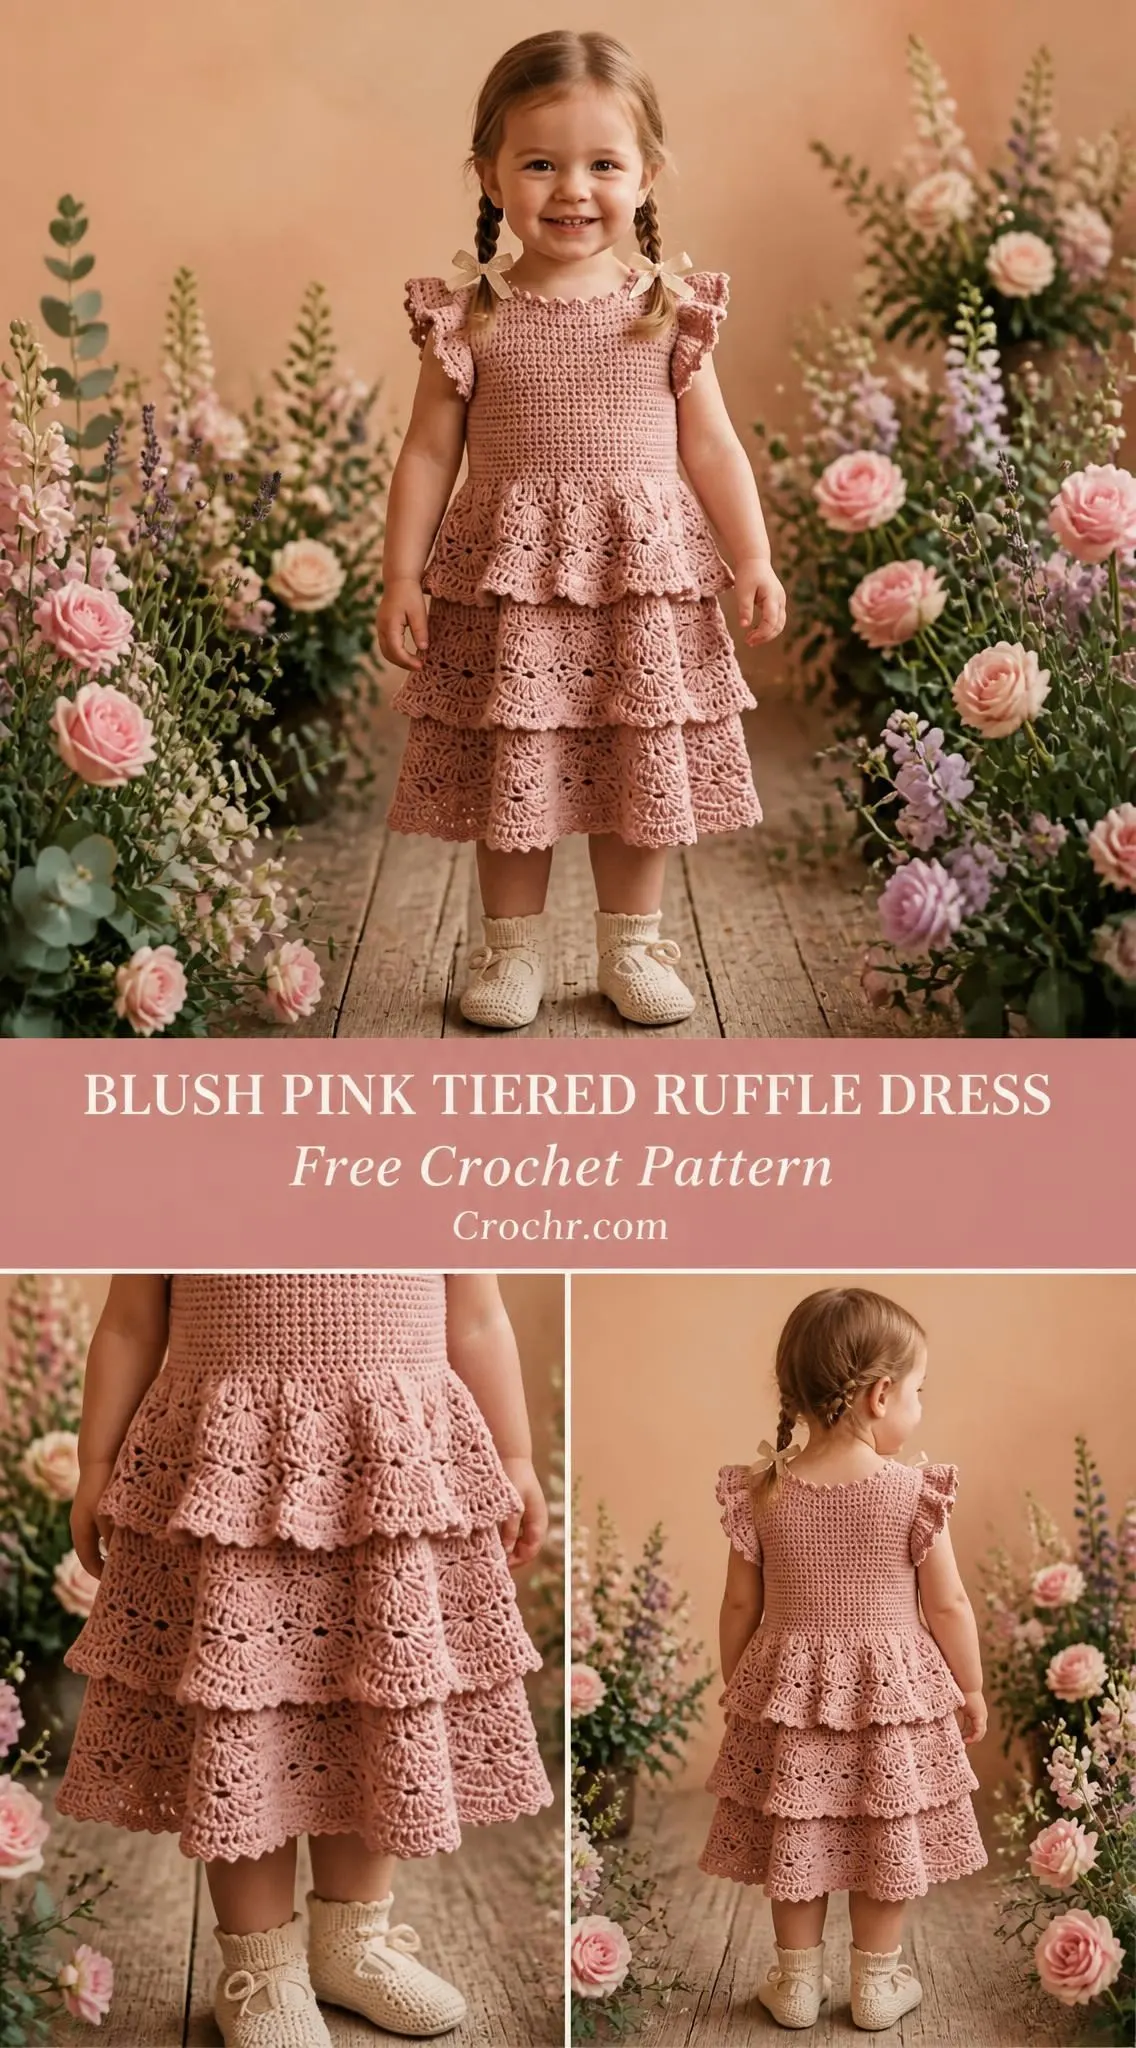
This tiered ruffle dress is an intermediate to advanced project that creates a stunning special occasion garment for toddlers. The construction is top-down, starting with a fitted bodice worked flat in two pieces, then seamed together. Three lace tiers are worked in joined rounds directly from the bodice, each one slightly longer and wider than the one above. Flutter sleeves are added last, creating that beautiful ruffled cap sleeve effect.
The pattern is written for sizes 2T, 3T, and 4T with all adjustments noted in parentheses throughout. The finished dress measures approximately 18 to 20 inches from shoulder to hem depending on size selected.
What makes this dress special: The bodice uses half double crochet through the back loop only (hdc BLO) which creates a ribbed stretchy texture that fits beautifully. The skirt tiers use a fan stitch lace pattern that produces open, airy fabric with scalloped edges. The combination of the structured bodice and flowing lace skirt creates that professional boutique look.
Skill Level
This crochet pattern is rated intermediate to advanced. You should be comfortable with working in joined rounds, increasing evenly, executing multi-stitch fan clusters, and picking up stitches along edges. The techniques themselves are not difficult once you understand them, but maintaining accurate stitch counts through the lace repeats requires attention. If you have made a few garments before and feel confident reading patterns, you can absolutely tackle this project.
Time estimate: Plan for approximately 18 to 26 hours of work depending on your experience level and working speed. The bodice works up relatively quickly. The three lace tiers will take the majority of your time because each row requires careful attention to the fan stitch pattern repeats.
Materials Needed
Yarn
You will need worsted weight yarn in 100% cotton or a cotton blend. The amount varies by size:
My recommended yarns:
1. Lion Brand 24/7 Cotton in Dusty Pink is my top choice. It is 100% mercerized cotton with excellent stitch definition. Each skein contains 186 yards, so you will need 4 skeins for the smallest size. It is machine washable which is essential for children’s clothing.
2. WeCrochet Dishie in Blush is another excellent option at 190 yards per skein. It has lovely drape which really shows off those ruffle tiers.
3. Paintbox Yarns Simply DK works beautifully but note that this is a DK weight yarn. If you use it, switch to a 3.5mm hook and reswatch to match gauge.
Important: Choose a yarn with minimal fuzz or halo. The lace fans need to read clearly, so avoid bouclé or fuzzy yarns. A smooth, tightly plied cotton will give you the best results.
Hooks
You will need two hook sizes for this project:
Using the larger hook on the tiers gives the lace an open, airy appearance and increases the drape significantly.
Notions
Gauge
Getting gauge right is critical for proper fit on this dress. You will need to swatch both gauges before beginning.
Bodice gauge with G/6 (4.0mm) hook in hdc BLO pattern:
16 hdc x 12 rows = 4 inches (10 cm) square
Tier gauge with H/8 (5.0mm) hook in fan stitch pattern:
One full fan repeat (12 stitches) = 2.5 inches (6.4 cm) wide
4 rows of fan pattern = 2.5 inches (6.4 cm) tall
Wash and dry your swatch as you intend to care for the finished dress before measuring. Cotton can shrink or relax after washing.
Finished Measurements
| Size | Chest | Waist | Length (shoulder to hem) |
|---|---|---|---|
| 2T | 21 in / 53 cm | 20 in / 51 cm | 18 in / 46 cm |
| 3T | 22 in / 56 cm | 21 in / 53 cm | 19 in / 48 cm |
| 4T | 23 in / 58 cm | 22 in / 56 cm | 20 in / 51 cm |
The pattern is written for size 2T with larger sizes noted in parentheses as (3T, 4T) throughout.
Abbreviations
Before we dive into the step by step instructions, let me define all the abbreviations you will encounter. I am using US crochet terms throughout.
Special Stitches Explained
Fan Stitch
The fan stitch creates the beautiful lace pattern on each tier. It is worked over a 12-stitch repeat. Here is exactly how to work one complete fan repeat:
1. Skip 2 stitches
2. Work 5 dc all into the next single stitch (this creates the first half of your fan)
3. Skip 2 stitches
4. Work 1 sc into the next stitch (this is your anchor)
5. Skip 2 stitches
6. Work 5 dc all into the next stitch (second half of your fan)
7. Skip 2 stitches
8. Work 1 sc into the next stitch (another anchor)
On subsequent rows, you work the 5-dc fans into the center dc of the previous fan, and the sc anchors go into the previous sc anchors. Once you get the rhythm, it flows beautifully.
Shell Border Stitch
This finishes the bottom edge of each tier with a delicate scalloped edge. Into one stitch, work: sc, ch 2, 3 dc, ch 2, sc. This creates a small pointed shell. You will work this into every sc anchor of the previous fan row.
hdc2tog (Half Double Crochet Two Together)
This is a decrease stitch. Yarn over, insert hook into next stitch, yarn over, pull up a loop (you now have 3 loops on your hook). Yarn over, insert hook into the following stitch, yarn over, pull up a loop (5 loops on hook). Yarn over and draw through all 5 loops at once. This counts as one stitch and decreases your count by one.
Ruffled Flutter Sleeve
The flutter sleeve creates that beautiful layered ruffle effect at the shoulders:
This rapid increase creates the dramatic ruffle.
Pattern Instructions
Bodice Front Panel
Using your G/6 (4.0mm) hook and yarn, ch 45 (47, 49).
Row 1 (WS): Hdc in 3rd ch from hook (the skipped 2 ch count as your first hdc), hdc in each ch across. Turn. (44, 46, 48 hdc)
Row 2 (RS): Ch 2 (counts as first hdc throughout the bodice), hdc BLO in each st across. Turn. (44, 46, 48 hdc)
Rows 3 through 14: Repeat Row 2. (44, 46, 48 hdc)
After Row 14, your front bodice panel should measure approximately 5 inches (12.7 cm) tall. This is your first checkpoint, so take a moment to measure.
Armhole Shaping
Row 15: Ch 2, hdc BLO in first 6 (7, 7) sts, pm in next st, hdc BLO in next 32 (32, 34) sts, pm in next st, hdc BLO in last 6 (7, 7) sts. Turn. (44, 46, 48 hdc)
Row 16: Sl st across first 6 (7, 7) sts, ch 2, hdc BLO in next 32 (32, 34) sts. Leave remaining 6 (7, 7) sts unworked. Turn. (32, 32, 34 hdc)
Rows 17 through 20: Ch 2, hdc BLO across. Turn. (32, 32, 34 hdc)
Neckline Shaping
Row 21: Ch 2, hdc BLO in first 10 (10, 11) sts. Leave remaining sts unworked. Turn. (10, 10, 11 hdc)
Fasten off.
Rejoin yarn at stitch 23 (23, 24) from the right edge.
Row 21b: Ch 2, hdc BLO in last 10 (10, 11) sts. Turn. (10, 10, 11 hdc)
Fasten off.
The center 12 (12, 12) stitches are left open for the front neckline.
Bodice Back Panel
The back is worked in two halves to create a keyhole opening for easy dressing.
Back Right Half
With G/6 hook, ch 24 (25, 26).
Row 1 (WS): Hdc in 3rd ch from hook, hdc in each ch across. Turn. (23, 24, 25 hdc)
Row 2 (RS): Ch 2, hdc BLO across. Turn. (23, 24, 25 hdc)
Rows 3 through 14: Repeat Row 2. (23, 24, 25 hdc)
Row 15 (Armhole Shaping): Sl st across first 6 (7, 7) sts, ch 2, hdc BLO across. Turn. (17, 17, 18 hdc)
Rows 16 through 20: Ch 2, hdc BLO across. Turn. (17, 17, 18 hdc)
Row 21 (Shoulder): Ch 2, hdc BLO in first 10 (10, 11) sts. Fasten off. (10, 10, 11 hdc)
The remaining 7 (7, 7) stitches at the neckline edge are left unworked.
Back Left Half
Work to mirror the Right Half, beginning at center back edge.
With G/6 hook, ch 24 (25, 26).
Rows 1 through 20: Work as for Back Right Half. (17, 17, 18 hdc after armhole shaping)
Row 21: Rejoin at neckline edge. Ch 2, hdc BLO in last 10 (10, 11) sts. Fasten off. (10, 10, 11 hdc)
Assembly of Bodice
Shoulder seams: With right sides together, slip stitch or mattress stitch the 10 (10, 11) front shoulder stitches to the 10 (10, 11) back shoulder stitches on each side. Fasten off and weave in ends.
Side seams: Align front and back panels at the side edges. Seam from the armhole down to the bottom edge on each side, leaving the bottom open.
Your finished bodice tube should measure approximately 21 (22, 23) inches around the chest and 20 (21, 22) inches at the waist.
Keyhole back finishing: Along the two center back vertical edges from the neckline down 2 inches, work 1 row of sc evenly. At the top right corner, ch 4 and sl st into the same corner to create a button loop. You can attach a small button or use a ribbon tie closure.
Checkpoint: Your assembled bodice should measure approximately 6.5 inches from shoulder to waist bottom edge and approximately 21 (22, 23) inches around the chest.
Neckline Edge Finishing
With RS facing and your G/6 hook, join yarn at the left back neckline edge. Work sc evenly around the entire neckline opening: approximately 8 sc along left back, 12 sc across back neckline, 8 sc along right back, 10 sc across each shoulder strap section, and 12 sc across front neckline. Adjust as needed so it lies flat. Sl st to first sc to join. Fasten off. (approximately 60 sc total around neckline)
Flutter Sleeves
With RS facing and your G/6 hook, join yarn at the underarm seam. Pick up and sc evenly around the entire armhole opening. (approximately 36, 36, 38 sc)
Place a marker at the beginning and join with sl st.
Sleeve Round 1: Ch 1 (does not count as st), sc in each sc around. Sl st to join. (36, 36, 38 sc)
Sleeve Round 2: Ch 3 (counts as first dc), 1 dc in same st as join, 2 dc in each sc around. Sl st to join. (72, 72, 76 dc)
Sleeve Round 3: Ch 3 (counts as first dc), 2 dc in same st, 3 dc in each dc around. Sl st to join. (216, 216, 228 dc)
Fasten off.
Repeat on the other armhole.
The flutter sleeve creates a ruffled cap approximately 2 inches deep and approximately 8 inches wide when laid flat. Tack the ruffle lightly to the bodice at the underarm point to prevent it from flipping outward.
Skirt Tier 1
Switch to your H/8 (5.0mm) hook for all tier work.
The skirt is worked in joined rounds attached to the bottom edge of the bodice.
Foundation Round (Tier 1): With H/8 hook and RS facing, join yarn at the right side seam at the bottom edge of the bodice. Ch 1. Work sc evenly around the entire bottom edge, increasing to reach a stitch count divisible by 12.
Sl st to first sc to join.
Tier 1, Row 1 (Fan Setup Row): Ch 3 (counts as first dc). Sk 2 sc, 5 dc in next sc, sk 2 sc, sc in next sc, sk 2 sc, 5 dc in next sc, sk 2 sc, sc in next sc. Rep from around to last 2 sts. Sk last 2 sc. Sl st to top of ch-3 to join.
Tier 1, Row 2: Ch 1 (does not count as st), sc in same st as join. Sk 2 dc, 5 dc in next dc (center dc of first 5-dc fan), sk 2 dc, sc in next sc, sk 2 dc, 5 dc in next dc (center dc of second 5-dc fan), sk 2 dc, sc in next sc. Rep from around. Sl st to first sc to join.
Tier 1, Row 3: Repeat Row 2.
Tier 1, Row 4 (Scallop Edge Row): Ch 1, sc in first st. Into each sc anchor across the round work: sc in sc, ch 2, 3 dc in same sc, ch 2, sc in same sc. Into each center dc of each fan work: sc. Sl st to first sc to join. Fasten off.
Checkpoint: Tier 1 should measure approximately 3.5 inches deep from the bodice join to the lowest point of the scalloped edge.
Skirt Tier 2
Tier 2 attaches approximately 1.5 inches above Tier 1 on the bodice, so the tiers overlap and create that beautiful cascading effect. Count up approximately 2 rows from the Tier 1 foundation round.
Foundation Round (Tier 2): With H/8 hook and RS facing, join yarn at the right side seam, 2 rows above the Tier 1 foundation. Ch 1. Work sc evenly into the bodice row stitches, increasing to a count divisible by 12 and larger than Tier 1.
Sl st to join.
Tier 2, Row 1 (Fan Setup): Ch 3 (counts as first dc). Sk 2 sc, 5 dc in next sc, sk 2 sc, sc in next sc, sk 2 sc, 5 dc in next sc, sk 2 sc, sc in next sc. Rep from around, ending sl st to top of ch-3.
Tier 2, Rows 2 through 4: Ch 1, sc in join. Sk 2 dc, 5 dc in center dc of fan, sk 2 dc, sc in sc anchor. Rep from around. Sl st to first sc to join.
Tier 2, Row 5 (Scallop Edge Row): Ch 1, sc in first st. Into each sc anchor work: sc, ch 2, 3 dc in same sc, ch 2, sc in same sc. Into each center dc of each fan work: sc. Sl st to join. Fasten off.
Checkpoint: Tier 2 should measure approximately 4 inches deep and extend approximately 0.5 inches below Tier 1 at the longest scallop points.
Skirt Tier 3
Tier 3 is the longest and widest tier, forming the main skirt volume. It attaches at the very bottom edge of the bodice.
Foundation Round (Tier 3): With H/8 hook and RS facing, join yarn at the bottom edge of the bodice. Ch 1. Work sc evenly around, increasing aggressively to create the widest tier.
Sl st to join.
Tier 3, Row 1 (Fan Setup): Ch 3. Sk 2 sc, 5 dc in next sc, sk 2 sc, sc in next sc, sk 2 sc, 5 dc in next sc, sk 2 sc, sc in next sc. Rep from around. Sl st to top of ch-3.
Tier 3, Rows 2 through 5: Ch 1, sc in join. Sk 2 dc, 5 dc in center dc of fan, sk 2 dc, sc in sc. Rep from around. Sl st to first sc.
Tier 3, Row 6 (Scallop Edge Row): Ch 1, sc in first st. Into each sc anchor work: sc, ch 2, 3 dc in same sc, ch 2, sc in same sc. Into each center dc of each fan work: sc. Sl st to join. Fasten off.
Checkpoint: Tier 3 should measure approximately 5 inches deep. Your full dress from shoulder to lowest hem point should measure 18 (19, 20) inches.
Finishing and Blocking
Weave in all ends securely using your tapestry needle. Tuck ends into the back loops of the hdc stitches in the bodice and into the dc posts of the fan stitches in the tiers.
Wet blocking is essential for a professional result. This step is not optional. The blocking opens up the fan stitches, defines those beautiful scalloped edges, and gives the tiers their proper cascading drape.
To wet block: Submerge the finished dress in cool water and gently squeeze out excess water without wringing. Lay flat on blocking mats. Use T-pins to pin each scallop point of all three tiers outward to its fullest extent. Allow to dry completely before unpinning.
If you are using a cotton yarn, light steam blocking with a pressing cloth held 1 inch above the surface (no direct contact) will further relax the stitches after wet blocking.
Adding the ribbon bows: Cut two lengths of satin ribbon, each 12 inches long. Fold each into a bow and hand stitch securely to the top of each shoulder strap at the front neckline join. Knot the ends and trim at a slight diagonal to prevent fraying. You can also seal the ends with a small amount of fabric glue.
Size Customization Tips
To go up one size beyond 4T: Add 12 stitches (one fan repeat) to each tier foundation round. Add 2 rows to the bodice length before armhole shaping.
To lengthen the dress: Add one additional fan pattern row to any or all tiers before working the Scallop Edge Row.
To shorten the dress: Remove one fan row from any or all tiers.
To increase flare: Add one additional fan repeat (12 stitches) to each tier’s foundation round beyond what is written.
Care Instructions
Hand wash in cool water with a gentle soap. Do not wring. Roll in a clean towel to remove excess water and reshape flat to dry.
If your yarn label permits machine washing, use the delicate cycle in a mesh bag and lay flat to dry. Do not tumble dry. Do not iron directly on the lace tiers.
Store flat or rolled rather than hanging. The weight of the tiers will stretch the bodice over time if hung.
You Did It!
Thank you so much for choosing this pattern for your little one. I hope every stitch brings you joy, and I hope the finished dress makes someone very happy. If you make this tiered ruffle dress crochet pattern, I would absolutely love to see it! Tag me on Instagram or share in my Facebook group. Seeing your finished projects is honestly the best part of designing.
If you found this crochet tutorial helpful, I hope you will save it to your Pinterest boards so you can find it easily when you are ready to start. And please drop a comment below if you make one. I read every single comment and love hearing how your projects turn out!
You Might Also Like
- Succulent Garden Crochet Bowl Free Crochet Pattern
- Rainbow Pastel Shell Baby Dress Free Crochet Pattern
- Sunflower Garden Crochet Headpiece Free Crochet Pattern
- Blush Pink Lacy Baby Dress Free Crochet Pattern
