
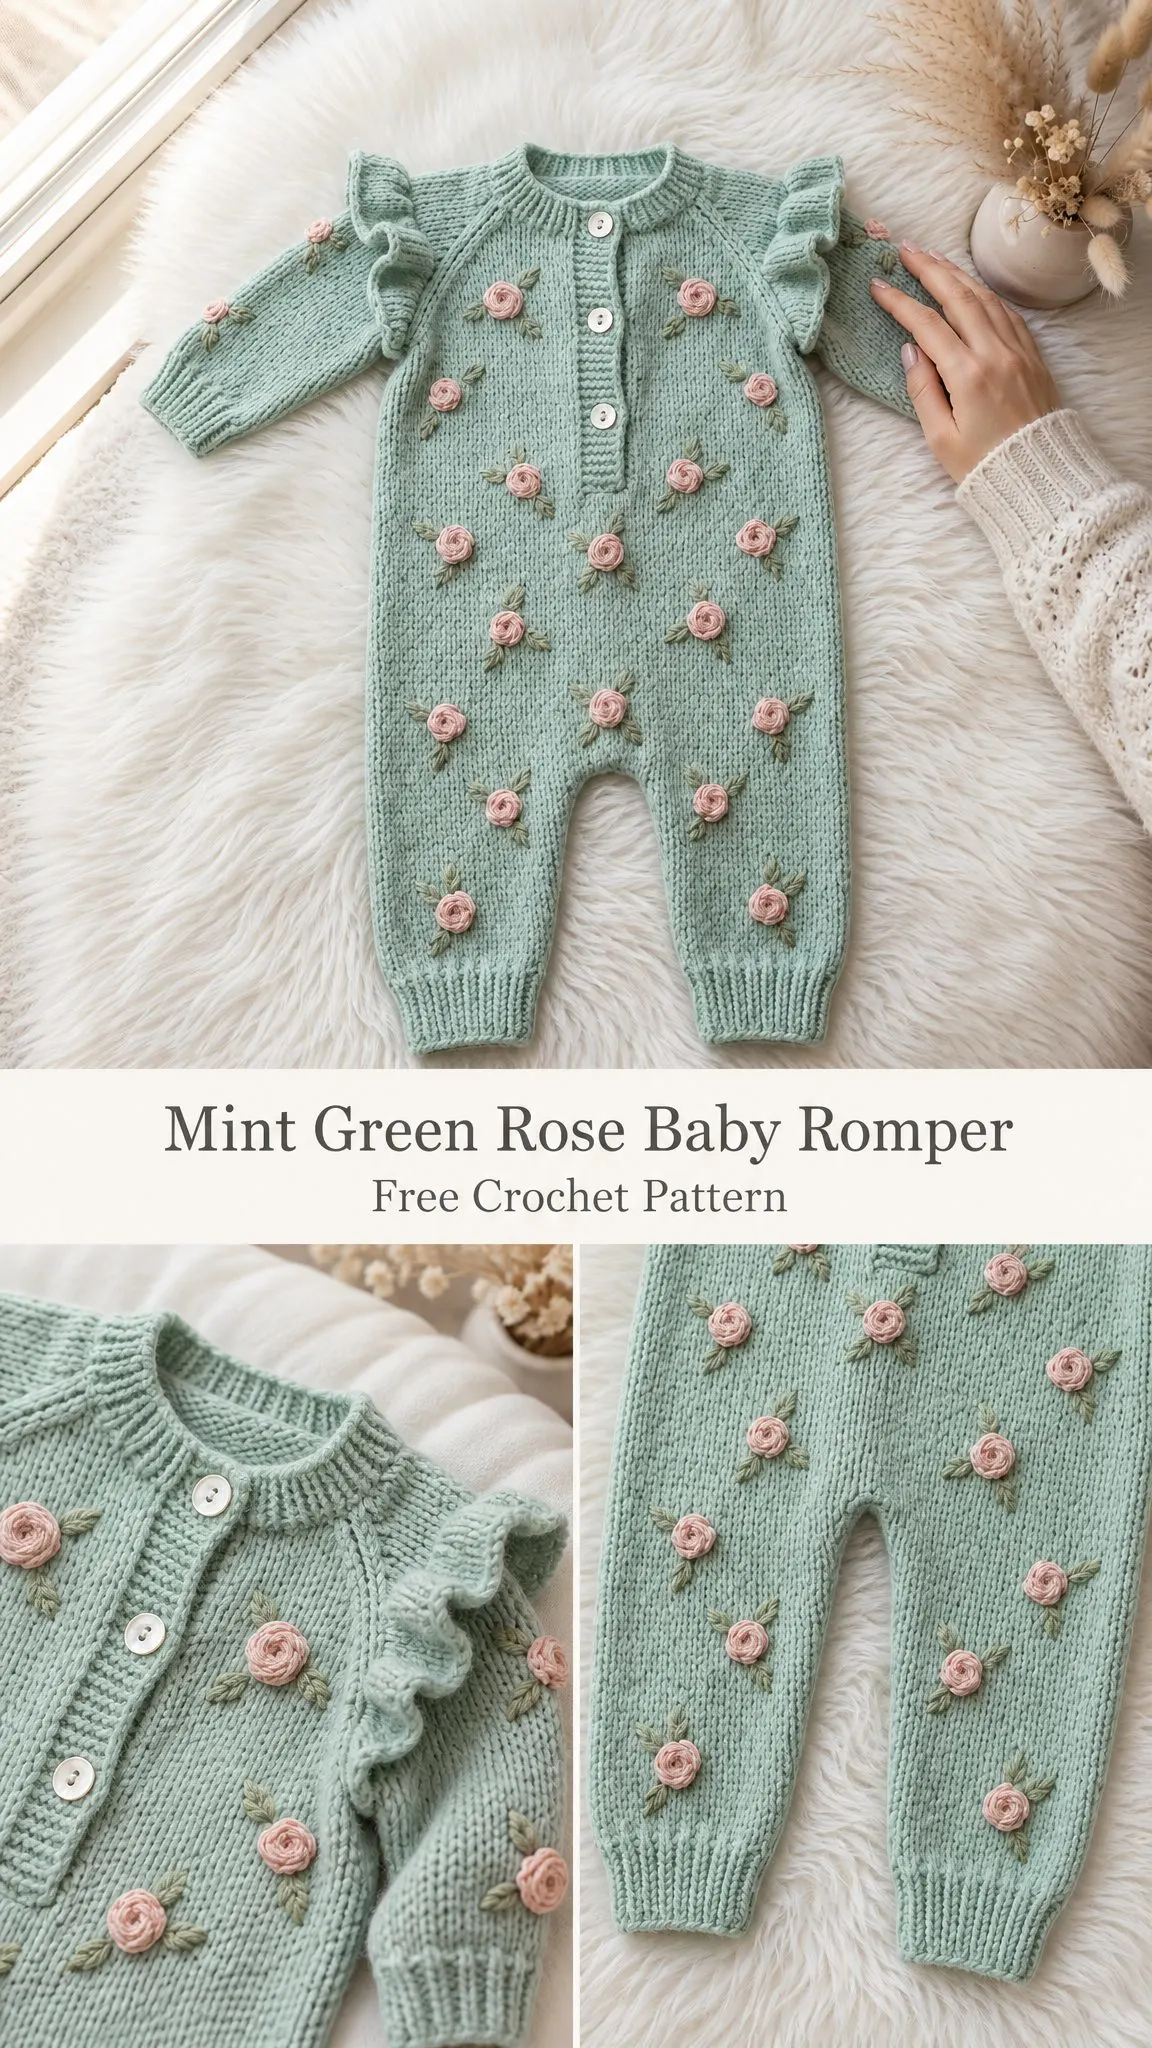
Looking for the perfect handmade gift for a new baby? This sweet mint green romper keeps little ones cozy from shoulder to ankle while looking absolutely adorable. The combination of textured stitches, delicate shoulder ruffles, and scattered rosebud embellishments creates a garment that looks far more complicated than it actually is.
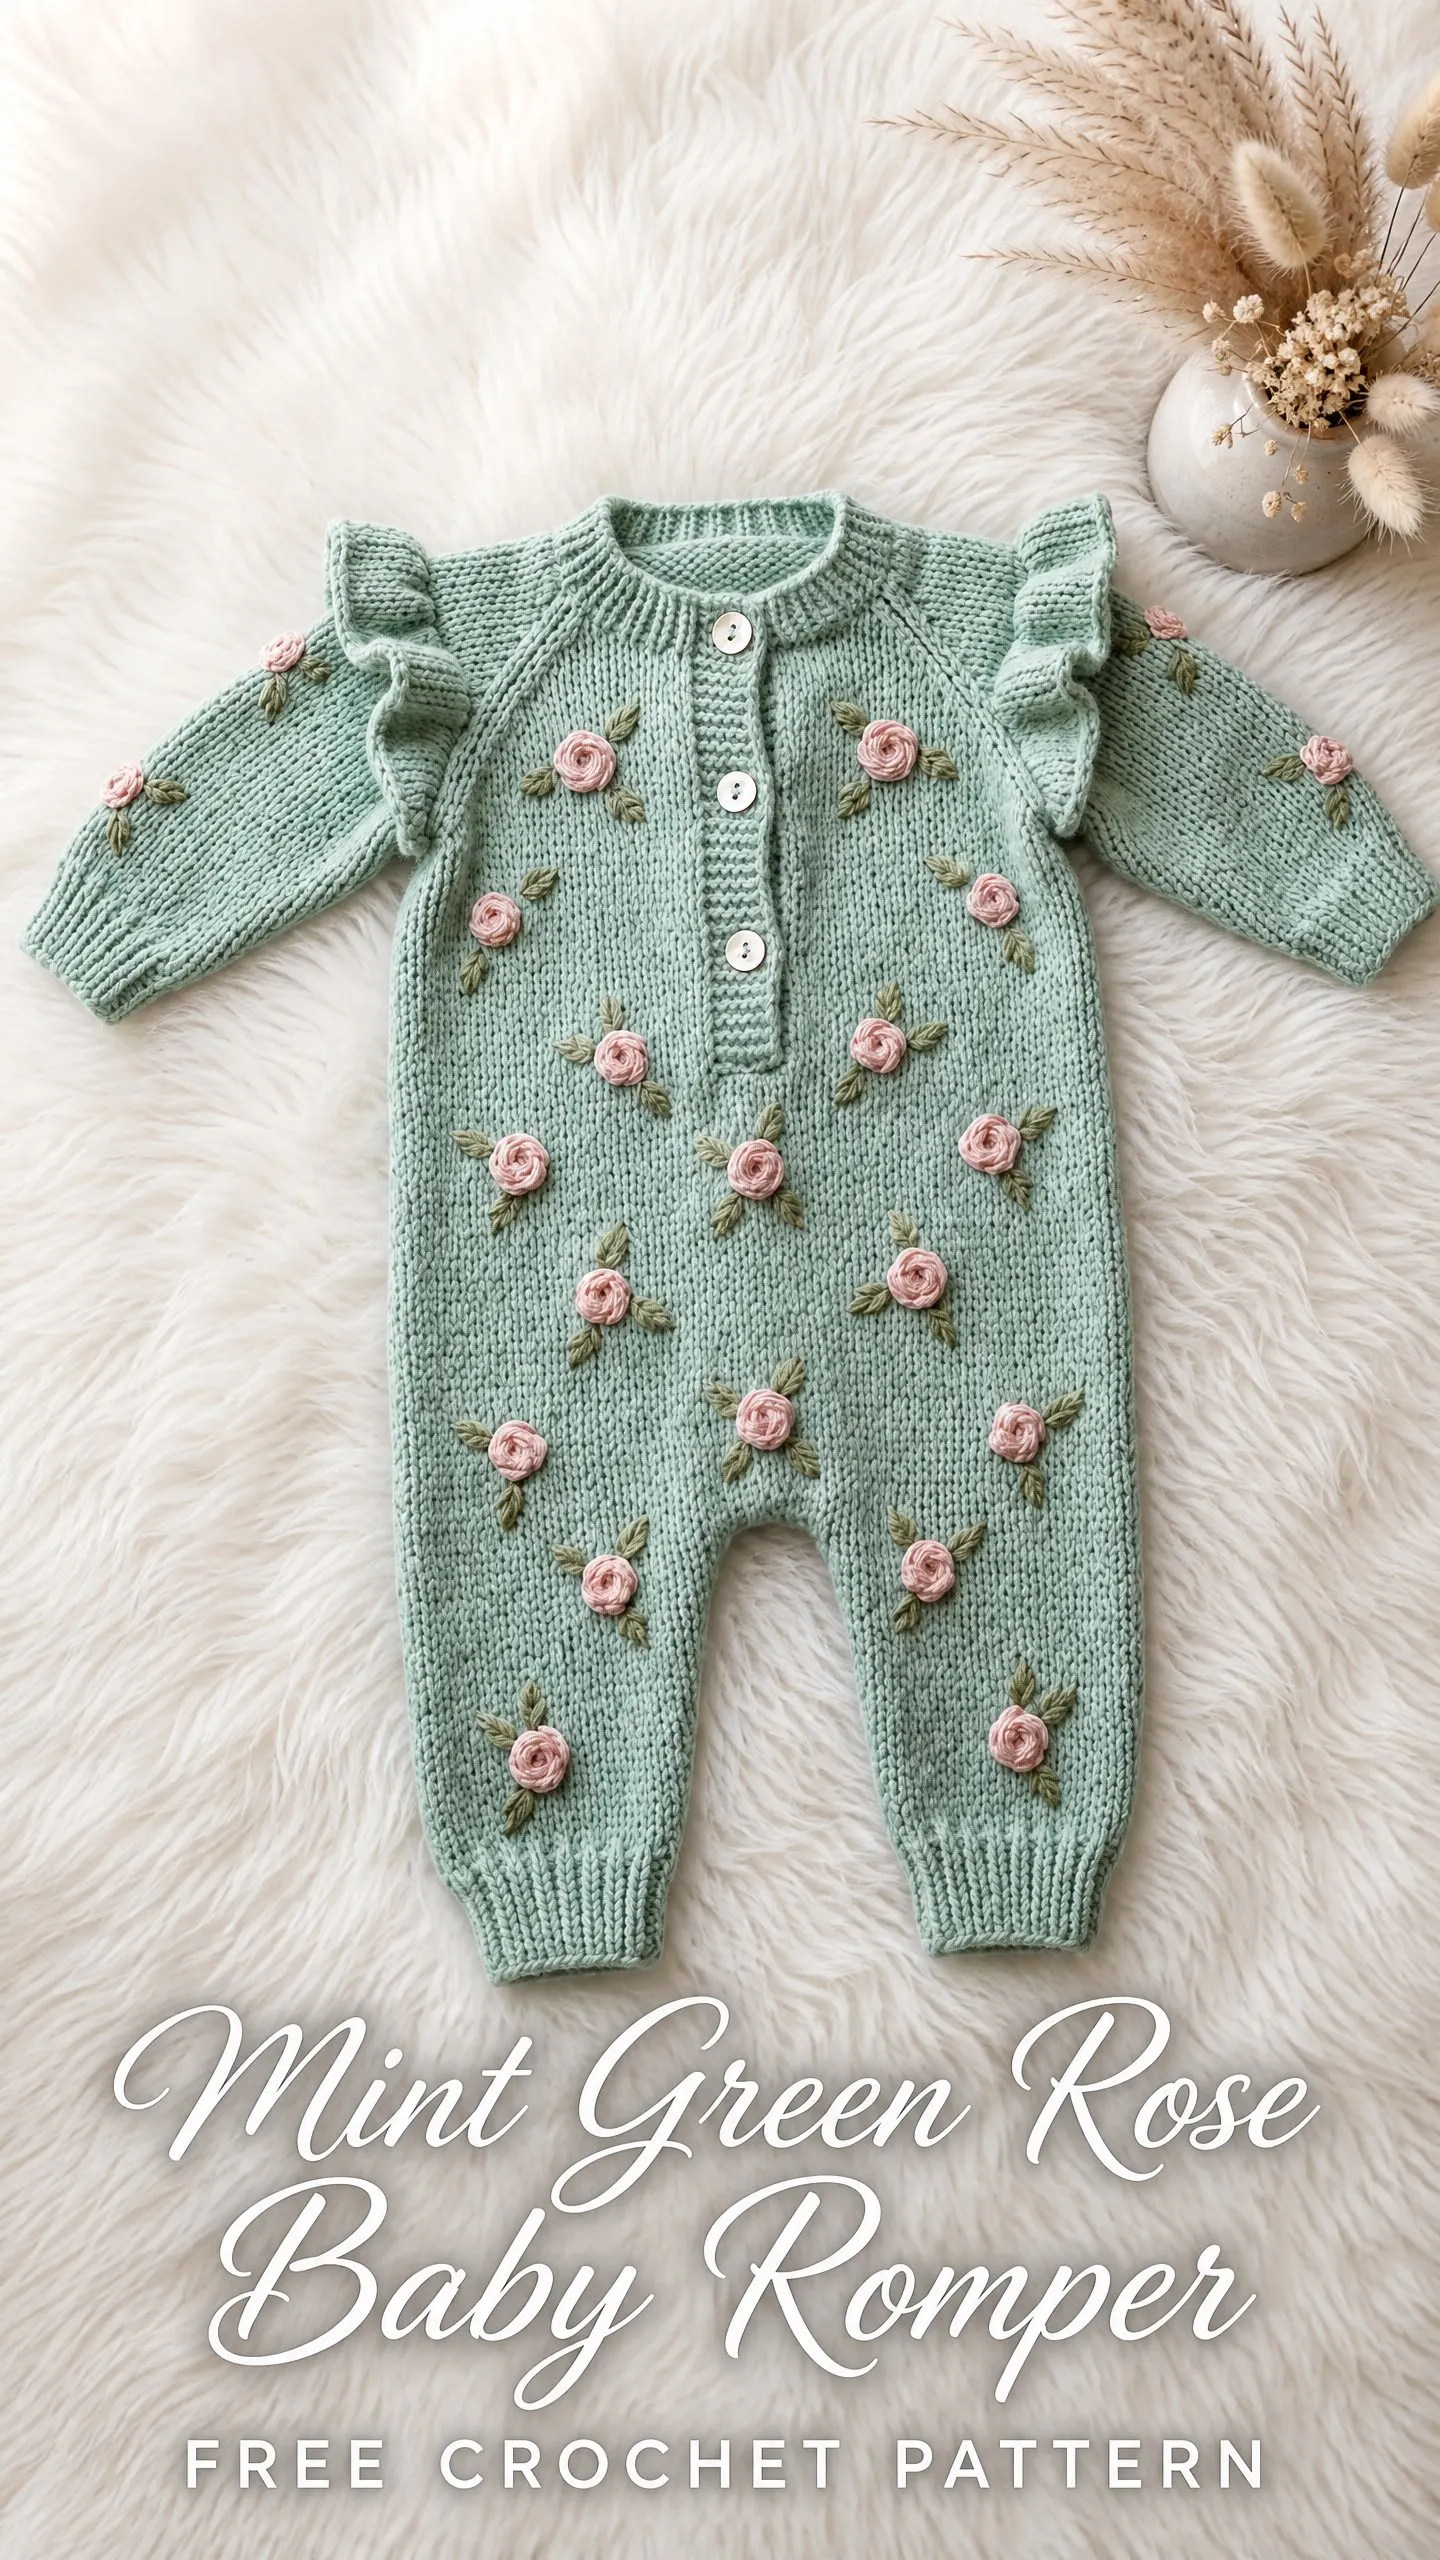
I designed this pattern with practical gift-giving in mind. The romper works up in worsted weight yarn, so it moves along faster than you might expect for a full garment. The single crochet construction creates a soft, drapey fabric that is gentle against baby skin while still holding its shape beautifully.
Whether you are welcoming a new little one into your own family or crafting for a baby shower, this romper delivers impressive results. The roses are worked separately and sewn on at the end, which means you can customize the placement and quantity to suit your style. Let me walk you through everything you need to bring this sweet project to life.
About This Crochet Baby Romper Pattern
This pattern creates a long-sleeved baby romper worked primarily in single crochet through the back loop only. That technique produces a lovely horizontal ridge texture that mimics the look of stockinette knitting. The finished garment features raglan shoulder construction, a center front button placket, ribbed cuffs at the wrists and ankles, and dimensional crocheted roses scattered across the entire piece.
The romper is constructed top down in flat pieces. You will work the yoke first, then divide for the body and sleeves, work each section separately, and seam everything together at the end. This construction method allows for easy fitting adjustments as you go.
Skill Level: Intermediate to Advanced
You should be comfortable working flat pieces, seaming garments, picking up stitches for finishing details, and working small dimensional motifs. If you have never made a garment before, I recommend practicing with a simpler project first. That said, if you take your time and follow each step carefully, you can absolutely tackle this pattern.
Time Estimate: Approximately 12 to 18 hours for an experienced crocheter, plus an additional 2 to 4 hours for making and attaching all the roses and leaves.
Finished Measurements
This pattern includes three sizes:
Newborn (0 to 3 months): Chest 16 in / 40.5 cm, total length shoulder to ankle 20 in / 51 cm
3 to 6 months: Chest 17.5 in / 44.5 cm, total length 22 in / 56 cm
6 to 12 months: Chest 19 in / 48 cm, total length 24 in / 61 cm
All instructions are written for the 3 to 6 month size, with newborn adjustments in parentheses and 6 to 12 month adjustments in brackets. Format: Newborn (3 to 6 months) [6 to 12 months].
Materials Needed
Yarn
Yarn A (main color): Soft mint green, worsted weight, approximately 650 (750) [850] yards / 595 (685) [777] meters
Yarn B (rose color): Blush pink, worsted weight, approximately 50 (60) [70] yards / 46 (55) [64] meters
Yarn C (leaf color): Sage green, worsted weight, approximately 30 (35) [40] yards / 27 (32) [37] meters
Yarn Suggestions
Lion Brand Pound of Love in Mint works beautifully for this project. This 100% acrylic yarn is machine washable, soft against baby skin, and has excellent stitch definition.
Paintbox Yarns Simply DK in Soft Fern is another great option when used at worsted gauge. Adjust your hook size as needed to match the gauge swatch.
Paintbox Yarns Baby DK in Spearmint held double creates an extra soft fabric perfect for newborns.
Any smooth worsted weight yarn (category 4) that achieves gauge and is machine washable will work. Avoid fuzzy yarns like mohair blends because they will obscure the stitch texture and make seaming difficult.
Tools
Gauge
Using US G-6 / 4.00 mm hook and Yarn A:
16 stitches and 20 rows = 4 in / 10 cm in single crochet worked in back loop only (BLO)
Gauge matters here. This is a fitted garment, and incorrect gauge will result in a romper that does not fit properly. Work a flat swatch of at least 20 stitches by 24 rows, block it, and measure in the center away from edges. If your swatch is larger than stated, go down one hook size. If smaller, go up one hook size.
Abbreviations and Stitch Definitions
Let me walk you through every abbreviation used in this pattern. Even if you are familiar with these terms, a quick review helps prevent mistakes.
ch = chain. Wrap yarn over hook and pull through the loop on your hook.
sc = single crochet. Insert hook into stitch, yarn over, pull up a loop (2 loops on hook), yarn over, pull through both loops.
BLO = back loop only. When you look at the top of a stitch, you see two loops forming a V. Insert your hook under only the back loop, the one farthest from you.
dc = double crochet. Yarn over, insert hook into stitch, yarn over, pull up a loop (3 loops on hook), yarn over, pull through 2 loops (2 loops remain), yarn over, pull through remaining 2 loops.
hdc = half double crochet. Yarn over, insert hook into stitch, yarn over, pull up a loop (3 loops on hook), yarn over, pull through all 3 loops at once.
sl st = slip stitch. Insert hook into stitch, yarn over, pull through both the stitch and the loop on your hook in one motion.
sc2tog = single crochet two together (a decrease). Insert hook in next stitch, pull up a loop, insert hook in following stitch, pull up a loop, yarn over, draw through all 3 loops on hook.
inc = increase. Work two single crochet stitches into the same stitch.
st(s) = stitch(es)
RS = right side (the outside of the finished garment)
WS = wrong side (the inside of the finished garment)
pm = place marker
sm = slip marker
rep = repeat
rem = remaining
cont = continue
YA/YB/YC = Yarn A (mint), Yarn B (pink), Yarn C (sage)
Special Techniques
BLO Texture Row
Every single crochet in this pattern is worked through the back loop only unless stated otherwise. This creates beautiful horizontal ridges on the right side that give the fabric a knit-like appearance. The technique is simple once you get used to it, just remember to consistently insert your hook under only the back loop.
Raglan Increase
At each of the four raglan points, you will work: 1 sc, ch 1, 1 sc all into the marked stitch. This adds two stitches at each raglan point per row (8 stitches total per increase row) and creates a small decorative eyelet along the raglan line.
Small Rose Motif
These adorable dimensional roses are worked separately and sewn on after the garment is complete. Here is how to make them:
With YB and G-6 hook, ch 16.
Row 1: Sc in second ch from hook, sc in each ch across. (15 sc)
Row 2: Ch 3, turn. Working in front loops only, (2 dc in next st) across all 15 sts. (30 dc)
Fasten off, leaving a long tail. Roll the strip tightly from one end to the other, keeping the flat bottom edge as the base. Use the tail to stitch through the base several times to secure the rose shape.
Make 20 (24) [28] roses total.
Leaf Cluster
Each rose gets a pair of leaves worked in sage green.
With YC, ch 6.
Row 1: Sl st in second ch from hook, sc in next ch, hdc in next ch, sc in next ch, sl st in last ch. (5 sts, one leaf made)
Ch 6 again from the base.
Row 2: Sl st in second ch from hook, sc in next ch, hdc in next ch, sc in next ch, sl st in last ch. (5 sts, second leaf made)
Fasten off, leaving a tail for sewing. Each cluster produces two small leaves at slight angles.
Make 20 (24) [28] leaf clusters total.
Pattern Instructions
Yoke
With YA and G-6 hook, ch 43 (47) [51].
Foundation row (WS): Sc in second ch from hook, sc in each ch across, turn. 42 (46) [50] sc.
Set up raglan markers. The stitches divide as follows:
Place markers at each division point.
Row 1 (RS): Ch 1, turn. Work BLO sc to 1 st before first marker, Raglan Increase in marked st, sm, BLO sc across sleeve to 1 st before next marker, Raglan Increase in marked st, sm, BLO sc across front to 1 st before next marker, Raglan Increase in marked st, sm, BLO sc across sleeve to 1 st before next marker, Raglan Increase in marked st, sm, BLO sc to end. Turn. 50 (54) [58] sts.
Row 2 (WS): Ch 1, turn. BLO sc across all sts, moving markers as you pass them. Turn. 50 (54) [58] sts.
Repeat Rows 1 and 2, working increases on RS rows only, until yoke measures 3.5 (4) [4.5] in / 9 (10) [11.5] cm from foundation, ending with a WS row.
After 14 (16) [18] RS increase rows, your stitch counts per section should be:
Divide Sleeves from Body
Next row (RS): Ch 1, turn. BLO sc across 20 (23) [26] right back sts. Ch 3 (for underarm bridge), skip the 34 (38) [42] right sleeve sts (place on stitch holder or scrap yarn). BLO sc across 46 (52) [58] front sts. Ch 3, skip the 34 (38) [42] left sleeve sts (place on holder). BLO sc across 20 (23) [26] left back sts. Turn.
Next row (WS): Ch 1, turn. BLO sc across all sts including 3 sc worked into each ch-3 bridge. Turn. 92 (104) [116] sc.
Body
Continue working flat in BLO sc without increases or decreases until body measures 5 (5.5) [6] in / 12.5 (14) [15] cm from underarm divide, ending with a WS row.
Shape Crotch and Work Legs
The body now divides into front and back, then into individual legs.
Front Body Division:
Identify the center of your 92 (104) [116] sts. The front half consists of the first 46 (52) [58] sts.
Row 1 (RS): Ch 1, turn. BLO sc across 22 (25) [28] sts for right front leg. Leave remaining sts unworked. Turn. 22 (25) [28] sc.
Right Front Leg:
Continue in BLO sc on these 22 (25) [28] sts until leg measures 5 (5.5) [6] in / 12.5 (14) [15] cm from division row, ending with a WS row.
Ankle Ribbing: Switch to F-5 hook.
Row 1: Ch 8. Sc in second ch from hook, sc in each ch across. (7 sc) Sl st into first 2 sts of leg edge to anchor. Turn.
Row 2: Working in BLO, sc across 7 sts. Turn.
Row 3: BLO sc across 7 sts, sl st into next 2 sts of leg edge. Turn.
Repeat Rows 2 and 3 until ribbing spans entire ankle width. Fasten off. Seam ribbing ends together.
Left Front Leg:
Rejoin YA at center front with RS facing.
Row 1 (RS): Ch 1. BLO sc across remaining 24 (27) [30] sts. Turn. 24 (27) [30] sc.
Continue in BLO sc until leg measures 5 (5.5) [6] in / 12.5 (14) [15] cm from division, ending with a WS row.
Work ankle ribbing same as right front leg. Fasten off.
Back Body:
Work back body exactly as front body, dividing at center and working right back leg and left back leg identically.
Sleeves
Transfer held right sleeve sts onto G-6 hook. Rejoin YA at underarm center with RS facing.
Set up: Work 2 sc into the underarm bridge sts to join cleanly. 36 (40) [44] sts total.
Row 1 (RS): Ch 1, turn. BLO sc across all sts. Turn. 36 (40) [44] sc.
Row 2 (WS): Ch 1, turn. BLO sc across. Turn. 36 (40) [44] sc.
Work straight in BLO sc until sleeve measures 3 (3.5) [4] in / 7.5 (9) [10] cm from underarm, ending with a WS row.
Sleeve taper (dec row): Ch 1, turn. Sc2tog over first 2 sts, BLO sc to last 2 sts, sc2tog. Turn. 34 (38) [42] sc.
Work 5 rows straight.
Repeat dec row. 32 (36) [40] sc.
Work 4 rows straight.
Repeat dec row one final time. 30 (34) [38] sc.
Continue straight until sleeve measures 6 (6.5) [7] in / 15 (16.5) [18] cm from underarm, ending with a WS row.
Wrist Ribbing: Switch to F-5 hook and work ribbing same as ankle ribbing.
Work second sleeve same as first.
Button Placket
The button placket is worked along the center front opening from neckline down 3 (3.25) [3.5] in / 7.5 (8) [9] cm.
With RS facing and G-6 hook, join YA at top right of center front opening.
Placket band (right side, buttonholes): Ch 1. Work sc evenly down the right edge, approximately 1 sc per row end. You should have approximately 15 (17) [18] sc. Turn.
Row 2: Ch 1. BLO sc across. Turn.
Row 3 (buttonhole row): Ch 1. Sc 2, (ch 1, sk 1 st, sc 3) repeat 3 times, sc to end. Turn.
Row 4: Ch 1. Sc across, working 1 sc into each ch-1 sp. Turn.
Row 5: Ch 1. BLO sc across. Fasten off.
Left placket band: With RS facing, join YA at bottom left of opening. Work sc evenly up left edge. Work 2 rows of BLO sc. Fasten off.
Neckline Edging
With RS facing and G-6 hook, join YA at top right of neckline. Work 1 round of sc evenly around entire neckline, including tops of placket bands. Sl st to first sc to join. Fasten off.
Ruffles
Ruffles are worked along the raglan seam lines on the RS after seaming.
With RS facing and G-6 hook, join YA at the base of one raglan seam where sleeve meets body.
Ruffle row: Ch 3 (counts as first dc). Work 2 dc into same st. (Work 3 dc into next st) across entire raglan seam line. Fasten off.
Repeat on all four raglan seam lines.
Seaming
1. Seam the left side seam of front body to left side seam of back body using whipstitch, RS facing outward.
2. Seam the right side seam the same way.
3. Seam the inseam of each leg: with RS together, align front and back leg edges and whipstitch from ankle cuff upward to crotch.
4. Seam the crotch: with RS together, whipstitch center crotch seam closed.
5. Seam sleeve underarms if any gap exists at underarm bridge.
Blocking
Wet block the finished garment by soaking in cool water for 15 minutes. Gently press out excess water in a towel. Lay flat on a blocking mat, pinning to finished measurements. Allow to dry completely before attaching rose motifs.
Attaching Rose Motifs and Leaves
Once the garment is fully dry and blocked, arrange the roses across the body, sleeves, and yoke in a scattered pattern. Space roses roughly 2 to 2.5 inches apart in a diagonal grid arrangement.
To attach each rose, thread the tail onto a tapestry needle. Insert needle from back through the garment at the chosen placement, securing the flat base with 6 to 8 stitches. Knot securely on the WS.
Position each leaf cluster behind and slightly beside its paired rose so the two leaves frame the rose at the lower left and lower right. Stitch through the base several times to secure. Knot on WS.
Button Attachment
Mark button placement on the left placket band to align with buttonholes on the right band. Sew each button securely using a double strand of YA, passing through the button shank 6 to 8 times and knotting tightly on the WS.
Care Instructions
Machine wash cold on gentle cycle. Lay flat to dry. Do not tumble dry. Do not iron directly on rose motifs. Steam blocking is acceptable if needed after washing, held at least 2 inches away from the fabric.
Tips for Success
Take your time with the raglan increases. Counting your stitches after each increase row helps catch mistakes early when they are easy to fix.
The roses take practice. Make a few extras before attaching to get the tension and rolling technique just right.
When seaming, use a tapestry needle and the same yarn you used for the garment. The seams will blend in beautifully.
If you want easier diaper changes, consider adding a snap at the crotch. Size 16 or 20 sew-on snaps in white work perfectly.
I hope you love making this crochet baby romper as much as I loved designing it. The combination of that soft mint green, the delicate roses, and those sweet shoulder ruffles creates something truly special for any little one in your life.
If this pattern caught your eye, save it to your Pinterest boards so you can find it when you are ready to start. And if you make one, I would absolutely love to see it! Drop a comment below or tag me in your photos. There is nothing better than seeing a finished project out in the world.
You Might Also Like
- Sunset Ombre Butterfly Free Crochet Pattern
- Sunshine Yellow Baby Crochet Pinafore Free Pattern
- Sunset Gradient Jellyfish Amigurumi Free Crochet Pattern
- Dusty Rose Boho Romper Free Crochet Pattern
