
Let me guess. You’ve seen those adorable hooded baby sweaters with the little bear ears and thought, "That looks way too complicated for me." Maybe you’ve scrolled past a dozen patterns, intimidated by words like "raglan construction" or "top-down shaping." I get it. Those terms sound fancy and a little scary.
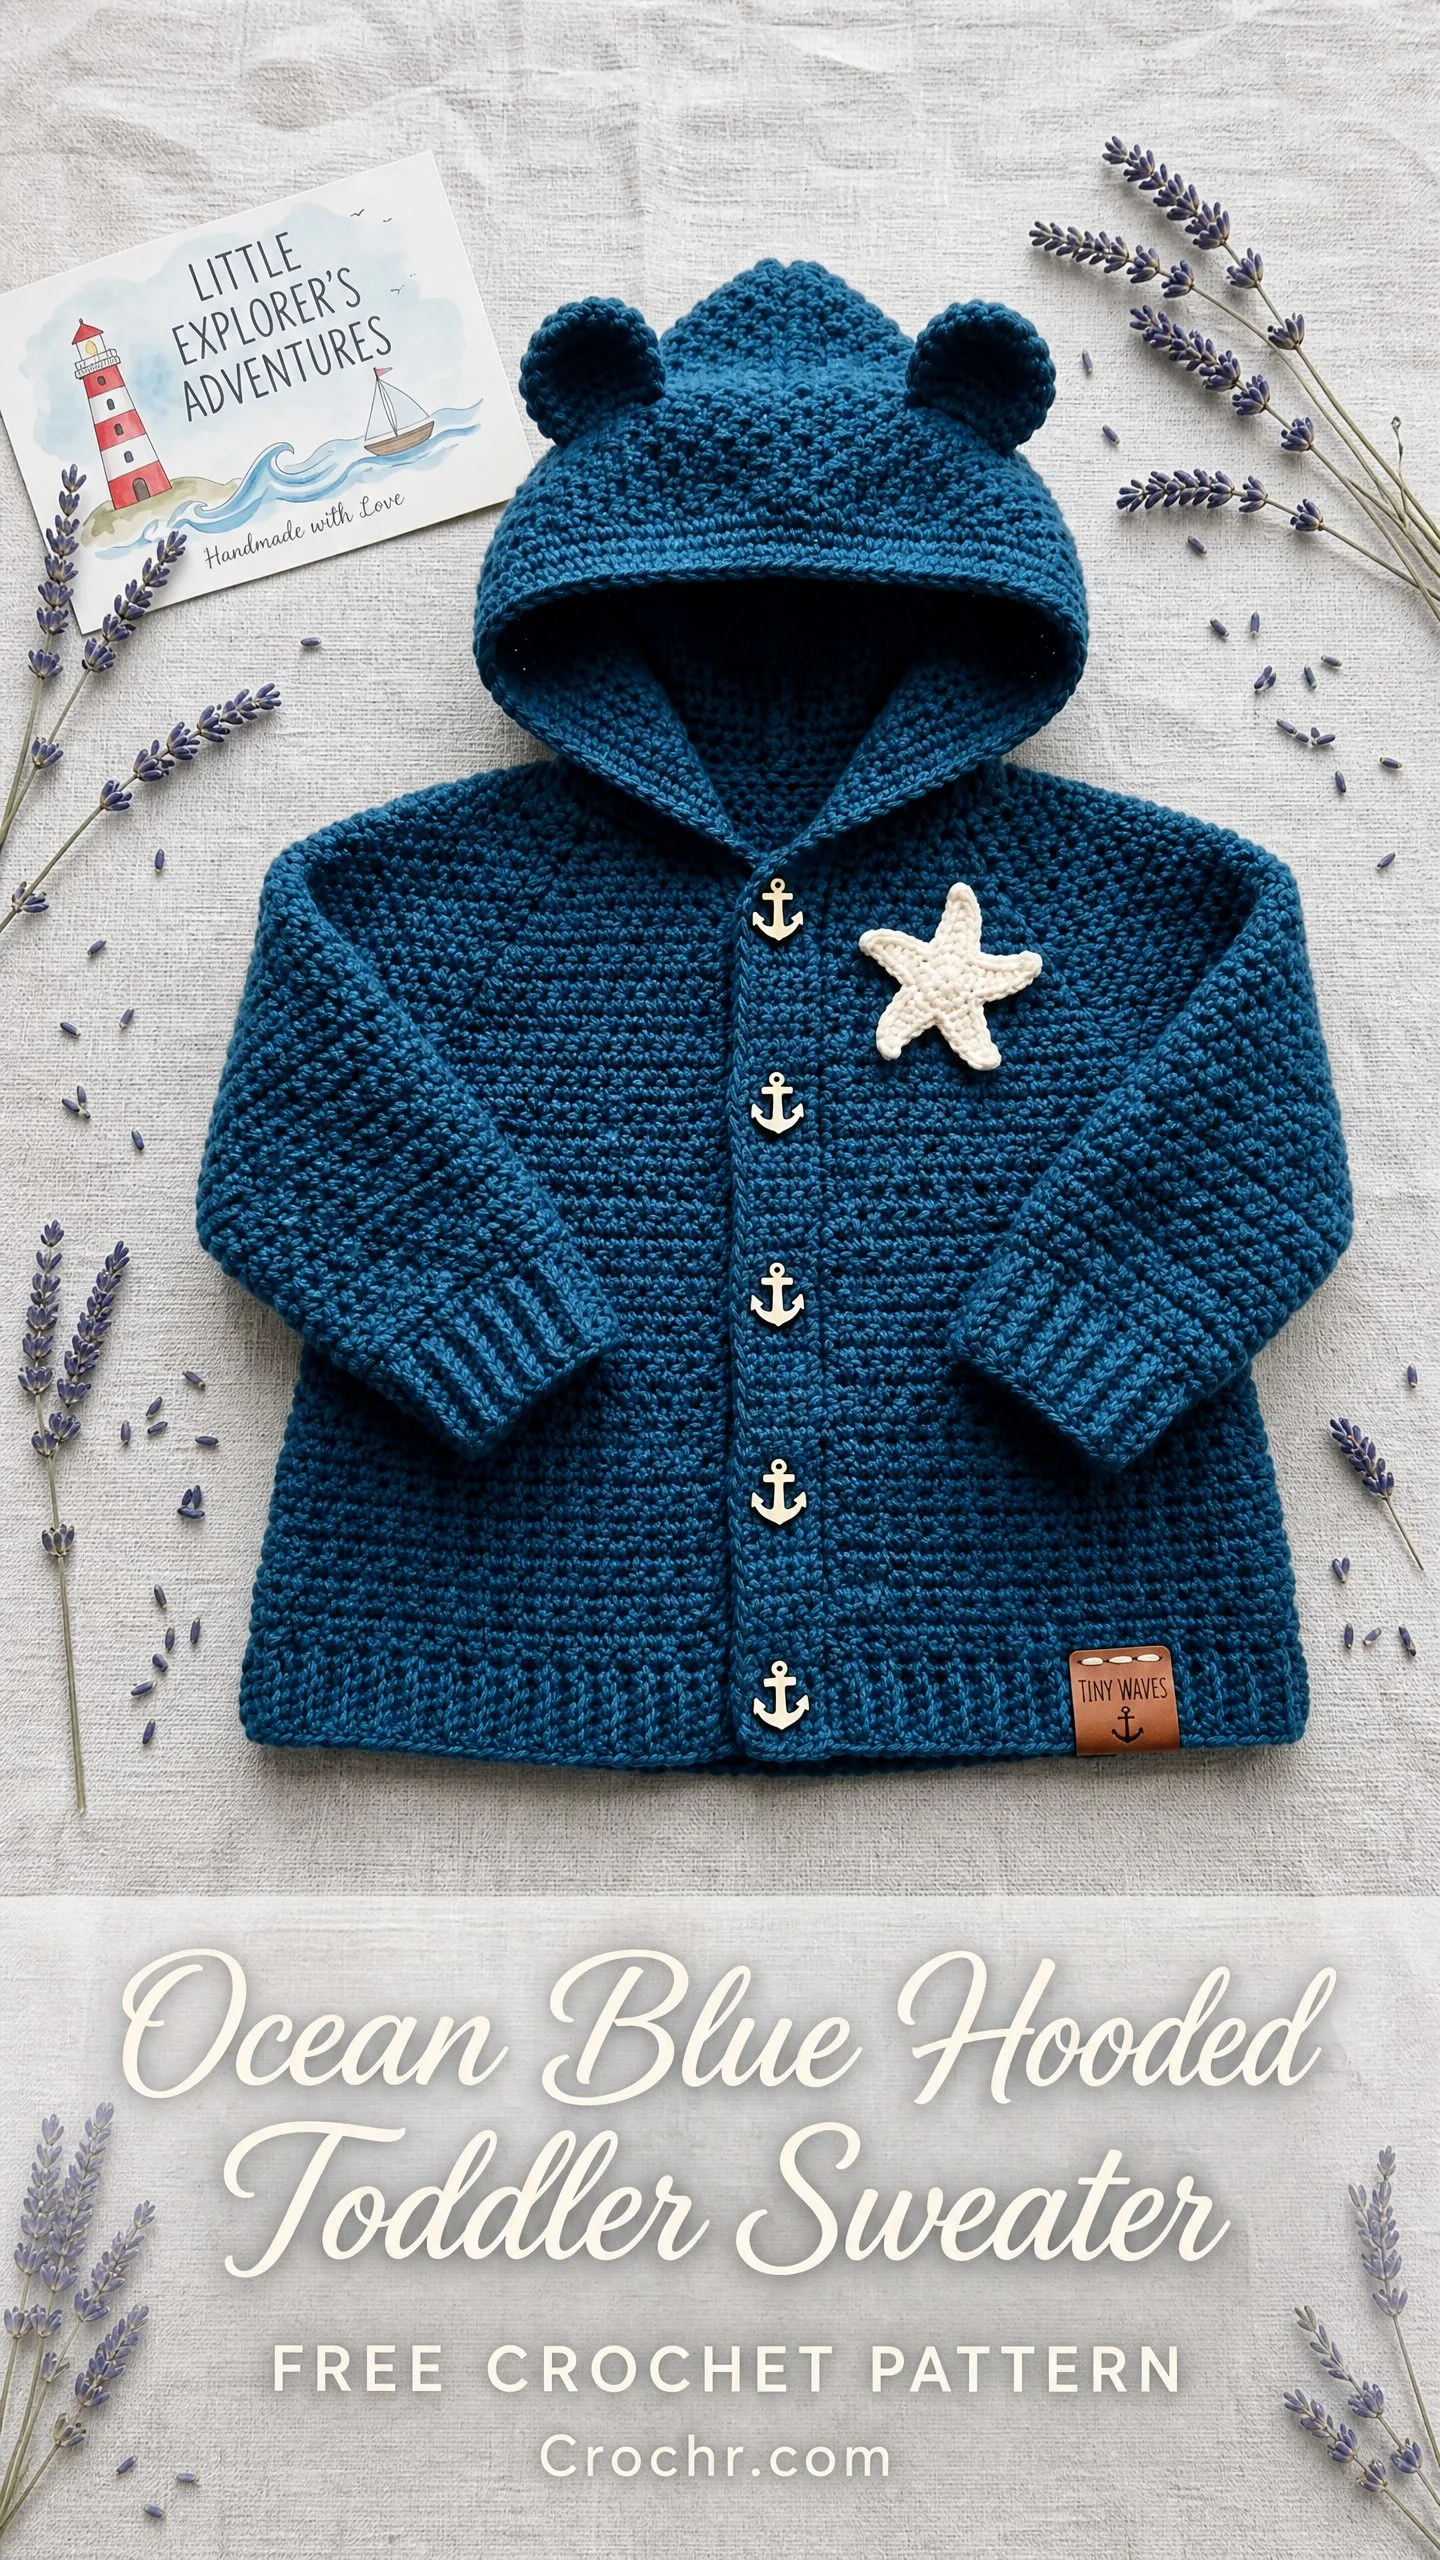
Here’s the truth. This sweater is built on single crochet. That’s it. If you can work a single crochet stitch, you can make this cardigan. The raglan shaping is just adding two stitches at the same spots every other row. The hood is a rectangle you fold and sew. The bear ears are tiny circles you pinch into shape. Nothing mysterious, nothing magical, just straightforward crochet worked one stitch at a time.
Whether you’re an intermediate crocheter ready to try your first garment or a brave beginner willing to take it slow, this pattern breaks everything down into manageable pieces. I’ll walk you through every single step, explain the why behind each technique, and give you checkpoints along the way so you always know you’re on track.
Why You’ll Love This Hooded Toddler Sweater Pattern
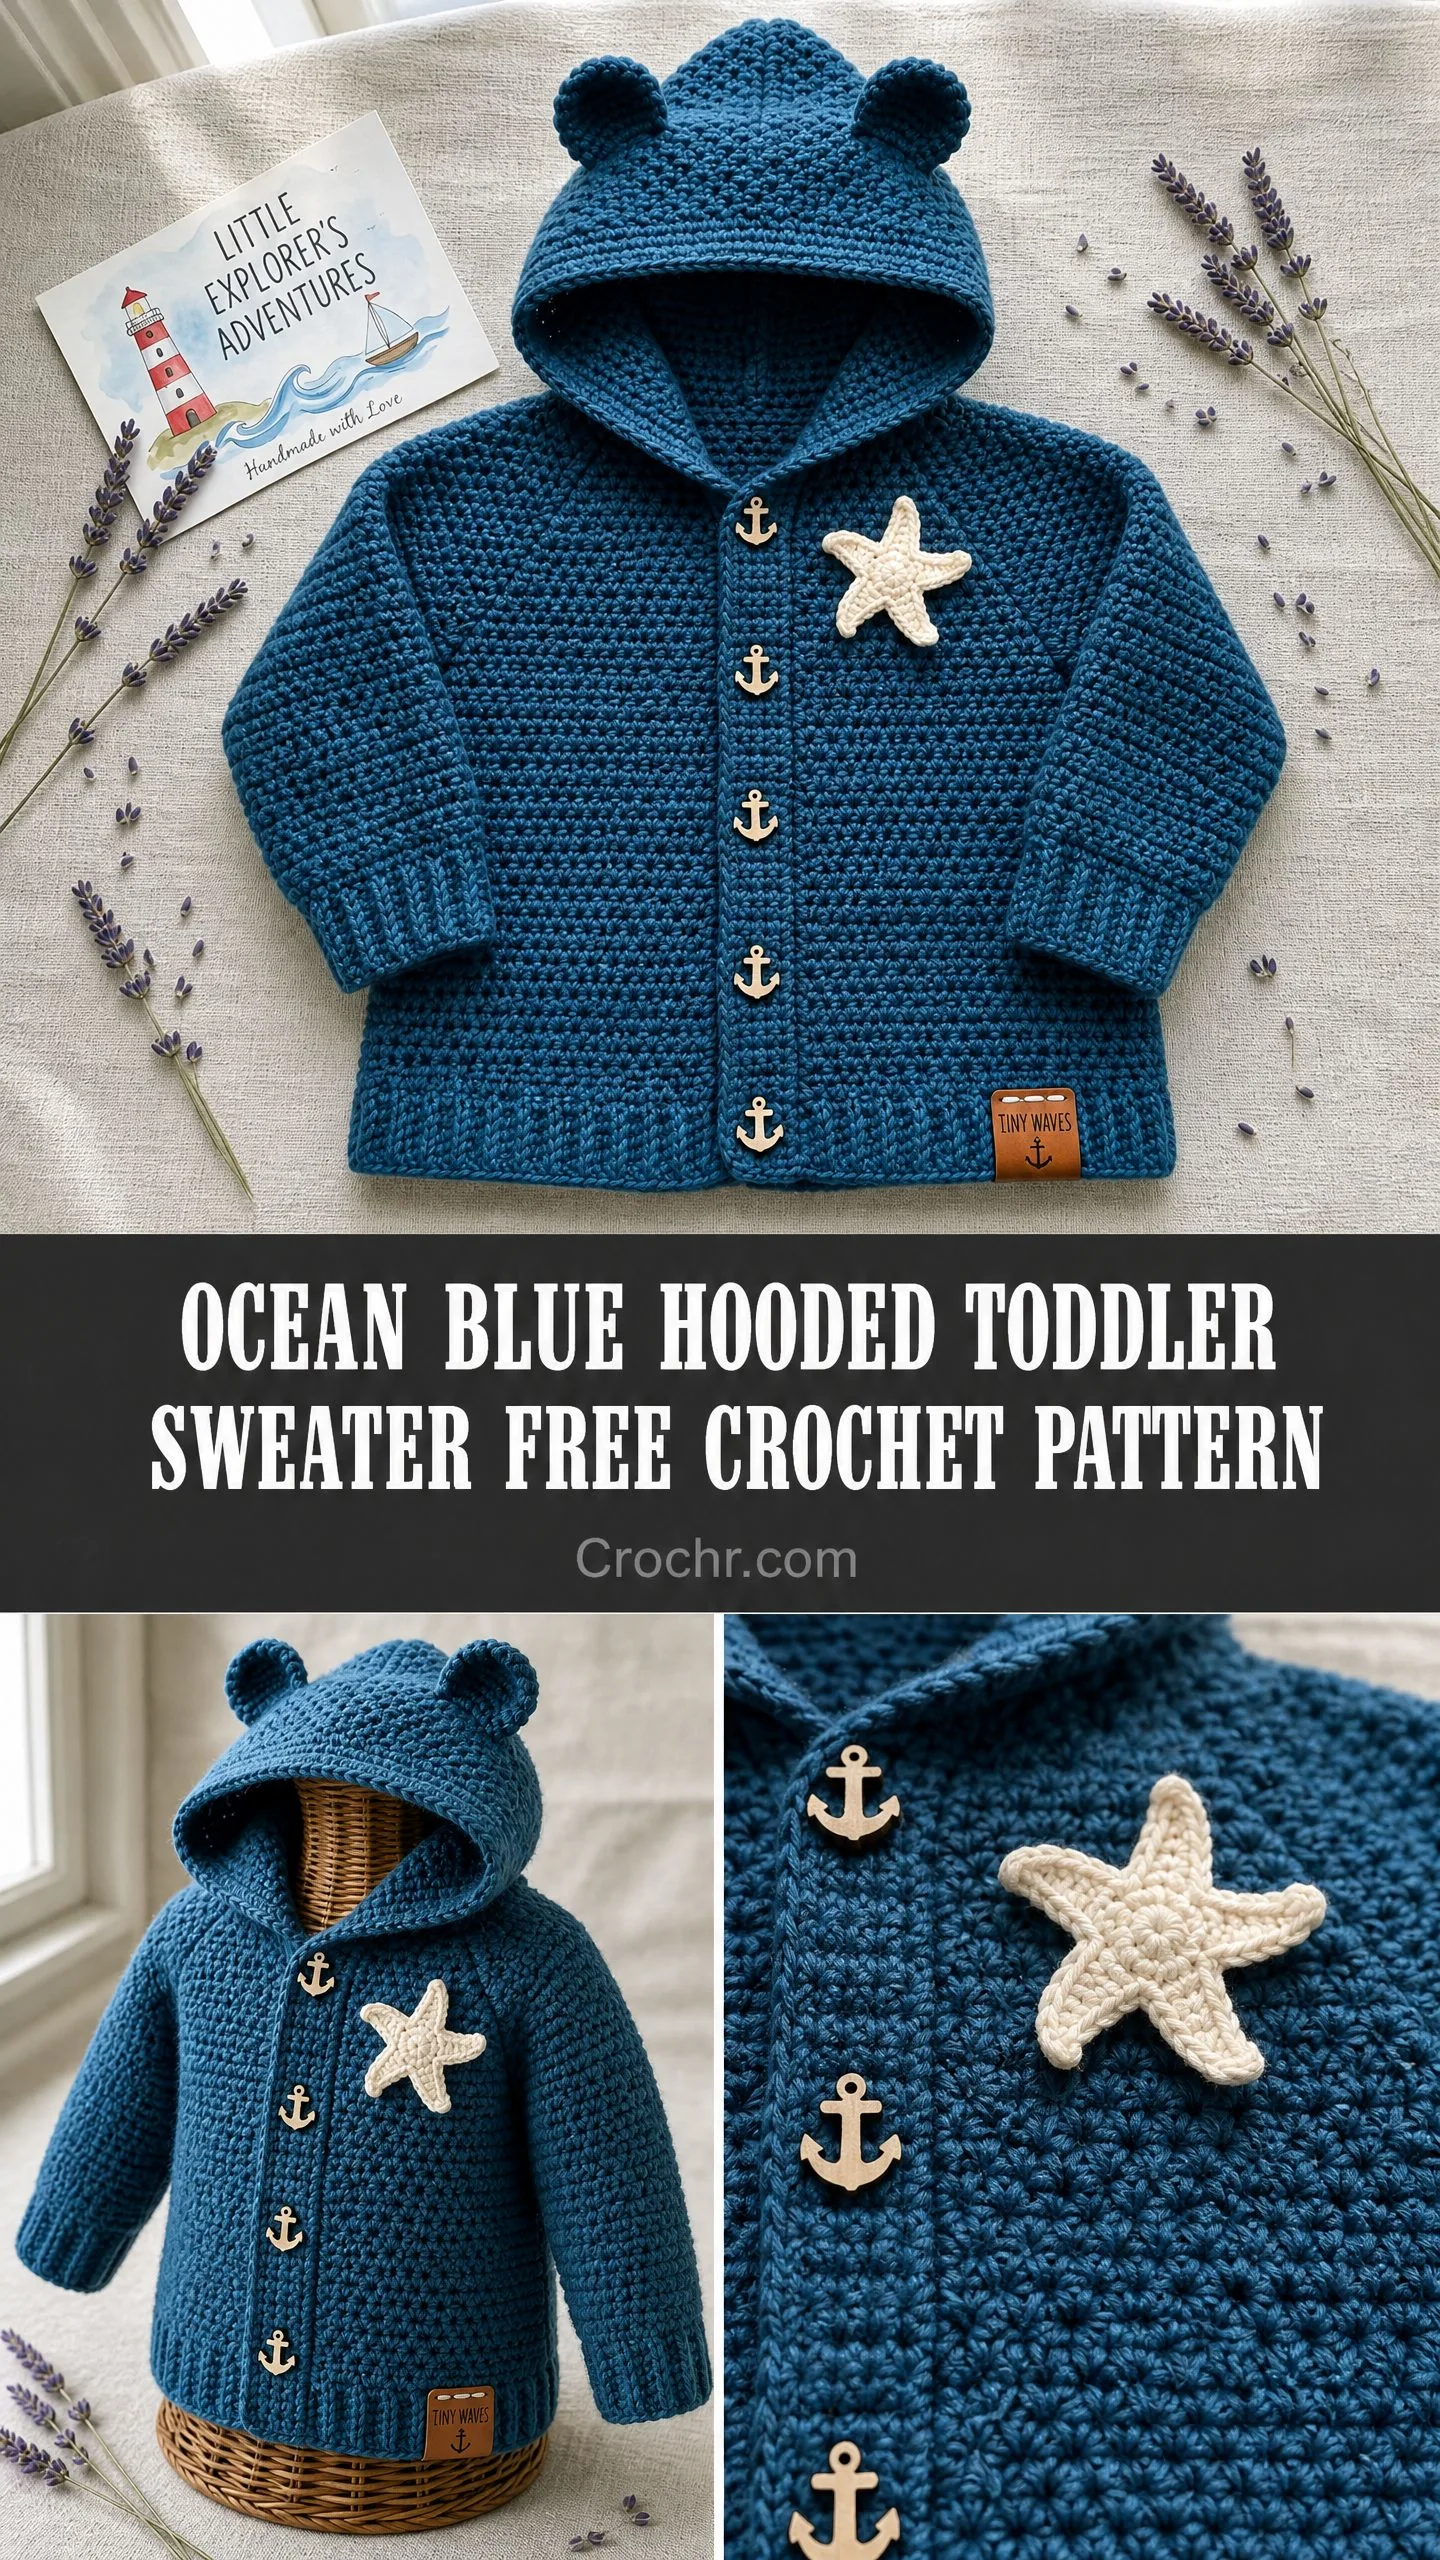
This ocean-themed cardigan hits all the right notes for a handmade baby gift. The dense single crochet (sc) fabric creates a cozy, warm layer perfect for chilly days. The oversized hood with those sweet little bear ears makes every toddler look absolutely adorable. And those anchor-shaped buttons down the front? Pure nautical charm.
The construction is smarter than it looks. You work from the top down, which means you can try the sweater on as you go and adjust the length. No complicated seaming of separate pieces. The sleeves get picked up right from the body and worked in the round. The hood attaches directly to the neckline. Everything flows together logically.
The finished sweater includes ribbed cuffs and hem for a polished look, a crocheted starfish applique on the chest, and that beautiful ocean teal-blue color that works for any little one. This is the kind of handmade piece that becomes an heirloom.
Skill Level and Time Estimate
I’d call this an intermediate pattern. The stitches themselves are beginner-friendly, but the raglan math, picking up stitches, and finishing details add complexity. If you’re a confident beginner who reads patterns carefully and doesn’t mind learning new techniques, you can absolutely do this.
Plan for approximately 12 to 18 hours of crochet time for the 18 to 24 month size. That’s spread across multiple sessions, of course. The body works up quickly once you get past the yoke. The sleeves and hood go faster than you’d expect.
Finished Measurements
This pattern is written for size 12 to 18 months with size 18 to 24 months in parentheses.
Chest circumference: 22 inches or 56 cm (24 inches or 61 cm)
Total length from back neck to hem: 13 inches or 33 cm (14 inches or 35.5 cm)
Sleeve length from underarm to cuff: 7 inches or 18 cm (8 inches or 20 cm)
Hood height from neckline to top seam: 8 inches or 20 cm (8.5 inches or 21.5 cm)
Hood width at opening: 11 inches or 28 cm (12 inches or 30.5 cm)
Materials You’ll Need
Yarn: Worsted weight, Category 4. You’ll need approximately 600 yards or 550 meters (700 yards or 640 meters for the larger size) in your main color. I’m using a gorgeous ocean teal-blue. You’ll also need about 30 yards or 27 meters of cream or off-white for the starfish applique.
Hooks: US size J or 6.0 mm for the main fabric. US size I or 5.5 mm for the ribbing sections on the cuffs and hem.
Notions:
Yarn Suggestions
Lion Brand Vanna’s Choice in Dusty Blue or Colonial Blue works beautifully. It’s 100% acrylic, machine washable, soft on baby skin, and holds stitch definition well.
Paintbox Yarns Simply DK held double in Sailor Blue gives you a slightly heathered look with excellent loft.
We Are Knitters The Wool in Petrol creates a luxurious heirloom finish if you want to splurge on 100% Peruvian wool.
Stick with smooth, non-splitty yarn. Fuzzy fibers will hide your stitches and make seaming harder.
Gauge
With your J or 6.0 mm hook in single crochet worked flat:
14 stitches = 4 inches or 10 cm
16 rows = 4 inches or 10 cm
Gauge matters for garments. Make a swatch at least 5 inches square, block it, then measure the center 4 inches. If your stitches are too small, go up a hook size. Too large, go down a hook size.
Abbreviations and Special Stitches
Let me define everything you’ll encounter:
sc = single crochet. Insert hook, yarn over, pull up a loop, yarn over, pull through both loops.
ch = chain. Yarn over, pull through loop on hook.
sl st = slip stitch. Insert hook, yarn over, pull through stitch and loop on hook in one motion.
inc = increase. Work 2 sc in the same stitch.
sc2tog = single crochet two together, a decrease. Insert hook in next stitch, pull up a loop (2 loops on hook). Insert hook in following stitch, pull up a loop (3 loops on hook). Yarn over and pull through all 3 loops. This turns 2 stitches into 1.
blo = back loop only. Instead of inserting your hook under both loops of a stitch, go under only the back loop (the one farthest from you). This creates ribbed texture.
RS = right side. The public-facing side of your work.
WS = wrong side. The inside of your garment.
pm = place marker
sm = slip marker (move it from left needle to right without working it)
MC = main color (your ocean blue)
CC = contrast color (cream for the starfish)
Important Pattern Notes Before You Begin
The turning chain (ch 1) at the start of each row does NOT count as a stitch. Skip it and work your first sc into the first actual stitch.
Raglan increases happen on right side rows only. You’ll alternate between increase rows and plain rows.
Four raglan markers divide your yoke into five sections: left front, left sleeve, back, right sleeve, right front. The two fronts are half the width of the back to allow for the button opening.
Stitch counts appear in parentheses at the end of each row, like this: (44 sc).
Step-by-Step Crochet Pattern Instructions
The Yoke
Foundation chain: With MC and J hook, ch 33 (37).
Row 1 (WS): Sc in 2nd ch from hook and in each ch across. Ch 1, turn. (32 sc) (36 sc)
Now place your raglan markers. For 32 stitches, divide like this: 4 left front, marker, 4 left sleeve, marker, 16 back, marker, 4 right sleeve, marker, 4 right front.
For 36 stitches: 5 left front, marker, 4 left sleeve, marker, 18 back, marker, 4 left sleeve, marker, 5 right front.
Row 2 (RS, Raglan Increase Row): Ch 1, turn. Sc in each st to 1 st before marker, inc, slip marker, inc. Repeat this at all 4 raglan points. Sc to end. Ch 1, turn. (40 sc) (44 sc)
Row 3 (WS, plain row): Ch 1, turn. Sc in each st across, slipping markers as you pass them. Ch 1, turn. (40 sc) (44 sc)
Continue alternating increase rows (RS) and plain rows (WS). Each RS row adds 8 stitches total.
Row 4 (RS): Raglan increase row. (48 sc) (52 sc)
Row 5 (WS): Plain row. (48 sc) (52 sc)
Row 6 (RS): Raglan increase row. (56 sc) (60 sc)
Row 7 (WS): Plain row. (56 sc) (60 sc)
Row 8 (RS): Raglan increase row. (64 sc) (68 sc)
Row 9 (WS): Plain row. (64 sc) (68 sc)
Row 10 (RS): Raglan increase row. (72 sc) (76 sc)
Row 11 (WS): Plain row. (72 sc) (76 sc)
Row 12 (RS): Raglan increase row. (80 sc) (84 sc)
Row 13 (WS): Plain row. (80 sc) (84 sc)
Row 14 (RS): Raglan increase row. (88 sc) (92 sc)
Row 15 (WS): Plain row. (88 sc) (92 sc)
Row 16 (RS): Raglan increase row. (96 sc) (100 sc)
Row 17 (WS): Plain row. (96 sc) (100 sc)
Size 12 to 18 months stops here.
Size 18 to 24 months continues:
Row 18 (RS): Raglan increase row. (108 sc)
Row 19 (WS): Plain row. (108 sc)
Yoke checkpoint: Your piece measured flat from center back neck to the base of the yoke should be approximately 4.5 inches or 11.5 cm (5 inches or 12.7 cm).
The Body
Now you’ll separate the sleeves from the body.
Separation Row (RS): Ch 1, turn. Sc across 12 (14) left front sts. Ch 4 to bridge the underarm gap. Skip 20 (22) left sleeve sts (put these on a stitch holder or scrap yarn). Sc across 32 (36) back sts. Ch 4. Skip 20 (22) right sleeve sts. Sc across 12 (14) right front sts. Ch 1, turn.
Body stitch count: 12 + 4 + 32 + 4 + 12 = 64 sc (72 sc for larger size)
Row 1 of Body (WS): Sc in each st and each ch across. Ch 1, turn. (64 sc) (72 sc)
Rows 2 through 32 (34): Work even in sc. Ch 1, turn at end of each row. (64 sc) (72 sc)
Hem Ribbing
Switch to your smaller hook (I or 5.5 mm).
Rows 1 through 6: Ch 1, turn. Work blo sc in each st across. (64 sc) (72 sc)
Fasten off and weave in ends.
Sleeves (Make 2)
Return your held sleeve stitches to the hook. Attach MC at center of the underarm chain bridge.
Setup Round: With J hook and RS facing, join MC with sl st at center of underarm chain. Sc 2 sts across remaining half of underarm chain. Sc across all 20 (22) held sleeve sts. Sc 2 sts across remaining half of underarm chain. Join with sl st to first sc. Place marker. (24 sc) (26 sc)
Sleeves are now worked in the round. Do not turn.
Rounds 1 through 4: Sc in each st around. (24 sc) (26 sc)
Decrease Round 1: Sc2tog, sc to last 2 sts, sc2tog. (22 sc) (24 sc)
Rounds 5 through 8: Sc in each st around. (22 sc) (24 sc)
Decrease Round 2: Sc2tog, sc to last 2 sts, sc2tog. (20 sc) (22 sc)
Rounds 9 through 14 (9 through 16): Sc in each st around. (20 sc) (22 sc)
Decrease Round 3: Sc2tog, sc to last 2 sts, sc2tog. (18 sc) (20 sc)
Rounds 15 through 20 (17 through 24): Work even in sc. (18 sc) (20 sc)
Sleeve Cuff Ribbing
Switch to smaller hook (I or 5.5 mm).
Rounds 1 through 8: Work blo sc in each st around. (18 sc) (20 sc)
Sl st to close. Fasten off. Repeat for second sleeve.
Button Bands
Right Front Buttonhole Band: With RS facing and J hook, join MC at lower right front corner. Work sc evenly up the right front edge, placing approximately 2 sc per every 3 rows. (approximately 36 sc) (38 sc)
Band Row 1 (RS): Sc in each st across. Ch 1, turn. (36 sc) (38 sc)
Band Row 2 (WS, Buttonhole Row): Sc in first 2 (3) sts. Ch 2, sk 2 sts, sc in next 6 sts repeat 4 times. Ch 2, sk 2 sts, sc in last 2 (3) sts. Ch 1, turn.
Band Row 3 (RS): Sc across, working 2 sc into each ch-2 sp. Ch 1, turn. (36 sc) (38 sc)
Band Row 4 (WS): Sc in each st across. Fasten off. (36 sc) (38 sc)
Left Front Button Band: With RS facing, join MC at upper left front corner. Work 4 rows of sc evenly down the left front edge. No buttonholes. Fasten off.
The Hood
Neckline Pickup: With RS facing and J hook, join MC at upper right front corner. Work sc evenly across the entire neckline edge. (32 sc) (36 sc)
Foundation Row (RS): Sc across all sts. Ch 1, turn. (32 sc) (36 sc)
Rows 1 through 4: Work even in sc. Ch 1, turn. (32 sc) (36 sc)
Row 5 (RS): Sc 14 (16), inc, sc 2, inc, sc 14 (16). Ch 1, turn. (34 sc) (38 sc)
Row 6 (WS): Work even. Ch 1, turn.
Row 7 (RS): Sc 15 (17), inc, sc 2, inc, sc 15 (17). Ch 1, turn. (36 sc) (40 sc)
Row 8 (WS): Work even. Ch 1, turn.
Row 9 (RS): Sc 16 (18), inc, sc 2, inc, sc 16 (18). Ch 1, turn. (38 sc) (42 sc)
Row 10 (WS): Work even. Ch 1, turn.
Row 11 (RS): Sc 17 (19), inc, sc 2, inc, sc 17 (19). Ch 1, turn. (40 sc) (44 sc)
Row 12 (WS): Work even. Ch 1, turn.
Row 13 (RS): Sc 18 (20), inc, sc 2, inc, sc 18 (20). Ch 1, turn. (42 sc) (46 sc)
Row 14 (WS): Work even. Ch 1, turn.
Row 15 (RS): Sc 19 (21), inc, sc 2, inc, sc 19 (21). Ch 1, turn. (44 sc) (48 sc)
Row 16 (WS): Work even. Ch 1, turn.
Work even in sc for 12 more rows (14 more rows for larger size). (44 sc) (48 sc)
Hood Top Seam: Fold the hood in half so the short side edges meet. Seam the top edge closed using whip stitch or slip stitch through both layers.
Bear Ears (Make 2)
With MC and J hook, make a magic ring.
Round 1: Work 6 sc into magic ring. Pull ring closed. Work in a continuous spiral. (6 sc)
Round 2: Inc in each st around. (12 sc)
Round 3: Sc 1, inc 6 times. (18 sc)
Round 4: Sc 2, inc 6 times. (24 sc)
Sl st to close. Fasten off, leaving a long tail.
Pinch the bottom quarter together to form a cup shape. Stitch the pinched base closed. Sew both ears to the top corners of the hood, approximately 2 inches apart.
Starfish Applique
With CC and J hook, make a magic ring.
Round 1: Ch 1, work 10 sc into magic ring. Pull closed. Join with sl st. (10 sc)
For each arm (make 5): Use 2 adjacent stitches from the center ring as the base.
Row 1: Join yarn in first base st. Ch 1. Sc in same st. Sc in next st. Ch 1, turn. (2 sc)
Row 2: Inc in first st. Inc in second st. Ch 1, turn. (4 sc)
Row 3: Sc in each st. Ch 1, turn. (4 sc)
Row 4: Sc2tog, sc2tog. Ch 1, turn. (2 sc)
Row 5: Sc2tog. (1 sc)
Fasten off. Repeat for remaining 4 arms. Sew the starfish to the upper left chest, about 2.5 inches below the neckline.
Finishing Your Hooded Toddler Sweater
Weave in all remaining ends. Sew the 5 anchor buttons opposite the buttonholes on the left front band. Attach your optional leather label to the lower right corner of the hem.
Blocking: Soak the finished sweater in cool water for 20 minutes. Roll in a towel to remove excess water. Pin to finished measurements and let dry completely.
Care Instructions
For acrylic yarn: Machine wash gentle cycle in cold water. Lay flat to dry. No high heat in the dryer.
For wool: Hand wash in cool water with wool wash. Press out water gently. Lay flat to dry. Never wring.
Thank you so much for choosing this pattern for your little one or for a special gift. I truly hope you enjoy every stitch of this cozy hooded sweater. If you make one, I would absolutely love to see it! Tag me on Instagram or share a photo in my Facebook group.
If this pattern caught your eye, go ahead and save it to your Pinterest boards so you can find it when you’re ready to cast on. And please drop a comment below if you make this sweater. I read every single one, and hearing about your projects makes my whole day.
You Might Also Like
- Sage Garden Granny Square Maxi Dress Free Crochet Pattern
- Coral Sunset Granny Square Tote Free Crochet Pattern
- Sunset Ombre Rose Bracelet Free Crochet Pattern
- Sunset Glow Sunburst Hobo Bag Free Crochet Pattern
