
You know that gorgeous mustard yellow skein you’ve been saving for the perfect project? This is it. Pull it out of your stash because this little pinafore dress is exactly the kind of heirloom piece that special yarn deserves.
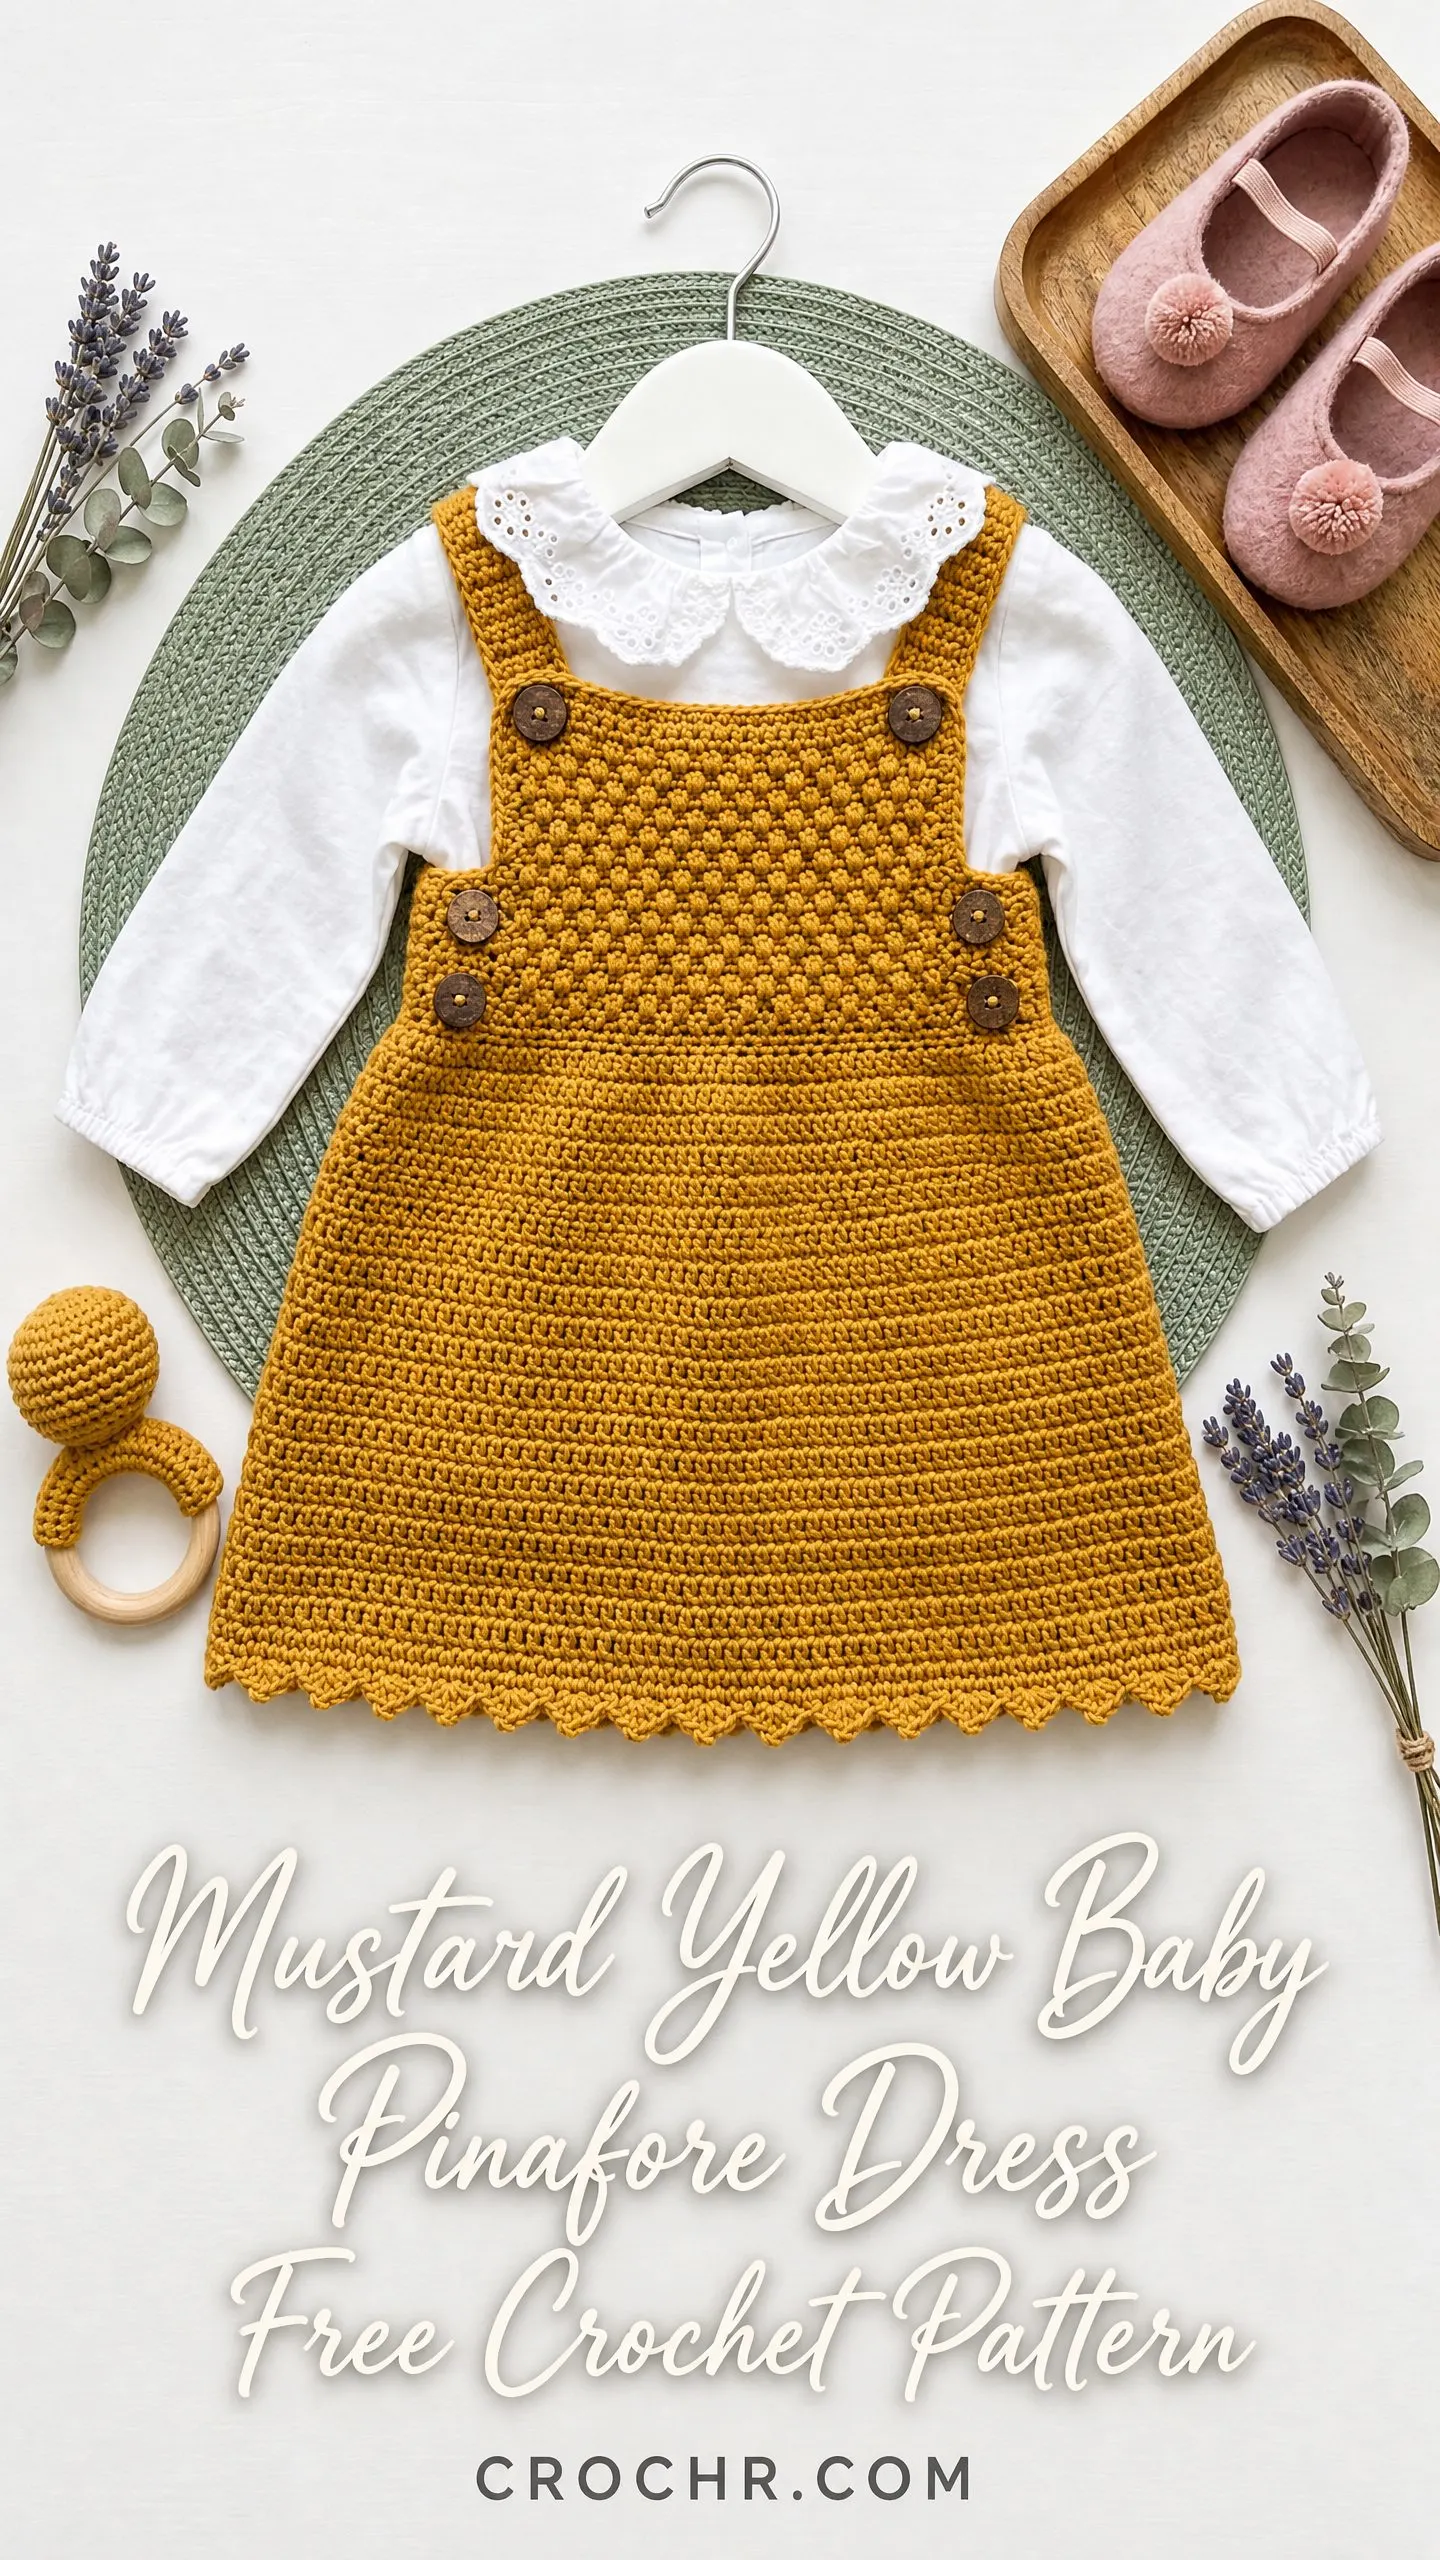
The construction here is genuinely interesting. You’ll work a textured bobble stitch bodice that gives the front all that beautiful dimensional detail, while the back stays smooth and comfortable against baby’s skin. The A-line skirt flares out with gradual increases, and the whole thing finishes with a sweet scallop hem that makes it look far more complicated than it actually is.
I’ll be honest with you. This pattern sits at an intermediate skill level. If you’ve never made a bobble stitch before, don’t panic. I’ll walk you through every single step. But if you’ve only ever made dishcloths, maybe bookmark this one and come back after you’ve tackled a couple more projects first.
About This Baby Pinafore Dress Crochet Pattern
This sweet pinafore dress fits babies 6 to 12 months old and measures approximately 18 inches around the chest. The total length from shoulder strap to hem runs about 13 inches. It’s designed to layer beautifully over a long sleeve blouse or onesie with a peter pan collar for that vintage, heirloom look.
The dress is worked flat in separate pieces. You’ll make a front bodice, a back bodice, and two skirt panels. Then you’ll seam everything together and add the straps. The straps attach permanently to the front and button onto the back, which means you can adjust the fit as baby grows.
The finished dress features:
Materials You’ll Need
Yarn: Worsted weight yarn, which is also called medium weight or CYCA category 4. You’ll need approximately 350 to 400 yards in mustard yellow.
Some yarn suggestions that work beautifully for this project:
Hook: US size G-6 / 4.0 mm crochet hook. Adjust if necessary to meet gauge.
Notions:
Gauge
17 single crochet stitches and 20 rows equals 4 inches, worked flat in single crochet, after blocking.
For the bobble section specifically, you’ll get about 16 stitches and 18 rows per 4 inches. Bobbles pull the fabric in slightly, so don’t tighten your tension in that section.
I cannot stress this enough. Gauge matters for garments. A half-stitch difference per inch will make your dress noticeably too big or too small. Make a swatch, wash it, block it, and measure it before you start. Your future self will thank you.
Abbreviations and Stitch Definitions
Let me walk you through every stitch you’ll use in this pattern.
ch = chain. Wrap yarn over hook and pull through the loop on your hook. This creates one chain stitch.
sl st = slip stitch. Insert hook into stitch, yarn over, pull through both the stitch and the loop on your hook in one motion.
sc = single crochet. Insert hook into stitch, yarn over and pull up a loop (2 loops on hook), yarn over and pull through both loops.
dc = double crochet. Yarn over, insert hook into stitch, yarn over and pull up a loop (3 loops on hook), yarn over and pull through 2 loops (2 loops remain), yarn over and pull through last 2 loops.
st(s) = stitch(es)
sk = skip
rep = repeat
RS = right side (the side that faces out when worn)
WS = wrong side (the side against baby’s skin)
inc = increase. Work 2 single crochet stitches into the same stitch.
sc2tog = single crochet decrease. Insert hook into next stitch, yarn over and pull up a loop (2 loops on hook). Insert hook into the following stitch, yarn over and pull up a loop (3 loops on hook). Yarn over and pull through all 3 loops. One decrease made.
t-ch = turning chain
yo = yarn over
Special Stitches
The Bobble Stitch (bo)
This stitch creates those beautiful textured bumps on the front bodice. Here’s exactly how to make one:
Step 1: Yarn over, insert hook into the indicated stitch.
Step 2: Yarn over and pull up a loop. You now have 3 loops on your hook.
Step 3: Yarn over and draw through 2 loops. You now have 2 loops remaining. This is one incomplete double crochet.
Step 4: Repeat Steps 1 through 3 four more times in the SAME stitch. You’ll now have 6 loops on your hook.
Step 5: Yarn over and draw through all 6 loops at once.
Step 6: Chain 1 to close and lock the bobble. This chain counts as a stitch in your row.
Important: Bobbles naturally form on the wrong side of your fabric and push toward the right side. Always start bobble rows from the right side so the bobbles appear on the outside of the dress.
Scallop Edging
This decorative edge finishes the bottom of the skirt. Work it like this:
Single crochet in the first stitch. Skip 2 stitches, work 5 double crochet into the next stitch, skip 2 stitches, single crochet in the next stitch. Repeat this pattern across the entire hem.
The scallop repeat uses 6 stitches, and your skirt will have exactly 60 stitches at the bottom, giving you 10 perfect scallops.
Pattern Notes Before You Begin
1. The front and back bodice pieces are worked separately from the bottom up. The skirt panels are worked separately from the top down. Everything gets seamed together at the end.
2. Turning chains: For all single crochet rows, chain 1 and turn. This chain 1 does NOT count as a stitch. Always work into the first stitch at the base of the turning chain.
3. Mark your right side with a stitch marker at the beginning. The RS is the side facing you when you work the bobble stitches.
4. Numbers in parentheses at the end of each row tell you how many stitches you should have. Count as you go.
5. Block your pieces before seaming. It makes everything easier to work with and gives you a much cleaner finish.
Front Bodice Instructions
The front bodice is worked from the bottom up. The bottom edge will eventually be seamed to the top of the skirt.
Foundation: Ch 41.
Row 1 (RS): Sc in 2nd ch from hook and in each ch across. Turn. (40 sc)
Row 2 (WS): Ch 1, turn. Sc in each st across. Turn. (40 sc)
Row 3 (RS, Bobble Row): Ch 1, turn. Sc in first st. Bo in next st, sc in next st repeat across to last st, sc in last st. Turn. (40 sts: 19 bobbles, 21 sc)
A quick note on counting. Each bobble with its closing chain occupies one stitch position. The sc between each bobble also counts as one stitch. Take a moment to count after your first bobble row.
Row 4 (WS): Ch 1, turn. Sc in each st across. Turn. (40 sc)
Row 5 (RS, Bobble Row): Ch 1, turn. Sc in first 2 sts. Bo in next st, sc in next st repeat across to last 2 sts, sc in last 2 sts. Turn. (40 sts)
Row 6 (WS): Ch 1, turn. Sc in each st across. Turn. (40 sc)
Row 7 (RS, Bobble Row): Repeat Row 3. (40 sts)
Row 8 (WS): Ch 1, turn. Sc in each st across. Turn. (40 sc)
Row 9 (RS, Bobble Row): Repeat Row 5. (40 sts)
Row 10 (WS): Ch 1, turn. Sc in each st across. Turn. (40 sc)
Row 11 (RS, Bobble Row): Repeat Row 3. (40 sts)
Row 12 (WS): Ch 1, turn. Sc in each st across. Turn. (40 sc)
Your front bodice body is complete. You should have 12 rows measuring approximately 2.5 inches tall. The bobble texture should be visible and prominent on the right side.
Front Bodice Armhole and Strap Shaping
Now you’ll shape the armholes and create the strap tabs. You’ll work each side separately.
Left Front Strap:
Row 13 (RS): Ch 1, turn. Sc across first 10 sts only. Leave remaining sts unworked. Turn. (10 sc)
Rows 14 through 18: Ch 1, turn. Sc in each st across. Turn. (10 sc each row)
Fasten off.
Right Front Strap:
With RS facing, skip the 20 center sts (this creates the neckline opening). Rejoin yarn in the 31st stitch.
Row 13 (RS): Ch 1, sc in same st as join and in each of the next 9 sts. Turn. (10 sc)
Rows 14 through 18: Ch 1, turn. Sc in each st across. Turn. (10 sc each row)
Fasten off.
Checkpoint: Your front bodice should measure approximately 5.5 inches tall and 9.5 inches wide. The center 20 stitches form the neckline opening.
Back Bodice Instructions
The back bodice matches the front in dimensions but uses plain single crochet throughout. No bobbles here, which keeps the back smooth and comfortable against baby’s skin.
Foundation: Ch 41.
Row 1 (RS): Sc in 2nd ch from hook and in each ch across. Turn. (40 sc)
Rows 2 through 12: Ch 1, turn. Sc in each st across. Turn. (40 sc each row)
Back Bodice Armhole, Strap Shaping, and Button Loops
Left Back Strap:
Row 13 (RS): Ch 1, turn. Sc across first 10 sts. Turn. (10 sc)
Rows 14 through 18: Ch 1, turn. Sc across. Turn. (10 sc each row)
Row 19 (Button Loop Row): Ch 1, turn. Sc in first 2 sts. Ch 2, sk 2 sts, sc in next 2 sts. Ch 2, sk 2 sts, sc in last 2 sts. Turn.
The ch-2 spaces form the button loops. You’ll have 2 button loops on each strap tab.
Row 20: Ch 1, turn. Sc in first 2 sts. 2 sc in ch-2 sp. Sc in next 2 sts. 2 sc in ch-2 sp. Sc in last 2 sts. Turn. (10 sc)
Fasten off.
Right Back Strap:
With RS facing, skip center 20 sts. Rejoin yarn in the 31st stitch.
Row 13: Ch 1, sc in same st and in next 9 sts. Turn. (10 sc)
Rows 14 through 18: Ch 1, turn. Sc across. Turn. (10 sc each row)
Row 19 (Button Loop Row): Ch 1, turn. Sc in first 2 sts. Ch 2, sk 2 sts. Sc in next 2 sts. Ch 2, sk 2 sts. Sc in last 2 sts. Turn.
Row 20: Ch 1, turn. Sc in first 2 sts. 2 sc in ch-2 sp. Sc in next 2 sts. 2 sc in ch-2 sp. Sc in last 2 sts. Turn. (10 sc)
Fasten off.
Skirt Front Panel Instructions
The skirt is worked from the top down. It starts with the same stitch count as the bodice and increases gradually to create the A-line silhouette.
Foundation: Ch 41.
Row 1 (RS): Sc in 2nd ch from hook and in each ch across. Turn. (40 sc)
Row 2: Ch 1, turn. Inc in first st, sc across to last st, inc in last st. Turn. (42 sc)
Row 3: Ch 1, turn. Sc across. Turn. (42 sc)
Row 4: Ch 1, turn. Inc in first st, sc across to last st, inc in last st. Turn. (44 sc)
Row 5: Ch 1, turn. Sc across. Turn. (44 sc)
Row 6: Ch 1, turn. Inc in first st, sc across to last st, inc in last st. Turn. (46 sc)
Row 7: Ch 1, turn. Sc across. Turn. (46 sc)
Row 8: Ch 1, turn. Inc in first st, sc across to last st, inc in last st. Turn. (48 sc)
Row 9: Ch 1, turn. Sc across. Turn. (48 sc)
Row 10: Ch 1, turn. Inc in first st, sc across to last st, inc in last st. Turn. (50 sc)
Row 11: Ch 1, turn. Sc across. Turn. (50 sc)
Row 12: Ch 1, turn. Inc in first st, sc across to last st, inc in last st. Turn. (52 sc)
Row 13: Ch 1, turn. Sc across. Turn. (52 sc)
Row 14: Ch 1, turn. Inc in first st, sc across to last st, inc in last st. Turn. (54 sc)
Row 15: Ch 1, turn. Sc across. Turn. (54 sc)
Row 16: Ch 1, turn. Inc in first st, sc across to last st, inc in last st. Turn. (56 sc)
Row 17: Ch 1, turn. Sc across. Turn. (56 sc)
Row 18: Ch 1, turn. Inc in first st, sc across to last st, inc in last st. Turn. (58 sc)
Row 19: Ch 1, turn. Sc across. Turn. (58 sc)
Row 20: Ch 1, turn. Inc in first st, sc across to last st, inc in last st. Turn. (60 sc)
Rows 21 through 28: Ch 1, turn. Sc across. Turn. (60 sc each row)
Do not fasten off. Leave a long tail for seaming.
Checkpoint: Your skirt front panel should measure approximately 7.5 inches from Row 1 to Row 28. The bottom edge should measure approximately 14 inches wide. The top edge should measure approximately 9.5 inches wide.
Skirt Back Panel Instructions
Work exactly as Skirt Front Panel, Rows 1 through 28. (60 sc at completion of Row 28)
Leave a long tail for seaming.
Scallop Hem Edging
Work the scallop edging along the bottom of BOTH skirt panels BEFORE seaming them together. This ensures the scallops curve outward evenly.
With RS facing, attach yarn at the right-hand corner of Row 28 (bottom edge of skirt panel).
Scallop Row: Sc in first st. Sk 2 sts, 5 dc in next st, sk 2 sts, sc in next st repeat across to end.
You’ll work 10 complete scallop repeats across your 60 stitches.
Fasten off. Weave in ends.
Repeat on the second skirt panel.
Assembly and Seaming
Block all four pieces before seaming. See the finishing section below for blocking instructions.
Step 1: With wrong sides together and right sides facing out, align the front bodice and back bodice at the side edges.
Step 2: Using a tapestry needle and yarn, whipstitch the side seams of the bodice pieces from the bottom edge up to the armhole. Leave the armhole open.
Step 3: Align the front skirt panel and back skirt panel at the side edges.
Step 4: Seam the skirt side seams from the top edge down to the bottom edge, stopping before the scallop edging. Leave the scallop edge unattached at the corners for a natural drape.
Step 5: Seam the bodice bottom edge to the skirt top edge. Align the 40-stitch bottom edge of the joined bodice with the 40-stitch top edge of the joined skirt. Using mattress stitch, join these edges together all the way around.
Straps (Make 2)
Foundation: Ch 7.
Row 1: Sc in 2nd ch from hook and in each ch across. Turn. (6 sc)
Rows 2 through 26: Ch 1, turn. Sc across. Turn. (6 sc each row)
Fasten off, leaving a long tail for attachment.
Your finished strap should measure approximately 5 inches long and 1.5 inches wide.
Attaching the Straps
Step 1: Place the front bodice with RS facing up.
Step 2: Align one end of a strap with the top edge of the left front strap tab, centered over the 10 stitches.
Step 3: Using the long tail and tapestry needle, whipstitch the bottom of the strap to the top edge of the strap tab. Sew securely.
Step 4: Sew 3 wooden buttons to the strap, evenly spaced along its length (approximately 1 inch, 2.5 inches, and 4 inches from the attached end).
Step 5: Button the strap through the corresponding button loops on the back bodice strap tab.
Repeat for the second strap.
The three-button placement allows you to adjust the dress length as baby grows. Such a thoughtful detail for a handmade gift.
Armhole Edging (Optional)
For a clean finish around the armholes, work one row of single crochet around each opening.
With RS facing, attach yarn at the bottom corner of the armhole opening. Work sc evenly around, placing approximately 1 sc for every row end. Join to first sc with a sl st. Fasten off and weave in ends.
Finishing and Blocking
Step 1: Weave in all loose ends securely, working each tail at least 1 inch in multiple directions.
Step 2: Wet block your finished dress. Submerge in lukewarm water and gently press out the excess. Do not wring or twist.
Step 3: Lay flat on a blocking mat or clean towel. Pin to shape, making sure the skirt hem lies flat and the scallop edging is spread open.
Step 4: Allow to dry completely, at least 12 to 24 hours.
Step 5: Sew on your wooden buttons using a double strand of matching thread or yarn.
Size Customization Tips
For a larger size (12 to 18 months, approximately 19 to 20 inch chest): Add 6 to 8 stitches to the foundation chains for both bodice pieces. Adjust skirt starting stitch count to match. Work skirt increases over 2 additional rows to reach 66 stitches (divisible by 6 for the scallop). Add 2 extra rows to the skirt for length.
For a smaller size (0 to 3 months, approximately 16 inch chest): Subtract 4 stitches from the foundation chains (making foundation ch 37, yielding 36 working stitches). Adjust skirt starting count to 36 and work increases to 54 stitches. Work 2 fewer skirt length rows.
General guidance: Every 2 additional stitches adds approximately 0.5 inches to the chest width. Every 5 additional rows adds approximately 1 inch of skirt length.
Care Instructions
For machine washable acrylic yarns: Machine wash cold on gentle cycle. Lay flat to dry. Never tumble dry or hang dry, as hanging will stretch crochet garments out of shape.
For wool or wool-blend yarns: Hand wash in cool water with a wool-safe detergent. Press gently in a towel. Lay flat to dry.
Store the dress folded flat, not on a hanger, to preserve its shape.
Final Thoughts on This Baby Pinafore Dress Crochet Pattern
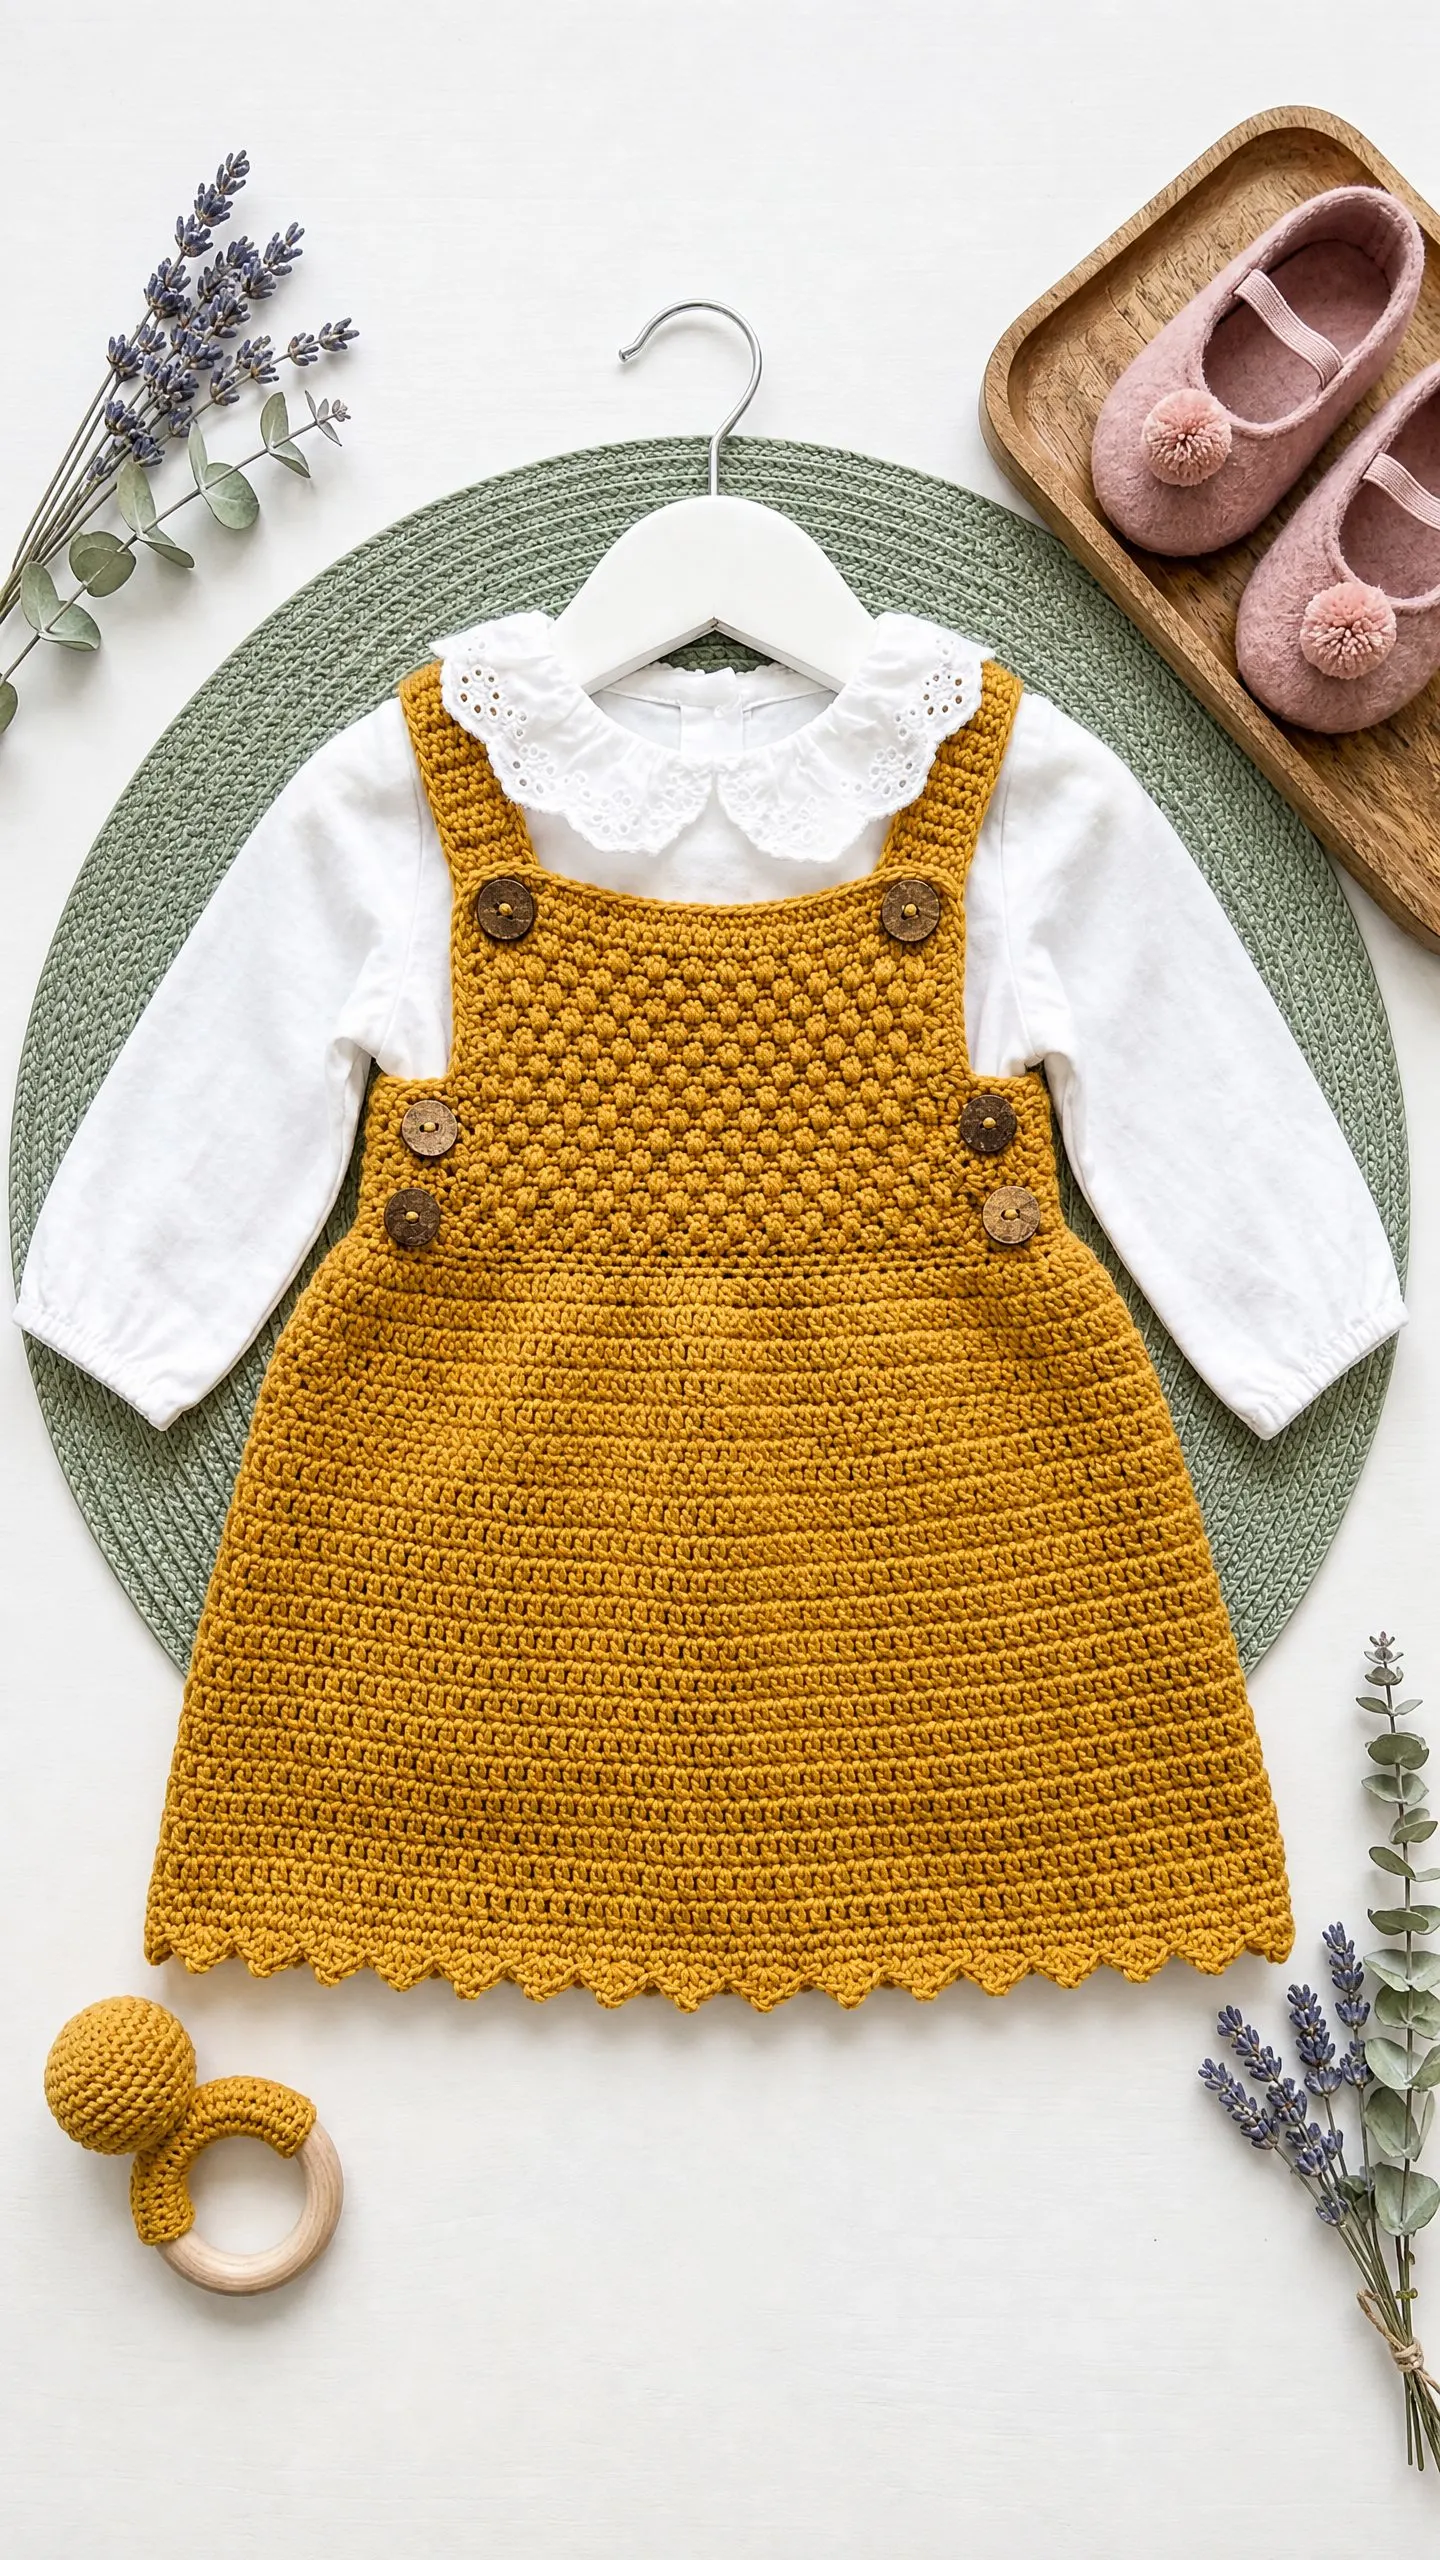
I absolutely love how this dress comes together. The bobble texture on the bodice adds so much visual interest without being overwhelming, and the smooth skirt lets the beautiful mustard color really shine. Those little wooden buttons give it such a sweet, handmade quality that you just can’t get from store-bought baby clothes.
This makes an incredible baby shower gift or a special outfit for photos. Pair it with a white blouse that has an eyelet collar and some soft pink mary janes, and you’ve got the most darling little outfit.
Thank you so much for choosing this pattern for your next project. I hope you enjoy every stitch.
If you love this mustard yellow baby pinafore dress pattern, go ahead and save it to your Pinterest boards so you can find it when you’re ready to cast on. And please leave a comment below when you finish yours. I would absolutely love to see how your dress turns out!
You Might Also Like
- Midnight Black Gothic Lace Choker Free Crochet Pattern
- Dusty Rose Gradient Crochet Mini Dress Free Pattern
- Black Cat Halloween Tote Bag Free Crochet Pattern
- Sunset Ombre Granny Square Bag Free Crochet Pattern
