I call this one the "Bennett Vest" after my grandmother, who kept a worn spiral notebook filled with cable patterns she never got around to making. When I finally sat down to create a cabled vest with serious texture and vintage appeal, I kept thinking about those sketches. The diamond lattice design took me three attempts to get right, but every frog and restart was worth it. This pattern is my love letter to cozy Sunday sweaters and the crafters who came before us.
About This Crochet Vest Pattern
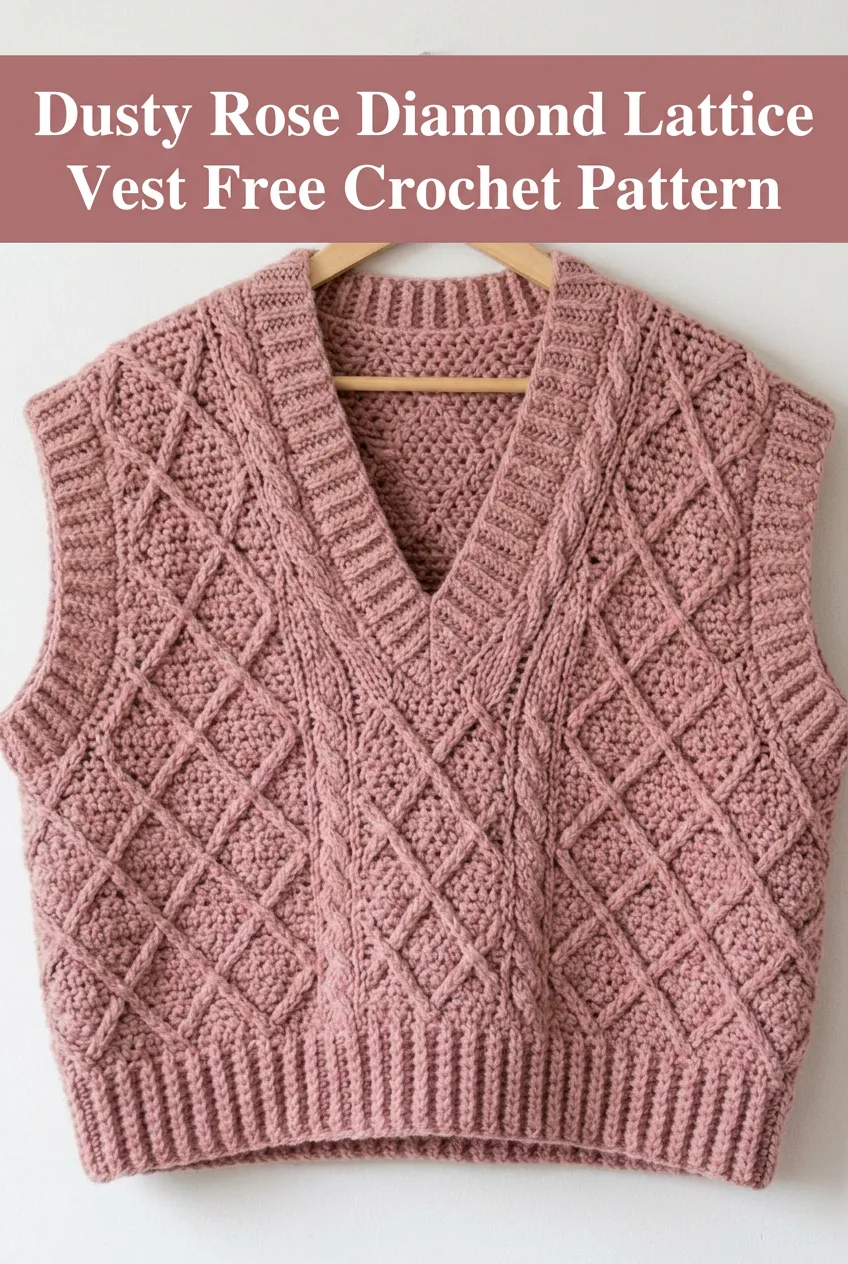
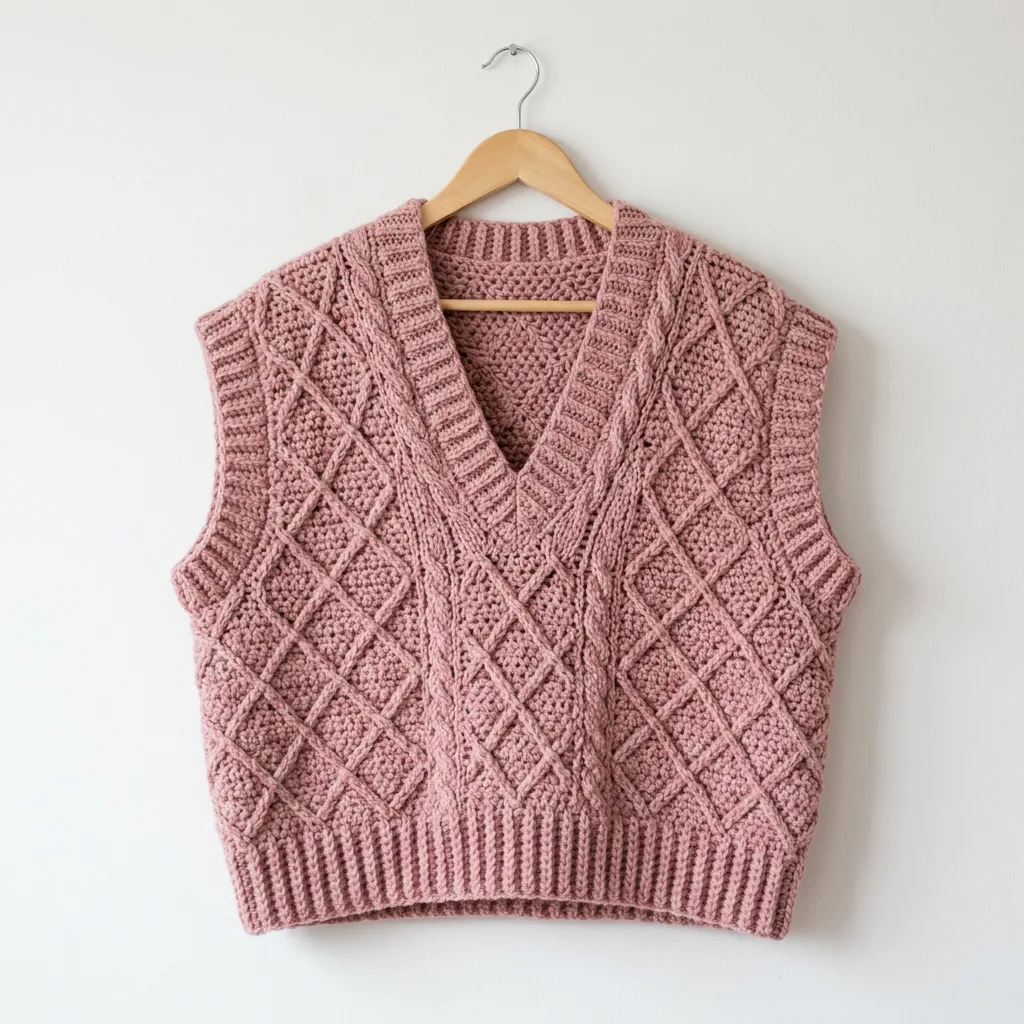
This V-neck crochet vest features an impressive diamond lattice texture across the body panels with a central cable detail down the front. The raised surface cables create a quilted, dimensional look that catches light beautifully. Ribbed edging at the hem, neckline, and armholes gives the garment structure and a polished finish.
The dusty rose colorway showcases the texture perfectly, but any solid or semi-solid yarn will let those cables shine. This is an intermediate level project. If you have made a basic sweater or worked post stitches before, you are ready for this vest.
What makes this pattern special:
Materials You Will Need
Gathering your supplies before you start makes the whole process smoother. Here is everything you need to complete this crochet vest pattern.
Yarn:
Hook:
Notions:
Gauge
Gauge matters for garments. Take the time to swatch.
Main pattern gauge: 16 stitches and 14 rows = 4 inches in half double crochet
Ribbing gauge: 18 stitches and 16 rows = 4 inches in single crochet ribbing
If your swatch is too small, go up a hook size. If too large, go down. Blocking will even things out but will not fix major gauge issues.
Finished Measurements
This pattern creates a cropped, relaxed fit vest. The sample measures approximately:
Adjust your starting chain for a smaller or larger size by adding or subtracting in multiples of 6 stitches to maintain the diamond pattern.
Abbreviations and Stitch Definitions
Let me walk you through every stitch used in this pattern. Understanding these before you begin will make the instructions much clearer.
Ch = Chain. Wrap yarn over hook and pull through the loop on your hook.
Sl st = Slip stitch. Insert hook, yarn over, pull through both the stitch and the loop on your hook in one motion.
Sc = Single crochet. Insert hook into stitch, yarn over, pull up a loop (2 loops on hook), yarn over, pull through both loops.
Hdc = Half double crochet. Yarn over, insert hook into stitch, yarn over, pull up a loop (3 loops on hook), yarn over, pull through all 3 loops.
FPdc = Front post double crochet. Yarn over, insert hook from front to back to front around the post of the stitch below, yarn over, pull up a loop, (yarn over, pull through 2 loops) twice. This creates raised texture on the front of your work.
BPdc = Back post double crochet. Yarn over, insert hook from back to front to back around the post of the stitch below, complete as a regular double crochet. This creates raised texture on the back of your work.
Dc = Double crochet. Yarn over, insert hook into stitch, yarn over, pull up a loop (3 loops on hook), yarn over, pull through 2 loops (2 loops remain), yarn over, pull through remaining 2 loops.
BLO = Back loop only. Work into only the back loop of the stitch, leaving the front loop unworked. This creates ribbed texture.
Skip = Skip over the indicated stitch without working into it.
Rep = Repeat.
Special Technique: Surface Crochet Cables
The diamond lattice effect comes from surface crochet worked after you complete the base fabric. Do not panic. It is simpler than it looks.
How surface crochet cables work:
1. Complete your base panel first
2. Using a separate strand of yarn, insert your hook from front to back through the fabric
3. Draw up a loop, then work slip stitches diagonally across the surface
4. The raised chain sits on top of the fabric, creating the cable appearance
Tips for clean cables:
Back Panel Pattern
The back panel is worked flat from bottom to top.
Foundation Row:
Ch 85. (Or adjust in multiples of 6 for different sizes.)
Row 1: Hdc in 3rd ch from hook and in each ch across. Turn. (83 hdc)
Row 2: Ch 2 (does not count as a stitch here and throughout), hdc in each st across. Turn. (83 hdc)
Rows 3 through 40: Rep Row 2. Your panel should measure approximately 11 inches from the foundation.
Armhole Shaping:
Row 41: Ch 2, skip first st, hdc in next 78 sts, skip 1 st, hdc in last st. Turn. (81 hdc)
Row 42: Ch 2, skip first st, hdc in next 76 sts, skip 1 st, hdc in last st. Turn. (79 hdc)
Rows 43 through 44: Rep Row 42 decreasing pattern. (75 hdc after Row 44)
Rows 45 through 62: Ch 2, hdc in each st across. Turn. (75 hdc)
Shoulder Shaping:
Row 63: Ch 2, hdc in first 22 sts. Fasten off. Skip center 31 sts. Join yarn in next st, ch 2, hdc in remaining 22 sts. Fasten off.
Adding the Diamond Lattice Surface Cables
Now comes the fun part. Working on the right side of your back panel, you will add the raised diamond lattice.
Diagonal Lines (Bottom Left to Top Right):
Starting at the bottom right corner, count 6 stitches in from the edge. Attach yarn with a slip stitch. Work surface slip stitches diagonally upward to the left, moving one stitch over and one row up with each slip stitch. Continue until you reach the armhole shaping.
Repeat this diagonal line every 6 stitches across the width of the panel.
Diagonal Lines (Bottom Right to Top Left):
Starting at the bottom left corner, work the same process in the opposite direction. These crossing diagonals create the diamond shapes.
Where the lines cross: Work one slip stitch through both previous cables to lock them together.
Front Panel Pattern (Make 2)
Each front panel is worked separately, then joined at the shoulders and sides.
Foundation Row:
Ch 43.
Row 1: Hdc in 3rd ch from hook and in each ch across. Turn. (41 hdc)
Rows 2 through 40: Ch 2, hdc in each st across. Turn. (41 hdc)
Armhole Shaping (Left Front):
Row 41: Ch 2, hdc in first 38 sts, skip 1 st, hdc in last st. Turn. (40 hdc)
Row 42: Ch 2, skip first st, hdc across. Turn. (39 hdc)
Continue decreasing at armhole edge only for 4 more rows. (35 hdc)
V-Neck Shaping (worked at the same time for rows 45 and beyond):
Beginning at Row 45, decrease 1 stitch at the neck edge every other row.
Row 45: Ch 2, hdc to last 2 sts, skip 1 st, hdc in last st. Turn. (34 hdc)
Row 46: Ch 2, hdc across. Turn. (34 hdc)
Continue this pattern until you have 22 stitches remaining for the shoulder. Work even until the front matches the back length to the shoulder.
Right Front: Work as a mirror image, reversing all shaping.
Adding Front Surface Cables:
Apply the diamond lattice surface crochet to each front panel following the same technique as the back. The center front features a vertical cable detail running from hem to neckline using front post double crochets worked in a twisted rope pattern.
Ribbed Edging
The ribbed edges give this vest its polished finish.
Bottom Ribbing:
Ch 12.
Row 1: Sc in 2nd ch from hook and in each ch across. Turn. (11 sc)
Row 2: Ch 1, sc BLO in each st across. Turn. (11 sc)
Rep Row 2 until the ribbing stretches comfortably across the bottom of the joined front and back panels. Slip stitch the short ends together to form a loop. Whipstitch to the bottom edge of the vest body.
Armhole Ribbing:
Ch 8.
Work as for bottom ribbing until the strip fits around the armhole opening. Join and attach.
Neckline Ribbing:
Ch 8.
Work as above, following the V-shape of the neckline. At the point of the V, decrease to create a clean angle by skipping one stitch at the center every other row.
Assembly
Time to put all your pieces together.
1. Block all pieces before seaming. Wet blocking works best for wool yarns.
2. Lay the back panel flat, right side up.
3. Place front panels on top, right sides together, matching shoulder edges.
4. Whipstitch or mattress stitch shoulder seams closed.
5. Whipstitch side seams from hem to armhole, leaving approximately 9 inches open for armholes.
6. Attach bottom ribbing to body.
7. Attach armhole ribbing to each armhole opening.
8. Attach neckline ribbing, starting at one shoulder, following the V down and up, ending at the opposite shoulder.
9. Weave in all ends. Block the finished garment gently.
Styling Your Diamond Lattice Vest
This vest layers beautifully over collared shirts, turtlenecks, and long sleeve tees. The cropped length pairs well with high-waisted pants or skirts. The dusty rose shade works for all seasons, but consider making additional versions in oatmeal, forest green, or charcoal gray for a complete collection.
Troubleshooting Common Issues
My cables look uneven: Check your tension. Surface crochet works best with a relaxed hand. You can also try using a hook one size smaller for the cable work.
The V-neck is too wide or too narrow: Adjust your decrease rate. Fewer decreases create a deeper V. More frequent decreases create a higher, narrower neckline.
My gauge is off: This affects fit significantly. Always swatch and block your swatch before measuring.
The armholes are too tight: Add one or two extra rows before beginning shoulder shaping on both front and back panels.

Final Thoughts on This Crochet Vest Pattern
This Bennett Vest crochet pattern combines classic cable techniques with modern cropped styling. The diamond lattice texture looks complex, but the step by step instructions break everything down into manageable pieces. Take your time with the surface cables. Once you understand the diagonal rhythm, you will find it almost meditative.
This vest makes an incredible gift for someone who appreciates handmade quality. The texture and construction show real skill, and the timeless design will stay in rotation for years. Whether you are making it for yourself or someone special, this is the kind of project that feels satisfying from the first chain to the final weave.
Thank you so much for choosing this pattern. Truly. I hope Bennett would have been proud of how her cable dreams finally came to life. If you make this vest, I would love nothing more than to see your finished piece. Tag me on Instagram or share a photo in my Facebook group. Seeing your work inspires me more than you know.
Save this Dusty Rose Diamond Lattice Vest pattern to your Pinterest boards so you can find it when you are ready to cast on. And if you make one, drop a comment below. I read every single one and would love to hear how your Bennett Vest turns out.
