
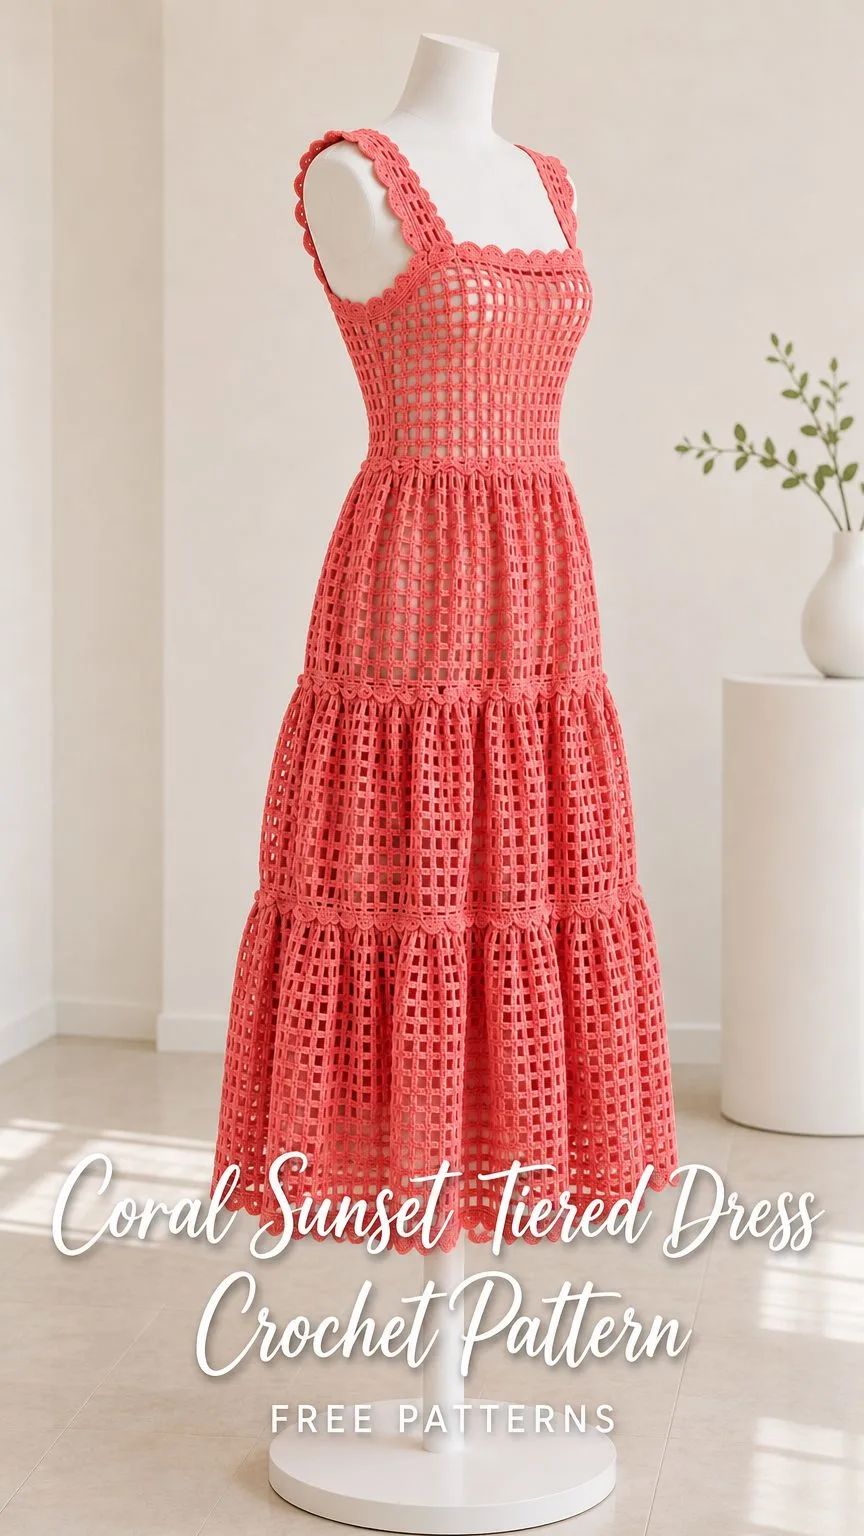
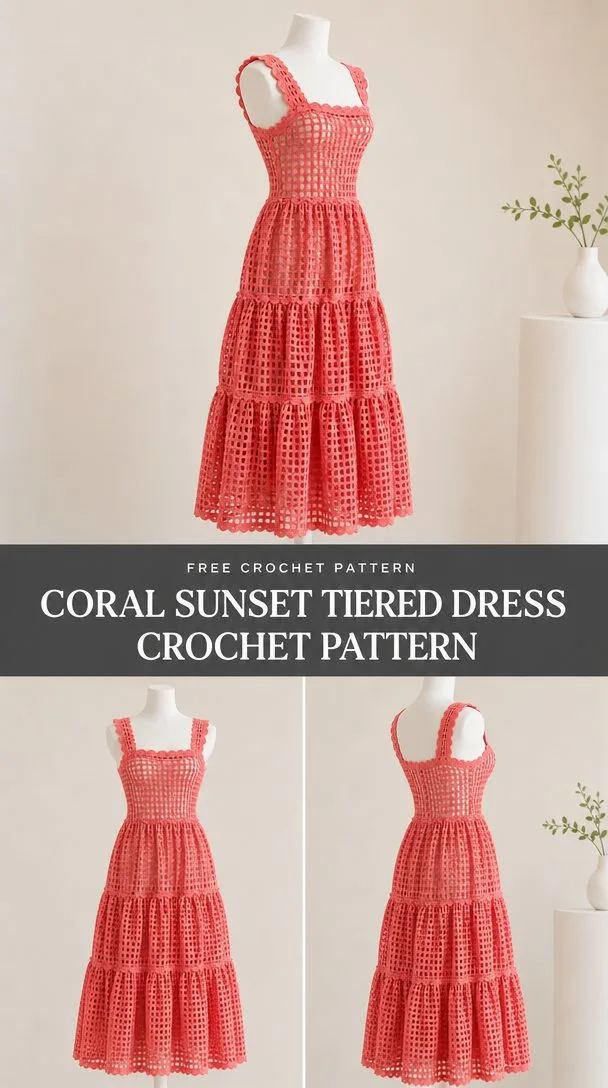
A coral pink lace dress with a fitted square mesh bodice and a gorgeous three-tier flared skirt. This sleeveless design features filet crochet throughout, wide straps with scalloped edges, and a romantic midi length that falls to approximately 115 cm from shoulder to hem.
The construction is straightforward. You’ll make two flat bodice panels, join them at the shoulders and sides, then work the tiered skirt downward from the waist. An invisible zipper at the left side makes getting in and out easy.
This pattern uses sport-weight cotton yarn in a beautiful coral pink shade. The open mesh fabric creates a breezy, summer-ready garment that pairs perfectly with a slip underneath.
About This Design
The Coral Sunset Tiered Dress combines classic filet crochet techniques with modern silhouette shaping. The bodice uses a simple square mesh construction, where each cell consists of one double crochet (dc) plus one chain-1 space. This creates the distinctive windowpane look visible in the finished piece.
What makes this dress special is the tiered skirt. Instead of a straight A-line shape, strategic increase rounds create three distinct gathered tiers. Each tier adds 36 units of width, producing that beautiful cascading effect you see in the reference images. The result is a dress with serious movement and visual interest.
The square neckline sits wide across the chest, and the straps are substantial enough to provide good support. A scalloped edging finishes the neckline, armholes, and hem with a delicate feminine touch.
This is an intermediate-level project. You should be comfortable with filet mesh, increasing within mesh fabric, working flat panels, and basic garment assembly including seaming and zipper installation.
Materials You’ll Need
Before you begin, gather these supplies. The pattern specifies exact quantities based on a worked size of 100 cm bust and 90 cm waist.
Yarn:
- Sport-weight smooth cotton, 160 m per 50 g
- Coral pink: 500 g / 1600 m total
Hooks:
- 3.5 mm crochet hook (or size needed to obtain gauge)
- 3 mm hook for edgings
Notions:
- Tapestry needle
- 12 stitch markers
- Measuring tape
- Blocking mat and pins
- One 20 cm invisible zipper in matching coral
- Matching sewing thread and hand-sewing needle
The yarn amount includes approximately 15% allowance. These are estimates rather than sample-measured usage, so having a bit extra on hand is wise for a garment this size.
Gauge Information
Getting gauge right is essential for a wearable garment. This pattern uses square mesh gauge:
8 cells and 8 rows = 10 x 10 cm
One cell equals 1 dc plus 1 ch-1 space.
To check your gauge, make a swatch at least 16 cells wide and 16 rows deep. Wash it, dry it flat, then measure the central 10 cm in both directions. If your swatch is too large, go down a hook size. If it’s too small, go up a hook size. Repeat until both dimensions match.
If your row gauge differs from the stated gauge, work to measurements rather than row counts throughout the pattern.
Abbreviations and Special Stitches
Here are all the abbreviations used in this pattern, with plain-English definitions:
- ch = chain: wrap yarn over hook and pull through the loop on hook
- sl st = slip stitch: insert hook, yarn over, pull through both loops at once
- sc = single crochet: insert hook, yarn over, pull up a loop (2 loops on hook), yarn over, pull through both loops
- dc = double crochet: yarn over, insert hook, yarn over, pull up a loop (3 loops), yarn over, pull through 2 loops, yarn over, pull through remaining 2 loops
- st(s) = stitch(es)
- sp = space
- sk = skip
- rep = repeat
- RS/WS = right side/wrong side
- yo = yarn over
Square Mesh Notation
This pattern uses a shorthand for mesh:
M(C) = Make C cells between C+1 dc posts
Foundation for M(C): Chain (2C+3). Work dc in 5th ch from hook, then [ch 1, sk 1 ch, dc in next ch] repeat (C-1) times.
Turning: Ch-4 counts as first dc plus first ch-1 space. Work dc in second post, then [ch 1, dc in next post] across.
Increase Row MI(C): Ch 4, dc in first post, [ch 1, dc in next post] C times, ch 1, dc again in last post. This results in C+2 cells.
Finished Measurements
This pattern is written for one specific size:
| Measurement | Finished Target |
|---|---|
| Bodice panel at waist | 45 cm / 36 units |
| Panel at bust | 50 cm / 40 units |
| Waist to armhole | 20 cm / 16 rows |
| Armhole depth | 20 cm / 16 rows |
| Shoulder seam | 12 units / 15 cm |
| Skirt length before border | 70 cm |
| Hem circumference | 150 cm / 120 units |
Worked fit: This dress fits a body bust of 90-94 cm and waist of 80-84 cm, with finished measurements of 100 cm bust and 90 cm waist. The skirt reaches 110 cm circumference at 10 cm below the waist.
To resize: Add or subtract 4 mesh units to each bodice panel for every 10 cm circumference change. Divide the neck opening in the same proportions and sketch a new schematic before beginning.
Pattern Notes
Read through the entire pattern before starting. A few important things to keep in mind:
- All measurements are taken after washing and blocking, not on the hook.
- Turn after every flat row.
- Ch 1 for sc/hdc and ch 2 for dc/post-stitch fabric do NOT count as stitches. Work the first stitch into the first stitch. Mesh turning chains are the stated exception.
- Joined rounds are not turned unless specified. End every joined round with sl st to the first stitch. The join does not count as a stitch.
- Square brackets [ ] group a repeat. Repeat counts and final counts refer only to the active piece.
- Do not crochet over abandoned neckline or armhole stitches.
- Right and left refer to the wearer’s right and left.
- Make and block a sample swatch before committing to the full yarn quantity.
Construction Overview
The dress is built in this order:
- Make the back bodice panel (waist to shoulder)
- Make the front bodice panel (waist to shoulder)
- Join shoulders and sides, leaving armholes open and a zipper opening at the left side
- Add the tiered skirt to the waist foundation edge, working downward
- Finish with edgings at the neck and hem
- Install the invisible zipper
This version is sleeveless. You will not make separate sleeve pieces.
Instructions
Back Bodice
Row 1: Make M(36). You now have 36 units.
Rows 2-4: Work selected mesh even. 36 units
Row 5: Work MI(36). 38 units
Rows 6-8: Work even. 38 units
Row 9: Work increase row again. 40 units
Rows 10-28: Work even. Rows 17-28 form the lower armhole zone. 40 units
Row 29 (First Shoulder): Work first 12 units only. Leave middle 16 and last 12 unworked. 12 units
Rows 30-32: Work first shoulder even, then fasten off. 12 units
Second Shoulder Rows 29-32: Rejoin yarn at outer edge of final 12 units. Work even for 4 rows and fasten off. 12 units
Front Bodice
Rows 1-16: Repeat back Rows 1-16. 40 units
Rows 17-22: Work even. 40 units
Row 23 (First Shoulder): Work first 12 units and turn. Leave middle 16 and opposite 12 unworked. 12 units
Rows 24-32: Work first shoulder even. Fasten off. 12 units
Second Shoulder Rows 23-32: Rejoin at opposite outer edge. Work the other 12 units even for 10 rows. Fasten off. 12 units
Tiered Skirt
Work the skirt after completing the bodice seams described in the Assembly section below.
Join yarn at the left waist opening on the lower foundation edge.
Important: Work skirt Rows 1-8 as FLAT ROWS, turning each row and leaving the left side open. This creates the lower half of the 20 cm side zipper opening. From Round 9 onward, join the work and continue in closed rounds.
For square mesh, pick up one cell for each original cell. The front and back each contribute 36 units. At the right seam, the shared post is counted once. The two left-edge posts remain separate until Round 9 joins them.
Round 1: Work evenly around the waist. 72 units
Round 2 (First Tier Increase): Make 2 units into every second unit (36 increases total). 108 units
Rounds 3-18: Work even. 108 units
Round 19 (Second Tier Increase): Make 2 units into every third unit (36 increases total). 144 units
Rounds 20-36: Work even. 144 units
Round 37 (Third Tier Increase): Make 2 units into every fourth unit (36 increases total). 180 units
Rounds 38-56: Work even. 180 units
Assembly
You’ll need coral pink yarn, your 3.5 mm hook, tapestry needle, and markers.
Seam Pass 1 (Shoulders): Using mattress stitch, seam each shoulder across the 12 matching units. You will have 2 seams, each 12 units wide.
Seam Pass 2 (Sides): Join the right side seam across Rows 1-16 (full length). Join the left side seam across Rows 9-16 only, leaving Rows 1-8 open for the zipper. This gives you 16 row ends joined on the right side and 8 row ends joined on the left side.
Seam Pass 3 (Zipper): After completing the skirt, pin the invisible zipper into the left opening (8 bodice row ends + 8 skirt row ends). Hand-backstitch each zipper tape to the wrong side, approximately 5 mm from the teeth. Reinforce both ends securely and test the opening before continuing.
Checkpoint: At this stage, your waist circumference should measure 90 cm and bust circumference should measure 100 cm. The neck and both armholes should lie flat. Try the bodice over your intended underlayer before adding the skirt to check the fit.
Edgings and Details
Switch to your 3 mm hook for all edgings.
Neck Edging
Neck Round 1: Work sc once into each post and once into each ch-1 space around the entire neckline. At side row ends, use 2 sc per square-mesh row. Record your total count as E. Adjust the rate only if needed to keep the edge lying flat. E sc
Neck Round 2: Sc in every sc around. E sc
Hem Edging
Hem Preparation Round 1: For square mesh, work 2 sc per cell around the entire hem. For the tiered version, this gives you 360 sc.
Hem Round 2: Sc in each sc. 360 sc
Checkpoint: The hem should remain flat with no tight ridges or accidental increases. The neck opening should pass comfortably over the head.
Finishing
You’ll need your yarn tails, tapestry needle, cool water, towels, and blocking pins. No hook is needed for this section.
Finishing Pass 1 (Weave Ends): Weave each tail through at least 5 cm of stitches, reverse direction, and weave again. You should have no loose tails remaining.
Finishing Pass 2 (Wet Block): Wash the dress gently in cool water. Squeeze out excess water using a towel (do not wring). Pin the dress to your blocking mat according to the measurements in the Construction Overview section. Do not stretch the neckline.
Final Checkpoint: After drying, your measurements should be: bust 100 cm, waist 90 cm, length approximately 115 cm. Let the dress hang for 24 hours over the intended underlayer and check that the hem hangs level before trimming any remaining ends.
Care Instructions
Follow your yarn label for specific guidance. Generally:
- Hand wash gently in cool water with mild detergent
- Do not wring
- Support the wet garment when lifting (it will be heavy)
- Reshape on a towel and dry flat away from direct heat
- Store folded to prevent stretching
This is an open mesh garment that requires an opaque layer underneath for everyday wear. Avoid wearing it near moving equipment or rough surfaces that could snag the delicate mesh.
Tips for Success
Before you start: Make a full gauge swatch and block it. Garment patterns are unforgiving when gauge is off, and you don’t want to discover fit problems after investing hours of work.
Keep track of your rows: Use a row counter or tally marks on paper. With 56 rounds in the skirt alone, it’s easy to lose count.
Try it on as you go: After completing the bodice and before starting the skirt, try the joined bodice over your slip or underlayer. This is your last good opportunity to adjust the fit.
Mark your increase rounds: When working the tiered skirt, place markers at the beginning of each increase round. This helps you stay oriented in the pattern.
The zipper is easier than you think: If you’ve never installed an invisible zipper by hand, watch a quick tutorial video first. Take your time and use small, even stitches. The result is worth the effort.
Who This Pattern Is For
This dress suits confident intermediate crocheters who have experience with:
- Filet mesh construction
- Flat panel garment assembly
- Basic seaming techniques
- Working from written instructions without charts
If you’ve made a few garments before and feel comfortable with shaping, you’ll handle this beautifully. The construction is logical, and the mesh fabric works up relatively quickly once you find your rhythm.
Styling Your Finished Dress
The open mesh of this dress requires a slip or fitted dress underneath. A simple cotton slip in white, nude, or matching coral all work beautifully. For a bolder look, try a contrasting color underneath, like navy or deep green.
This dress is perfect for summer weddings, garden parties, beach vacations, or any occasion where you want to feel special. The coral pink color is universally flattering and photographs beautifully.
Pair it with strappy sandals and minimal jewelry for a relaxed vibe, or dress it up with heeled mules and statement earrings.
Final Thoughts on the Coral Sunset Tiered Dress Crochet Pattern
This is a showstopper project. The combination of fitted bodice, tiered skirt, and delicate mesh creates a dress that looks far more complex than it actually is. The construction is methodical, the stitches are basic, and the result is absolutely stunning.
You’ll spend real time on this project, so settle in with your favorite podcast or audiobook and enjoy the process. The rhythm of filet mesh is meditative once you get going, and watching those tiers take shape is genuinely satisfying.
Thank you for choosing this pattern. If you make this dress, please share your photos on Instagram or Facebook. Seeing your finished projects is the best part, and your version might inspire someone else to pick up their hook and start.
If you love this design, save it to your Pinterest boards so you can find it when you’re ready to cast on. And if you do make it, drop a comment below. Your feedback and photos are always welcome here.
You Might Also Like
- Soft Lavender Dream Slipper Boots Free Crochet Pattern
- Sage Checker Garden Dress Crochet Pattern
- Lilac Dreams Floral Crochet Robe Free Pattern
- Ocean Blue Nautical Baby Romper Set Free Crochet Pattern