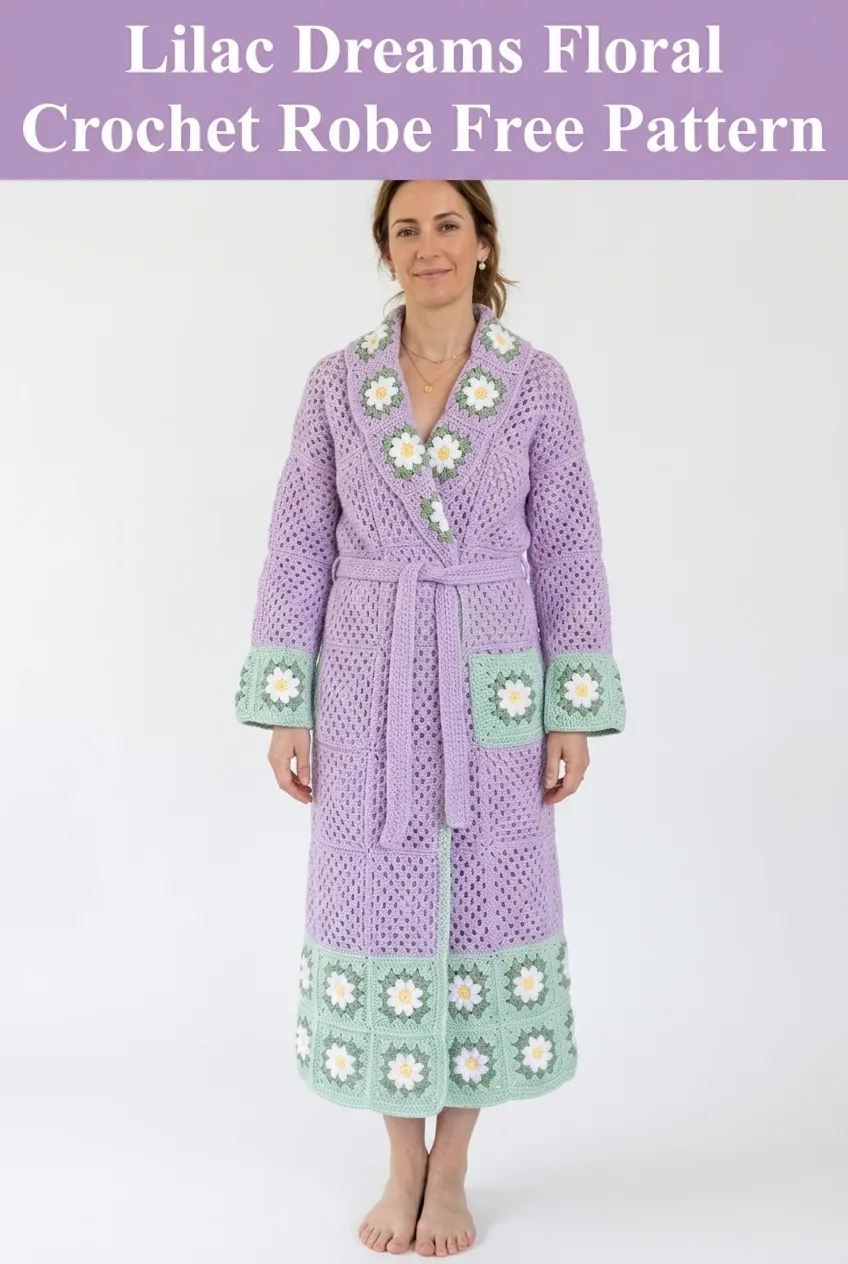
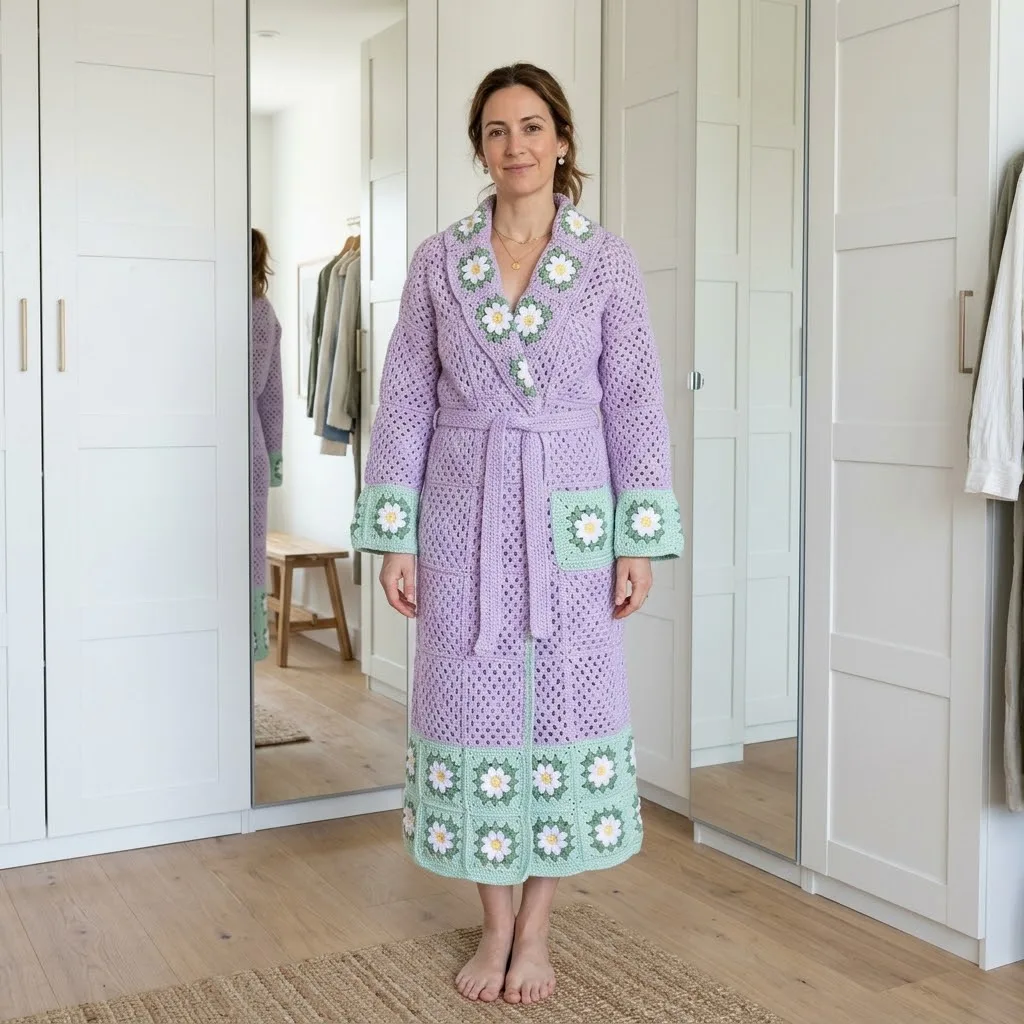
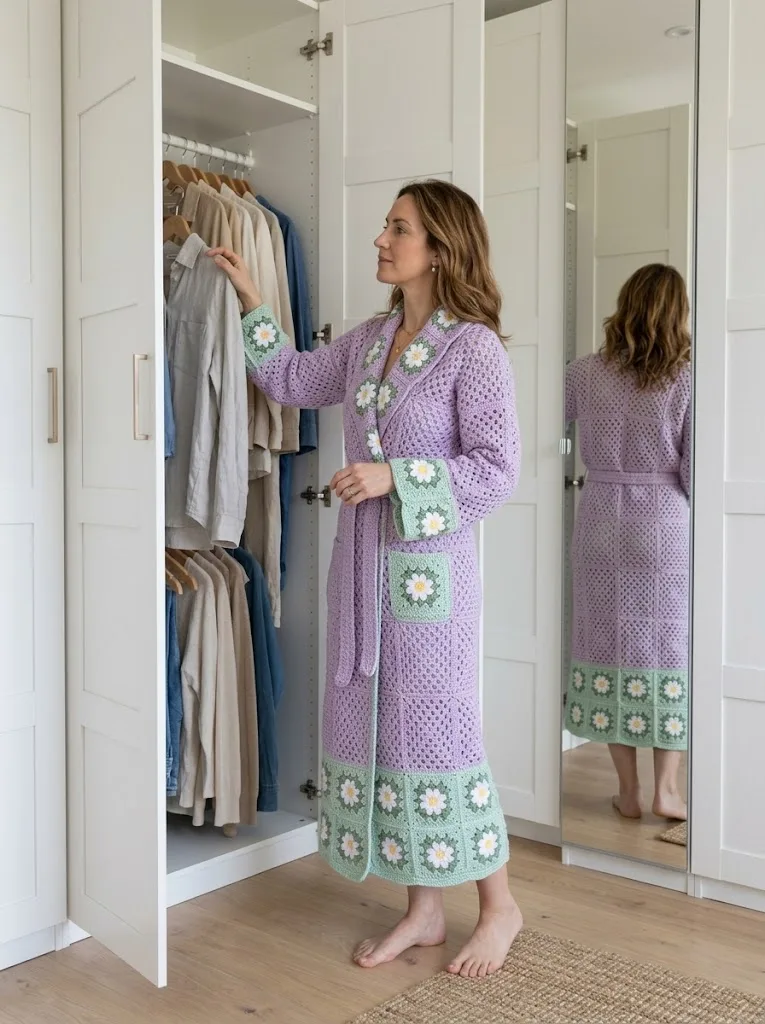
Looking for the perfect project to keep you cozy while lounging at home? This stunning crochet robe combines the classic granny square technique with a beautiful daisy flower motif, creating a garment that works up beautifully in worsted weight yarn. The construction uses basic stitches that intermediate crocheters will find approachable, and the finished robe makes an absolutely gorgeous handmade gift for someone special. Whether you’re making this for yourself or a loved one, the combination of soft lilac and mint green creates a fresh, springtime feel that you’ll reach for again and again.
About This Crochet Robe Pattern
This long, wrap-style crochet robe features an open mesh body with decorative granny square panels along the collar, cuffs, hem, and pockets. The daisy flower centers give each square a cheerful focal point. The overall construction combines panels worked flat and joined together with granny squares that are made separately and seamed into place.
Skill Level: Intermediate
This pattern requires comfort with basic crochet stitches, granny square construction, working in the round, color changes, and seaming multiple pieces together. If you’ve made a few granny square projects before and feel confident reading patterns, you’re ready for this robe.
Finished Measurements
The robe shown fits approximately a women’s size medium with a relaxed, oversized fit perfect for loungewear.
Approximate Dimensions:
Materials Needed
Yarn:
I recommend a soft acrylic or cotton blend for easy care and comfort against the skin. Look for yarn with good stitch definition so your daisy petals really pop.
Hook:
Notions:
Gauge
For mesh body panels: 14 stitches and 8 rows = 4 inches in double crochet mesh pattern
For granny squares: One completed daisy granny square = 4 x 4 inches
Always check your gauge before beginning. If your squares are too large, go down a hook size. If too small, go up a hook size. Gauge matters especially for garment fit.
Abbreviations and Stitch Definitions
Before we dive into the pattern, let me define every stitch and term you’ll encounter:
Special Techniques
Magic Ring (Adjustable Loop): This technique creates a closed center for working in the round. Make a loop with your yarn, insert hook, pull up a loop, chain to secure, then work your stitches over both the loop and the tail. Pull the tail tight to close the center completely. If you prefer, you can substitute ch 4 and sl st to join as an alternative.
Joining Granny Squares: This pattern uses a whip stitch join on the wrong side for a clean finish. You can also use a slip stitch join or single crochet join if you prefer a more decorative seam.
Pattern Instructions
Part 1: Daisy Granny Squares
You’ll need approximately 24 daisy granny squares total for the collar, cuffs, hem, and pockets. Make all squares before beginning the body panels so you can ensure consistent sizing.
Daisy Center (Color C, Yellow):
Round 1: Using Color C, make a magic ring. Ch 3 (counts as first dc throughout), work 11 dc into the ring. Sl st to top of ch-3 to join. Pull magic ring closed. (12 dc)
Fasten off Color C. This creates the sunny center of your daisy.
Daisy Petals (Color B, White):
Round 2: Join Color B in any st. *Ch 3, sl st in next st.* Rep from * around. You should have 12 petals total. Sl st to base of first ch-3. (12 petals)
Fasten off Color B. Don’t worry if your petals look a bit wonky at this stage. They’ll settle once you add the green border.
Granny Square Border (Color A, Mint Green):
Round 3: Join Color A in any ch-3 petal space. Ch 3, 2 dc in same space, ch 1, 3 dc in next petal space, ch 1. *3 dc in next petal space, ch 2 (this creates a corner), 3 dc in next petal space, ch 1, 3 dc in next petal space, ch 1.* Rep from * around, ending with ch 2, sl st to top of ch-3. (4 corners, 8 ch-1 spaces along sides)
Round 4: Sl st to corner ch-2 space. Ch 3, 2 dc, ch 2, 3 dc in same corner space. *Ch 1, 3 dc in next ch-1 space, ch 1, (3 dc, ch 2, 3 dc) in corner ch-2 space.* Rep from * around. Sl st to join. (4 corners with ch-2 spaces)
Fasten off Color A. Weave in ends. Your daisy granny square is complete!
Make 24 total squares. Set aside.
Part 2: Mesh Body Panels
The robe body uses a simple open mesh pattern that creates beautiful drape and breathability. This mesh consists of double crochet stitches separated by chain stitches.
Back Panel:
Using MC (Lilac), ch 78.
Row 1 (RS): Dc in 6th ch from hook (skipped ch counts as dc + ch 1), *ch 1, sk 1 ch, dc in next ch.* Rep from * across. Turn. (37 dc, 36 ch-1 spaces)
Row 2: Ch 4 (counts as dc + ch 1), sk first dc, dc in next dc, *ch 1, sk ch-1 space, dc in next dc.* Rep from * across. Turn. (37 dc, 36 ch-1 spaces)
Rep Row 2 until piece measures 34 inches from beginning, or desired length to underarm.
Shape Armholes:
Row 1: Sl st across first 6 sts (3 dc and their ch-sps), ch 4, continue in mesh pattern until 6 sts remain, turn, leaving remaining sts unworked. (31 dc)
Continue in mesh pattern for 14 more inches, or until piece measures 48 inches total.
Fasten off.
Left Front Panel:
Using MC, ch 42.
Row 1 (RS): Dc in 6th ch from hook, *ch 1, sk 1 ch, dc in next ch.* Rep from * across. Turn. (19 dc, 18 ch-1 spaces)
Continue in mesh pattern until piece measures 34 inches.
Shape Armhole (Left Side):
Next Row: Sl st across first 6 sts, ch 4, continue in mesh pattern to end. Turn. (16 dc)
Continue in mesh pattern for 14 more inches.
Fasten off.
Right Front Panel:
Work same as Left Front Panel, but shape armhole at opposite end. On armhole row, work in mesh pattern until 6 sts remain, turn, leaving remaining sts unworked.
Sleeve Panels (Make 2):
Using MC, ch 50.
Row 1: Dc in 6th ch from hook, *ch 1, sk 1 ch, dc in next ch.* Rep from * across. Turn. (23 dc)
Continue in mesh pattern for 20 inches.
Fasten off.
Part 3: Assembly
This is where your robe comes together! Take your time with seaming for professional results.
1. Shoulder Seams: Place back panel and front panels right sides together. Whip stitch or mattress stitch shoulders together, leaving center 10 inches open for neck.
2. Side Seams: Sew front panels to back panel along sides, from bottom edge up to armhole shaping.
3. Sleeve Seams: Fold each sleeve panel in half lengthwise, wrong sides facing out. Seam the long edge to create a tube. Turn right side out.
4. Attach Sleeves: Pin sleeves into armholes, easing to fit. Whip stitch in place.
Part 4: Granny Square Placement
Now for the fun part! Attach your beautiful daisy squares.
Collar: Arrange 7 daisy squares along the neckline and down the front opening. Whip stitch securely to the mesh fabric, taking care to catch the mesh stitches evenly.
Cuffs: Attach 2 squares around each sleeve cuff, joining them side by side first, then attaching the strip around the sleeve opening. (4 squares total for both cuffs)
Hem Border: Join 9 squares in a row. Attach this strip across the bottom front and back hem.
Pockets: Attach 2 squares side by side to create each pocket (2 squares per pocket, 4 squares total). Position pockets at hip level on front panels. Sew along three sides, leaving the top open.
Part 5: Belt
Using MC, ch 250.
Row 1: Sc in 2nd ch from hook and each ch across. Turn. (249 sc)
Rows 2 through 4: Ch 1, sc in each st across. Turn.
Fasten off. Weave in ends.
Part 6: Finishing
Edging (Optional):
For a polished look, work one round of single crochet around the entire front opening, neckline, and bottom hem using MC. This creates a neater edge and helps the granny squares blend seamlessly.
Blocking:
Wet block your finished robe by soaking in cool water, gently squeezing out excess moisture, and laying flat to dry. Pin granny squares to ensure they lay flat and corners are sharp. This step makes a noticeable difference in the final appearance.
Weave in all remaining ends thoroughly. For a garment that will be worn and washed, I recommend weaving each end through at least 2 inches of stitches in multiple directions.
Customization Ideas
This crochet robe pattern adapts beautifully to your personal style:
Size Adjustments: Add or remove mesh repeats to adjust width. Each repeat adds approximately 1/2 inch. For length, simply work more or fewer rows.
Color Variations: Try a bold jewel tone body with cream squares, or go monochromatic with matching squares and body for an elegant look.
Shorter Version: Stop the body at knee length for a lighter spring robe.
Skip the Pockets: If you prefer a sleeker silhouette, simply omit the pocket squares.
Care Instructions
Machine wash on gentle cycle with cold water. Lay flat to dry to maintain shape and prevent stretching. If needed, steam block after washing to refresh the drape.
Troubleshooting Tips
Squares don’t match in size? Check your tension. Tighter crocheters may need to go up a hook size. Work a few practice squares until you hit gauge consistently.
Mesh looks uneven? Make sure your chain stitches are relaxed. Tight chains create puckering. If this is a struggle for you, try going up half a hook size just for your chain rows.
Seaming feels overwhelming? Take breaks! This is a big project. Work on seaming one section at a time, and celebrate each completed join.
I really hope you love making this Lilac Dreams Floral Crochet Robe as much as I enjoyed designing it. There’s something so satisfying about watching all those daisy squares come together into a wearable garment. Thank you for choosing this pattern for your next project! If you make this robe, I’d absolutely love to see it. Tag me on Instagram or share a photo in our Facebook group.
If this crochet robe pattern is calling your name, go ahead and save it to your Pinterest boards so you can find it when you’re ready to start. And please drop a comment below if you make one! I love hearing how your projects turn out and seeing the color combinations you choose.
