
I call this one "Copper Fields" in my pattern notebook, and it has been waiting patiently for its moment since I first sketched it two autumns ago. The original was made for my sister’s farmhouse dining table, where she wanted something that felt handmade and warm but could survive Sunday dinners with her kids. She specifically asked for sunflowers, and I remember spending an entire afternoon swatching different petal techniques until I landed on this layered copper and mustard combination.
Get the Ad-Free PDF Pattern
You can find the free pattern below, or you can purchase the ad-free printable PDF from my shop.
Get the Printable PDF →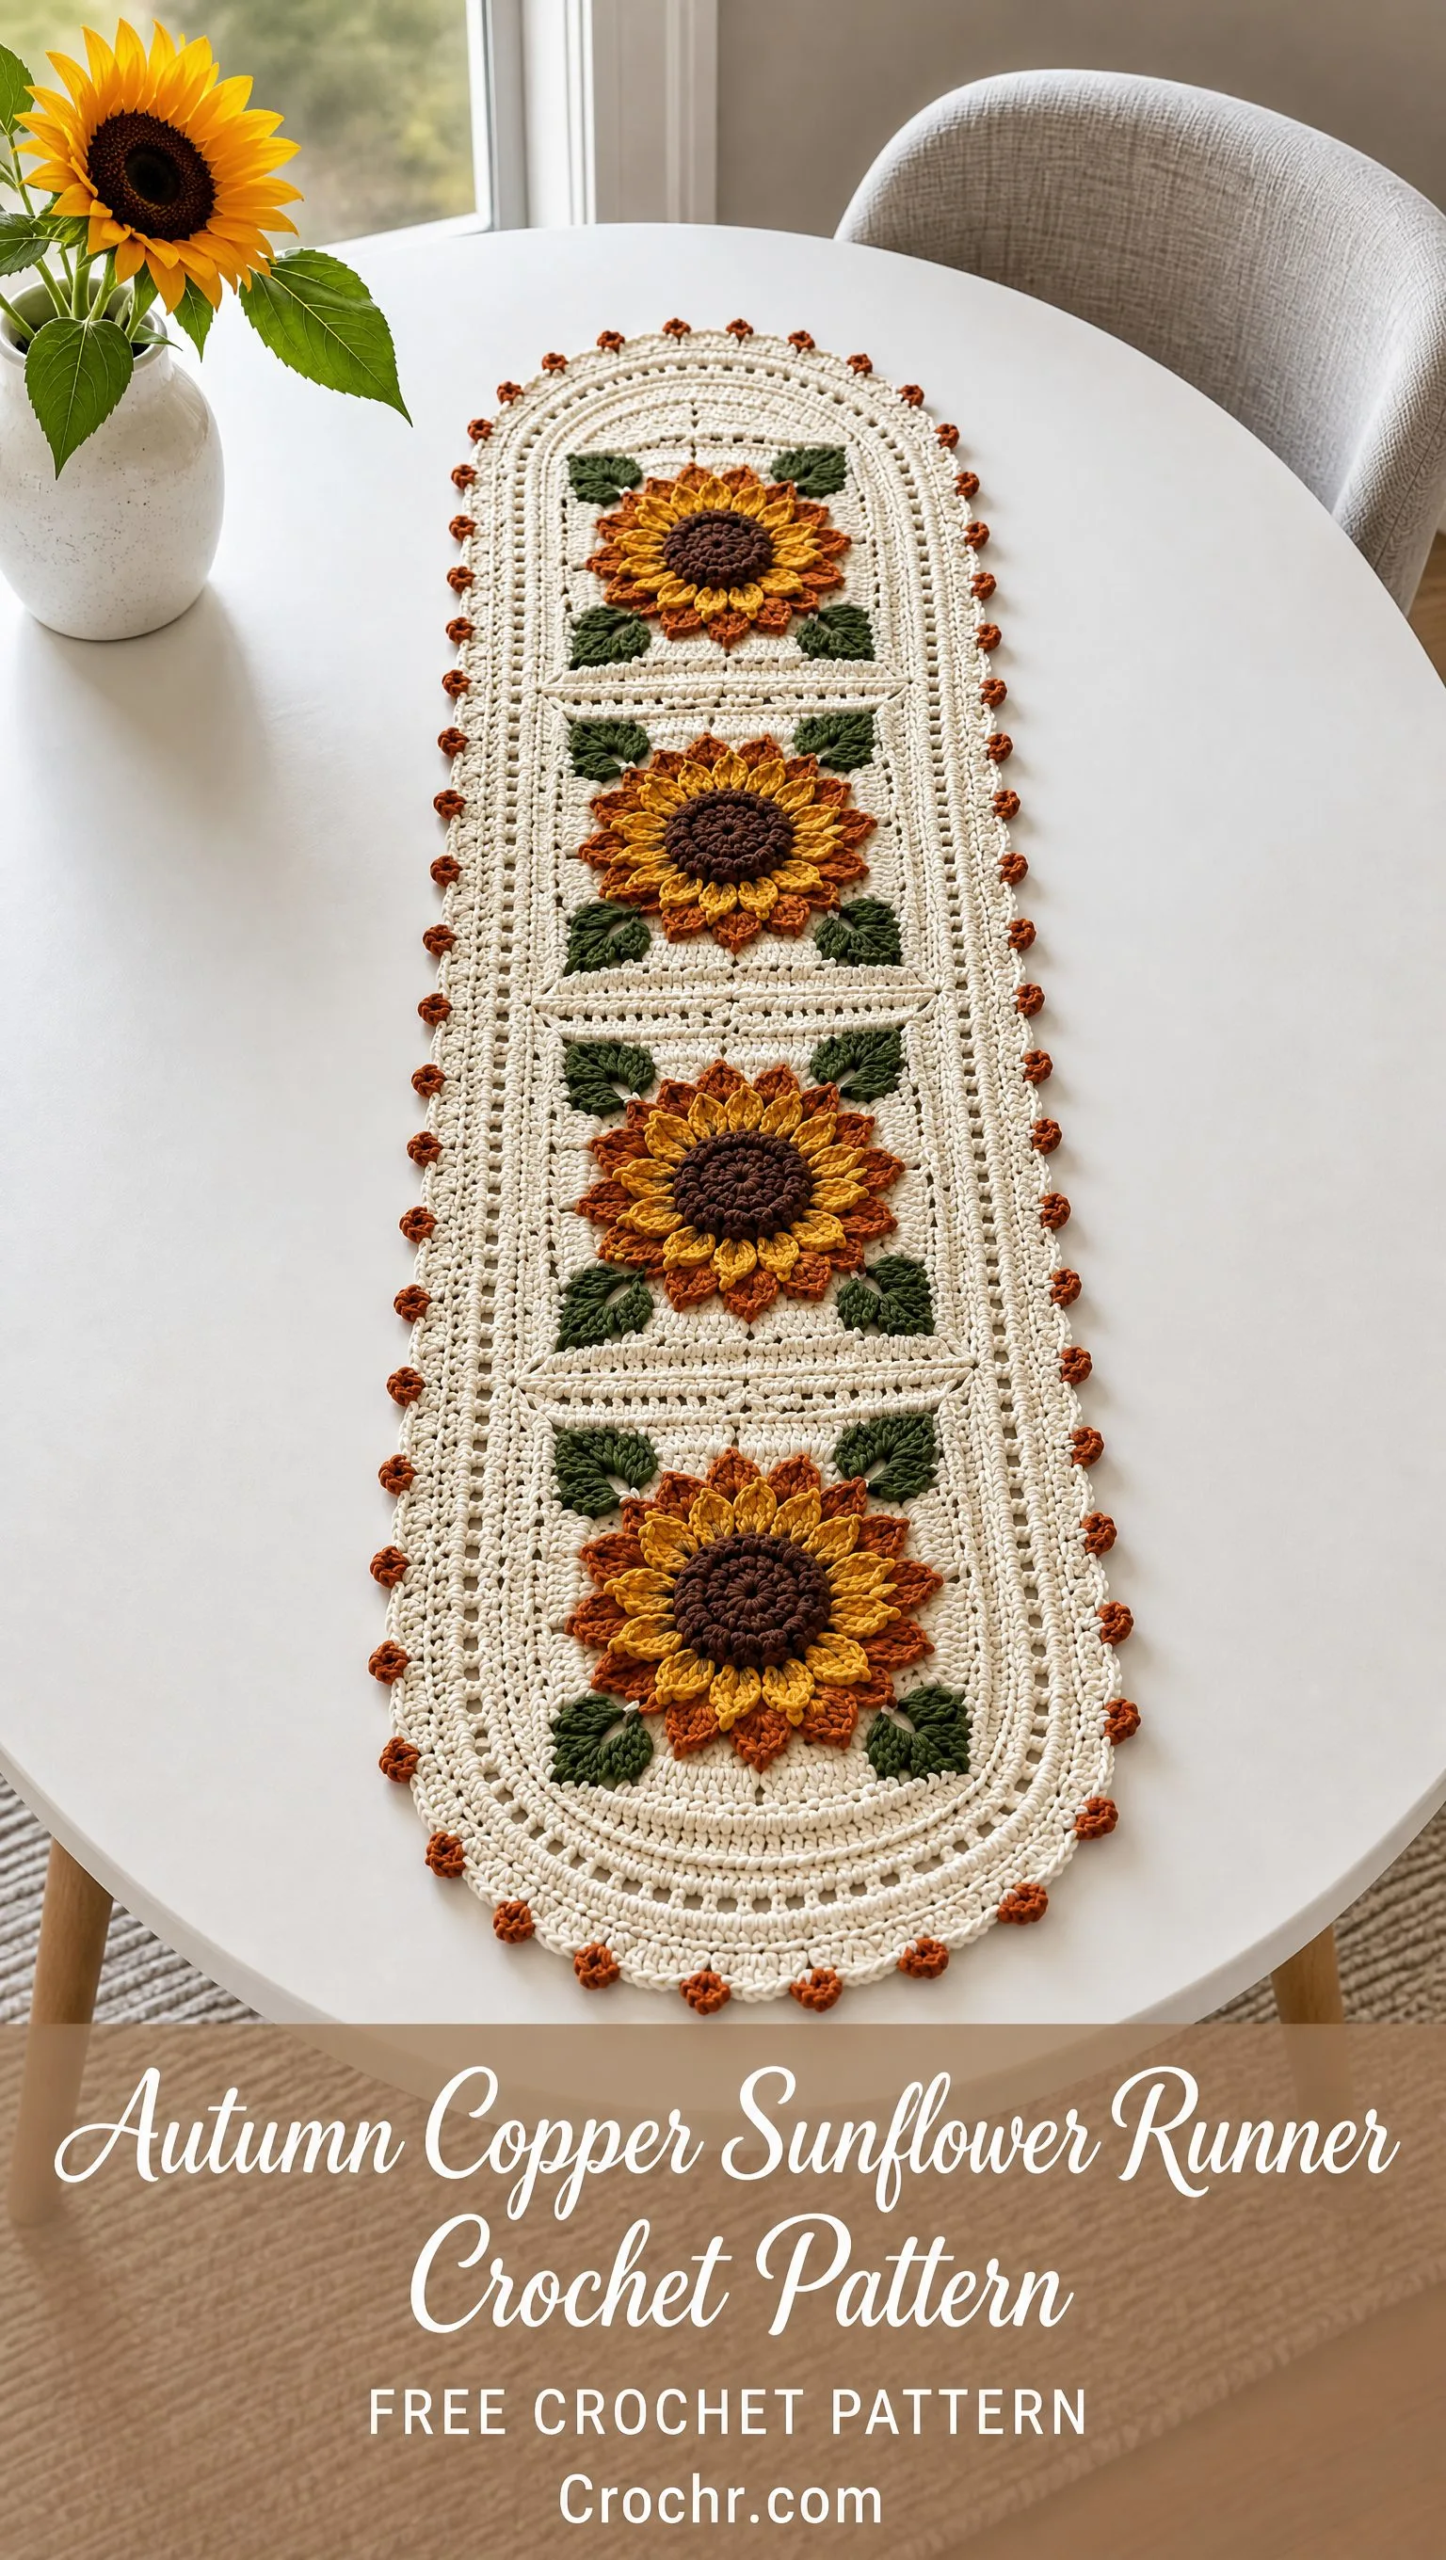
The runner sat on her table for nearly a year before I finally wrote down the pattern properly. Every time I visited, I would notice how the light caught those raised cinnamon centers differently depending on the time of day. That little detail convinced me this design deserved to be shared more widely.
Now it is ready for your hook. Whether you are decorating for fall, making a housewarming gift, or just want a project that feels a bit more special than the usual dishcloth, this table runner delivers. The construction is straightforward once you understand how the motifs fit together, and the finished piece looks far more complicated than it actually is.
Why You Will Love This Sunflower Table Runner
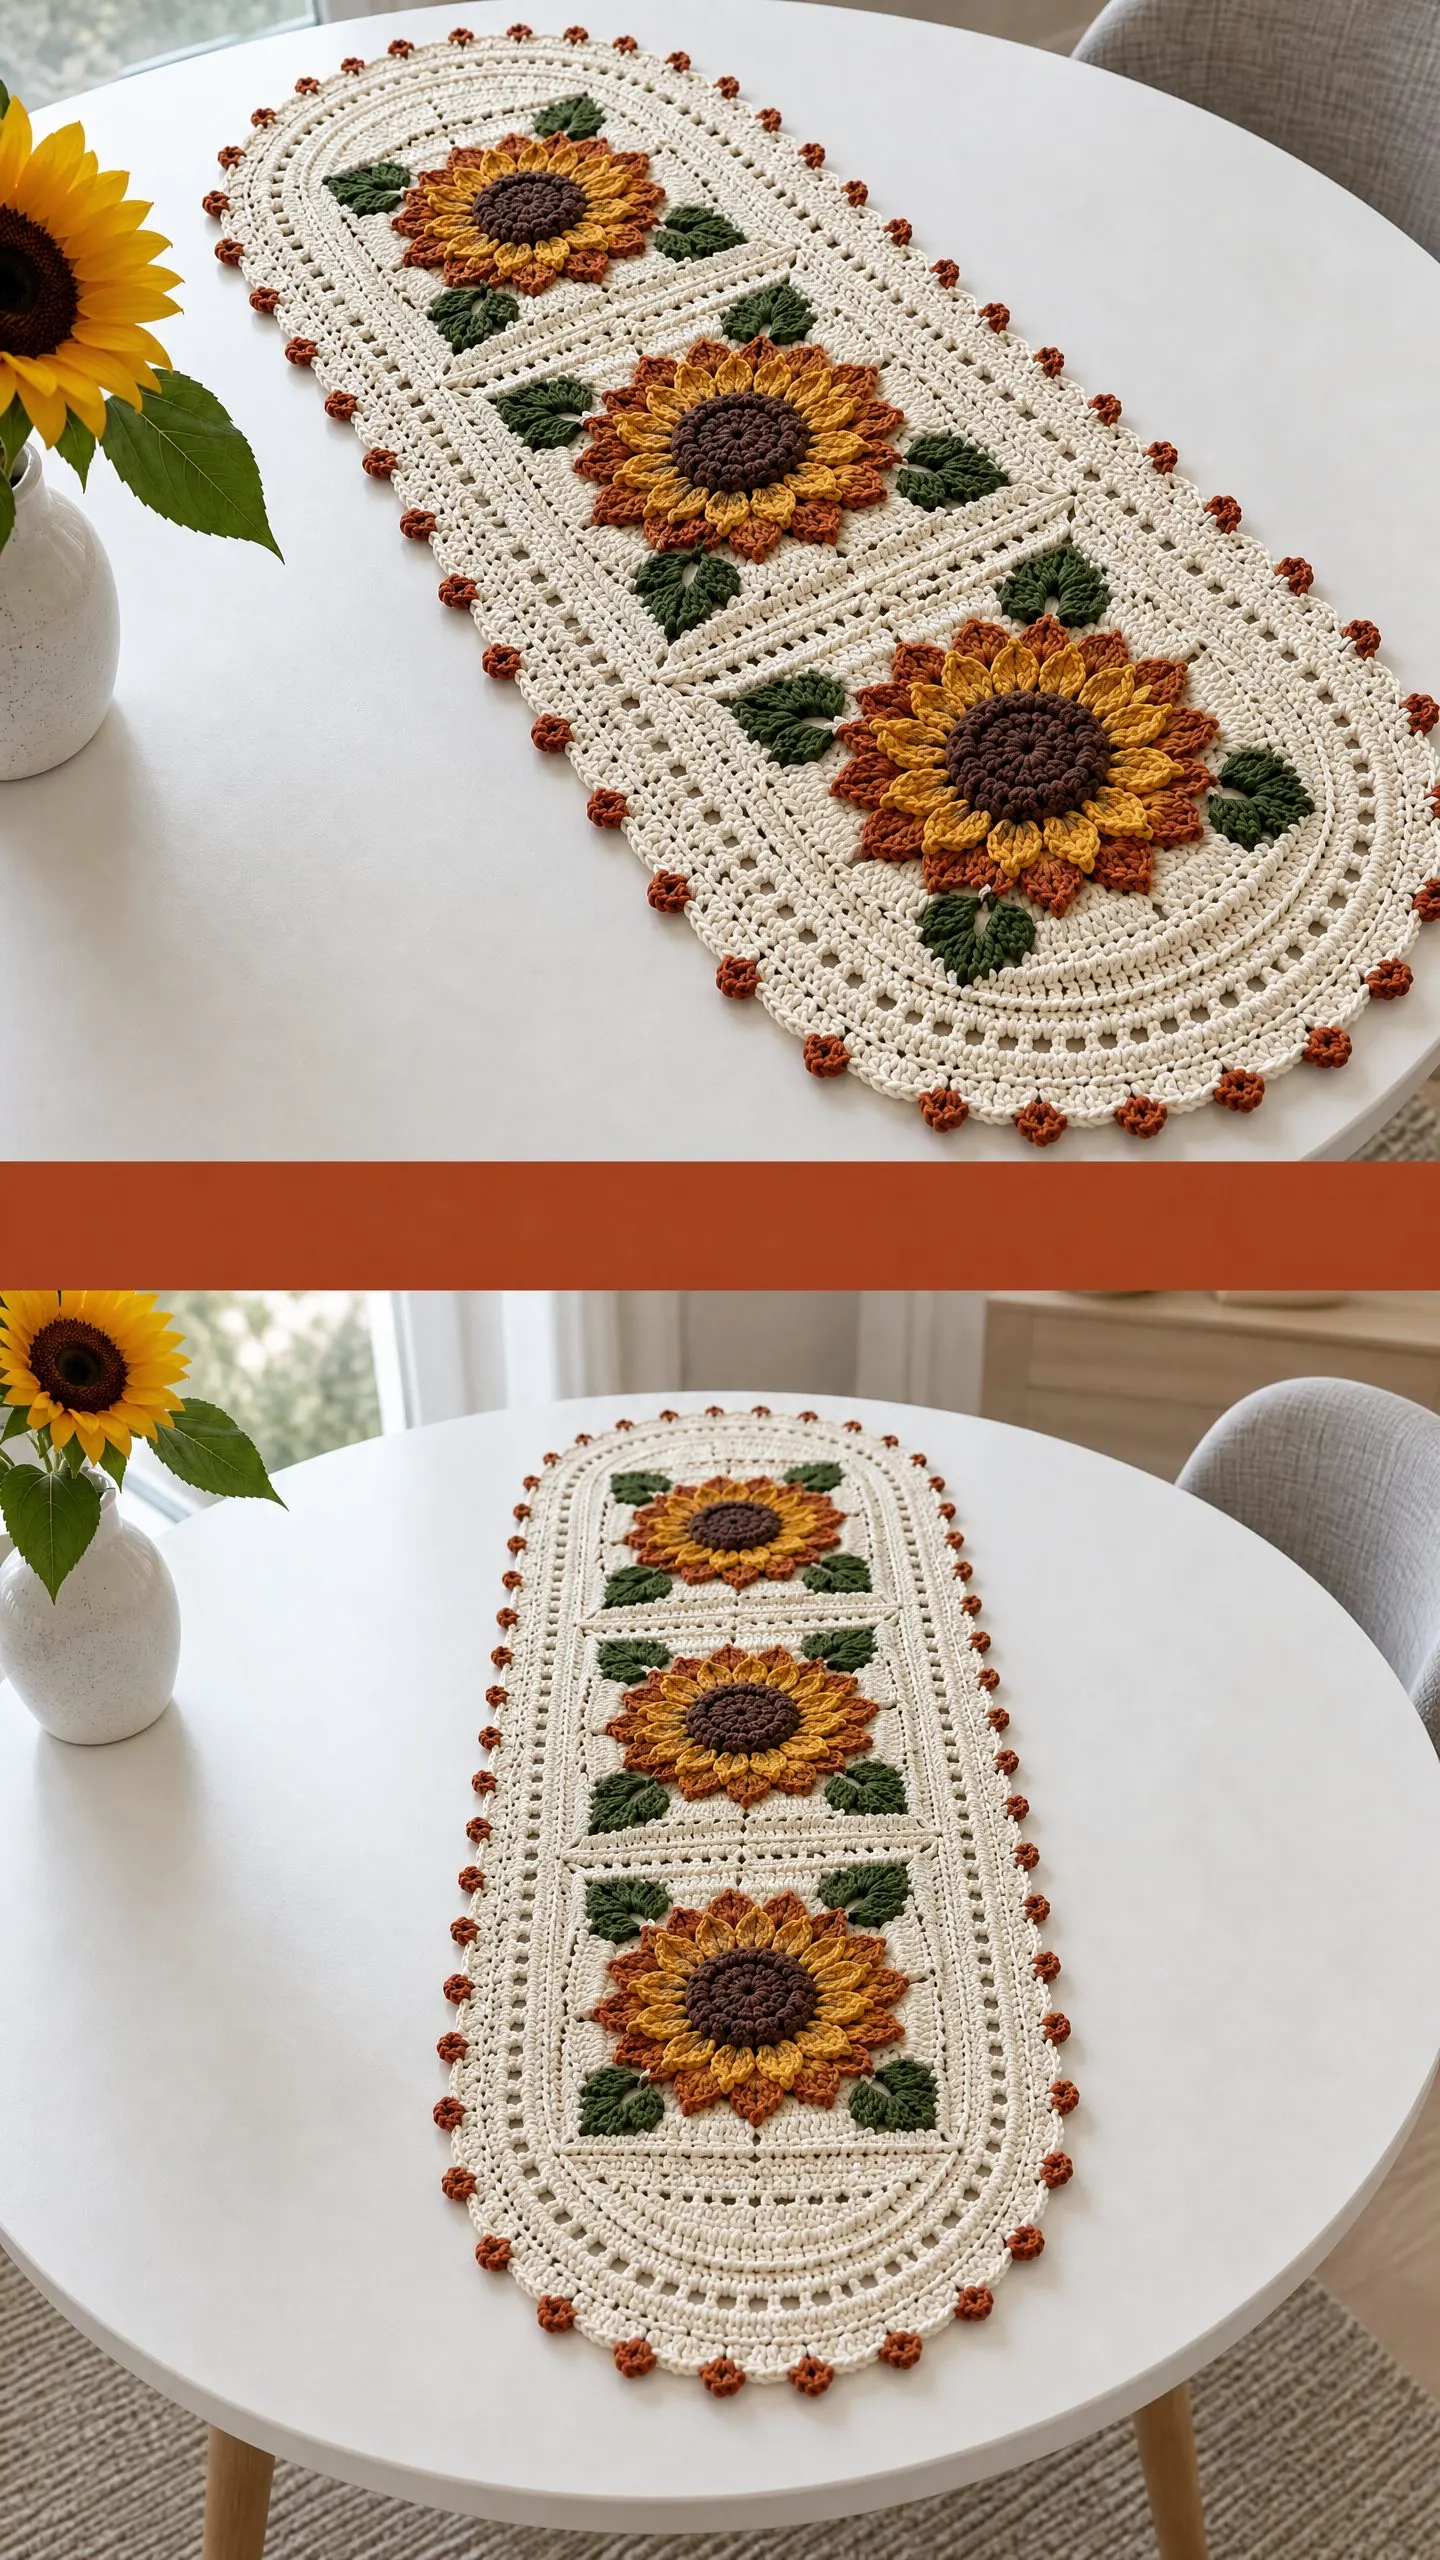
This crochet pattern combines several elements that make it genuinely satisfying to work. The sunflowers feature textured raised centers that pop off the background, created with simple front post stitches. The petals layer copper and mustard tones for that authentic autumn sunflower look. Deep moss green leaves frame each bloom, and the whole thing sits within elegant ivory diamond motifs.
What I appreciate most about this design is its versatility. At approximately 14 x 42 inches, it fits perfectly on a dining table, buffet, or entryway console. But the pattern is fully adjustable. Want a shorter runner for a side table? Make fewer motifs. Need something longer for a banquet table? Simply add more diamond sections. The modular construction makes customization easy.
The skill level sits at intermediate, but do not let that scare you if you are a confident beginner. If you can work double crochet (dc), half double crochet (hdc), and are willing to try front post stitches, you have everything you need. I will walk you through each technique as we go.
Materials You Will Need
Gathering your supplies before starting always makes the process smoother. Here is everything required for this autumn copper sunflower runner crochet pattern:
Yarn:
Mercerized cotton is the ideal choice here. It gives you crisp stitch definition, holds up beautifully to washing, and has a subtle sheen that elevates the finished look. The durability matters since this runner will likely see spills and need occasional cleaning.
Tools:
The blocking supplies are not optional for this project. Proper blocking transforms the diamond motifs from slightly wonky to perfectly crisp. Your finished runner will look professionally made with just 30 minutes of blocking time.
Stitch Abbreviations and Definitions
Let me define every abbreviation before we begin. If you are newer to crochet patterns, bookmark this section for quick reference.
Front post stitches deserve special mention since they create the texture in this pattern. Instead of inserting your hook through the top of a stitch, you insert it around the post (the vertical part) from front to back to front. This pushes the stitch forward, creating a raised ridge. The technique sounds tricky but becomes intuitive after a few repetitions.
Step 1: Make the Sunflower Center
We start at the heart of each sunflower. These cinnamon centers have a bumpy, realistic texture that mimics the seed head of an actual sunflower.
Using cinnamon yarn:
Round 1: Create a magic ring. Chain 2 (this counts as your first hdc), then work 12 hdc into the ring. Pull the ring closed and join with a slip stitch to the top of your beginning chain 2. You should have 12 stitches total.
Round 2: Chain 2, work 2 hdc in each stitch around. Join with a slip stitch. You now have 24 stitches.
Round 3: This is where the texture happens. Add texture by working raised stitches around each hdc from the previous round. Work front post half double crochet around each stitch. This pushes the stitches forward, creating that bumpy seed texture. Fasten off and weave in your end.
The center should measure roughly 2 inches across. If yours is significantly larger or smaller, adjust your hook size accordingly.
Step 2: Create Sunflower Petals
Now we add the gorgeous copper petals that make these sunflowers so striking. The petal construction creates dimensional, pointed petals that curve naturally.
Attach copper yarn to any stitch on the outer edge of your center.
Petal Round:
Work the following repeat around the entire center:
Slip stitch into next stitch, chain 3, work 3 dc into the same stitch, chain 3, slip stitch into the same stitch.
Repeat this sequence around to create petals. Each petal forms a little shell shape that points outward.
Adding Mustard Highlights:
Once your copper petals are complete, take your mustard yarn and add highlights using surface slip stitches. Thread the mustard yarn onto your tapestry needle or use your hook to work surface slip stitches along selected petals. I typically highlight every second or third petal, working a line of slip stitches down the center of each chosen petal. This creates the color variation you see in real sunflowers.
Fasten off and weave in ends. Set your completed sunflowers aside.
Step 3: Crochet the Leaves
Each sunflower gets 2 to 3 leaves tucked around it. These simple pointed leaves work up in minutes.
Using moss green yarn:
Chain 8.
Working along one side of the chain, work the following sequence: sc in second chain from hook, hdc in next chain, dc in next chain, tr in next chain, dc in next chain, hdc in next chain, sc in last chain.
Now slip stitch back along the opposite side of the chain to the beginning. Fasten off.
The leaf should have a pointed tip at the treble crochet and taper at both ends. Make 2 to 3 leaves for each sunflower. For a runner with 5 sunflowers, you will need 10 to 15 leaves total.
Step 4: Create Ivory Diamond Motifs
The diamond motifs form the background and structure of your runner. These granny square style motifs have a classic look that frames each sunflower beautifully.
Using ivory yarn:
Round 1: Chain 4 and join with a slip stitch to form a ring.
Round 2: Work corner groups of dc stitches separated by chains to create a diamond shape. Work (3 dc, ch 2, 3 dc) in the ring for the first corner. Chain 1, work (3 dc, ch 2, 3 dc) in the ring. Repeat from * two more times. Chain 1, join with slip stitch.
Continue increasing at all four corners until your motif reaches the desired size. Each round should add a corner group (3 dc, ch 2, 3 dc) in each corner space, with 3 dc clusters in the chain 1 spaces along the sides.
Add ribbed texture using front post stitches on your final round. This creates subtle ridges that add visual interest and help the motifs lie flat.
The exact number of rounds depends on your gauge and desired motif size. Aim for motifs approximately 6 to 7 inches across to accommodate the sunflowers with some background showing.
Step 5: Assemble the Runner
With all your components ready, it is time to bring everything together.
Arrange motifs lengthwise with oval ends. For a 42 inch runner, you will typically need 5 to 6 diamond motifs arranged in a row.
Join motifs using slip stitches through matching loops. Line up two motifs side by side with wrong sides facing you. Working through both layers, slip stitch through the corresponding stitches along the edges. Keep your tension consistent to ensure joins stay neat and flat.
Position and attach sunflowers to the center of each motif. Use your tapestry needle and matching ivory thread to whip stitch the sunflower centers securely in place.
Tuck leaves under the petals at pleasing angles. Attach each leaf with a few small stitches at its base. Vary the angles so leaves point in different directions for a natural look.
Step 6: Add Ribbed and Eyelet Sections
Once assembled, we work border rounds around the entire runner to unify the design.
Work ivory rounds around the entire runner:
Round 1: Single crochet evenly around the entire outer edge. Work 3 sc in each corner to maintain the shape. Join with slip stitch.
Round 2: Alternate front post and back post stitches for rib texture. This creates a subtle ribbed effect that adds sophistication. Front post dc around next st, back post dc around next st. Repeat around, adjusting at corners as needed.
Round 3: Create eyelet band. Dc in next stitch, chain 1, skip 1 stitch. Repeat around the entire runner. This lacy band provides visual breathing room between the solid ribbed section and the decorative border.
Step 7: Decorative Border
The final border brings everything together with elegant scallops and those charming copper picot accents.
Final Border:
Round 1: Single crochet around the entire edge. This creates a stable base for the scalloped edge.
Round 2: Work scallops as follows: 5 dc in one stitch, skip next stitch, slip stitch in next stitch. Repeat around the entire runner. Adjust spacing slightly at corners to keep scallops even.
Add copper picots: Switch to copper yarn. Work small picots as decorative accents along the scalloped edge. To make a picot: chain 3, slip stitch into the first chain. Attach these as small decorative points at regular intervals, typically at the peak of each scallop or every few scallops.
The copper picots tie back to the sunflower petals and give the border a finished, intentional look.
Finishing Your Sunflower Runner
Almost done! These final steps ensure your runner looks polished and professional.
Weave in all ends. Take your time here. A tapestry needle and patience will prevent ends from working loose later. Weave each end through several stitches, then double back for security.
Block the runner gently to shape. Lay your runner on a blocking mat, pin it to the correct dimensions, and mist with water or use steam. Pay special attention to the diamond points and scalloped edges. Blocking makes an enormous difference in how professional your finished piece looks.
Allow to dry completely before placing on furniture. This prevents color transfer and ensures the blocking sets properly. Overnight drying is ideal.
Care Instructions
Your finished sunflower runner will last for years with proper care:
Cotton yarn becomes softer with washing while maintaining its shape. Your runner will actually improve with gentle use and care.
Pattern Notes and Customization Tips
This pattern is adjustable. Add or remove diamond motifs to change the length. For a shorter 30 inch runner, use 4 motifs. For a longer 54 inch runner, use 7 motifs. The design scales beautifully.
Use cotton yarn for a durable, washable table runner with crisp stitch definition. Acrylic works in a pinch but will not have the same crispness or durability. Mercerized cotton specifically gives you that subtle sheen visible in the finished photos.
Color substitutions work wonderfully with this design. Consider burgundy and gold for a deeper autumn feel, or pale yellow and cream for a spring version. The construction stays exactly the same regardless of your color choices.
For beginners to front post stitches, practice on a small swatch first. Work 10 dc, then try front post dc around each stitch on the next row. Once you feel how the hook moves around the post, you will be ready to tackle this pattern confidently.
Wrapping Up This Autumn Crochet Pattern
I hope you love making this autumn copper sunflower runner as much as I enjoyed designing it. There is something deeply satisfying about watching those dimensional sunflowers come to life under your hook, and the finished runner makes such a beautiful statement piece for fall decorating.
The combination of textured centers, layered petals, and elegant ivory backgrounds creates a table runner that looks complex but builds from simple, repeatable techniques. Once you complete your first sunflower motif, the rest flows naturally.
If you found this sunflower runner crochet pattern helpful, I would love for you to save it to your Pinterest boards so you can find it easily when you are ready to start. And please, leave a comment below if you make one! Seeing your finished runners genuinely makes my day, and I always love hearing about any color combinations you tried.
Happy crocheting, friend. I cannot wait to see what you create.
Want a Quick & Easy Printable Version?
Get a clean, beautifully formatted PDF of this pattern — easy to follow step by step, ready to print or save on any device. No scrolling, no distractions, just the pattern.
Get the Printable PDF →You Might Also Like
- Sunset Gradient Star Cocoon Free Crochet Pattern
- Dusty Rose Pink Tassel Crossbody Free Crochet Pattern
- Sage Green Boho Tiered Lace Dress Free Crochet Pattern
- Creamy White Boho Peplum Sleeve Top Free Crochet Pattern
