
THIS is the baby gift that will have everyone asking where you bought it. Seriously. The Sunset Gradient Star Cocoon is one of those projects that looks absolutely incredible but comes together using techniques you probably already know. We’re talking granny-style clusters, basic single crochet decreases, and simple seaming. That’s it.
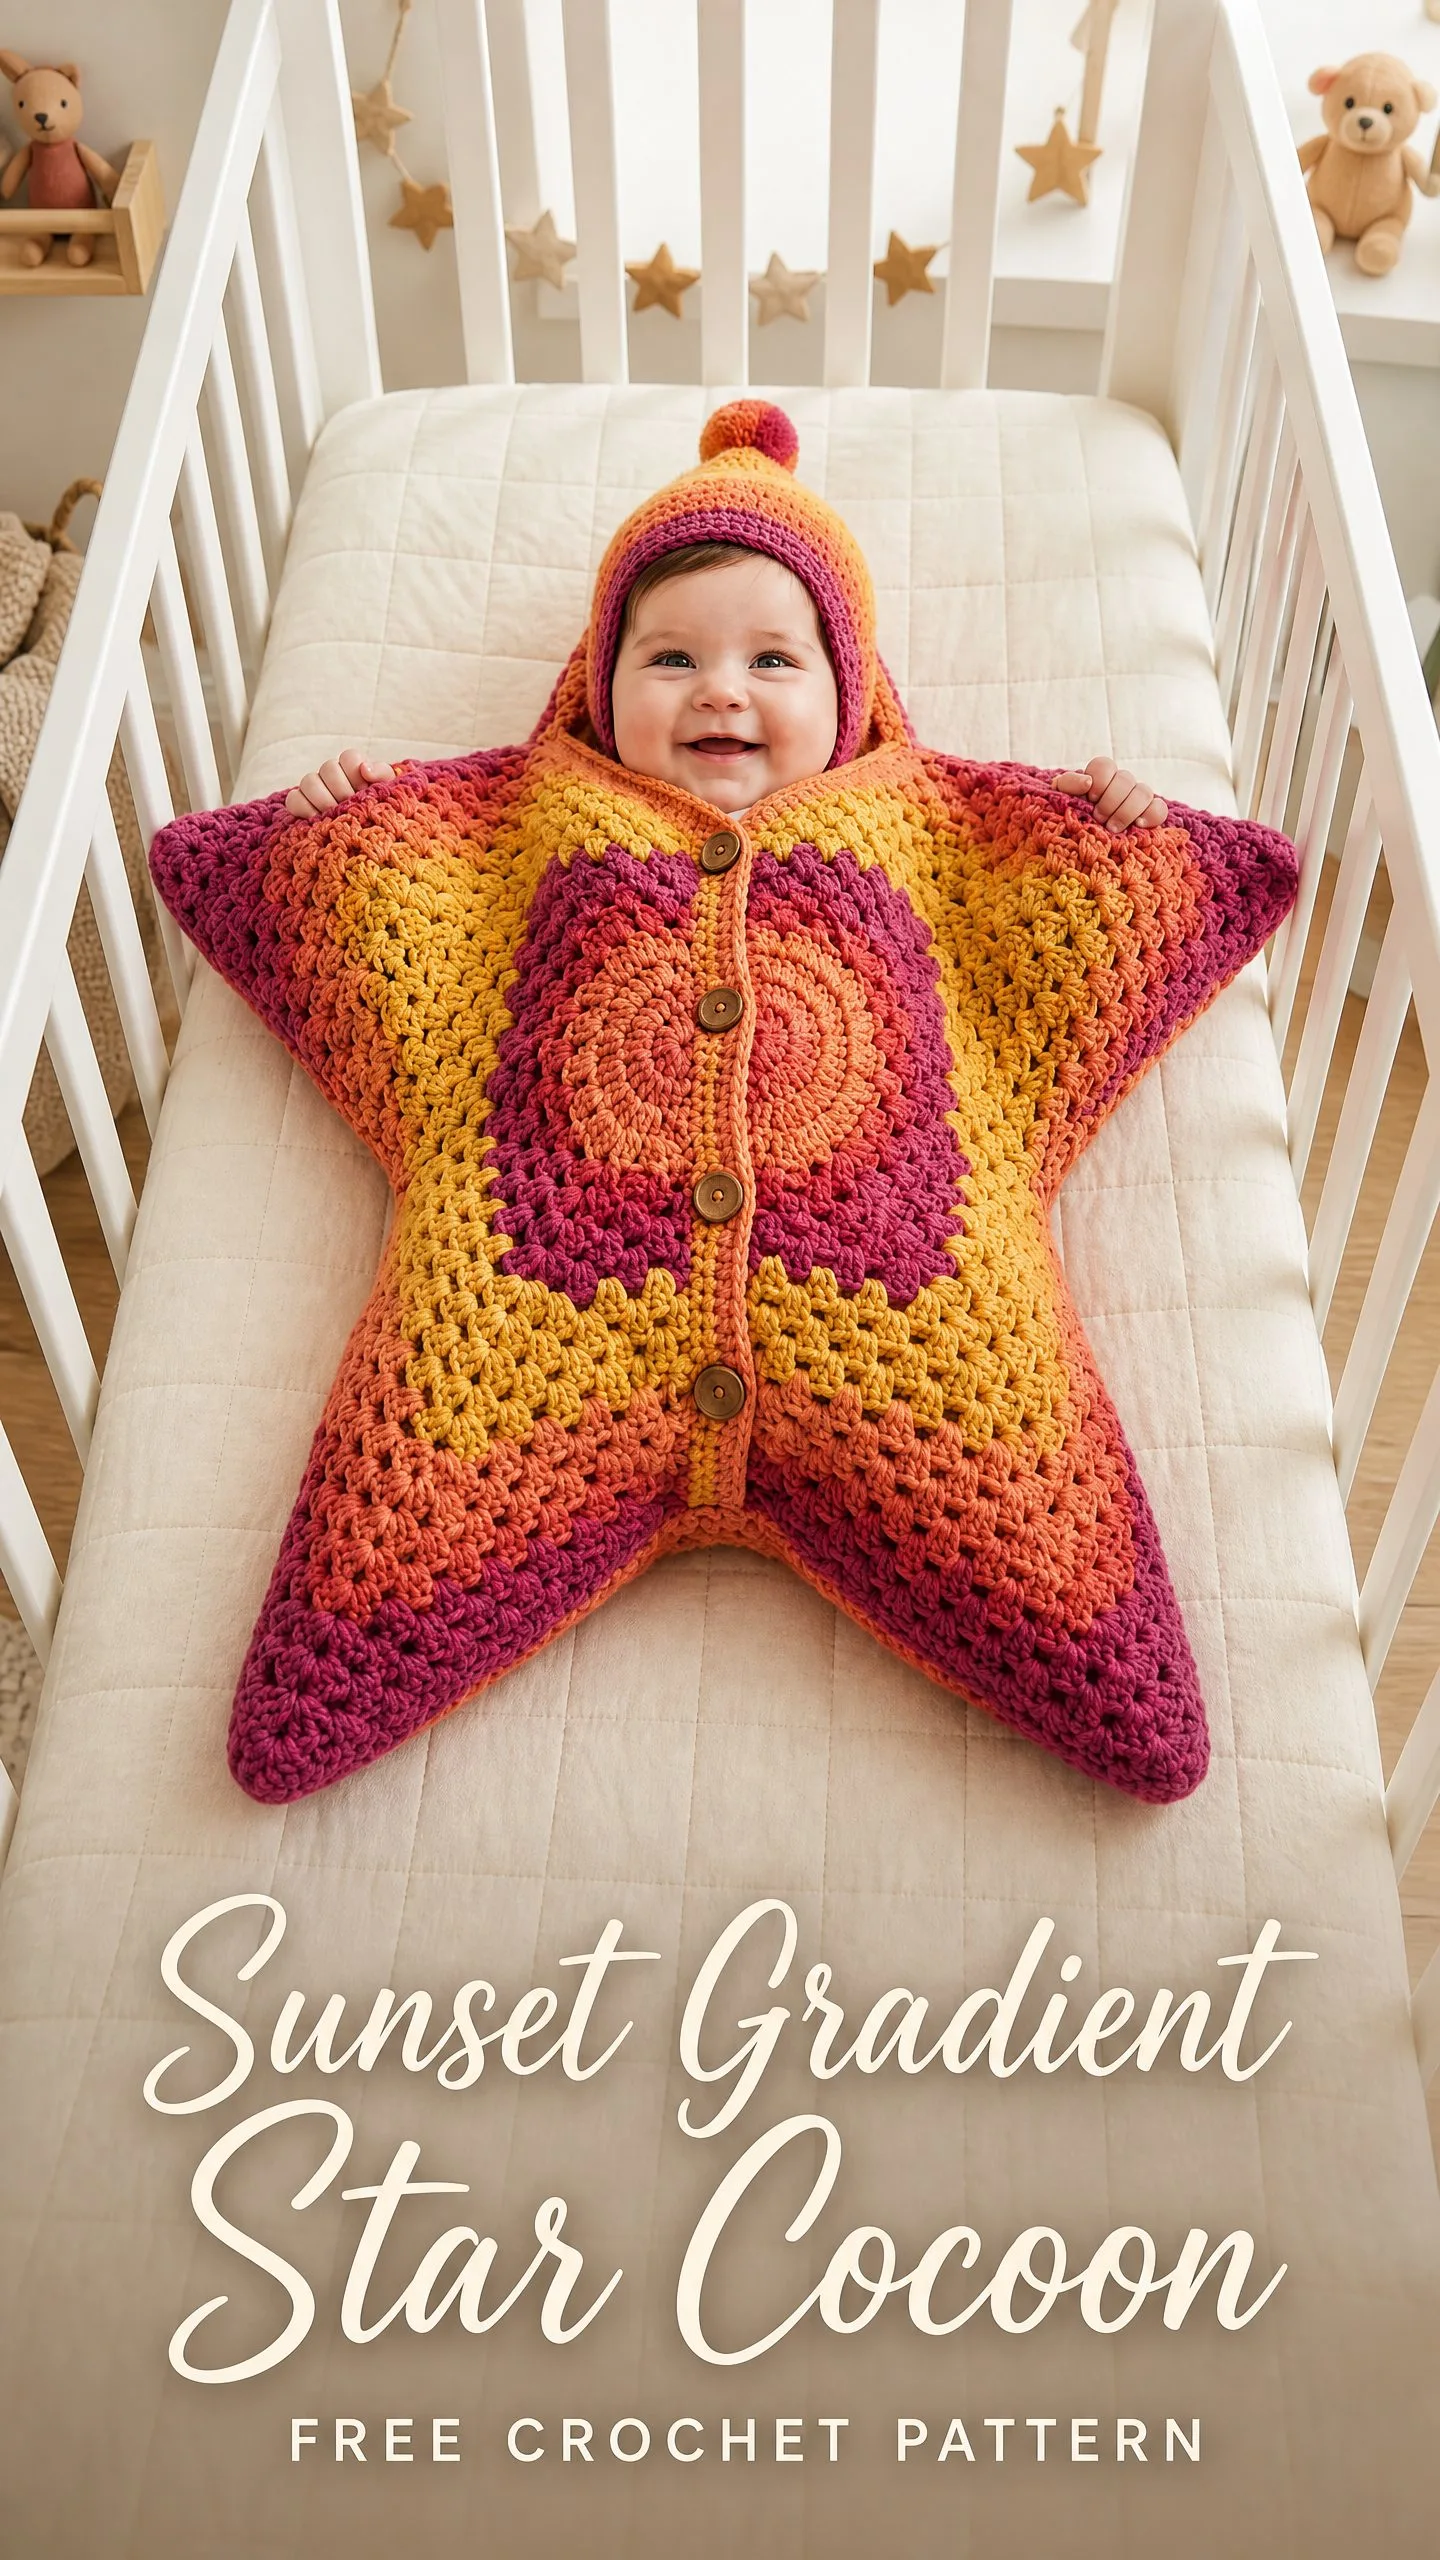
I won’t lie to you. This is an intermediate project, and it takes about 20 to 30 hours total. But here’s the thing. Every single hour is worth it. When you see a squishy baby nestled inside a star-shaped cocoon in sunset colors, complete with a matching pompom bonnet? Pure magic.
If you’ve been looking for a showstopper baby shower gift or a special keepsake for a new arrival, you just found it. Let me walk you through everything you need to make one yourself.
Why This Crochet Pattern Works So Beautifully
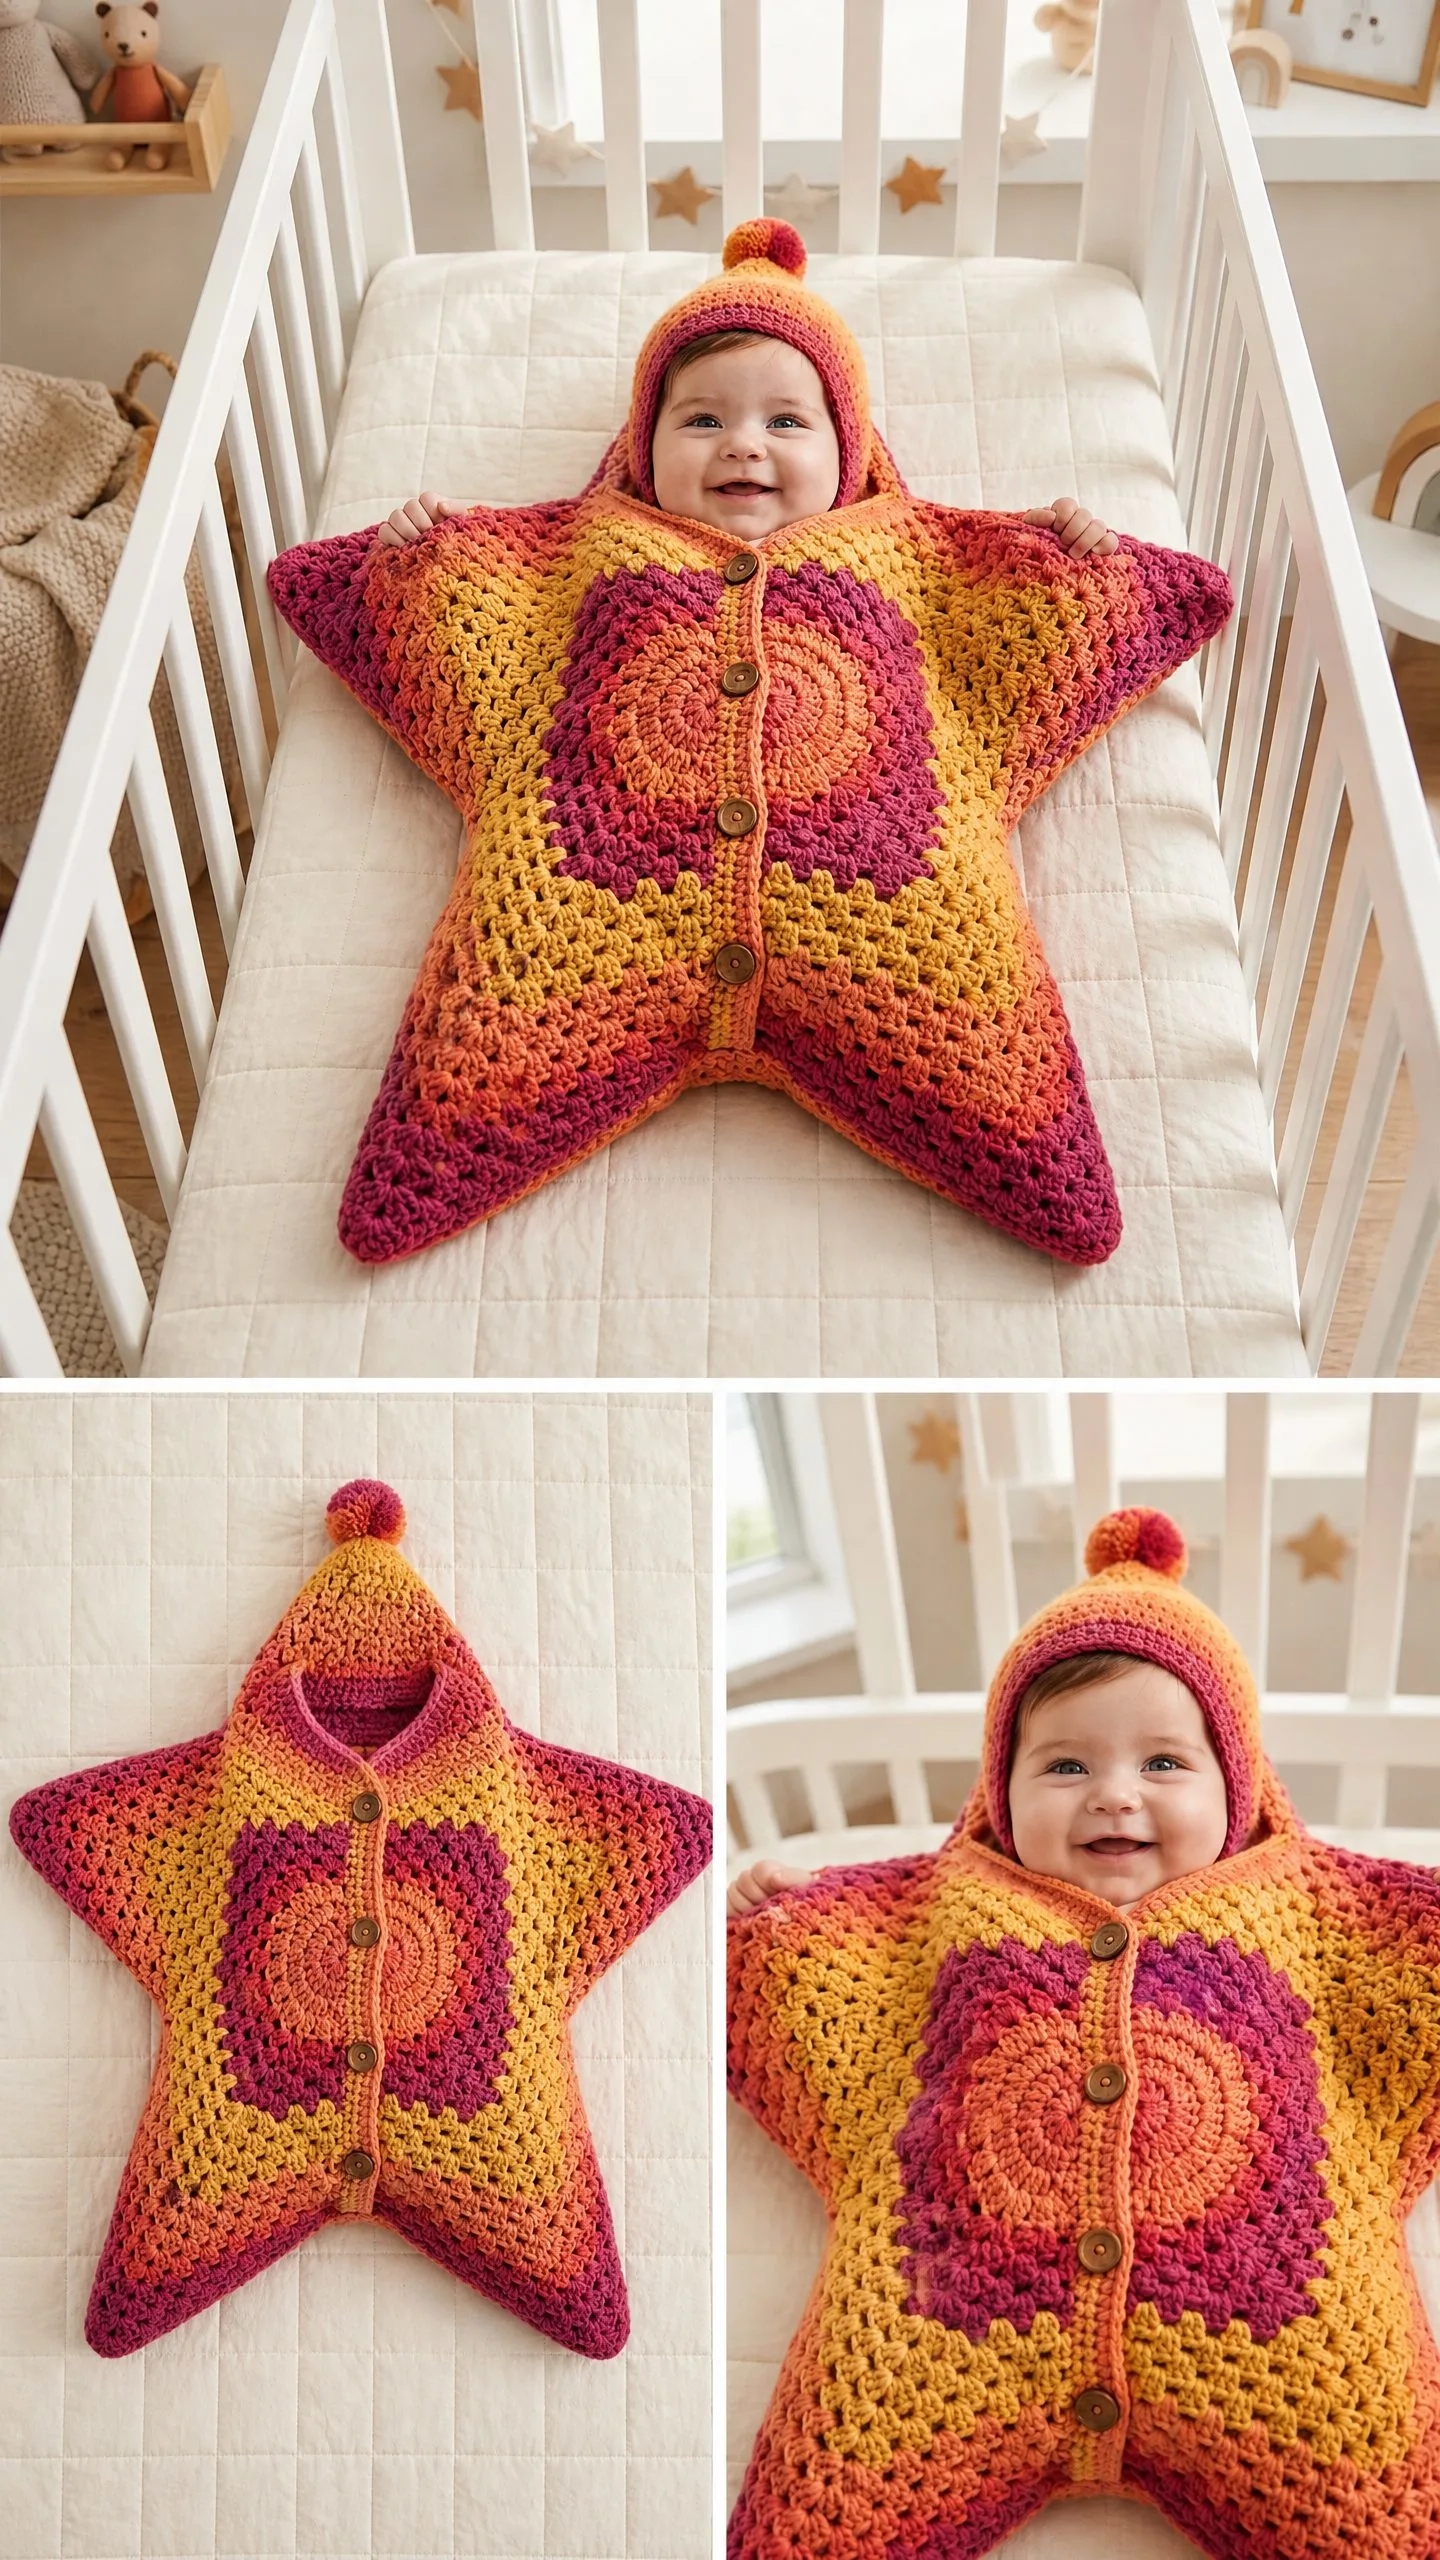
The construction is clever but not complicated. You’ll make two identical flat star panels, seam them together around the edges, and leave an opening at the top for the baby’s head. The front panel gets a button band down the center so you can easily place baby inside. Add a coordinating bonnet with chin ties and a fluffy pompom, and you have the most photogenic baby accessory ever created.
The gradient colorway moves from deep magenta at the center through coral and orange, ending in golden yellow at the star points. This sunset ombre effect happens naturally as you change colors at specific rounds. No fancy techniques required.
The raised spiral texture you see radiating from the center? That comes from working clusters, which are just three double crochets worked into the same space and joined at the top. If you’ve ever made a granny square, you’ve already done something similar.
Finished Size and Fit
The completed cocoon measures approximately 28 inches wide at the widest point, which is tip to tip across two opposite star points. It’s about 24 inches tall from top point to bottom point.
The bonnet fits a newborn to 3 month old baby with approximately a 13 inch head circumference.
This size accommodates babies from newborn up to about 3 months of age, or babies up to approximately 24 inches in length. I’ll include customization tips later if you need to size up or down.
Materials You’ll Need
Yarn: Bulky weight yarn (CYCA weight 5), approximately 800 yards total divided across four colors:
Hook: US size K / 6.5 mm crochet hook
Notions:
Yarn Suggestions
Lion Brand Pound of Love works beautifully for this project. It’s 100% acrylic, machine washable, and wonderfully soft against baby skin. Grab one skein each in a deep pink, coral, orange, and gold.
Paintbox Yarns Simply Super Chunky is another excellent choice. You’ll need two balls each of Raspberry Pink, Coral Blush, Mustard Yellow, and Flamingo Pink.
Whatever you choose, look for yarn that’s soft, machine washable, and consistent in dye lot. Avoid high wool content unless the family has confirmed no sensitivities.
Gauge
Getting gauge right is critical for this pattern. A difference of even half a stitch per inch will significantly affect your finished size.
With a K / 6.5 mm hook:
In cluster stitch pattern:
Make a gauge swatch before you start. Adjust your hook size up or down as needed to match these measurements.
Abbreviations and Special Stitches
Let me define every abbreviation before we dive in. Bookmark this section if you need to reference it while working.
How to Work a Cluster (cl)
This is a 3-double-crochet cluster worked into a single stitch or space. Here’s how:
1. Yarn over, insert hook into the designated stitch or space
2. Yarn over and pull up a loop (3 loops on hook)
3. Yarn over and pull through 2 loops (2 loops on hook)
4. Yarn over again, insert hook into the same stitch or space
5. Yarn over and pull up a loop (4 loops on hook)
6. Yarn over and pull through 2 loops (3 loops on hook)
7. Yarn over again, insert hook into the same stitch or space
8. Yarn over and pull up a loop (5 loops on hook)
9. Yarn over and pull through 2 loops (4 loops on hook)
10. Yarn over and pull through all 4 remaining loops
That’s one cluster complete. It creates a puffy, textured stitch that gives this cocoon its beautiful raised spiral effect.
Pattern Notes Before You Begin
Read these carefully. They’ll save you confusion later.
1. The star is made of two identical flat panels worked separately, then joined together.
2. Each panel starts as a center circle, expands outward, then divides into five individual points worked as tapered triangles.
3. To change colors cleanly, work the last yarn over of your final stitch in the new color before pulling through all loops.
4. Color sequence (worked from center outward):
5. All rounds of the main body panels are worked with the right side facing (do not turn). All point sections are worked flat, turning at the end of each row.
6. When counting stitches in cluster rounds, each cluster counts as 1 stitch and each ch-1 between clusters counts as 1 stitch.
Main Star Panel Instructions (Make 2)
You’ll make two identical panels, then seam them together. The panel begins at the center and expands outward before splitting into five individual star points.
Section 1: Center Circle
Using Color A and your K hook, make a magic ring.
Round 1: Ch 3 (counts as first dc), work 11 dc into MR, sl st to top of beginning ch-3 to join. Pull MR closed. (12 dc)
Round 2: Ch 3, dc in same st as join, 2 dc in each remaining st around, sl st to top of beginning ch-3 to join. (24 dc)
Round 3: Ch 3, dc in same st, dc in next st, [2 dc in next st, dc in next st] 11 times, sl st to join. Change to Color B at last pull-through. (36 dc)
Round 4 (Color B): Ch 1, sc in same st, ch 1, sk 1 st, [cl in next st, ch 1, sk 1 st] 17 times, sl st to first sc to join. (18 clusters plus 18 ch-1 sps = 36 stitch units)
Round 5 (Color B): Sl st into first ch-1 sp, ch 3, 2 dc in same ch-1 sp (half cluster made at beginning), ch 1, [cl in next ch-1 sp, ch 1] 17 times, sl st to top of beginning ch-3. (18 clusters plus 18 ch-1 sps = 36 stitch units)
Round 6 (Color B): Sl st into first ch-1 sp, ch 3, dc in same ch-1 sp (first half-cl increase), ch 1, [cl in next ch-1 sp, ch 1, cl in same ch-1 sp, ch 1] 9 times, [cl in next ch-1 sp, ch 1] 8 times, sl st to top of beginning ch-3. Change to Color C. (27 clusters plus 27 ch-1 sps = 54 stitch units)
Round 7 (Color C): Sl st into first ch-1 sp, ch 1, [cl in next ch-1 sp, ch 1] 27 times, sl st to first ch to join. (27 clusters, 27 ch-1 sps = 54 stitch units)
Round 8 (Color C): Sl st into first ch-1 sp, ch 1, [cl in ch-1 sp, ch 1, cl in same ch-1 sp, ch 1] 9 times, [cl in ch-1 sp, ch 1] 18 times, sl st to join. (36 clusters, 36 ch-1 sps = 72 stitch units)
Round 9 (Color C): Sl st into first ch-1 sp, ch 1, [cl in ch-1 sp, ch 1] 36 times, sl st to join. (36 clusters, 36 ch-1 sps = 72 stitch units)
Round 10 (Color C): Sl st into first ch-1 sp, ch 1, [cl in ch-1 sp, ch 1, cl in same ch-1 sp, ch 1] 12 times, [cl in ch-1 sp, ch 1] 24 times, sl st to join. Change to Color D. (48 clusters, 48 ch-1 sps = 96 stitch units)
Round 11 (Color D): Sl st into first ch-1 sp, ch 1, [cl in ch-1 sp, ch 1] 48 times, sl st to join. (48 clusters, 48 ch-1 sps = 96 stitch units)
Round 12 (Color D): Sl st into first ch-1 sp, ch 1, [cl in ch-1 sp, ch 1, cl in same ch-1 sp, ch 1] 16 times, [cl in ch-1 sp, ch 1] 32 times, sl st to join. (64 clusters, 64 ch-1 sps = 128 stitch units)
Checkpoint: Your circle should measure approximately 9 to 10 inches in diameter. Count 128 stitch units before proceeding.
Round 13 (Color D): Sl st into first ch-1 sp, ch 1, [cl in ch-1 sp, ch 1] 64 times, sl st to join. (64 clusters, 64 ch-1 sps = 128 stitch units)
Round 14 (Color D): Sl st into first ch-1 sp, ch 1, sc in same sp, sc in each cl and each ch-1 sp around. Sl st to join. (128 sc)
This single crochet round consolidates everything into a clean foundation for the star points. Place stitch markers at stitches 1, 26, 52, 77, and 103. These marked stitches identify where each star point begins.
Section 2: Star Points (Work Each of 5 Points Separately)
Fasten off after Round 14. You’ll now work each point individually as a flat tapered triangle.
The math works out to three points with 25-stitch bases and two points with 26-stitch bases.
For 25-stitch base points (Points 1, 3, and 5):
Join Color D to the first stitch of the point group with a sl st.
Row 1 (RS): Ch 1, sc across all 25 stitches of this point base. Turn. (25 sc)
Row 2 (WS): Ch 1, sc2tog, sc to last 2 sts, sc2tog. Turn. (23 sc)
Row 3 (RS): Ch 1, sc2tog, sc to last 2 sts, sc2tog. Turn. (21 sc)
Continue decreasing 2 stitches every row:
Row 12 (WS): Ch 1, sc2tog, sc1, sc2tog. Turn. (3 sc)
Row 13 (RS): Ch 1, sc2tog, sc1. Turn. (2 sc)
Row 14 (WS): Ch 1, sc2tog. Fasten off, leaving a 6-inch tail. (1 sc)
For 26-stitch base points (Points 2 and 4):
Row 1 (RS): Ch 1, sc across all 26 stitches. Turn. (26 sc)
Row 2 (WS): Ch 1, sc2tog, sc to last 2 sts, sc2tog. Turn. (24 sc)
Continue decreasing 2 stitches every row:
Row 14: Sc2tog. Fasten off. (1 sc)
Work all 5 points on both panels.
Checkpoint: Each completed star panel should measure approximately 14 inches from center to tip of any point, and approximately 28 inches from tip to opposite tip.
Section 3: Edging the Panels
Work one round of sc edging around the entire outer perimeter of each panel.
Join Color D to any outer edge stitch with sl st.
Edging Round: Ch 1, sc evenly around the entire outer perimeter of the star. Work sc in each sc along the point edges (approximately 14 sc per point edge). Work (sc, ch 2, sc) at each outer point tip (5 tips total). At each inner valley between points, sc2tog to draw the valley inward slightly. Sl st to first sc to join. Fasten off.
Aim for approximately 220 to 240 sc around the perimeter. The edge should lie flat without puckering or ruffling.
Section 4: Joining the Panels
Place your front and back panels together with wrong sides facing (right sides will face outward on both sides).
Using Color D and the joining slip stitch seam method, work through both layers around the perimeter. Insert your hook through both panels, yarn over, and pull through both layers and the loop on hook. This creates a visible decorative ridge on the outside.
Important: Leave the top center point opening unsewn. This opening is approximately 5 to 6 inches wide and provides the neck hole for baby’s head.
Also leave the center vertical line of the top front point unworked (approximately 8 to 10 inches). This becomes your front button closure area.
Section 5: Button Band and Neck Opening
Button Band (Right Front Edge):
Join Color D to the bottom of the center front opening.
Row 1: Ch 1, sc evenly up the right edge of the front opening, approximately 2 sc per every 3 row ends, for approximately 30 to 34 sc. Turn.
Row 2: Ch 1, sc in each st across. Turn. (30 to 34 sc)
Row 3: Ch 1, sc across. Fasten off.
Buttonhole Band (Left Front Edge):
Join Color D to the top of the center front opening at the neck edge.
Row 1: Ch 1, sc evenly down the left edge for the same number of stitches as the button band. Turn.
Row 2 (buttonhole row): Ch 1, sc 2, [ch 2, sk 2, sc 6] 4 times, ch 2, sk 2, sc to end. Turn. (5 buttonholes made)
Row 3: Ch 1, sc across, working 2 sc into each ch-2 buttonhole space. Fasten off.
Neck Opening Edging:
Join Color B at the right edge of the neck opening. Work 1 round of sc evenly around the entire neck opening circumference. Sl st to join. Fasten off.
Bonnet Instructions
The bonnet is worked from the back of the head forward.
Using Color A and K hook, ch 31.
Row 1: Sc in 2nd ch from hook and in each ch across. Turn. (30 sc)
Rows 2 through 14: Ch 1, sc across. Turn. (30 sc)
After Row 14, fold the piece so the two short ends meet. Sl st across the top through both layers to form the back seam of the hat crown. Fasten off.
Bonnet Face Border
Join Color B at the lower front corner of the bonnet.
Row 1: Ch 1, sc evenly around the front face opening edge, working 3 sc at each lower front corner. Work approximately 44 sc total. Turn.
Row 2 (Color C): Ch 1, sc in each st, working 3 sc in each corner st. Turn. (48 sc)
Row 3 (Color D): Ch 1, sc in each st, working 3 sc in each corner st. Fasten off. (52 sc)
Bonnet Chin Ties
Join Color A to the lower right front corner of the face border.
Ch 40. Sl st back along the chain for a firm tie. Fasten off. Repeat on the left side.
Safety note: These ties are optional. If included, always supervise baby when the bonnet is worn.
Pompom
Using Color A, make one pompom approximately 1.5 inches in diameter. Attach it to the top center crown seam by threading the tie tails through the seam and knotting firmly. Trim evenly.
The bonnet is designed to sit within the neck opening of the cocoon, not permanently attached. If desired, you can lightly tack it to the back neck inner edge with 2 to 3 whip stitches.
Finishing Your Star Cocoon
Blocking: Wet block both star panels before seaming for best results. Soak in cool water with baby-safe detergent for 20 minutes. Gently squeeze out water without wringing. Lay flat and pin each star point to its correct position. Allow to dry completely.
Buttons: Sew buttons onto the button band directly opposite the buttonholes. Pass through all layers twice for security.
Weaving Ends: Weave each tail in at least two directions for a minimum of 2 inches to prevent unraveling during washing.
Size Customization Tips
For a larger cocoon (3 to 6 months): Add 2 additional increase rounds to the center circle section. Increase each star point base by 4 stitches and add 2 additional decrease rows.
For a smaller newborn-only cocoon: Subtract one increase round from the center circle. The finished star will measure approximately 22 to 24 inches tip to tip.
Care Instructions
Machine wash cold on delicate cycle in a mesh laundry bag. Lay flat to dry. Do not tumble dry or bleach. Check all button attachments before each use.
I really hope you love making this sunset gradient star cocoon crochet pattern as much as I loved designing it. There’s something so satisfying about watching those colors shift from round to round, and the finished piece is guaranteed to be treasured for years.
If you found this tutorial helpful, save it to your Pinterest boards so you can find it when you’re ready to start. And please leave a comment below if you make one. I’d absolutely love to see your color choices and hear how the project went for you!
You Might Also Like
- Mermaid Tail Sparkle Baby Blanket Free Crochet Pattern
- Ocean Wave Peplum Dress Free Crochet Pattern
- Dusty Rose Boho Romper Free Crochet Pattern
- Sage Green Shell Stitch Romper Free Crochet Pattern
