
When I sat down to design this dress, I had a clear vision in my head. I wanted something that looked like it belonged in a garden fairy tale, with soft blues and delicate flowers that would make any little one look absolutely precious. The puff sleeves had to be just right, the skirt needed that perfect flare, and those bluebell flowers had to pop against the eyelet lace.
Get the Ad-Free PDF Pattern
You can find the free pattern below, or you can purchase the ad-free printable PDF from my shop.
Get the Printable PDF →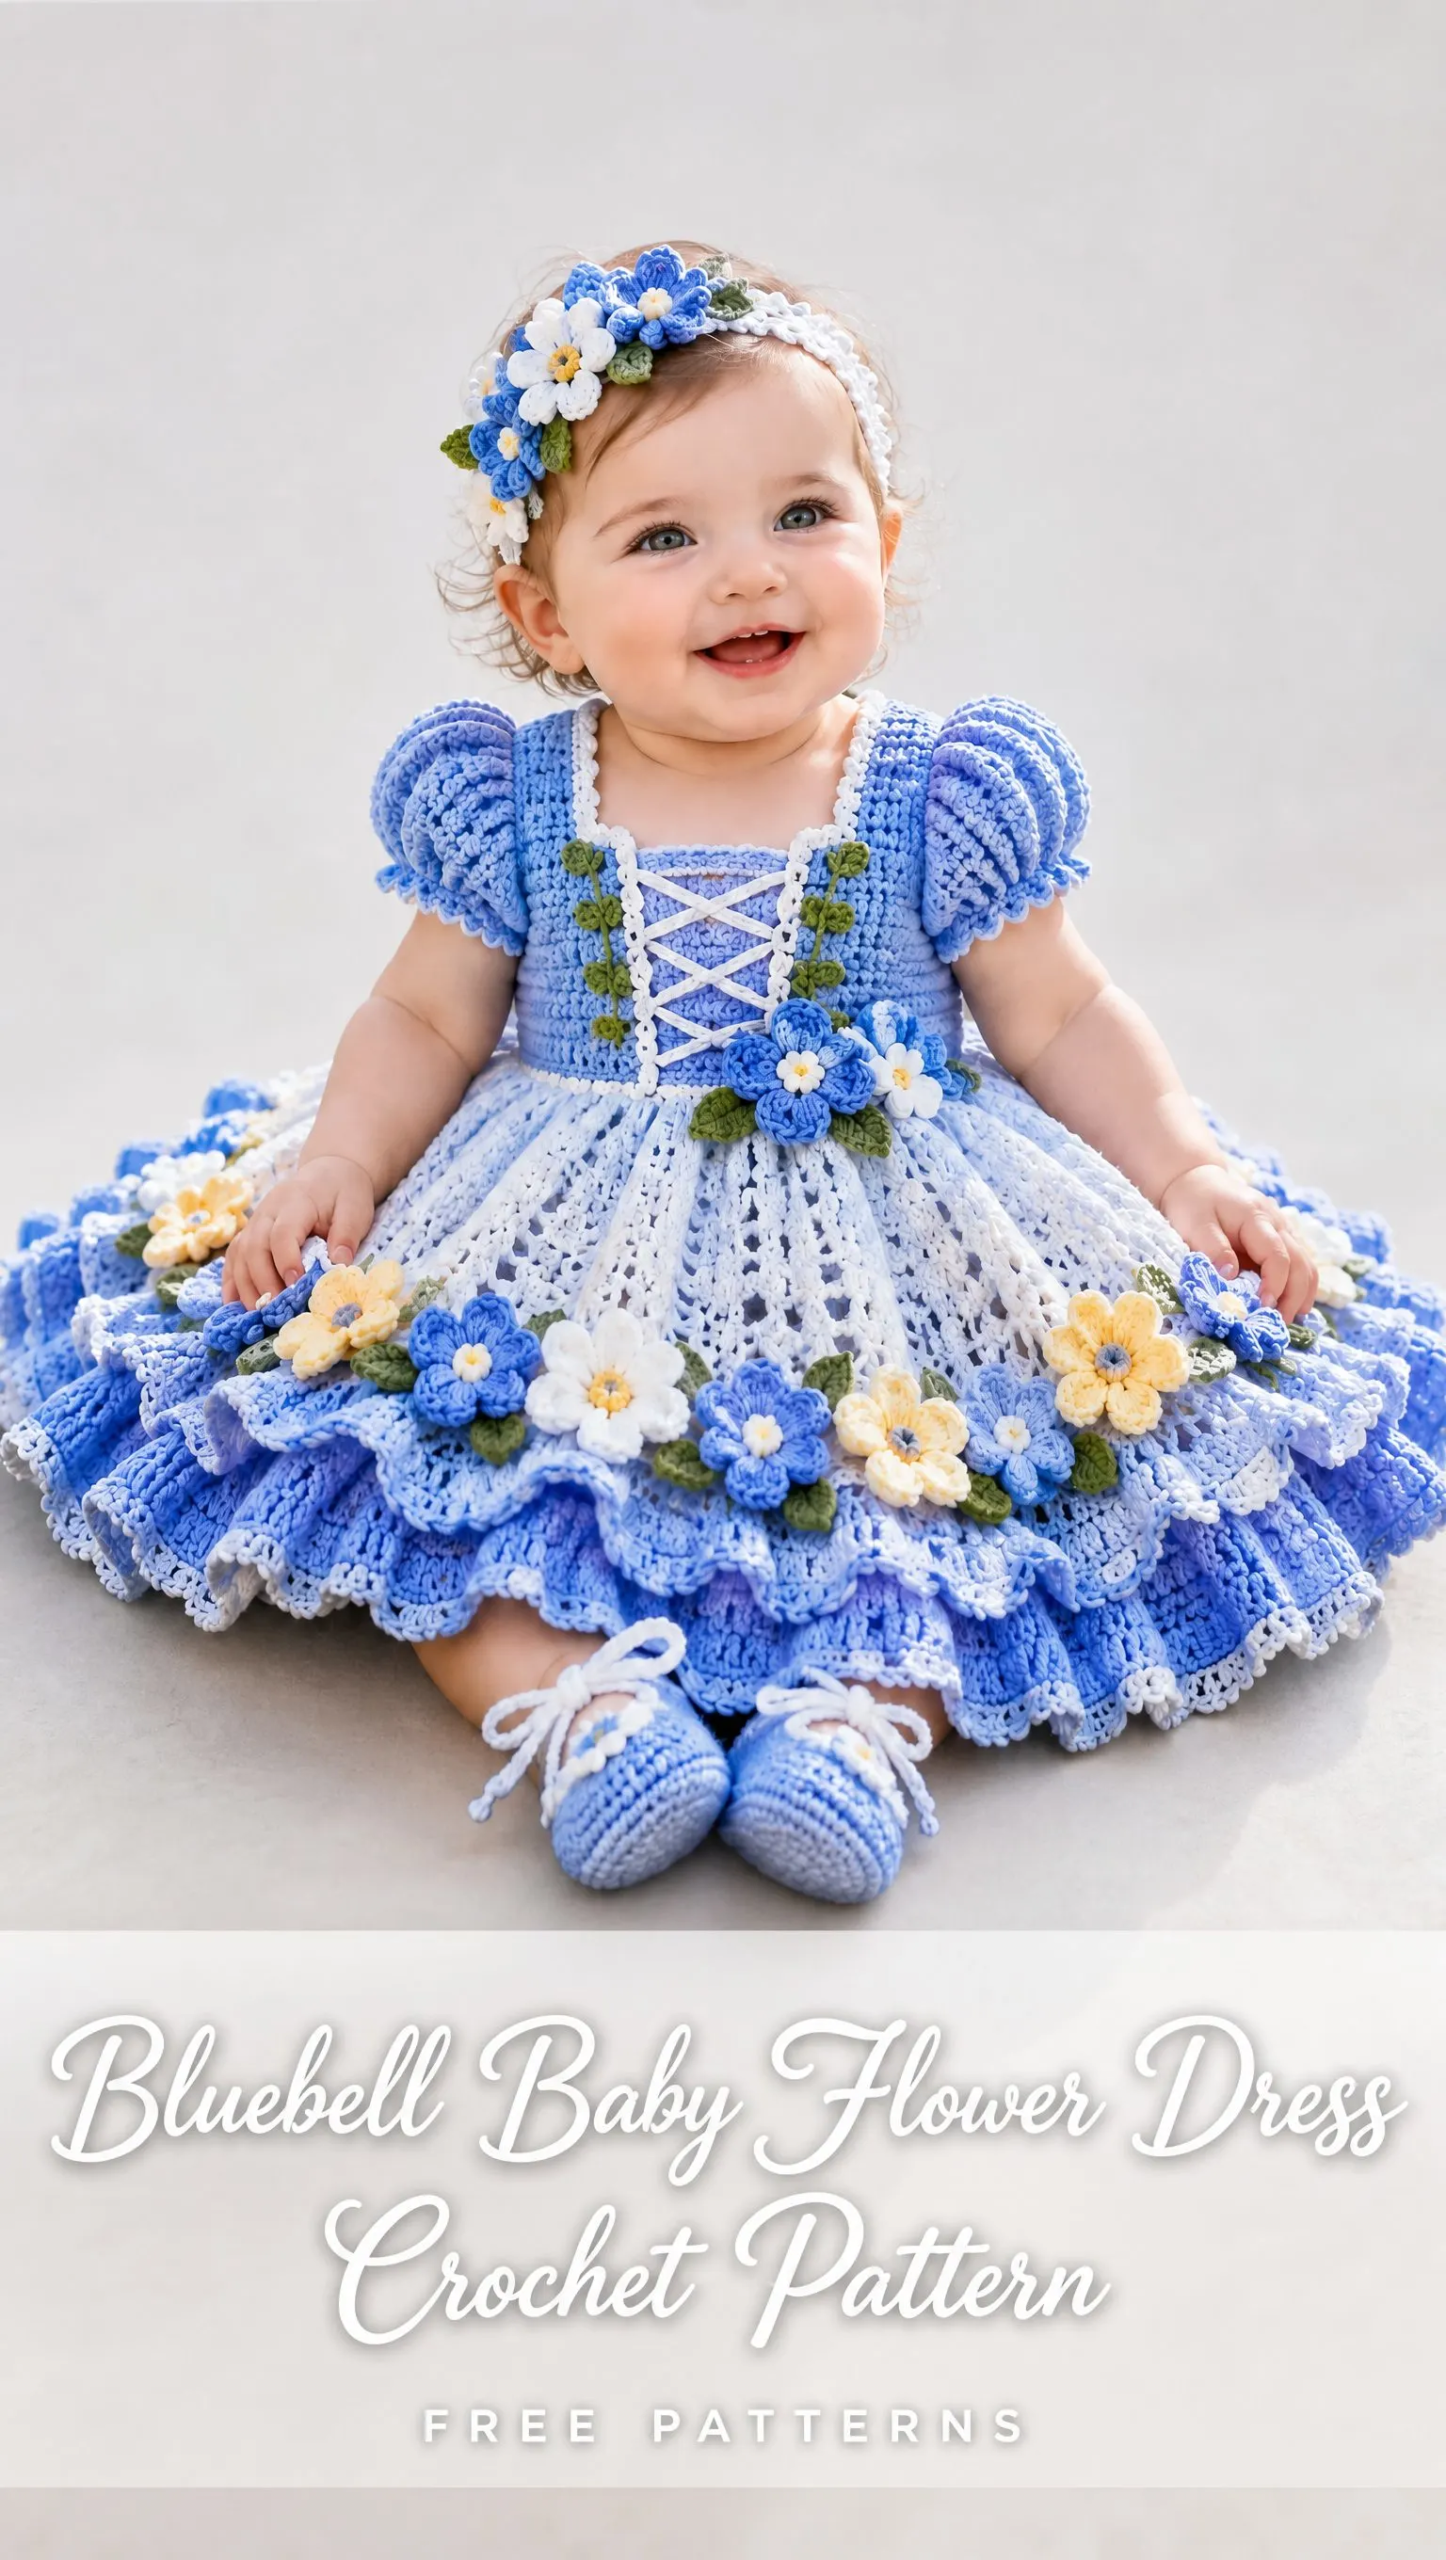
I spent weeks tweaking the bodice ribbing, adjusting the ruffle layers, and perfecting those sweet little flower accents. Every detail matters when you are creating something this special.
And honestly? I am SO thrilled with how this turned out. The Bluebell Baby Flower Dress is everything I hoped it would be, and I cannot wait for you to make one too.
About This Crochet Pattern
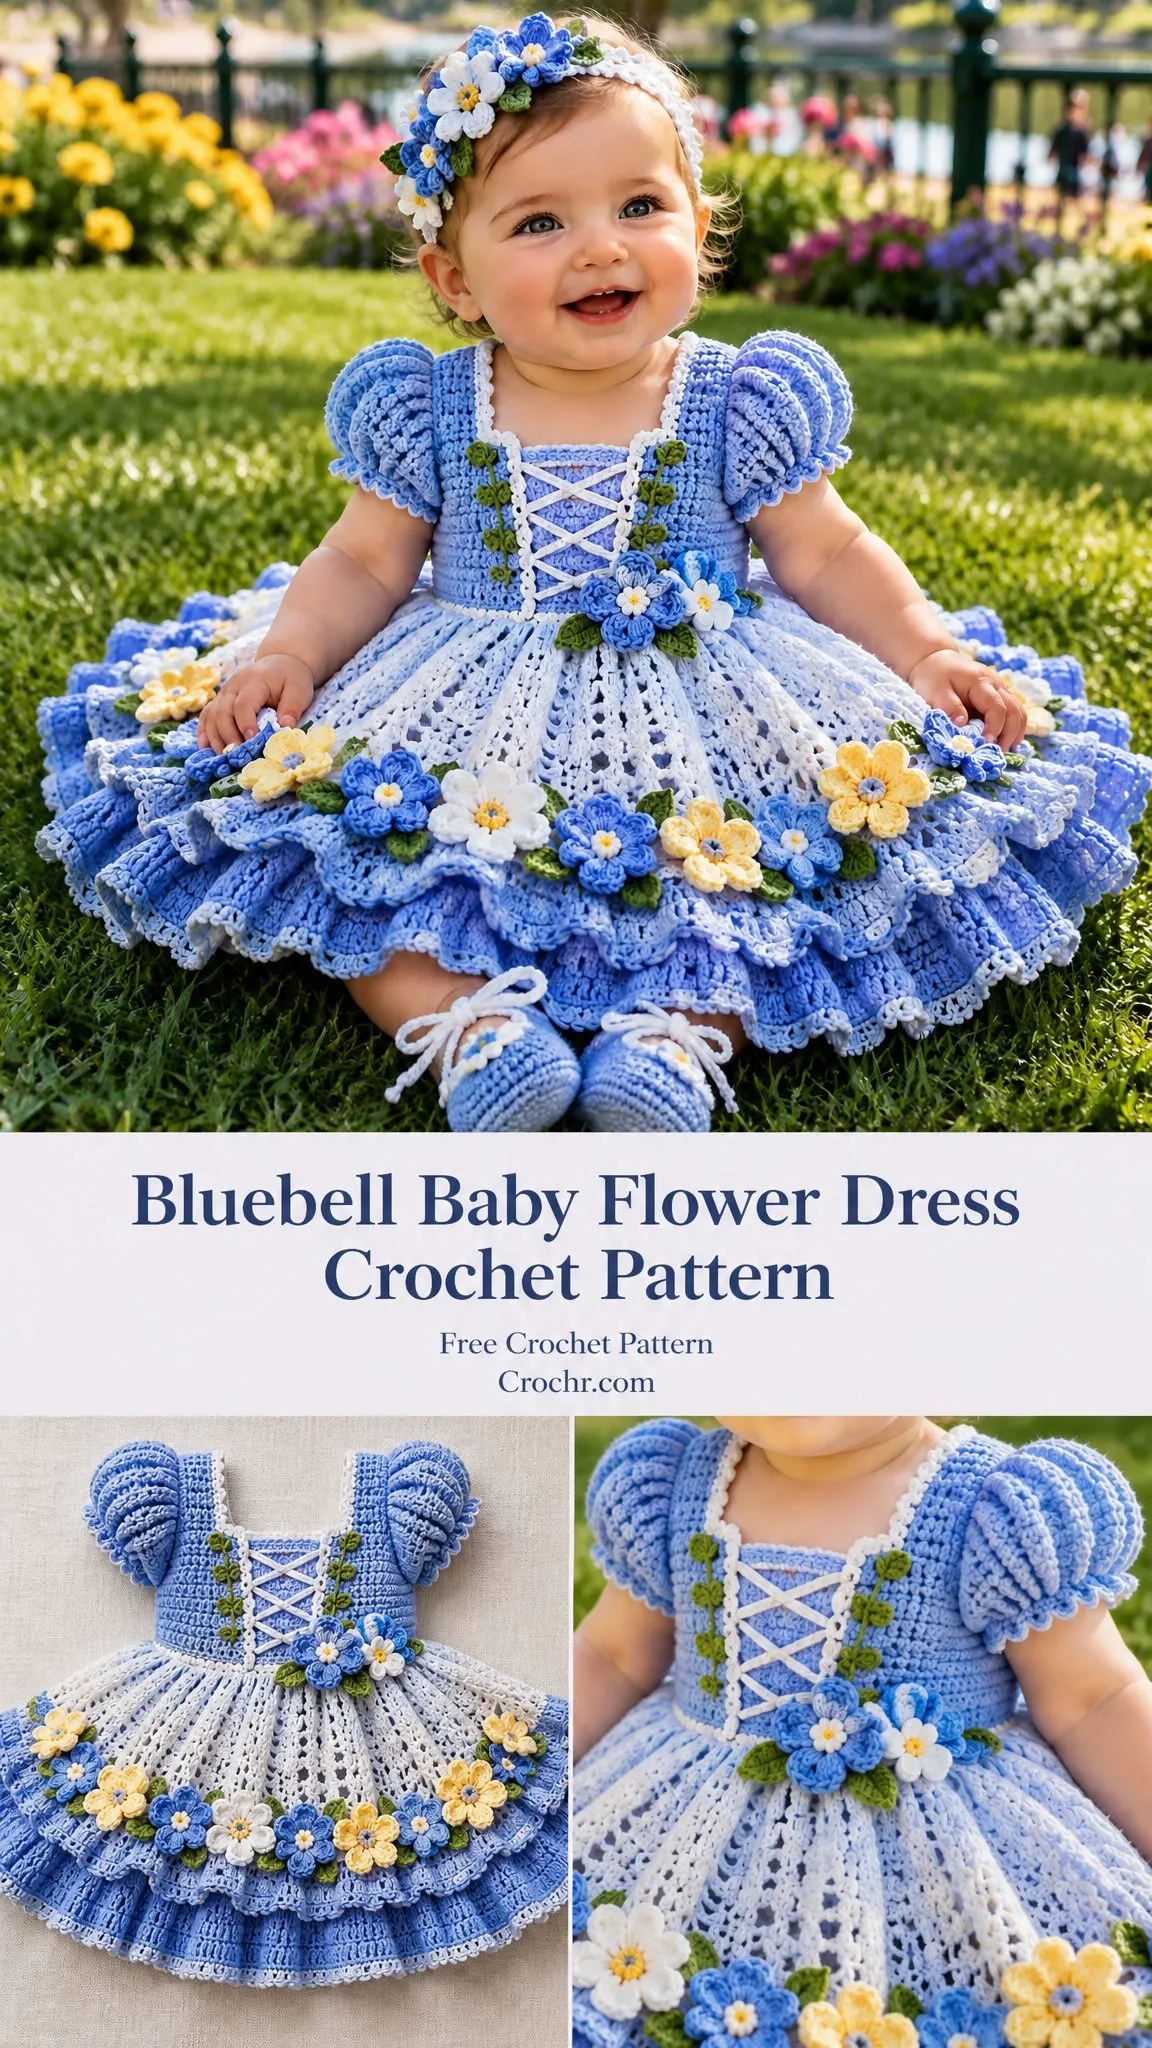
This intermediate level crochet pattern creates a stunning baby dress sized for 6 to 12 months, though it is easily adjustable for other sizes. The finished dress measures approximately 18 inches around the chest, 14 inches in length, and the skirt spans about 28 inches in width for that beautiful full circle shape.
The dress features a fitted bodice with half double crochet ribbing, adorable puff sleeves with scalloped edging, a charming lace-up front panel, and a flared eyelet skirt with ruffled layers. The whole piece is decorated with handmade bluebell flowers and leaves. This pattern also includes instructions for a matching headband and booties to complete the set.
Construction method: The dress is worked from the top down. You will start with the bodice, then work your way through the sleeves, skirt, ruffles, and finally add the flower decorations.
Materials You Will Need
Gather these supplies before you begin:
Yarn (DK weight cotton):
Tools:
Cotton yarn works beautifully for baby garments because it is soft against delicate skin, breathable, and holds up well to washing. If you cannot find periwinkle, any soft blue shade will look lovely.
Abbreviations and Stitch Definitions
Let me walk you through each stitch you will use in this pattern:
ch stands for chain. This is your foundation stitch where you yarn over, then pull through the loop on your hook.
sc stands for single crochet. Insert your hook into the stitch, yarn over and pull up a loop (2 loops on hook), yarn over and pull through both loops.
hdc stands for half double crochet. Yarn over, insert hook into stitch, yarn over and pull up a loop (3 loops on hook), yarn over and pull through all 3 loops at once.
dc stands for double crochet. Yarn over, insert hook into stitch, yarn over and pull up a loop (3 loops on hook), yarn over and pull through 2 loops, yarn over and pull through remaining 2 loops.
tr stands for treble crochet. Yarn over twice, insert hook into stitch, yarn over and pull up a loop (4 loops on hook), then yarn over and pull through 2 loops three times.
sl st stands for slip stitch. Insert hook into stitch, yarn over and pull through both the stitch and the loop on your hook in one motion.
st means stitch, inc means increase (working 2 stitches into one stitch), and dec means decrease (working 2 stitches together).
Bodice Pattern Instructions
The bodice forms the fitted top portion of the dress. Take your time here because a well-made bodice sets up the entire garment for success.
Foundation
Chain 60 using your periwinkle blue yarn. Join with a slip stitch to form a ring, making sure the chain is not twisted. This is important! A twisted chain will create a permanent spiral in your work that you cannot fix later. Lay your chain flat on a table and make sure all the bumps face the same direction before joining.
Round 1
Chain 2 (this counts as your first hdc). Work 1 half double crochet in each chain around. Join with a slip stitch to the top of your beginning chain 2.
Rounds 2 through 12
Now you will create the ribbed texture of the bodice. Work hdc ribbing by crocheting in the back loop only of each stitch. This technique creates those lovely horizontal ridges you see in the finished piece.
Continue working in the back loop only until the bodice reaches approximately 4 inches tall. The ribbing gives the bodice a stretchy quality that helps it fit comfortably around baby’s torso.
Sleeve Preparation
Using your stitch markers, mark the stitches for the front section, back section, and both sleeve openings. Leave 10 stitches for each sleeve opening. These 10 stitches will become the base for your puff sleeves.
Join the front and back sections under each arm by working across, skipping the sleeve stitches, and connecting to the other side.
Puff Sleeve Pattern
These sweet little puff sleeves are one of my favorite details on this dress. They add such a romantic, vintage feel.
Attach periwinkle yarn at one sleeve opening.
Round 1: Work single crochet evenly around the sleeve opening.
Round 2: Increase evenly around by working 2 stitches into some of your stitches, spacing them evenly.
Rounds 3 through 6: Work double crochet clusters to create the puff volume. The clusters bunch the fabric together and create that adorable gathered look.
Finishing: Switch to white yarn and finish with a scalloped edging around the bottom of each sleeve.
Repeat for the second sleeve.
Lace-Up Front Panel
This decorative panel adds such a charming cottage-core aesthetic to the dress.
Using white yarn, create a rectangle of single crochet rows approximately 3 inches wide. The panel should be tall enough to cover most of the front bodice.
Sew or crochet the panel onto the front center of the bodice.
Add crossed white chains to create the lace-up detail. This is purely decorative, so make sure you secure the chains firmly.
Using green yarn, add small leaf stitches along both sides of the panel. These leaves frame the lace-up section beautifully and tie into the flower theme.
Skirt Pattern Instructions
The skirt is where this dress really starts to feel magical. The eyelet pattern lets light peek through and creates movement when baby wiggles around.
Round 1
Attach pale blue yarn at the waist where the bodice ends. Work double crochet evenly around the bodice bottom.
Round 2
Begin creating the flare by increasing every 5 stitches. Work 4 double crochets, then work 2 double crochets into the next stitch. Repeat this pattern around.
Rounds 3 through 12
Now you will alternate between two different round types:
Plain rounds: Work 1 double crochet in each stitch around.
Eyelet pattern rounds: Work the pattern as follows: double crochet, chain 1, skip 1 stitch. Repeat this sequence around the entire round.
Continue increasing gradually as you work down the skirt. The increases should be spaced out so the skirt develops a full circular shape. By the end, your skirt width should measure approximately 28 inches.
Ruffle Layers
The ruffles add dimension and movement to the skirt hem. You will create two layers of ruffles using a shell stitch pattern.
Lower Ruffle
Attach periwinkle yarn at the bottom edge of the skirt.
Work the following pattern around: 3 double crochets in one stitch, skip next stitch, slip stitch in the following stitch. Repeat this shell pattern all the way around.
Second Ruffle
Work a similar shell pattern two rows above the first ruffle. This creates that lovely layered effect you see in the finished dress.
Final Edge
Switch to white yarn for a delicate finishing touch.
Work single crochet around the entire hem, followed by small picot stitches. To make a picot, work 3 chains then slip stitch into the first chain. These tiny points add a sweet feminine detail to the edge.
Flower Decorations
The bluebell flowers are what give this dress its name and personality. Making them is easier than you might think!
Bluebell Flowers
Using white or blue yarn:
Round 1: Make a magic ring and work 6 single crochets into it. Pull tight.
Round 2: Create 6 petals by working the following in each stitch: chain 2, double crochet, chain 2, slip stitch. Each stitch becomes one petal.
For the flower centers, use yellow yarn to create small French-knot-style crochet circles. Attach these to the center of each flower.
Leaves
Using green yarn, chain 5. Turn and work single crochet and half double crochet back along the chain to create a pointed leaf shape.
Make several leaves to attach beside your flowers.
Placement
Sew flowers evenly around the skirt hem. Space them out so they have room to shine. Place one larger flower at the waist as a focal point. I like to arrange a cluster of flowers with leaves near the lace-up panel as well.
Headband Pattern
Want to complete the look? This matching headband is quick to make.
Chain enough stitches to fit comfortably around baby’s head. Measure carefully because you want it snug enough to stay on but not tight enough to leave marks.
Work several rows of single crochet to create a band about half an inch to an inch wide.
Add small bluebell flowers and green leaves, attaching them securely. A cluster on one side looks adorable, or you can space flowers evenly around.
Booties Pattern
Matching booties tie the whole outfit together perfectly.
Sole
Chain 10.
Work oval rounds around the chain using single crochet increases at both ends. You are essentially working around both sides of your starting chain, adding extra stitches at the heel and toe to create an oval shape. Continue until the sole fits baby’s foot comfortably.
Upper
Work single crochet rounds upward from the sole, creating the sides of the bootie.
Add blue yarn details to match the dress. Finish with white ties that thread through the top edge.
Finishing Steps
You are almost done! These final steps ensure your dress looks polished and professional.
1. Weave in all yarn ends securely using your yarn needle. Take extra care with the flower attachments.
2. Block the dress gently to shape the skirt. Wet blocking works well for cotton. Lay the dress flat, shape the skirt into a circle, and let it dry completely.
3. Sew all flowers firmly in place. Give each one a gentle tug to make sure it is secure.
4. Check all buttons and decorations are securely attached before use. Baby safety is paramount, so nothing should be able to come loose.
5. Hand wash gently and lay flat to dry. Cotton can stretch when wet, so avoid hanging.
Customization Notes
This pattern adapts easily for different sizes and seasons:
For larger sizes: Increase the number of bodice rounds and start with a longer foundation chain.
For a longer dress: Add additional skirt rounds before starting the ruffle layers.
For different seasons: Change the flower colors to match holidays or personal preferences. Pink and white for spring, orange and gold for fall, red and green for winter celebrations.
Tips for Success
Gauge matters for garment fit. Make a small swatch before starting and adjust your hook size if needed.
Count your stitches at the end of each round, especially during the bodice section. Consistent stitch counts keep the dress symmetrical.
Use stitch markers liberally. Mark the beginning of each round, mark where sleeves will go, mark increase points. You cannot have too many markers.
Block your flowers before attaching them. It really makes them look more professional.
I hope you enjoy making this Bluebell Baby Flower Dress as much as I enjoyed designing it. There is something so special about creating a handmade outfit for a little one, and this dress is guaranteed to get compliments.
If you love this pattern, save it to your Pinterest boards so you can find it easily when you are ready to start. And please leave a comment below if you make one! I would absolutely love to see your finished dresses and hear which color combinations you chose.
Want a Quick & Easy Printable Version?
Get a clean, beautifully formatted PDF of this pattern — easy to follow step by step, ready to print or save on any device. No scrolling, no distractions, just the pattern.
Get the Printable PDF →You Might Also Like
- Sunset Peach Coral Ombre Sweater Free Crochet Pattern
- Tropical Hibiscus Mermaid Amigurumi Free Crochet Pattern
- Black White Cow Print Crochet Joggers Pattern
- Dusty Rose Romantic Lace Maxi Skirt Free Crochet Pattern
