
I don’t know about you, but I have a serious weakness for tiny baby outfits that look good enough to eat. There’s something about turning a newborn into an adorable little fruit that makes my crafter heart absolutely sing.
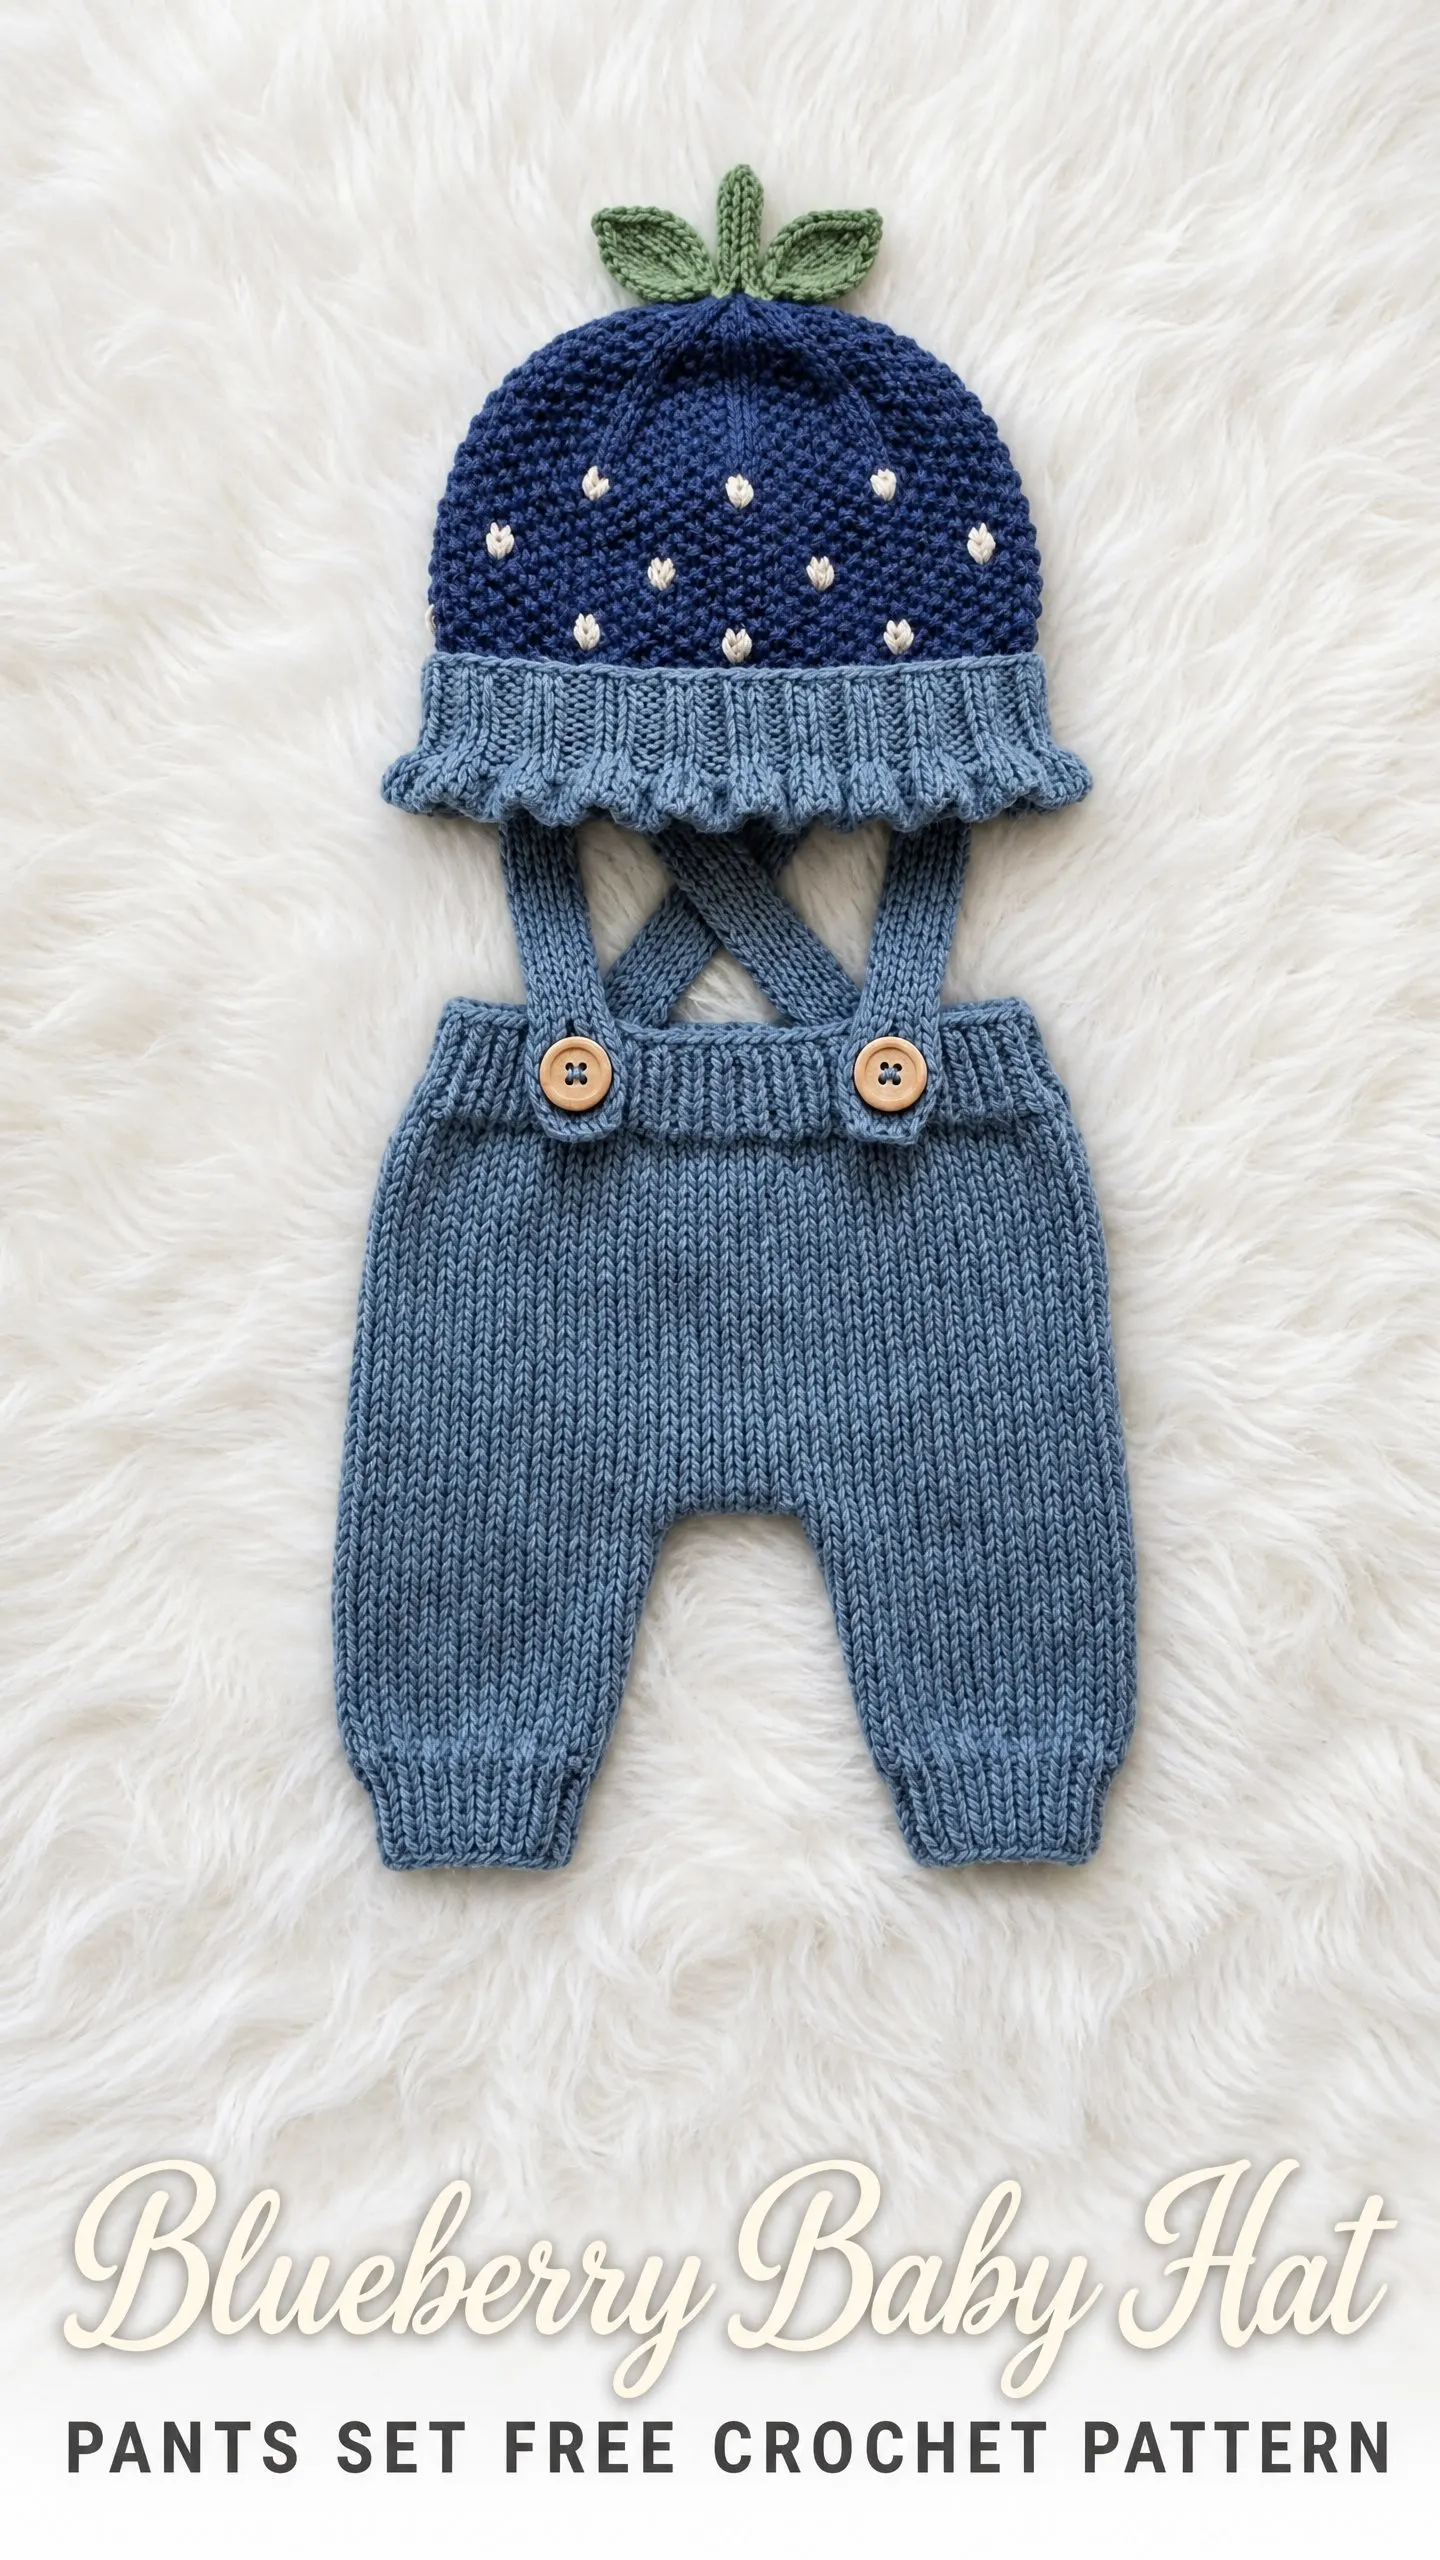
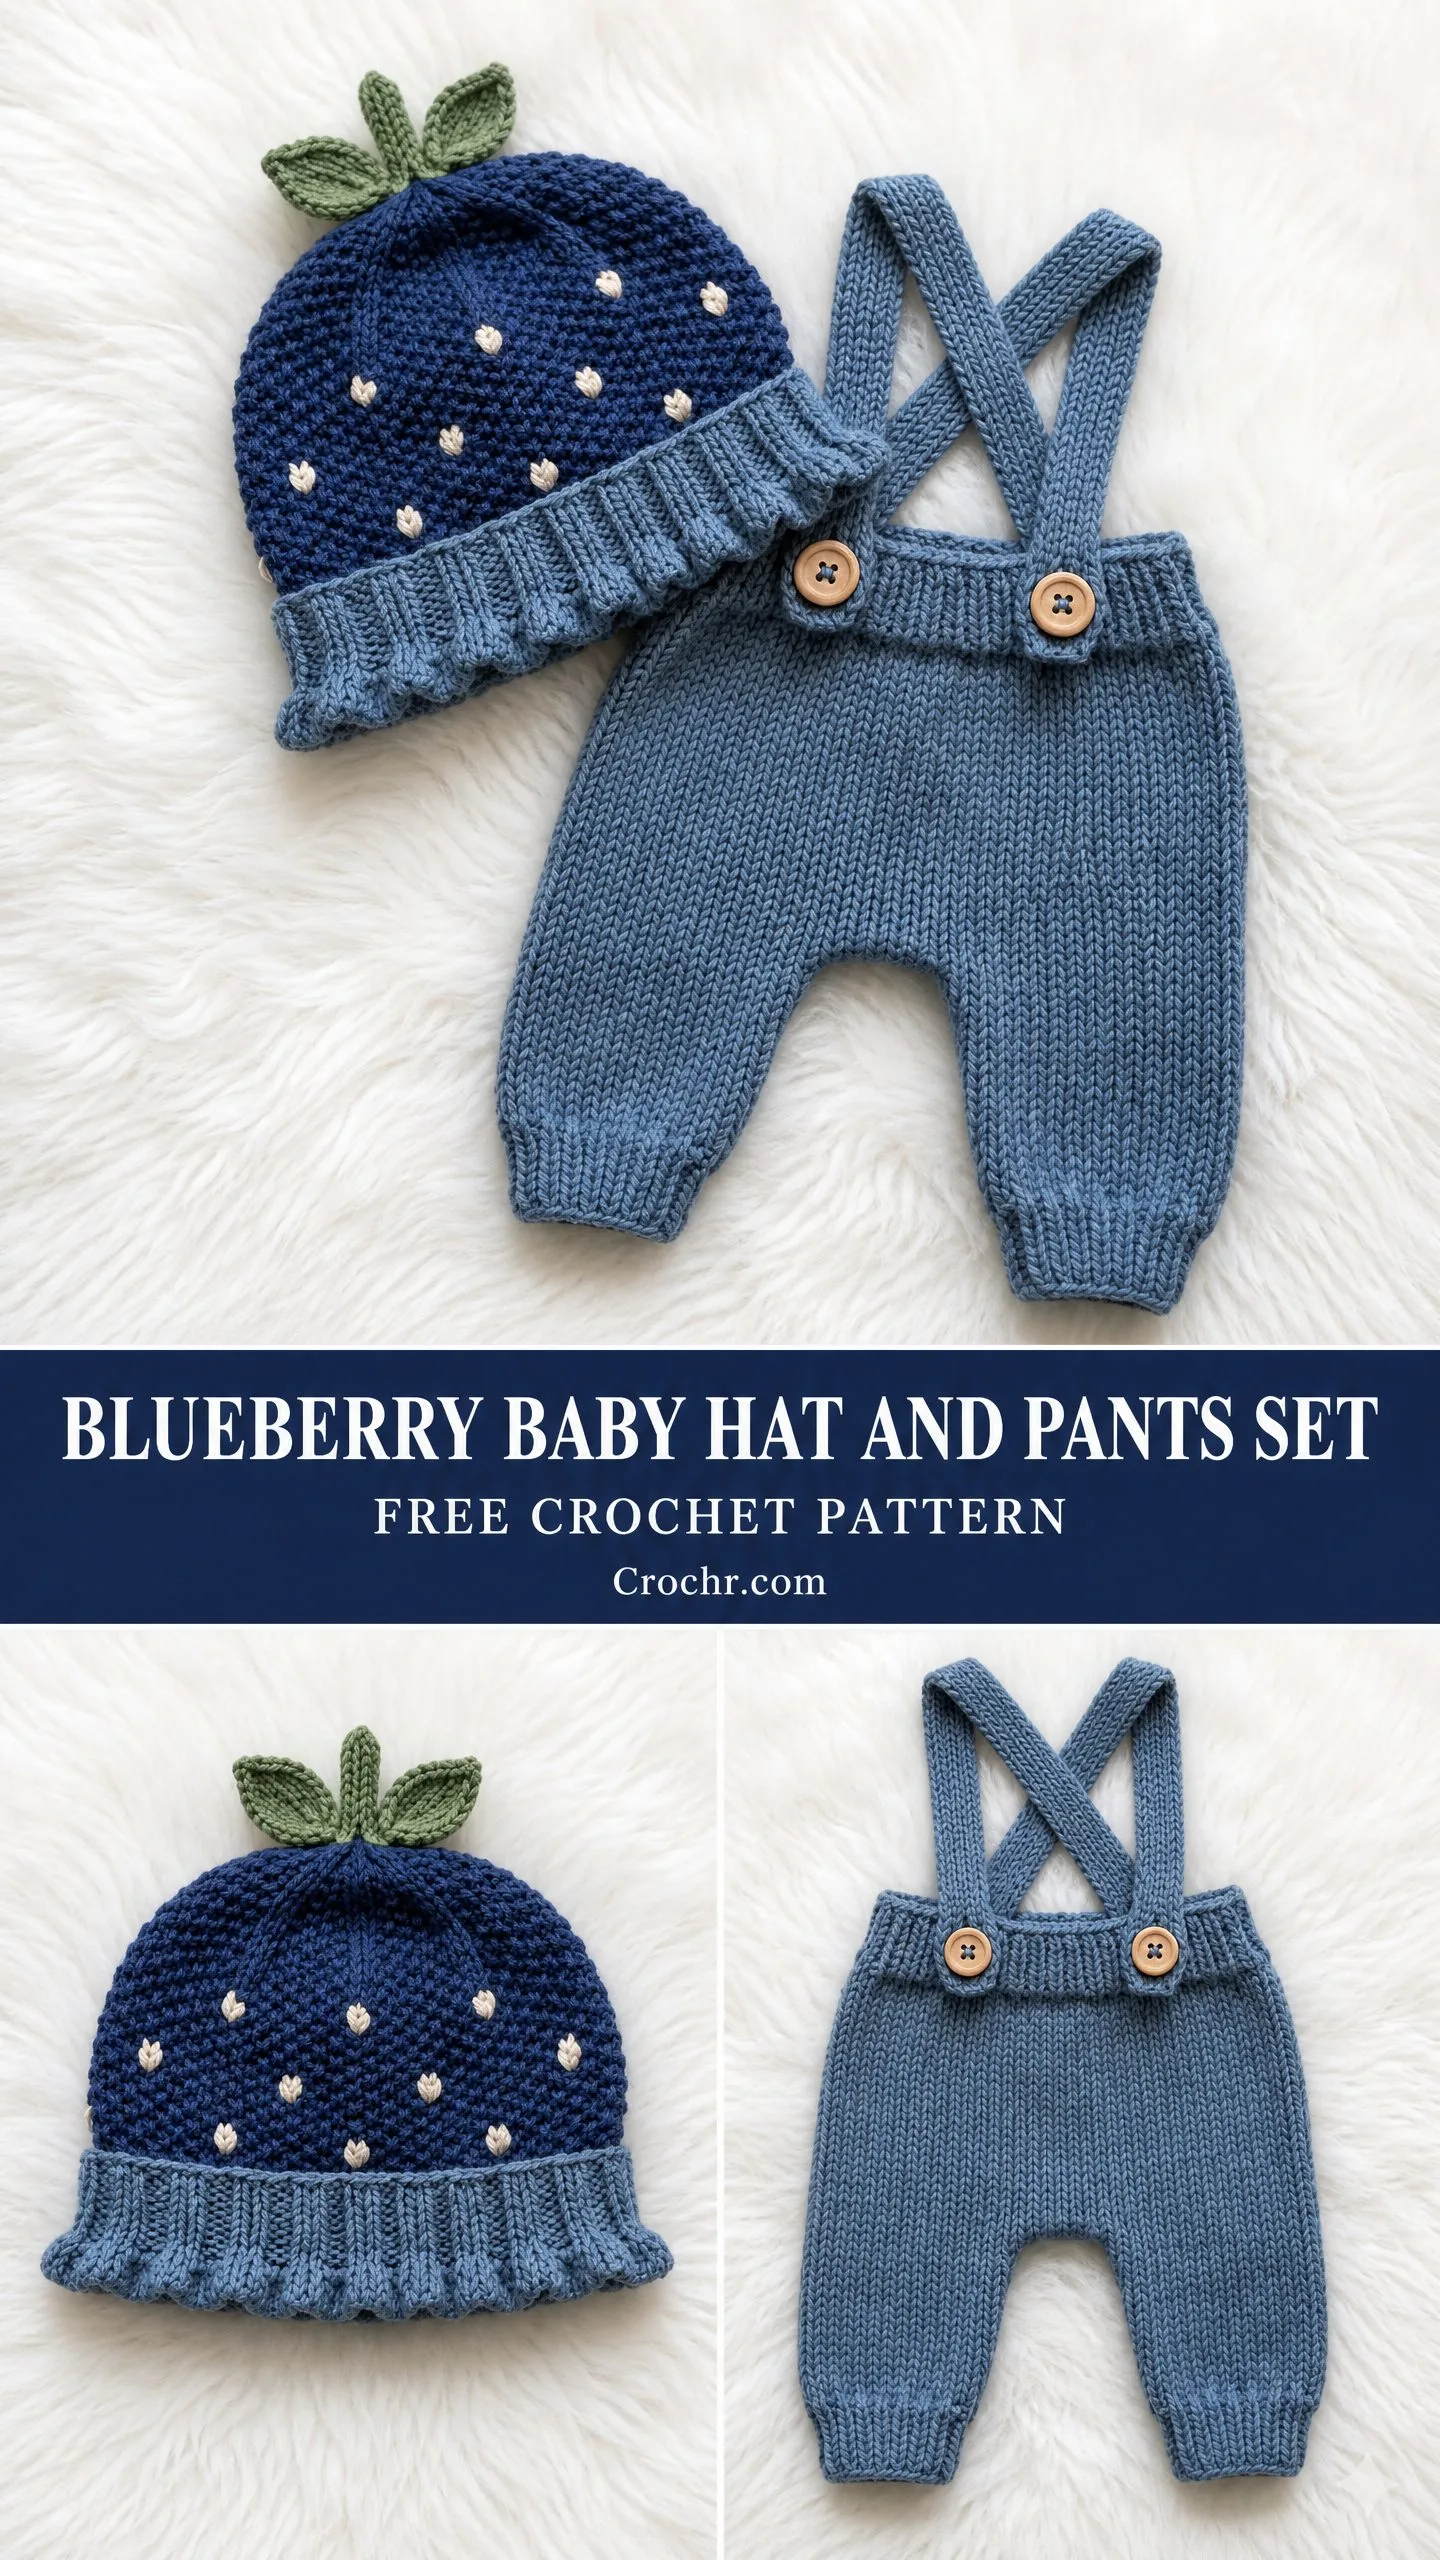
This blueberry baby hat and pants set hits all the right notes. You get the textured berry look from a gorgeous moss stitch, those sweet little white dot embellishments, a ruffly brim that photographs like a dream, and matching suspender pants with the cutest crossed straps at the back. It’s the kind of newborn photo prop that makes parents gasp and photographers grin.
Whether you’re making this for your own little one, a baby shower gift, or building up inventory for a craft fair, this crochet pattern delivers major impact without requiring expert skills. Let me walk you through every single step.
About This Blueberry Baby Set Crochet Pattern
This coordinating set features two pieces designed to work together beautifully. The hat creates that classic blueberry shape with a textured navy dome, scattered white French knot "seeds," a perky green leaf cluster at the crown, and a wavy steel blue ruffle brim. The pants bring it all together with a smooth stockinette-style finish, ribbed waistband, and those charming crossed suspender straps with wooden button closures.
The hat works from the crown down in the round. The pants are constructed flat in two separate leg pieces, then seamed and joined with a stretchy ribbed waistband. Don’t let the construction sound intimidating. If you can single crochet, chain, and follow a simple increase pattern, you can absolutely make this set.
Skill level: Advanced beginner to intermediate. You should feel comfortable working in the round, making basic increases, seaming pieces together, and doing simple surface embroidery for the French knots.
Time estimate: Plan for about 9 to 13 hours total. The hat takes roughly 3 to 4 hours, the pants need 5 to 7 hours, and finishing touches add another 1 to 2 hours.
Finished Measurements
This pattern fits newborn to 0 to 3 months.
Hat:
Pants:
Materials You’ll Need
Yarn:
Hooks:
Notions:
Yarn suggestions: Paintbox Yarns Simply DK works beautifully for this project with excellent stitch definition. Lion Brand Pound of Love is another great option, especially if you want something super soft against newborn skin. For warmer climates, try Paintbox Yarns Cotton DK, but definitely swatch first since cotton has less stretch than acrylic.
Avoid fuzzy or loosely spun yarns here. They’ll hide that lovely moss stitch texture you’re working so hard to create.
Gauge
Getting gauge right matters a lot for baby garments. Take time to swatch before diving in.
With US G-6 / 4.00 mm hook and Yarn A in moss stitch:
18 stitches and 20 rows = 4 inches (10 cm)
With US G-6 / 4.00 mm hook and Yarn B in single crochet:
18 stitches and 20 rows = 4 inches (10 cm)
Block your swatch before measuring for the most accurate results.
Abbreviations and Stitch Definitions
Let me break down every stitch term you’ll encounter in this crochet tutorial. If you’re newer to crochet, bookmark this section for easy reference.
Special Stitches for This Pattern
Moss Stitch (Also Called Linen Stitch)
This stitch creates that gorgeous dense, seed-like texture that makes the blueberry hat look so realistic. It works over an even number of stitches.
How to work it in the round:
1. Single crochet (sc) in the first stitch
2. Chain 1 (ch 1)
3. Skip the next stitch
4. Single crochet in the following stitch
5. Chain 1
6. Skip the next stitch
7. Repeat steps 4 through 6 around
When working subsequent rounds, you’ll work your single crochets into the chain-1 spaces of the previous round, not into the skipped stitches. The chain-1 spaces count as stitches for counting purposes.
French Knot (Surface Embroidery)
This creates those adorable white dots scattered across the berry.
1. Thread your tapestry needle with Yarn D
2. Insert needle from wrong side to right side at the desired dot location
3. Wrap the yarn around the needle twice (or three times for a larger knot)
4. Insert needle back into the fabric as close to the exit point as possible without going back through the same hole
5. Pull the needle through to the wrong side while holding the wrapped loops against the fabric with your thumb
6. The wraps form a raised dot on the right side
7. Secure on wrong side with a small knot
Don’t stress if your first few French knots look a bit wonky. They take practice, and the scattered, organic look actually works in your favor here.
Blueberry Hat Instructions
Crown (Yarn A, US G-6 / 4.00 mm hook)
Begin with a magic ring.
Rnd 1: Ch 1 (does not count as stitch), work 6 sc into magic ring, join with sl st to first sc. Pull ring closed. (6 sc)
Rnd 2: Ch 1, 2 sc in each st around, join. (12 sc)
Rnd 3: Ch 1, [sc in next st, 2 sc in next st] 6 times, join. (18 sc)
Rnd 4: Ch 1, [sc in next 2 sts, 2 sc in next st] 6 times, join. (24 sc)
Rnd 5: Ch 1, [sc in next 3 sts, 2 sc in next st] 6 times, join. (30 sc)
Rnd 6: Ch 1, [sc in next 4 sts, 2 sc in next st] 6 times, join. (36 sc)
Rnd 7: Ch 1, [sc in next 5 sts, 2 sc in next st] 6 times, join. (42 sc)
Rnd 8: Ch 1, [sc in next 6 sts, 2 sc in next st] 6 times, join. (48 sc)
Rnd 9: Ch 1, [sc in next 7 sts, 2 sc in next st] 6 times, join. (54 sc)
Rnd 10: Ch 1, [sc in next 8 sts, 2 sc in next st] 6 times, join. (60 sc)
Checkpoint: After Rnd 10, your flat circle should measure approximately 4.25 inches (10.75 cm) in diameter. Check your gauge before continuing.
Hat Body in Moss Stitch (Yarn A, US G-6 / 4.00 mm hook)
Now we transition from plain single crochet to that beautiful textured moss stitch. Your 60 stitch count divides evenly for this pattern.
Rnd 11: Ch 1, [sc in next st, ch 1, sk next st] 30 times, join to first sc. (30 sc and 30 ch-1 sps = 60 stitch positions)
Rnd 12: Sl st into first ch-1 sp, ch 1, [sc in ch-1 sp, ch 1, sk sc] around, join to first sc. (30 sc and 30 ch-1 sps = 60 stitch positions)
Rnds 13 through 20: Rep Rnd 12. Continue working sc into each ch-1 sp and ch 1 over each sc, joining each round. (30 sc and 30 ch-1 sps = 60 stitch positions each round)
Place a stitch marker at the beginning of each round to keep track. Don’t turn between rounds when working moss stitch in the round.
Checkpoint: After Rnd 20, the hat body from the crown base to the current edge should measure approximately 3.5 to 4 inches (9 to 10 cm).
Brim Transition (Yarn A to Yarn B)
Rnd 21: With Yarn A, sl st into first ch-1 sp, ch 1, sc in each ch-1 sp and each sc around, join. Fasten off Yarn A. (60 sc)
This round converts the moss stitch back to plain single crochet to prepare for the ruffle.
Ruffle Brim (Yarn B, switch to US E-4 / 3.50 mm hook)
Rnd 22: Join Yarn B to any st, ch 1, 2 sc in each st around, join. (120 sc)
Doubling the stitch count is what creates that gathered ruffle effect. It’s like magic watching it bloom.
Rnd 23: Ch 3 (counts as first dc), 2 dc in same st, [3 dc in next st] around, join to top of ch-3. (360 dc)
Fasten off Yarn B. Weave in ends.
Checkpoint: The completed hat including ruffle brim should measure approximately 5.5 inches (14 cm) from crown to brim edge. The ruffle should lie in pretty waves around the hat opening.
Leaf Cluster (Yarn C, US E-4 / 3.50 mm hook)
Make 3 leaves separately and attach all three to the crown center.
For each leaf:
Foundation: Ch 6.
Row 1: Sl st in 2nd ch from hook (leaf tip), sc in next ch, hdc in next ch, dc in next ch, (dc, ch 2, sl st) in last ch (leaf base with stem nub). Do not fasten off after last leaf. Leave an 8 inch (20 cm) tail for sewing.
Pinch each leaf gently to give a slight curl. Arrange the 3 leaves in a fan formation at the crown of the hat. Thread a tapestry needle with the tail and sew each leaf securely to the center of the magic ring on the right side. The leaves should fan outward to resemble the calyx of a blueberry.
Adding the French Knot Dots
Using Yarn D and a tapestry needle, add French knot dots scattered across the navy dome of the hat body (Rnds 11 through 20). Place approximately 15 to 18 dots evenly but organically scattered. Avoid the brim transition and ruffle.
Space them approximately 0.75 to 1 inch (2 to 2.5 cm) apart in a scattered pattern. Larger dots can be achieved with 3 wraps. Standard dots use 2 wraps. Secure each knot on the wrong side and weave in all ends.
Your hat is complete!
Suspender Pants Instructions
The pants are worked in two identical legs, each worked flat in rows of single crochet, then seamed.
Pants Leg (Make 2, Yarn B, US G-6 / 4.00 mm hook)
Ankle Cuff:
Foundation: Ch 24.
Row 1 (RS): Sc in 2nd ch from hook and in each ch across, turn. (23 sc)
Rows 2 through 6: Ch 1, sc in BLO of each st across, turn. (23 sc each row)
Working in back loop only for these 6 rows creates that lovely ribbed ankle cuff effect.
Row 7: Ch 1, sc in both loops of each st across, turn. (23 sc)
Leg Tube:
Rows 8 through 14: Ch 1, sc in each st across, turn. (23 sc each row)
Row 15: Ch 1, 2 sc in first st, sc to last st, 2 sc in last st, turn. (25 sc)
Rows 16 through 20: Ch 1, sc in each st across, turn. (25 sc each row)
Row 21: Ch 1, 2 sc in first st, sc to last st, 2 sc in last st, turn. (27 sc)
Rows 22 through 26: Ch 1, sc in each st across, turn. (27 sc each row)
Row 27: Ch 1, 2 sc in first st, sc to last st, 2 sc in last st, turn. (29 sc)
Rows 28 through 32: Ch 1, sc in each st across, turn. (29 sc each row)
Row 33: Ch 1, 2 sc in first st, sc to last st, 2 sc in last st, turn. (31 sc)
Rows 34 through 38: Ch 1, sc in each st across, turn. (31 sc each row)
Fasten off, leaving a 12 inch (30 cm) tail for seaming.
Checkpoint: Each completed leg panel should measure approximately 6 inches (15 cm) wide at the top and approximately 4.75 inches (12 cm) wide at the ankle cuff. Total height should be approximately 8.5 inches (21.5 cm).
Seaming the Legs
Fold each leg panel with right sides together so the long edges align. Using the yarn tail and a tapestry needle, seam the inseam using whipstitch or mattress stitch, picking up matching rows on each edge. The inseam runs the full length from ankle to the top. Leave the top edge open for the waistband.
Turn each leg right side out.
Joining the Legs
Hold both completed legs side by side, right sides out, inseams aligned at center. Using Yarn B, join the two legs together at the front and back crotch points by working a small whipstitch or seaming 2 to 3 stitches at the center top edge to create a joined crotch.
The two legs should now form a pants shape with a combined top edge of 62 stitches total.
Waistband (Yarn B, US E-4 / 3.50 mm hook, worked in the round)
Join Yarn B to any stitch at the top edge of the joined pants.
Rnd 1: Ch 1, sc evenly around the entire top opening, picking up approximately 62 sts, join. (62 sc)
Rnds 2 through 6: Ch 1, sc in BLO of each st around, join. (62 sc each round)
Fasten off. Weave in ends.
Working 6 rounds in BLO creates that stretchy ribbed waistband. It will measure approximately 1.25 inches (3 cm) in height.
Suspender Straps (Make 2, Yarn B, US G-6 / 4.00 mm hook)
Foundation: Ch 5.
Row 1: Sc in 2nd ch from hook and in each ch across, turn. (4 sc)
Rows 2 through 46: Ch 1, sc in each st across, turn. (4 sc each row)
Each strap should measure approximately 9 inches (23 cm) in length.
Button Loop: After Row 46, do not fasten off. Instead, ch 4, sl st into the same stitch to form a small button loop. Fasten off and weave in ends.
Attaching the Straps
1. Lay the pants flat with the front facing you
2. Position the two button loops at the front waistband, spaced approximately 2.5 inches (6.5 cm) apart
3. Sew the button loop end of each strap to the outside top of the front waistband ribbing
4. Cross the straps at the back so the right strap crosses over the left strap, forming an X
5. Sew the opposite ends of each strap to the back waistband, placing each attachment point approximately 2.5 inches (6.5 cm) from center back
6. Sew buttons to the front waistband directly beneath each button loop using a doubled length of Yarn B
Blocking and Finishing
Wet blocking makes a real difference with this set. Soak both finished pieces in cool water with a small amount of wool wash for 15 minutes. Gently press out excess water without wringing. Lay flat on a clean towel or blocking mat and shape to the finished dimensions.
For the hat, insert a balloon or small ball to help it hold its dome shape while drying. Allow to dry completely before wearing or photographing.
After blocking, review all French knots and tighten any that may have loosened. Secure on the wrong side if needed.
Size Customization Tips
To size up to 3 to 6 months:
For the hat, add 2 additional increase rounds at the beginning to reach a 72 stitch crown. Work 2 additional even rounds in the body section before the ruffle transition.
For the pants, add 4 additional stitches to the foundation chain (ch 28 instead of 24) and add 2 additional increase rows to the leg shaping.
To size down for a very small newborn:
For the hat, remove 1 increase round to reach a 54 stitch crown. Work 2 fewer even rounds in the body.
For the pants, reduce foundation chain by 4 stitches (ch 20) and omit 2 increase rows in the leg shaping.
Care Instructions
For acrylic yarn: Machine wash cold on gentle cycle. Lay flat to dry. Do not iron.
For cotton yarn: Machine wash cold. Lay flat to dry. May be ironed on low with a pressing cloth.
Store the set folded flat away from direct sunlight to prevent color fading, especially in the navy yarn.
I really hope you love making this blueberry baby set as much as I enjoyed designing it. If you give this crochet pattern a try, I would absolutely love to see your finished project! Tag me on Instagram or share a photo in our Facebook group.
Before you go, save this pattern to your Pinterest boards so you can find it easily when you’re ready to start. And please drop a comment below if you make this set. I love hearing how projects turn out for you!
You Might Also Like
- Ocean Wave Teal Bikini Set Free Crochet Pattern
- Ocean Breeze Tiered Crochet Dress Free Crochet Pattern
- Strawberry Sweet Bow Crochet Vest Free Crochet Pattern
- Sunset Safari Beaded Animal Anklet Free Crochet Pattern
