
I’ve been looking for the perfect beach crochet project for months now. Something that captures that breezy coastal vibe without being too complicated. This teal bikini set with its wave stitch texture and adorable starfish appliques is exactly what I had in mind.
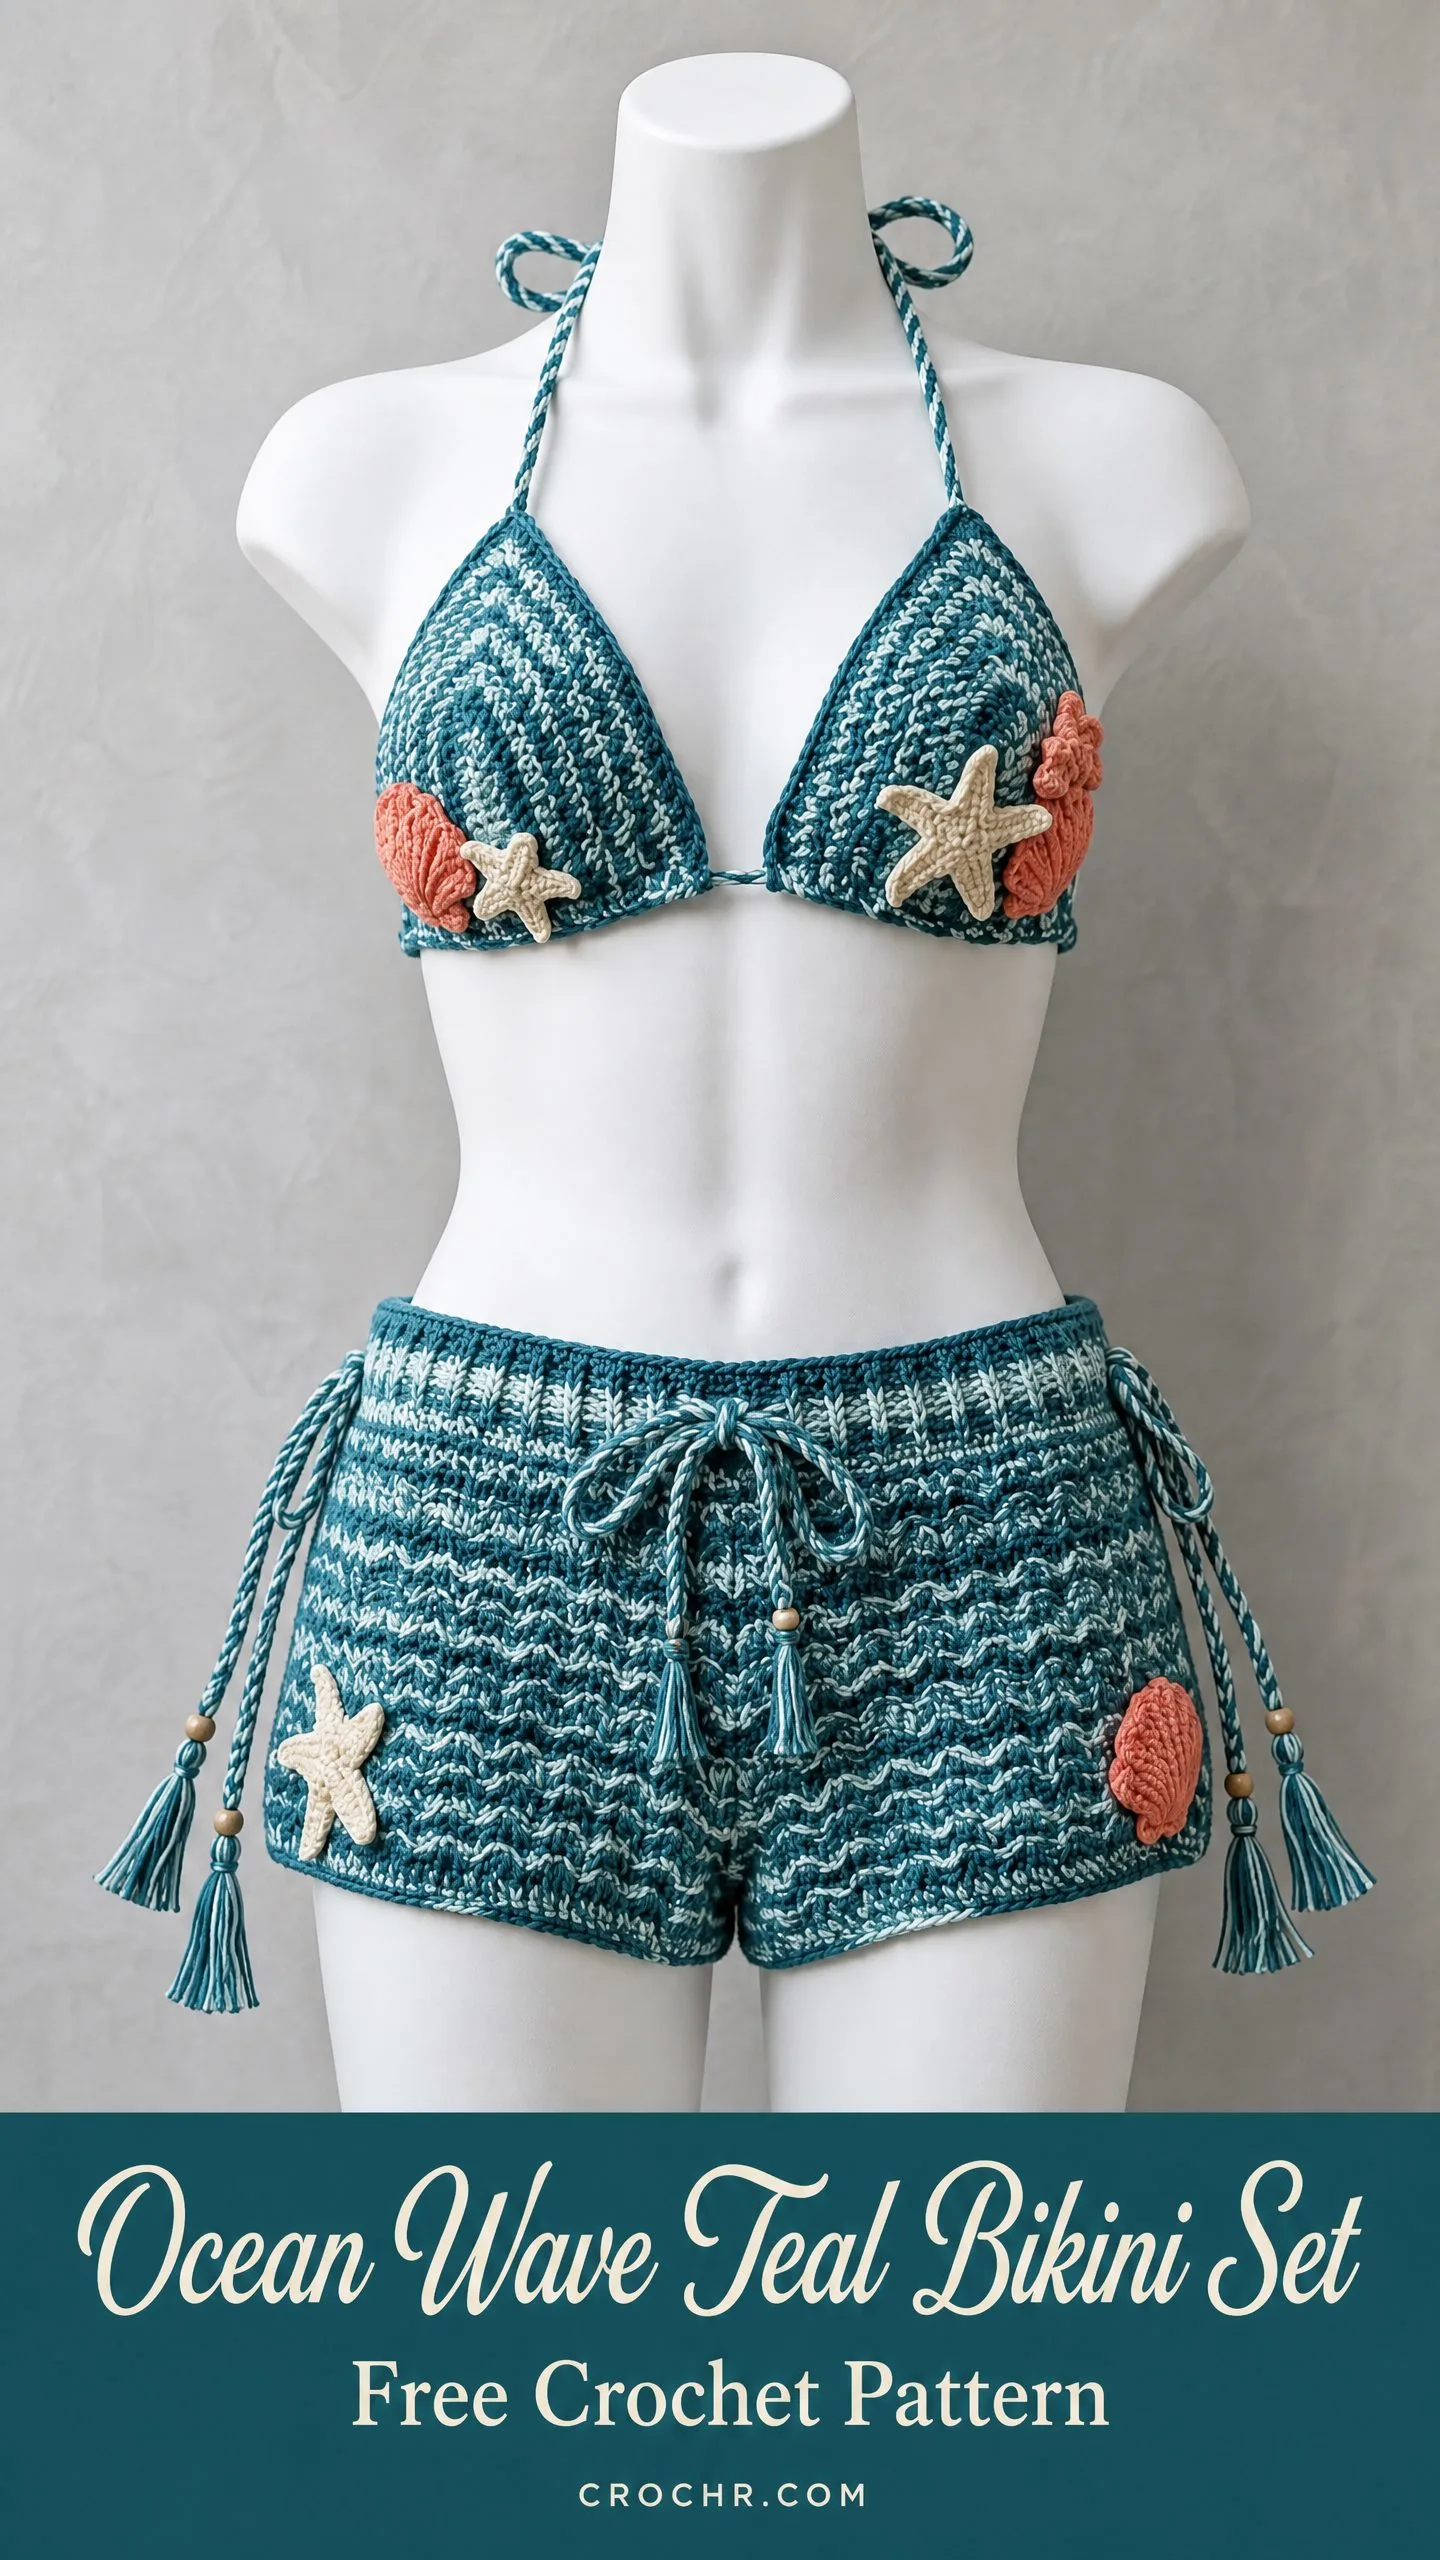
The marled teal and white yarn creates such a beautiful water-like effect, almost like you’re wearing the ocean itself. And those little coral seashells and cream starfish? They turn a simple bikini into wearable art.
This pattern includes a triangle halter top and high-waisted shorts with the cutest tassel ties. It’s one of those projects that looks incredibly impressive but breaks down into manageable steps. Let me walk you through everything you need to know.
About This Ocean Wave Bikini Crochet Pattern
This two-piece beach set features construction techniques that build on each other nicely. The triangle bikini top uses simple decreases to create that classic shape, while the shorts body showcases a gorgeous wave stitch that mimics rolling ocean waves. Both pieces get finished with handmade starfish and seashell appliques in coral and cream.
The skill level sits at advanced beginner to intermediate. If you can work basic stitches and count a ten-stitch repeat, you can absolutely make this set. The wave stitch might sound intimidating, but it only uses single crochet (sc), half double crochet (hdc), double crochet (dc), and treble crochet (tr). The variation in stitch heights does all the visual work for you.
Plan for about 12 to 18 hours total for the complete set, including those sweet appliques and all the finishing details. The shorts body takes the most time, but it’s meditative work once you get into the rhythm.
Finished Measurements
Bikini Top:
Each cup measures approximately 5 inches wide at the base and 4.5 inches tall for size Small. Medium measures 5.5 inches wide and 5 inches tall. Large measures 6 inches wide and 5.5 inches tall.
The neck ties run about 14 inches each, and the back band ties measure approximately 18 inches each.
Shorts:
The drawstring adds 2 to 4 inches of stretch ease, so these fit comfortably.
Materials You’ll Need
Yarn:
Main Color (MC): Teal and white variegated yarn, or hold one strand of teal sport weight with one strand of white sport weight for that beautiful marled effect. You’ll need approximately 550 yards for Small, 650 yards for Medium, or 750 yards for Large.
Contrast Color A (CA): Coral or peach in worsted or DK weight. About 30 yards for the seashell appliques.
Contrast Color B (CB): Cream or off-white in DK or worsted weight. About 30 yards for the starfish appliques.
Yarn Suggestions:
Lion Brand Comfy Cotton Blend in Teal paired with White works beautifully. It’s machine washable and has the perfect drape for swimwear-adjacent garments.
Paintbox Yarns Simply DK in Spearmint Blue and Paper White held together creates that gorgeous marled effect you see in the photos.
Knit Picks Comfy Sport in Celestial and White is another excellent choice. Sport weight held double gives great stitch definition for the wave pattern.
Important: Choose yarn with at least 50 percent cotton content. This keeps the fabric comfortable against skin and prevents excessive stretching when wet. Skip 100 percent acrylic for the shorts body since it won’t drape naturally.
Hooks:
Notions:
Gauge
Getting gauge right matters a lot for fit with this pattern. Make a 5-inch swatch in each stitch before starting.
Top cups using E-4 hook:
18 sc = 4 inches
20 rows = 4 inches in single crochet
Shorts body using F-5 hook:
One full wave repeat (10 stitches) = 2.25 inches
8 rows of wave stitch = 2 inches
Block your swatch before measuring. This gives you accurate numbers.
Abbreviations and Stitch Definitions
Let me break down every stitch you’ll use:
ch = chain. Wrap yarn over hook, pull through loop on hook.
sl st = slip stitch. Insert hook, yarn over, pull through stitch and loop on hook in one motion.
sc = single crochet. Insert hook, yarn over, pull up loop (2 loops on hook), yarn over, pull through both loops.
hdc = half double crochet. Yarn over, insert hook, yarn over, pull up loop (3 loops on hook), yarn over, pull through all 3 loops.
dc = double crochet. Yarn over, insert hook, yarn over, pull up loop (3 loops on hook), yarn over, pull through 2 loops, yarn over, pull through remaining 2 loops.
tr = treble crochet. Yarn over twice, insert hook, yarn over, pull up loop (4 loops on hook), [yarn over, pull through 2 loops] three times.
inc = increase. Work two sc in the same stitch.
dec = invisible decrease. Insert hook in front loop only of next stitch, then front loop only of following stitch, yarn over, pull through both loops, yarn over, pull through both loops on hook.
sk = skip
st(s) = stitch(es)
sp = space
rep = repeat
RS = right side
WS = wrong side
BLO = back loop only
pm = place marker
rnd = round
Special Stitches
Wave Stitch
This creates the beautiful undulating texture throughout the shorts. It’s worked on a flat foundation using stitches of varying heights in a single row.
Wave Row (Right Side): Ch 1, turn. Sc in first st (edge). Then across all interior stitches, work [sc, sc, hdc, dc, tr, dc, hdc, sc, sc, sc] repeating this 10-stitch sequence. Sc in last st (edge).
Wave Return Row (Wrong Side): Ch 1, turn. Sc in each stitch across.
Each 10-stitch section uses 10 stitches and produces 10 stitches. Your count stays the same throughout. The variation in stitch height creates visual wave crests and troughs automatically.
Shell Stitch
Work 5 dc into one stitch or space. This produces the fan shape for the seashell appliques.
Picot
Ch 3, sl st in first ch made. Used for shell applique ridges.
Pattern Notes Before You Begin
The top cups are worked flat in rows. You start at the bottom edge and decrease toward the point. Each cup is made separately, then joined to a continuous tie-band.
The shorts are worked flat (not in the round) so the wave stitch right side faces consistently. You’ll sew the back seam after blocking.
All chain-3 turning chains at the start of dc rows do NOT count as a stitch. Always work your first dc into the first stitch at the base of the turning chain.
When holding two strands of yarn together for MC, wind each into its own ball and pull from both at the same time. Treat those two strands as one throughout.
All sizes are written as Small (Medium, Large). When only one number appears, it works for all sizes.
Bikini Top Instructions
Triangle Cup (Make 2)
Using MC and E-4 (3.5 mm) hook, ch 30 (34, 38).
Foundation Row (WS): Sc in second ch from hook and in each ch across. Turn.
(29, 33, 37 sc)
Row 1 (RS): Ch 1, turn. Dec over first 2 sts, sc in each st to last 2 sts, dec over last 2 sts.
(27, 31, 35 sc)
Row 2 (WS): Ch 1, turn. Sc in each st across.
(27, 31, 35 sc)
Row 3 (RS): Ch 1, turn. Dec over first 2 sts, sc in each st to last 2 sts, dec over last 2 sts.
(25, 29, 33 sc)
Row 4 (WS): Ch 1, turn. Sc in each st across.
(25, 29, 33 sc)
Row 5 (RS): Ch 1, turn. Dec over first 2 sts, sc in each st to last 2 sts, dec over last 2 sts.
(23, 27, 31 sc)
Row 6 (WS): Ch 1, turn. Sc in each st across.
(23, 27, 31 sc)
Row 7 (RS): Ch 1, turn. Dec over first 2 sts, sc in each st to last 2 sts, dec over last 2 sts.
(21, 25, 29 sc)
Row 8 (WS): Ch 1, turn. Sc in each st across.
(21, 25, 29 sc)
Row 9 (RS): Ch 1, turn. Dec over first 2 sts, sc in each st to last 2 sts, dec over last 2 sts.
(19, 23, 27 sc)
Row 10 (WS): Ch 1, turn. Sc in each st across.
(19, 23, 27 sc)
Row 11 (RS): Ch 1, turn. Dec over first 2 sts, sc in each st to last 2 sts, dec over last 2 sts.
(17, 21, 25 sc)
Row 12 (WS): Ch 1, turn. Sc in each st across.
(17, 21, 25 sc)
Row 13 (RS): Ch 1, turn. Dec over first 2 sts, sc in each st to last 2 sts, dec over last 2 sts.
(15, 19, 23 sc)
Row 14 (WS): Ch 1, turn. Sc in each st across.
(15, 19, 23 sc)
Row 15 (RS): Ch 1, turn. Dec over first 2 sts, sc in each st to last 2 sts, dec over last 2 sts.
(13, 17, 21 sc)
Row 16 (WS): Ch 1, turn. Sc in each st across.
(13, 17, 21 sc)
Row 17 (RS): Ch 1, turn. Dec over first 2 sts, sc in each st to last 2 sts, dec over last 2 sts.
(11, 15, 19 sc)
Row 18 (WS): Ch 1, turn. Sc in each st across.
(11, 15, 19 sc)
For Size Small: Skip to Cup Point Section.
For Size Medium Only:
Row 19 (RS): Ch 1, turn. Dec over first 2 sts, sc in each st to last 2 sts, dec over last 2 sts.
(13 sc)
Row 20 (WS): Ch 1, turn. Sc in each st across.
(13 sc)
Row 21 (RS): Ch 1, turn. Dec over first 2 sts, sc in each st to last 2 sts, dec over last 2 sts.
(11 sc)
Row 22 (WS): Ch 1, turn. Sc in each st across.
(11 sc)
Skip to Cup Point Section.
For Size Large Only:
Row 19 (RS): Ch 1, turn. Dec over first 2 sts, sc in each st to last 2 sts, dec over last 2 sts.
(17 sc)
Row 20 (WS): Ch 1, turn. Sc in each st across.
(17 sc)
Row 21 (RS): Ch 1, turn. Dec over first 2 sts, sc in each st to last 2 sts, dec over last 2 sts.
(15 sc)
Row 22 (WS): Ch 1, turn. Sc in each st across.
(15 sc)
Row 23 (RS): Ch 1, turn. Dec over first 2 sts, sc in each st to last 2 sts, dec over last 2 sts.
(13 sc)
Row 24 (WS): Ch 1, turn. Sc in each st across.
(13 sc)
Row 25 (RS): Ch 1, turn. Dec over first 2 sts, sc in each st to last 2 sts, dec over last 2 sts.
(11 sc)
Row 26 (WS): Ch 1, turn. Sc in each st across.
(11 sc)
Cup Point Section (All Sizes)
You should have 11 sc on your hook at this point.
Row A (RS): Ch 1, turn. Dec, sc 7, dec.
(9 sc)
Row B (WS): Ch 1, turn. Sc in each st across.
(9 sc)
Row C (RS): Ch 1, turn. Dec, sc 5, dec.
(7 sc)
Row D (WS): Ch 1, turn. Sc in each st across.
(7 sc)
Row E (RS): Ch 1, turn. Dec, sc 3, dec.
(5 sc)
Row F (WS): Ch 1, turn. Sc in each st across.
(5 sc)
Row G (RS): Ch 1, turn. Dec, sc 1, dec.
(3 sc)
Row H (WS): Ch 1, turn. Sc in each st across.
(3 sc)
Row I (RS): Ch 1, turn. Insert hook in first st and second st together (dec), sc in last st.
(2 sc)
Row J (WS): Ch 1, turn. Dec.
(1 sc)
Fasten off, leaving a 6-inch tail. This is the top point of your triangle cup.
Checkpoint: Each completed cup should measure approximately 5 (5.5, 6) inches wide at the foundation edge and 4.5 (5, 5.5) inches tall from foundation to tip.
Cup Edging and Neck Tie Attachment
Don’t seam the two cups together yet.
With RS facing and MC, attach yarn at the top-right corner of the right cup (at the tip point).
Neck Tie Right: Ch 65. This forms the right neck tie and measures approximately 14 inches. Sl st back down the chain to create a twisted cord texture, or leave as a simple chain.
Secure the chain to the tip with a sl st. Then work sc evenly along the right diagonal edge of the right cup (approximately 18, 20, 22 sc depending on size), along the bottom foundation edge (29, 33, 37 sc), up the left diagonal edge of the right cup (18, 20, 22 sc).
Continue directly into the left cup without breaking yarn. Work sc along the right diagonal edge of the left cup (18, 20, 22 sc), along its bottom edge (29, 33, 37 sc), up its left diagonal edge (18, 20, 22 sc) to the tip.
At the top-left tip of the left cup, ch 65 for the left neck tie.
Fasten off. Weave in ends. Fold the chain neck ties in half and twist them together from the base, then secure with a slip knot or tie at the top to form braided-looking cords.
Back Band Ties
With MC and E-4 hook, make two back ties.
Side Tie (Make 2): Ch 80 (approximately 18 inches when slightly tensioned). Sl st in second ch from hook and in each ch across. Fasten off.
Attach one side tie to each outer bottom corner of each cup using a yarn needle. Stitch through 3 to 4 stitches at the corner for security. These tie behind the back to close the top.
Shorts Instructions
Shorts Body
The shorts body is worked flat in rows, then seamed at the back center. The wave stitch RS always faces outward.
Using MC and F-5 (3.75 mm) hook.
Foundation Chain:
Small: Ch 153
Medium: Ch 173
Large: Ch 193
Foundation Row (WS): Sc in second ch from hook and in each ch across. Turn.
(152, 172, 192 sc)
Row 1 (WS, plain sc): Ch 1, turn. Sc in each st across.
(152, 172, 192 sc)
Row 2 (RS, Wave Row): Ch 1, turn. Sc in first st (edge). Across interior 150 (170, 190) sts, work [sc, sc, hdc, dc, tr, dc, hdc, sc, sc, sc] repeating this 10-stitch sequence. Sc in last st (edge).
(152, 172, 192 sts)
Rows 3 through 40: Continue working Wave Row then Return Row (sc across) for a total of 20 wave pattern repeats (40 rows total after the foundation row and Row 1 setup).
After all 40 rows: (152, 172, 192 sc)
Checkpoint: The shorts body panel should measure approximately 10 (10.5, 11) inches tall and 34 (38.5, 43) inches wide.
Waistband
Using MC and E-4 (3.5 mm) hook.
Ch 9.
Row 1: Sc in second ch from hook and in each ch across. Turn.
(8 sc)
Rows 2 onward: Ch 1, turn. Sc in BLO of each st across.
(8 sc per row)
Repeat Row 2 until waistband strip measures 26 inches for Small, 30 inches for Medium, or 34 inches for Large.
Eyelet Row: Before fastening off, work one final RS row to create drawstring eyelets. Ch 1, turn. Sc in BLO of first 2 sts. [Ch 1, sk 1, sc in BLO of next st] across to last st. Sc in BLO of last st.
Fasten off, leaving a 24-inch tail for seaming.
Assembly
Step 1: Fold the shorts body panel in half with RS together, aligning the two short edges. Using yarn needle and MC, whipstitch or mattress stitch the back center seam from hem to top edge. Leave 0.5 inch open at the top for seam ease.
Step 2: With RS facing out, pin the waistband strip along the top edge of the shorts body. Using the long tail and yarn needle, sew the waistband to the shorts body with a whipstitch. Overlap the two short ends of the waistband by 0.5 inch at the back seam and stitch together.
Step 3: Fold the waistband down over the top edge to the inside, creating a doubled waistband casing. Sew the inner edge down with a whipstitch, leaving a 1-inch opening above front center for the drawstring to exit.
Drawstring Cord
With MC and two strands held together, ch 120 (130, 140) or until cord measures approximately 30 (33, 36) inches. Sl st in second ch from hook and in each ch across for a twisted cord.
Thread the cord through the waistband casing using a large safety pin or bodkin, entering and exiting through the front opening.
Side Tassel Ties
Make four tassel ties total (two per side).
For each tassel tie:
With MC, ch 40 (approximately 9 inches). Sl st back along chain for a cord. Thread 2 to 3 wooden beads onto the cord. Leave 3 inches at the end free.
Tassel: Cut 10 lengths of MC, each 6 inches long. Fold in half. Attach to the end of the cord by looping the fold through and pulling the ends through the loop. Wrap a short separate piece of yarn around all tassel strands 0.25 inch from the top and knot tightly. Trim tassel to even length of approximately 2 inches.
Attach the unbeaded end of each tassel cord to the side seams of the shorts at waistband level, sewing through several stitches securely.
Applique Instructions
Starfish (Make 3)
Using CB and E-4 hook.
Magic ring or ch 4 and join.
Round 1: Ch 1. Work 5 sc into ring. Sl st to join to first sc.
(5 sc)
Round 2: Ch 1. [Sc in next st, ch 1] 5 times. Sl st to join.
(5 sc, 5 ch-1 sps)
For each of the 5 arms:
Sl st into ch-1 sp. Ch 8. Sc in second ch from hook, sc in next 2 ch, hdc in next 2 ch, dc in last 2 ch. Sl st back to ch-1 sp at base.
Repeat for all 5 ch-1 spaces, forming 5 arms. Sl st to join.
Fasten off, leaving a tail for sewing.
For the small starfish on the left cup, work ch 6 per arm instead of ch 8.
Seashell Applique (Make 3)
Using CA and E-4 hook.
Ch 4. Join with sl st to form ring.
Row 1 (RS): Ch 3 (does not count as dc). Work 11 dc into ring. Turn.
(11 dc)
Row 2 (WS): Ch 3, turn. Dc in first st, 2 dc in each of next 9 sts, dc in last st. Turn.
(21 dc)
Row 3 (RS): Ch 1, turn. Sc in first st. [Work 5 dc in next st, sk 1, sc in next st] across, working approximately 5 shells and ending with sc in last st.
Fasten off, leaving a tail for sewing.
Attaching Appliques
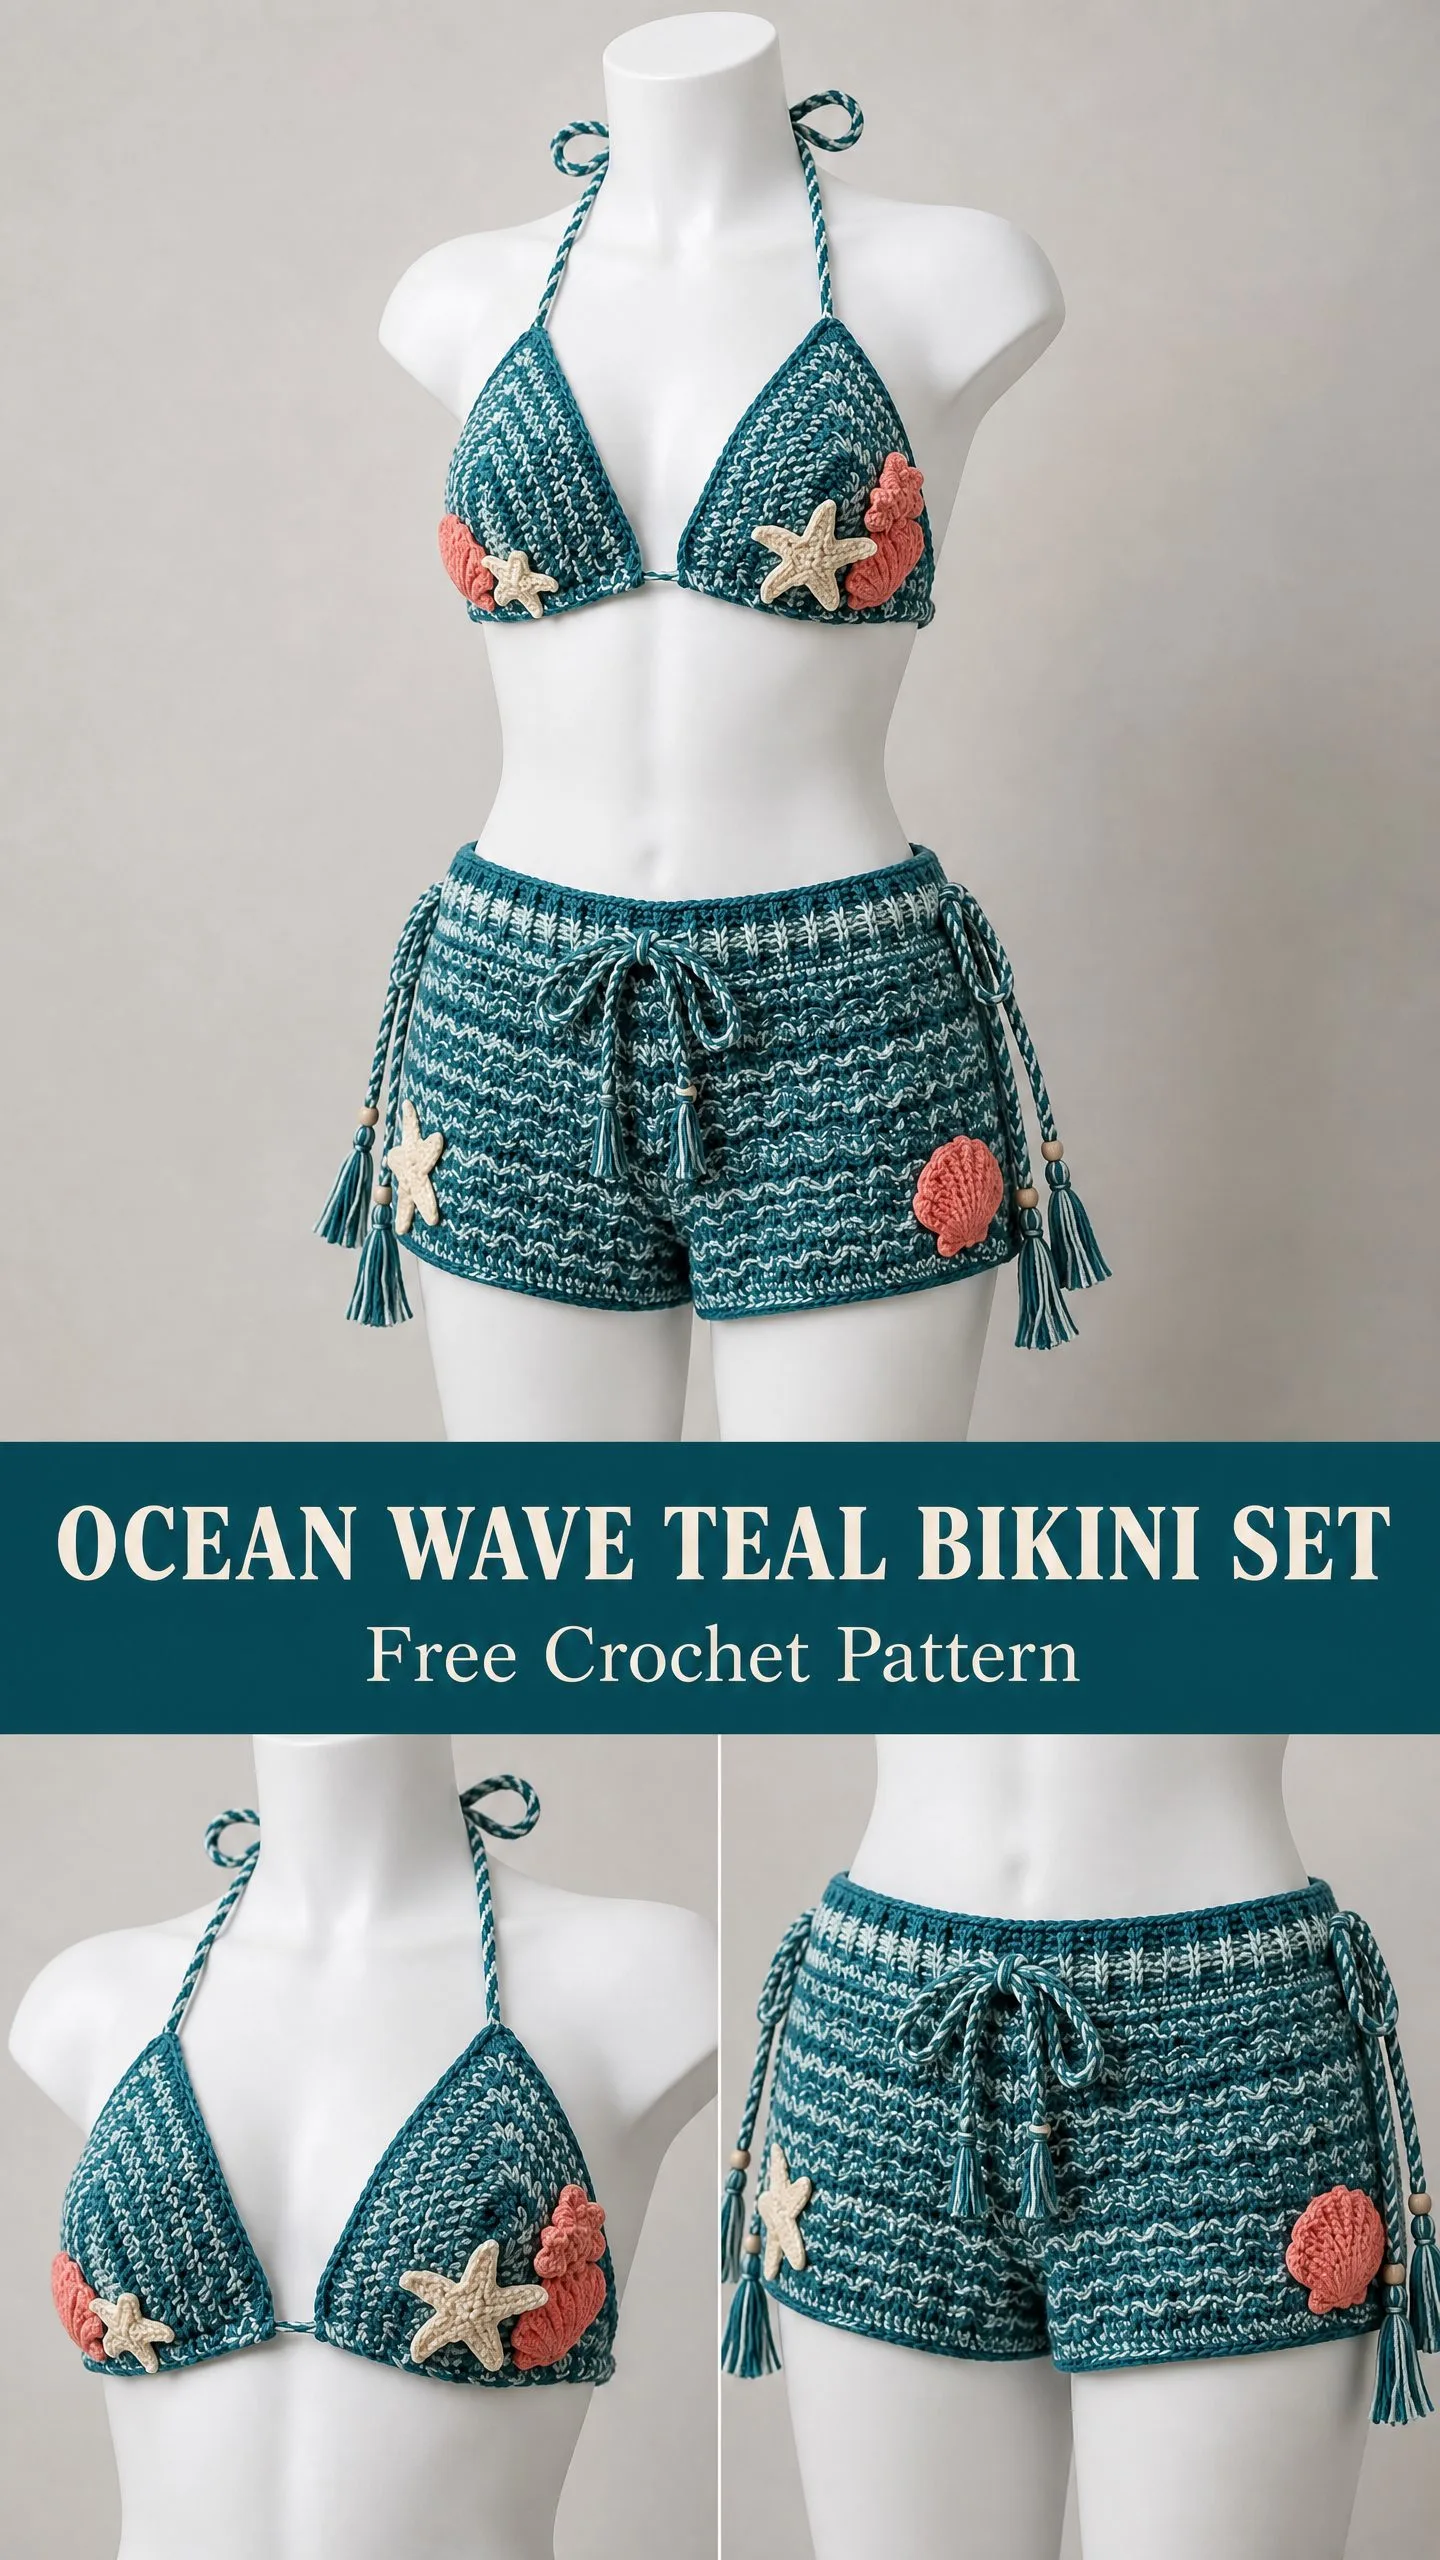
Block all appliques lightly and press flat. Sew to cups and shorts using a tapestry needle and matching yarn. Place one starfish at the inner-lower edge of each cup and one on the front-left of the shorts near the hem. Position one seashell on each cup and one on the shorts front.
Tack around the full perimeter so appliques lie flat and secure.
Finishing Tips
Block all pieces before final assembly. This evens out your stitches and helps everything lie flat.
For the braided neck ties, twist the chains from the base upward and secure at the top. This creates that polished look you see in the finished photos.
Make sure your wooden beads have holes large enough for two strands of yarn. Test this before purchasing a large quantity.
The tassel wrapping is easier if you use a contrasting piece of scrap yarn, then slide it off and replace with matching MC once positioned correctly.
Thank you so much for choosing this ocean wave bikini set pattern. I had such a wonderful time designing this coastal-inspired project, and I truly hope it brings you joy to make and wear.
If you love this pattern, please save it to your Pinterest boards so you can find it again easily. And I would absolutely love to see your finished set! Drop a comment below or tag me on Instagram when you complete yours. Happy crocheting!
You Might Also Like
- Lavender Lace Summer Two-Piece Free Crochet Pattern
- Sage Green Lacy Summer Romper Free Crochet Pattern
- Rainbow Hexagon Pride Blanket Free Crochet Pattern
- Sunset Daisy Chain Dress Free Crochet Pattern
