
I’ve been on the hunt for the perfect cropped hoodie pattern for ages. You know the kind. Relaxed fit, retro vibes, and a color palette that makes you feel like you’re wrapped in a sunset. This Berry Sorbet Mesh Cropped Hoodie is exactly what I was looking for, and I’m thrilled to share it with you today.
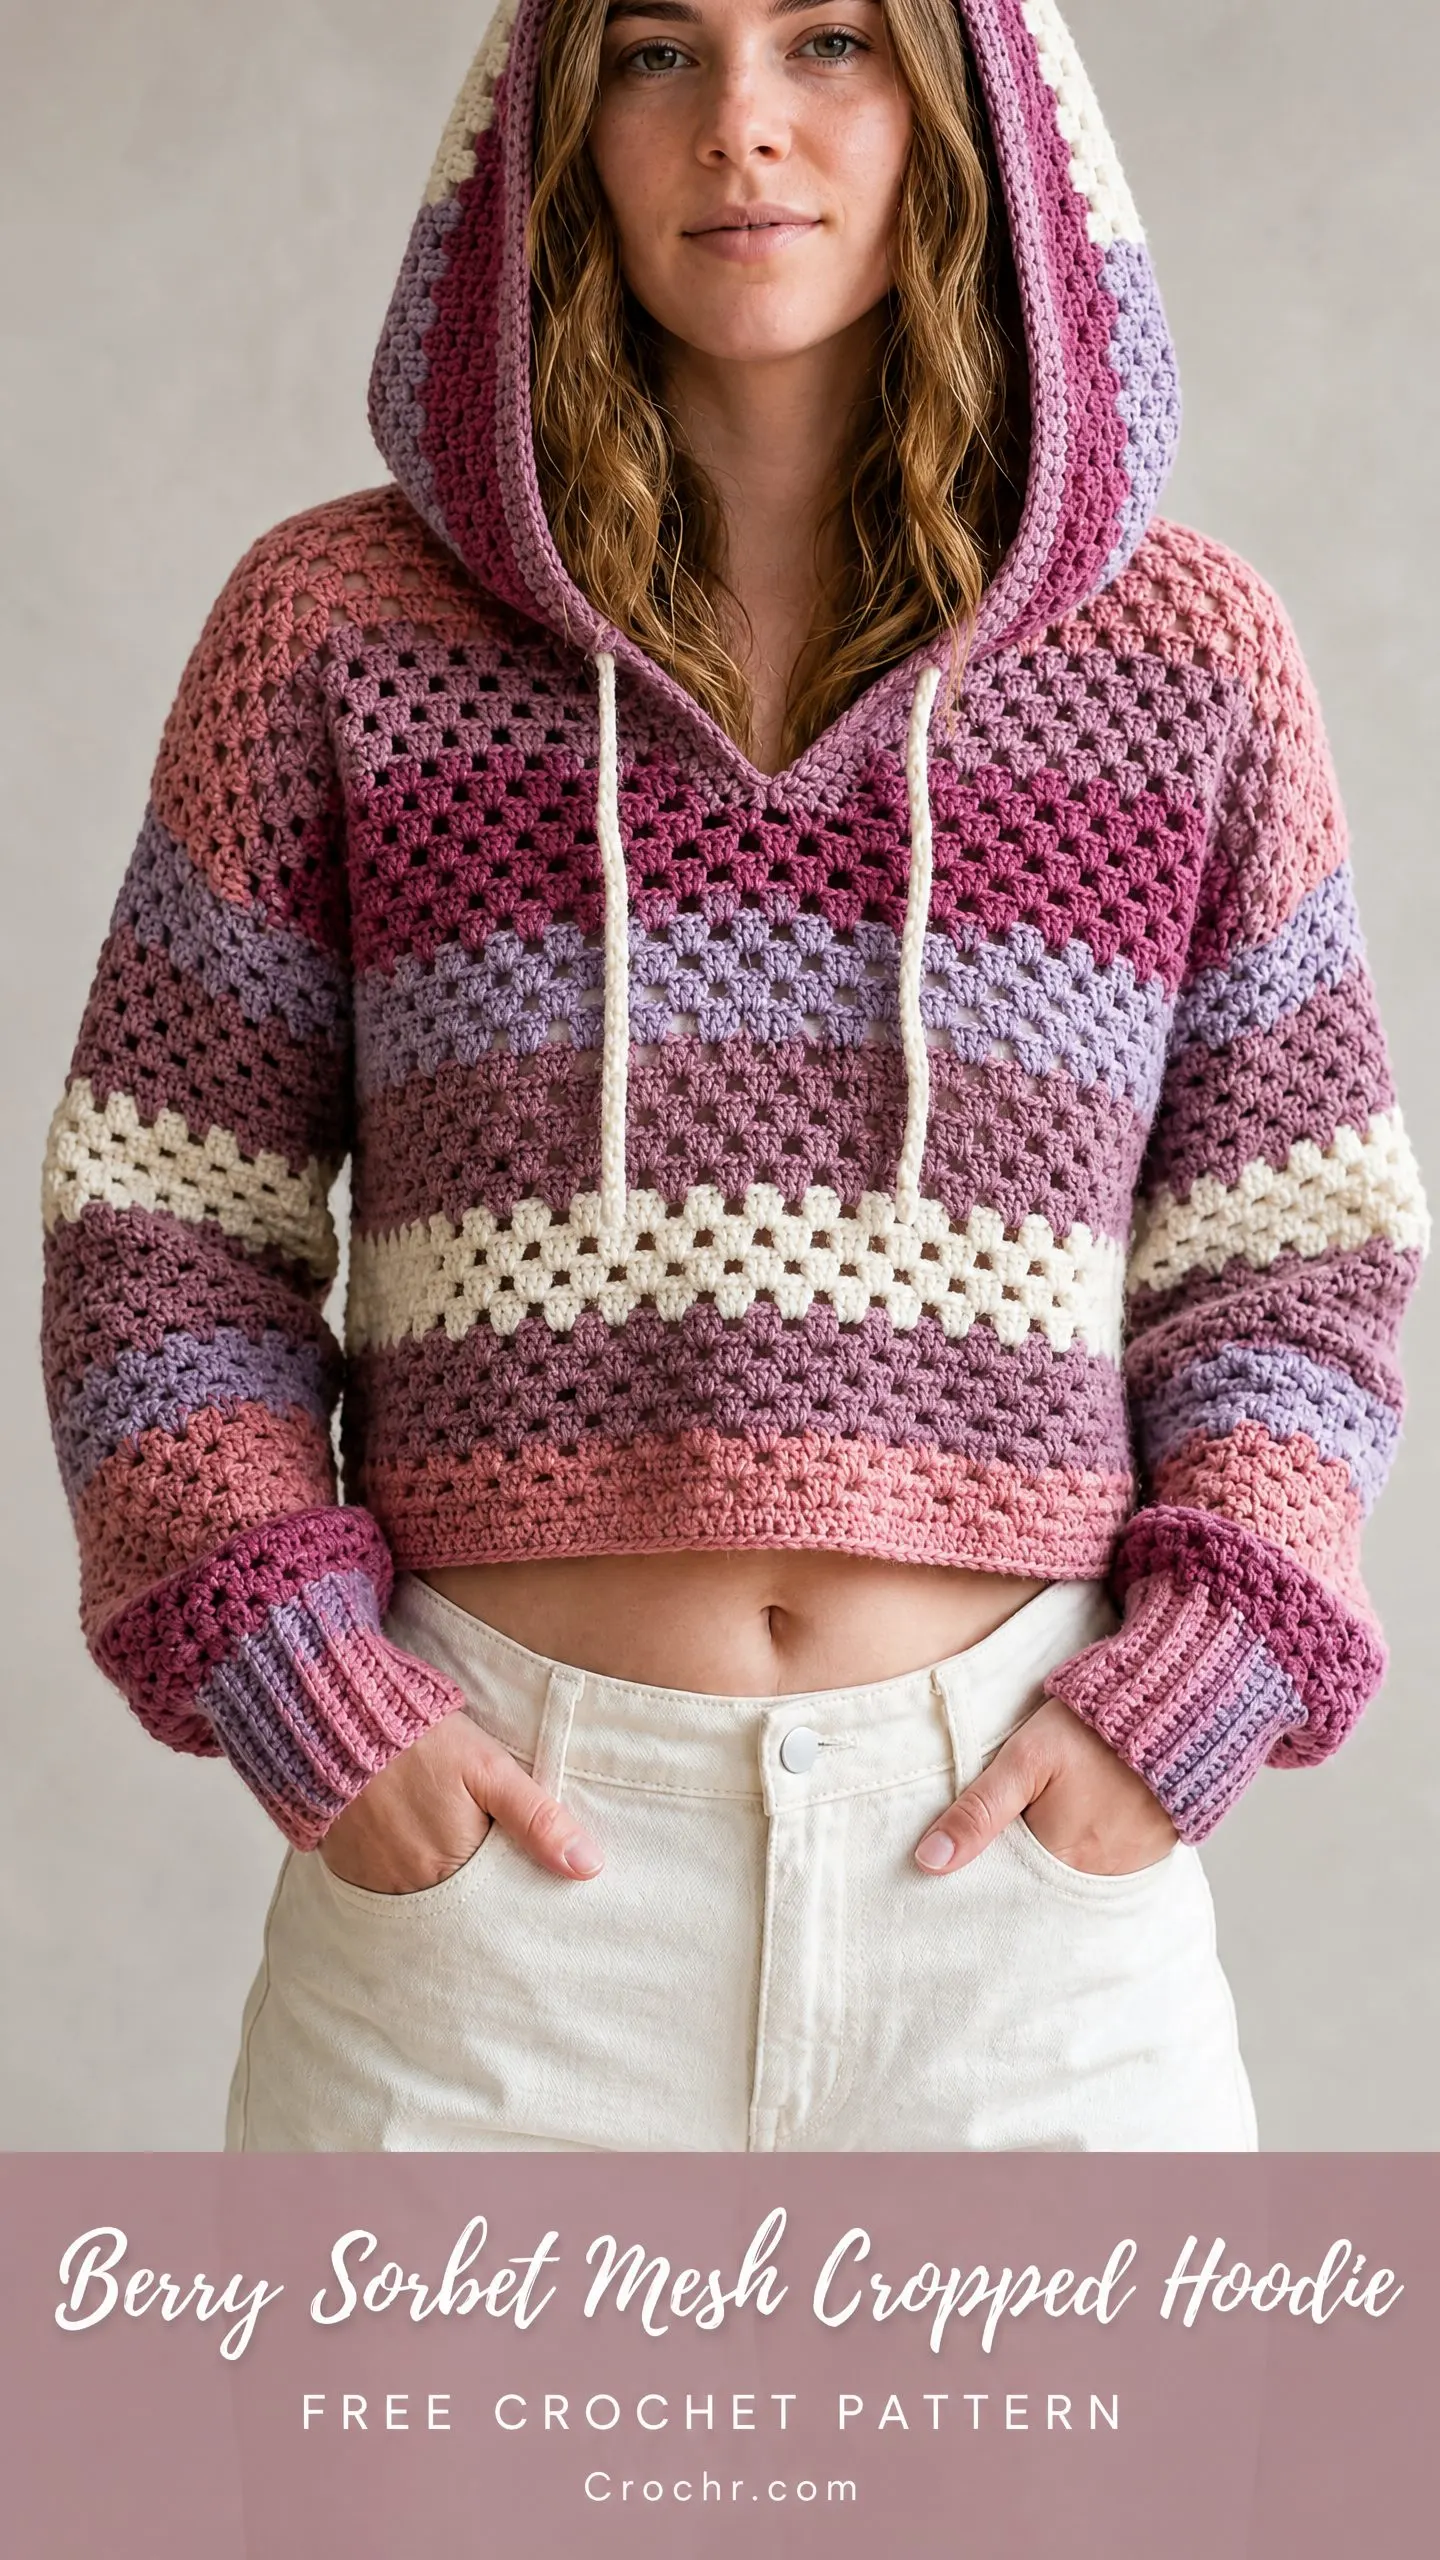
This gorgeous pullover combines the classic granny stitch with modern cropped styling. The open mesh texture gives it that breezy, laid-back feel while the hood and drawstring keep things cozy. Whether you’re layering it over a tank top for a festival or throwing it on for a coffee run, this hoodie works.
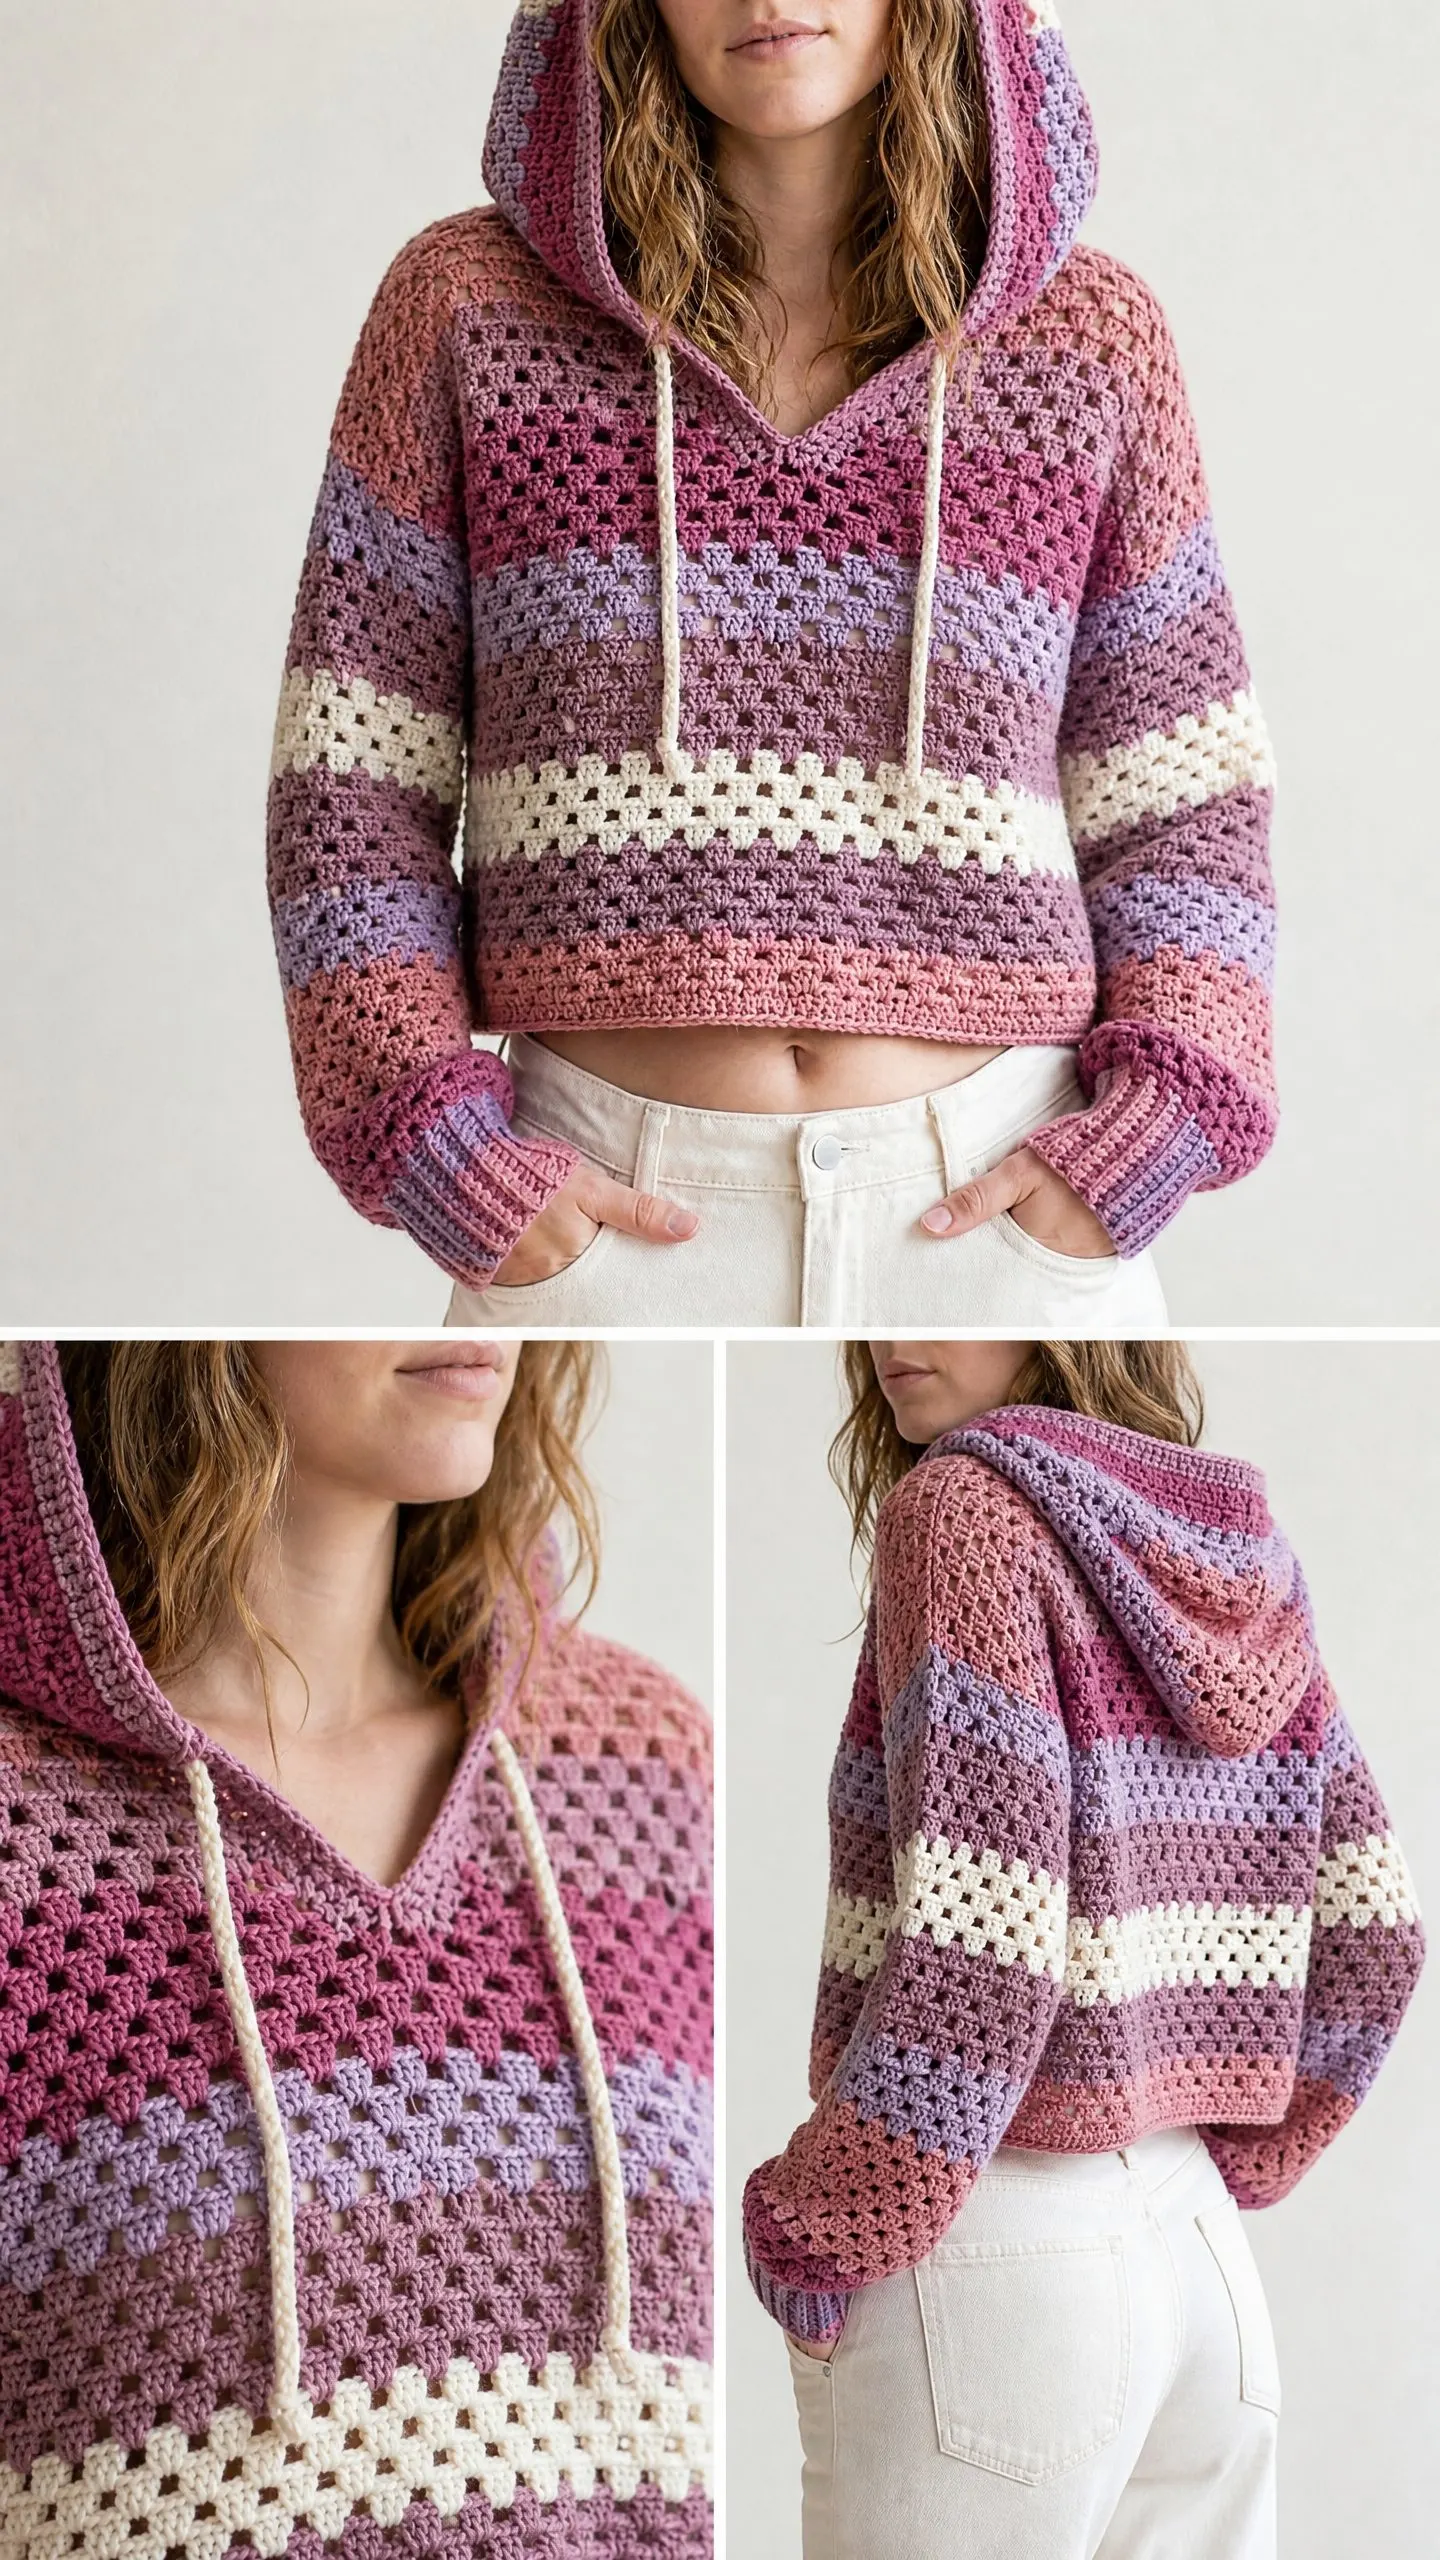
The gradient colorway moves from hot pink at the top through lilac, mauve, and blush, with a wide cream stripe near the hem that ties everything together. It looks complicated, but I promise the construction is more straightforward than you might think. Let’s break it down together.
Why You’ll Love This Crochet Hoodie Pattern
The granny stitch is one of those timeless techniques that never goes out of style. If you’ve ever made a granny square blanket, you already know the basics. This pattern takes that same concept and applies it to flat panels worked back and forth in rows. The result is a beautifully textured mesh fabric with that signature "holes and clusters" look.
What makes this hoodie special is the construction method. You’ll work five separate pieces: a back panel, a front panel with a V-neck opening, two tapered sleeves, and a hood rectangle. Everything gets seamed together at the end. This approach means you can work on each piece individually, making it perfect for on-the-go crafting.
The striped ribbed cuffs and hem band add a polished finish that elevates the whole garment. They’re worked in a simple single crochet back loop only technique that creates stretchy, comfortable edges.
Skill Level and Time Estimate
This pattern is rated intermediate. The granny stitch itself is beginner-friendly, but you’ll be managing multiple color changes every two rows. You’ll also be reading flat panel construction, seaming with an even slip stitch join, and working the V-neck split. If you’re comfortable with basic garment shaping and can maintain consistent tension, you’ll do great.
Expect to spend approximately 30 to 45 hours on this project, depending on your speed and chosen size. I know that sounds like a lot, but the repetitive nature of the granny stitch makes this an excellent TV project. Put on your favorite show and let the rows fly by.
Finished Measurements
This pattern includes three sizes with built-in positive ease of 2 to 4 inches for that relaxed fit.
XS/S: Bust 36 inches, Length 15 inches, Sleeve length 18 inches
M/L: Bust 40 inches, Length 15.5 inches, Sleeve length 18.5 inches
XL/2X: Bust 44 inches, Length 16 inches, Sleeve length 19 inches
The cropped fit sits at or just above the natural waist. Throughout this pattern, stitch counts appear in parentheses in this order: (XS/S, M/L, XL/2X).
Materials Needed
Yarn: Worsted weight (#4), approximately 1200 (1400, 1650) yards total distributed across six colors.
Hook: US Size J-10 / 6.0 mm
Notions:
Yarn Suggestions
Lion Brand Pound of Love works beautifully here. It’s widely available in compatible colors, machine washable, and affordable for the yardage required.
Paintbox Yarns Simply DK held double produces a slightly airier granny stitch with excellent stitch definition. They offer a full range of pinks, mauves, and lilacs to recreate this gradient precisely.
Cascade 220 is a premium option if you want something extra special. The 100% Peruvian Highland wool creates beautiful stitch definition and natural drape. It does require hand washing, but the resulting fabric is exceptionally soft.
Any worsted weight yarn that achieves gauge will work. Avoid very fuzzy fibers like mohair blends because the open granny mesh will lose definition.
Gauge
14 double crochet stitches (across one full granny cluster repeat of 3 dc + 1 ch-1 space) = 4 inches in granny stitch pattern
8 rows of granny stitch = 4 inches
More precisely: one granny repeat unit (3-dc cluster plus the ch-1 space before the next cluster) measures approximately 1 inch wide. One pair of rows measures approximately 1 inch tall.
Gauge is critical for this garment. Please swatch before beginning. To make a gauge swatch, chain 28 and work the granny stitch pattern for 12 rows. Block and measure.
Abbreviations
Special Stitches
Granny Stitch Row (worked flat)
The granny stitch creates a continuous row of 3-dc clusters separated by ch-1 spaces. Each cluster consists of 3 double crochet stitches worked into the same chain space from the previous row.
Foundation setup row (RS): Chain a multiple of 4 plus 3. Work 3 dc into the 4th chain from the hook (this counts as your first cluster), ch 1, skip 3 chains, work 3 dc into next chain, ch 1. Repeat this skip-3/cluster pattern across to the last 4 chains, skip 3, work 3 dc into the last chain, turn.
Granny stitch row (all subsequent rows): Ch 3 (counts as first dc throughout), turn. Work 2 dc into the first ch-1 sp (completing the first cluster at the edge), ch 1, work 3 dc into each subsequent ch-1 sp across with ch 1 between clusters. Work 3 dc into the top of the turning chain space at the end, turn.
The ch-3 at the start of each row counts as 1 dc. Combined with the 2 dc worked into the first space, this creates your edge cluster.
Color Change Method
When changing colors, complete the last dc of the final cluster in the old color up to the last yarn over and pull through step. Then pull the new color through the final two loops to complete the stitch. Cut and fasten off the old color unless it will be rejoined within two rows.
Color Sequence for Body and Sleeves
Back Panel Instructions
Foundation Chain:
This produces (18, 20, 22) clusters per row. The formula is: clusters x 4 + 3 = chain length.
Row 1 (RS): Work 3 dc into 4th ch from hook (first cluster made), ch 1, skip 3 ch, 3 dc in next ch, ch 1, skip 3 ch across to last ch, 3 dc in last ch, turn. (18, 20, 22 clusters)
Row 2: Ch 3, 2 dc in first ch-1 sp, ch 1, 3 dc in next ch-1 sp, ch 1 across, 3 dc in top of t-ch, turn. (18, 20, 22 clusters)
Continue repeating Row 2 as your established granny stitch row throughout. Follow the color sequence listed above for Rows 1 through 24.
Work all 24 rows without any shaping. The back panel is a plain rectangle.
Checkpoint: After Row 24, your back panel should measure approximately 15 (15.5, 16) inches tall and 18 (20, 22) inches wide. Fasten off.
Front Panel Instructions
Work the Foundation Chain exactly as for the back panel.
Rows 1 to 16: Work exactly as for back panel Rows 1 to 16 following the same color sequence. No shaping. (18, 20, 22 clusters each row)
V-Neck Split
The V-neck begins at Row 17. You’ll divide your work and complete each shoulder separately.
Right Shoulder (as worn):
Row 17 (RS, Color D): Ch 3, 2 dc in first ch-1 sp, ch 1, 3 dc in next ch-1 sp, ch 1 across until you have completed (8, 9, 10) clusters. Leave remaining sts unworked. Turn. (8, 9, 10 clusters)
Rows 18 to 24: Continue in established granny stitch pattern on these clusters only, following the color sequence:
Each row: (8, 9, 10 clusters)
Fasten off after Row 24.
Left Shoulder (as worn):
With RS facing, skip the center 2 clusters (this forms the V center base). Rejoin Color D in the next ch-1 sp.
Row 17 (RS, Color D): Ch 3, 2 dc in same sp, ch 1, 3 dc in next ch-1 sp, ch 1 across to end, 3 dc in top of t-ch, turn. (8, 9, 10 clusters)
Rows 18 to 24: Continue in established granny stitch pattern, matching the color sequence as for right shoulder. (8, 9, 10 clusters each row)
Fasten off after Row 24.
Sleeve Instructions (Make 2)
The sleeve is a tapered rectangle that starts narrower at the cuff and widens toward the sleeve cap.
Foundation Chain:
Row 1 (RS, Color A): 3 dc in 4th ch from hook, ch 1, skip 3 ch, 3 dc in next ch, ch 1 across, 3 dc in last ch, turn. (10, 11, 12 clusters)
Row 2 (Color A): Ch 3, 2 dc in first ch-1 sp, ch 1, 3 dc in next ch-1 sp, ch 1 across, 3 dc in top of t-ch, turn. (10, 11, 12 clusters)
Increase Row Instructions
To add 1 cluster at each end: At the beginning of the row, ch 5, 3 dc in the 4th ch from hook, ch 1 (this adds 1 cluster at the left edge), then continue across. At the end of the row, after the last cluster, ch 1, 3 dc in the base of the t-ch (this adds 1 cluster at the right edge). Net gain: 2 clusters per increase row.
Increases happen every 4 rows:
For size XL/2X only: Work one additional increase row at Row 19, bringing total to 22 clusters by Row 19. No further increases through Row 24.
Fasten off after Row 24.
Ribbed Cuffs (Make 2)
The cuff rib is worked lengthwise in single crochet through the back loop only to create a stretchy ribbed texture.
Foundation Chain: Ch 8.
Row 1: Sc in 2nd ch from hook and in each ch across. (7 sc)
Row 2 and all following rows: Ch 1, turn. Sc in back loop only of each st across. (7 sc)
Continue until the cuff rib strip measures:
Fasten off. Fold the strip in half and sl st the two short ends together to form a tube. Attach to the lower edge of the sleeve with a sc join, distributing evenly around the cuff opening. Fasten off and weave in ends.
For a striped cuff like the photographed garment, work 2 rows each in Color E, Color D, Color C, Color B, and Color A.
Ribbed Hem Band
Work exactly as for the cuff but to these lengths:
Height remains 7 sc (approximately 1.5 inches wide).
Fasten off. Seam short ends together. Attach to the lower edge of the assembled body after side seams are complete.
Hood Instructions
The hood is a flat rectangle that gets folded in half and seamed along the top.
Foundation Chain:
This produces (16, 18, 20) clusters per row.
Row 1 (RS, Color A): 3 dc in 4th ch from hook, ch 1, skip 3 ch, 3 dc in next ch, ch 1 across, 3 dc in last ch, turn. (16, 18, 20 clusters)
Work Row 2 and all subsequent rows in the established granny stitch pattern.
Follow the same color sequence as the body panels for Rows 1 through 24. Each row maintains (16, 18, 20 clusters).
Fasten off after Row 24.
Hood Assembly
Fold the rectangle in half so that Row 1 and Row 24 align. This creates the face opening at the fold line. Seam the two short edges together using a sl st seam to close the top of the hood. This seam runs along the crown of the head. Turn right side out.
The open long edge (the fold line) is the raw edge that attaches to the neckline.
Final Assembly
Step 1: Shoulder Seams
Hold back and front panels with right sides together, aligning shoulder edges. Sl st through both layers over (8, 9, 10) clusters of shoulder width on each side. Leave the center top of the back panel unworked (this is the back neck opening that the hood will cover). Turn right side out.
Step 2: Sleeve Attachment
Mark the armhole opening on each side by measuring approximately 9 (10, 11) inches down from the shoulder seam on both back and front panels. Pin the top of the sleeve (the wide end) to the armhole opening with right sides together. Sl st the sleeve cap to the body.
Step 3: Side and Sleeve Seams
With right sides together, work a continuous sl st seam from the cuff edge up the sleeve to the underarm, then down the body side to the hem. Repeat for second sleeve. Turn right side out.
Step 4: Hood Attachment
Pin the open face opening edge of the hood around the neckline of the assembled body. Match the center back of the hood to the center back of the neckline. The V-neck center should land at the midpoint of the front hood edge. Join hood to neckline with a sc seam worked through both layers from the right side.
Step 5: Hem Band
Attach the ribbed hem band to the lower body opening.
Step 6: Cuffs
Attach ribbed cuffs to each sleeve.
Step 7: Drawstring
Create a twisted cord or finger chain approximately 36 inches long in Color F. Thread through the ch-1 spaces running along the front opening edge of the hood, beginning at one side of the V-neck and exiting at the other side. Tie an overhand knot at each end.
Blocking and Finishing
Wet blocking is recommended. Soak all completed pieces in cool water with a drop of fiber wash for 20 minutes. Gently squeeze out water without wringing. Lay flat on foam mats, pin to finished measurements, and allow to dry completely before seaming.
After assembly, weave all ends securely on the wrong side. Travel each tail through at least 2 to 3 clusters in different directions before trimming.
Care Instructions
Machine wash cold on a gentle cycle if using acrylic yarn. Lay flat to dry. Do not tumble dry as the granny stitch mesh may distort under heat. For wool yarn, hand wash in cool water with wool wash and lay flat to dry.
Store folded, not hung, to prevent the open mesh from stretching over time.
Tips for Customizing Your Hoodie
To add width: Each additional cluster unit adds approximately 1 inch of width. Add clusters in multiples of 1 (add 4 chains to the foundation for each). Adjust both front and back panels equally.
To add body length: Each additional 2 rows adds approximately 1 inch of length. Continue or extend your color sequence as desired.
To add sleeve length: Add pairs of rows at the narrow cuff end before the increases begin.
To deepen the V-neck: Begin the V-neck split 2 rows earlier for each additional inch of V-depth you want.
I really hope you love making this Berry Sorbet Mesh Cropped Hoodie as much as I enjoyed putting this pattern together. The gradient colorway is so satisfying to watch come together, and that finished hoodie is going to be a wardrobe staple.
If you found this pattern helpful, I’d love it if you saved it to your Pinterest boards so you can find it easily when you’re ready to start. And please drop a comment below if you make one. Seeing your finished projects absolutely makes my day!
You Might Also Like
- Pastel Pink Daisy Tote Bag Free Crochet Pattern
- Dusty Rose Pink Tassel Crossbody Free Crochet Pattern
- Rose Garden Granny Square Tote Free Crochet Pattern
- Ocean Blue Tropical Crochet Dress Free Pattern
