
Three-dimensional crochet roses look intimidating. I get it. Those layered petals, the way they puff up from the fabric, the whole "how does that even work?" feeling when you see a finished piece. But here’s the truth: if you can make a basic granny square and work a simple puff stitch, you can absolutely make this bag.
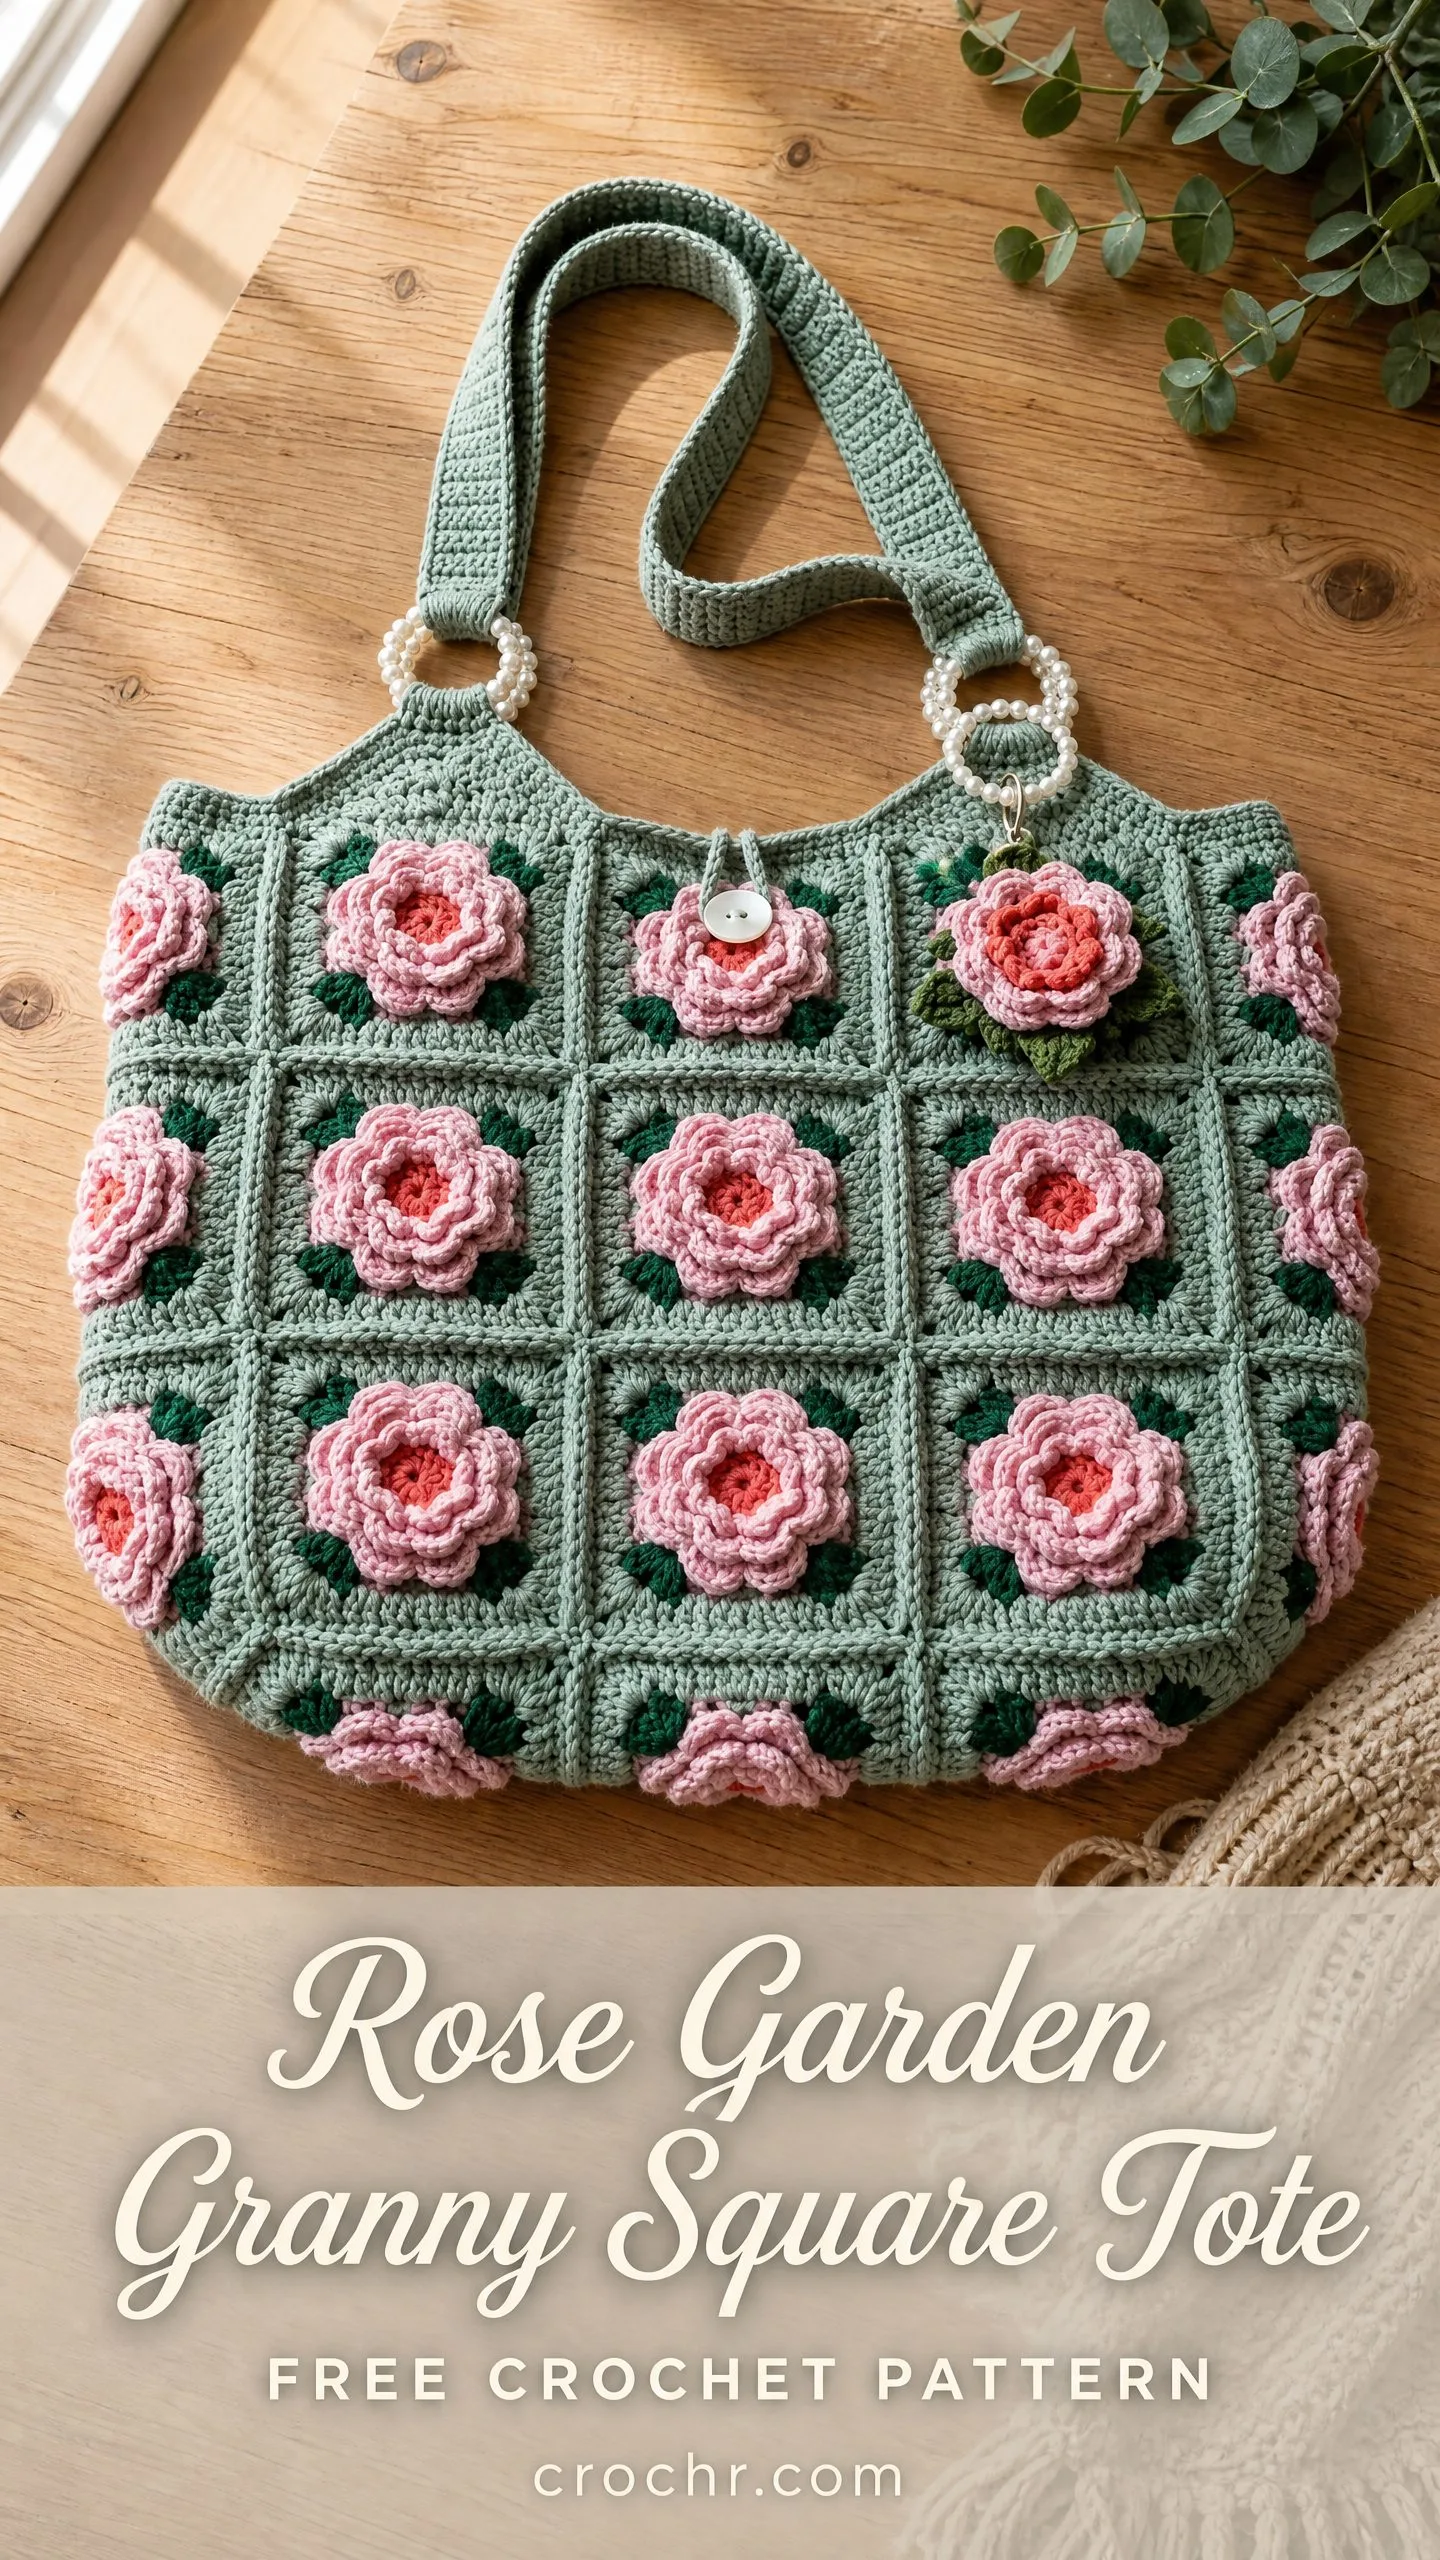
This Rose Garden Granny Square Tote breaks down into manageable pieces. You’re not crocheting one giant complicated thing. You’re making individual squares, each one identical to the last. You’re making roses separately and sewing them on. You’re joining everything with slip stitches. Every single step is something you probably already know how to do.
Whether you’re an advanced beginner ready to level up or an experienced crocheter looking for a satisfying project, this crochet pattern meets you where you are. Let me walk you through exactly how it all comes together.
About This Rose Garden Tote Pattern
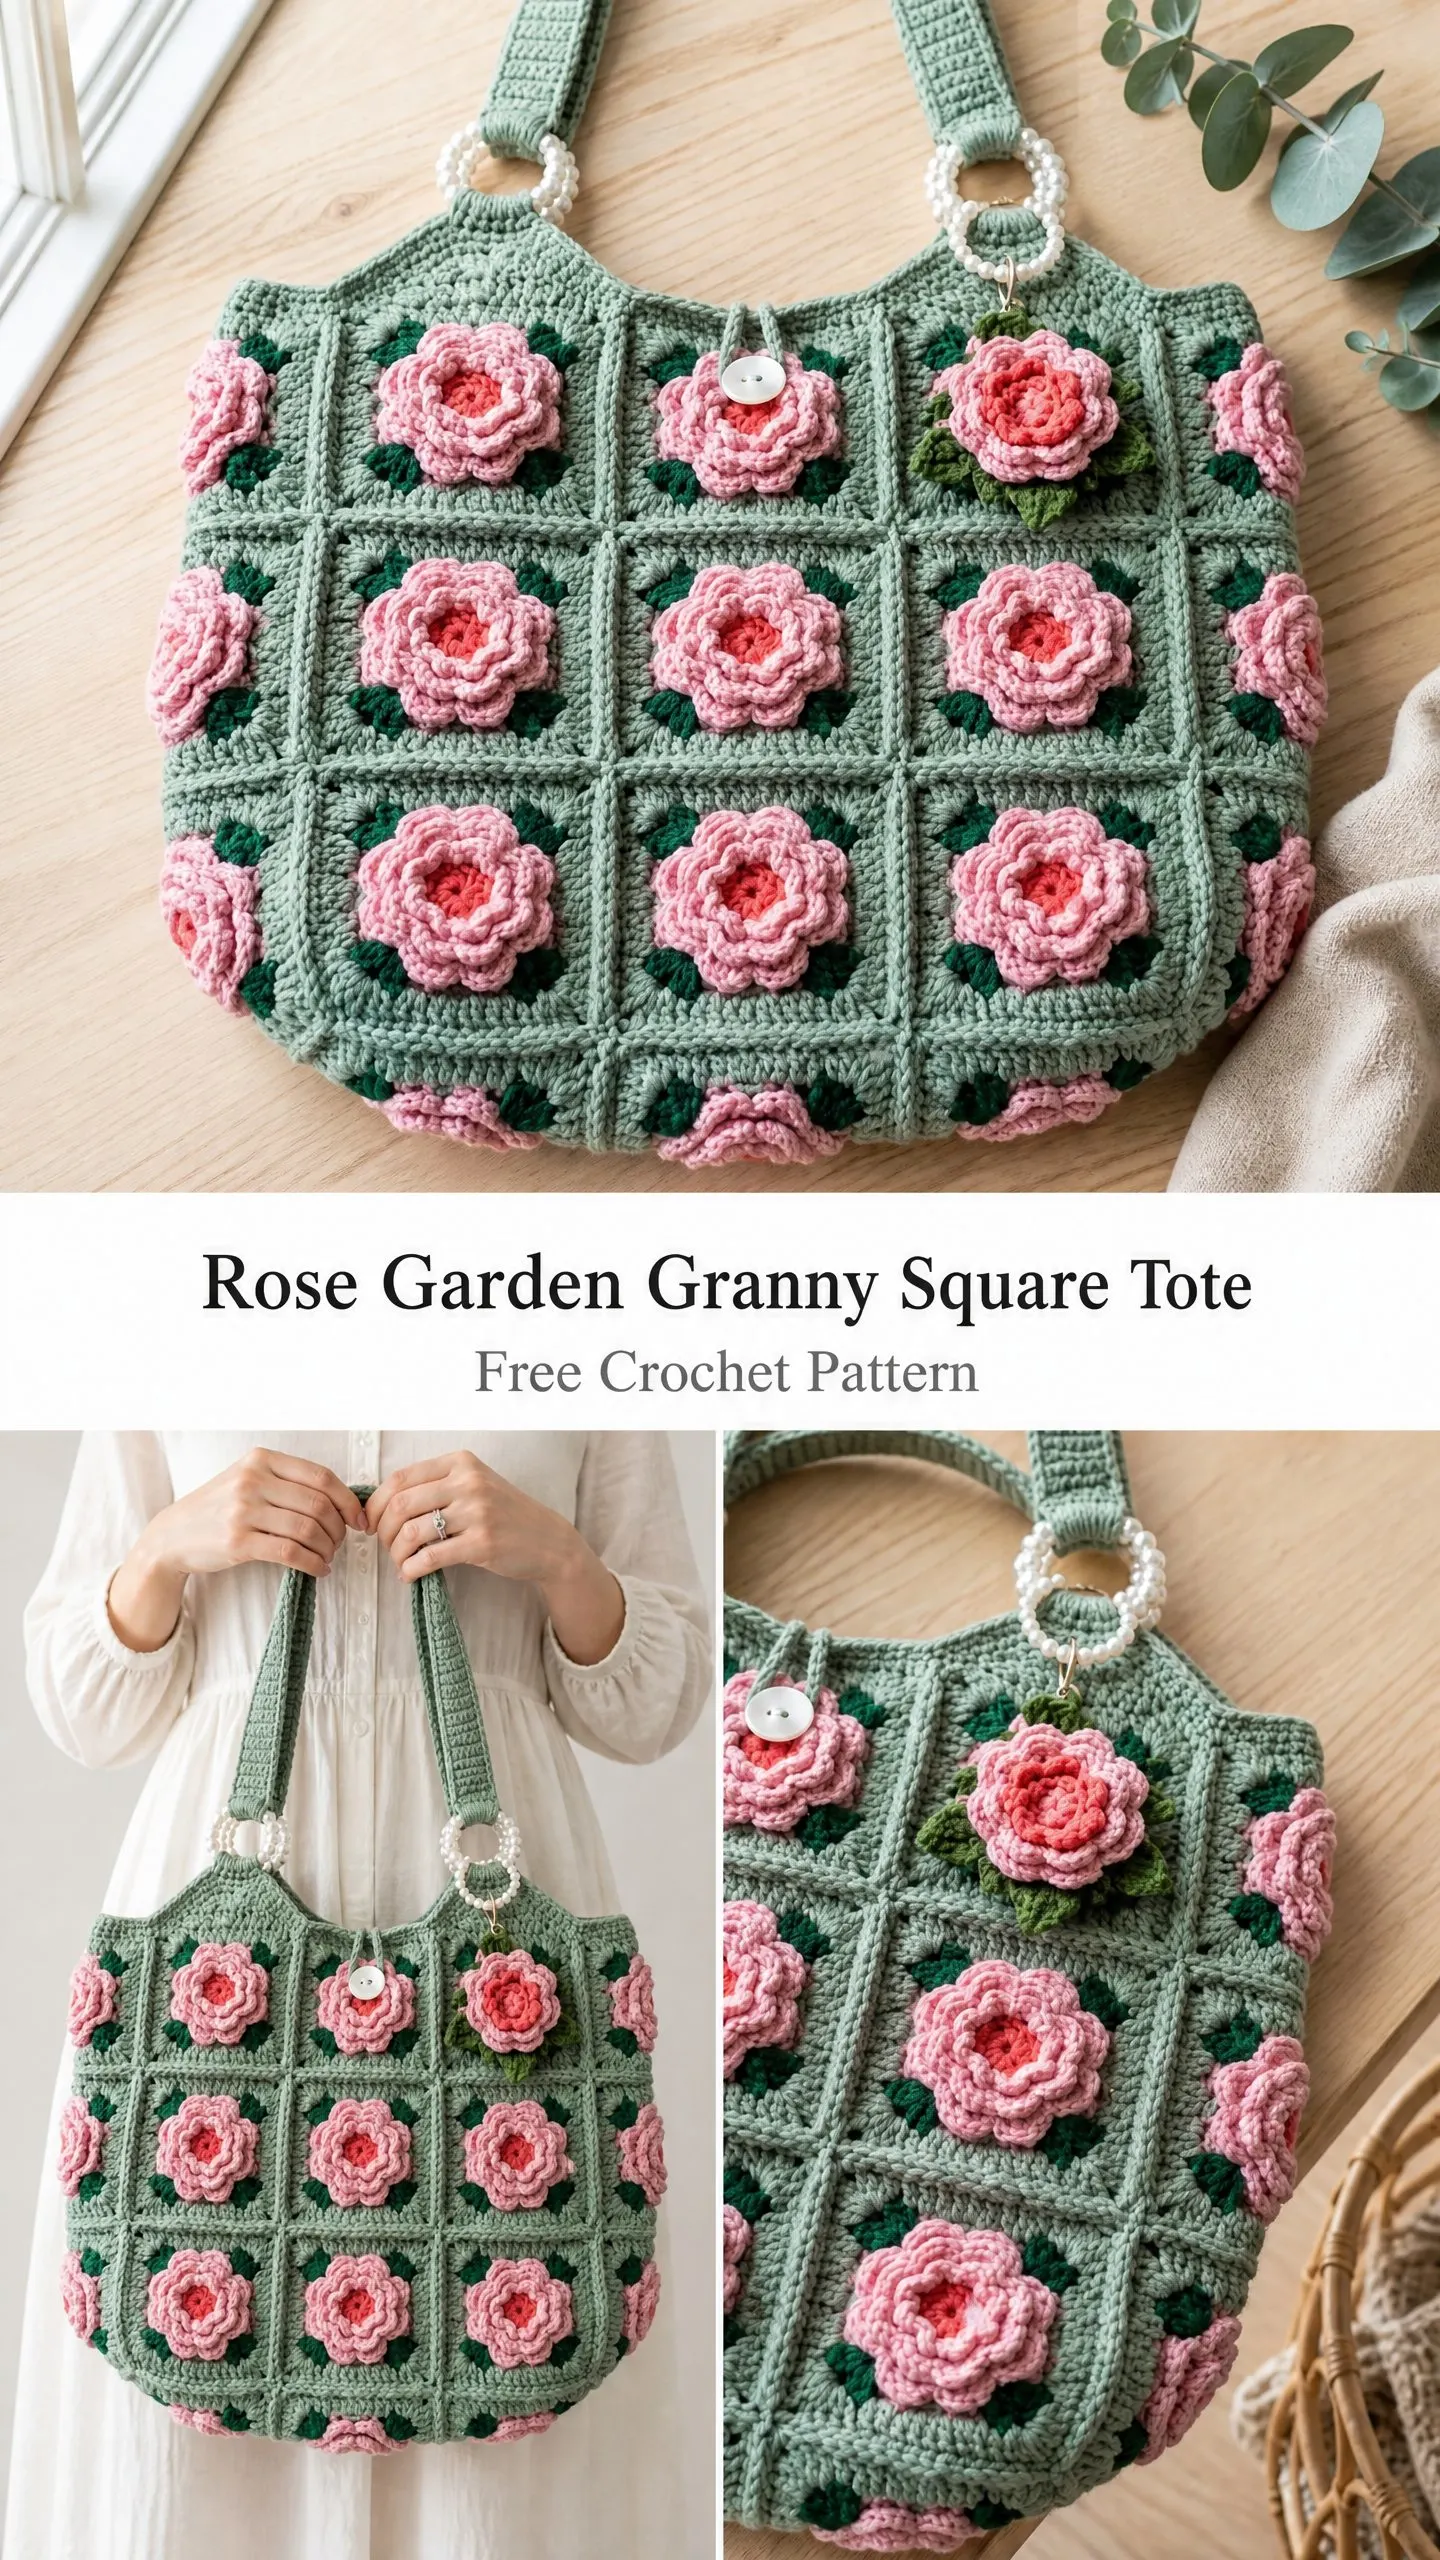
This gorgeous tote bag is constructed entirely from granny squares, each featuring a raised three-dimensional rose motif at the center. The roses sit surrounded by dark green leaves against a soft sage background. The finished bag has a relaxed silhouette with a slightly rounded bottom, flat sides, and elegant pearl bead rings at the handle attachment points.
The modular construction makes this project perfect for working on during commutes, waiting rooms, or quiet evenings. Each square takes about 30 to 45 minutes to complete, so you can see steady progress without committing to marathon crochet sessions.
Skill Level: Advanced Beginner to Intermediate
Time Estimate: 25 to 40 hours total
Finished Dimensions: Approximately 14 inches wide by 12 inches tall (excluding handles) by 3.5 inches deep. Handle drop measures approximately 9 inches.
Materials You’ll Need
Gathering your supplies before you start keeps the process smooth. Here’s everything you’ll need for this crochet tutorial.
Yarn (Worsted Weight):
Hook: US size G-6 / 4.0 mm crochet hook (or size needed to obtain gauge)
Notions:
Yarn Suggestions: Lion Brand Vanna’s Choice works beautifully for this project. The stitch definition is excellent, it holds its shape well, and the color range includes perfect shades. WeCrochet Wool of the Andes Worsted is another great option. The slight memory in wool helps the rose petals stay perky.
Choose yarn with clean stitch definition. Avoid fuzzy, chenille, or heavily textured yarns since the three-dimensional roses need crisp edges to really pop.
Gauge
One completed Rose Granny Square (after blocking) measures 3.5 inches by 3.5 inches.
Gauge matters here because your squares need to join correctly. If your test square comes out larger, go down a hook size. If smaller, go up a hook size.
Abbreviations and Special Stitches
Let me define every stitch you’ll encounter. Even if you know these, a quick refresher never hurts.
Standard Abbreviations:
Special Stitch: Rose Petal
This creates the rounded, puffed petals for your roses. In the designated chain space, work the following as one unit: (yarn over, insert hook, pull up loop, yarn over, pull through 2 loops) 3 times into the same space, then yarn over and pull through all 4 loops on hook.
It’s similar to a puff stitch but uses only 3 yarn-over insertions to keep the petal compact and rounded.
How Many Squares Do You Need?
This bag requires 44 squares total:
You’ll also need 44 roses and 88 leaves (2 leaves per square).
Part One: The Square Background
Make all 44 squares before moving to assembly. Consistency is key.
With Color A (Sage Green), make a magic ring.
Round 1: Ch 3 (counts as first dc), 2 dc into ring, ch 3, (3 dc, ch 3) 3 times into ring, sl st to top of starting ch-3 to join. Pull ring closed. (12 dc, 4 ch-3 corner spaces)
Round 2: Sl st into next 2 dc and into corner ch-3 sp, ch 3 (counts as dc), 2 dc in same sp, ch 3, 3 dc in same sp, ch 1, (3 dc, ch 3, 3 dc) in next ch-3 sp, ch 1, rep from start 2 more times, sl st to top of starting ch-3. (24 dc, 4 ch-3 corner sps, 4 ch-1 side sps)
Round 3: Sl st into next 2 dc and into corner ch-3 sp, ch 3, 2 dc in same sp, ch 3, 3 dc in same sp, ch 1, 3 dc in ch-1 side sp, ch 1, (3 dc, ch 3, 3 dc) in next ch-3 sp, ch 1, 3 dc in ch-1 side sp, ch 1, rep from corner instruction 2 more times to complete the round, sl st to top of starting ch-3. (36 dc, 4 ch-3 corner sps, 8 ch-1 side sps)
Round 4: Switch to Color D (Hunter Green). Sl st into next 2 dc and into corner ch-3 sp, ch 3, 2 dc in same sp, ch 3, 3 dc in same sp, (ch 1, 3 dc in next ch-1 sp) twice, ch 1, (3 dc, ch 3, 3 dc) in next ch-3 sp, rep around, sl st to top of starting ch-3. Fasten off. (48 dc, 4 ch-3 corner sps, 12 ch-1 side sps)
Checkpoint: Your completed square should measure 3.5 by 3.5 inches after a light block.
Part Two: The Rose Motif
Make 44 roses total. Work these with slightly tighter tension than your squares to keep the petals firm and upright.
With Color C (Coral), make a magic ring.
Round 1 (Center): 6 sc into ring, pull ring closed. Do not join. (6 sc)
Round 2 (First Petal Ring): Still with Color C, (ch 3, work 1 Rose Petal into the ch-3 sp, ch 1, sl st into next sc) 6 times. (6 small petals)
Switch to Color B (Dusty Pink).
Round 3 (Second Petal Ring): Working behind Round 2 petals (push them forward toward you), sl st into back of each sl st base from Round 2. (Ch 4, work 1 Rose Petal into ch-4 sp, ch 1, sl st into back of next Round 2 sl st base) 6 times. (6 medium petals)
Round 4 (Third Petal Ring): Working behind Round 3 petals, sl st into back of each sl st base from Round 3. (Ch 5, work 1 Rose Petal into ch-5 sp, ch 2, sl st into back of next Round 3 sl st base) 6 times. Fasten off Color B, leave 10 inch tail for sewing. (6 large outer petals)
Your completed rose should measure approximately 1.5 inches in diameter when lying flat.
Part Three: Leaves
Make 88 leaves total (2 per square).
With Color D (Hunter Green), ch 8.
Row 1: Starting in 2nd ch from hook, sc 1, hdc 1, dc 2, hdc 1, sc 1, sl st into last ch. Rotate work 180 degrees.
Row 2: Working into the other side of the foundation chain, sc 1, hdc 1, dc 2, hdc 1, sc 1, sl st into the tip ch. Fasten off, leave 10 inch tail for sewing.
Each completed leaf measures approximately 1 inch long.
Part Four: Assembling Each Square
This step brings everything together on each individual square.
1. Lay one completed square background flat, right side up.
2. Position 2 leaves at the center, crossing slightly at the base and fanning out at roughly 10 o’clock and 2 o’clock positions. Thread tails through to wrong side and tie off securely.
3. Place the completed rose over the crossed leaf bases at the center. Thread the rose tail through to wrong side and sew the base down securely at 4 to 6 points around its circumference.
4. Weave in all ends on wrong side.
The rose should sit upright and dimensional, covering the leaf bases and the center of the square background.
Part Five: Joining Squares Into Panels
Flat Slip Stitch Join Method:
Hold two squares with wrong sides facing each other (right sides facing out on both). With Color A, insert hook through the corner ch-3 sp of both squares simultaneously. Join yarn with sl st. Work sl st through both layers in each corresponding ch-1 sp and dc group along the joining edge. At the end of the seam, fasten off and weave in end. The seam ridge faces inward.
Assembly Order:
For the front panel, first join squares into 4 horizontal rows of 4 squares each. Then join rows together to form the complete 4×4 panel. Repeat for the back panel. Join each side panel as a vertical strip of 4 squares. Join the base squares in a strip of 4.
Checkpoint: Your front panel should measure approximately 14 inches wide by 14 inches tall.
Part Six: Assembling the Bag Body
1. Join the front panel to the back panel along both side edges by inserting a side panel strip between them.
2. Join the base strip to the bottom edge of the front panel, then join the sides of the base to the bottom edges of the side panels, then join the back panel bottom edge to the remaining edge of the base strip.
3. Reinforce all internal seam intersections with a yarn needle, sewing a small cross-stitch through all layers at each corner.
Part Seven: Top Border and Button Loop
With Color A, attach yarn at any top edge corner.
Round 1 (Top Border): Work 1 sc in each dc and 1 sc in each ch-1 sp across the top opening. At each corner, work 3 sc into the corner ch-3 sp. Sl st to first sc to join.
Round 2 (Stabilizing Round): Sl st into each sc around. Fasten off.
Button Loop: On the center front top edge, attach Color A. Ch 12, skip 2 sc on the border, sl st into the 3rd sc to anchor the loop. Fasten off and weave in ends. Sew the button to the corresponding center back position.
Part Eight: Handles
With Color A, ch 7.
Row 1: Starting in 2nd ch from hook, sc in each ch across. (6 sc)
Row 2: Ch 1, turn, sc in each sc across. (6 sc)
Repeat Row 2 until the strip measures 25 inches from beginning.
Before attaching, thread the handle end through a pearl bead ring. Fold 1.5 inches of the handle end back over itself (catching the pearl ring inside) and sew firmly. Do this at both ends of both handles (4 pearl rings total).
Position handle ends on the inside of the bag top edge, approximately 3.5 inches from each outer side edge. Sew each end down securely, stitching a rectangle of stitches (4 stitches wide by 4 rows tall) at each attachment point.
Part Nine: Optional Corsage Charm
Make one additional rose with a couple of extra leaves. Attach a small safety pin to the back and pin it near the top left area of the front panel for that finishing touch you see in the photos.
Blocking and Finishing Tips
Block individual squares before assembly by pinning them to 3.5 by 3.5 inches, spraying lightly with water, and allowing to dry completely. This ensures consistent sizing and flat joins.
After assembly, lightly steam the joined seams on the wrong side. Do not press the 3D roses with direct steam or iron pressure.
Consider adding a fabric liner to protect the bag interior and prevent small items from falling through the openings.
Care Instructions
Hand wash in cool water with gentle detergent. Press gently between towels to remove excess water. Reshape while damp and lay flat to dry. Do not tumble dry or iron the roses directly. Store stuffed lightly with tissue paper to maintain shape.
I really hope you enjoy making this Rose Garden Granny Square Tote as much as I enjoyed designing it. The modular construction means you can work at your own pace, and watching those roses stack up is incredibly satisfying.
If you’re planning to make this beautiful bag, go ahead and save this pattern to your Pinterest boards so you can find it easily when you’re ready to start. And please, if you make one, drop a comment below or tag me on social media. I absolutely love seeing your finished projects and hearing which color combinations you chose!
You Might Also Like
- Blush Ballerina Baby Crochet Dress Free Pattern
- Sunset Coral Ruffle Dress Free Crochet Pattern
- Coral Sunset Granny Square Tote Free Crochet Pattern
- Ocean Jellyfish Crochet Market Bag Free Pattern
