
Last summer, my grandmother passed down her collection of vintage table linens. Among the yellowed doilies and embroidered napkins was a rose-covered runner she had made decades ago. It was worn beyond repair, but I kept running my fingers over those faded dimensional flowers, wishing I could recreate something with that same romantic charm.
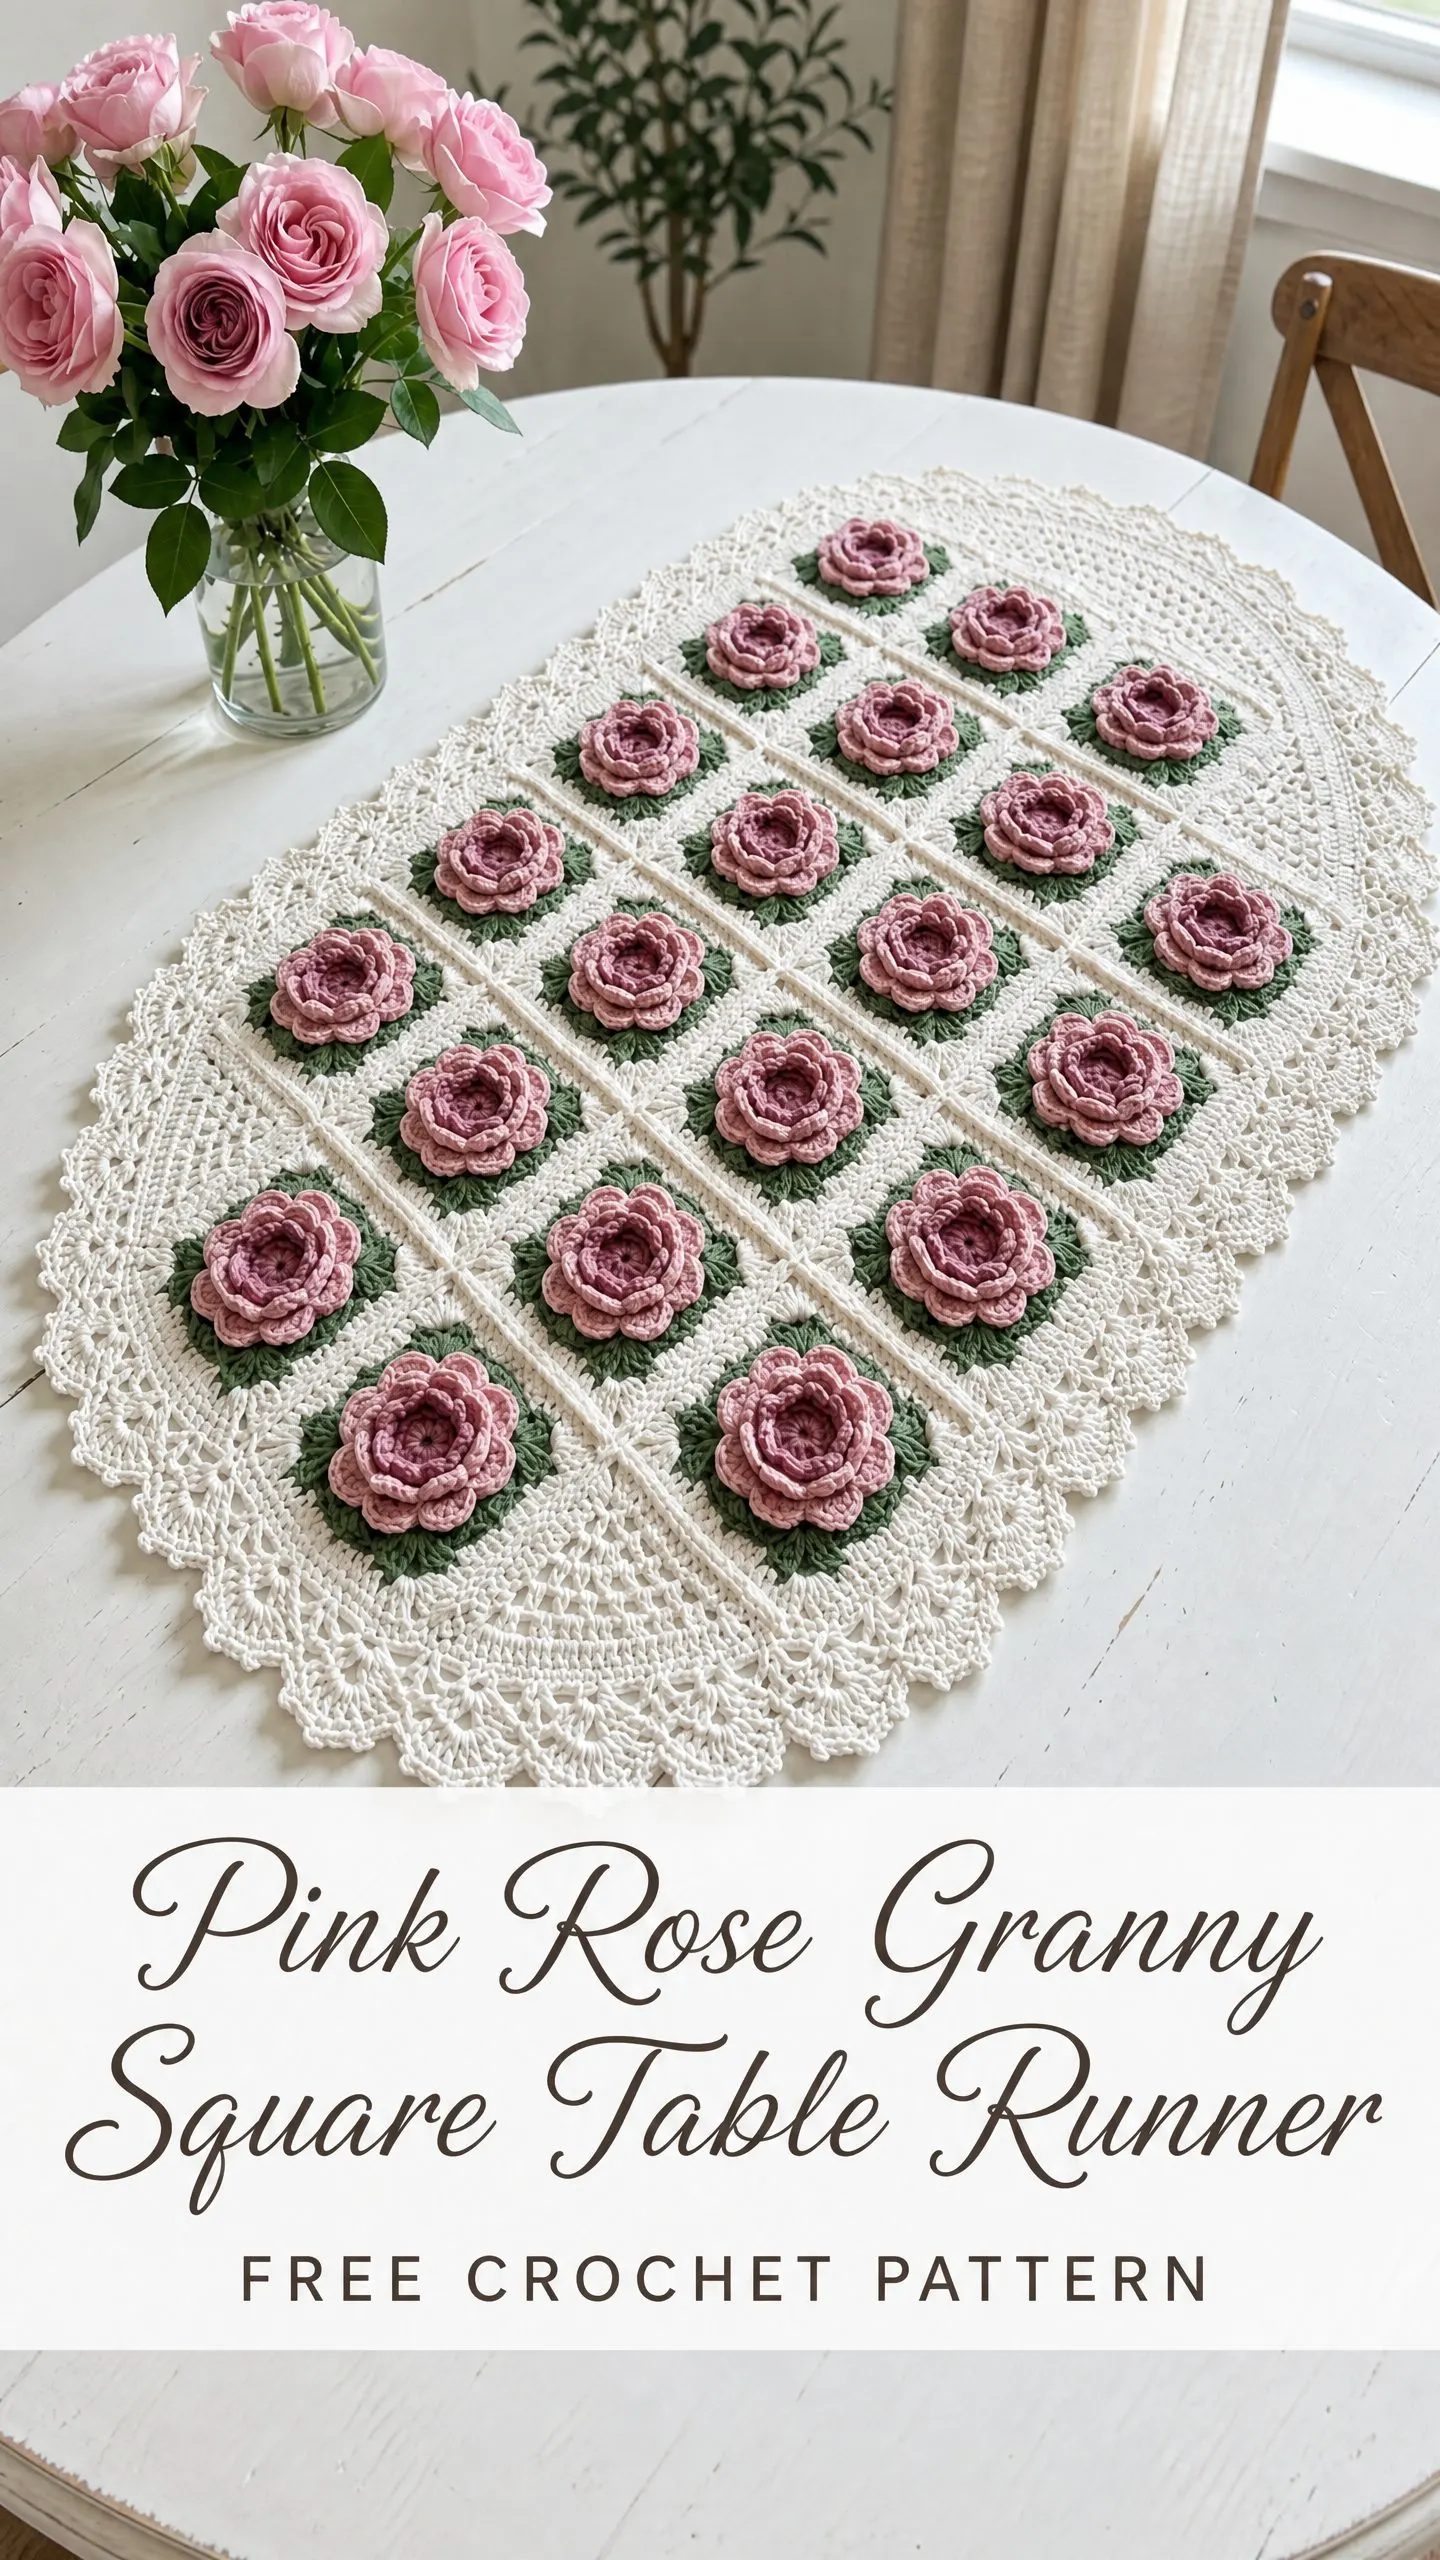
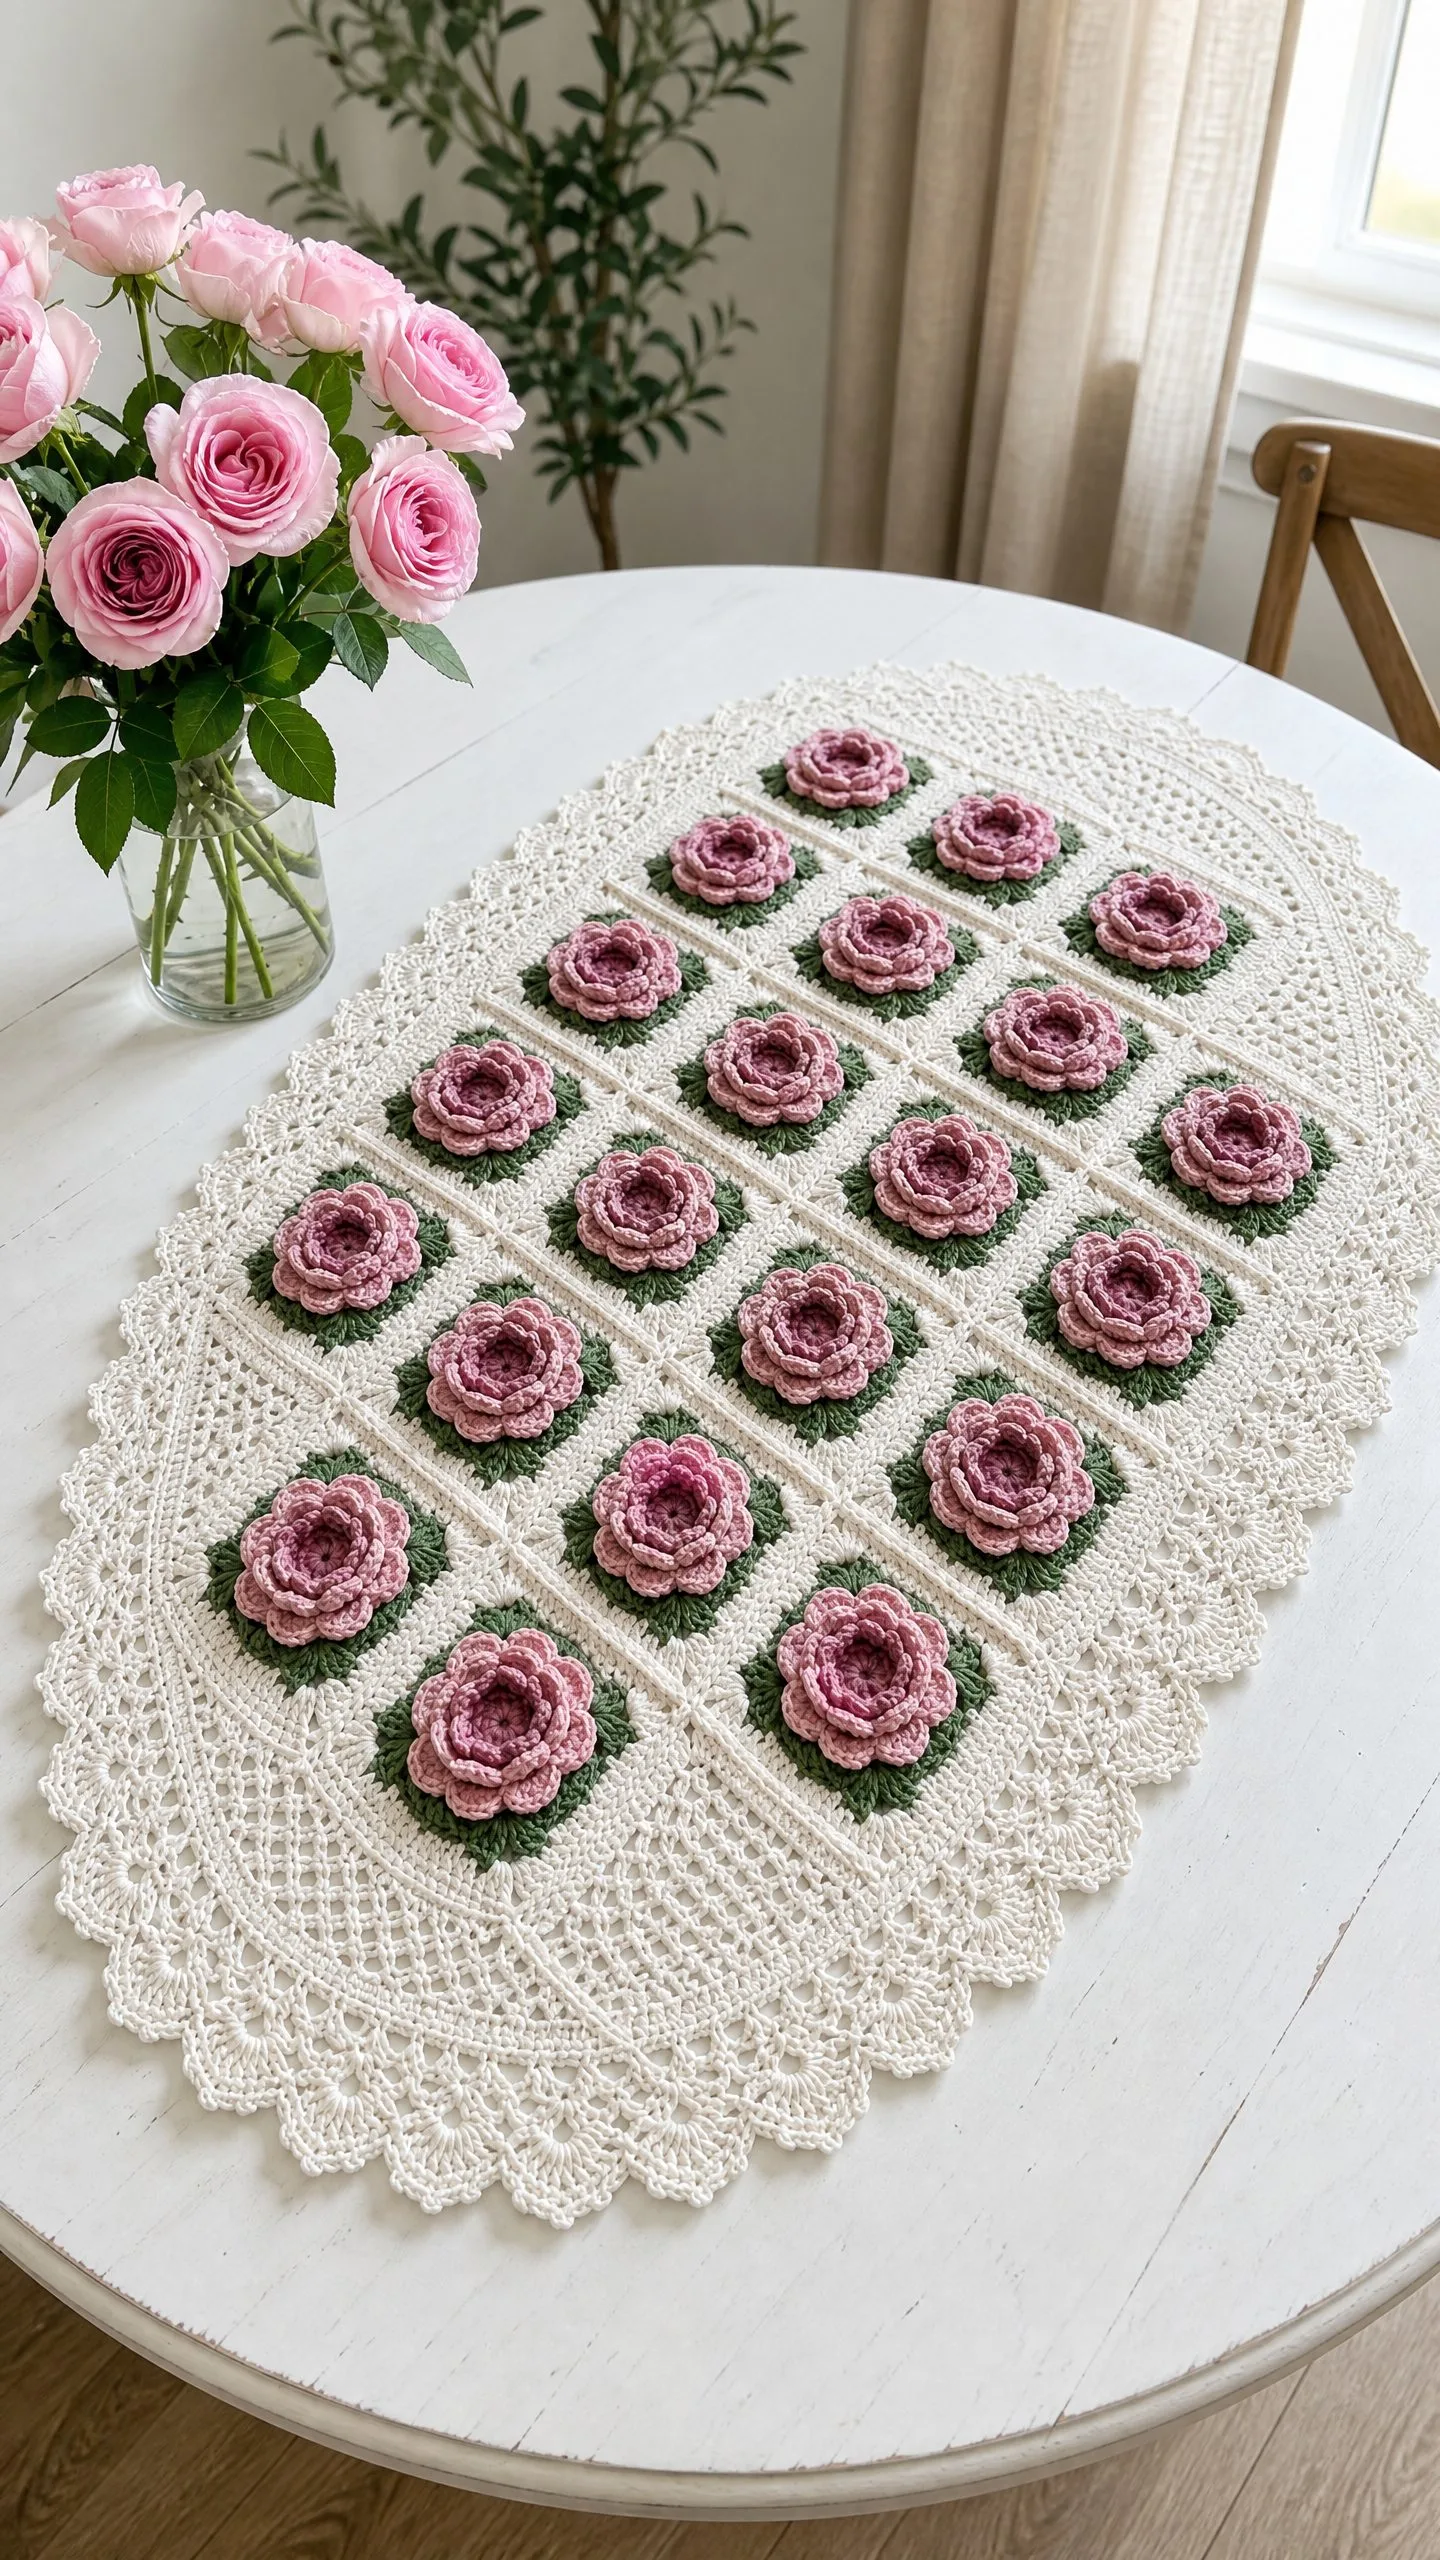
That memory inspired me to design this table runner. Twenty dusty pink roses sit in their own little granny square gardens, joined together and wrapped in a delicate lace border that transforms the rectangular grid into an elegant oval. The whole piece feels like something you might find in an antique shop, except you made it yourself.
Whether you display it on a dining table, a console in your entryway, or across a dresser in your bedroom, this runner adds instant heirloom appeal to any space. Let me walk you through exactly how to create your own.
About This Rose Granny Square Table Runner Pattern
This crochet table runner combines several beloved techniques into one stunning project. You will create twenty individual granny squares, each featuring a three-dimensional crocheted rose with layered petals. The roses sit raised above a sage green background, creating beautiful depth and texture that photographs cannot fully capture.
The construction method is straightforward once you understand the flow. You make all twenty squares first, join them in a four by five grid, then work a wide oval lace border directly onto the joined piece. The border rounds include increases at the short ends, which is what gives the runner its graceful oval shape rather than a plain rectangle.
I would classify this as an advanced beginner to intermediate project. The rose motif requires working into specific loops to build dimensional petals across multiple rounds, which demands moderate stitch control. If you have never made a dimensional flower before, give yourself grace during the first square or two. By square number three, your hands will know exactly what to do.
Finished Measurements
Your completed rose table runner will measure approximately 14 inches by 22 inches (35.5 cm by 56 cm), including the lace border. The central joined grid of squares measures approximately 10 inches by 13.5 inches (25.5 cm by 34 cm) before you add the border.
Actual size may vary slightly depending on your tension and blocking method.
Materials Needed for This Crochet Pattern
Yarn
Color A (Cream or Ivory): Approximately 400 yards (365 m), worsted weight, 100% cotton or cotton-acrylic blend. This is your primary color for the outer round of each square and the entire border.
Color B (Dusty Pink or Mauve Rose): Approximately 180 yards (165 m), worsted weight. This creates your beautiful dimensional roses.
Color C (Sage Green): Approximately 120 yards (110 m), worsted weight. This forms the leafy background behind each rose.
Recommended Yarn Brands
Lion Brand 24/7 Cotton works beautifully in Ecru, Rose, and Sage. This 100% mercerized cotton gives excellent stitch definition for the dimensional rose petals and blocks flat.
Paintbox Yarns Simply DK (used at slightly tighter tension) in Champagne White, Vintage Pink, and Grass Green also produces lovely results.
WeCrochet Comfy Worsted in Cream, Blush, and Fern offers a cotton-acrylic blend that adds drape and is machine washable, making it practical for everyday use.
Important substitution note: Choose a smooth, plied yarn with low halo. Fuzzy or bouclé yarns will obscure your rose petal definition and muddy the delicate details you worked so hard to create.
Hook and Notions
Gauge
One completed rose granny square equals 2.5 inches by 2.5 inches (6.5 cm by 6.5 cm) after light blocking, measured flat.
Border lace pattern (cream, in rows): 18 double crochet stitches equal 4 inches (10 cm). Eight rows equal 4 inches (10 cm).
Please check your gauge before starting. Make one complete square, weave in your ends, and block lightly before measuring. Adjust your hook size up or down as needed.
Abbreviations Used in This Pattern
Here are all the abbreviations you will encounter, with full definitions:
ch = chain: Wrap yarn over hook and pull through the loop on your hook
sl st = slip stitch: Insert hook, yarn over, pull through both the stitch and the loop on your hook in one motion
sc = single crochet: Insert hook, yarn over, pull up a loop (2 loops on hook), yarn over, pull through both loops
hdc = half double crochet: Yarn over, insert hook, pull up a loop (3 loops on hook), yarn over, pull through all 3 loops
dc = double crochet: Yarn over, insert hook, pull up a loop, yarn over, pull through 2 loops, yarn over, pull through remaining 2 loops
tr = treble crochet: Yarn over twice, insert hook, pull up a loop, (yarn over, pull through 2 loops) three times
BLO = back loop only: Work into only the back loop of the stitch
FLO = front loop only: Work into only the front loop of the stitch
sp = space
ch-sp = chain space: The gap created by a chain in the previous round
sk = skip: Pass over the indicated stitch without working into it
rep = repeat
pm = place marker
rm = remove marker
RS = right side: The front of your work
WS = wrong side: The back of your work
yo = yarn over: Wrap yarn over your hook
st(s) = stitch(es)
beg = beginning
rem = remaining
rnd = round
[ ] = Work instructions within brackets the number of times indicated
\* = Repeat from asterisk to end or as directed
Special Stitches for the Rose Table Runner
These special stitches create the dimensional roses and decorative border. Read through them before you begin.
Rose Center Cluster
Yarn over, insert hook into ring, pull up a loop, yarn over, pull through two loops on hook (one half-finished dc). Yarn over, insert hook into same ring, pull up a loop, yarn over, pull through two loops, yarn over and pull through all three loops on hook. This makes a two-dc cluster used to build the tight rose center.
Petal (Front Petal)
In the designated chain space or slip stitch space: work (sc, hdc, 3 dc, hdc, sc) all into the same space. This creates one rounded petal.
Large Petal (Back Petal)
In the designated chain space behind a front petal: work (sc, hdc, 5 dc, hdc, sc) all into the same space. This creates a wider, taller petal that frames the front layer.
Picot
Chain 3, slip stitch into the first chain made. Used along the outer border edge to create decorative points.
Shell
Work 5 dc all into the same stitch or space. Used in the lace border rounds.
V-Stitch
Work (dc, ch 2, dc) all into the same stitch or space. Used in the lace border.
Pattern Notes Before You Begin
All squares are worked in joined rounds. Do not turn between rounds. All rounds are worked with the right side facing unless noted.
The rose is built in two stages: a tight center spiral, then two layers of petals. The inner petal layer is worked into the front of chain loops, and the outer petal layer is worked into the back of the same chain loops by inserting the hook from behind.
Work all twenty squares completely before joining. This helps maintain consistent tension and makes it easier to arrange them for joining.
The squares are arranged in a four-column by five-row grid. Join squares in rows first (four across), then join the rows together.
Chain 3 at the beginning of double crochet rounds counts as one dc throughout this pattern.
When working the back petal round, insert the hook from the wrong side (back of work) through the chain-1 spaces that were skipped during the front petal round. You are reaching behind the front petals to access these spaces.
Step by Step Instructions
Section One: Rose Granny Square (Make 20)
Rose Center (Color B)
Begin with a magic ring or ch 4, sl st to form a ring.
Rnd 1: Ch 1, work 10 sc into the ring, sl st to first sc to join. (10 sc)
Rnd 2: Ch 1, [sc in next st, ch 3] 10 times, sl st to first sc to join. Do not fasten off yet. (10 sc, 10 ch-3 loops)
You now have ten chain-3 loops radiating from the center. The next round works front petals into these loops.
Front Petal Round (still Color B)
Rnd 3: Working into each ch-3 loop around, work one Petal (sc, hdc, 3 dc, hdc, sc) into each ch-3 loop. Sl st into the base of the first sc of the first petal to join. (10 petals)
After completing Rnd 3, the front petal layer is complete. Before cutting yarn, prepare the back petal chain.
Back Petal Preparation (still Color B)
Rnd 4: Working from behind the front petals, insert hook from the RS through the space between two adjacent sc stitches of Rnd 1, directly below the point between two front petals. Ch 4, sl st between the next two sc of Rnd 1; rep from around for a total of 10 ch-4 loops behind the petals. Sl st to the base sl st to join. (10 ch-4 back loops)
Back Petal Round (still Color B)
Rnd 5: Working into each ch-4 loop from behind the front petals, work one Large Petal (sc, hdc, 5 dc, hdc, sc) into each ch-4 loop. Sl st to the base of the first sc of the first large petal to join. (10 large petals)
Fasten off Color B, leaving a 6-inch tail for weaving.
Checkpoint: Your rose motif should be a full, three-dimensional rose approximately 1.25 inches (3 cm) in diameter with two visible petal layers. The outer back petals should frame the inner front petals beautifully.
Green Square Base (Color C)
Join Color C with a sl st into any visible space at the outer edge of the rose, or into the back loop of any outer large petal sc.
Rnd 6: Ch 1, sc evenly around the entire outer perimeter of the rose, placing sc into the top of each petal stitch. Work approximately 2 sc per petal, adjusting as needed to keep work flat. You should have approximately 20 sc around the rose. Sl st to first sc to join. (20 sc)
Rnd 7: Ch 3 (counts as dc), dc in same st, ch 1, sk 1 st, 2 dc in next st; rep from around, ending ch 1, sk last st, sl st to top of beg ch-3. (10 two-dc groups, 10 ch-1 spaces)
Rnd 8: Sl st into next dc and into ch-1 sp, ch 3 (counts as dc), (dc, ch 2, 2 dc) in same ch-1 sp (corner made), ch 1, sk next 2-dc group, (2 dc, ch 1, 2 dc) in next ch-1 sp (side), ch 1, sk next 2-dc group, (2 dc, ch 2, 2 dc) in next ch-1 sp (corner); rep from twice more, ch 1, sk next 2-dc group, (2 dc, ch 1, 2 dc) in next ch-1 sp (side), ch 1, sl st to top of beg ch-3. (4 corner ch-2 spaces, 8 ch-1 side spaces, 16 two-dc groups)
Rnd 9: Sl st to corner ch-2 sp, ch 3, (dc, ch 2, 2 dc) in same sp (corner), [ch 1, 2 dc in next ch-1 sp] across side, ch 1, (2 dc, ch 2, 2 dc) in corner ch-2 sp; rep from around, ending with ch 1, sl st to top of beg ch-3. (4 corners with ch-2 spaces, 3 ch-1 side spaces per side, 20 two-dc groups total)
Fasten off Color C, leaving a 6-inch tail for weaving.
Checkpoint: Your green square should measure approximately 1.75 inches by 1.75 inches (4.5 cm by 4.5 cm) before the cream outer round.
Cream Outer Round (Color A)
Join Color A with sl st into any corner ch-2 sp.
Rnd 10: Ch 3 (counts as dc), (dc, ch 2, 2 dc) in same sp (corner), [ch 1, 2 dc in next ch-1 sp] 3 times across, ch 1, (2 dc, ch 2, 2 dc) in corner ch-2 sp; rep from around, ending [ch 1, 2 dc in next ch-1 sp] 3 times, ch 1, sl st to top of beg ch-3. (4 corners with ch-2 spaces, 4 ch-1 side spaces per side, 24 two-dc groups total)
Fasten off if this is a standalone square.
Checkpoint: Each completed square should measure 2.5 inches by 2.5 inches (6.5 cm by 6.5 cm) after light blocking.
Section Two: Joining the Squares
Arrange your 20 squares in a 4-column by 5-row grid on a flat surface. Orient all squares so the roses face upward.
Flat Slip-Stitch Join Method
Place two squares together with right sides facing up, side by side. Insert hook from RS through the corresponding ch-1 sp (or corner ch-2 sp) of both squares simultaneously. Sl st through both layers. Continue across all corresponding spaces along the shared edge. Each joining seam will produce 5 sl sts (4 side ch-1 spaces plus 1 connecting sl st between corner spaces).
Join all squares in rows first: join Row 1 (4 squares horizontally), then Row 2, and so on through Row 5. Then join the five completed rows to each other along their long horizontal edges in the same manner.
Checkpoint: The joined grid should measure approximately 10 inches by 13.5 inches (25.5 cm by 34 cm). All roses should face upward and the grid should lie flat without puckering at the joins.
Section Three: Oval Lace Border
The border is worked directly onto the outer edge of the joined grid. It transforms the rectangular grid into an oval through increases at the two short ends. The border is worked entirely in Color A (Cream).
With RS facing, join Color A with sl st into the center corner ch-2 space at one short end (4-square end) of the joined grid.
Border Round 1: Foundation Round
Ch 3 (counts as dc). Work dc evenly around the entire perimeter of the joined grid as follows:
Along each short end (4-square width): Work (2 dc, ch 2, 2 dc) at each outer corner, 2 dc in each ch-1 space, and 1 dc in each dc along the top of the outer squares. At each inner join between squares on the short end, work 2 dc into the joining seam space. At the two outer corners of each short end, work (2 dc, ch 2, 2 dc) into the corner ch-2 space to begin building the oval curve. Additionally, work 5 dc into the corner ch-2 space at each of the two outermost corners of the short ends to create extra width for the oval shaping.
Along each long side (5-square length): Work 2 dc in each ch-1 side space, 1 dc in each dc group, and 2 dc into each join space between squares. At each outer corner between a short end and a long side, work (2 dc, ch 2, 2 dc).
Join with sl st to top of beg ch-3. (approximately 180 dc, 4 ch-2 sp)
The exact stitch count along the sides will vary slightly depending on how your squares were joined. What matters is that you have a smooth, flat round with corner ch-2 spaces and that the work lies flat.
Border Round 2: Begin Oval Shaping
Join Color A (if not already attached), ch 3 (counts as dc).
Along each long side: Work dc in each dc across, with no increases.
At each short end: Work (2 dc, ch 2, 2 dc) into each ch-2 corner sp, AND work an additional increase of 3 dc spaced evenly across the short end top edge to begin the oval curve. Place these 3 extra dc by working 2 dc into every third stitch across the short end.
Join with sl st to top of beg ch-3. (approximately 196 dc, 4 ch-2 sp)
Border Round 3: Continue Oval Shaping
Ch 3 (counts as dc).
Along each long side: V-stitch (dc, ch 2, dc) in every 3rd dc, dc in remaining stitches.
At each short end: Work [2 dc, ch 2, 2 dc] in corner sp, continue placing a V-stitch every 3rd stitch across the short end to build fullness.
Join with sl st to top of beg ch-3. (approximately 216 sts and sp)
Border Round 4: Lace Shell Round
Ch 3 (counts as dc).
Work Shell (5 dc in same st) into each V-stitch ch-2 sp from previous round.
Between Shells: work ch 1, sk 2 sts, sc in next st, ch 1, sk 2 sts.
At each short end corner ch-2 sp: work (Shell, ch 2, Shell) to maintain the oval curve.
Along long sides where there are no V-stitches: work (sk 2, Shell in next st, ch 1, sc in center of next group, ch 1) to fill the space evenly.
Join with sl st to top of beg ch-3. (approximately 36 Shells distributed evenly around oval)
Border Round 5: Open Lace Round
Ch 5 (counts as dc, ch 2).
Sc into center dc of next Shell, ch 2, dc into sc between Shells, ch 2; rep from around, adjusting at short ends with (dc, ch 2, dc, ch 2, dc) into the (Shell, ch-2, Shell) corner groupings to maintain oval width.
Join with sl st to 3rd ch of beg ch-5. (approximately 72 ch-2 spaces)
Border Round 6: Second Shell Round
Sl st into first ch-2 sp, ch 3 (counts as dc), 4 dc in same sp (Shell).
Ch 1, sc in next ch-2 sp, ch 1, Shell in next ch-2 sp; rep from around, working (Shell, ch 2, Shell) at each short-end curve point to maintain oval shaping.
Join with sl st to top of beg ch-3. (approximately 36 Shells, 36 sc)
Border Round 7: Connector Round
Ch 1, sc in same st (top of Shell center dc).
Ch 3, sc in sc between Shells, ch 3, sc in center of next Shell; rep from around, working (sc, ch 3, sc, ch 3, sc) at each short-end curve transition.
Join with sl st to first sc. (approximately 72 ch-3 loops)
Border Round 8: Scalloped Picot Edge
Sl st into first ch-3 sp.
Work (sc, hdc, dc, Picot, dc, hdc, sc) into each ch-3 sp around; rep from working into every ch-3 loop.
Join with sl st to first sc. Fasten off Color A.
Checkpoint: After completing the border, the runner should have a smooth oval outline with a decorative scalloped picot edge. The total finished measurement should be approximately 14 inches by 22 inches (35.5 cm by 56 cm).
Finishing and Blocking Your Rose Table Runner
Weave in all ends securely using a tapestry needle. For cotton yarn, weave tails at least 1 inch in two different directions and trim close.
Wet block the finished runner for best results. Soak in cool water for 15 to 20 minutes until fully saturated. Gently squeeze out excess water (do not wring). Roll in a clean dry towel and press to remove more moisture.
Lay the runner flat on blocking mats. Pin the outer scalloped edge at each picot point, stretching gently to open the lace border. Pin the long edges straight. At the short oval ends, pin in a smooth curve.
Allow to dry completely. This may take 24 hours or more depending on humidity.
Once dry, the runner should lie perfectly flat with the rose motifs raised and the lace border open and even.
Care Instructions
Machine wash on gentle/delicate cycle in cool water if using a cotton-acrylic blend. Hand wash in cool water if using 100% cotton to preserve the dimensional roses.
Lay flat to dry. Do not tumble dry. Do not iron directly over the dimensional rose motifs as heat may flatten the petals. If light pressing is needed, place the runner face down on a thick towel and steam lightly from the wrong side.
Store flat or loosely rolled, not folded, to prevent creasing the three-dimensional roses.
Size Customization Tips
To make a larger runner: Add more rose granny squares to the grid. Each additional square adds approximately 2.5 inches (6.5 cm). Increase yarn quantities proportionally: approximately 18 yards of Color B, 12 yards of Color C, and 20 yards of Color A per additional square.
To make a smaller runner: Reduce the grid to 3 columns by 4 rows (12 squares) for a placemat-sized piece, approximately 10 inches by 13 inches before the border.
To make a round doily: Work a grid of 4 by 4 (16 squares) and work the border with even increases on all four sides instead of only at the two short ends.
You Did It!
Thank you so much for choosing this rose granny square table runner pattern for your next project. I truly hope it brings as much joy to your home as my grandmother’s vintage piece brought to mine. The dimensional roses really do look impressive, and now you know exactly how to create them yourself.
If you make this runner, I would absolutely love to see it! Tag me on Instagram or share a photo in my Facebook group. Seeing your finished projects is honestly the best part of sharing patterns.
Save this rose table runner crochet pattern to your Pinterest boards so you can find it whenever inspiration strikes. And please drop a comment below if you give it a try. I read every single one and love hearing how your projects turn out!
You Might Also Like
- Sage Green Boho Tiered Crochet Dress Free Pattern
- Lavender and Lilac Baby Dress Free Crochet Pattern
- Pastel Rainbow Cloud Dress Free Crochet Pattern
- Charcoal Gray Everyday Socks Free Crochet Pattern
