This is one of those projects that looks SO much harder than it actually is. Seriously, if you can single crochet, you can make this stunning nautical barrel purse. It takes about 8 to 12 hours of work, and the finished piece looks like something you would find in a high-end boutique. Whether you are making it for yourself or as a jaw-dropping gift, this purse is going to turn heads everywhere you go!
Get the Ad-Free PDF Pattern
You can find the free pattern below, or you can purchase the ad-free printable PDF from my shop.
Get the Printable PDF →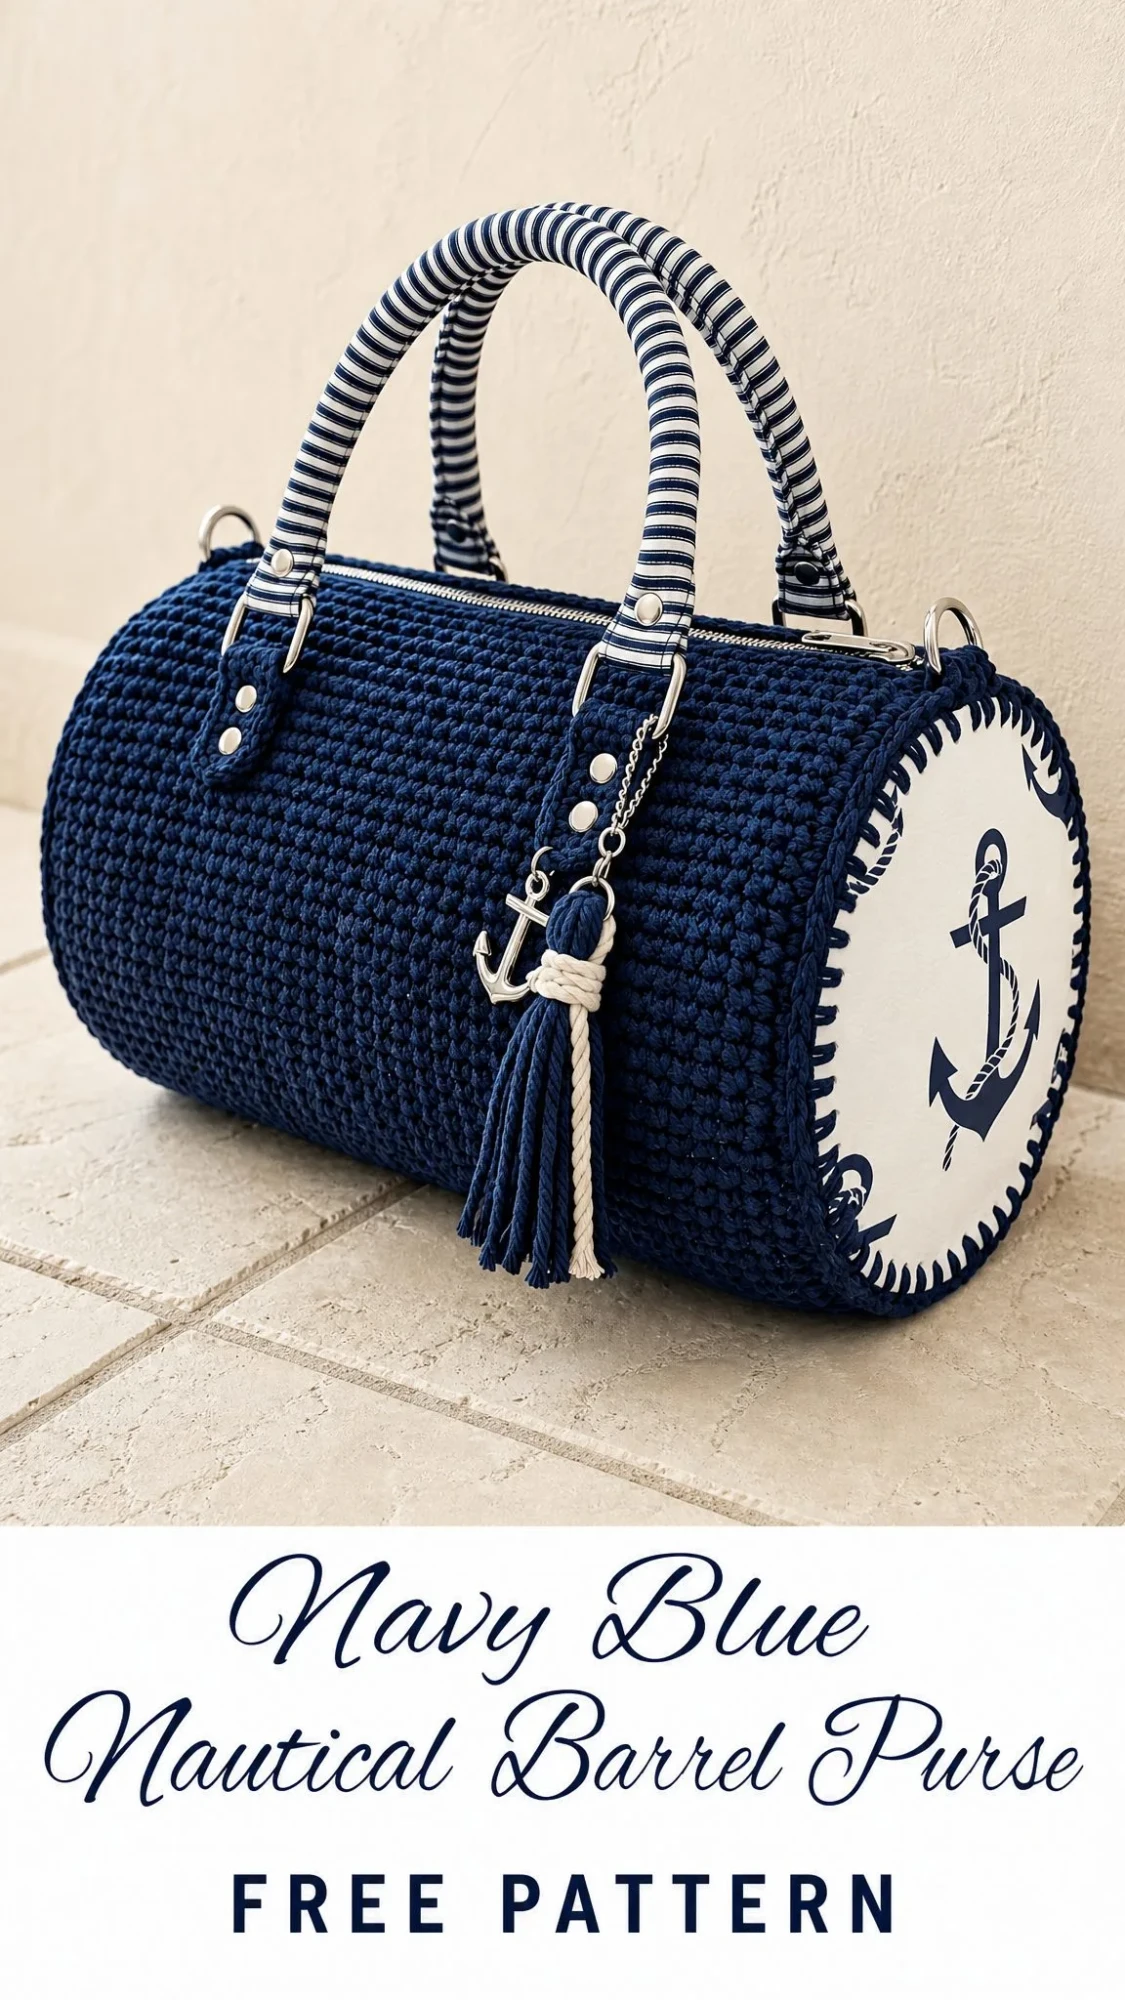
About This Nautical Barrel Purse Pattern
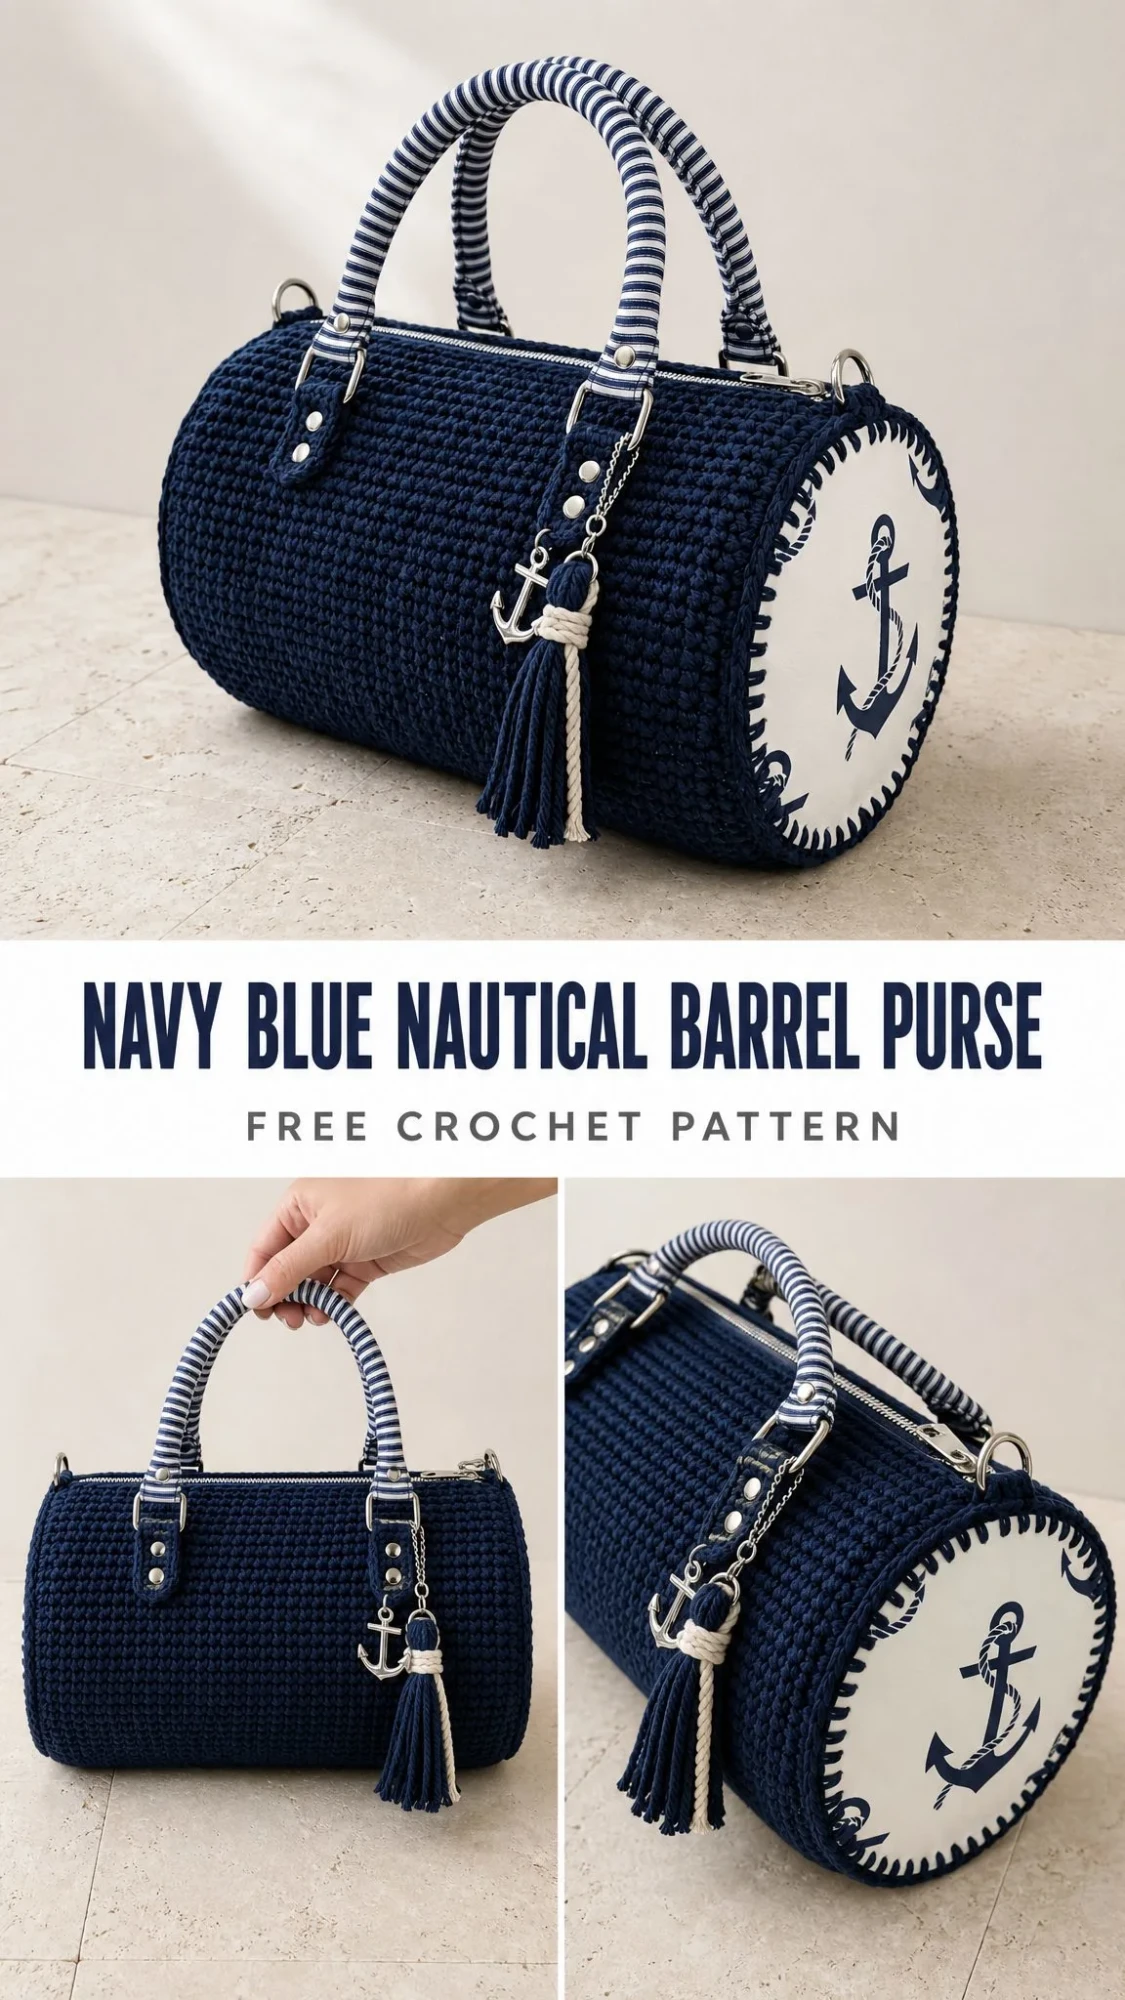
This structured crochet purse features a classic barrel shape with round end panels on each side, striped handles, a top zipper closure, and crisp nautical details that give it a polished, professional finish. The construction is simpler than you might expect. You will work one flat rectangular body panel that wraps around two matching circular end panels. A zipper forms the top opening, and strap tabs with D-rings hold two beautiful striped handles.
The finished purse measures approximately 12 inches long by 5.75 inches in diameter, with a handle drop of about 4.75 inches. This makes it the perfect size for everyday essentials while still being compact enough to carry comfortably.
The skill level is confident advanced beginner to intermediate. You will use simple stitches throughout, but you will need accurate gauge, some experience with zipper insertion, firm seaming, and hardware placement. If you have never installed a zipper before, do not worry. I will walk you through it step by step.
Materials You Will Need
Before you begin, gather all your supplies. Having everything ready makes the process so much smoother.
Yarn:
Yarn Suggestions:
Lion Brand 24/7 Cotton works beautifully for this project. It is a crisp mercerized cotton that gives clear stitch definition and a structured finish.
Paintbox Yarns Cotton Aran is another excellent choice. It offers smooth texture with saturated color and a sturdy handmade feel.
Knit Picks Dishie Worsted is a durable cotton option for bags that need firm fabric and easy care.
When substituting yarn, choose a firm worsted or aran cotton that can meet gauge without becoming floppy. If your fabric relaxes too much, go down a hook size or plan to add lining and interfacing for structure.
Tools and Notions:
Gauge
Getting your gauge right is essential for this project because the end panels need to fit perfectly with the body panel.
16 single crochet stitches x 16 rows/rounds = 4 inches (10 cm) in firm single crochet after light blocking.
Make a swatch before you start. Adjust your hook size if needed. The body math uses this gauge: 48 stitches equals 12 inches (30.5 cm), and 72 rows equals 18 inches (45.5 cm) around.
Stitch Guide and Abbreviations
Let me walk you through all the stitches and techniques you will use.
Abbreviations (US Terms):
UK crocheters: US single crochet (sc) equals UK double crochet (dc).
Invisible Join: Cut yarn and pull tail through last stitch. Thread needle, insert under both loops of first stitch of the round, then back down into the last stitch to mimic a stitch. This creates a seamless finish.
Surface Slip Stitch Embroidery: Hold working yarn on the wrong side. Insert hook from front to back, pull a loop to the front, insert in the next marked point, pull up a loop, and draw it through the loop on hook. This technique creates the anchor design.
Whipstitch Seam: Place pieces wrong sides together. Sew through one body row-end and one end-panel stitch at a time, keeping tension firm and even.
Pattern Notes
Before diving into the instructions, here are some important things to keep in mind:
Left-handed crocheters: Work the same instructions. Your rounds and seaming direction may mirror the photos. Keep the zipper centered at the top and place strap tabs symmetrically from each end.
Body Panel Instructions
With navy yarn, chain 49.
Row 1: Single crochet in 2nd chain from hook and in each chain across. Turn. (48 sc)
Rows 2 through 72: Chain 1, single crochet in each stitch across. Turn after every row except Row 72. (48 sc)
Do not fasten off if you want to edge the zipper side with the same strand.
Zipper Edge Prep
Chain 1. Work 1 round of single crochet evenly around the body panel: 48 single crochet along Row 72, 72 single crochet down the side edge, 48 single crochet along the foundation edge, and 72 single crochet up the opposite side edge. Join invisibly. (240 sc)
Maker checkpoint: Your flat panel should measure about 12 inches (30.5 cm) wide and 18 inches (45.5 cm) tall. Long side edges should each have 72 row-ends for joining.
Clean edge option: For a smoother zipper installation, work 1 extra row of single crochet along Row 1 and Row 72 only, keeping 48 single crochet on each zipper edge.
Round End Panels
Make 2. Work in joined rounds with white yarn. Chain 2 to begin.
Round 1: 6 single crochet in 2nd chain from hook, join. (6 sc)
Round 2: 2 single crochet in each stitch around, join. (12 sc)
Round 3: [Single crochet in next stitch, 2 single crochet in next stitch] 6 times, join. (18 sc)
Round 4: [Single crochet in next 2 stitches, 2 single crochet in next stitch] 6 times, join. (24 sc)
Round 5: [Single crochet in next 3 stitches, 2 single crochet in next stitch] 6 times, join. (30 sc)
Round 6: [Single crochet in next 4 stitches, 2 single crochet in next stitch] 6 times, join. (36 sc)
Round 7: [Single crochet in next 5 stitches, 2 single crochet in next stitch] 6 times, join. (42 sc)
Round 8: [Single crochet in next 6 stitches, 2 single crochet in next stitch] 6 times, join. (48 sc)
Round 9: [Single crochet in next 7 stitches, 2 single crochet in next stitch] 6 times, join. (54 sc)
Round 10: [Single crochet in next 8 stitches, 2 single crochet in next stitch] 6 times, join. (60 sc)
Round 11: [Single crochet in next 9 stitches, 2 single crochet in next stitch] 6 times, join. (66 sc)
Round 12: [Single crochet in next 10 stitches, 2 single crochet in next stitch] 6 times, join. (72 sc)
Panel Border and Anchor Design
Border: Join navy in any stitch of an end panel. Chain 1, single crochet in each stitch around, join. (72 sc) Fasten off. Repeat for second panel.
Whipstitch-style accent: With navy, embroider evenly spaced vertical stitches over the outer border. Place 1 stitch over approximately every other border stitch. Keep the stitches tall enough to frame the white center without hiding it.
Anchor motif: Lightly mark a centered anchor about 3.75 inches (9.5 cm) tall. Use navy surface slip stitch or chain-stitch embroidery for the vertical shank, curved flukes, crossbar, and ring. Keep the design centered so the border remains visible.
Simple Anchor Placement Map
Maker checkpoint: Each finished panel should measure about 5.75 to 6 inches (14.5 to 15 cm) across and have exactly 72 outer stitches for joining to the body.
Assembly: Barrel and Zipper
Follow these steps carefully for professional results.
1. Block body panel and end panels lightly to measurements. Do not stretch the edges.
2. Place zipper between Row 1 and Row 72 edges of the body panel. Pin so the zipper teeth run straight down the center of the 12 inch (30.5 cm) length. Sew by hand or machine close to the crocheted edge.
3. With zipper closed, shape the body into a cylinder. The two 72-row side edges become the circular openings.
4. Mark each opening every 12 row-ends. Mark each end panel every 12 stitches.
5. Hold one end panel to one body opening with wrong sides together. Whipstitch 1 panel stitch to 1 body row-end all the way around. (72 joins)
6. Repeat for the second end panel. Keep the zipper centered at the top.
7. Insert lining and optional structure before fully closing any hand-sewn lining seam.
Lining Guide
Cut one lining rectangle about 13 x 19 inches (33 x 48 cm) and two circles about 6.5 inches (16.5 cm) across. Sew into a barrel lining with a zipper opening allowance. Slip inside and hand-stitch lining to zipper tape and seam allowances.
Maker checkpoint: Before adding hardware, the purse should sit as a firm cylinder about 12 inches (30.5 cm) long with a centered zipper and two smooth round ends.
Strap Tabs and Handles
Strap Tabs (Make 4)
With navy yarn, chain 6.
Row 1: Single crochet in 2nd chain from hook and across. Turn. (5 sc)
Rows 2 through 14: Chain 1, single crochet in each stitch across. Turn. (5 sc)
Finish: Fold each tab around a D-ring or handle ring and sew or rivet through both layers to the purse body. Finished folded tab is about 1.75 inches (4.5 cm) long.
Striped Handle Covers (Make 2)
With navy yarn, chain 7.
Row 1: Single crochet in 2nd chain from hook and across. Turn. (6 sc)
Rows 2 through 52: Chain 1, single crochet in each stitch across, changing color every row between navy and white. Turn. (6 sc)
Finish: Wrap strip around firm cord or rope, seam long edges closed around the core, and attach ends to D-rings. Finished handle is about 13 inches (33 cm) along the curve with about 4.75 inches (12 cm) drop.
Placement: Set tabs about 2 inches (5 cm) in from each end panel and about 0.75 inches (2 cm) below the zipper edge. Mirror placement on the back.
Embellishments and Finishing
Tassel: Cut sixteen 8 inch (20 cm) navy strands and four 8 inch (20 cm) white strands. Fold over a chain or ring, wrap the neck tightly with white yarn, knot securely, and trim even. Add a small anchor charm if desired.
Final shaping: Steam lightly from a distance or wet block gently. Do not flatten the cylinder. Let dry with tissue, foam, or a rolled towel inside.
Size Customization Tips
Want to make your purse larger or smaller? Here is how to adjust:
Troubleshooting Common Issues
Panel cups or ruffles: Check your increase count. Each circle round adds exactly 6 stitches. Block gently and keep border tension even.
Body is floppy: Use a smaller hook, firmer cotton, lining, or bag foam for structure.
End panel does not fit: Count 72 body row-ends and 72 panel stitches. Pin markers first, then seam.
Zipper waves: Baste first. Do not stretch crochet while sewing.
Care Instructions
Final Thoughts on This Nautical Barrel Purse Crochet Pattern
This nautical barrel purse combines classic craftsmanship with modern style. The simple single crochet construction keeps things manageable, while the finished piece looks incredibly sophisticated. I love how the striped handles and anchor details give it that perfect seaside charm without being too literal or kitschy.
Keep your gauge swatch and note your hook size, yarn brand, and any lining or structure choices. These notes make it easier to reproduce a matching purse later if you want to make one as a gift.
Thank you so much for choosing this pattern! I really hope you enjoy making this beautiful purse. If you give it a try, I would absolutely love to see your finished project. Tag me on Instagram or share a photo in our Facebook group.
If you loved this pattern, save it to your Pinterest boards so you can find it easily when you are ready to start. And please drop a comment below if you make one. I love hearing about your projects and seeing your color combinations!
Want a Quick & Easy Printable Version?
Get a clean, beautifully formatted PDF of this pattern — easy to follow step by step, ready to print or save on any device. No scrolling, no distractions, just the pattern.
Get the Printable PDF →