
Last summer, my niece came running up to me at a family barbecue with watermelon juice dripping down her chin and announced that bats were her new favorite animal. She had just learned they pollinate plants and eat mosquitoes. "Auntie, can you make me a bat?" she asked. I promised I would, but I wanted it to be special. Something that captured that exact moment of sticky summer sweetness and her newfound love for these misunderstood little creatures.
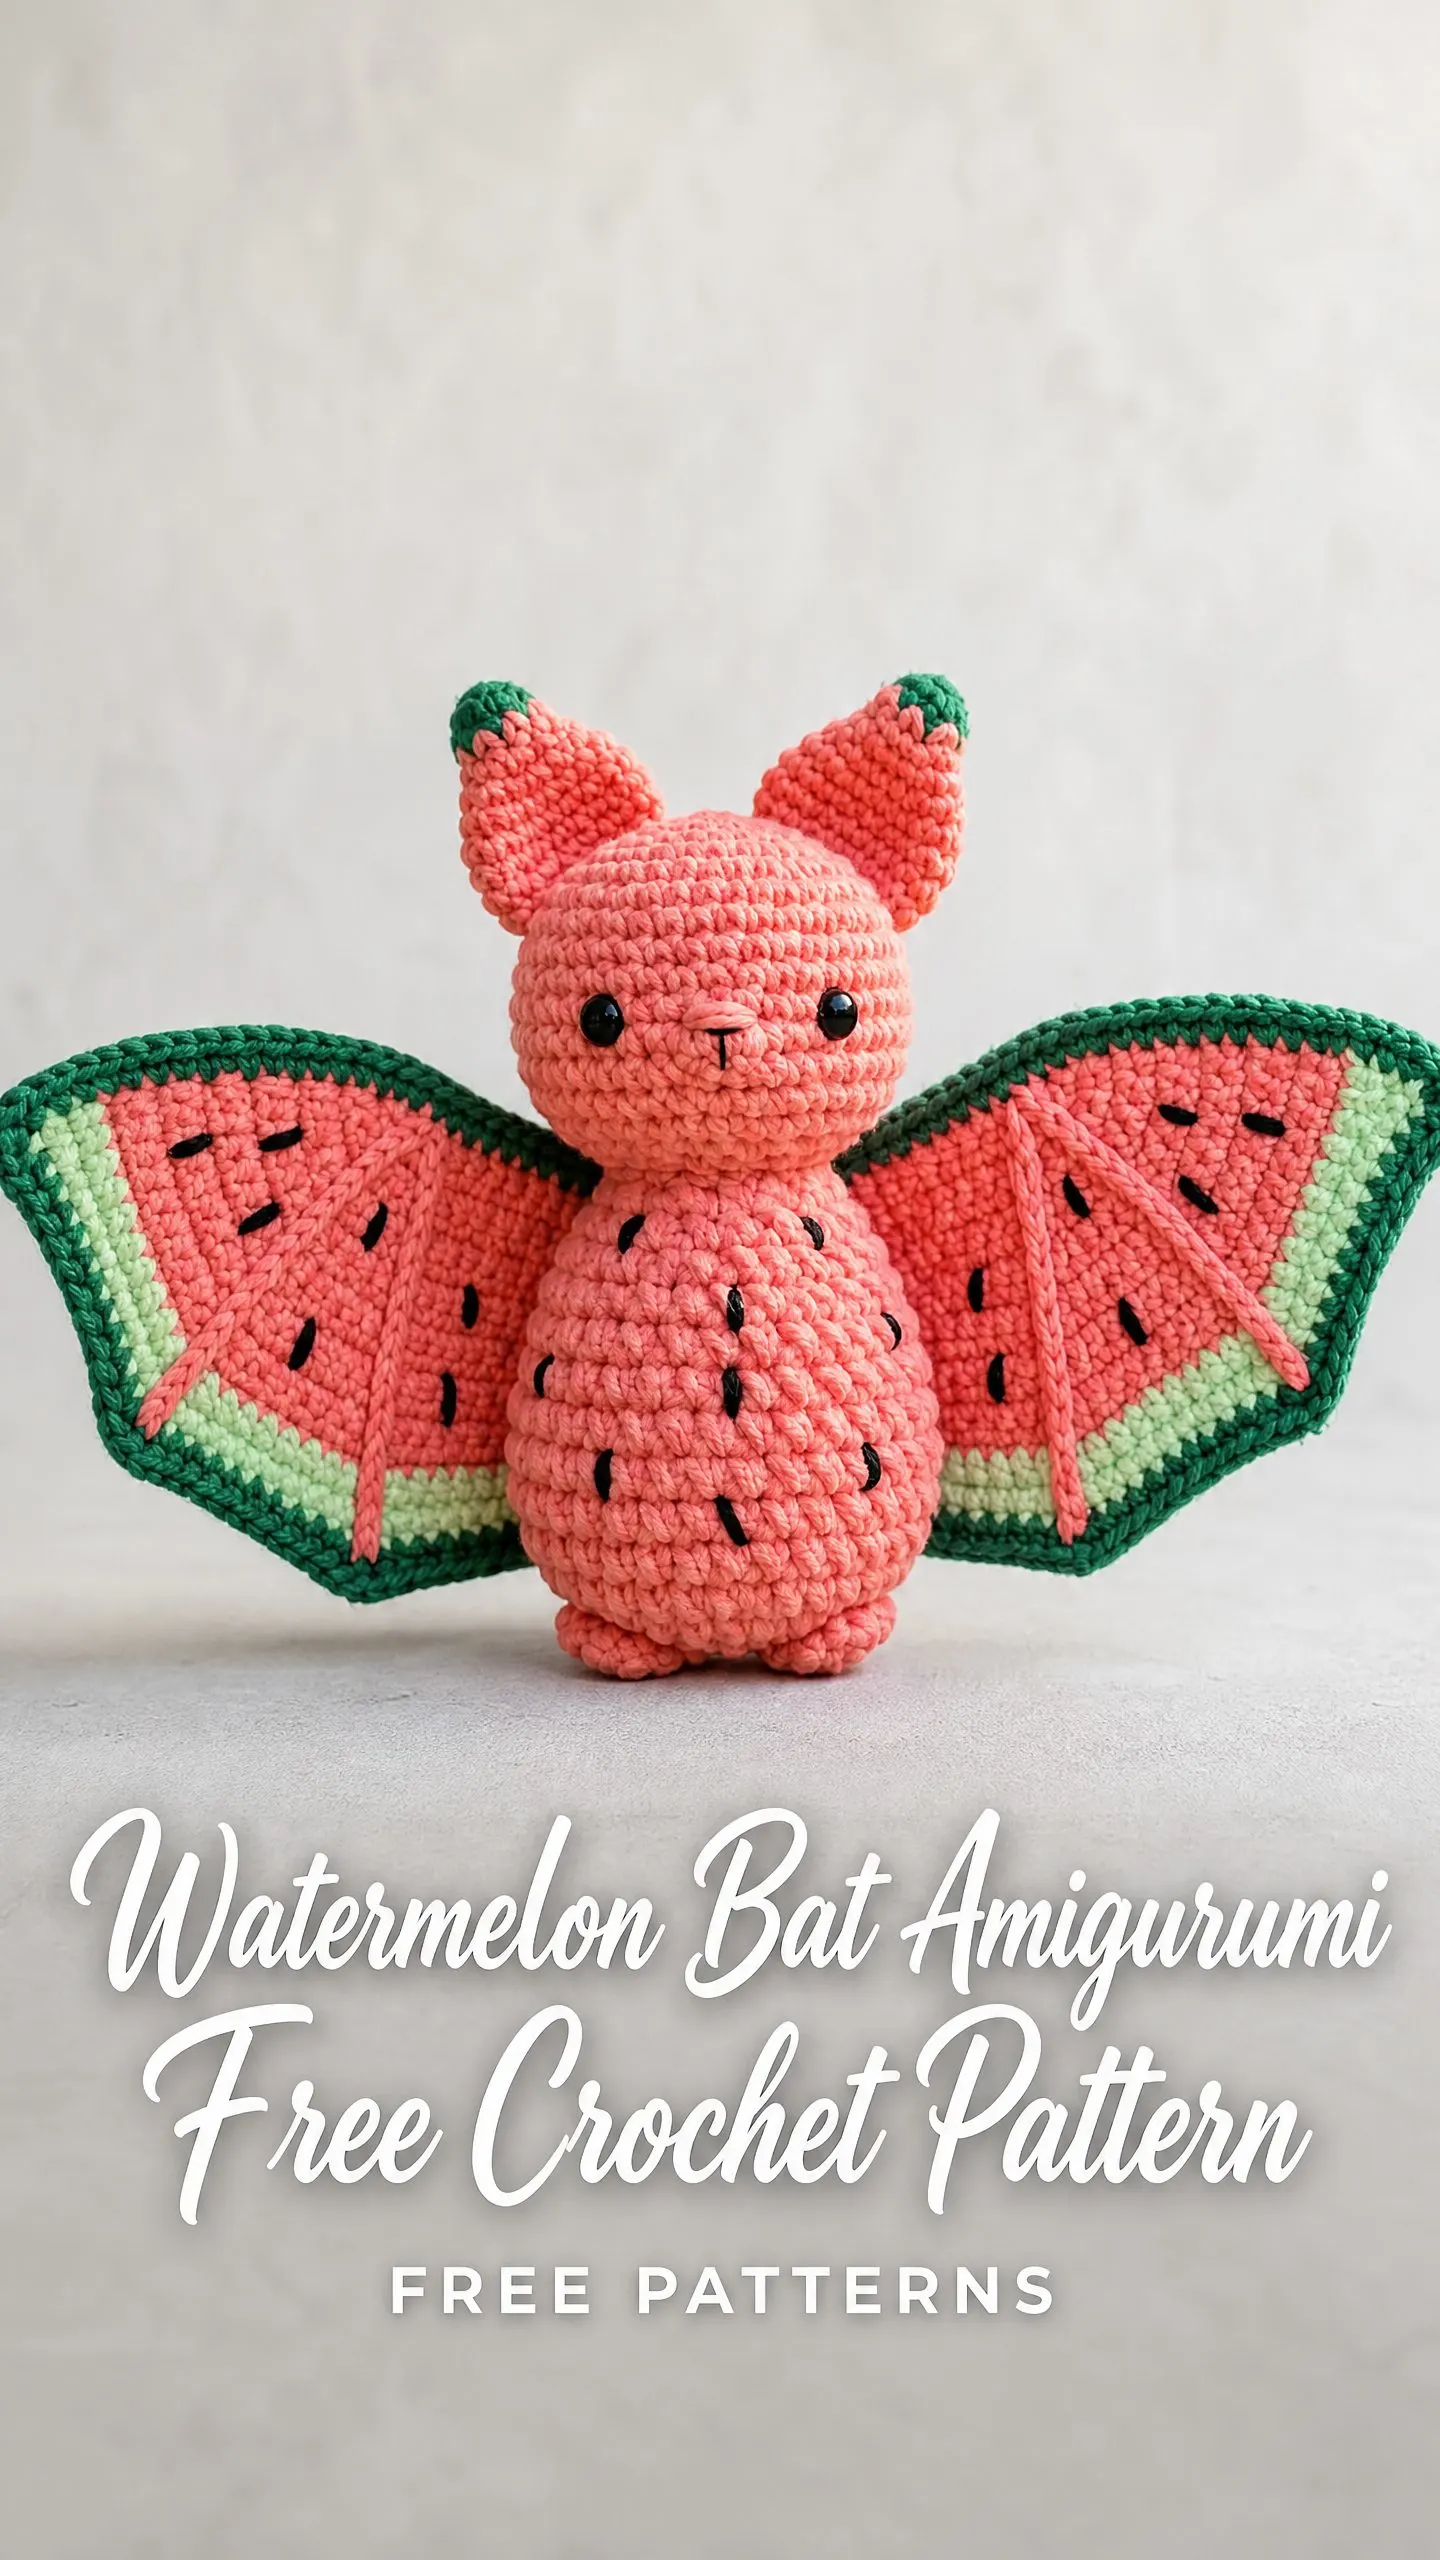
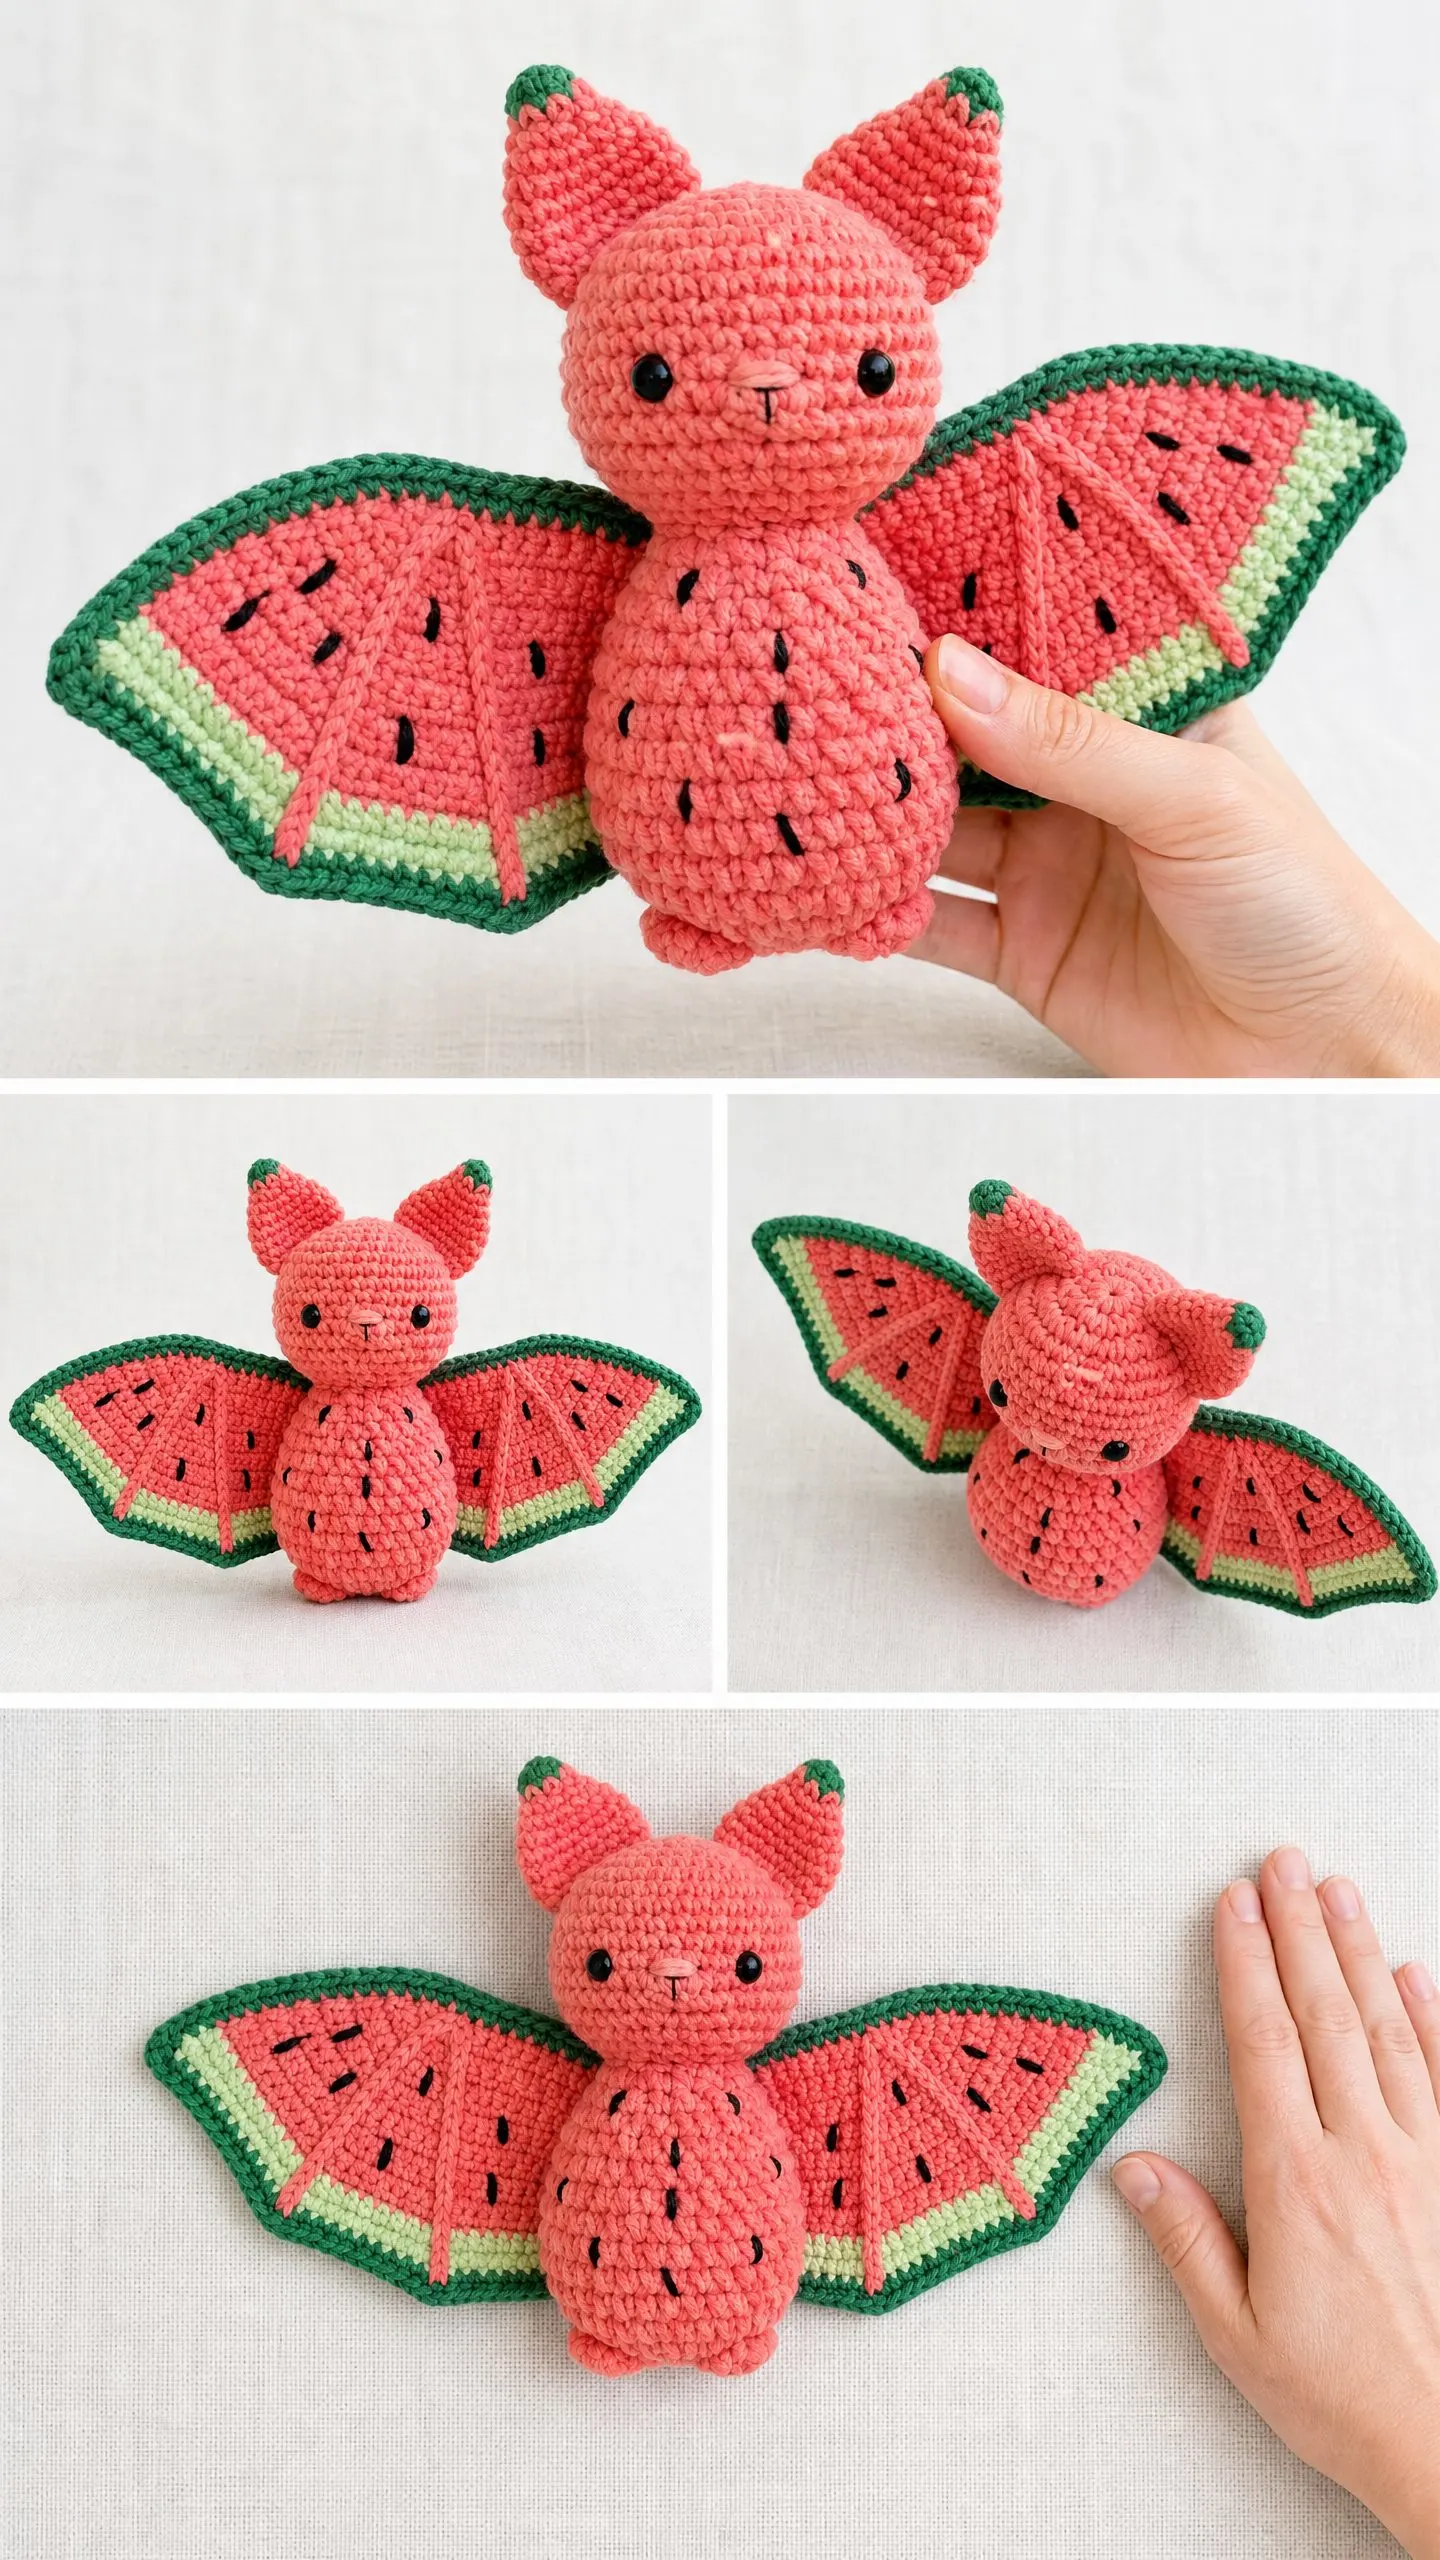
That is how this watermelon bat came to life. A chubby coral pink body dotted with embroidered seeds. Wings that look like fresh watermelon slices complete with the green rind. Tiny pointed ears tipped in forest green. It is part fruit, part flying mammal, and entirely adorable.
This pattern sits at an intermediate skill level, but do not let that scare you off. If you can work in a magic ring and change colors, you have got this. I will walk you through every step, explain each technique, and give you plenty of checkpoints along the way.
Pattern Overview and Skill Level
This amigurumi crochet pattern creates a three-dimensional stuffed bat approximately 5.5 inches tall and 8.5 inches wide with wings fully spread. The body and head are worked in continuous rounds using the spiral method. The wings are flat panels worked in rows with color changes to create that signature watermelon stripe effect.
You will need to be comfortable with several techniques: working in a magic ring (MR), making invisible decreases, joining new yarn colors mid-row, and basic embroidery for the seeds. The wing color sections require some discipline with color changes, but nothing too tricky once you get the rhythm.
Total time estimate: 10 to 14 hours spread across body and head (3 to 4 hours), wings (3 to 4 hours), ears and assembly (2 to 3 hours), and embroidery and finishing (1 to 2 hours).
Materials You Will Need
Yarn
You will need five colors in light worsted weight (weight 3) or DK yarn:
Yarn suggestions: Lion Brand Amigurumi yarn works beautifully here. The 100% nylon gives a tight, smooth fabric that holds the seed embroidery crisply. Paintbox Yarns Simply DK is another great option if you prefer a squishier result. For cotton lovers, Scheepjes Catona provides excellent stitch definition.
Avoid fluffy or fuzzy yarns. Stitch definition is essential for the seed motif and wing stripe pattern to read clearly.
Hook and Notions
Gauge
14 single crochet by 16 rounds = 4 inches (10 cm) in single crochet worked in the round, measured over a flat swatch after light steam blocking.
Gauge matters here. A looser gauge creates gaps through which stuffing shows. A tighter gauge may make the wings too stiff.
Abbreviations and Stitch Definitions
Before we begin, let me define every abbreviation you will encounter:
Special Techniques
Invisible Decrease
This technique closes more neatly than a standard decrease and is used throughout the body and head. Insert hook through the front loop only of the next stitch. Without completing, insert hook through the front loop only of the stitch after that. Yarn over and pull through both front loops (2 loops on hook). Yarn over and pull through both remaining loops.
Color Change at End of Row
For the wings, work the last stitch of the current color until 2 loops remain on the hook. Drop the old color to the wrong side. Pick up the new color and pull through the 2 remaining loops to complete the stitch. Turn and continue with the new color.
Surface Slip Stitch
This creates raised vein lines on the wings. With RS facing, insert hook through the fabric at the starting point. Pull up a loop of Color D. Without chaining, insert hook through fabric at the next point along the vein and pull through the fabric and the loop on hook simultaneously. Repeat along the vein line.
Pattern Instructions
Body
The body is a rounded oval, narrowest at the base and widest at the mid-section. Work in Color A throughout.
Rnd 1: MR, 6 sc in ring. (6 sc)
Rnd 2: Inc in each st around. (12 sc)
Rnd 3: (Inc, 1 sc) x 6. (18 sc)
Rnd 4: (Inc, 2 sc) x 6. (24 sc)
Rnd 5: (Inc, 3 sc) x 6. (30 sc)
Rnd 6: (Inc, 4 sc) x 6. (36 sc)
Rnd 7: (Inc, 5 sc) x 6. (42 sc)
Rnds 8-11: Sc in each st around. (42 sc)
Rnd 12: (Dec, 5 sc) x 6. (36 sc)
Rnd 13: Sc in each st around. (36 sc)
Rnd 14: (Dec, 4 sc) x 6. (30 sc)
Rnd 15: Sc in each st around. (30 sc)
Rnd 16: (Dec, 3 sc) x 6. (24 sc)
Rnd 17: Sc in each st around. (24 sc)
Rnd 18: (Dec, 2 sc) x 6. (18 sc)
Begin stuffing body firmly as you work.
Rnd 19: (Dec, 1 sc) x 6. (12 sc)
Rnd 20: Dec x 6. (6 sc)
Fasten off, leaving a 12-inch tail. Close hole by weaving tail through front loops of all 6 sts and pulling tight. Weave in tail securely.
Checkpoint: Body should measure approximately 2.5 inches tall by 2.75 inches wide.
Head
Work in Color A throughout.
Rnd 1: MR, 6 sc in ring. (6 sc)
Rnd 2: Inc in each st around. (12 sc)
Rnd 3: (Inc, 1 sc) x 6. (18 sc)
Rnd 4: (Inc, 2 sc) x 6. (24 sc)
Rnd 5: (Inc, 3 sc) x 6. (30 sc)
Rnd 6: (Inc, 4 sc) x 6. (36 sc)
Rnds 7-10: Sc in each st around. (36 sc)
Install safety eyes now between Rnds 6 and 7, approximately 8 stitches apart (4 stitches on either side of center front). Embroider a small nose in pale pink directly below and between the eyes using 2 to 3 horizontal straight stitches. Add a tiny smile with Color E using 3 to 4 small straight stitches in a gentle curve.
Rnd 11: (Dec, 4 sc) x 6. (30 sc)
Rnd 12: (Dec, 3 sc) x 6. (24 sc)
Rnd 13: (Dec, 2 sc) x 6. (18 sc)
Begin stuffing head firmly.
Rnd 14: (Dec, 1 sc) x 6. (12 sc)
Rnd 15: Dec x 6. (6 sc)
Fasten off, leaving a 14-inch tail for attaching to body. Close hole by weaving through front loops.
Ears (Make 2)
Each ear is worked flat in rows with a green tip. Start with Color D for 2 rows, then switch to Color A.
With Color D, ch 2.
Row 1 (RS): 3 sc in second ch from hook. Turn. (3 sc)
Row 2: Ch 1, inc in first st, sc in next st, inc in last st. Turn. (5 sc)
Switch to Color A.
Row 3: Ch 1, inc in first st, sc in next 3 sts, inc in last st. Turn. (7 sc)
Row 4: Ch 1, inc in first st, sc in next 5 sts, inc in last st. Turn. (9 sc)
Rows 5-6: Ch 1, sc in each st across. Turn. (9 sc)
Row 7: Ch 1, dec, sc in next 5 sts, dec. Turn. (7 sc)
Row 8: Ch 1, dec, sc in next 3 sts, dec. Turn. (5 sc)
Row 9: Ch 1, dec, sc in next st, dec. Turn. (3 sc)
Row 10: Ch 1, dec, sc in last st. (2 sc)
Do not fasten off. Work 1 round of sc evenly around the entire ear edge, placing 3 sc in the green tip point. Join with sl st. Fasten off, leaving a 10-inch tail.
Fold each ear in half lengthwise and whip stitch the base closed to create a slight cup shape.
Wings (Make 2, mirror images)
Each wing is a flat panel shaped like a bat wing with watermelon stripe coloring. The stripe layout from inside to outside: coral pink (Color A), light green (Color B), medium green (Color C), deep green border (Color D).
Wing Foundation: With Color A, ch 22.
Row 1 (RS): Sc in second ch from hook, sc in next 20 chs. Turn. (21 sc)
Row 2 (WS): Ch 1, sc in each st across. Turn. (21 sc)
Row 3: Ch 1, inc in first st, sc in next 19 sts, inc in last st. Turn. (23 sc)
Row 4: Ch 1, sc in each st across. Turn. (23 sc)
Row 5: Ch 1, inc in first st, sc in next 21 sts, inc in last st. Turn. (25 sc)
Row 6: Ch 1, sc in each st across. Turn. (25 sc)
Row 7: Ch 1, inc in first st, sc in next 23 sts, inc in last st. Turn. (27 sc)
Row 8: Ch 1, sc in each st across. Turn. (27 sc)
Row 9: Ch 1, inc in first st, sc in next 25 sts, inc in last st. Turn. (29 sc)
Row 10: Ch 1, sc in each st across. Turn. (29 sc)
Row 11: Ch 1, inc in first st, sc in next 27 sts, inc in last st. Turn. (31 sc)
Row 12: Ch 1, sc in each st across. Turn. (31 sc)
Begin tapering toward outer tip:
Row 13: Ch 1, sc in next 29 sts, dec. Turn. (30 sc)
Row 14: Ch 1, dec, sc in next 28 sts. Turn. (29 sc)
Row 15: Ch 1, sc in next 27 sts, dec. Turn. (28 sc)
Row 16: Ch 1, dec, sc in next 26 sts. Turn. (27 sc)
Row 17: Ch 1, sc in next 25 sts, dec. Turn. (26 sc)
Row 18: Ch 1, dec, sc in next 24 sts. Turn. (25 sc)
Row 19: Ch 1, sc in next 23 sts, dec. Turn. (24 sc)
Row 20: Ch 1, dec, sc in next 22 sts. Turn. (23 sc)
Row 21: Ch 1, sc in next 20 sts, dec. Turn. (21 sc)
Row 22: Ch 1, dec, sc in next 18 sts, dec. Turn. (19 sc)
Row 23: Ch 1, dec, sc in next 15 sts, dec. Turn. (17 sc)
Row 24: Ch 1, dec, sc in next 13 sts, dec. Turn. (15 sc)
Row 25: Ch 1, dec, sc in next 11 sts, dec. Turn. (13 sc)
Row 26: Ch 1, dec, sc in next 9 sts, dec. Turn. (11 sc)
Row 27: Ch 1, dec, sc in next 7 sts, dec. Turn. (9 sc)
Row 28: Ch 1, dec, sc in next 5 sts, dec. Turn. (7 sc)
Row 29: Ch 1, dec, sc in next 3 sts, dec. Turn. (5 sc)
Row 30: Ch 1, dec, sc in next 1 st, dec. Turn. (3 sc)
Row 31: Ch 1, dec, sc in last st. Turn. (2 sc)
Row 32: Ch 1, dec. Fasten off Color A. (1 sc)
Wing Color Border
Rejoin yarn along the foundation chain edge of the wing.
With Color B:
Row B1: Join Color B in first ch at base, ch 1, sc evenly across entire foundation chain edge. (21 sc)
Row B2: Ch 1, sc in each st across. Turn. (21 sc)
Switch to Color C:
Rows C1-C2: Ch 1, sc in each st across. Turn. (21 sc each row)
Switch to Color D:
Rows D1-D2: Ch 1, sc in each st across. Fasten off Color D. (21 sc each row)
Wing Outer Edging: With Color D, work a single round of sc evenly around the entire wing perimeter. At the sharp outer tip, place 3 sc to maintain the point. Join with sl st. Fasten off.
Wing Vein Lines: Using the surface slip stitch method with Color D, add 2 to 3 vein lines radiating from the inner base outward toward the tip across the Color A section.
For Wing 2, reverse direction so the finished pair is symmetrical.
Seed Embroidery
Using Color E and a yarn needle, embroider watermelon seeds. Each seed is formed by two straight stitches side by side, approximately 3 to 4 mm long, angled slightly to create an oval shape.
On the body: Place 6 to 8 seeds scattered across Rnds 4 through 14. Add 2 to 3 seeds visible from each side.
On wings: Place 8 to 10 seeds per wing across the Color A section, avoiding the green stripe area. Angle each seed slightly toward the outer tip.
Assembly
Step 1: Position head on top of body. Using the long tail from the head, whip stitch around the join, catching one stitch from the head edge and one from the body edge alternately.
Step 2: Pin ears to the top of the head between Rnds 2 and 5. The green tip should point upward and slightly outward. Whip stitch each ear base securely.
Step 3: Position wings on either side of the body, placing the straight inner edge flush against the body from approximately Rnd 6 to Rnd 16. Using Color D, whip stitch the inner seam edge of each wing to the body.
Step 4: Ensure all eyes are secured, all tails are woven in at least 2 to 3 inches, and all seams are tight.
Care Instructions
Hand wash in cool water with mild detergent. Do not wring. Press gently between two towels to remove excess water. Reshape and allow to air dry flat. If wings curl after washing, re-steam them flat once dry.
You Did It!
I hope this watermelon bat brings you as much joy to make as it did for me. Every time I look at mine perched on my craft room shelf, I think of that sticky summer day and my niece’s excited face. That is the magic of handmade gifts. They carry stories.
Thank you so much for choosing this pattern. I would absolutely love to see your finished bats! Tag me on Instagram or share a photo in my Facebook group. Seeing your creations genuinely makes my day.
If you enjoyed making this little guy, go ahead and save this pattern to your Pinterest boards so you can find it again later. And please drop a comment below if you make one. I read every single comment and love hearing about your projects!
You Might Also Like
- Sage Green Boho Lace Crochet Pullover Free Pattern
- Manta Ray Crochet Beach Carryall Free Pattern
- Rose Romance Tote Bag Free Crochet Pattern
- Sunshine Bumble Bee Baby Dress Free Crochet Pattern
