
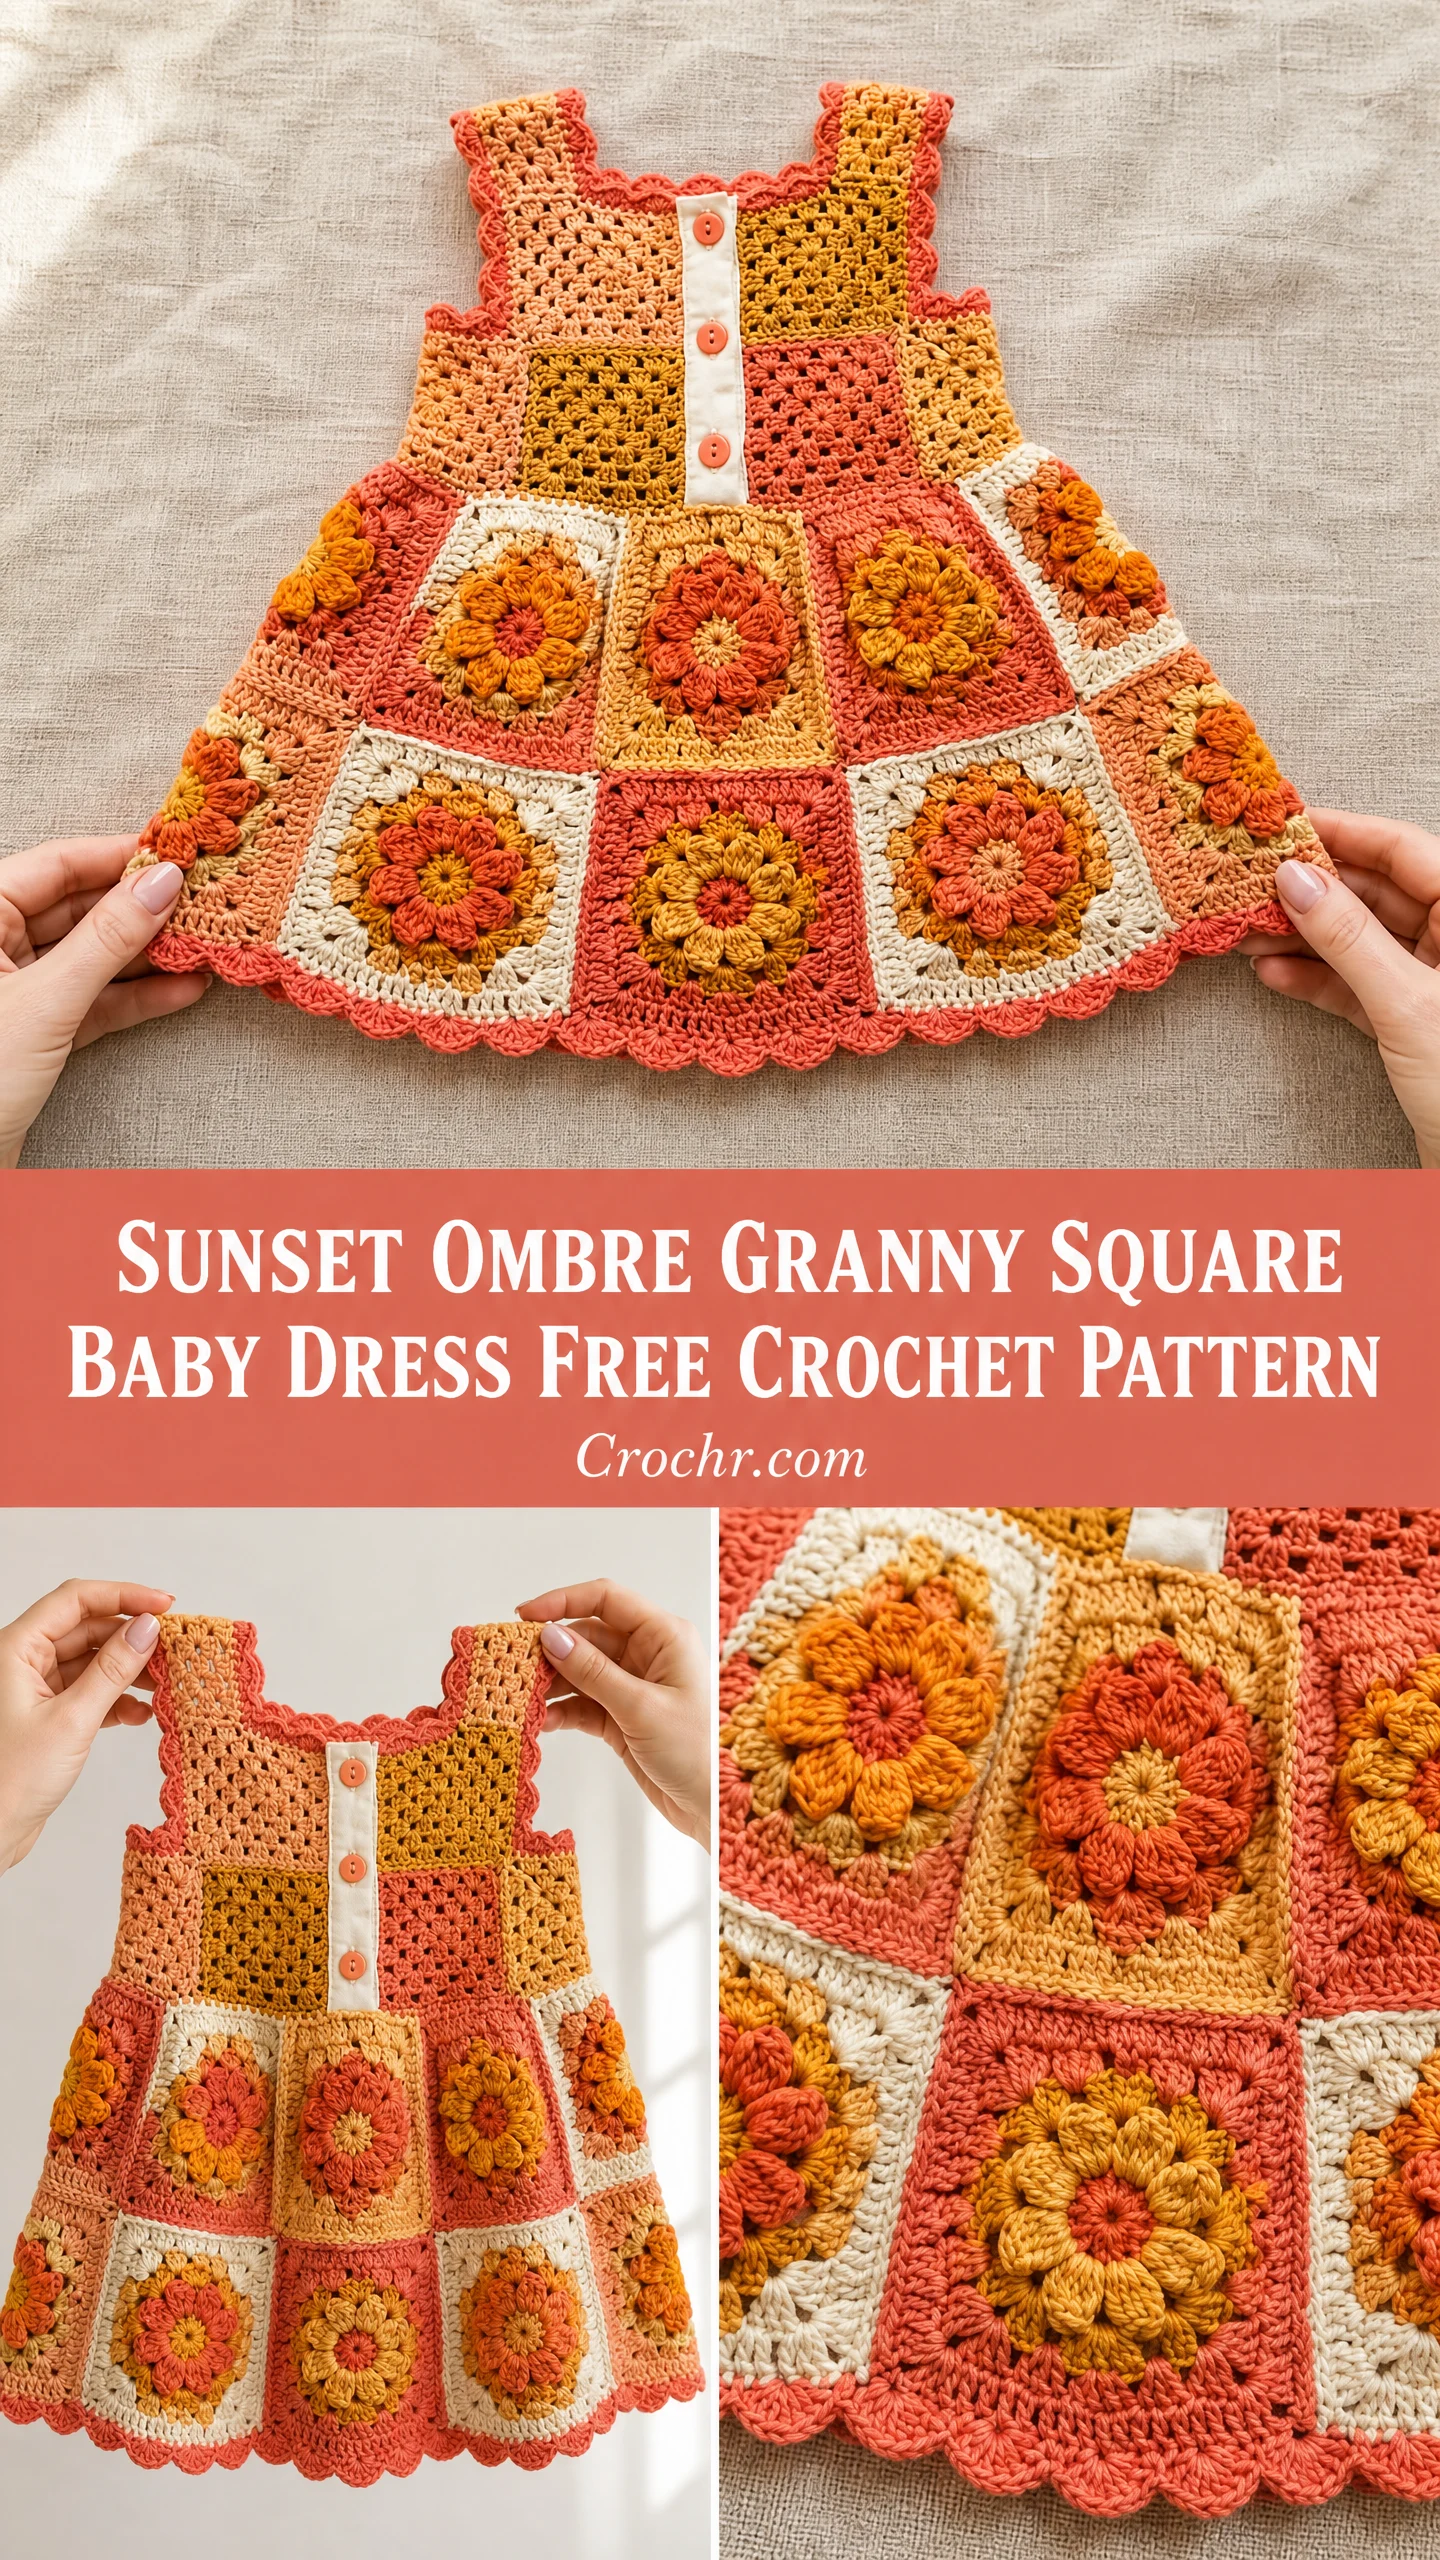
This crochet baby dress uses classic granny squares joined together to create an A-line silhouette. The bodice features smaller four-round squares arranged in a grid. The skirt uses larger six-round flower-center squares that give the dress its signature flare. If you know how to make a basic granny square, you can absolutely make this dress.
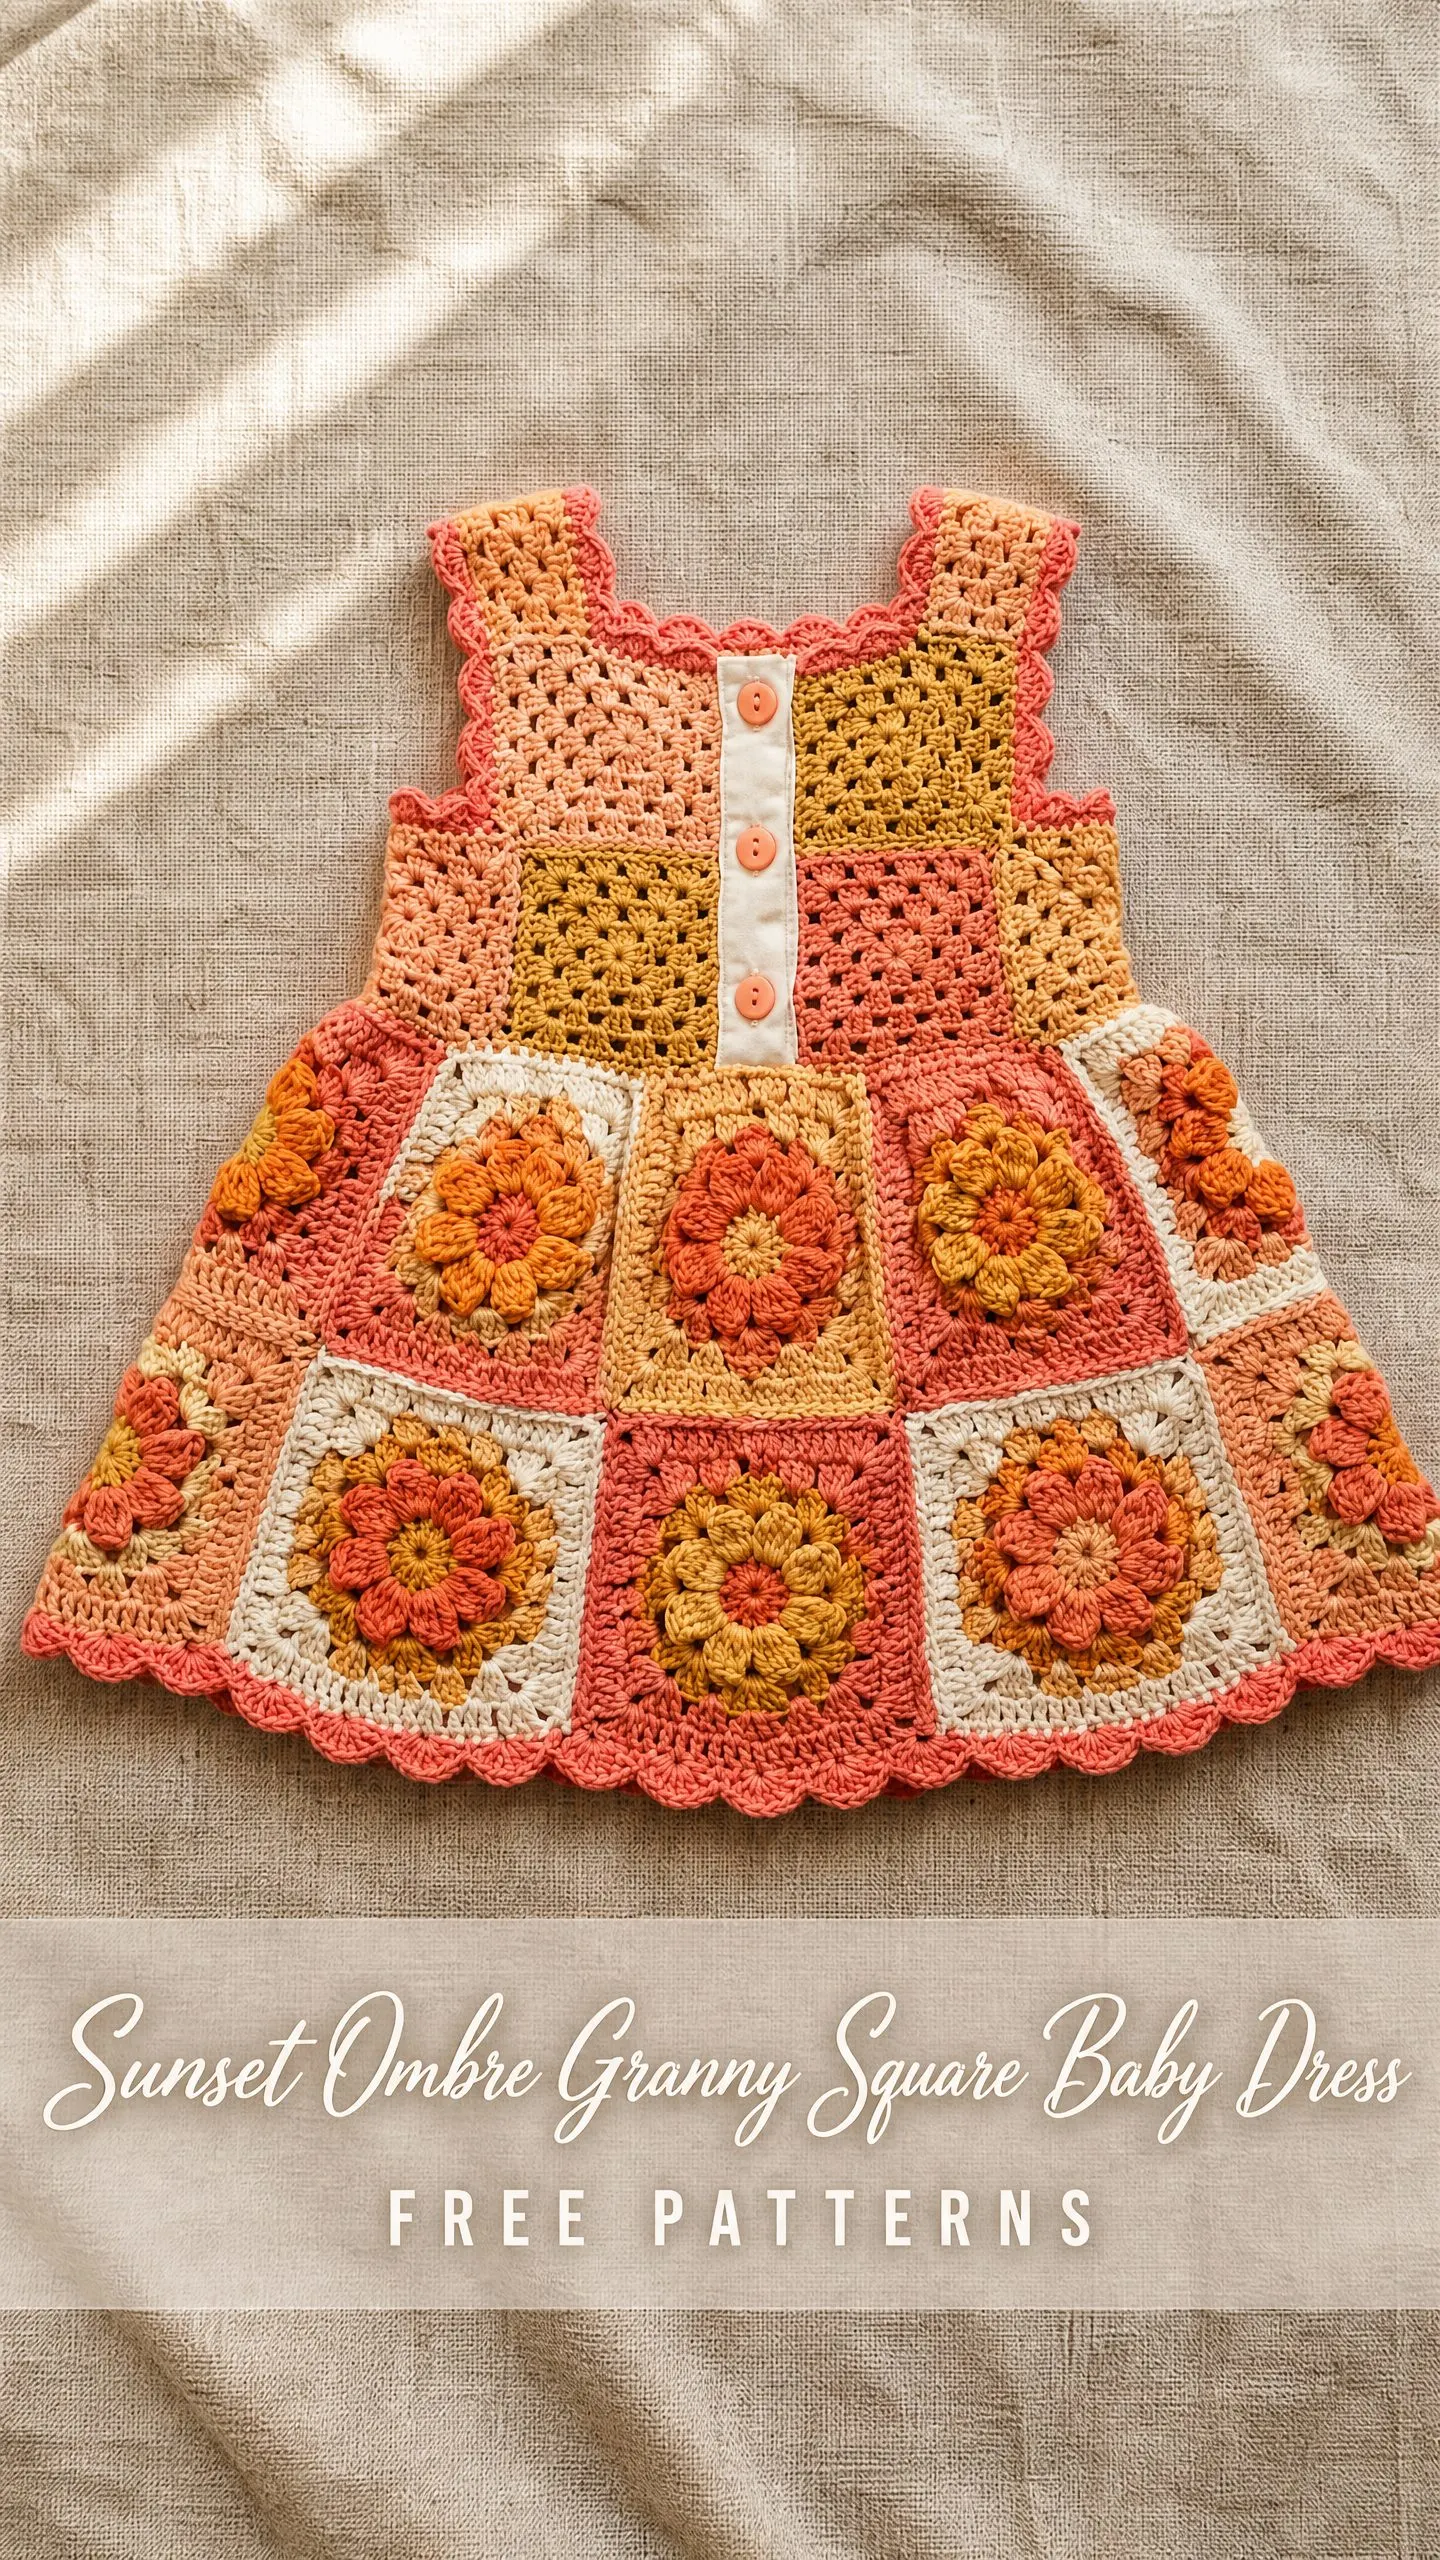
The construction is straightforward. You make all your squares first, join them into panels, then add scallop borders at the neckline, armholes, and hem. A ribbon placket with buttons runs down the center front for a sweet finishing touch.
The warm sunset color palette moves through coral pink, dusty rose, warm orange, golden mustard, and cream. You can follow the color placement guide exactly or swap in your own favorite shades. Either way, you will end up with an heirloom-quality baby dress perfect for gift giving or your own little one.
Why This Granny Square Baby Dress Works So Well
Granny squares are one of the most satisfying things to crochet. Each one works up quickly, travels well, and gives you that instant gratification of a finished piece. When you join them into a garment like this dress, you get something truly special without the complexity of shaping or complicated stitch patterns.
The size difference between the bodice squares (3 inches) and the skirt squares (4 inches) creates a natural A-line shape. No increasing, no shaping math, no stress. The dress simply flares out beautifully from the waist because the skirt squares are larger.
I love that this pattern uses a flower-center variation for the skirt squares. Those puff stitch petals add texture and visual interest that elevates the whole piece. The bodice squares are classic granny construction, so you get variety without having to learn anything too complicated.
Skill Level
This crochet pattern is rated intermediate. The individual granny squares are beginner-friendly, but you will need some experience with joining motifs, maintaining color placement, and working scallop edging around curves.
If you have made a granny square blanket before, you have most of the skills you need. The flower-center squares add one new technique (puff stitches), but I will walk you through it step by step.
Finished Measurements
Size: 12-18 months
Size customization tips are included at the end of this pattern if you need to go smaller or larger.
Materials You Will Need
Yarn: DK weight (CYCA #3) in five colors
Hook: US Size E-4 / 3.5 mm
Notions:
Yarn Suggestions
Paintbox Yarns Simply DK (100% acrylic, 276 yards per 100 g skein) offers excellent stitch definition with a wide color range including corals and golds. Machine washable and ideal for baby items.
Lion Brand Feels Like Butta DK (100% polyester, 230 yards per 100 g skein) is ultra-soft against baby skin and holds color vibrantly.
Scheepjes Stonewashed XL (60% cotton, 40% acrylic, 123 yards per 50 g skein) gives lovely drape and breathability with beautiful tonal colorways.
Any DK weight yarn achieving the stated gauge will work. For baby garments, prioritize machine-washable yarns and avoid novelty or loosely plied options.
Gauge
One small bodice granny square (4 rounds) = approximately 3 inches x 3 inches blocked
One large skirt granny square (6 rounds) = approximately 4 inches x 4 inches blocked
Gauge is critical for finished size. Adjust your hook size up or down as needed to match these square dimensions before beginning assembly.
Abbreviations (US Terms)
Special Stitches
Puff Stitch (used in flower center)
Yarn over, insert hook into indicated stitch or space, yarn over and pull up a loop to approximately 1/2 inch height. Repeat this step (yarn over, insert, pull up loop) three more times in the same stitch or space, keeping all loops on hook (nine loops on hook). Yarn over and draw through all nine loops on hook. Chain 1 to close and secure. One puff stitch made.
This sounds complicated but gets easy fast. You are basically pulling up tall loops repeatedly in the same spot, then closing them all at once.
Scallop Edging
With RS facing and working yarn attached, insert hook into first stitch, sc in same stitch, ch 2, work 4 dc in same stitch, skip next 2 stitches, sc in next stitch. Repeat across edge.
One scallop unit = (sc, ch 2, 4 dc) in one stitch, skip 2, sc in next stitch.
Pattern Notes Before You Begin
1. The dress is constructed top down in sections. First make all individual squares, then join them by section (bodice first, then skirt), then join the two sections together, followed by border finishing.
2. Color placement creates the sunset ombre effect. Follow the color guide or customize to your preference.
3. The bodice uses 8 small squares total (4 front, 4 back).
4. The skirt uses 12 large squares total (6 front, 6 back).
5. All squares are worked with RS always facing. You never turn your work.
6. When changing colors, finish the last yarn over of the last stitch in the current color with the new color.
7. Always weave in ends on the WS of each square before joining.
Small Bodice Granny Square (Make 8 total)
Color placement: Center rounds in Color B (dusty rose) or Color D (golden mustard), alternating for variety. Final rounds in Color A (coral pink).
Square measures 3 inches x 3 inches after blocking.
Foundation
With Color B (or D), make a magic ring, or ch 4 and join with sl st to form a ring.
Round 1
Ch 3 (counts as first dc now and throughout), work 2 dc into ring, ch 2, (3 dc into ring, ch 2) 3 times, join with sl st to top of beg ch-3. Fasten off.
4 groups of 3 dc, 4 ch-2 corner spaces. Total: 12 dc.
Round 2
Join Color A with sl st to any ch-2 corner sp. Ch 3, work 2 dc in same corner sp, ch 2, 3 dc in same corner sp (first corner made), ch 1, (3 dc in next corner sp, ch 2, 3 dc in same corner sp, ch 1) 3 times, join with sl st to top of beg ch-3.
8 groups of 3 dc, 4 ch-2 corners, 4 ch-1 side spaces. Total: 24 dc.
Round 3
Sl st to next dc, sl st into first corner ch-2 sp. Ch 3, 2 dc in same sp, ch 2, 3 dc in same sp (corner), ch 1, 3 dc in next ch-1 side sp, ch 1, (3 dc in next corner ch-2 sp, ch 2, 3 dc in same sp, ch 1, 3 dc in next ch-1 sp, ch 1) 3 times, join with sl st to top of beg ch-3.
12 groups of 3 dc, 4 ch-2 corner sp, 8 ch-1 side sp. Total: 36 dc.
Round 4
Sl st to next dc, sl st into first corner ch-2 sp. Ch 3, 2 dc in same sp, ch 2, 3 dc in same sp, ch 1, (3 dc in next ch-1 sp, ch 1) twice, (3 dc in corner ch-2 sp, ch 2, 3 dc in same sp, ch 1, (3 dc in ch-1 sp, ch 1) twice) 3 times, join with sl st to top of beg ch-3. Fasten off and weave in ends.
16 groups of 3 dc, 4 ch-2 corner sp, 12 ch-1 side sp. Total: 48 dc.
Large Skirt Granny Square with Flower Center (Make 12 total)
Color placement: Rounds 1-2 use Colors C, D, or E for the flower motif. Rounds 3-4 use Color B or A. Rounds 5-6 use Color A.
Square measures 4 inches x 4 inches after blocking.
Foundation
With Color C (or D or E per color placement), make a magic ring.
Round 1 (flower petals)
Ch 1 (does not count as stitch). Work 8 sc into ring. Join with sl st to first sc.
8 sc.
Round 2 (puff stitch petals)
Ch 2 (does not count as stitch). Work 1 puff stitch into same sc as joining sl st, ch 2. (Puff stitch in next sc, ch 2) 7 times. Join with sl st to top of first puff stitch.
8 puff stitches, 8 ch-2 spaces between them.
Round 3 (granny structure begins)
Sl st into first ch-2 sp. Ch 3 (counts as dc), 2 dc in same sp, ch 2, 3 dc in same sp (first corner cluster pair made). Sk to next ch-2 sp, sc in sp. Sk to next ch-2 sp, (3 dc, ch 2, 3 dc in same sp, sc in next ch-2 sp) 3 times. Join with sl st to top of beg ch-3.
24 dc in corners (6 dc per corner pair), 4 sc side stitches, 4 ch-2 corner spaces.
Round 4
Sl st across to corner ch-2 sp. Ch 3, 2 dc in same corner sp, ch 2, 3 dc in same sp, ch 1, 3 dc in sc side stitch below, ch 1, (3 dc in corner ch-2 sp, ch 2, 3 dc in same sp, ch 1, 3 dc in sc side st, ch 1) 3 times. Join with sl st to top of beg ch-3. Fasten off current color, join Color A or Color B.
36 dc in groups, 4 ch-2 corner sp, 8 ch-1 side sp.
Round 5
Join new color with sl st to any corner ch-2 sp. Ch 3, 2 dc in same sp, ch 2, 3 dc in same sp, ch 1, (3 dc in next ch-1 sp, ch 1) twice, (3 dc in next corner ch-2 sp, ch 2, 3 dc in same sp, ch 1, (3 dc in ch-1 sp, ch 1) twice) 3 times. Join with sl st to top of beg ch-3.
48 dc in groups, 4 ch-2 corner sp, 12 ch-1 side sp.
Round 6
Sl st to corner ch-2 sp. Ch 3, 2 dc in same sp, ch 2, 3 dc in same sp, ch 1, (3 dc in next ch-1 sp, ch 1) 3 times, (3 dc in next corner ch-2 sp, ch 2, 3 dc in same sp, ch 1, (3 dc in ch-1 sp, ch 1) 3 times) 3 times. Join with sl st to top of beg ch-3. Fasten off and weave in ends.
64 dc in groups, 4 ch-2 corner sp, 16 ch-1 side sp.
Color Placement Guide
Bodice Squares (8 total)
Alternate centers: 4 squares with Color D (golden mustard) center in Round 1, and 4 squares with Color B (dusty rose) center in Round 1. Rounds 3 and 4 are consistently Color A.
Skirt Squares (12 total)
Front row 1 (top row, 3 squares): Round 1 in Color C, Round 2 in Color C, Rounds 3-4 in Color B, Rounds 5-6 in Color A.
Front row 2 (bottom row, 3 squares): Round 1 in Color E, Round 2 in Color D, Rounds 3-4 in Color B, Rounds 5-6 in Color A.
Back skirt squares follow identical placement.
Assembly: Bodice
You have 8 small squares: 4 for front, 4 for back.
Layout: Arrange each set of 4 squares in a 2 columns x 2 rows grid.
Step 1: Join front bodice squares horizontally
Hold two top-row squares with RS facing up. Using Color A and a tapestry needle, whip stitch through the back loops of the outermost dc stitches along one shared side. Repeat for the two bottom-row squares.
Step 2: Join front bodice squares vertically
Join the completed top row to the bottom row, creating a 2×2 grid (front bodice panel).
Step 3: Repeat for back bodice
Join 4 squares in the same 2×2 configuration.
Step 4: Join at shoulders
Each panel’s top edge spans 2 squares wide. With RS of front and back panels together, join using whip stitch along the top outer edge of each side, approximately 1.5 inches in from each outer edge.
After joining shoulders, the neckline opening is approximately 3 inches wide and the armhole openings are approximately 3 inches deep.
Assembly: Skirt
You have 12 large squares: 6 for front, 6 for back.
Layout: Arrange each set of 6 squares in a 3 columns x 2 rows grid.
Step 1: Join front skirt squares
Join 3 squares in a row for the top row. Join 3 squares in a row for the bottom row.
Step 2: Join rows together
Join the two rows to create the front skirt panel.
Step 3: Repeat for back skirt panel
Step 4: Join at side seams
With RS together, join front skirt panel to back skirt panel along both side edges. The skirt is now a tube.
Assembly: Joining Bodice to Skirt
With RS facing, place the bodice inside the skirt tube so RS faces RS. Top edge of skirt aligns with lower edge of bodice.
Working from the outside, join with whip stitch, matching center fronts and center backs. Work all the way around.
Turn RS out. The dress is assembled.
Center Front Placket
Cut ribbon to approximately 7 inches. Fold under 1/4 inch at each short end.
Locate the center front joining seam between the two columns of bodice squares. Pin the ribbon to the RS, centered over this vertical join, running from neckline to approximately 1 inch below the bodice-skirt join.
Hand-stitch the ribbon in place along both long edges.
Evenly space 3 to 4 buttons along the ribbon. Place the first button approximately 1/2 inch below the neckline, the last button approximately 1 inch above the bodice-skirt join, and remaining buttons evenly spaced between.
Sew buttons through ribbon and crochet fabric, knotting securely on the WS.
Scallop Edging: Neckline
With RS facing, join Color A with sl st to any stitch along the neckline edge.
Round 1: Work 1 sc evenly into each stitch and ch-sp along the entire neckline opening. Target approximately 48 sc. Adjust to nearest multiple of 3. Join with sl st to first sc.
Round 2: (Sc in first sc, ch 2, 4 dc in same sc, sk 2 sc, sc in next sc) repeat around. Join with sl st to first sc. Fasten off.
Scallop Edging: Armholes
Work each armhole separately.
Round 1: With RS facing, join Color A with sl st to any stitch along one armhole opening. Work 1 sc evenly around the entire armhole, working 3 sc in each corner. Target approximately 36 sc. Join with sl st to first sc.
Round 2: (Sc, ch 2, 4 dc in same sc, sk 2 sc, sc in next sc) repeat around. Join with sl st to first sc. Fasten off.
Repeat for second armhole.
Scallop Edging: Hem
Round 1: With RS facing, join Color A with sl st to any stitch along the hem edge. Work 1 sc into each stitch and ch-sp along the entire lower hem. Target approximately 96 sc. Join with sl st to first sc.
Round 2: (Sc, ch 2, 4 dc in same sc, sk 2 sc, sc in next sc) repeat around. Join with sl st to first sc. Fasten off.
Finishing
Weave in all remaining ends on the WS, threading yarn through at least 1 inch of stitches in two directions to secure.
Check all joins for gaps. Close any with matching yarn knotted on the WS.
Sew ribbon placket and buttons as described above.
Blocking Your Baby Dress
Dampen the completed dress thoroughly with cool water. Gently squeeze out excess water without wringing. Lay flat on blocking mats.
Pin to final measurements: approximately 10 inches wide from armhole to armhole, 14 inches from shoulder to hem. Pin scallop edging points out slightly for a crisp finish.
Allow to dry completely (12 to 24 hours).
For acrylic yarn, you can steam block by hovering a steam iron above the surface without touching the yarn.
Size Customization Tips
Smaller size (3-6 or 6-9 months): Work one fewer round on both square sizes, or use a US Size D-3 / 3.25 mm hook.
Larger size (2T or 3T): Add one additional round to both square sizes, or use worsted weight yarn with a US Size G-6 / 4.0 mm hook.
Longer skirt: Add a third row of large squares to both front and back skirt panels.
Wider bodice: Add one additional column of small squares to both front and back bodice panels.
Care Instructions
Machine wash on gentle cycle in cold water. Lay flat to dry. Do not tumble dry. Do not iron directly on crochet fabric. Store flat or loosely folded.
You Did It!
Thank you so much for choosing this crochet baby dress pattern. I hope you love making it as much as I loved designing it. The combination of classic granny squares and that gorgeous flower center variation creates something truly beautiful for the little one in your life.
I would absolutely love to see your finished dress! Tag me on Instagram or share in my Facebook group. Seeing your color combinations and finished pieces is the best part of sharing patterns.
If this pattern brought you joy, save it to your Pinterest boards so you can find it again later. And please drop a comment below when you make yours. I read every single one and love hearing how your projects turn out!
You Might Also Like
- Mint Daisy Notebook Cover Free Crochet Pattern
- Pastel Rainbow Dreamy Clutch Free Crochet Pattern
- Berry Blush Butterfly Halter Top Free Crochet Pattern
- Sunset Daisy Chain Dress Free Crochet Pattern
