A sturdy, beautiful tote bag is one of those projects that actually gets used every single day. This sage green granny square tote keeps your essentials organized, looks absolutely gorgeous, and works up faster than you might expect. The sunburst granny squares use basic stitches you probably already know, making this an ideal project for confident beginners ready to level up.
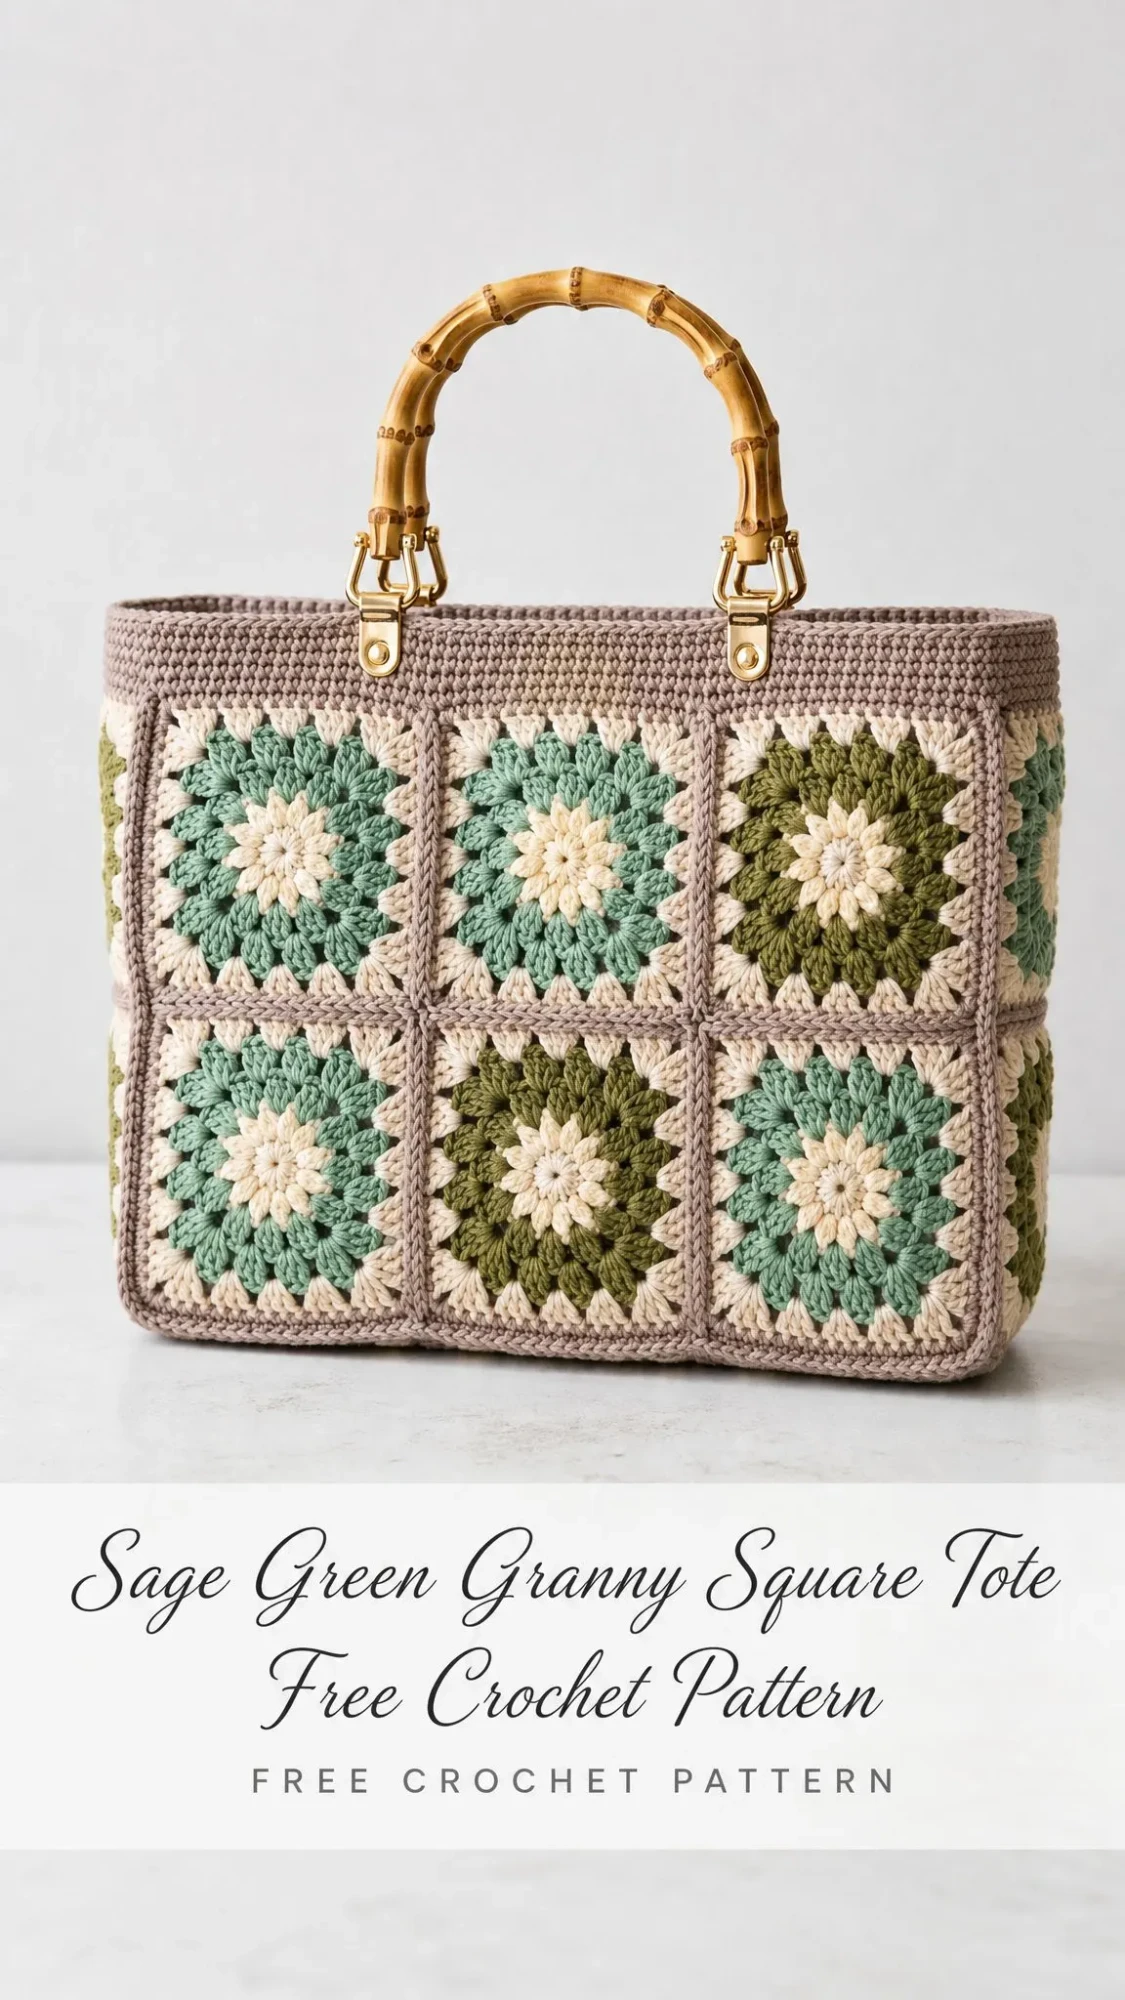
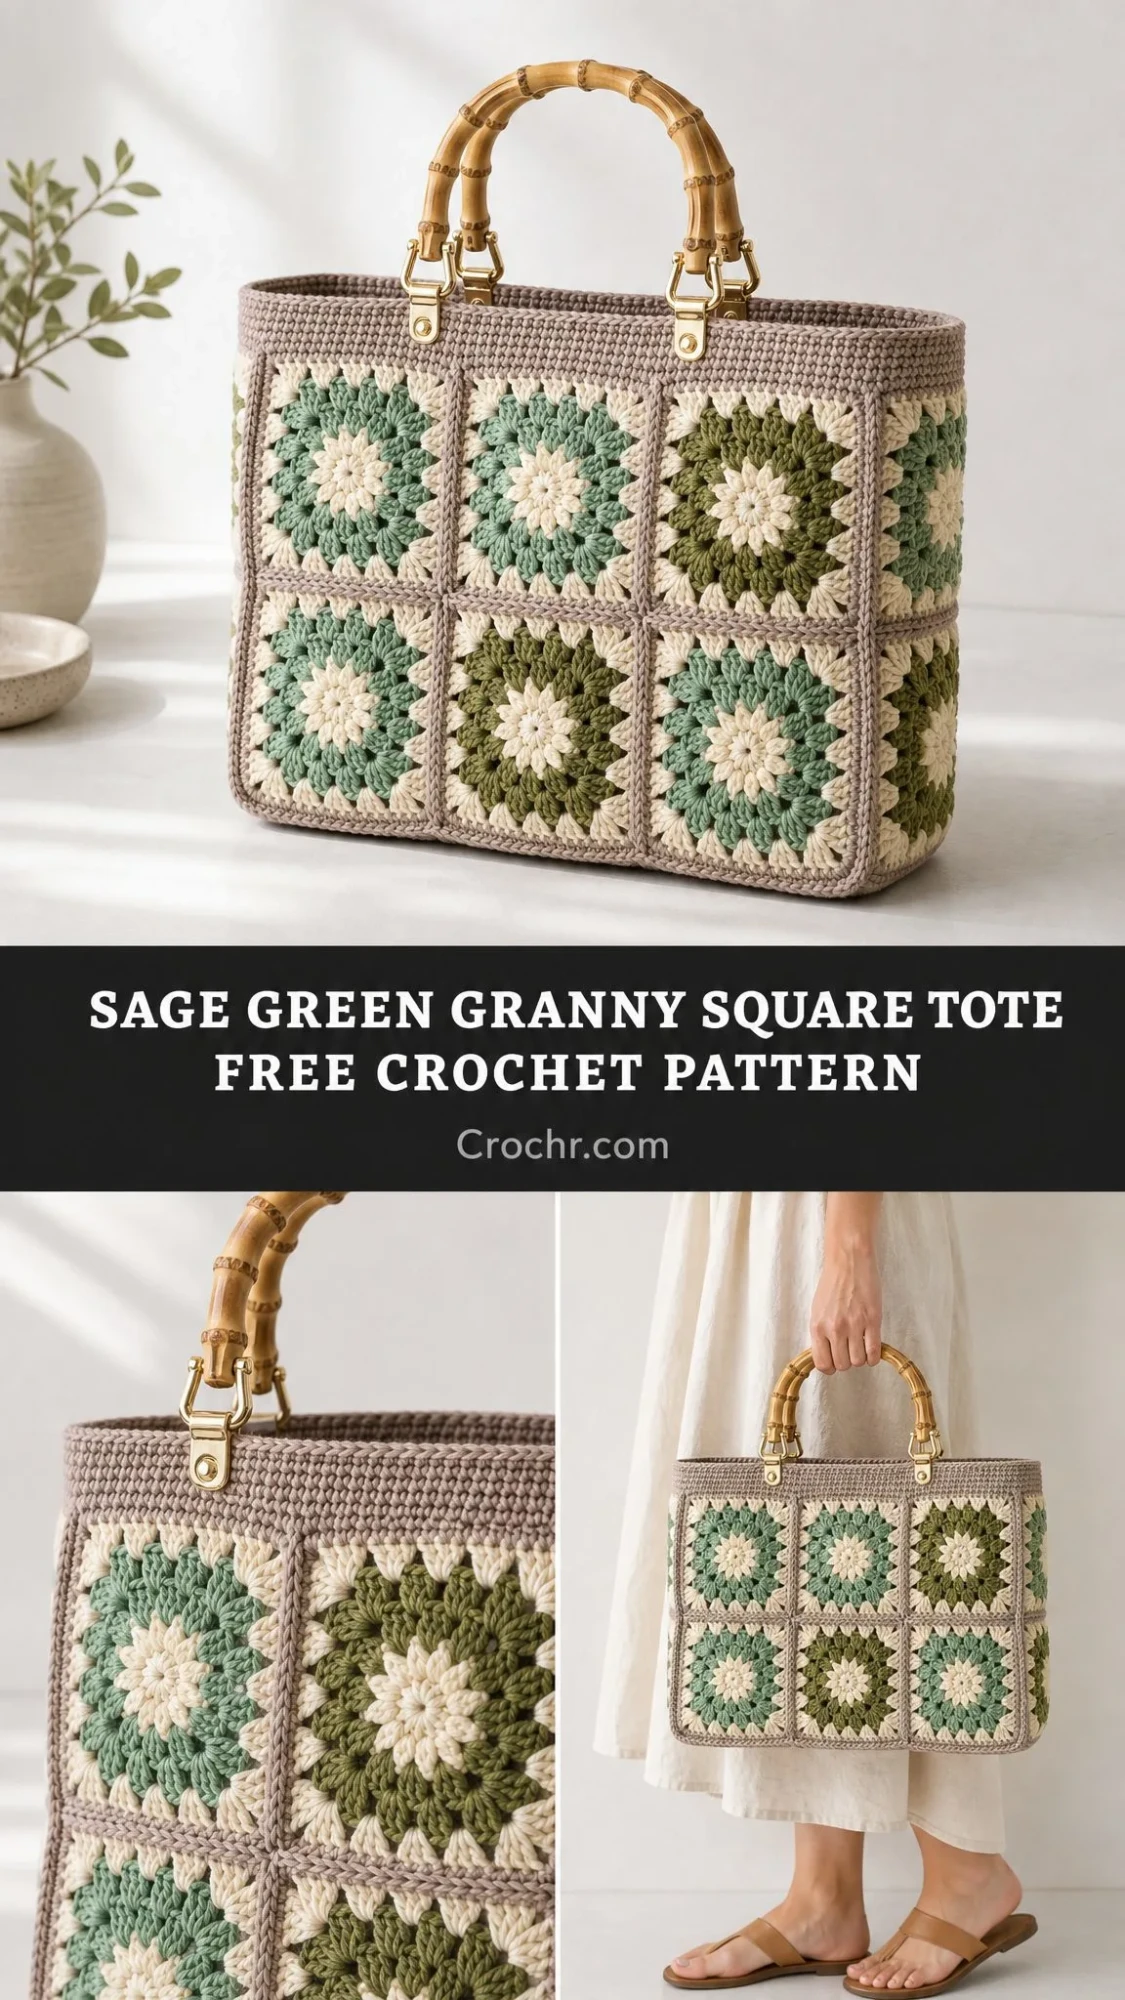
The finished bag measures 12 inches wide, 10 inches tall, and 4 inches deep. That is the perfect size for farmers market trips, library runs, or just carrying your current work in progress around. The bamboo handles give it a polished, professional look that makes people ask where you bought it.
If you have been wanting to try a granny square bag but felt intimidated by the assembly, this pattern breaks everything down into manageable steps. You will make 16 individual squares, join them into panels, add a solid base for structure, and finish with a clean top band. Let me walk you through the whole process.
Why You Will Love This Tote Pattern
This tote combines the nostalgic charm of classic granny squares with a modern, structured silhouette. The sunburst center in cream radiates outward through soft sage and moss greens, all framed by warm taupe borders that create a beautiful grid effect.
The construction is straightforward once you understand the flow. You work each square in the round, block them to a consistent size, then join them with single crochet seams that become part of the design. The raised taupe ridges between squares add visual interest and structural integrity.
Cotton aran weight yarn gives this bag excellent stitch definition and enough body to hold its shape. Unlike acrylic, cotton will not stretch out over time, so your tote stays looking crisp and professional wash after wash.
Materials You Will Need
Gather these supplies before you start. The yarn amounts are approximate for the finished size shown.
Yarn (Aran or Worsted Weight Cotton):
Suggested Yarn Brands:
Hook and Notions:
Gauge Information
Getting gauge right is essential for this project because it determines your final bag size and ensures your squares match up perfectly during assembly.
One finished sunburst square should measure 4 inches by 4 inches (10 cm by 10 cm) after blocking.
For the single crochet panels: 16 stitches and 18 rows equals 4 inches.
If your squares are too large, try going down a hook size. Too small? Go up a hook size. Always make a test square first and block it before committing to all 16.
Abbreviations and Stitch Definitions
Let me break down every stitch abbreviation you will encounter. Even if you know these, a quick refresher never hurts.
Special Stitches:
Corner cluster: Work (2 dc, ch 2, 2 dc) all into the same stitch or space. This creates the corner turn on your granny square.
Beg-cluster: The ch 3 at the start of double crochet rounds counts as the first dc throughout the entire pattern.
Important Pattern Notes
Before you dive in, keep these tips in mind. They will save you frustration later.
The ch-3 at the start of dc rounds counts as a stitch. Join each round with a slip stitch to the top of this beginning chain.
Carry colors up only one round. Otherwise, fasten off and rejoin for clean color blocks. This prevents messy color floats showing through your work.
Block every single square to a true 4 inches by 10 cm before joining. This is the single most important step for making your panels line up perfectly. Do not skip blocking.
Stitch counts appear in parentheses at the end of each instruction, like this: (60 dc). Use these to check your work.
The Sunburst Square Pattern
Make 16 squares total. The centers (Rounds 1 and 2) are always Cream. The green rounds change to create two colorways.
Round 1 (Cream)
With Cream, make a magic ring. Ch 3 (this counts as your first dc), then work 11 dc into the ring. Slip stitch to the top of the beginning ch-3 to join.
(12 dc)
Round 2 (Cream)
Ch 3, dc in the same stitch, then 2 dc in each stitch around. Slip stitch to join. Fasten off Cream.
(24 dc)
Round 3 (Sage or Moss)
Join your green color in any stitch. In the same stitch, work a corner cluster: (2 dc, ch 2, 2 dc). Then work 1 dc in each of the next 5 stitches.
Corner cluster in next stitch, 1 dc in each of next 5 stitches. Repeat from * two more times. Slip stitch to the first dc to join.
(36 dc, 4 corner spaces)
Round 4 (Sage or Moss)
Slip stitch into the first corner ch-2 space. Ch 3, then work (2 dc, ch 2, 3 dc) in the same corner space.
1 dc in each of the next 9 dc, then (3 dc, ch 2, 3 dc) in the corner space. Repeat from * around. End with 1 dc in each of the last 9 dc. Slip stitch to join. Fasten off.
(60 dc, 4 corner spaces)
Each finished edge has 9 dc framed by two 3-dc corner groups. That gives you 15 stitches plus a corner space at each end. This count is what you will match when joining.
Colorways and Layout
For the gathered patchwork feel shown in the photos, mix two simple colorways across your sixteen squares.
Colorway 1 (Sage):
Colorway 2 (Moss):
Want more variation? Work a few squares with Sage on Round 3 and Moss on Round 4, or the reverse. This creates two-tone blooms scattered through your finished tote. There is no wrong arrangement. Shuffle the squares until the greens feel balanced to your eye.
How the Squares Are Used
Joining the Panels
Lay your blocked squares out as front, back, and two sides before joining. This lets you arrange the colors so they read evenly across the finished bag. Join with Taupe (MC) to create the soft sashing between motifs.
Join As You Go Method (Recommended)
Hold two squares with wrong sides together. Using Taupe and your 4.0 mm hook, work a row of sc through the matching back loops along one edge. Work 1 sc into each pair of stitches and 1 sc into the corner spaces.
(approximately 17 sc per seam)
This raised ridge gives the visible taupe grid effect that makes the bag look so polished.
Building the Panels
1. Join squares into rows of 3 for the front, rows of 3 for the back, and columns of 2 for each side panel.
2. Join the two rows of each large panel along their long edge. (approximately 51 sc across)
3. Join front to side to back to side into a continuous ring, matching corners. Leave the top and bottom open.
Outline Round
With Taupe, work 1 full round of sc around the entire top opening. Separately, work another round around the bottom opening. Work 1 sc in each stitch and 1 sc in each seam to even the edges.
(approximately 136 sc each opening)
Tension Tip: Keep your joining tension firm but not tight. A relaxed seam ripples and an over-tight one curls the squares. Aim for seams that lie as flat as the squares themselves.
Base and Assembly
A firm single crochet base gives the tote its upright market bag shape. Work this flat in Taupe, then attach it to the bottom opening.
The Base
Row 1: With Taupe, ch 49. Sc in the 2nd ch from hook and in each ch across. Turn. (48 sc)
Rows 2 through 18: Ch 1, sc in each stitch across. Turn. (48 sc)
The base measures about 12 inches by 4 inches (30 cm by 10 cm). Do not fasten off. Continue around all four sides.
Edging: Ch 1, sc evenly around the whole base, working 3 sc in each corner. Slip stitch to join. Fasten off. (approximately 136 sc)
Attaching the Base
Hold the base and the bottom opening of the square ring with wrong sides together. Match the long edges to the front and back panels.
With Taupe, sc through both layers all the way around. Work 1 sc per stitch and 3 sc at each corner. Slip stitch to join and fasten off. (approximately 136 sc)
Turn right side out. The bag now stands on its own.
For Extra Firmness: Cut a piece of plastic canvas or stiff felt to 12 inches by 4 inches. Drop it into the base before adding your lining. This keeps the bottom crisp even when carrying heavier items.
Top Band and Handles
The taupe band at the top frames the squares and anchors the bamboo handles. Work this in continuous rounds from the top opening.
Rounds 1 through 6: Join Taupe at the top opening. Sc in each stitch around. Slip stitch to join at the end of each round, or work in a continuous spiral. Repeat for 6 rounds total. (136 sc each round)
Round 7: Sc in each stitch around for a clean finishing round. Slip stitch, fasten off, and weave in all ends. (136 sc)
Handle Tabs (Make 4)
Tab: With Taupe, ch 7. Sc in the 2nd ch from hook and across. Turn. Work 9 more rows of sc. Fasten off, leaving a long tail for sewing. (6 sc by 10 rows)
Attaching the Handles
Mark 2 points on the front band and 2 on the back. Space them to match your handle width, about 4 inches or 10 cm apart, centered on each panel.
Thread each tab through a gold swivel clasp ring. Fold the tab in half and sew both ends firmly to the inside of the band at a marked point. Reinforce with several passes of yarn.
Clip the swivel clasps of each bamboo handle onto the tabs. The handles stay removable, which makes washing much easier.
Optional Fabric Lining
A cotton lining hides your interior seams and adds welcome structure to the bag.
Cut cotton fabric to the inside dimensions plus a 1 cm seam allowance. Stitch the pieces into a pouch shape. Press the top edge under and hand sew it just below the crocheted band.
This step is optional but highly recommended if you plan to use this bag daily.
Care Instructions
Washing: Unclip the bamboo handles first. Hand wash the cotton body in cool water with mild soap. Press out excess water between towels and reshape flat to dry. Avoid wringing, which can distort your stitches.
Everyday Care: Keep bamboo handles dry. Store the bag stuffed lightly with tissue to hold its box shape. Spot clean small marks rather than doing a full wash when possible.
Customization Ideas
Resizing Your Tote
Bigger bag: Add a column of squares. Go 4 wide instead of 3 and widen the base to 64 sc. Each extra column adds 4 inches or 10 cm of width.
Taller bag: Add a third row of squares (3 tall) and lengthen each side panel to match. This adds 4 inches or 10 cm of height.
Deeper bag: Make the side panels 2 squares wide and widen the base to 8 inches or 20 cm deep.
Mini version: Use DK weight cotton with a 3.5 mm hook. Your squares will shrink to about 3 inches or 7.5 cm for a sweet little grab bag.
Color Variations
Swap the greens for any two-tone palette you love. Dusty rose and rust, denim and sky, or warm neutrals all work beautifully.
Keep the centers cream for that classic sunburst glow, or try a soft yellow for true sunflower vibes.
Add a crocheted button loop closure to the band if you want to carry it open-top without worrying about things falling out.
Blocking Tips for Perfect Squares
If your squares feel slightly off-size, wet blocking to a 4 inch template before joining fixes almost everything. This is the single best habit for crisp granny square bags.
Pin each damp square to a blocking mat or foam board. Gently stretch the corners to true right angles. Let dry completely before removing the pins.
Consistent squares make joining so much easier and give your finished bag that professional, polished look.
I hope you love making this sage green granny square tote as much as I enjoyed putting together this pattern. It is such a satisfying project to watch come together, and you will reach for it constantly once it is finished.
If you make this tote, I would absolutely love to see it. Tag me on Instagram or share a photo in our Facebook group. Seeing your finished projects is truly the best part of sharing patterns.
Save this pattern to your Pinterest boards so you can find it when you are ready to start. And please drop a comment below if you have any questions or just want to share your progress. Happy hooking!
