I wanted to design a handbag that looked like it stepped right out of a designer boutique window. Something structured, polished, and absolutely stunning. The goals were clear: clean lines, a show-stopping bow detail, and hardware that elevates the whole piece. I am SO pleased with how this turned out! This crochet bow handbag has that luxe feel you usually only find in high-end shops, but you can make it yourself with your own two hands.
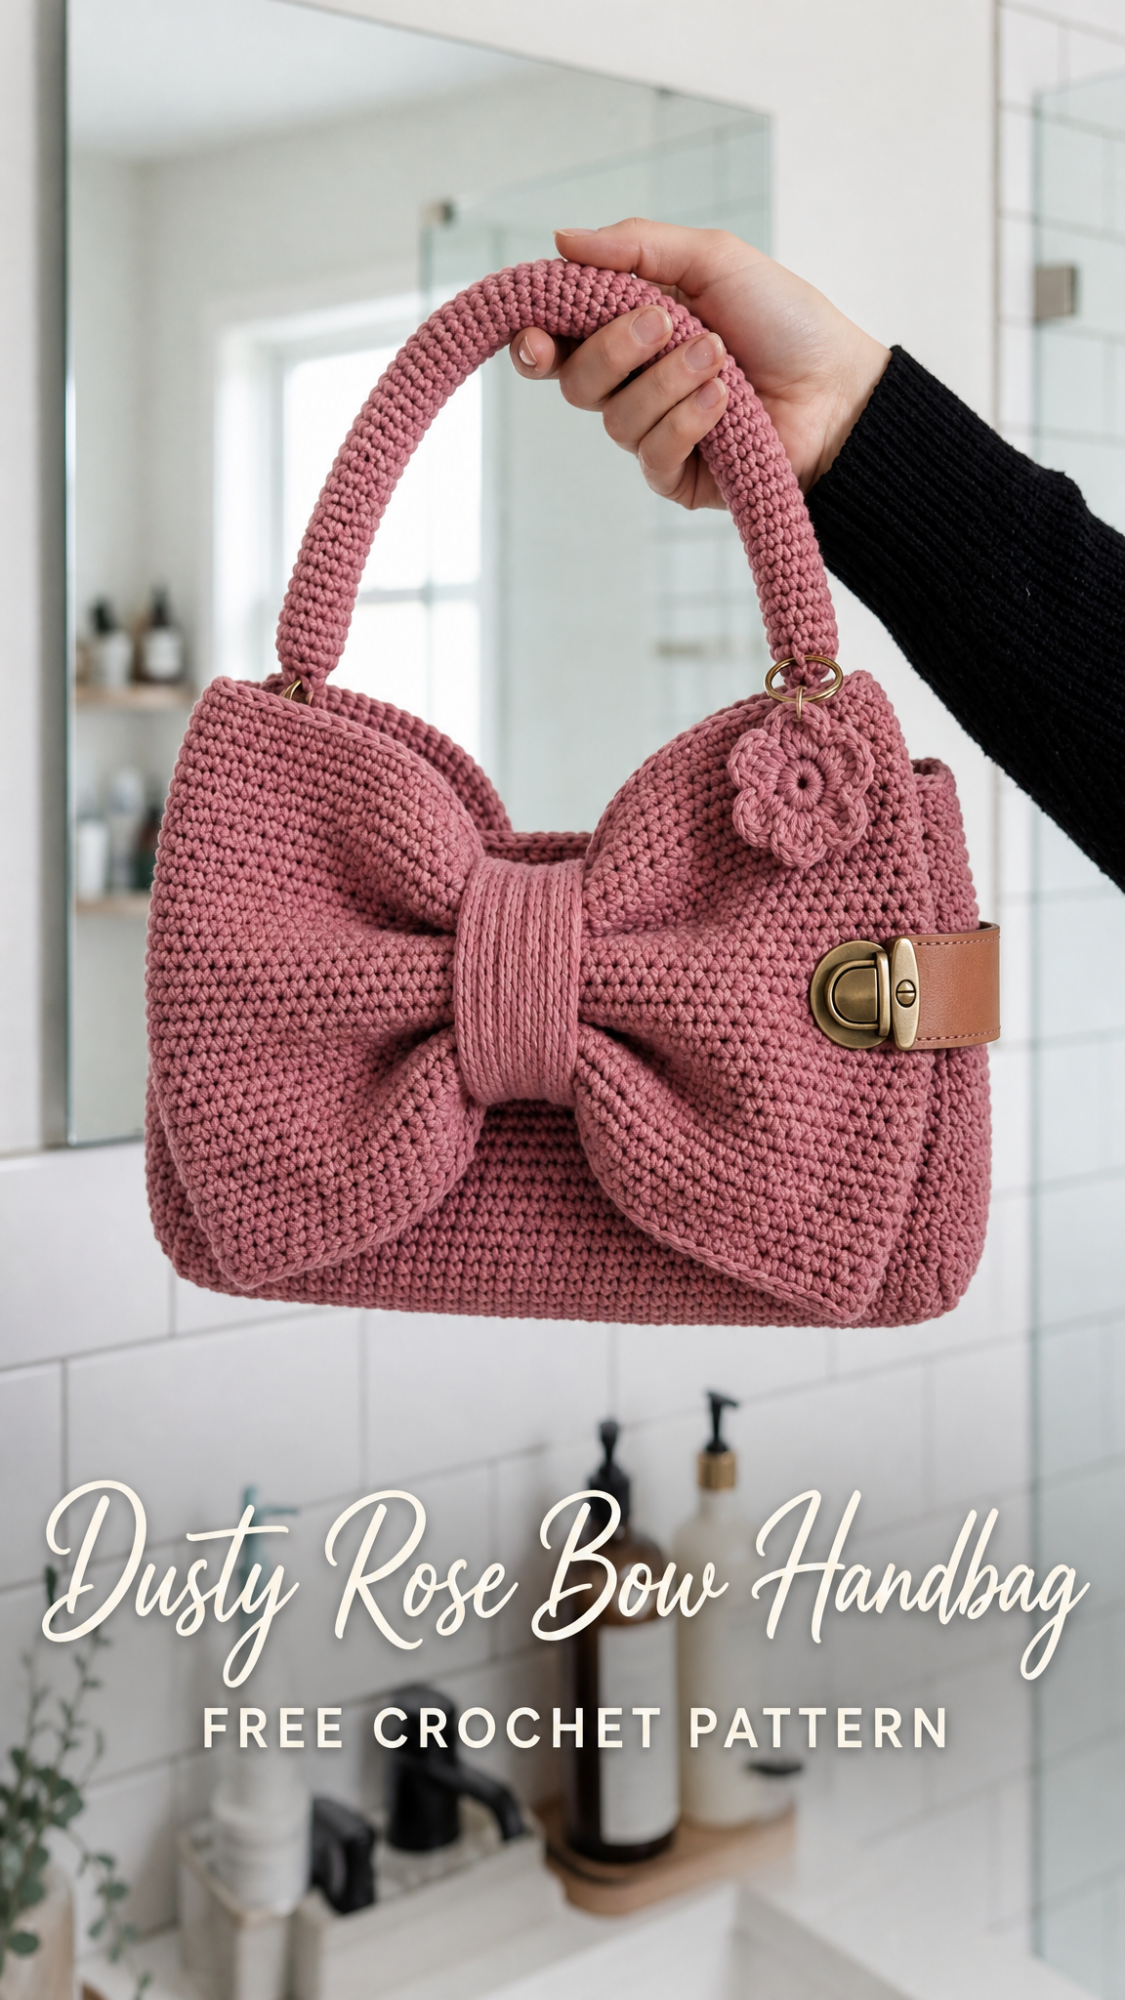
This pattern combines tight, even stitches with thoughtful construction to create a bag that holds its shape beautifully. The oversized bow on the front is the real star here. It transforms a simple structured bag into a statement piece. Whether you carry it to brunch, a wedding, or just want to feel fancy at the grocery store, this bag delivers.
Why You Will Love This Crochet Handbag Pattern
This is not your average slouchy crochet tote. This handbag has serious structure. The dense stitch work creates a fabric that stands up on its own without any additional interfacing. The boxy silhouette gives it that classic top-handle bag shape that never goes out of style.
The single crochet (sc) stitch used throughout creates an incredibly tight, uniform fabric. This is key for bags because loose stitches lead to stretching and sagging over time. With this construction method, your bag will look just as crisp on day one hundred as it does on day one.
The bow detail adds a feminine, playful touch without being too cutesy. It is substantial enough to make an impact but proportioned perfectly to the bag size. A small crocheted flower charm adds an extra bit of handmade charm near the clasp.
Skill Level
This pattern is intermediate level. You should be comfortable with:
If you have made amigurumi before, you already have the tight tension skills this bag requires. If you typically crochet loosely, consider going down one hook size to achieve the structured fabric shown.
Materials Needed
Yarn:
Hook:
Notions:
Gauge
18 stitches and 20 rows = 4 inches in single crochet with 3.5mm hook
Gauge matters for this pattern. A bag that is too loose will not hold its shape. Work a gauge swatch and adjust your hook size if needed. Your fabric should be tight enough that you cannot easily see through it.
Finished Dimensions
Abbreviations
Pattern Notes
This bag is constructed from several flat pieces that are seamed together. Working in pieces gives you cleaner edges and more control over the final shape. All pieces are worked in rows of single crochet through both loops unless otherwise noted.
The tight gauge is essential. Do not skip the gauge swatch. I know it is tempting, but trust me on this one.
When counting rows, remember that your starting chain does not count as a row. Row 1 is your first row of single crochet worked into the chain.
Crochet Handbag Pattern Instructions
Front Panel
Ch 42.
Row 1: Sc in 2nd ch from hook and in each ch across. (41 sts)
Rows 2 to 32: Ch 1, turn. Sc in each st across. (41 sts)
Fasten off and weave in ends. You should have a rectangle approximately 9 inches wide by 6.5 inches tall.
Back Panel
Work exactly the same as the Front Panel.
Ch 42.
Row 1: Sc in 2nd ch from hook and in each ch across. (41 sts)
Rows 2 to 32: Ch 1, turn. Sc in each st across. (41 sts)
Fasten off and weave in ends.
Bottom Panel
Ch 42.
Row 1: Sc in 2nd ch from hook and in each ch across. (41 sts)
Rows 2 to 16: Ch 1, turn. Sc in each st across. (41 sts)
Fasten off. This creates a rectangle approximately 9 inches by 3.5 inches.
Side Panels (make 2)
Ch 16.
Row 1: Sc in 2nd ch from hook and in each ch across. (15 sts)
Rows 2 to 32: Ch 1, turn. Sc in each st across. (15 sts)
Fasten off. Each side panel should measure approximately 3.5 inches wide by 6.5 inches tall.
Flap
Ch 42.
Row 1: Sc in 2nd ch from hook and in each ch across. (41 sts)
Rows 2 to 12: Ch 1, turn. Sc in each st across. (41 sts)
Border Round: Ch 1, do not turn. Work sc evenly around all four edges, placing 3 sc in each corner. Sl st to first sc to join.
Fasten off. The flap will attach to the back panel and fold over the front.
Bow Assembly
The bow is the signature element of this handbag. It consists of three pieces: the main bow loop, a second bow loop, and the center wrap.
Main Bow Loop
Ch 26.
Row 1: Sc in 2nd ch from hook and in each ch across. (25 sts)
Rows 2 to 50: Ch 1, turn. Sc in each st across. (25 sts)
Fasten off, leaving a long tail for seaming. Fold the piece in half with wrong sides together and whip stitch the short ends together to form a loop.
Second Bow Loop
Ch 22.
Row 1: Sc in 2nd ch from hook and in each ch across. (21 sts)
Rows 2 to 40: Ch 1, turn. Sc in each st across. (21 sts)
Fasten off, leaving a long tail. Seam short ends together to form a smaller loop.
Center Wrap
Ch 8.
Row 1: Sc in 2nd ch from hook and in each ch across. (7 sts)
Rows 2 to 20: Ch 1, turn. Sc in each st across. (7 sts)
Fasten off, leaving a long tail.
Assembling the Bow
Flatten the main bow loop with the seam at the back center. Pinch the center to create the bow shape. Do the same with the second loop. Stack the smaller loop on top of the larger loop, both pinched at center.
Wrap the center piece around both loops tightly. Use your tapestry needle to stitch the wrap securely in place at the back. The wrap should be snug enough to hold the bow shape but not so tight that it distorts the loops.
Handle
The handle is worked around a core for extra structure. You can use a rope core, rolled fabric, or work around a purchased plastic handle form.
Ch 6. Join with sl st to form ring.
Round 1: Ch 1, sc in each ch around. (6 sts)
Rounds 2 to 80: Sc in each st around. Do not join rounds. Work in a continuous spiral.
After approximately 15 rounds, begin inserting your core material and continue crocheting around it. The handle should measure approximately 12 inches when complete.
Sl st to next st. Fasten off and weave in ends.
Small Flower Charm
Magic ring.
Round 1: Ch 1, 5 sc into ring. Pull ring closed. (5 sts)
Round 2: (Ch 3, sl st in same st, sl st in next st) 5 times to create 5 petals.
Fasten off, leaving a tail for attachment.
Assembly Instructions
Take your time with assembly. This is where your bag really comes together, and neat seaming makes all the difference.
Step 1: Create the Box Shape
Using a tapestry needle and matching yarn, whip stitch the bottom panel to the front panel along one long edge. Then attach the back panel to the opposite long edge of the bottom panel. You should now have three panels connected in a row.
Attach each side panel to the corresponding short edges of the bottom panel. Then seam the side panels to the front and back panels along their long edges. Your bag body should now form a box shape that stands up on its own.
Step 2: Attach the Flap
Position the flap along the top edge of the back panel, right sides together. Whip stitch securely along the top edge only. The flap should fold forward over the front of the bag.
Step 3: Install Hardware
Mark the center front of your flap where the turn lock will go. The leather tab included with most turn locks can be stitched or riveted directly through the crochet. Install the corresponding bottom piece of the clasp on the front panel, approximately 1 inch below the top edge.
Attach D-rings to each side panel near the top edge. You can crochet small tabs to hold these, or stitch them directly.
Step 4: Attach the Handle
Clip swivel clasps to your D-rings. Attach the handle to both swivel clasps. This allows the handle to be removable if desired.
Step 5: Attach the Bow
Position the bow on the front of the bag, centered and sitting just above the clasp. Use a tapestry needle to stitch the bow securely in several places at the back. Make sure it is firmly attached but that your stitches are invisible from the front.
Step 6: Add the Flower Charm
Use the tail from your flower to attach it near the clasp area, or attach it to a jump ring and clip it to one of the D-rings.
Optional Lining
For a truly professional finish, add a fabric lining. Cut fabric pieces slightly smaller than each panel. Sew together by machine or hand, then slip stitch the lining to the inside of the bag just below the top edges. Adding an interior pocket is a nice touch for keys or lip balm.
You can also insert plastic canvas or cardboard into the bottom before adding lining for extra rigidity.
Tips for Success
Tension is everything. Keep your stitches tight and consistent throughout. If you find yourself crocheting loosely, take breaks to reset.
Block your pieces. Wet blocking your panels before assembly helps even out any inconsistencies and gives sharper edges.
Use quality hardware. The turn lock and D-rings are visible design elements. Choose hardware with a finish you love. Antique brass, gold, and silver all work beautifully with this mustard shade.
Customize your color. This pattern works in any color. Imagine it in blush pink, classic black, cream, or navy. The structured design looks sophisticated in any shade.
More Crochet Bag Patterns to Try
If you love this structured handbag, you might also enjoy making a crochet clutch, crossbody bag, or market tote. The techniques you practiced here, like tight tension and neat seaming, will serve you well in any bag project.
Thank you so much for choosing this pattern! I truly hope you love making this bow handbag as much as I loved designing it. If you make one, please share a photo with me on Instagram or in our Facebook group. I would absolutely love to see your color choices and styling.
If this pattern inspired you, save it to your Pinterest boards so you can find it easily when you are ready to start. And please drop a comment below if you make this bag. Hearing from you always makes my day!
