
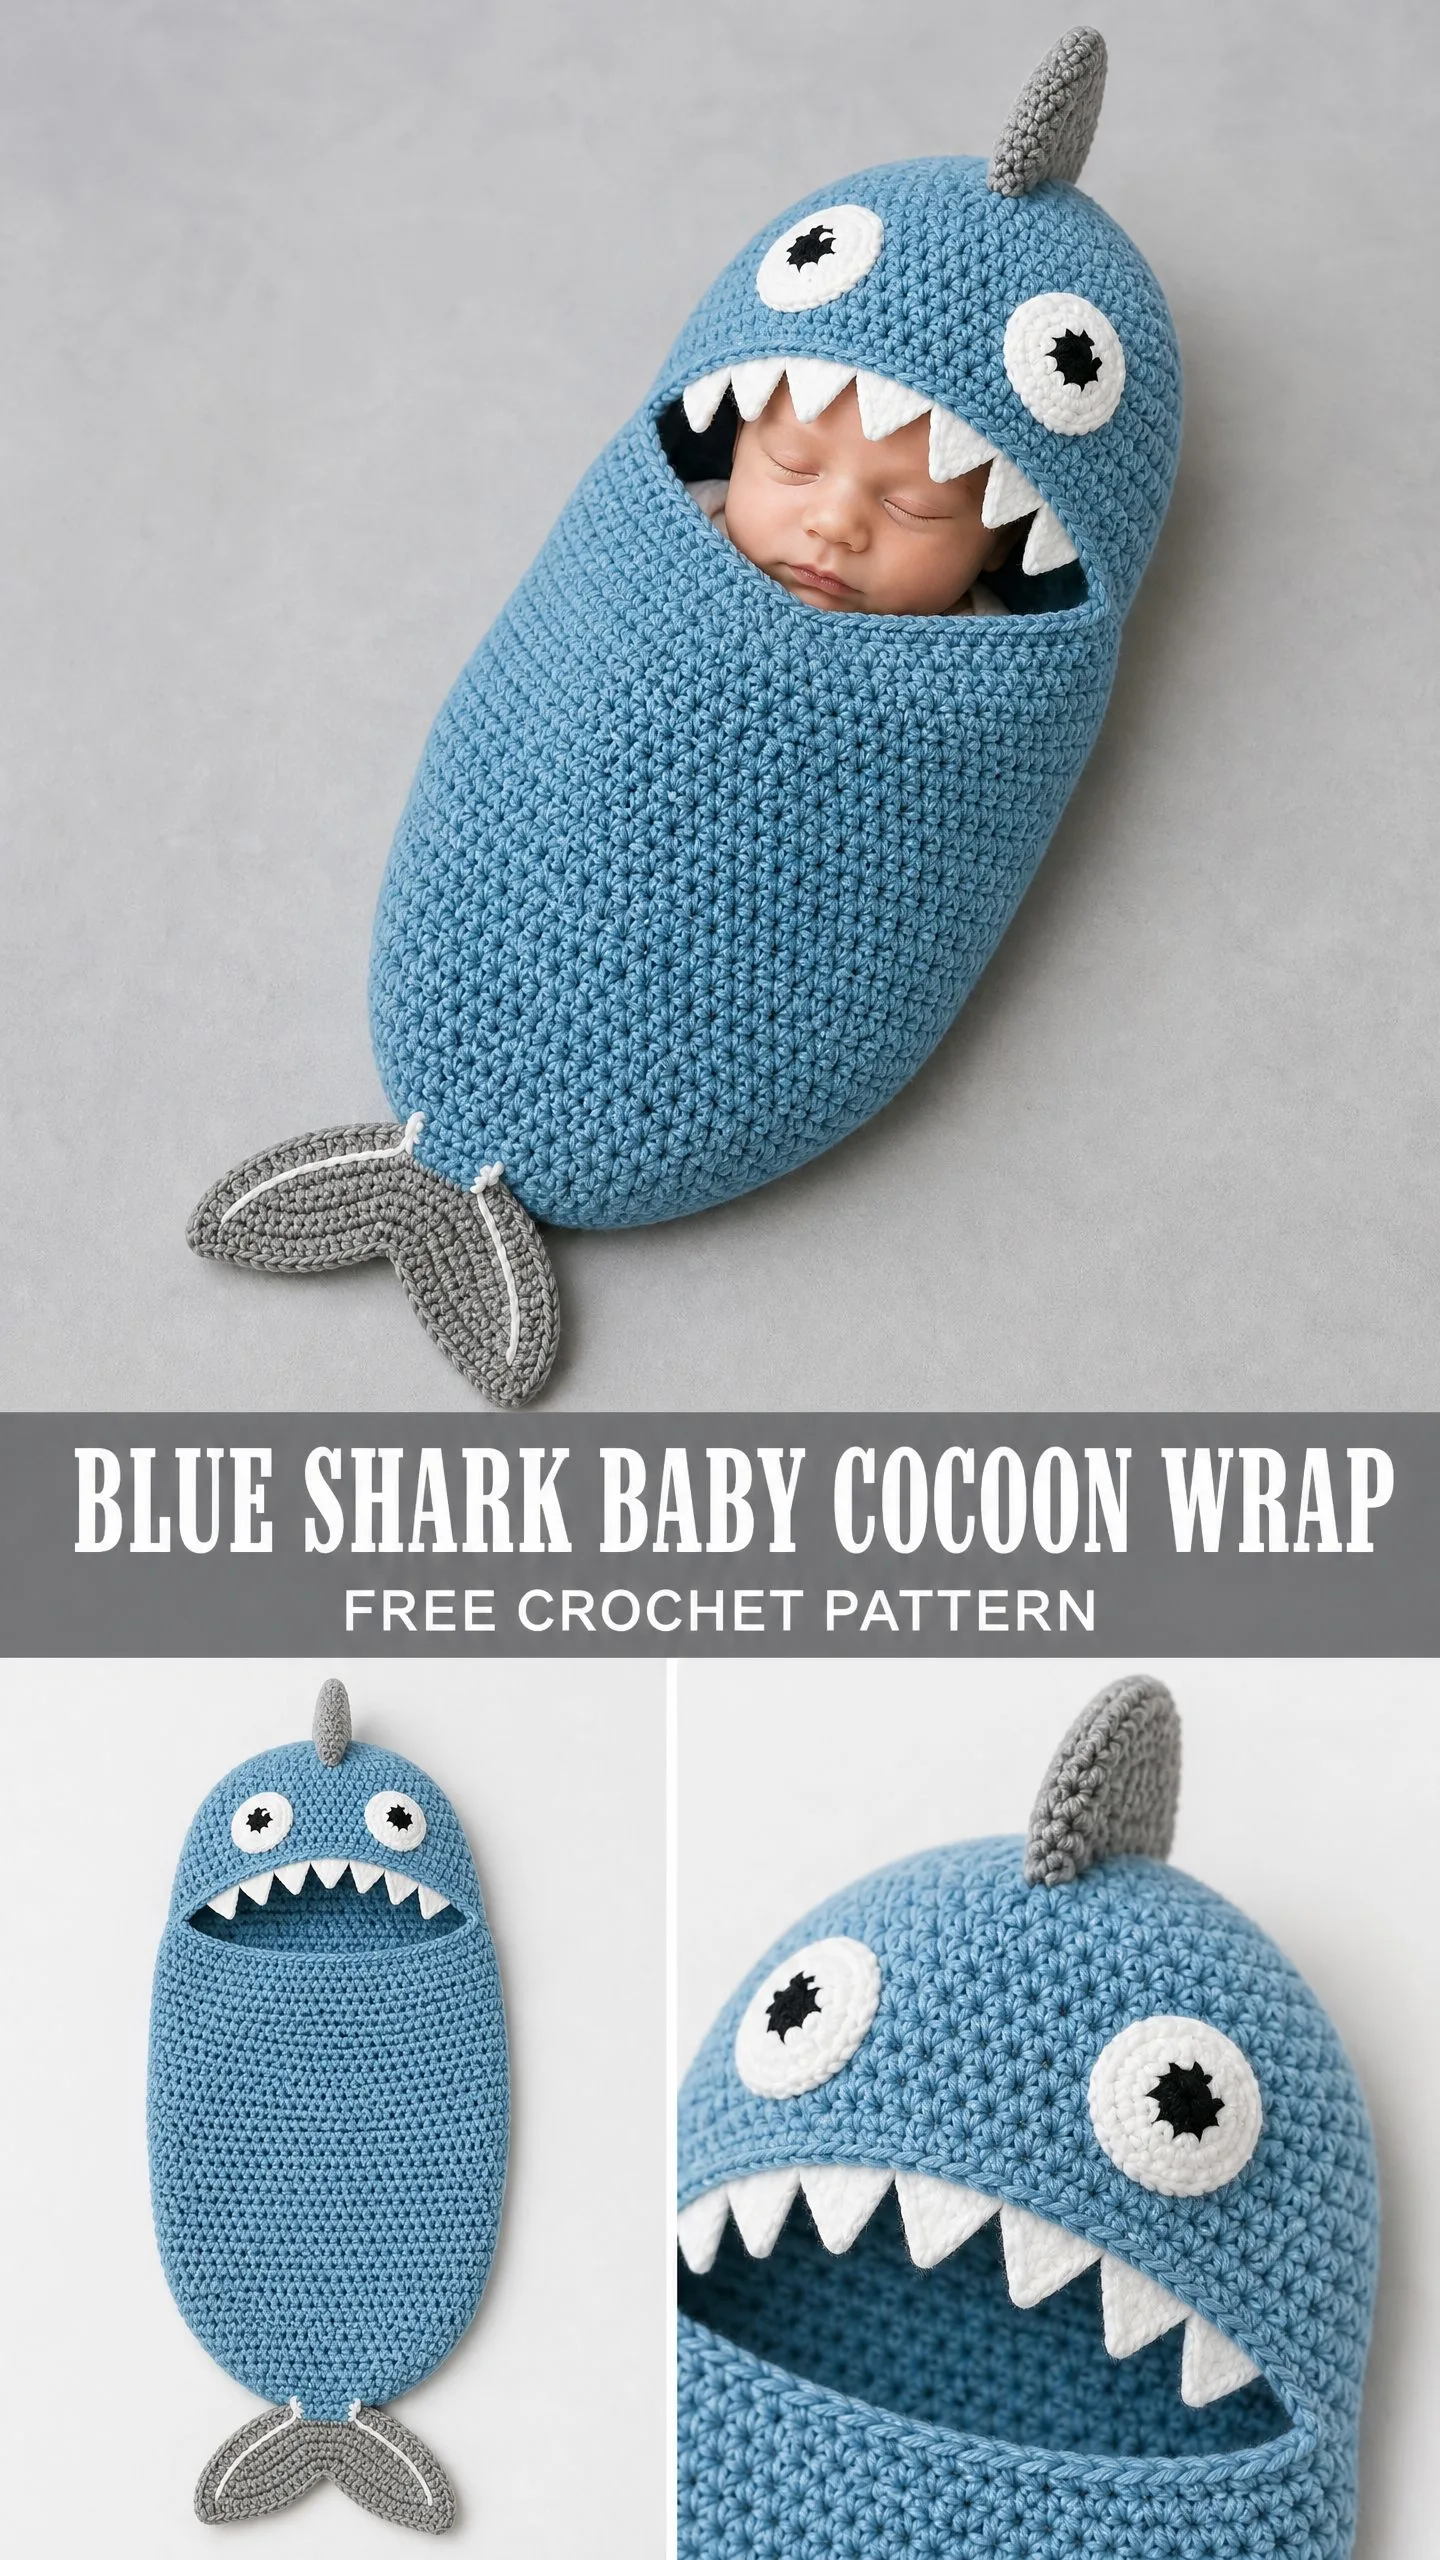
This is a cozy baby cocoon worked in single crochet from the bottom up. It fits newborns to three months. The construction is straightforward: a tube body, a shaped hood, appliqué eyes, pointed teeth, a dorsal fin, and a tail fin.
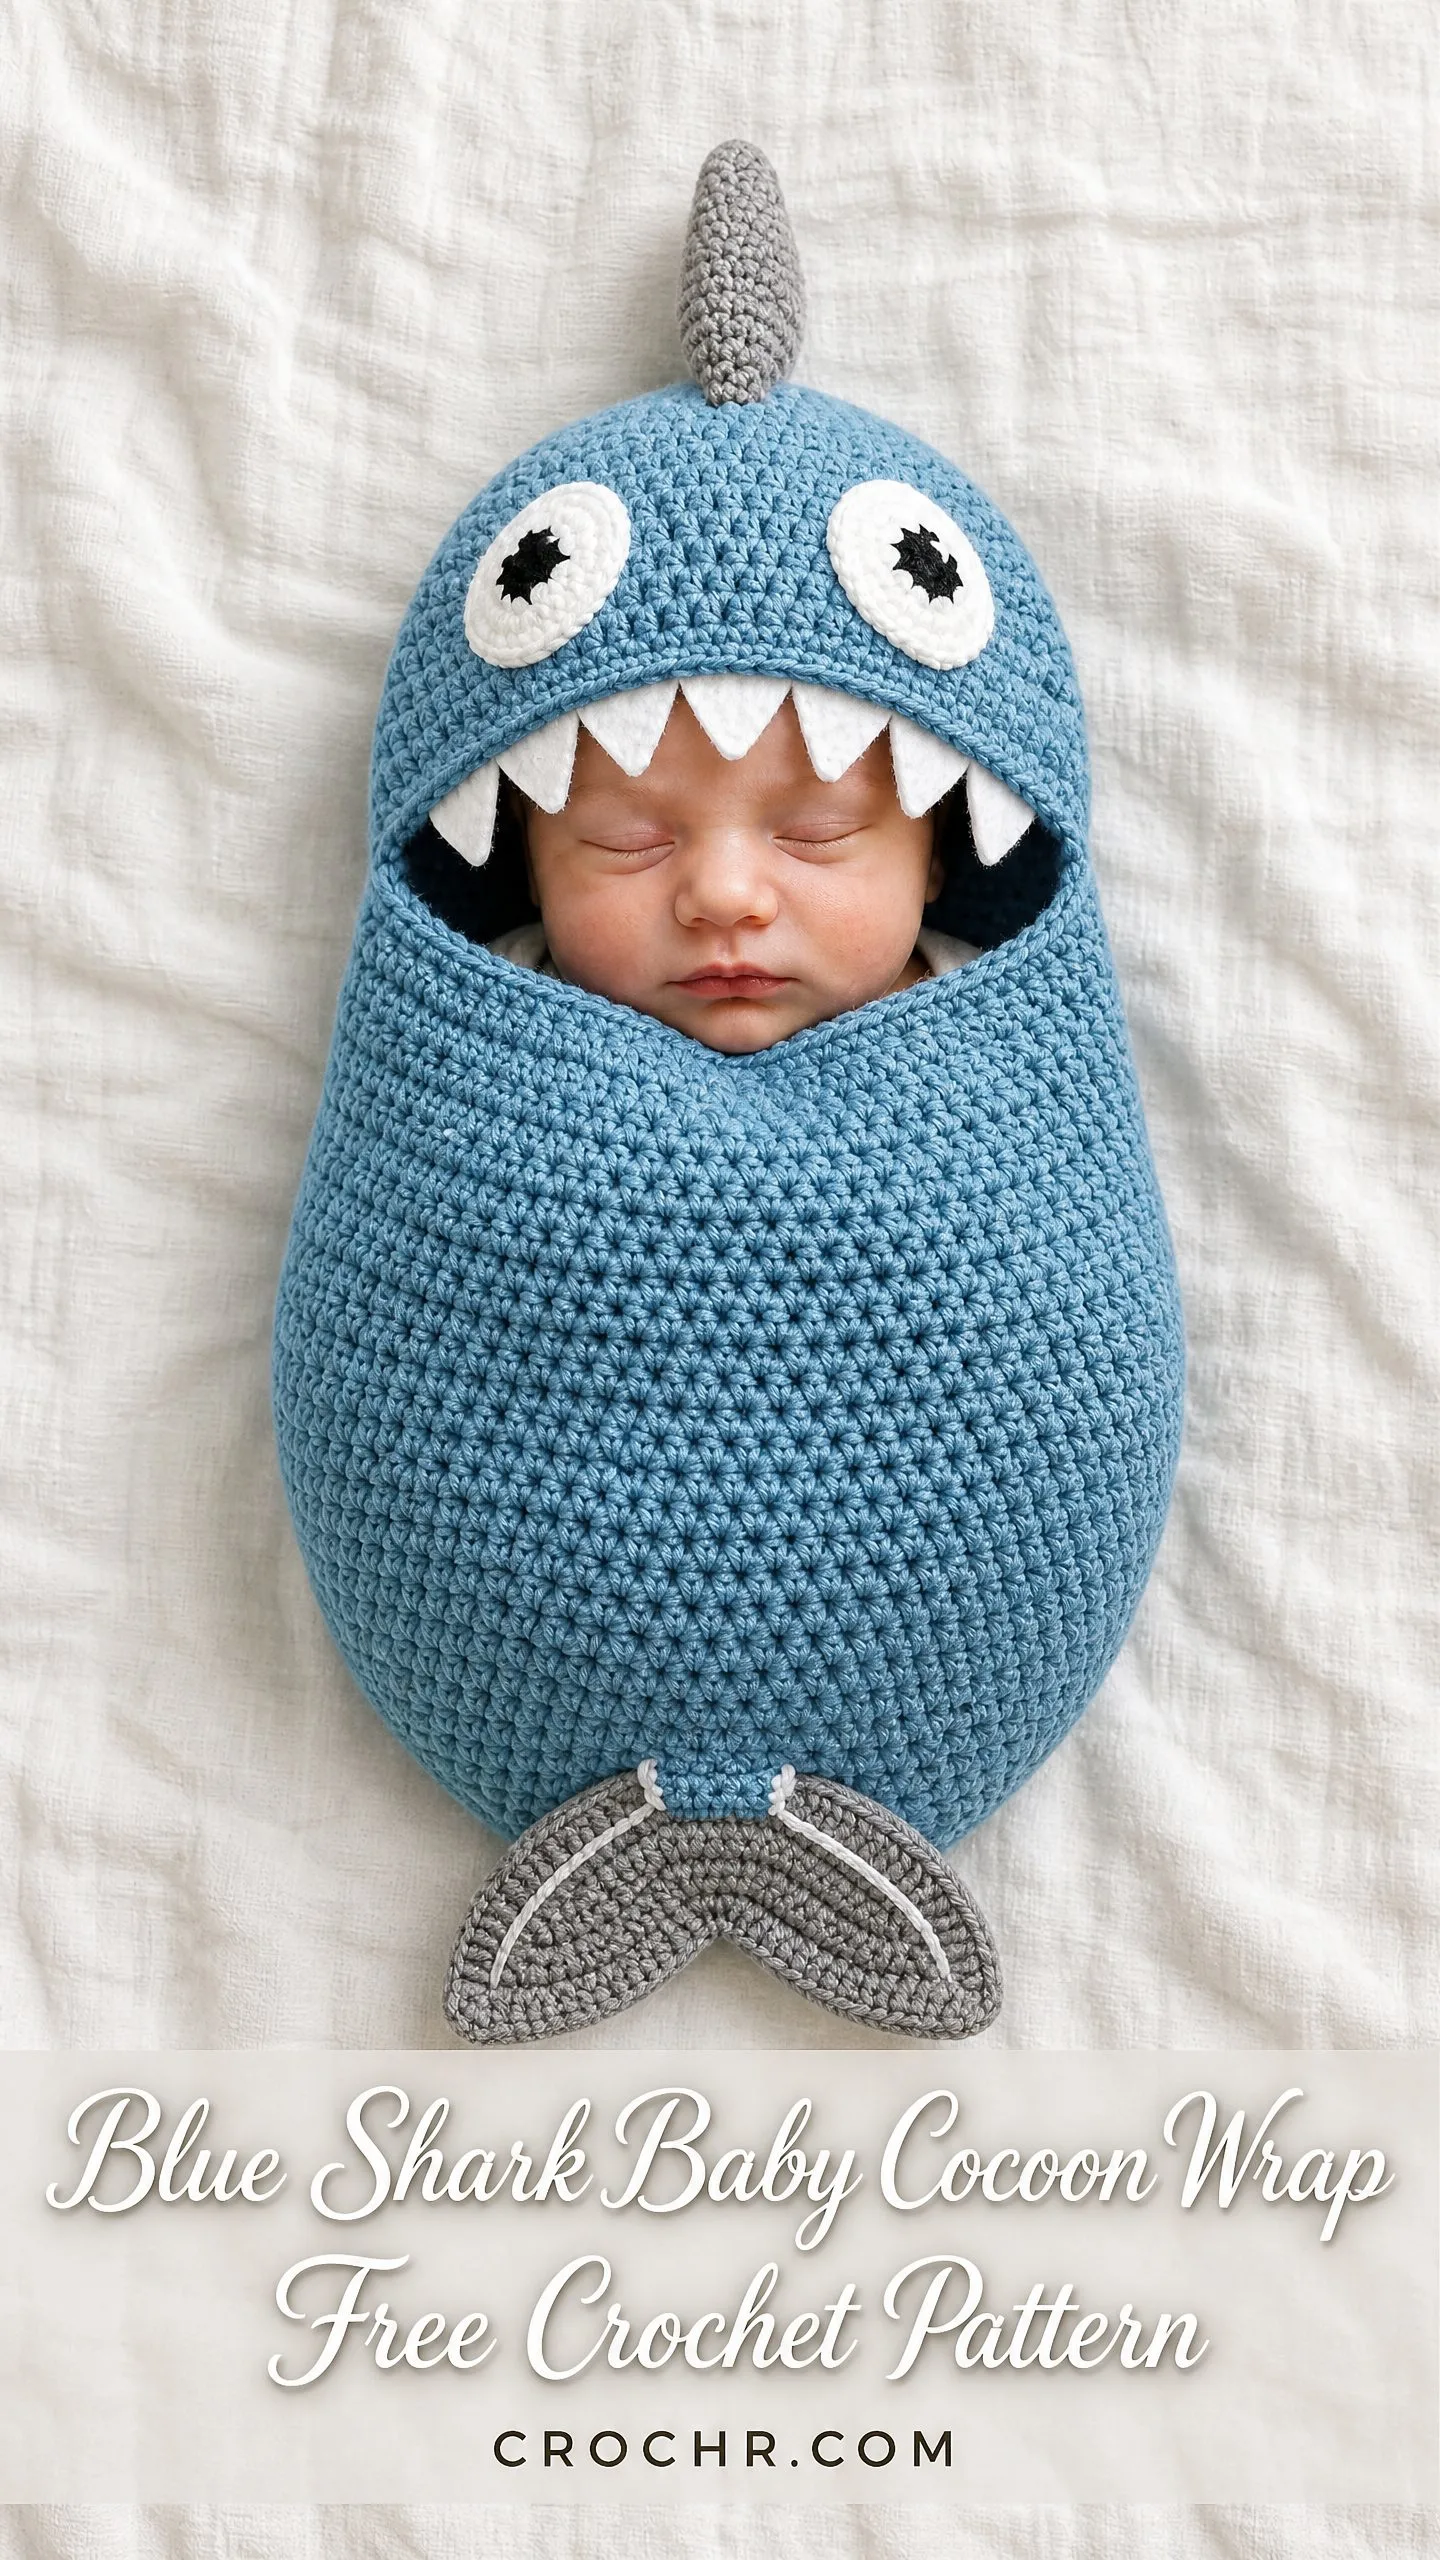
If you can crochet in the round and sew on a few pieces, you can absolutely make this. The shark face frames the baby’s head perfectly, with white felt teeth and big googly eyes creating that adorable cartoon look.
Fair warning: this one takes about 12 to 18 hours total. But the stitches themselves are simple, and the result is a showstopper baby gift that nobody else at the shower will bring.
Why This Shark Cocoon Makes Such a Great Project
Baby items are always satisfying to crochet because they work up faster than adult sizes. This cocoon hits a sweet spot. It is big enough to feel like a real accomplishment but small enough to finish in a week or two of evening sessions.
The construction teaches you useful skills. You will practice working in continuous rounds, shaping with decreases, creating appliqué pieces, and assembling a multi-part project. These techniques transfer to amigurumi, hats, and countless other patterns.
Plus, let’s be honest. A baby dressed as a shark is objectively hilarious. New parents will use this for newborn photos, Halloween, or just regular Tuesday naps. It is the kind of handmade gift people actually remember.
Materials You Will Need
Gather everything before you start. Nothing is worse than running out of yarn halfway through the hood.
Yarn (all worsted weight, Category 4):
Tools:
Yarn Suggestions:
Lion Brand Pound of Love in Pale Blue works beautifully. It is soft, machine washable, and affordable. Cascade 220 Superwash gives you a natural fiber option if you prefer wool. Any smooth worsted weight yarn that matches gauge will work. Avoid textured or variegated yarns because they hide the clean stitch definition.
Gauge
14 single crochet x 16 rows = 4 inches / 10 cm in single crochet worked in continuous rounds, after blocking.
Gauge matters here. Too tight and the cocoon will be too small for a newborn. Too loose and it will not hold its shape. Make a swatch, measure honestly, and adjust your hook size up or down as needed.
Finished Measurements
Skill Level
Intermediate. The body is just single crochet in the round, which is beginner territory. But you also need to work back and forth for the hood shaping, pick up stitches for edging, and construct several separate pieces that get sewn on. If you have made a hat or a simple amigurumi toy, you are ready for this.
Abbreviations and Stitch Definitions
ch: chain. Wrap yarn over hook and pull through the loop on your hook.
sl st: slip stitch. Insert hook, yarn over, pull through both the stitch and the loop on your hook in one motion.
sc: single crochet. Insert hook into stitch, yarn over, pull up a loop (two loops on hook), yarn over, pull through both loops.
sc2tog: single crochet two together. A decrease. Insert hook into first stitch, pull up a loop, insert hook into next stitch, pull up a loop (three loops on hook), yarn over, pull through all three loops. You just turned two stitches into one.
inc: increase. Work 2 sc in the same stitch. You just turned one stitch into two.
st(s): stitch(es)
rnd(s): round(s)
MR: magic ring. Also called magic circle. Make a loop with yarn, insert hook, pull up a working loop, chain 1, then work the required stitches into the loop. Pull the tail to close the center hole.
BLO: back loop only
FLO: front loop only
pm: place marker
RS: right side
WS: wrong side
Pattern Notes Before You Begin
1. The body is worked in continuous rounds. Do not join at the end of each round. Do not turn. Just keep spiraling. Use a stitch marker in the first stitch of each round and move it up as you go.
2. The mouth opening is created by splitting the work and working back and forth in rows. One section becomes the upper jaw, one becomes the back of the hood. Then you join them at the top.
3. All appliqué pieces (eyes, fins, teeth) are made separately and sewn on at the end.
4. For babies under 36 months, consider embroidering the eye pupils instead of using safety eyes. Even well-secured safety eyes carry a small risk.
5. The right side faces outward throughout.
6. "Front" means the shark face side.
Section 1: Body Tube
The body starts at the closed bottom and works upward. You begin with a flat circle, then stop increasing to form a tube.
Foundation: Using MC, make a magic ring.
Rnd 1: Ch 1, work 6 sc into the MR, pull ring closed. Do not join. Place marker. (6 sc)
Rnd 2: Inc in each st around. (12 sc)
Rnd 3: (Sc 1, inc) repeat 6 times. (18 sc)
Rnd 4: (Sc 2, inc) repeat 6 times. (24 sc)
Rnd 5: (Sc 3, inc) repeat 6 times. (30 sc)
Rnd 6: (Sc 4, inc) repeat 6 times. (36 sc)
Rnd 7: (Sc 5, inc) repeat 6 times. (42 sc)
Rnd 8: (Sc 6, inc) repeat 6 times. (48 sc)
Rnd 9: (Sc 7, inc) repeat 6 times. (54 sc)
Rnd 10: (Sc 8, inc) repeat 6 times. (60 sc)
Rnd 11: (Sc 9, inc) repeat 6 times. (66 sc)
Rnd 12: (Sc 10, inc) repeat 6 times. (72 sc)
Checkpoint: Your flat circle should measure approximately 8 inches / 20 cm in diameter.
Now work even (no increases) to form the tube:
Rnds 13-30: Sc in each st around. (72 sc per round)
Checkpoint: After Rnd 30, the tube should measure approximately 9 inches / 23 cm from the bottom.
Now add gentle widening toward the opening:
Rnd 31: (Sc 10, inc) repeat 6 times. (78 sc)
Rnds 32-34: Sc in each st around. (78 sc)
Rnd 35: (Sc 12, inc) repeat 6 times. (84 sc)
Rnds 36-38: Sc in each st around. (84 sc)
Checkpoint: After Rnd 38, the body measures approximately 11 inches / 28 cm from the bottom.
Now divide for the hood. Mark stitch 1 and stitch 43. You have two halves of 42 stitches each. The front 42 stitches become the upper jaw and face. The back 42 stitches become the rear hood.
Section 2: Upper Jaw and Head
Work back and forth on the front 42 stitches only.
Row 39: Ch 1, turn. Sc in each of the next 42 sts. (42 sc)
Rows 40-41: Ch 1, turn. Sc in each st across. (42 sc)
Row 42: Ch 1, turn. Sc2tog, sc to last 2 sts, sc2tog. (40 sc)
Row 43: Ch 1, turn. Sc in each st across. (40 sc)
Row 44: Ch 1, turn. Sc2tog, sc to last 2 sts, sc2tog. (38 sc)
Row 45: Ch 1, turn. Sc in each st across. (38 sc)
Row 46: Ch 1, turn. Sc2tog, sc to last 2 sts, sc2tog. (36 sc)
Row 47: Ch 1, turn. Sc in each st across. (36 sc)
Row 48: Ch 1, turn. Sc2tog, sc to last 2 sts, sc2tog. (34 sc)
Row 49: Ch 1, turn. Sc in each st across. (34 sc)
Row 50: Ch 1, turn. Sc2tog, sc to last 2 sts, sc2tog. (32 sc)
Row 51: Ch 1, turn. Sc in each st across. (32 sc)
Row 52: Ch 1, turn. Sc2tog, sc to last 2 sts, sc2tog. (30 sc)
Row 53: Ch 1, turn. Sc in each st across. (30 sc)
Row 54: Ch 1, turn. Sc2tog, sc to last 2 sts, sc2tog. (28 sc)
Row 55: Ch 1, turn. Sc in each st across. (28 sc)
Do not fasten off. Leave this panel on hold.
Section 3: Rear Hood Panel
Reattach MC to stitch 43 (first stitch of the back half). Work the same sequence on the back 42 stitches:
Row 39B: Sc in each of the 42 back sts. (42 sc)
Rows 40B-41B: Ch 1, turn. Sc in each st across. (42 sc)
Continue the same decrease pattern as the upper jaw:
Row 42B: Ch 1, turn. Sc2tog, sc to last 2 sts, sc2tog. (40 sc)
Continue through Row 55B following the same alternating decrease/plain row sequence until you reach 28 sc.
Do not fasten off.
Section 4: Joining the Top of the Hood
Hold the upper jaw panel and rear hood panel with wrong sides together. Using MC, slip stitch through both layers across all 28 stitches. Fasten off. Weave in ends.
Section 5: Mouth Lining
With CA (dark teal or navy), join yarn at the right corner of the mouth opening. Work sc evenly around the entire interior perimeter, approximately 1 sc per stitch along horizontal edges and 1 sc per row end along side edges.
Work 3 rounds of sc in continuous rounds around the mouth lining.
Sl st to join, fasten off. Weave in ends.
Section 6: Teeth
Make two strips using CB (white).
Upper Teeth Strip:
Ch 43.
Foundation row: Sc in the 2nd ch from hook and in each ch across. (42 sc)
Row 1 (teeth row): Ch 1, turn. (Sc 1, hdc 1, dc 2, hdc 1, sc 1) repeat 7 times. (42 sts total, 7 teeth)
Fasten off, leaving a long tail.
Lower Teeth Strip: Make identical to upper strip.
Sewing: Pin upper teeth along the upper lip with the scalloped edge pointing down into the mouth. Sew the straight foundation edge flat against the jaw. Repeat for lower teeth with scallops pointing up.
Section 7: Eyes
Make 2 using CB (white).
Rnd 1: With CB, MR. Ch 1, 6 sc into MR, pull closed. (6 sc)
Rnd 2: Inc in each st around. (12 sc)
Rnd 3: (Sc 1, inc) repeat 6 times. (18 sc)
Rnd 4: (Sc 2, inc) repeat 6 times. (24 sc)
Rnd 5: Sc in each st around. (24 sc)
Sl st to join, fasten off with long tail.
Attach safety eyes to center of each circle before sewing to cocoon, or embroider black pupils after attachment.
Placement: Position eyes on the upper front of the head, above the mouth, spaced approximately 2.5 inches apart, about 1 inch above the mouth opening.
Section 8: Dorsal Fin
Using CC (gray), make a magic ring.
Rnd 1: Ch 1, 4 sc into MR, pull closed. (4 sc)
Row 2: Ch 1, turn. Inc in first st, sc to last st, inc in last st. (6 sc)
Row 3: Ch 1, turn. Sc in each st across. (6 sc)
Continue alternating increase rows and plain rows through Row 13, ending with 16 sc.
Fold fin in half lengthwise (wrong sides together). Sl st or sc across the curved edge to close, stuffing lightly with fiberfill as you go.
Placement: Center on top of the hood seam with fin pointing straight up. Sew base flat against the hood.
Section 9: Tail Fin
Make 2 identical pieces using CC (gray).
Ch 2.
Row 1: Work 3 sc in 2nd ch from hook. (3 sc)
Row 2: Ch 1, turn. Inc in first st, sc 1, inc in last st. (5 sc)
Continue increasing at each end on alternate rows through Row 11, ending with 13 sc.
Shape the notch:
Left lobe:
Right lobe:
Reattach CC to 8th stitch of Row 11.
Make second piece. Hold both pieces wrong sides together and whipstitch around entire outer perimeter.
Placement: Center over the closed bottom of the cocoon with lobes extending outward. Sew securely.
Finishing
Weave in all ends. Wet block by submerging in cool water, pressing out excess without wringing, reshaping to measurements, and laying flat to dry.
Check all appliqués are secure. Tug firmly on each piece and reinforce any loose areas.
Care Instructions
Machine wash gentle cycle in cold water if using acrylic yarn. Tumble dry low or lay flat. For superwash wool, hand wash in cool water with wool-safe detergent and lay flat to dry.
Important: Remove baby from cocoon for any unattended sleep, following safe sleep guidelines. Inspect all embellishments before each use.
You Did It!
This blue shark baby cocoon wrap crochet pattern creates such a memorable gift. The finished piece is cozy, photogenic, and guaranteed to make everyone smile. Whether you are making it for your own little one or for a baby shower, this project is worth every stitch.
I hope you enjoyed working through this crochet tutorial. If you make one, I would absolutely love to see it! Tag me on Instagram or share a photo in our Facebook group.
If this pattern is going in your project queue, save it to your Pinterest boards so you can find it easily when you are ready to start. And if you do make this shark cocoon, drop a comment below and let me know how it turned out. I read every single one and it genuinely makes my day to see your finished projects.
You Might Also Like
- Autumn Burnt Orange Monstera Crochet Plant Free Pattern
- Ocean Blue Pineapple Crochet Crop Top Free Pattern
- Moonlight Snake Plant Amigurumi Free Crochet Pattern
- Sunshine Bumble Bee Baby Dress Free Crochet Pattern
