
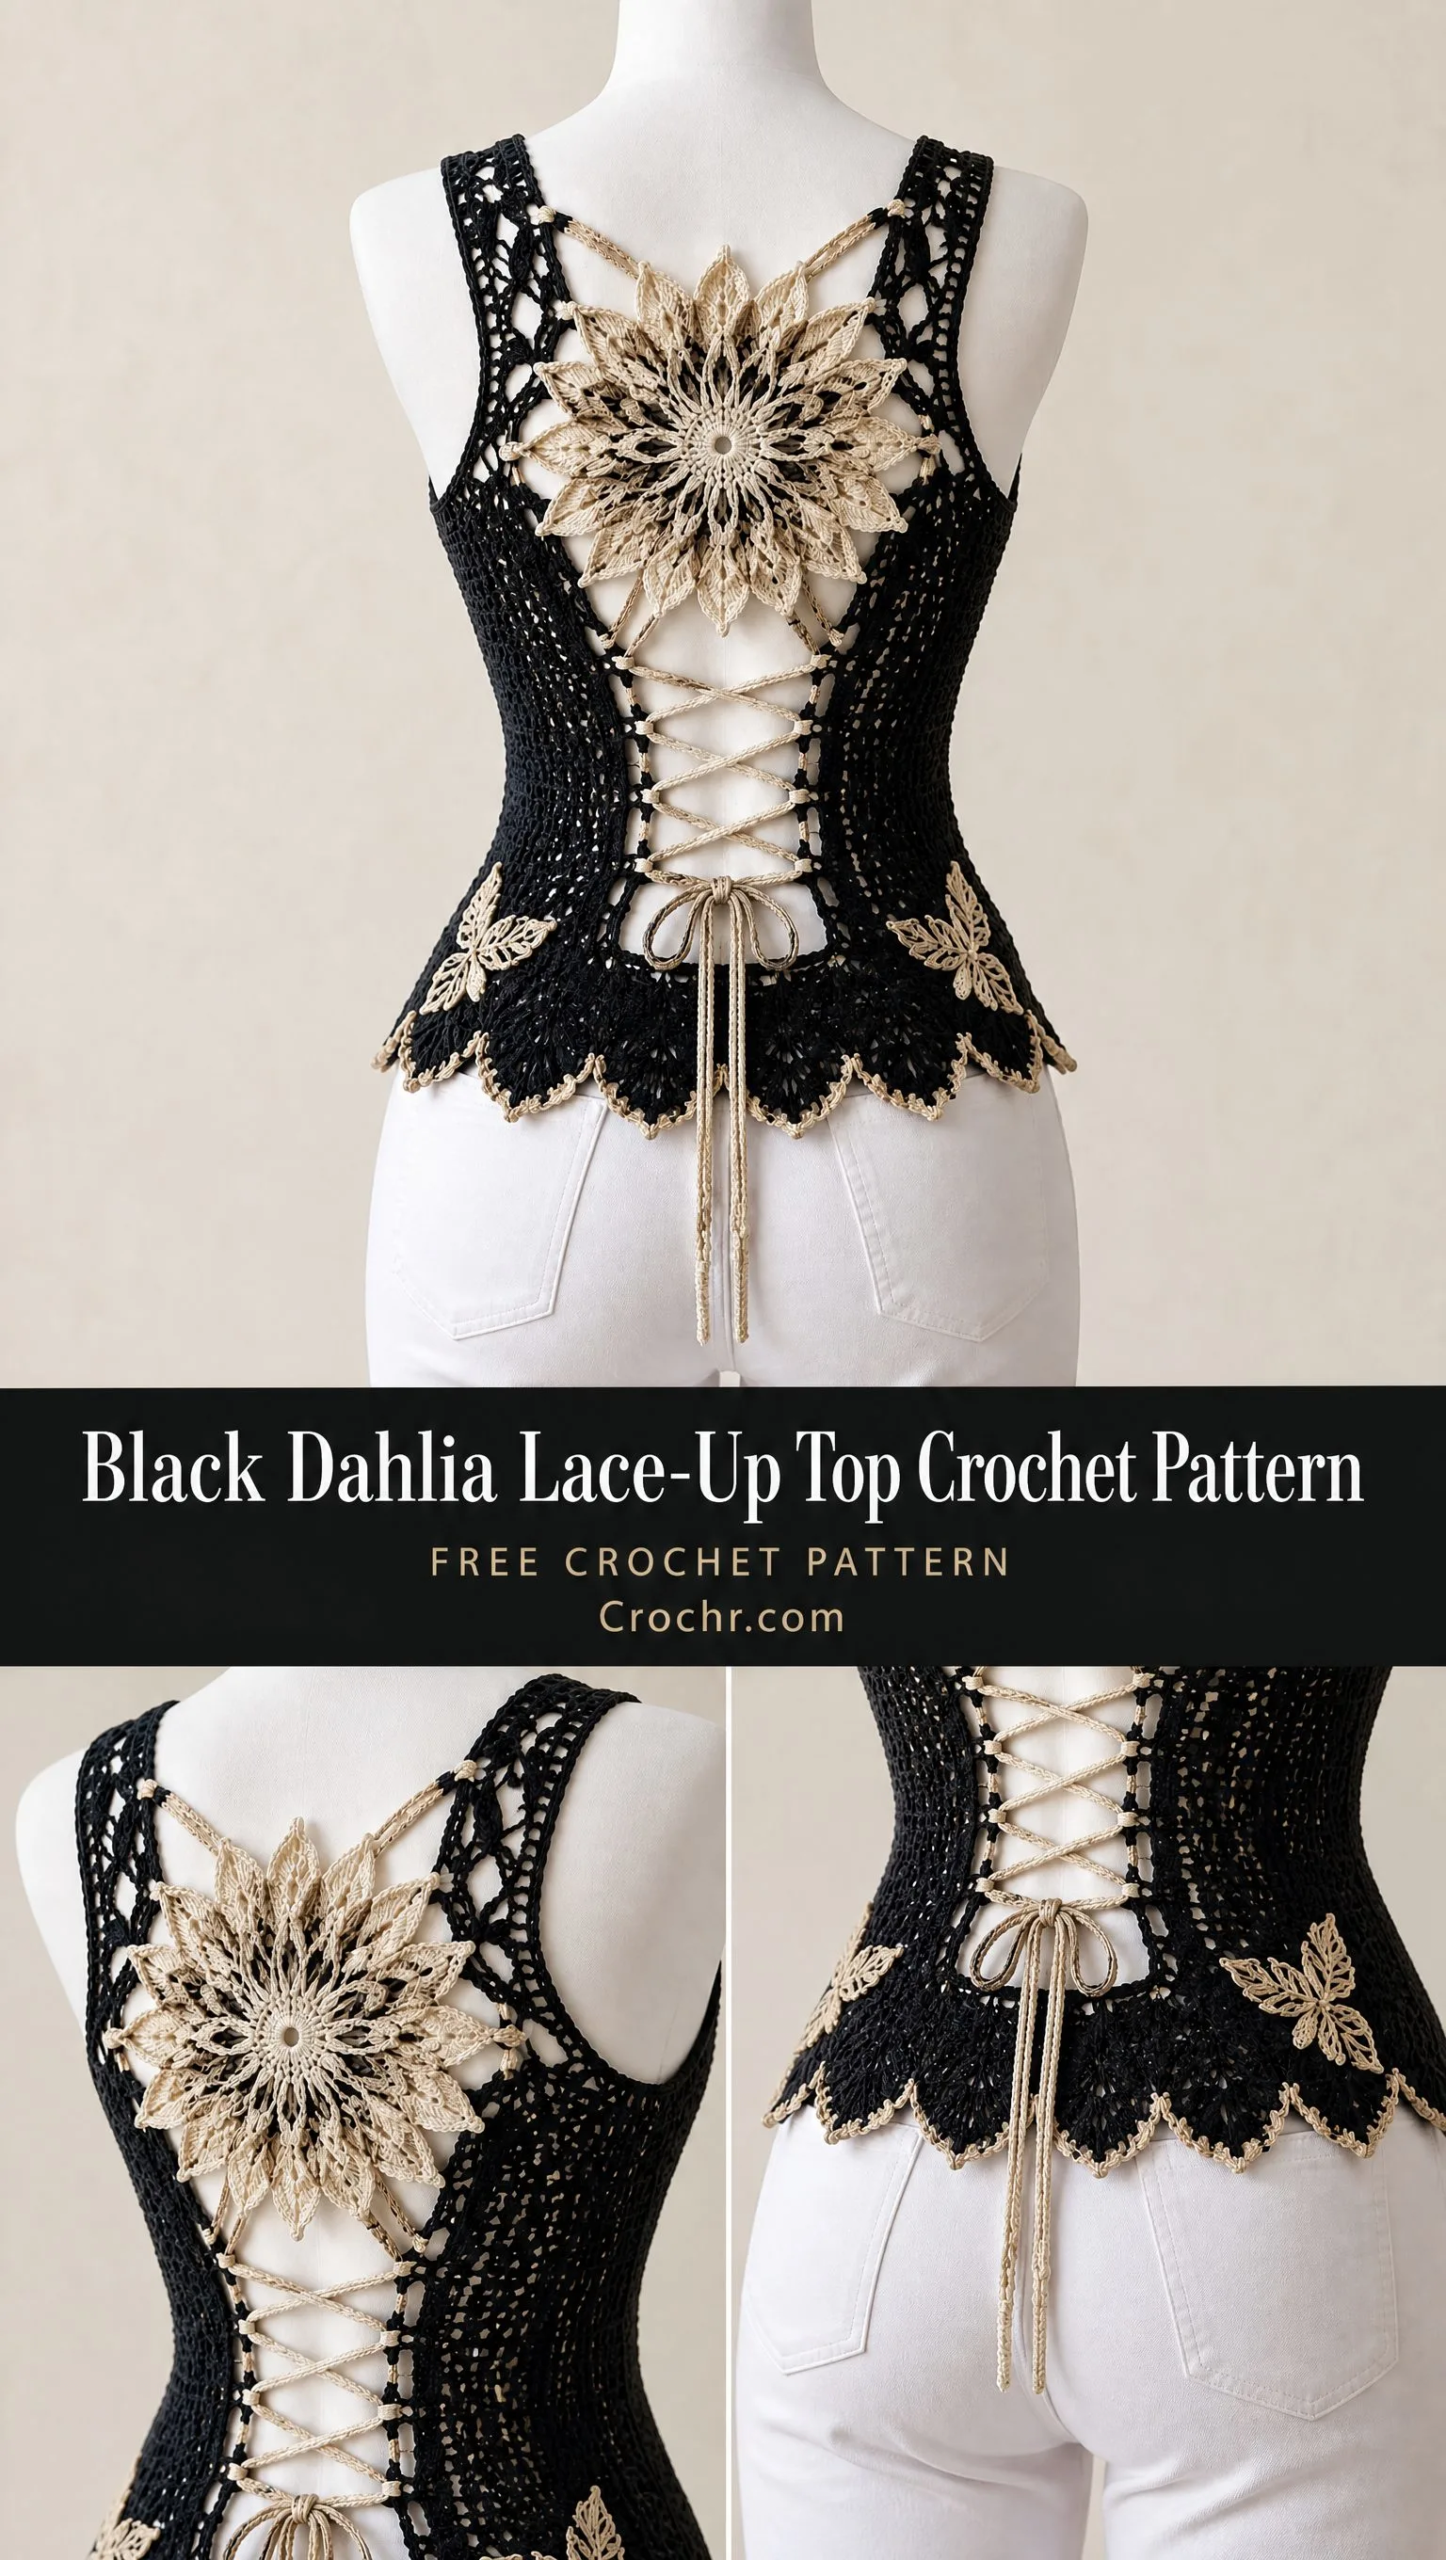
Looking for a statement piece that turns heads while keeping you cool on warm evenings? This fitted open-back crochet top delivers on all fronts. The sculptural dahlia motif adds drama, the champagne lace-up back provides adjustable fit, and the scalloped hem gives it that polished finish.
Get the Ad-Free PDF Pattern
You can find the free pattern below, or you can purchase the ad-free printable PDF from my shop.
Get the Printable PDF →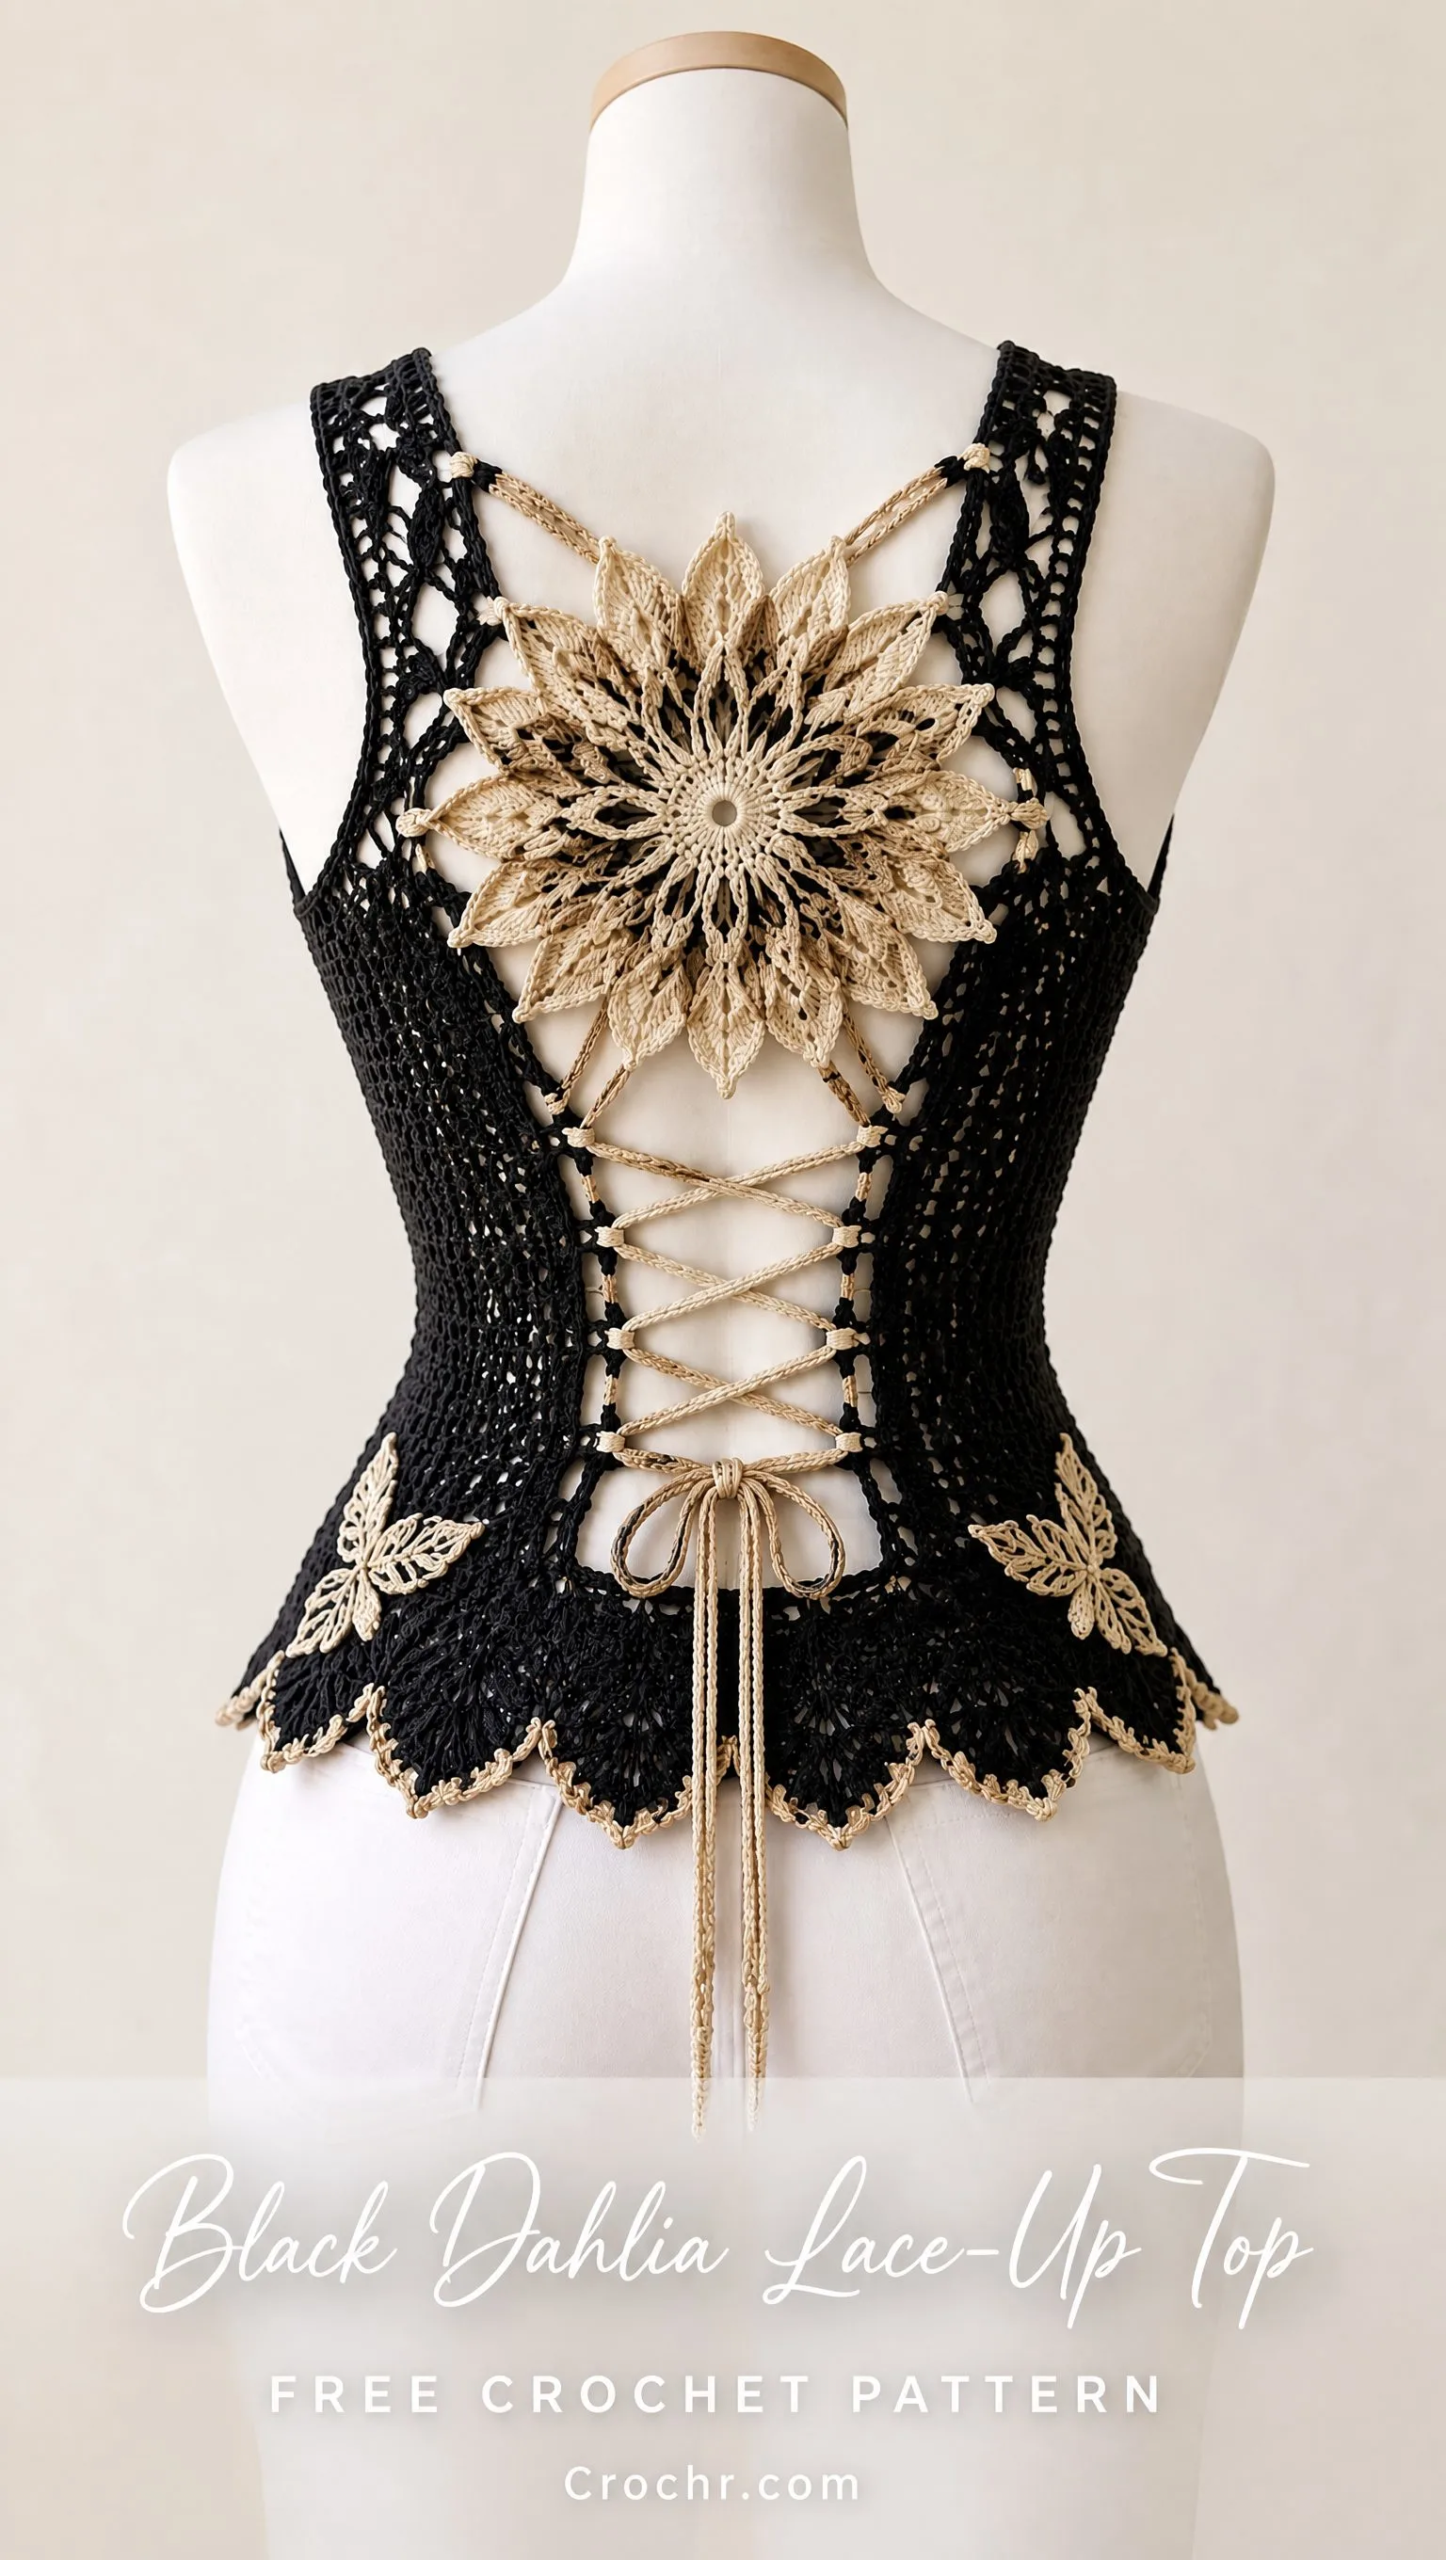
This pattern uses half double crochet (hdc) for the body panels, which works up quickly and creates a dense, flattering fabric. The dahlia yoke combines double crochet (dc), treble crochet (tr), and double treble crochet (dtr) for those gorgeous layered petals. If you have been wanting to level up your garment-making skills, this is a beautiful project to grow with.
The construction breaks down into manageable sections, so you are never overwhelmed. You will make the front panel, two back panels, the dahlia motif, straps, cords, hem, and leaf appliques separately before joining everything together. Perfect for intermediate crocheters ready to tackle something special, or advanced beginners who want a challenge.
Skill Level
Intermediate to Advanced Crochet
This pattern involves shaping, working in the round, creating a multi-layered motif, and garment assembly. If you are comfortable with basic stitches and have made at least one or two garments before, you will do great here.
Materials You Will Need
Gather these supplies before you start:
Why mercerized cotton? This type of yarn has been treated to create a smooth, lustrous finish with excellent stitch definition. It holds its shape beautifully and gives this top that polished, almost elegant look you see in the photos.
Gauge
Approximately 24 single crochet stitches x 26 rows = 10 cm (4 inches) square after blocking.
Please make a gauge swatch before starting. Gauge matters enormously for garment fit. If your swatch is too big, go down a hook size. Too small? Go up a hook size.
Abbreviations
Here is every abbreviation used in this pattern, with plain-English definitions:
Construction Overview
This top is made in seven separate sections, then assembled:
1. Front fitted panel
2. Two back side panels
3. Dahlia lace yoke motif
4. Shoulder straps
5. Champagne lace-up cord
6. Hem scallops
7. Leaf appliques
Working in sections keeps each piece manageable and allows you to block components individually for the crispest results.
Step 1: Front Body Panel
The front panel is worked flat in rows from the bottom up.
Chain the width needed for your size. This will depend on your measurements. Use your gauge to calculate: multiply your desired width in centimeters by 2.4 (the number of stitches per cm from gauge).
Row 1: Work hdc across the chain.
Rows 2 through 8: Continue working hdc rows. If you need bust shaping, increase slightly at the sides during these rows. To increase, work 2 hdc into the same stitch at each end of the row.
Neckline Shaping: Once you reach the desired length to the neckline, begin reducing stitches evenly toward the center. You can do this by skipping stitches or working decreases (hdc2tog) at regular intervals.
Continue until the front reaches your waistline measurement.
Border: Add a firm single crochet border around all edges. This stabilizes the panel and creates clean edges for assembly.
Step 2: Back Side Panels
You will make two mirrored panels for the back. These create the fitted sides and leave the center back open for the lace-up detail.
Chain from waist upward for the desired height.
Work hdc in dense rows to create a fitted side section. The panels should be wide enough to wrap around your sides but leave a gap at center back.
Creating Eyelets: Along the inner edge (the edge that will face center back), create evenly spaced eyelets for the lacing:
Eyelet Row: sc, chain 1, skip 1 stitch. Repeat across the inner edge.
Space your eyelets evenly, approximately every 2 to 3 cm apart, depending on how many crossings you want in your lacing.
Make sure both panels mirror each other exactly. The eyelets should align when the panels are placed side by side.
Step 3: Dahlia Lace Yoke
This is the showstopper of the design. The dahlia is worked in the round from the center outward.
Center Ring: Create a center ring with 8 single crochet stitches. You can start with a magic ring or chain 4 and slip stitch to join.
Round 1: Work 16 dc into the ring. Slip stitch to join.
Round 2 (First Petal Layer):
Work pointed petals around:
dc, tr, dtr, tr, dc all in one stitch, skip next stitch
Repeat around the entire round.
Round 3 (Chain Bridges):
Add chain bridges between petals:
sc into petal tip, ch 5, sc into next petal tip
Repeat around.
Round 4 (Outer Petal Layer):
Build outer petals with taller stitches into the chain spaces:
hdc, dc, tr, dtr, tr, dc, hdc
Repeat around into each chain-5 space.
Blocking the Dahlia: This step is crucial. Wet block the dahlia on your blocking mat, pinning each petal individually to open up the lace structure. Let it dry completely before attaching.
Attachment: Position the dahlia between the shoulder blades, centered at the top of the back opening. Use matching black yarn and small, secure stitches to join the outer edges of the dahlia to the back panels and straps.
Step 4: Shoulder Straps
The straps connect the front panel to the back panels and frame the dahlia motif.
Work black lace straps from the top corners of the back panels.
Use a combination of chain spaces and single crochet reinforcement. A simple approach:
Chain the desired strap length, then work sc back across the chain. For a lacier look, alternate ch-2 spaces with sc clusters.
Attach the straps beside the dahlia motif at the back and to the top corners of the front panel.
Tip: Try the top on (or use a dress form) before finalizing strap length. You want them snug enough to support the garment but comfortable to wear.
Step 5: Champagne Lace-Up Cord
Switch to your champagne or ivory yarn for this step.
Make two long cords:
Chain approximately 120 to 160 stitches, depending on your size and how long you want the cord tails.
Work slip stitches back across the chain for a smooth, rounded cord.
Threading: Starting from the top of the back opening, thread the cords through the eyelets in symmetrical X crossings, like you would lace a corset or sneaker.
Finishing: Tie a neat bow at the lower back opening. Leave tails long enough to create a pretty bow with trailing ends.
Step 6: Scalloped Hem
Attach black yarn at the lower edge of the assembled top.
Scallop Round:
sc, skip 2 stitches, 5 dc in next stitch, skip 2 stitches
Repeat around the entire hem to create shallow petal scallops.
Contrast Edging: Using your champagne yarn, work slip stitches around the edge of each scallop. This adds a beautiful golden outline that ties the whole design together.
Step 7: Champagne Leaf Appliques
These small leaves add a botanical touch at the hips.
Chain 10 with champagne yarn.
Work around the chain in a leaf shape:
Add a central embroidered vein using a yarn needle and the same champagne yarn. Use a simple running stitch or chain stitch down the center.
Make two leaves and attach one at each back hip, near the bottom of the back panels.
Finishing Your Black Dahlia Top
Now for the final touches that make everything polished:
1. Weave in all ends securely. For garments, I recommend weaving ends through at least 2 to 3 inches of stitches to prevent unraveling with wear.
2. Wet block the entire garment. Submerge in cool water, gently squeeze out excess (do not wring), and lay flat on your blocking mat.
3. Shape the dahlia petals individually while the fabric is damp. Pin each petal to maintain its sculptural shape.
4. Check lace openings and cord tension once dry. Adjust as needed.
5. Add hidden reinforcement stitches at stress points, particularly where straps meet panels and where the dahlia attaches to the body.
Sizing Adjustments
This pattern can be customized for different body measurements:
Always work a gauge swatch and take your measurements before beginning. The lace-up back provides some adjustability, but you want the panels themselves to fit your body comfortably.
Care Instructions
Your finished top deserves gentle care:
Store flat or loosely folded. Avoid hanging, which can stretch the straps over time.
Tips for Success
Take your time with the dahlia. This is the focal point of the entire design. If your first attempt does not look right, rip it out and try again. The motif should lay flat and have clearly defined petals.
Block aggressively. Mercerized cotton responds beautifully to blocking. Do not skip this step. The difference between blocked and unblocked lace is dramatic.
Try it on during construction. Garment making is personal. Bodies are different. Check the fit as you go and adjust accordingly.
Use stitch markers generously. Mark the center of your front panel, the eyelet positions on back panels, and anywhere you need to keep track of your place.
Final Thoughts
The Black Dahlia Lace-Up Top is one of those projects that looks incredibly impressive but breaks down into straightforward components. Each section is manageable on its own. The magic happens when you assemble everything and see that sculptural flower emerge between the shoulder blades.
I hope you enjoy making this as much as I enjoyed designing it. The combination of the black mercerized cotton with champagne accents creates such a striking contrast. It is perfect for summer evenings, music festivals, or any occasion where you want to feel a little bit special.
Thank you so much for choosing this pattern. I truly appreciate you being here.
If you love this Black Dahlia Lace-Up Top crochet pattern, save it to your Pinterest boards so you can find it when you are ready to cast on. And please, if you make one, drop a comment below or tag me on Instagram. I would absolutely love to see your version come to life.
Want a Quick & Easy Printable Version?
Get a clean, beautifully formatted PDF of this pattern — easy to follow step by step, ready to print or save on any device. No scrolling, no distractions, just the pattern.
Get the Printable PDF →You Might Also Like
- Mint Snowflake Hooded Coat Free Crochet Pattern
- Ocean Blues Granny Square Bag Free Crochet Pattern
- Mint Garden Baby Romper Set Free Crochet Pattern
- Ocean Blue Bobble Flower Bag Free Crochet Pattern
