
Let me guess. You saw this dragonfly back design somewhere and thought, "That looks incredible, but I could never make that." I hear you. Lace wings, color changes, mirrored motifs, garment construction. It sounds like a lot.
Get the Ad-Free PDF Pattern
You can find the free pattern below, or you can purchase the ad-free printable PDF from my shop.
Get the Printable PDF →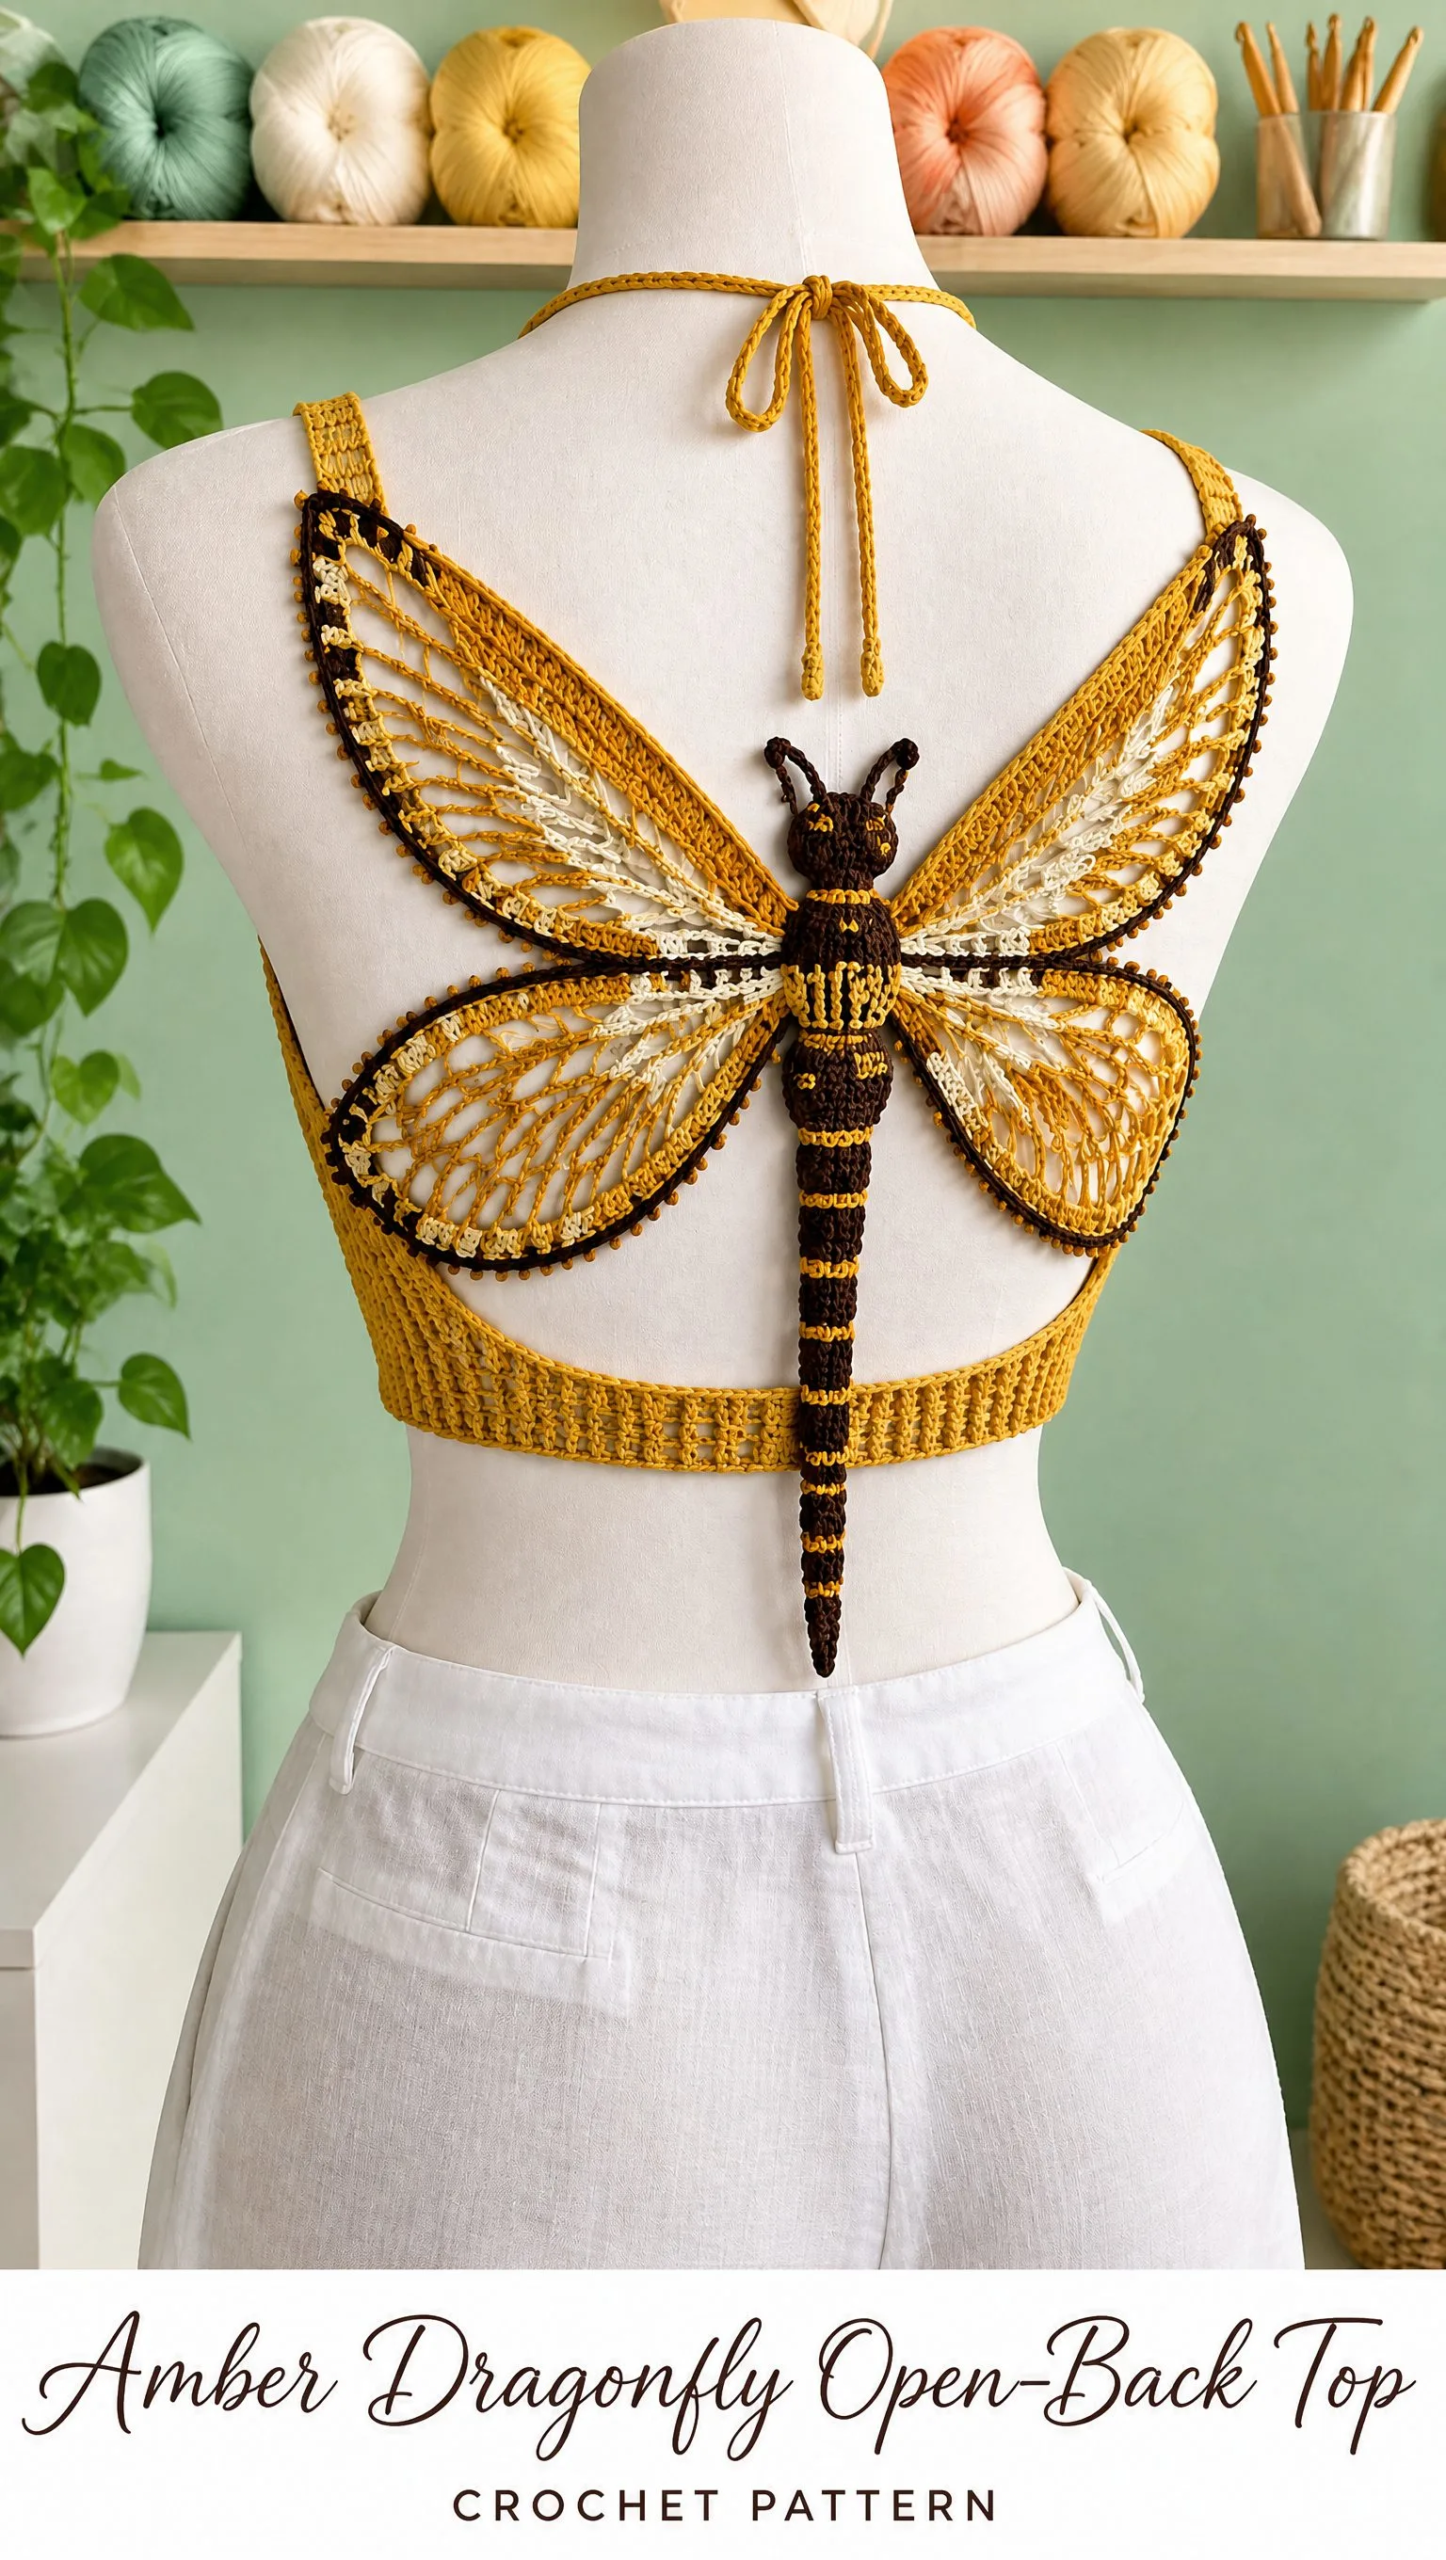
But here’s the thing. This top breaks down into simple, manageable pieces. You’re not crocheting magic. You’re crocheting a body, then some wings, then connecting everything to a band. Each section uses stitches you probably already know. Single crochet. Double crochet. Treble crochet. Chain spaces. That’s really it.
Whether you’re an adventurous intermediate crocheter ready to level up or an experienced maker looking for a stunning summer project, this pattern meets you where you are. I’ll walk you through every step, explain the tricky bits, and help you create a wearable piece of art.
Why This Dragonfly Top Is Worth Your Time
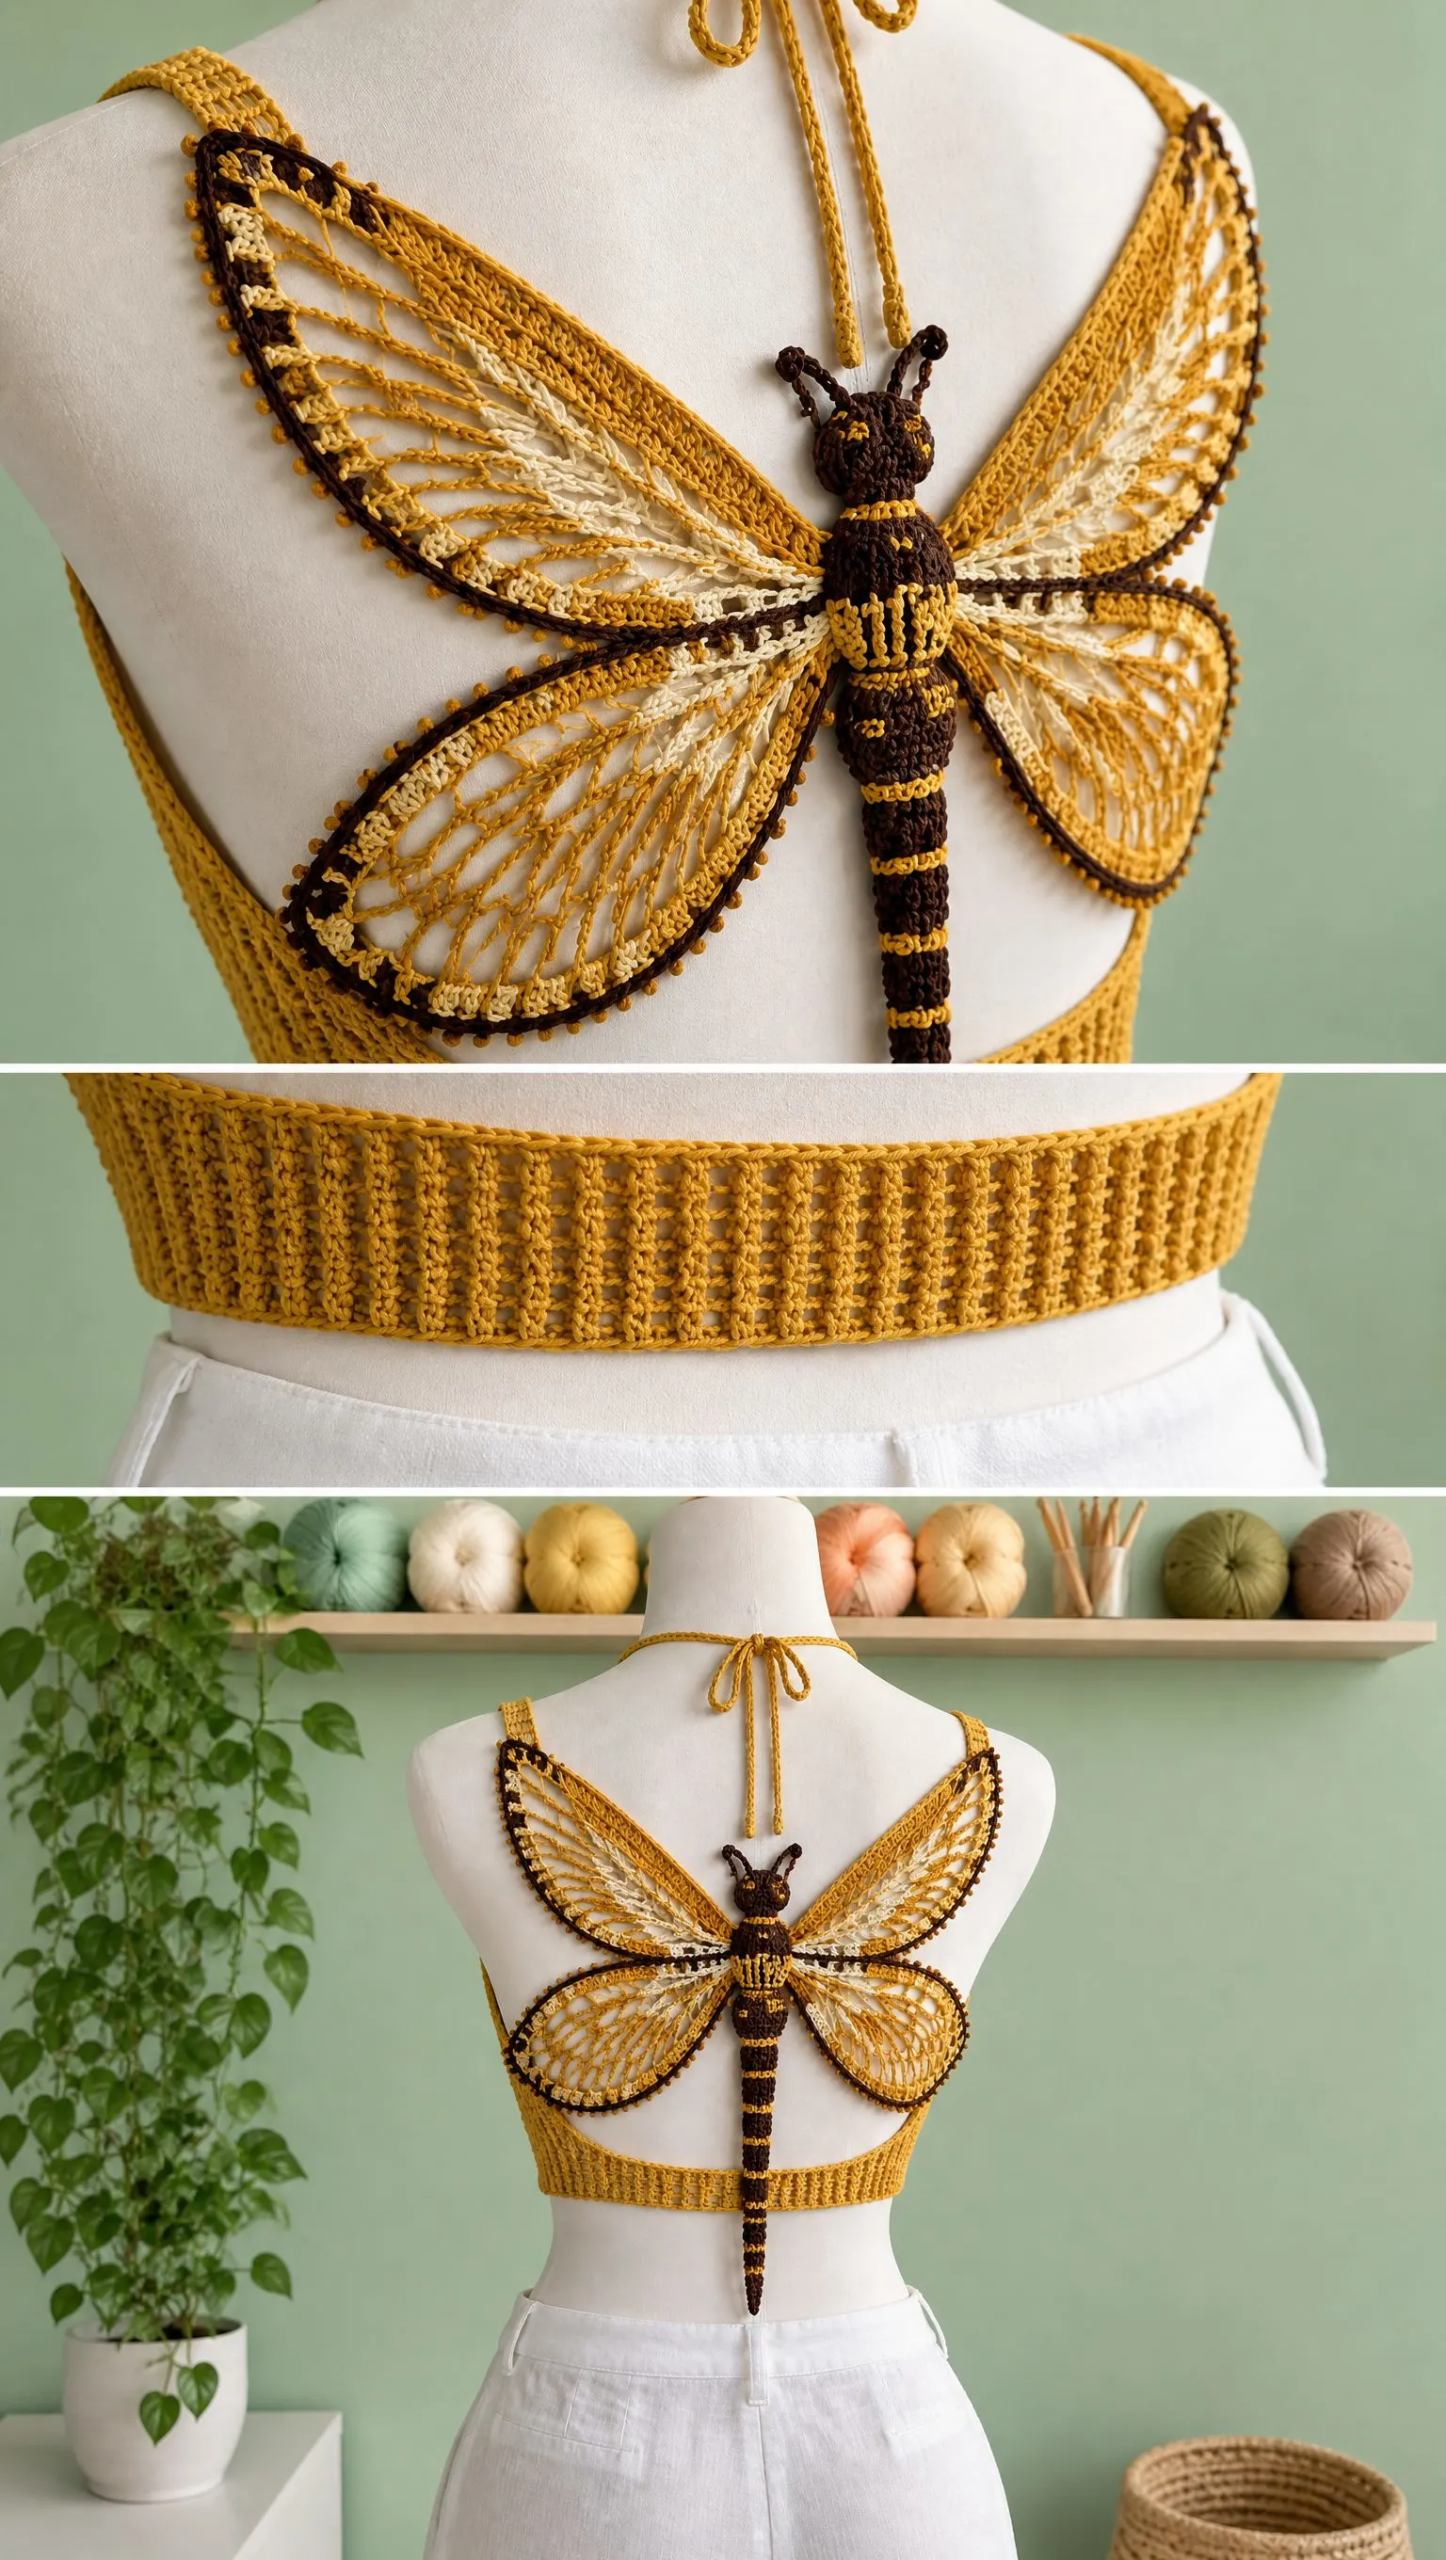
This open-back crop top isn’t just another garment pattern. It’s a statement piece that showcases your skills while remaining completely wearable. The large symmetrical dragonfly motif spans the entire back, with amber-gold lace wings catching the light, cream chain windows adding airiness, and chocolate-brown body segments creating bold contrast.
The botanical aesthetic works beautifully for summer festivals, beach cover-ups, or layered over a simple tank for everyday wear. And because it uses ties at the neck and back, the fit adjusts across multiple sizes without complicated shaping.
Materials You’ll Need
Gather these supplies before you begin:
Yarn (Sport Weight Cotton)
Tools
Yarn Selection Tips
Your yarn choice affects the finished look significantly. Mercerized cotton gives crisp stitch definition, which is perfect for showing off the lace wing details. Bamboo-cotton blends create a softer drape that moves beautifully when worn. Egyptian cotton produces a refined sheen that elevates the whole piece.
Any sport-weight yarn that matches gauge will work. Just make sure to swatch first.
Gauge
24 double crochet stitches x 12 rows = 4 x 4 inches (10 x 10 cm)
Gauge matters here. This is a fitted garment, and the lace sections need to open properly. If your gauge is too tight, the wings will look cramped. Too loose, and the whole piece becomes floppy. Take time to swatch and adjust your hook size if needed.
Finished Sizes
This pattern is adjustable from XS to XL using the neck and back ties. The waist band measurements are:
Skill Level
This pattern is rated Advanced Intermediate to Advanced. You’ll work with lace shaping, mirrored motifs, color changes, garment fitting, and careful finishing. If you’ve successfully completed lace projects and feel comfortable reading patterns, you’re ready for this.
Abbreviations and Stitch Definitions
Let me define every stitch you’ll use:
ch (chain): Yarn over, pull through the loop on your hook. This creates the foundation for most crochet work.
sl st (slip stitch): Insert hook, yarn over, pull through both the stitch and the loop on your hook in one motion. Used for joining and creating flat surface details.
sc (single crochet): Insert hook, yarn over, pull up a loop (2 loops on hook), yarn over, pull through both loops. The shortest and densest basic stitch.
hdc (half double crochet): Yarn over, insert hook, yarn over, pull up a loop (3 loops on hook), yarn over, pull through all 3 loops. Slightly taller than single crochet with a bit more drape.
dc (double crochet): Yarn over, insert hook, yarn over, pull up a loop (3 loops on hook), yarn over, pull through 2 loops, yarn over, pull through remaining 2 loops. A versatile medium-height stitch that forms the backbone of this pattern.
tr (treble crochet): Yarn over twice, insert hook, yarn over, pull up a loop (4 loops on hook), then yarn over and pull through 2 loops three times until one loop remains. The tallest stitch in this pattern, used to create height in the wing ribs.
Pattern Instructions
Step 1: Waist Band
The waist band anchors your entire garment. Getting this right sets you up for success.
Using amber yarn, chain a length matching your underbust measurement. Check your size in the finished measurements above and chain accordingly.
Row 1: Double crochet (dc) across the entire chain.
Rows 2 through 8: Alternate between dc ribbing rows and chain-window rows. The ribbing creates structure while the chain windows add visual interest and breathability.
Join the band into a circle, but leave the back center open for the dragonfly motif. This opening is where all the magic happens.
Quick tip: Use stitch markers to mark the exact center back. You’ll reference this point constantly as you build the motif.
Step 2: Dragonfly Body
Now we’re getting to the fun part. The body is the central spine of your dragonfly, and everything else attaches to it.
Switch to chocolate brown yarn.
Chain 18 for the center body.
Work tightly packed single crochet rounds to create a raised oval body. The tight tension here is intentional. You want the body to have dimension and stand out from the lacy wings.
Add amber segment stripes every 4 rounds. This creates the characteristic banded look of a dragonfly’s abdomen. To change colors cleanly, complete your last stitch in brown but pull through with amber for the stripe round.
Continue downward with decreasing rounds to create the tapered tail. Gradually reduce your stitch count each round until you achieve that elegant pointed shape.
Finish with a pointed end. Fasten off and weave in your tail (pun intended).
Step 3: Upper Wings
The upper wings are the largest and most dramatic elements. You’ll create two mirrored wings, working from the body outward toward the shoulders.
Switch to amber yarn.
Work tall stitch ribs:
Row 1: Attach yarn at the body side, then work chain spaces outward. These chains create the structural framework of your wing.
Row 2: Fill the spaces with dc and tr stitches. The combination of stitch heights creates the veined, organic look of actual dragonfly wings.
Increase toward the shoulder edge. The wing should fan out as it extends away from the body.
Add cream chain windows between ribs. Switch to cream yarn for these sections. The contrast color creates depth and mimics the translucent quality of real wings.
Outline each wing with chocolate brown slip stitches and amber picots. The brown outline defines the wing shape crisply, while the picots add that delicate finishing touch.
Important: Work one wing completely, then create the second as a mirror image. Take photos of your first wing from multiple angles to reference while making the second.
Step 4: Lower Wings
The lower wings are smaller, oval-shaped versions that sit below the upper wings.
Create two smaller oval wings using the same techniques as the upper wings.
Shape with gradual increases to form the oval silhouette. Start narrow at the body attachment point and widen toward the outer edge.
Keep both sides identical. Symmetry is everything here. Count your stitches carefully and compare frequently.
Finish with the same chocolate border and amber picot edge for visual continuity with the upper wings.
Step 5: Side Panels
The side panels connect your beautiful dragonfly motif to the practical waist band.
Work amber compact double crochet panels from the wing edges to the waist band. These sections should be sturdy and smooth, providing structure without competing with the lace wings.
Add smooth edging for clean lines and comfortable wear against your skin.
Step 6: Neck and Back Ties
The ties make this garment adjustable and eliminate complicated sizing calculations.
Make two long amber cords using chained slip stitches. This technique creates a smooth, rounded cord that’s comfortable against your neck.
Attach at the neckline securely. These ties bear weight, so make sure your attachment is strong.
Create adjustable bows for easy on and off. The ties should be long enough to wrap, tie, and leave attractive trailing ends.
Step 7: Finishing
You’re almost there. Don’t rush this step.
Weave in all ends thoroughly. With three colors, you’ll have quite a few tails. Take your time and weave each one through several stitches in different directions so nothing works loose.
Block gently on a flat surface. Wet blocking works well for cotton. Pin the piece to your blocking mat, stretching the lace sections to open up the wing windows.
Stretch lace sections evenly so wing openings remain clean and uniform. The blocking process transforms good crochet into stunning crochet.
Check symmetry before wearing. Lay the piece flat and compare both sides. If something looks off, you can often adjust during blocking while the fabric is still damp.
Care Instructions
Your finished top deserves gentle treatment:
With proper care, this piece will last for years.
Helpful Tips for Success
On color changes: When switching between amber, cream, and brown, carry your unused yarns loosely along the back when possible. For the wings, you may find it easier to cut and rejoin rather than carry yarn across long distances.
On mirroring: The trickiest part of this pattern is creating identical mirrored wings. Work slowly on the second wing, constantly comparing to the first. Some crocheters find it helpful to work both wings simultaneously, completing one row on each before moving to the next.
On fitting: Try the waist band on before you start the dragonfly motif. It should sit snugly at your underbust without feeling restrictive. Adjust now rather than later.
On the body dimension: Stuffing the dragonfly body lightly with a tiny amount of yarn scraps can enhance its three-dimensional appearance. This is optional, but it adds a nice sculptural quality.
You’ve Got This
Yes, this pattern has multiple components. Yes, it requires attention to detail. But every single element uses basic stitches arranged thoughtfully. You’re not learning anything new. You’re applying what you already know in a creative way.
Take it one section at a time. Celebrate each completed wing. And when you finally tie those neck straps and see the full dragonfly spread across your back, you’ll understand why this project is worth the effort.
I hope you love making this Amber Dragonfly Open-Back Top as much as I loved designing it. If this pattern caught your eye, save it to your Pinterest boards so you can find it when you’re ready to start. And please, leave a comment below when you finish yours. I’d love to see your color choices and hear how the process went for you.
Want a Quick & Easy Printable Version?
Get a clean, beautifully formatted PDF of this pattern — easy to follow step by step, ready to print or save on any device. No scrolling, no distractions, just the pattern.
Get the Printable PDF →You Might Also Like
- Lilac Dreams Floral Crochet Robe Free Pattern
- Blueberry Baby Hat and Pants Set Free Crochet Pattern
- Orange Ginger Cat Velvet Bow Sweater Free Crochet Pattern
- Sage Green Bohemian Lace Dress Free Crochet Pattern
