
Go dig through your yarn stash right now. That gorgeous lavender cotton you’ve been saving? This is the project it’s been waiting for.
Get the Ad-Free PDF Pattern
You can find the free pattern below, or you can purchase the ad-free printable PDF from my shop.
Get the Printable PDF →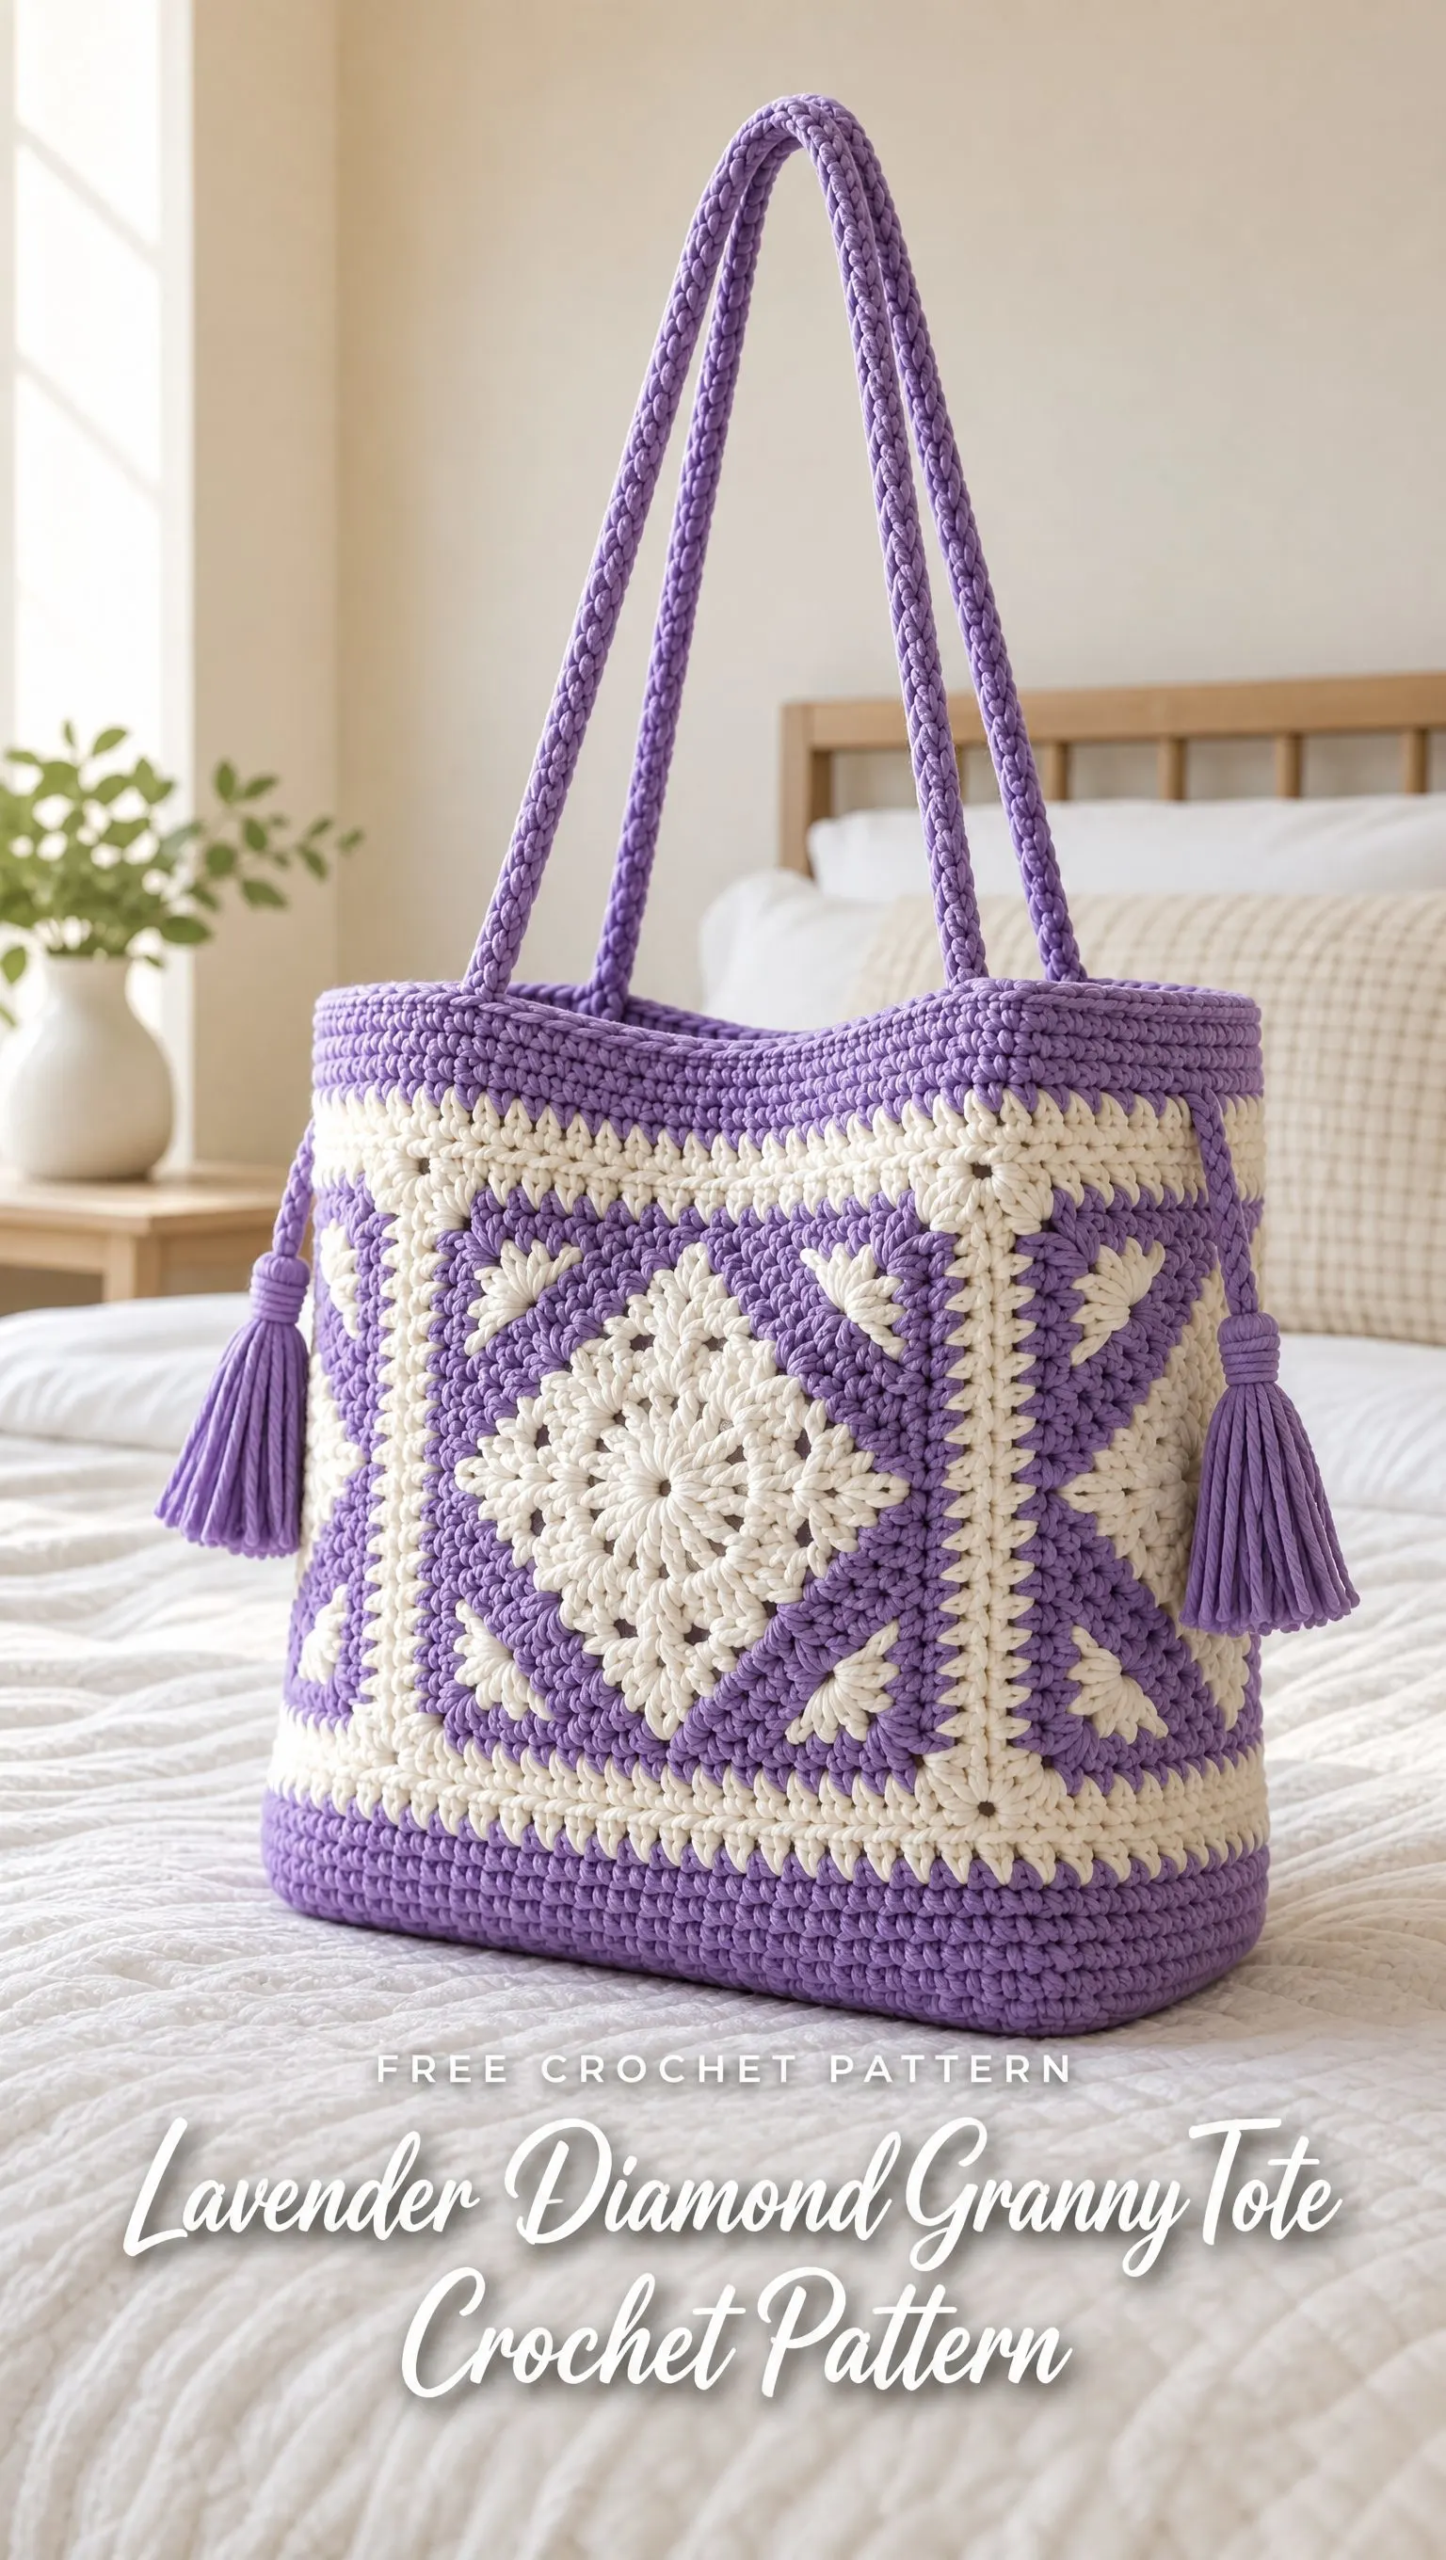
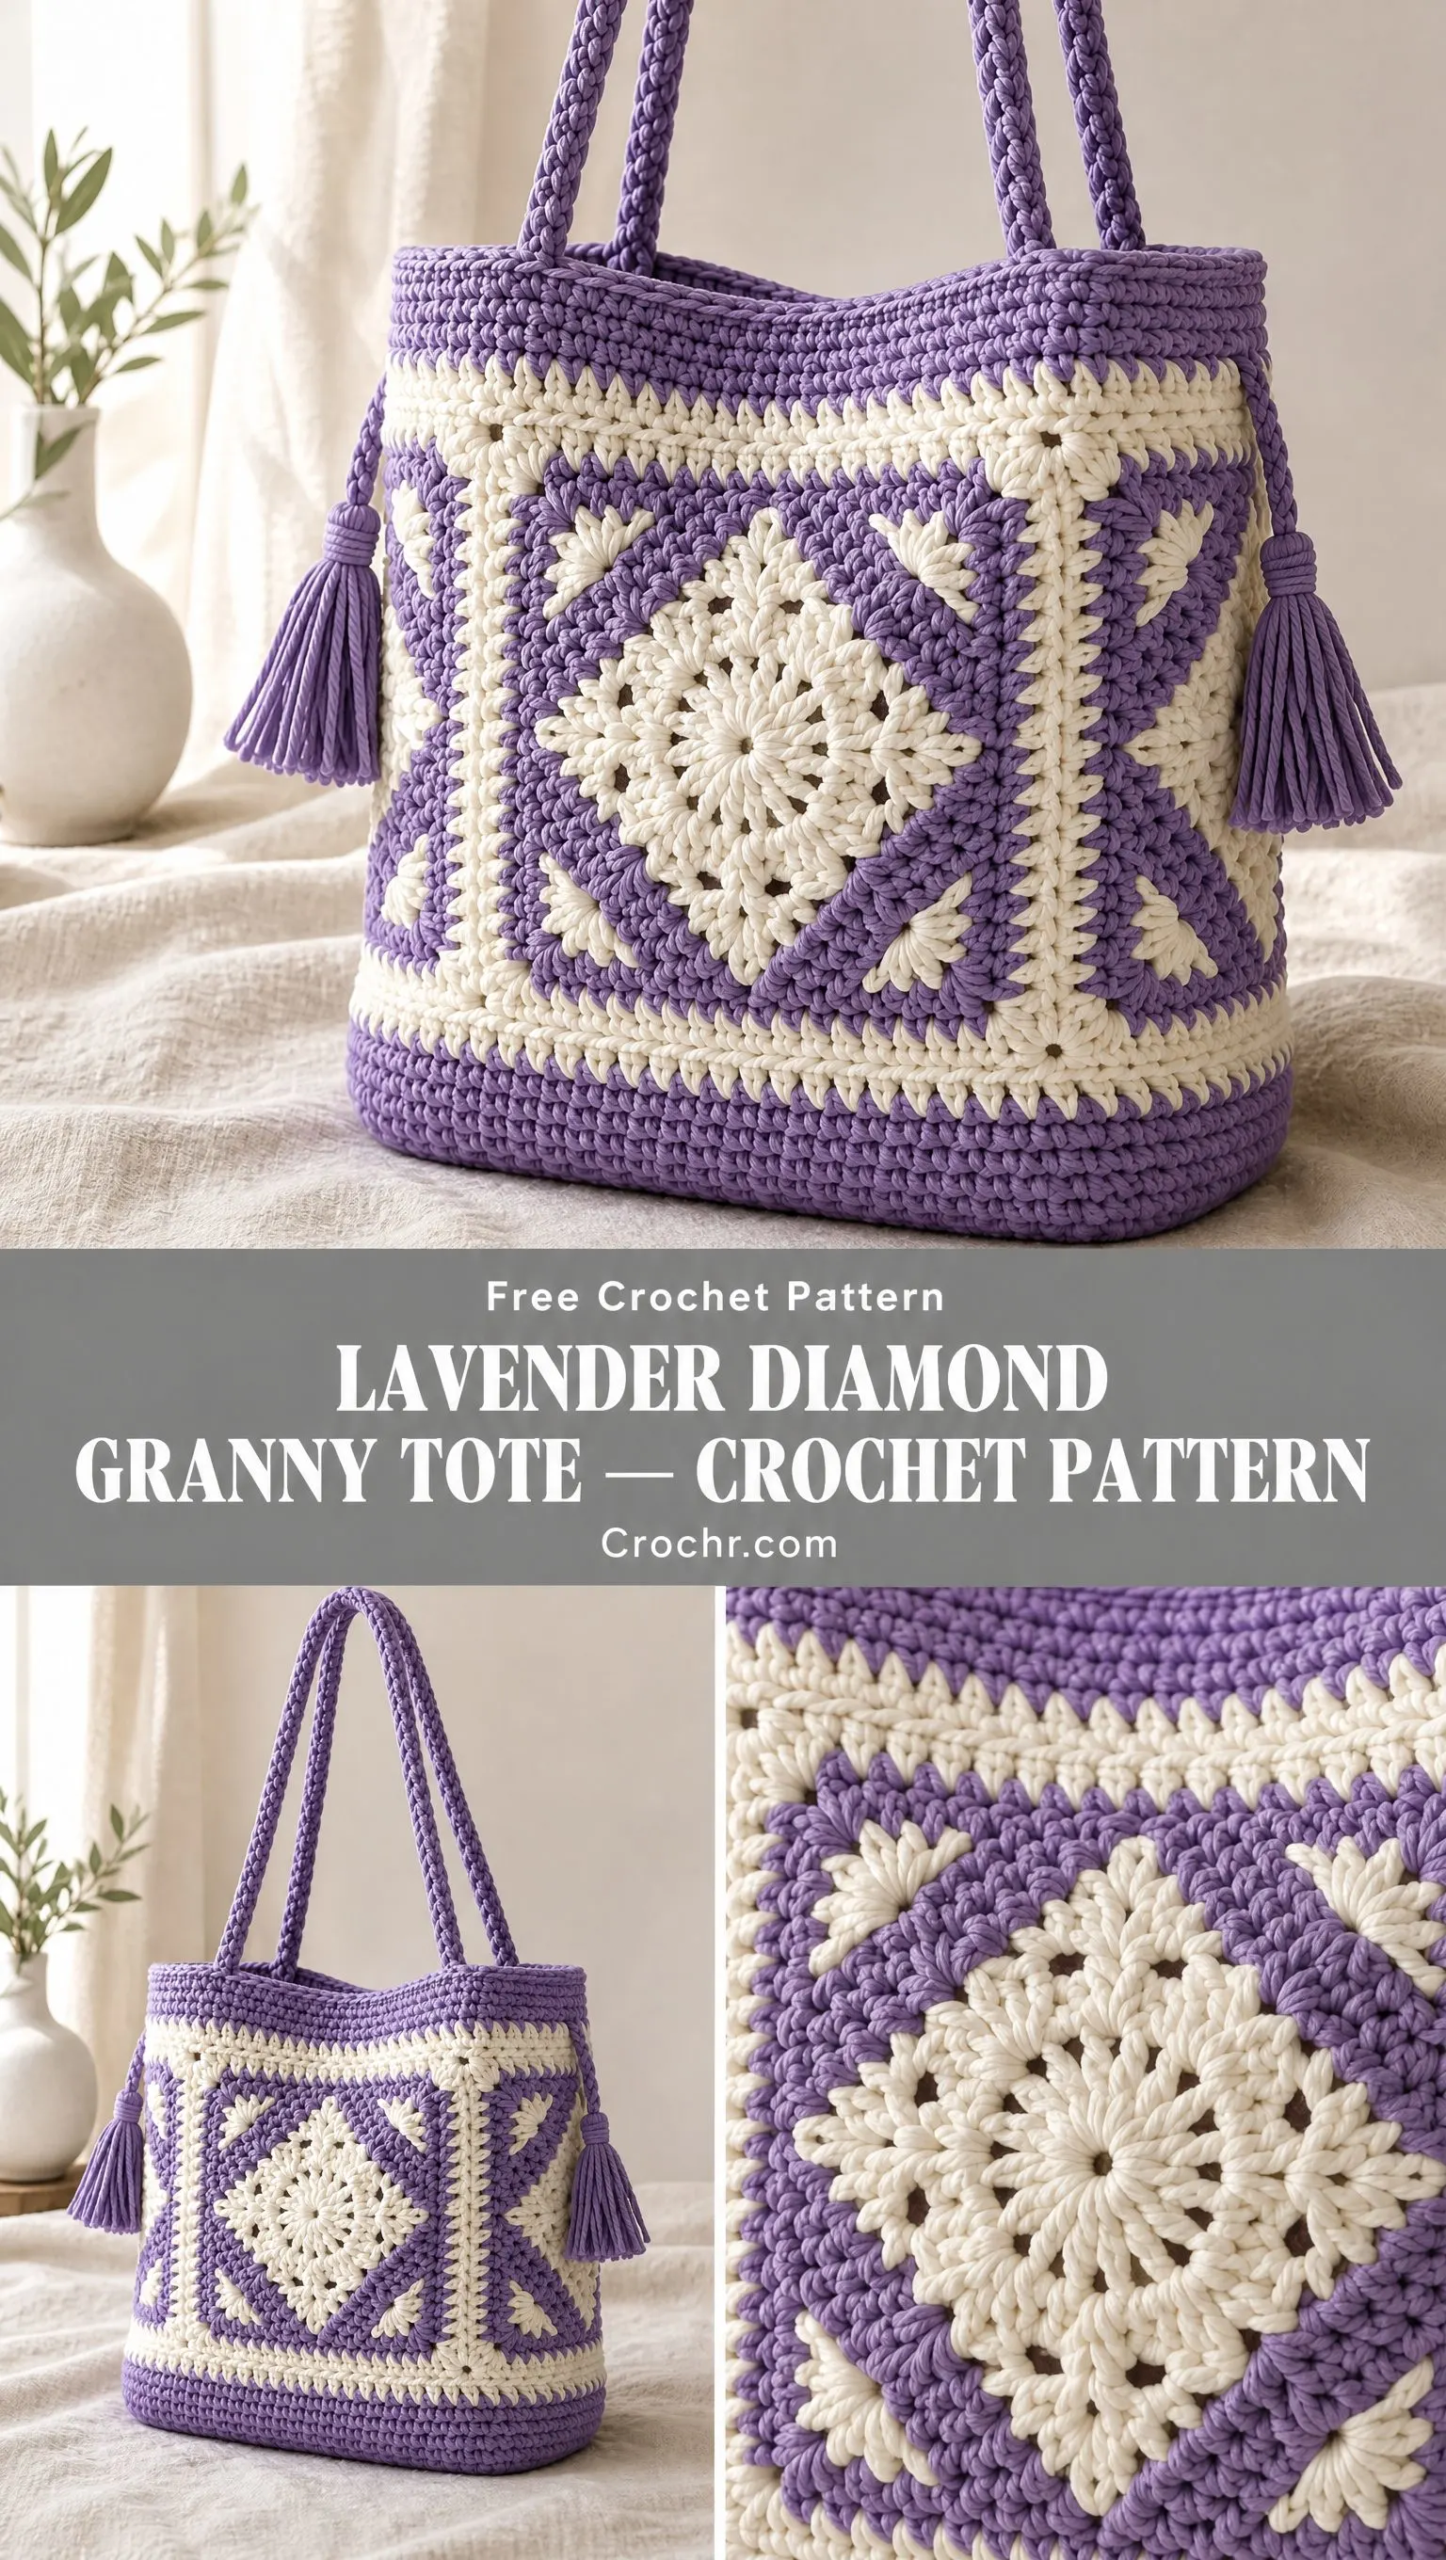
The Lavender Diamond Granny Tote combines classic granny square construction with a structured oval base, giving you a bag that actually holds its shape. You’ll work four flower-center squares, join them into a ring, then build up dense bands and sturdy straps. The construction is more interesting than your average granny bag, and the two-color design creates those beautiful stepped diamond frames you see radiating from each center.
I’ll be honest with you: this is an intermediate project. You’ll need to be comfortable with joining rounds, working in continuous spirals for the base, and seaming pieces together. But if you’ve made a few granny squares before and you’re ready to level up, this tote will teach you some great techniques without overwhelming you.
Why This Granny Tote Pattern Works
The magic of this design is in the structure. Unlike floppy granny bags that lose their shape the moment you set them down, this tote has a crocheted oval base with a built-in wall. The dense single crochet bands at the top and bottom give the whole piece stability. Add the optional cotton lining and webbing-reinforced straps, and you’ve got a bag that can actually handle daily use.
The four squares join into a ring with a 72 cm circumference, giving you a finished bag that measures approximately 34 to 36 cm wide when laid flat and 25 to 28 cm high. The handle drop sits at about 23 to 25 cm, which is perfect for carrying over your shoulder.
Materials You’ll Need
Before you start, gather everything so you’re not hunting for supplies mid-project.
Yarn:
Hooks:
Notions:
Optional additions:
Gauge and Sizing
Getting gauge right matters here because four squares need to match perfectly before you can join them.
Square gauge: One blocked 7-round square should measure 18 cm along each side. Four squares give you 72 cm circumference.
Band gauge: Approximately 20 single crochet stitches per 10 cm.
Make a complete square and a 10 cm single crochet swatch before committing to assembly. If your squares are too big, go down a hook size. Too small? Go up.
Abbreviations and Stitch Definitions
Let me walk you through every abbreviation you’ll see in this pattern:
Important: Turning chains do not count as a stitch unless a step explicitly says they do.
Pattern Conventions
Work all joined rounds with the right side always facing you. Chain 3 counts as a double crochet, and you’ll join to its top. Chain 1 before single crochet does not count as a stitch.
When changing colors, do it on the final pull-through of the last stitch before joining. Or you can fasten off and join the new color neatly. Either method works.
Flower Squares: Make Four
These squares form the body of your tote. Each one features an ivory flower center with lavender framing and a thin ivory accent stripe.
Round 1, Color B (Ivory)
Work into an adjustable ring: ch 3, work 11 dc, join to top of ch-3. (12 dc)
Tighten your center ring so there’s no gap.
Round 2, Color B
Ch 3, dc in same st. Work 2 dc in each of the remaining 11 sts, join. (24 dc)
Work loosely enough so your round lies flat. The paired stitches form a radiating flower center.
Round 3, Color B
Ch 3, work (dc, ch 2, 2 dc) in same st for your first corner. Dc in the next 5 sts. Repeat the following 3 more times: (2 dc, ch 2, 2 dc) in next st, dc in next 5 sts. Join. (36 dc, four corner ch-2 spaces, 9 dc between corner spaces)
Round 4, Color A (Lavender)
Join Color A in any corner space. In each corner, work (2 dc, ch 2, 2 dc). Work dc in every dc along each side. Join. (52 dc total, 13 dc between corners)
Round 5, Color A
Repeat Round 4, working a stitch in every side stitch. (68 dc, 17 dc between corners)
Round 6, Color B
Repeat Round 4. (84 dc, 21 dc between corners)
Round 7, Color A
Repeat Round 4. (100 dc, 25 dc between corners)
Fasten off.
Blocking: Block each square to 18 x 18 cm without distorting the corner angles. All four squares must match in size. When you look at the right side, you’ll see a large pale center with broad lavender framing and a thin ivory accent stripe.
Join the Body and Make the Base
Creating the Body Ring
Arrange your four squares side by side with all right sides facing up. Sew adjacent vertical edges using Color B through outer loops only. Match the 25 dc between corner spaces, then secure each corner with 2 small stitches.
Join the last square to the first to form a ring. Leave the top and bottom open.
When you lay the ring flat, center one square on the front. The seams will sit near the curved side edges.
Oval Base Round 1, Color A
Switch to your smaller hook. Ch 22.
Sc in second ch from hook, sc in next 19 ch, work 3 sc in the last ch. Rotate to work along the underside: sc in next 19 ch, work 2 sc in last ch beside first sc. (44 sts)
Work continuous rounds from here. Place a marker in your first st.
You now have 19 straight stitches on each side and 3 turning stitches at each end.
Round 2
Work 2 sc in first st, sc in next 19 sts, inc in each of next 3 sts, sc in next 19 sts, inc in each of last 2 sts. (50 sts)
Round 3
(Sc, inc), sc 19, (sc, inc) 3 times, sc 19, (sc, inc) twice. (56 sts)
Rounds 4 through 9
Follow this formula for each round: Round n uses (sc in next n-2 sts, inc) once, sc 19, (sc in next n-2 sts, inc) 3 times, sc 19, (sc in next n-2 sts, inc) twice.
For Round 9, you’ll work 7 sc before each increase.
Stitch counts by round: Round 4 = 62 sts, Round 5 = 68 sts, Round 6 = 74 sts, Round 7 = 80 sts, Round 8 = 86 sts, Round 9 = 92 sts.
Rounds 10 through 18
Continue the same oval formula. Round 10 uses 8 sc before each increase. Round 18 uses 16 sc before each increase.
Keep the 19-stitch straight sections aligned from round to round.
Stitch counts: Round 10 = 98 sts, Round 11 = 104 sts, Round 12 = 110 sts, Round 13 = 116 sts, Round 14 = 122 sts, Round 15 = 128 sts, Round 16 = 134 sts, Round 17 = 140 sts, Round 18 = 146 sts.
Fit the Base and Finish the Bands
Base Fit Check
Your final base has 146 stitches, which equals about 73 cm perimeter at gauge. Measure it against the 72 cm blocked square ring. You’ll ease about 1 cm during sewing.
If your base is more than 2 cm too large or too small, adjust your hook size and remake the final rounds. Don’t force folds into the join.
Base Wall
Work 1 round of sc in back loops only. (146 sts)
Then work 4 rounds of sc in both loops. (146 sts each round)
This creates a structured rim rising from the oval. Sl st to join, fasten off with a long sewing tail.
Lower Body Border, Color B
Join Color B at one lower square corner. Around each square bottom, work 1 sc in each of its 25 dc and 2 sc in each corner space. That gives you 29 sc per square, 116 total.
At shared seam corners, each square contributes its own 2 sc. Join.
Ch 1 and work a second round of 116 sc. Join and fasten off.
Joining the Base to the Body
Quarter-mark both the base and body. Match your markers and sew with Color A through both layers using small whipstitches.
Each quarter matches 29 body sts to either 36 or 37 base sts. Make 2 base attachments to one body st at 7 or 8 evenly spaced positions in that quarter. Do not skip body stitches.
The different stitch densities are intentional. The measured circumferences must match.
Top Band Round 1, Color B
Work 116 sc around the top exactly as you did at the lower body edge. Join.
Use the larger hook if this round contracts the squares.
Top Band Round 2, Color A
Ch 1. Distribute 28 increases by repeating (sc 3, inc) 28 times, then sc 4. (144 sts)
This provides the stitch count for the smaller hook and dense band. Switch to the smaller hook after this round.
Top Band Rounds 3 through 8
Sc in each stitch, joining every round. (144 sts per round)
Finish with one loose sl st round.
The opening should remain about 72 cm around, without flaring or cinching. If your gauge differs, recalculate the top band target from circumference x sc per cm and distribute increases evenly.
Straps, Tassels, and Optional Lining
Two Straps, Color A
With the smaller hook, ch 7.
Row 1: Sc in second ch from hook and next 5. (6 sts)
Ch 1, turn. Repeat rows of 6 sc until your strip measures 60 cm. Make two.
Fold each strip lengthwise and whipstitch the long edges together for a thick narrow strap. Leave 4 cm flat at both ends for sewing.
For less stretch, enclose cotton webbing inside before seaming.
Attaching the Handles
Lay your bag flat with the front motif centered. Mark two attachment points on the front about 8 cm apart, and matching points on the back.
Sew each flat strap end 4 cm down inside the top band using a rectangle and diagonal cross pattern. Sew through several rows, not only the top loops.
Both handles must have the same drop. Pull gently to check the attachment before adding weight.
Two Tassels, Color A
Wrap yarn 35 times around a 10 cm piece of cardboard. Tie a doubled 20 cm strand through the top. Cut the bottom loops, then bind firmly 1.5 cm below the top and trim ends even.
Attach one tassel to each side seam just below the top band. Weave attachment tails deeply through at least 3 cm of fabric.
Optional Cotton Lining
Measure your actual inside width and height. Cut two fabric rectangles to measured flat width plus 2 cm and height plus 2 cm.
Sew sides and bottom with 1 cm seam allowances. Box the lower corners to match your measured base depth.
Turn the upper edge under 1 cm, press, and hand sew just below the top band, catching yarn on the inside only. Keep the lining slightly roomy and place handle reinforcing ends between the lining and crochet.
Finishing and Testing Your Tote
Weave all yarn ends through several directions so they stay secure. Support the base while shaping and dry flat after any wet blocking.
Test with a light load first, checking your base seam and strap attachment. Cotton stretches over time, so add the lining and reinforced straps before carrying heavier items.
Record your final size, yarn usage, and any gauge changes after making the complete sample. This information will help you if you want to make another one or adjust the size.
Tips for Success with This Crochet Tote Pattern
Blocking is essential. Your squares need to match exactly, so take the time to wet block or steam block each one to 18 x 18 cm.
Don’t skip the gauge swatch. The math for the base and body connection only works if your gauge matches. A few minutes spent swatching saves hours of frustration.
Consider the lining. Cotton crochet stretches and can show wear over time. A simple cotton lining protects your work and keeps small items from poking through.
Reinforce those straps. The cotton webbing option isn’t just for looks. It prevents the straps from stretching out under the weight of your belongings.
I really hope you enjoy making this Lavender Diamond Granny Tote as much as I enjoyed putting this pattern together for you. If you make one, I’d absolutely love to see it! Tag me on Instagram or share a photo in our Facebook group.
If this pattern caught your eye, go ahead and pin it to your Pinterest boards so you can find it when you’re ready to start. And please drop a comment below if you give it a try. I always love hearing how your projects turn out!
Want a Quick & Easy Printable Version?
Get a clean, beautifully formatted PDF of this pattern — easy to follow step by step, ready to print or save on any device. No scrolling, no distractions, just the pattern.
Get the Printable PDF →You Might Also Like
- Cherry Blossom Butterfly Garden Charm Free Crochet Pattern
- Ocean Wave Teal Bikini Set Free Crochet Pattern
- Lemon Blossom Baby Dress Free Crochet Pattern
- Sunset Hibiscus Anklet Crochet Pattern
