
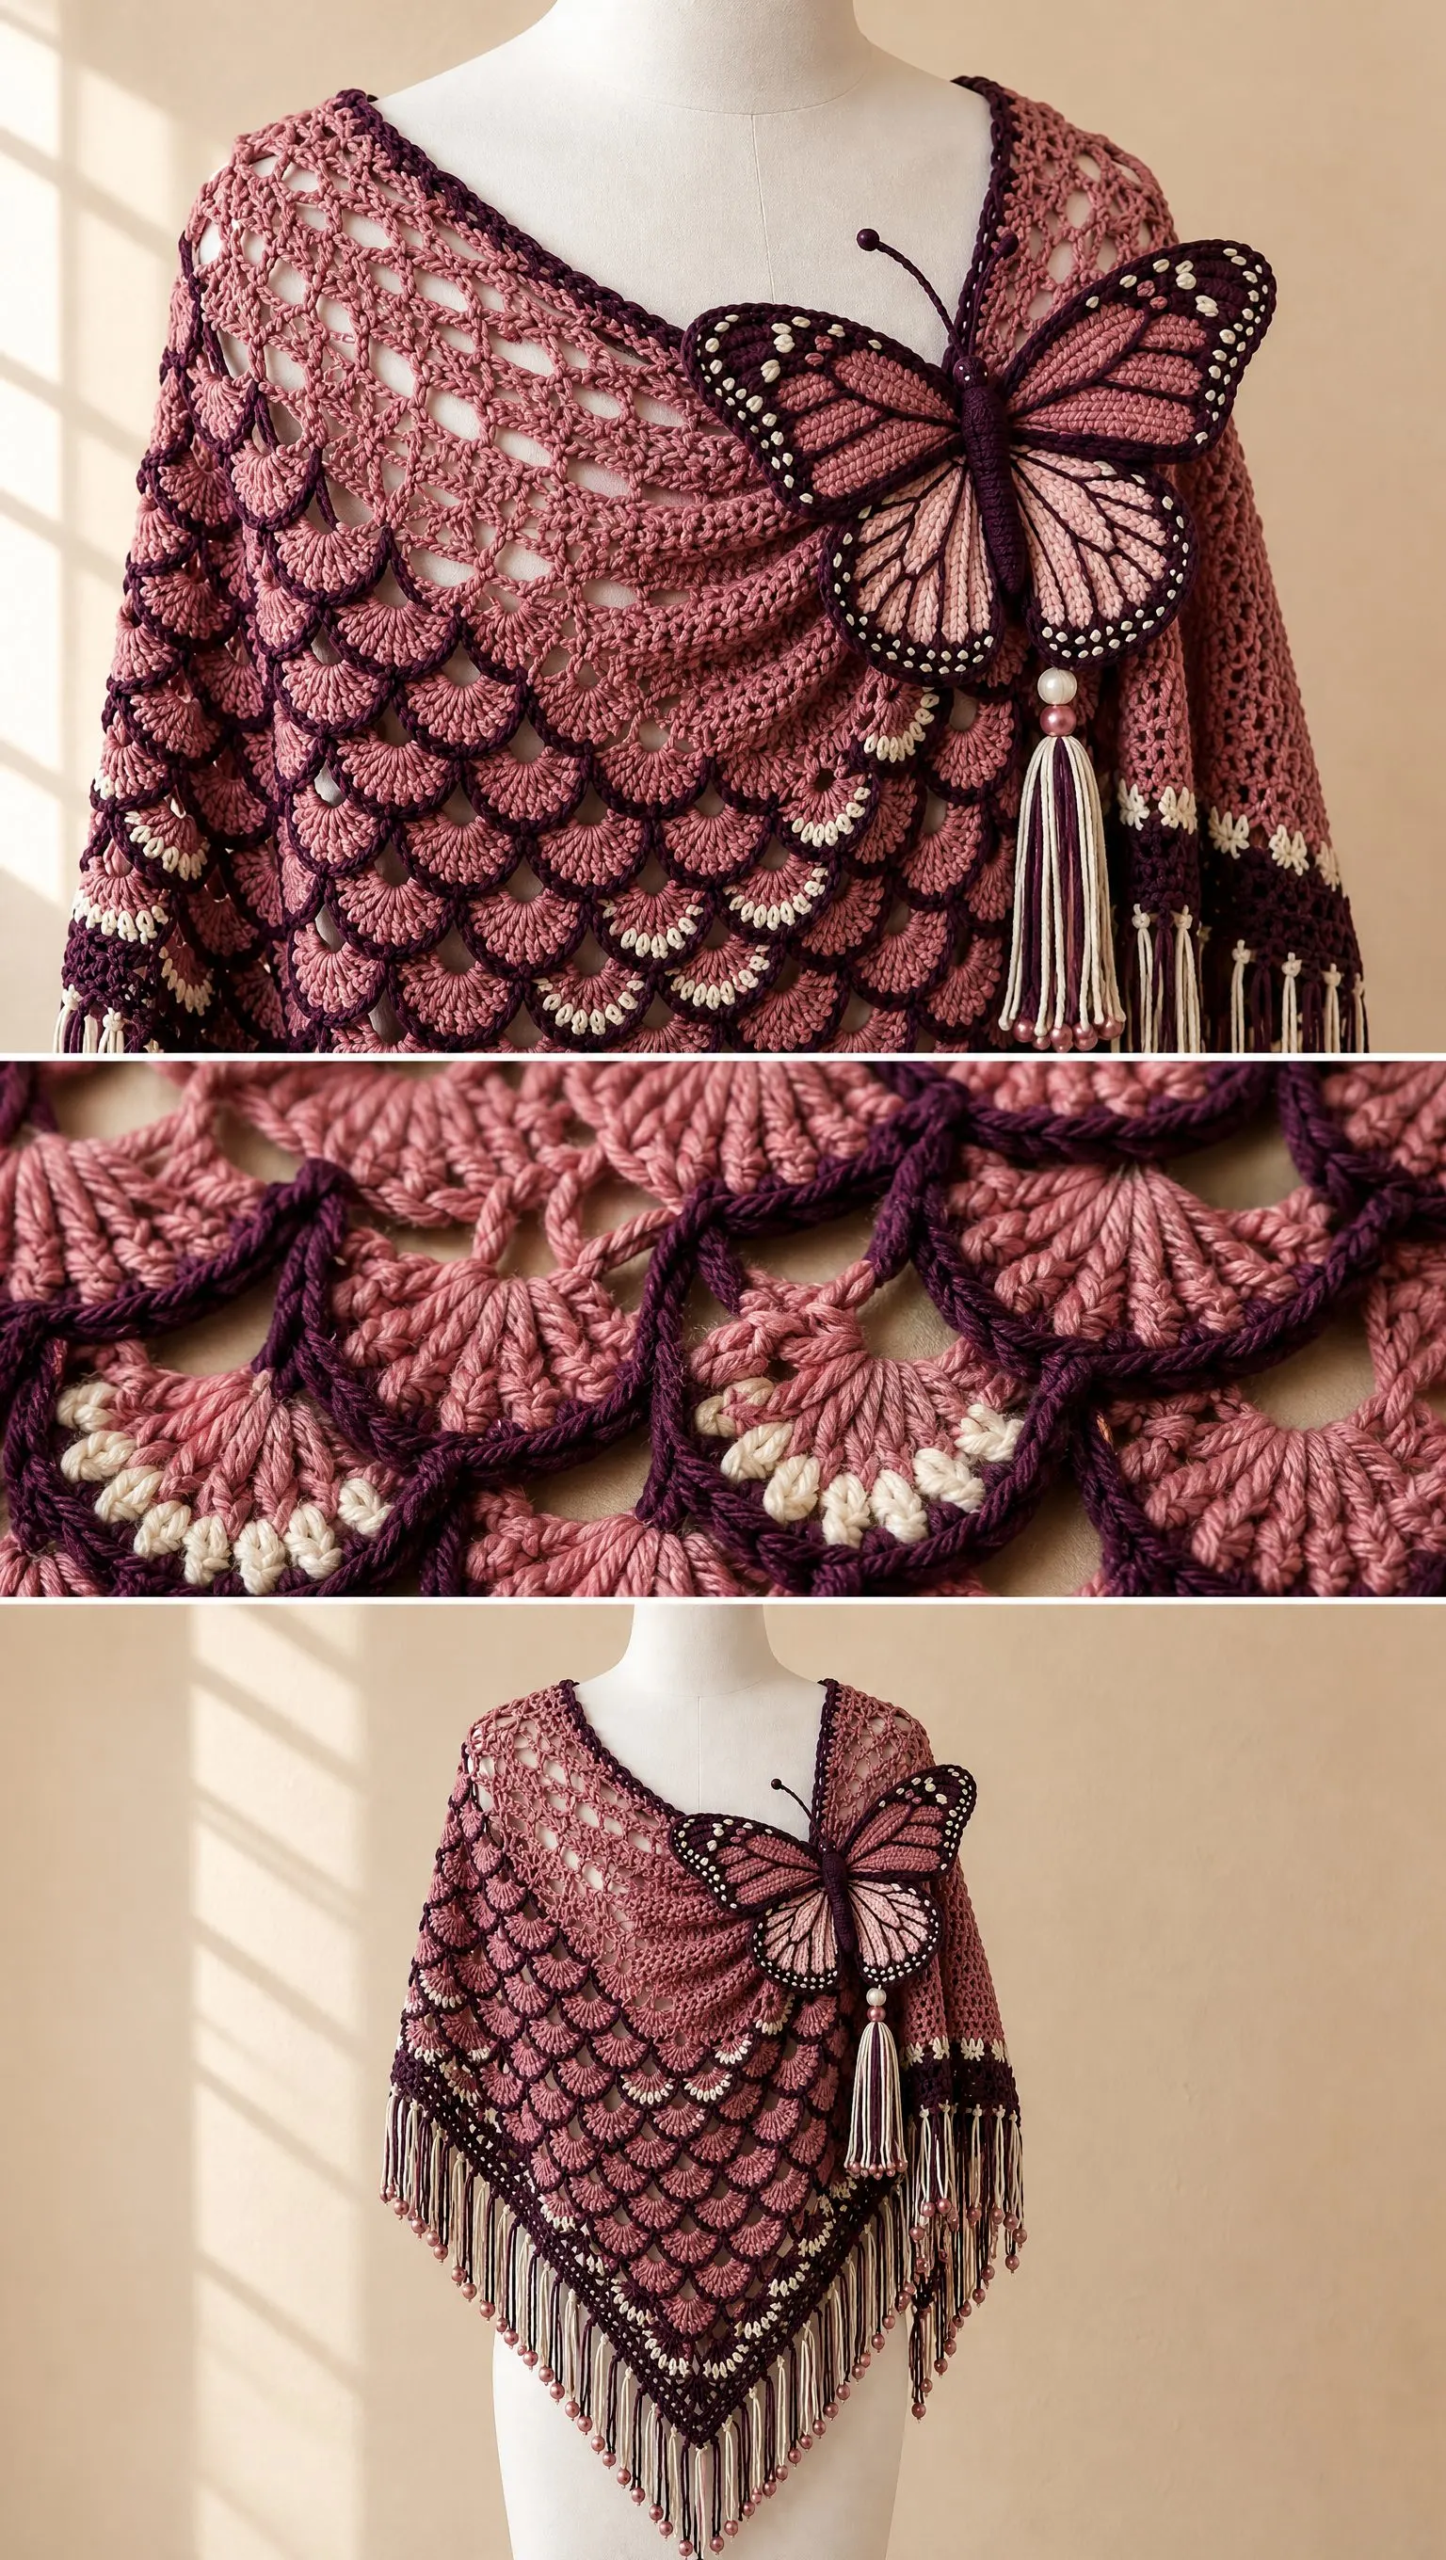
When I sat down to design this shawl, I had one vision in my head: a wearable piece of art that feels like wrapping yourself in a rose garden at twilight. I wanted overlapping shell fans that cascade like petals, a butterfly appliqué that looks intricate but comes together in four simple pieces, and colors that shift from dusty rose to deep plum with cream accents catching the light.
Get the Ad-Free PDF Pattern
You can find the free pattern below, or you can purchase the ad-free printable PDF from my shop.
Get the Printable PDF →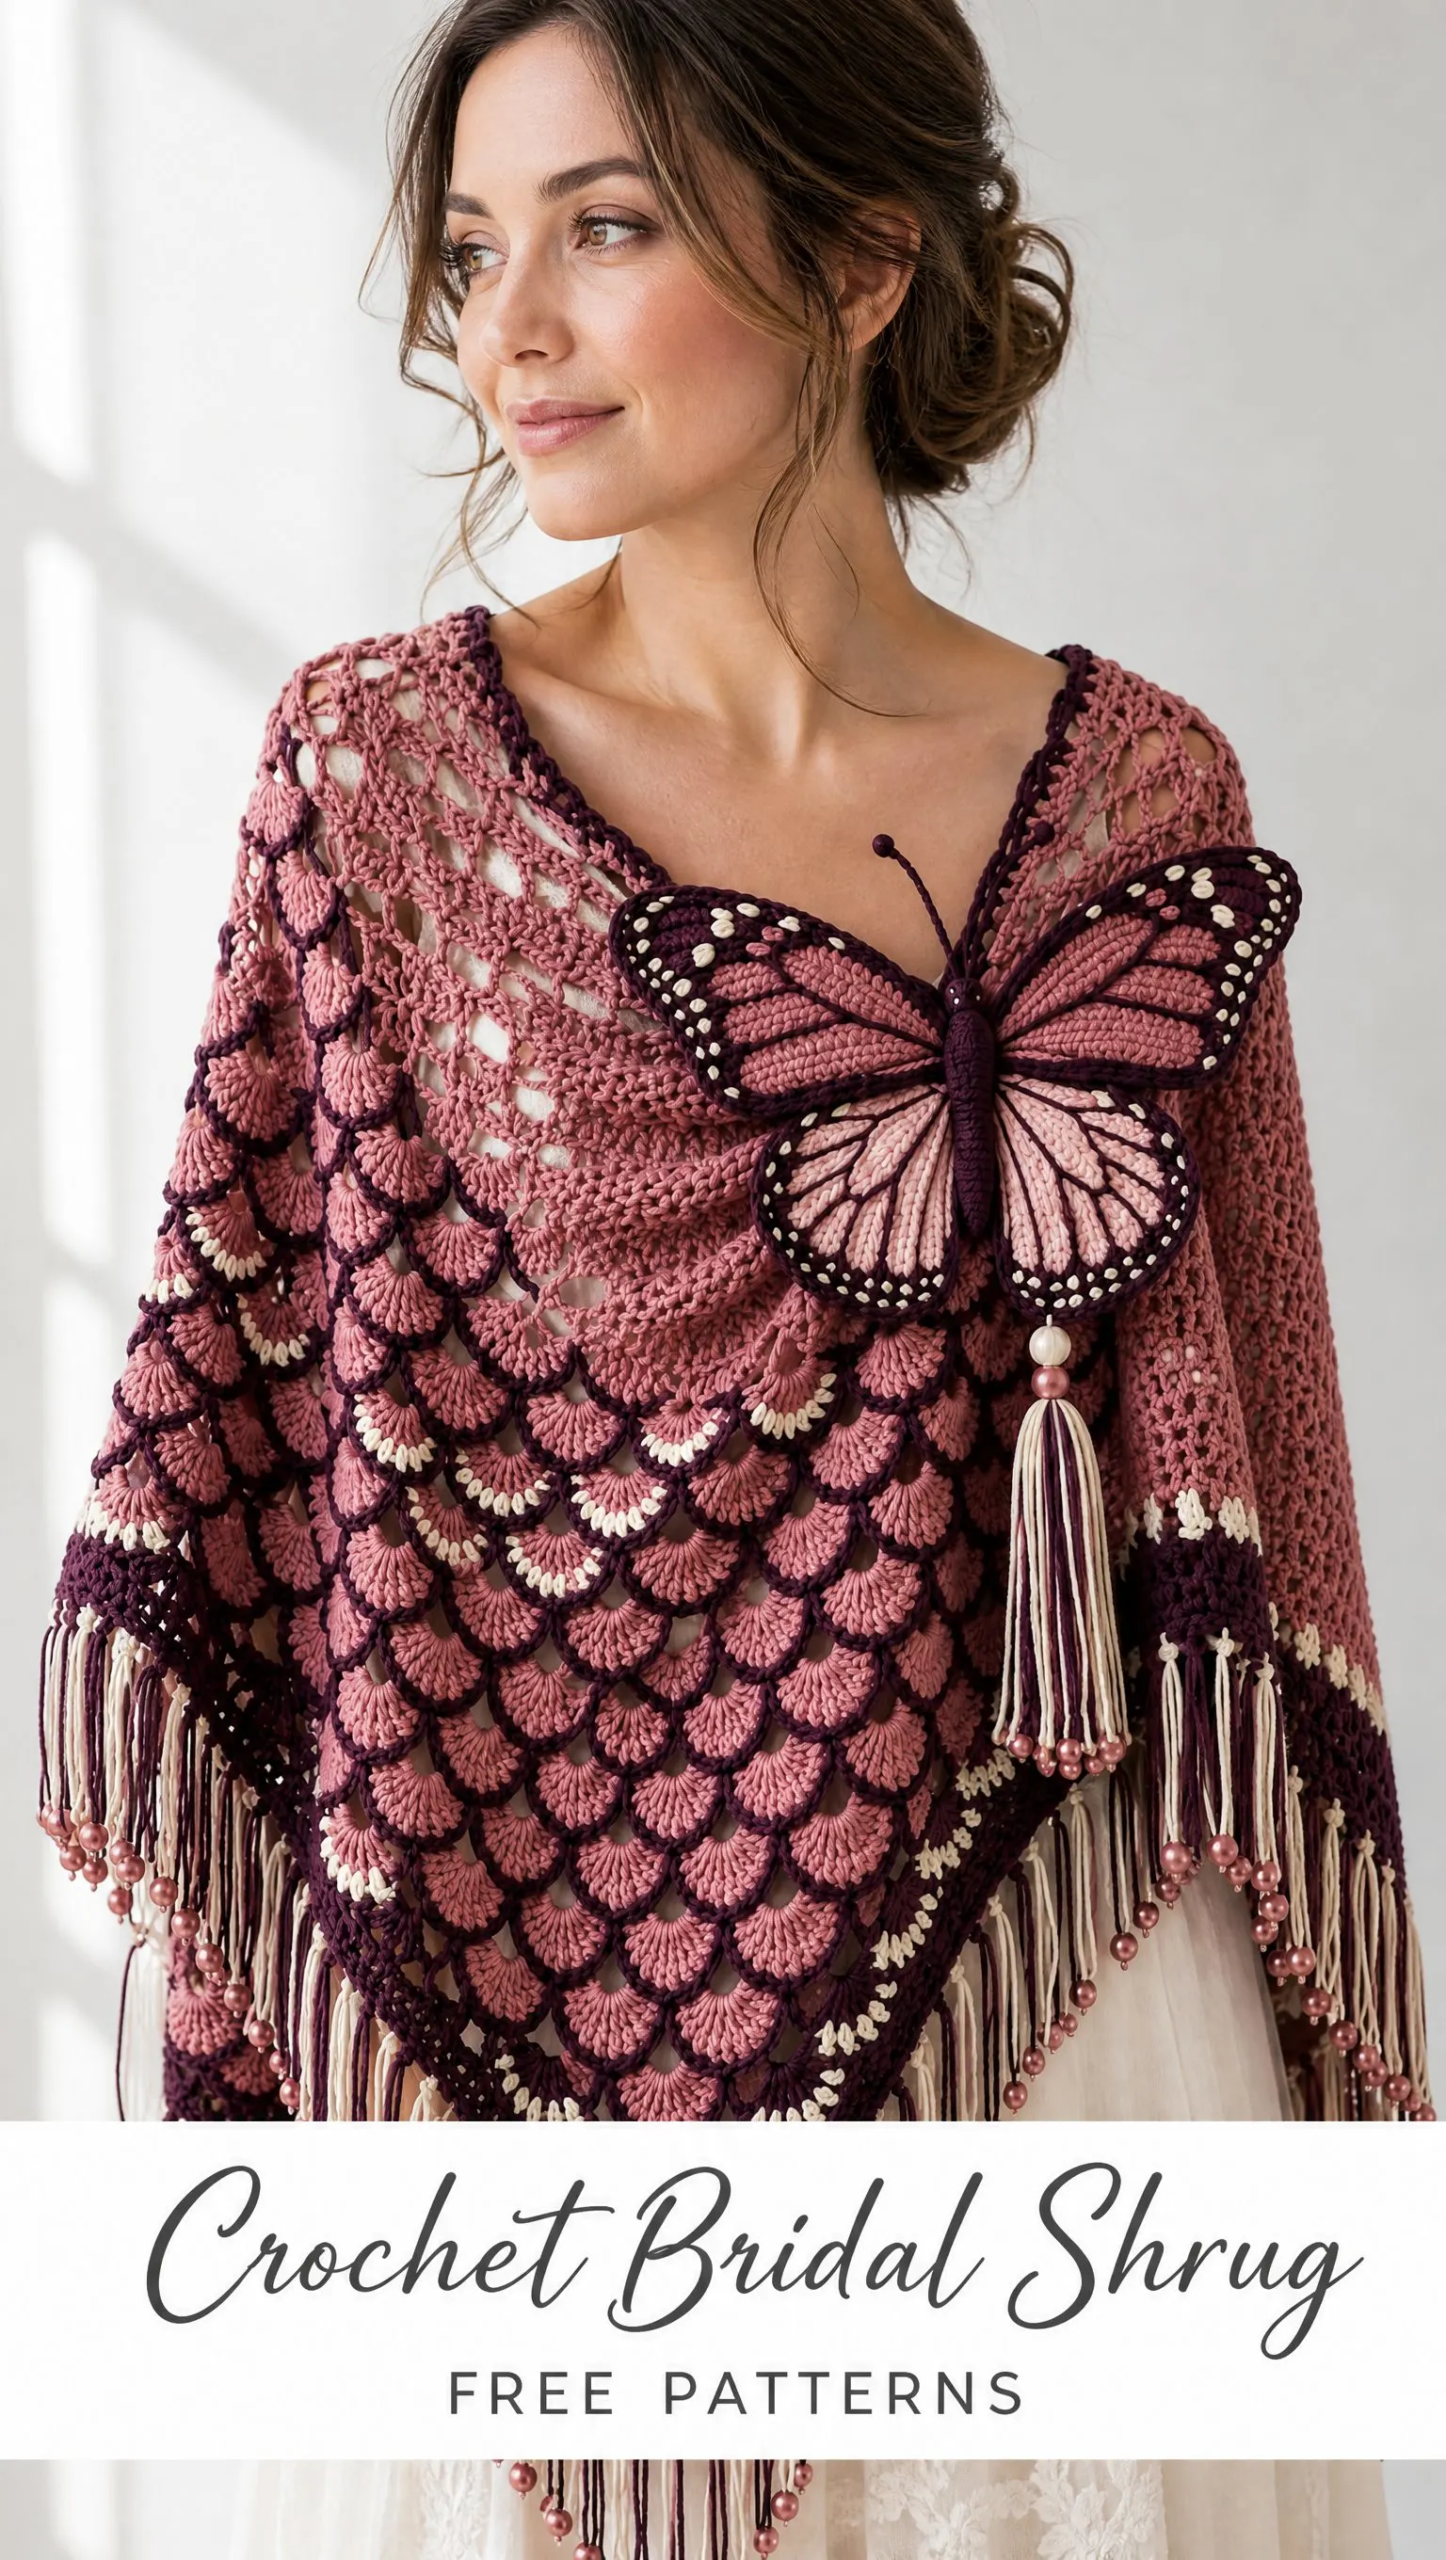
I am SO thrilled with how this turned out. The cluster lace foundation grows predictably with a clean formula you can check at every tenth row. The raised fans add texture and drama without complicated colorwork. And that butterfly? It looks far more advanced than it actually is.
This shawl sits at the intermediate to advanced level, but if you have made a granny triangle and worked surface slip stitches before, you have got all the skills you need. Let me walk you through every single step.
About This Pattern
The Rose Garden Butterfly Shawl is a triangular cluster lace shawl with applied shell fans, a four piece crocheted butterfly, contrast outlines, and beaded fringe. You work the triangle foundation from the top down, then add raised fans in alternating rows to create those gorgeous overlapping scales you see in the photos.
The finished size targets approximately 150 to 160 cm wingspan by 75 to 80 cm center depth, plus 15 cm of fringe. That gives you a generous wrap that drapes beautifully over your shoulders.
This is a reconstructed design with physical sample testing pending. I recommend making a complete sample and checking your gauge before diving into the full project.
Materials You Will Need
Yarn: Fingering or light sport weight yarn with good drape in four colors.
| Color | Name | Yardage |
|---|---|---|
| A | Dusty Rose | 1,200 m |
| B | Deep Plum | 550 m |
| C | Blush Pink | 80 m |
| D | Cream | 200 m |
Allow 15% extra for gauge variation. Better to have too much than run short on your main color.
Hooks:
Notions:
If beads are not your thing or you cannot find ones with suitable holes, yarn knots work just as well for weighting the fringe.
Gauge
Block a 10 row practice triangle. The long edge should measure about 38 to 40 cm. If your triangle is larger, try a smaller hook. If it is smaller, go up a hook size. Use the same hook for the entire shawl body once you have matched gauge.
These measurements are targets, not tested sample measurements. Your yarn choice and tension will affect the final size.
Abbreviations and Stitch Definitions
Before we begin, let me define every abbreviation you will see in this pattern.
Important: Turning chains do not count as a stitch unless a step explicitly says they do.
Section 02: Triangle Foundation
This section builds the entire base of your shawl. You will work flat and turn each row. In this section only, ch 3 counts as the first dc.
Place a removable marker in the center ch 2 space. This marked space forms the lower point of your triangle. The two ends form the straight neck edge.
Row 1 (Color A)
Make an adjustable ring. Ch 3, 2 dc, ch 2, 3 dc into ring. Tighten the ring. Turn.
Count: 2 clusters / 6 dc / 1 center space
Row 2
Ch 3, 2 dc in first st, ch 1. Work (3 dc, ch 2, 3 dc) in center space. Ch 1, 3 dc in last st (this is the top of turning ch). Turn.
Count: 4 clusters / 12 dc / 2 side ch 1 spaces
Row 3
Ch 3, 2 dc in first st, ch 1. Work 3 dc in the side ch 1 sp, ch 1. Work (3 dc, ch 2, 3 dc) in center. Ch 1, 3 dc in next side ch 1 sp, ch 1. Work 3 dc in last st. Turn.
Count: 6 clusters / 18 dc / 4 side ch 1 spaces
Rows 4 through 40
Repeat this pattern for every remaining row:
Ch 3, 2 dc in first st, ch 1. Work 3 dc in every side ch 1 space, with ch 1 between clusters and before the center. In center work (3 dc, ch 2, 3 dc). Ch 1, then 3 dc in each remaining side space, separating clusters with ch 1. Ch 1, 3 dc in last st. Turn.
Keep all rows in Color A.
Count Check Formula
At any row n, you should have:
Use this to verify your work:
Stop at row 40. Fasten off.
Tip: Do not mistake the turning chain for a side space. This is the most common counting error.
Section 03: Raised Fans and Edging
This is where your shawl transforms from a simple triangle into those stunning overlapping scales.
Fan Placement
Lay your shawl RS up with the neck edge horizontal. You will apply fans to rows 12, 14, 16, and every second row through row 38.
Use the ch 1 spaces of each selected row. The fan top lies over the row above, creating shallow overlapping scales. This adds substantial weight to your shawl, so check the drape after completing two fan rows. If it feels too heavy, you may want to use a lighter yarn.
Working One Fan Row (Color A)
Join A with sl st to the middle dc of the outermost cluster. Work 5 dc into the next ch 1 space, then sl st into middle dc of next cluster. Repeat to center.
Fasten off before the center ch 2 space. Repeat separately on the other half.
Each half has n minus 1 fans on row n. Do not work fans into the center space.
Fan Outlines (Color B)
For each fan row, join B at its first anchor. Sl st loosely through the top of each of the 5 fan dc, then sl st in anchor. Repeat along the fans.
Keep the strand loose enough that the shawl stays flat. Fasten at each center and end.
Color accent: On fan rows 16, 24, and 32, use D (cream) for the middle 3 sl sts of alternate fans. This creates those beautiful cream highlights you see scattered through the finished piece.
Outer Border Round 1 (Color B)
Join at a neck corner. Along the two sloping edges (the outermost row 40), sc in each dc and each ch 1 space. Work (sc, ch 2, sc) in the center point.
At the far neck corner, ch 1, then work about 2 sc into each dc row end along the straight neck edge. Ease the count to avoid rippling. Join to first sc.
Border Round 2
Ch 1, sc in first st. Along each slope repeat: ch 3, skip 2 sc, sc in next sc.
If 1 or 2 stitches remain at a corner, skip those together. Work (sc, ch 3, sc) into point. Work 1 sc per sc along neck edge.
Join and fasten off.
Important: The scallops must lie flat. Adjust only the final skip at each corner, not the body counts.
Section 04: Butterfly Pieces
The butterfly is made in four separate pieces plus a body, then assembled and attached to the shawl. Use your 3 mm hook for all butterfly pieces.
Upper Wings (Make 2 in Color A)
Ch 3.
Row 1: Sc in second ch and next ch. (2 sts)
Ch 1 and turn each row. The turning ch never counts.
Rows 2 through 10: 2 sc in first st, sc to last st, 2 sc in last st. You increase 2 each row. Row 10 should have 20 sts.
Rows 11 through 14: Sc across. (20 sts)
Rows 15 through 18: Sc2tog, sc to last 2, sc2tog. You will have 18, then 16, then 14, then 12 sts.
Fasten off. The narrow starting end joins the body.
Lower Wings (Make 2 in Color C)
Ch 7.
Round 1: 2 sc in second ch, sc in next 4, 3 sc in last ch. Work down underside: sc in next 4, sc in last ch beside starting increase. (14 sts)
Mark first st and work continuously in rounds.
Round 2: 2 sc in each of first 2 sts, sc 4, 2 sc in each of next 3, sc 4, 2 sc in last st. (20 sts)
Round 3: (Sc, inc) twice, sc 4, (sc, inc) three times, sc 4, sc, inc. (26 sts)
Round 4: (2 sc, inc) twice, sc 4, (2 sc, inc) three times, sc 4, 2 sc, inc. (32 sts)
Sl st next st, fasten off.
Outline and Veins (Colors B and D)
Sc evenly around each wing in B, using 1 sc per stitch and about 1 per sc row end. Add 1 extra sc at any corner that curls.
Embroider 4 radiating B lines from each narrow base toward the outer edge, using short backstitches without pulling tight.
Add evenly spaced D French knots or tiny straight stitches inside the dark outline.
Body (Color B)
Ch 25. Sc in second ch and each remaining ch. (24 sts)
Work 3 more rows of 24 sc, turning with ch 1.
Fold lengthwise and whipstitch long edges, lightly stuffing with yarn ends if desired.
Sew the two upper wings to the upper two thirds and lower wings to lower third. Set wings at slightly upward angles.
Stitch ch 12 antennae to top. Knot ends. Avoid wire.
Section 05: Assembly and Finishing
Attaching the Butterfly
Block wing pieces lightly. Pin arrangement first, then sew body and wing bases to the upper right chest area.
Add small stabilizing tacks halfway along each wing if it flops. Keep needlework on the fabric surface and do not catch unrelated layers.
A finished wingspan around 25 to 30 cm is a useful target. Adjust hook or yarn only after making a trial wing.
Fringe
Cut 32 cm strands in B and D.
Fold 2 strands together. Pull fold through one border ch 3 loop, then pass tails through fold and snug.
Repeat in every second border loop along the two slopes, alternating color pairs.
If adding beads, thread one onto each selected tail and secure with a double knot.
Trim to an even 15 cm after blocking.
Butterfly Tassel
Wrap B and D together 20 times around a 16 cm card. Tie top firmly. Cut bottom.
Bind 1 cm below top and sew under the butterfly body. Add optional bead only if attachment is secure.
Keep tassel removable for washing.
Blocking and Care
Soak according to yarn label. Support all the weight when lifting. Press between towels and pin the triangle evenly.
Keep butterfly raised on a folded towel while drying. Never hang the wet shawl.
Hand wash gently if compatible with yarn. Dry flat.
Fit and Troubleshooting Tips
Smaller shawl: Stop at an even row and omit fan rows beyond it. Keep the same count formula.
Cupping: Increase hook size or loosen surface outlines.
Ruffling: Remove excess border stitches.
Heavy butterfly: Use lighter yarn or tack wing edges in more places.
Confirm gauge, drape, bead security, and neck comfort on the completed sample.
Final Thoughts on the Rose Garden Butterfly Shawl
This crochet pattern brings together so many techniques I love: the meditative rhythm of cluster rows, the satisfaction of watching fans transform a flat triangle into dimensional texture, and the joy of creating a statement butterfly that makes everyone ask "did you really make that yourself?"
Yes. Yes you did.
The pattern looks complex in photos, but every element breaks down into basic stitches. Double crochets. Single crochets. Slip stitches. Chains. That is truly all you need.
Take your time with the foundation triangle. Check your counts at rows 10, 20, and 30. Once you have a solid base, the fans work up faster than you might expect.
I hope you love making this shawl as much as I loved designing it. Wear it to a wedding, wrap it around yourself on a chilly evening, or drape it over your shoulders when you need to feel like the main character in your own story.
If this pattern is calling to you, go ahead and save it to your Pinterest boards so you can find it when you are ready to cast on. And please, if you make your own Rose Garden Butterfly Shawl, leave a comment below or tag me on Instagram. I would absolutely love to see your color choices and your finished butterfly. Happy crocheting!
Want a Quick & Easy Printable Version?
Get a clean, beautifully formatted PDF of this pattern — easy to follow step by step, ready to print or save on any device. No scrolling, no distractions, just the pattern.
Get the Printable PDF →You Might Also Like
- Blush Pink Seahorse Baby Blanket Free Crochet Pattern
- Lavender Garden Toddler Outfit Free Crochet Pattern
- Tropical Hibiscus Mermaid Amigurumi Free Crochet Pattern
- Sage Fern Shoulder Shawl Crochet Pattern
