
This is a plush amigurumi owl designed to hold back your curtains. It uses basic single crochet, increases, decreases, and a few puff stitches for texture. The finished owl stands about 20 cm tall with a 28 cm wingspan.
Get the Ad-Free PDF Pattern
You can find the free pattern below, or you can purchase the ad-free printable PDF from my shop.
Get the Printable PDF →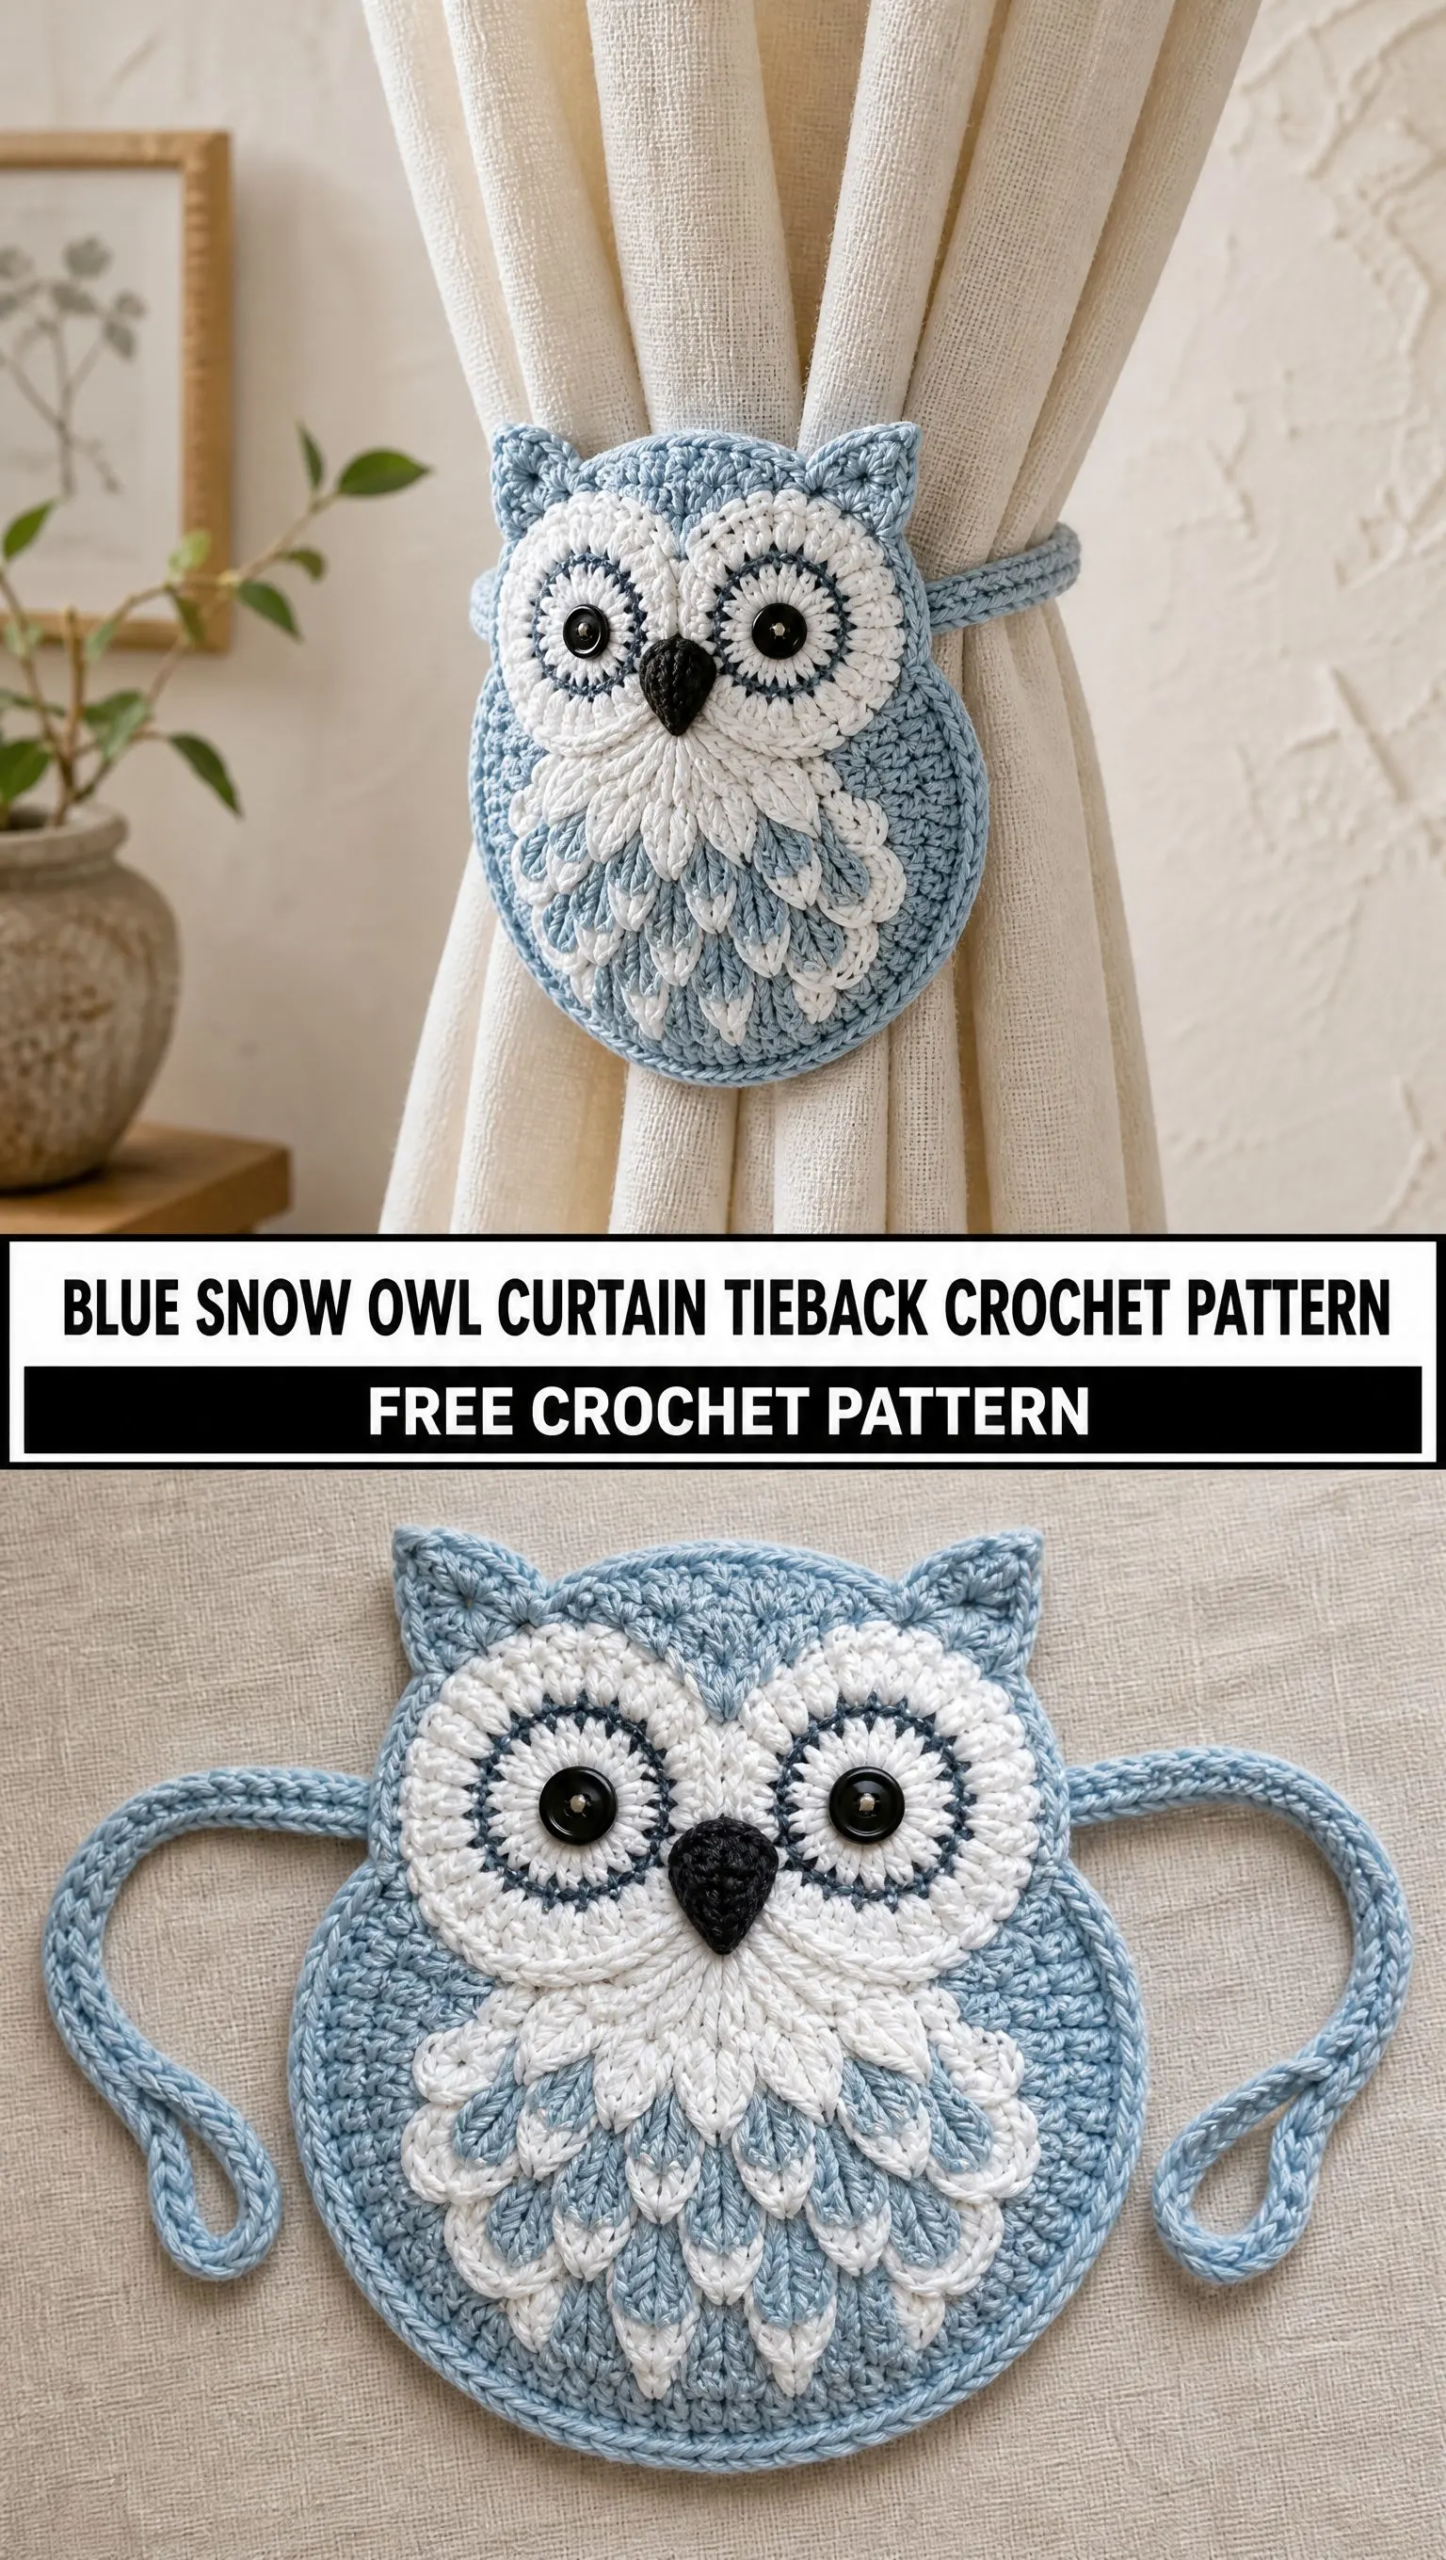
If you love adding handmade touches to your home, this little snow owl brings instant charm to any window. The pale blue and powder white color palette gives it a soft winter woodland feel without being too seasonal.
This pattern is rated intermediate, but confident beginners who have made a few amigurumi projects before will do just fine. Let me walk you through everything you need to know.
Why You Will Love This Blue Snow Owl Curtain Tieback
I adore functional crochet projects that double as decor. This owl tieback checks both boxes beautifully. It holds your curtains in place while looking absolutely adorable perched on your window frame.
The construction is straightforward once you break it down. You are essentially making a stuffed body, two flat facial disks, a tiny beak, two textured wings, and a hidden strap that wraps around your curtain fabric. Each piece is simple on its own. The magic happens when you assemble them together.
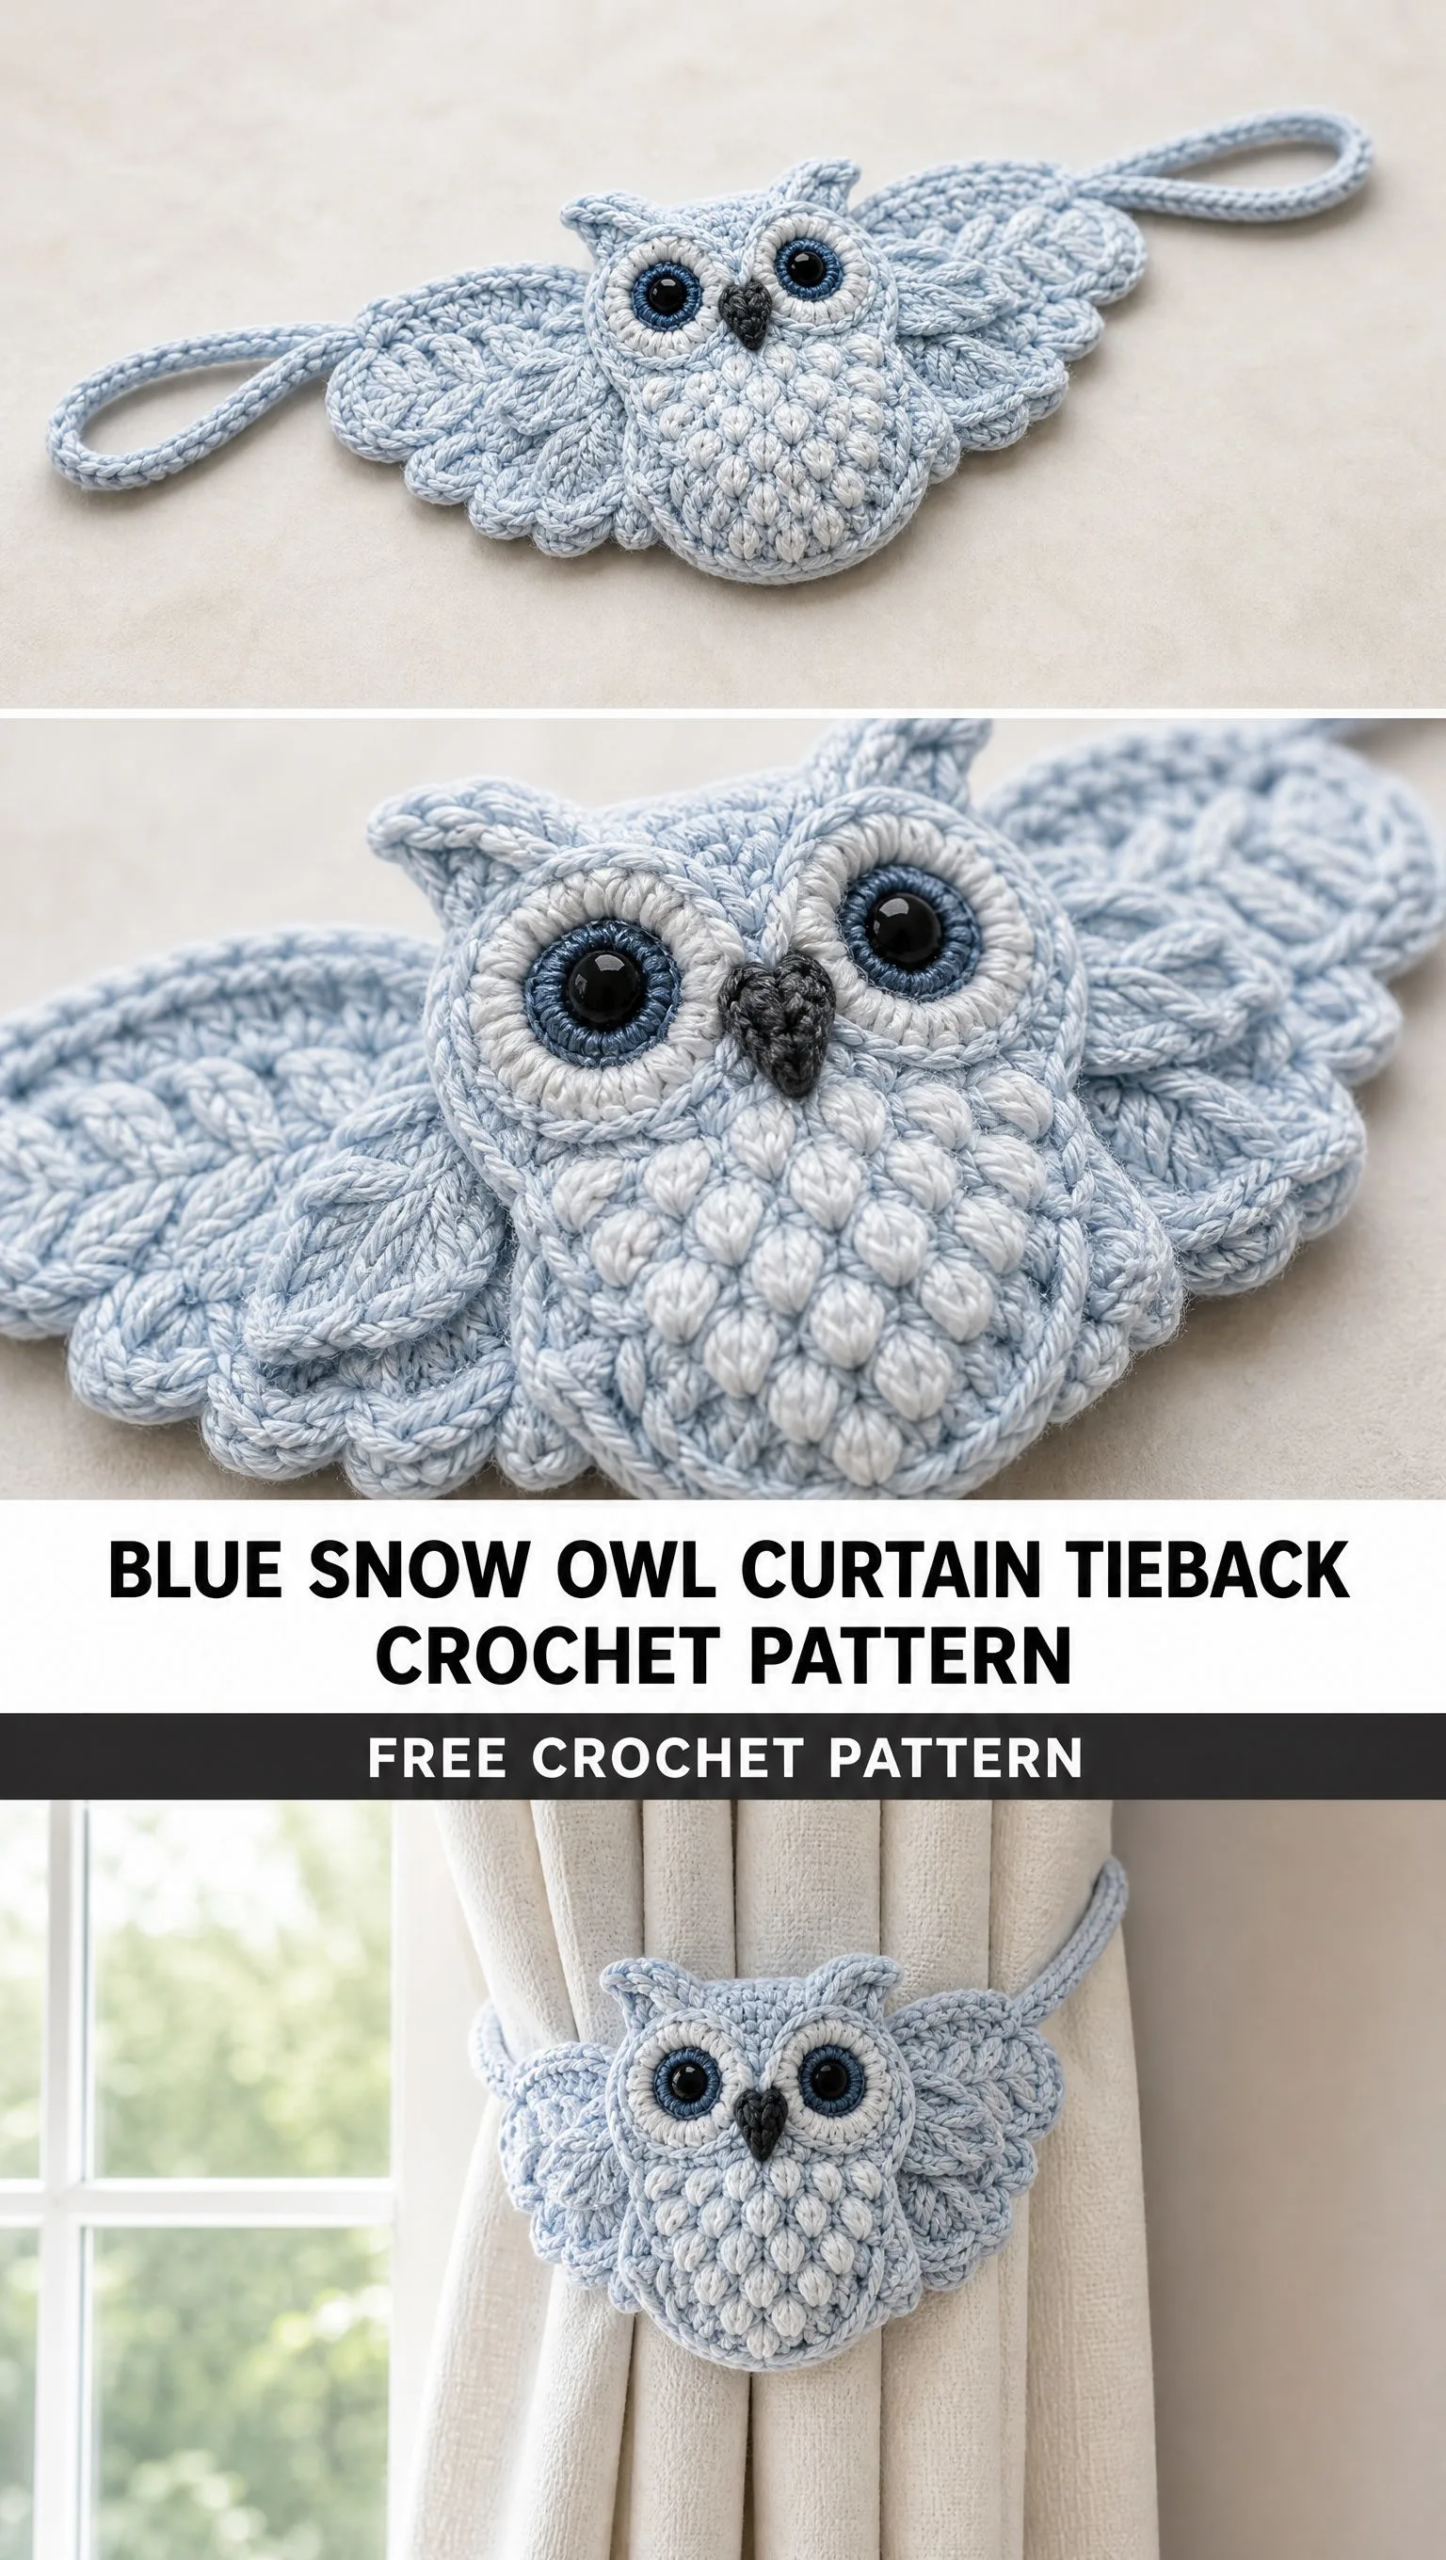
The dimensional feather details on the wings really make this project special. Those little puff stitch clusters and white picot tips create realistic texture that catches the light. Your guests will definitely notice this little guy.
Materials You Will Need
Before you start, gather these supplies. Having everything ready makes the project flow smoothly.
Yarn:
Tools:
A note on gauge: The fabric should be firm enough that stuffing does not show through. If you can see white polyester peeking between your stitches, go down a hook size. This is especially important for amigurumi projects where a tight fabric keeps everything looking clean and professional.
Stitch Abbreviations and Definitions
Let me define every stitch before we begin. Even if you know these well, a quick refresher never hurts.
MR (magic ring): A technique for starting rounds that creates a tight, closed center with no hole. You wrap yarn around your fingers, pull up a loop, and work your first stitches into that adjustable ring.
ch (chain): The foundation stitch. Yarn over, pull through the loop on your hook. One chain made.
sc (single crochet): Insert hook into stitch, yarn over and pull up a loop (two loops on hook), yarn over and pull through both loops. This is your main stitch for this project.
hdc (half double crochet): Yarn over, insert hook into stitch, yarn over and pull up a loop (three loops on hook), yarn over and pull through all three loops.
dc (double crochet): Yarn over, insert hook into stitch, yarn over and pull up a loop, yarn over and pull through two loops, yarn over and pull through remaining two loops.
sl st (slip stitch): Insert hook into stitch, yarn over and pull through both the stitch and the loop on your hook in one motion. Used for joining and creating tiny stitches.
inc (increase): Work two single crochet stitches into the same stitch. This adds one stitch to your count.
dec (decrease): Insert hook into next stitch and pull up a loop, insert hook into following stitch and pull up a loop (three loops on hook), yarn over and pull through all three. This removes one stitch from your count.
puff (puff stitch): A cluster of half double crochets worked into the same stitch that creates a puffy, textured bump. Yarn over, insert hook, pull up a loop, repeat two to three more times in the same stitch, then yarn over and pull through all loops.
st (stitch): A single stitch.
Pattern Overview
The owl is made from six separate components:
1. Plush rounded body
2. Two circular facial disks
3. Embroidered eyes
4. Small beak
5. Two tapered feather wings
6. Rear crocheted curtain closure
You will crochet each piece separately, then assemble them into your finished tieback. I recommend making the body first since it forms the foundation for everything else.
Body Instructions
Using pale blue chunky cotton yarn, create the main body of your owl.
Round 1: Make a magic ring. Crochet 6 single crochet into the ring. (6 sts)
Round 2: Increase in each stitch around. (12 sts)
Round 3: Single crochet in first stitch, increase in next stitch. Repeat around. (18 sts)
Round 4: Single crochet in first 2 stitches, increase in next stitch. Repeat around. (24 sts)
Rounds 5 through 12: Single crochet in each stitch around. (24 sts)
This creates the main body of your owl. You are working in a continuous spiral, so use a stitch marker to track the beginning of each round.
Round 13: Single crochet in first 2 stitches, decrease. Repeat around. (18 sts)
Begin stuffing firmly at this point. You want the body to feel plump and hold its shape well.
Round 14: Single crochet in first stitch, decrease. Repeat around. (12 sts)
Round 15: Decrease around until the opening is closed.
Fasten off and weave in your ends securely. Give the body a gentle squeeze to distribute the stuffing evenly.
Facial Disks Instructions
Make two of these circular pieces using powder white cotton yarn. They form the distinctive owl face.
Round 1: Make a magic ring. Work 6 single crochet into the ring. (6 sts)
Round 2: Increase in each stitch around. (12 sts)
Round 3: Single crochet in first stitch, increase in next stitch. Repeat around. (18 sts)
Round 4: Single crochet in first 2 stitches, increase in next stitch. Repeat around. (24 sts)
Fasten off, leaving a long sewing tail.
Sew the disks symmetrically onto the front of the body. Position them so they slightly overlap in the center, creating that classic owl face shape.
Once attached, use your midnight blue embroidery thread to embroider pupils onto each disk. Add small highlight stitches in white for a realistic snowy owl appearance. A few small straight stitches create a lovely eye effect.
Beak Instructions
Using silver gray yarn, create a tiny triangular beak.
Chain 5.
Row 1: Single crochet across. (4 sts, working into second chain from hook)
Row 2: Decrease at both ends. (2 sts)
Fasten off, leaving a tail. Fold the piece into a small triangle shape. The decreases naturally create a pointed tip.
Sew the beak between the facial disks, positioned just below where they meet in the center.
Wings Instructions
Make two wings using pale blue chunky cotton yarn. Each wing begins separately and gets attached to the side of the owl body.
Row 1: Chain 12.
Row 2: Single crochet across. (11 sts)
Row 3: Turn. Single crochet 10, increase at end. (12 sts)
Row 4: Add puff stitches evenly across the row. These create the feathered texture.
Row 5: Single crochet across.
Repeat rows 3 through 5 while gradually decreasing one stitch on each side until a tapered feather shape forms. This creates the natural wing silhouette.
Feather Detail:
Add alternating solid rows with subtle puff stitch clusters scattered throughout. This builds up that dimensional feathery texture that makes these wings so charming.
White Picot Tips:
Using powder white yarn, finish the outer edge with tiny picot points. Work as follows: single crochet, chain 3, slip stitch into the first chain, single crochet. Repeat along the wing edge. These little white tips mimic the markings on real snowy owl feathers.
Attach the wings so they wrap naturally around where the gathered curtain fabric will sit. Position them with a slight forward angle so they look like they are hugging the curtain.
Curtain Closure Instructions
This hidden strap is what actually holds your curtain. Use sage green yarn or a color that matches your curtains.
Chain 18 to 24 depending on your curtain thickness. Thicker curtains need a longer strap.
Work 2 rows of single crochet to create a sturdy band.
Attach one end behind the owl body, securing it firmly with several stitches. Create a small loop on the opposite side and secure firmly.
The closure should be invisible from the front while being strong enough to hold your curtain fabric in place day after day.
Assembly Steps
Now for the satisfying part. Putting your owl together.
1. Shape the stuffed body, making sure it sits nicely and the stuffing is evenly distributed.
2. Attach the facial disks to the front, positioning them symmetrically.
3. Add the embroidered pupils with highlight stitches.
4. Sew on the beak between and slightly below the facial disks.
5. Attach wings with slight overlap positioning so they wrap around where the curtain will gather.
6. Add the white feather tip edging to the wings if you have not already.
7. Attach the concealed closure strap to the back.
8. Check all joins and reinforce any spots that feel weak. This is home decor that will be handled regularly, so durability matters.
Finishing Notes and Care Tips
Use tight stitches throughout for durability. This owl will be touched, adjusted, and moved every time someone opens or closes the curtains.
Steam lightly from a distance to shape the wings if needed. Hold your iron several inches away and let the steam relax the fibers. Do not press directly on the crochet.
Avoid loose fibers near children or pets. Make sure all your ends are woven in securely and trimmed close.
Hand wash gently if needed and reshape while drying. Lay flat on a towel and pat the wings and body back into shape before the yarn dries.
Styling Your Blue Snow Owl Curtain Tieback
This little owl creates a soft winter woodland accent with dimensional crochet texture, plush shaping, and detailed feather construction. It works beautifully in nurseries, bedrooms, living rooms, and anywhere you want a touch of whimsy.
Pair two owls on opposite curtain panels for a symmetrical look. Or make one owl and add a coordinating crocheted accent on the other side.
The pale blue and white color scheme works year round, though it feels especially magical during winter months. You could easily adapt the colors to match any room. Imagine a warm rust and cream version for autumn, or soft pink and white for a little girl’s room.
Tips for Intermediate Crocheters
If this is your first amigurumi project with multiple assembled pieces, take your time with the sewing. Use a yarn needle and take small, even stitches. Secure each piece from multiple angles so nothing shifts over time.
The puff stitches on the wings can feel awkward at first. Practice a few on a scrap piece before committing to your wing. Once you get the rhythm of yarn over, pull up a loop, repeat, pull through all, they become almost meditative.
Do not stress about perfect symmetry. Real owls are not perfectly symmetrical either. A little variation adds character and charm.
I hope you absolutely love making this Blue Snow Owl Curtain Tieback crochet pattern. It is such a satisfying project that combines practical function with adorable design. Thank you so much for choosing this pattern.
If you make one, I would love to see it. Tag me on Instagram or share a photo in our Facebook group. Seeing your finished owls perched on windows around the world genuinely makes my day.
Save this pattern to your Pinterest boards so you can find it whenever you are ready to start. And please leave a comment below if you make this sweet little owl. I read every single one and love hearing about your projects.
Want a Quick & Easy Printable Version?
Get a clean, beautifully formatted PDF of this pattern — easy to follow step by step, ready to print or save on any device. No scrolling, no distractions, just the pattern.
Get the Printable PDF →You Might Also Like
- Sunset Orange Boho Crochet Ruffle Set Free Pattern
- Mint Green Shell Stitch Baby Dress Free Crochet Pattern
- Granny Square Patchwork Baby Dress Free Crochet Pattern
- Ocean Blue Seashell Motif Tote Free Crochet Pattern
