
Go dig through your yarn stash right now. I know you have been saving those beautiful blush and berry skeins for something special. This is that project.
Get the Ad-Free PDF Pattern
You can find the free pattern below, or you can purchase the ad-free printable PDF from my shop.
Get the Printable PDF →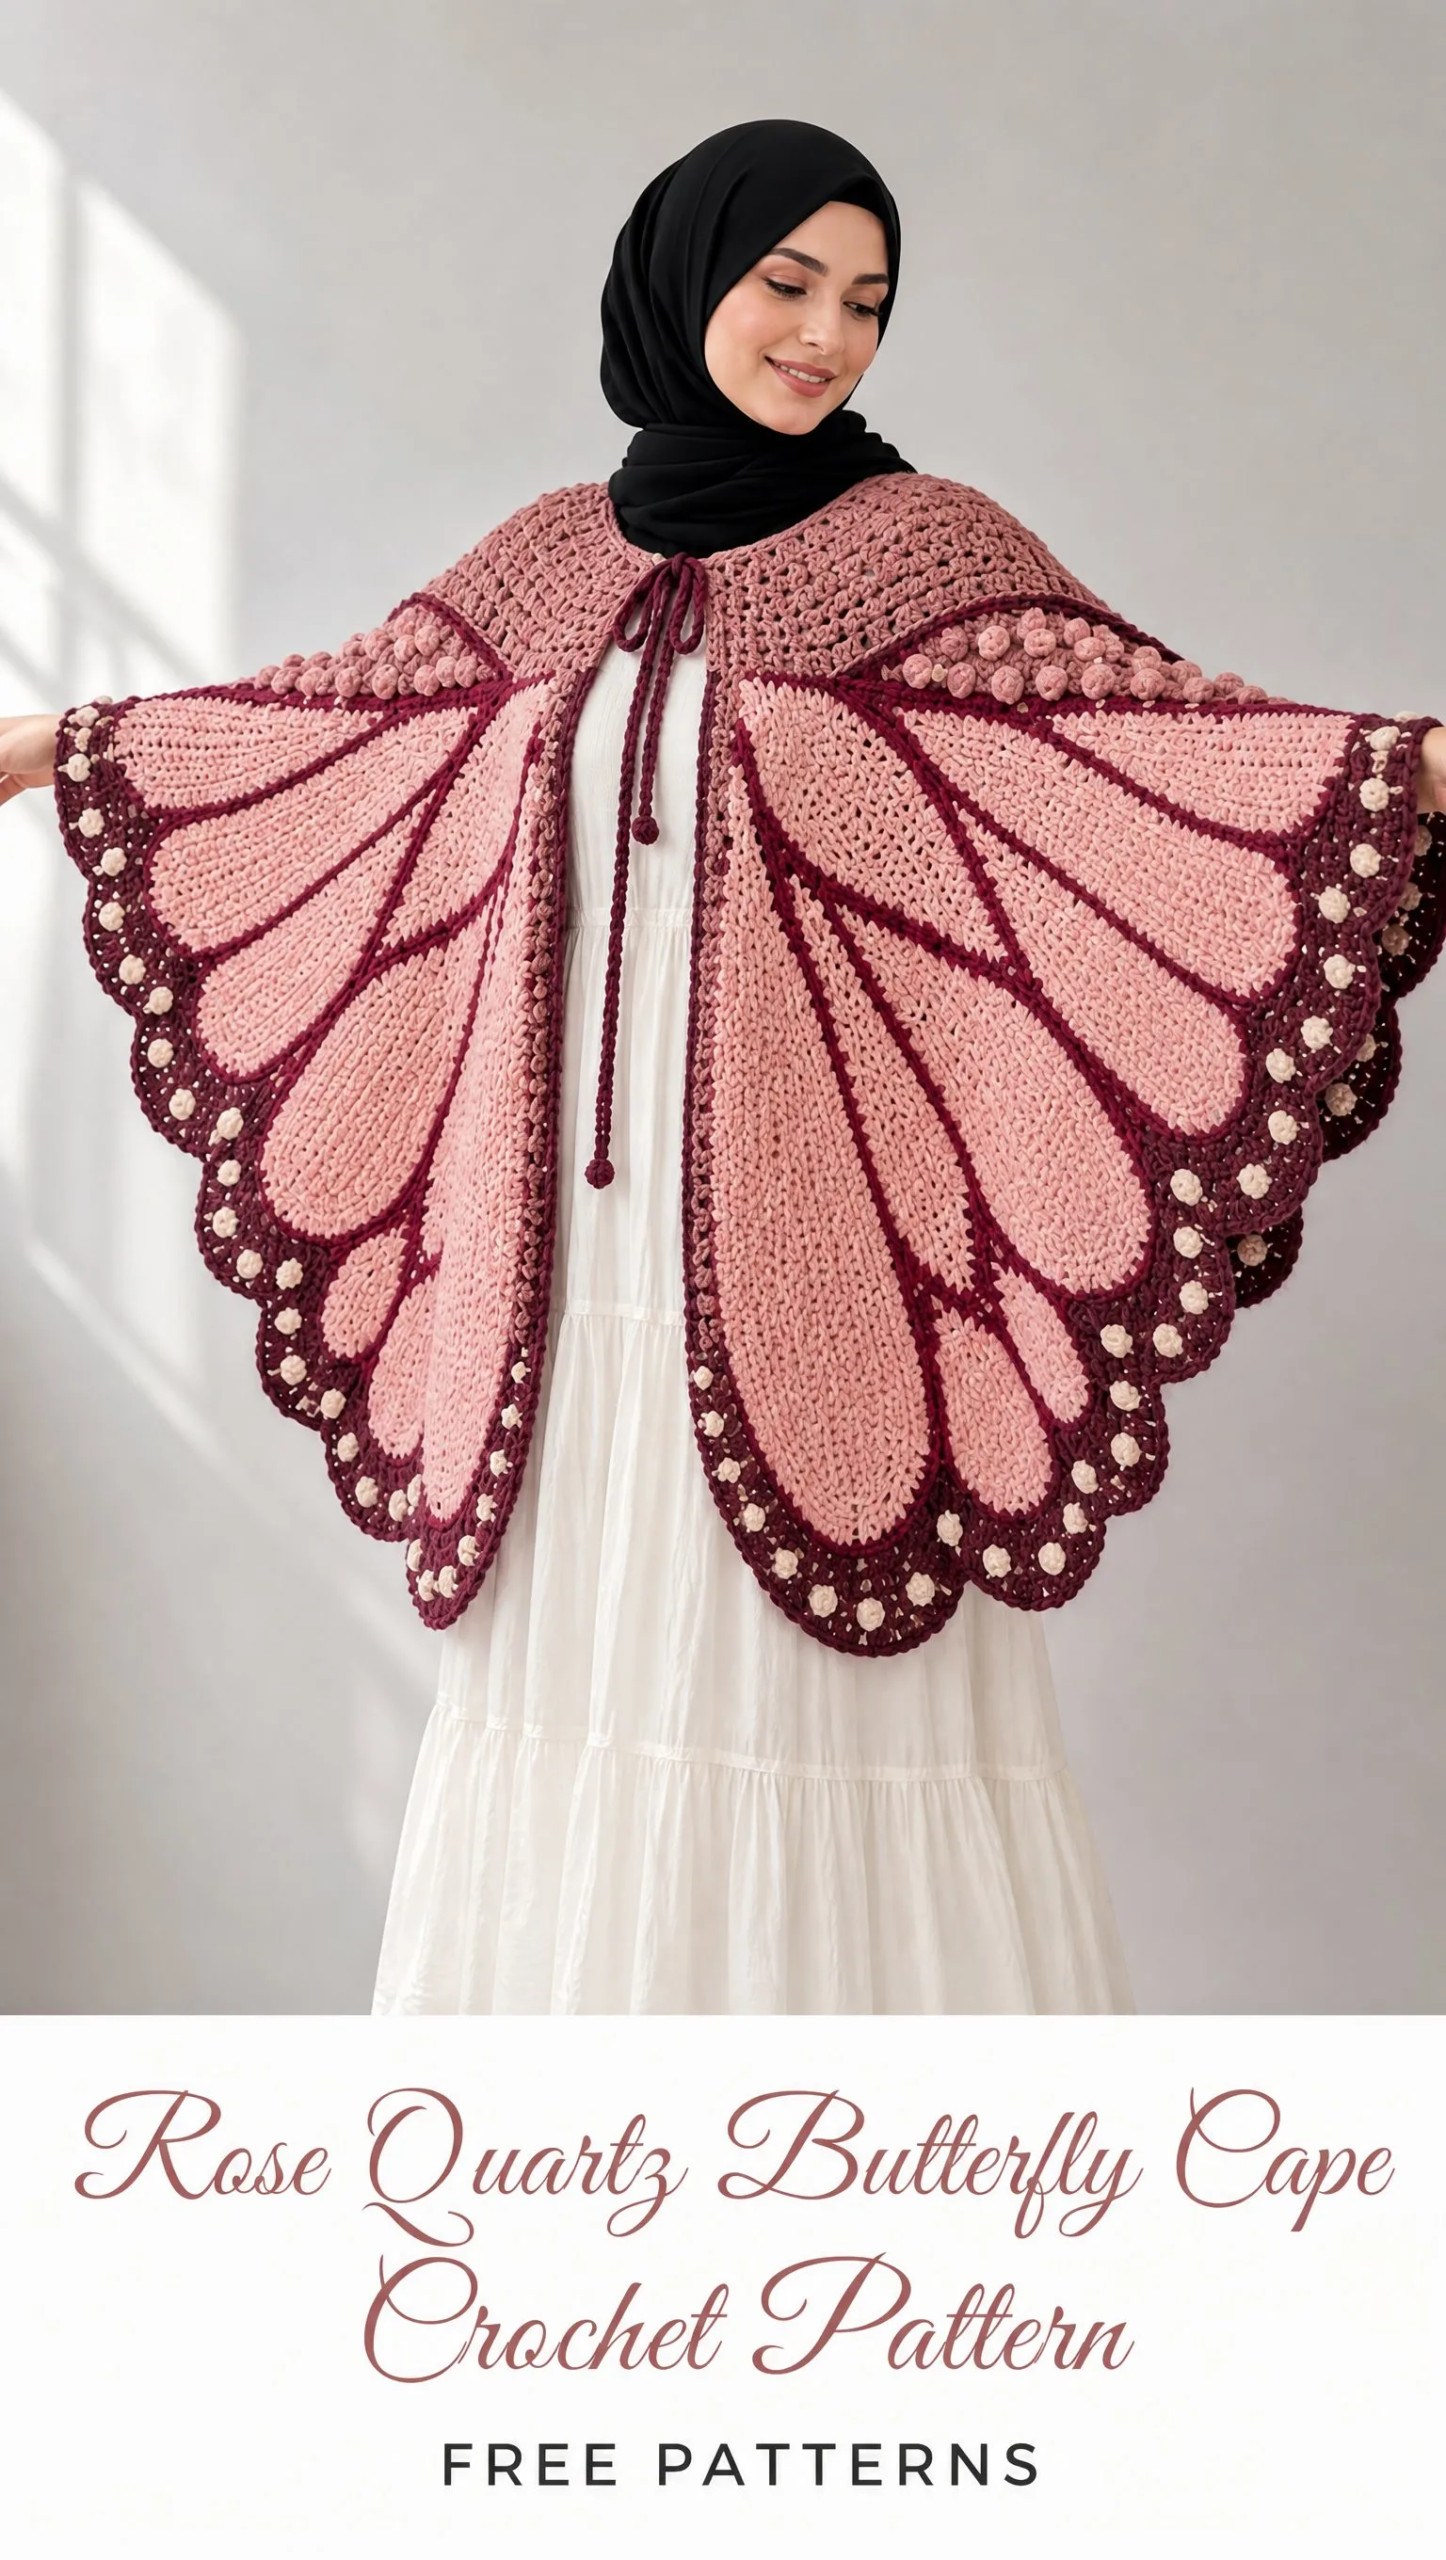
This butterfly cape is a showstopper, and the construction is more interesting than you might expect. You will work a top-down yoke, then build two mirrored wing panels that taper into elegant teardrop shapes. The raspberry veins are added afterward with surface crochet, so the wings stay one solid piece of fabric while looking like intricate stained glass. It is an intermediate to advanced project, and I will not pretend otherwise.
But here is the thing. If you can single crochet, increase, decrease, and follow a shaping sequence, you can absolutely make this cape. The complexity comes from patience and symmetry, not from impossible techniques.
Pattern Overview
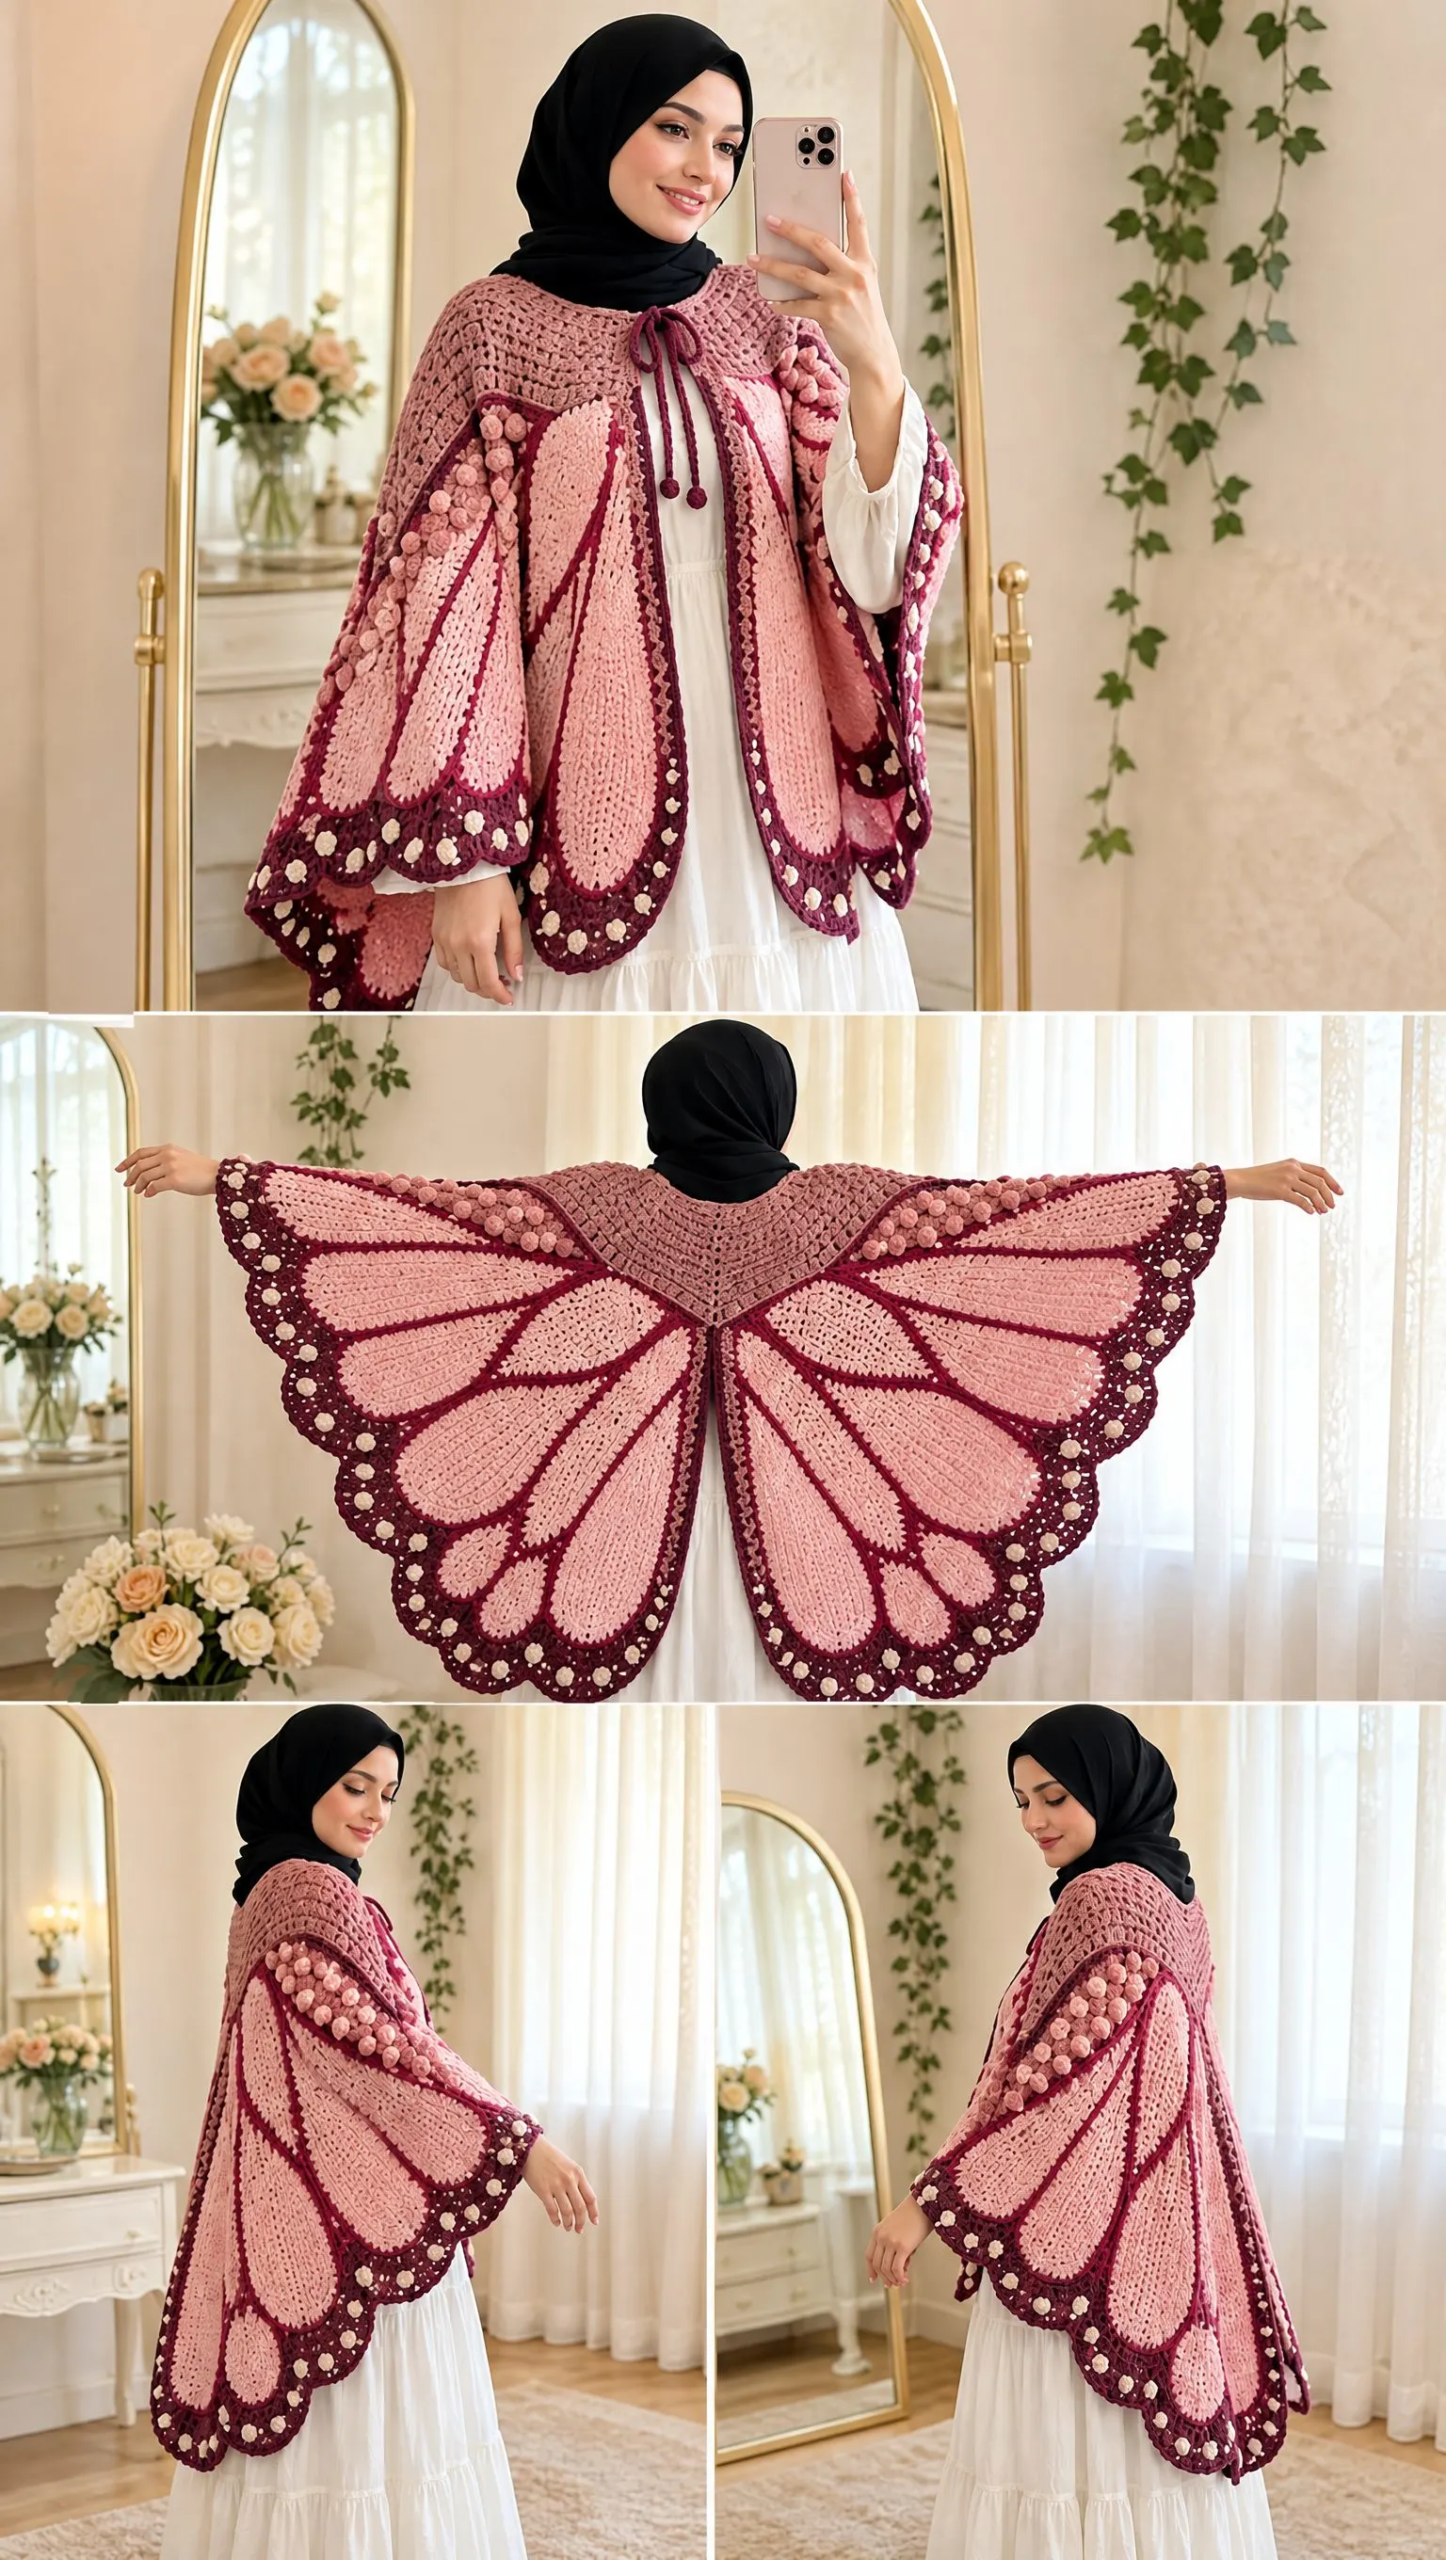
This hip-length cape creates a dramatic butterfly silhouette when you spread your arms. The finished piece measures approximately 31 inches from neck to hem and spans 66 to 70 inches across the total wingspan. It fits adult sizes small through extra large through natural drape, with resize notes included for adjustments.
The construction follows a logical sequence. First, you crochet a dusty rose shoulder yoke from the neckline down. Then you pick up stitches along the lower yoke edge and work each wing panel downward. The wings start broad at the top and taper into long lower teardrop lobes through controlled decreases. After both wings are complete, you add raspberry surface crochet veins, a dusty plum scalloped border, and tiny cream dot accents.
Important note from the pattern: This design has not been physically test crocheted. Work a gauge swatch and compare your measurements as you go, especially before completing the second wing.
Materials You Will Need
Yarn (DK weight or light worsted, #3):
Hooks:
Notions:
Yarn tip: Choose a smooth, matte cotton or cotton-acrylic blend with enough body to hold the wing shape. Avoid very fuzzy yarn because crisp color boundaries are important for the butterfly cell effect.
Gauge
Main fabric gauge: 18 single crochet (sc) stitches and 20 rows equals 4 inches (10 cm) after blocking with a 4.0 mm hook.
Surface crochet gauge: Work loosely enough that the wing remains flat. Your surface slip stitches must not shorten or bunch the fabric.
Take the time to swatch. This project requires significant yardage and shaping precision, so matching gauge will save you heartache later.
Finished Measurements
| Area | Target Measurement | How to Adjust |
|---|---|---|
| Neck opening | 21 to 23 inches | Add or subtract yoke foundation stitches in multiples of 4 |
| Yoke depth | 7 to 8 inches | Add or subtract yoke rows before wing pickup |
| Each wing width | 31 to 33 inches | Change wing starting count in multiples of 6 |
| Wing length | 24 to 25 inches from under yoke | Repeat or omit straight rows before lower shaping |
Abbreviations
Before You Begin
A few important notes will help you succeed with this pattern:
Part 1: Dusty Rose Shoulder Yoke
Foundation: With 4.0 mm hook and CC3 (dusty rose), chain 97. This creates a rounded open-front neckline. For a smaller or larger neck, change the chain in multiples of 4 while keeping an odd total stitch count.
Row 1 (RS): Sc in 2nd ch from hook and across. 96 sc. Turn.
Row 2: Ch 1, sc 12, inc, sc 22, inc, sc 24, inc, sc 22, inc, sc 12. 100 sc. Turn.
Row 3: Ch 1, sc across. Turn.
Row 4: Ch 1, sc 13, inc, sc 23, inc, sc 26, inc, sc 23, inc, sc 13. 104 sc. Turn.
Rows 5 through 14: Repeat the increase logic every even-numbered row. Add 1 sc immediately before and after each of the four shaping points. Work odd rows even in sc.
Rows 15 through 28: Continue in sc, increasing at the same four points every 3rd row rather than every 2nd row. Stop when yoke depth is 7 to 8 inches and front edges lie flat without pulling.
Yoke fit checkpoint: Drape the piece over your shoulders. The lower edge should reach just below the shoulder caps. If it sits too high, add plain sc rows. If it flares excessively, remove the last increase row.
Mark the Wing Pickup Zones
Lay the yoke flat with the RS facing you. Mark the exact center back.
From center back, count approximately 38 to 42 stitches toward each front edge and place markers. These are the outer limits of the left and right wing pickup zones. Leave the front 12 to 16 stitches on each side unworked as the open-front bands.
Each wing should pick up approximately 70 to 76 stitches across the lower yoke edge. If your yoke count differs, divide the usable back-and-shoulder edge evenly so both wings have the same count.
Part 2: Left Rose Quartz Wing Panel
Setup row: With MC (blush) and RS facing, join at the left front pickup marker. Work 1 sc evenly in each marked yoke stitch to the center back, then continue across the left half of the back pickup zone to the opposite boundary for this wing. Target: 72 sc. Turn.
Rows 1 through 6: Ch 1, sc across. At the end of Rows 2, 4, and 6, inc in the first and last stitch. After Row 6 you will have 78 sc.
Rows 7 through 16: Ch 1, sc across. Inc at both edges on Rows 8, 11, and 14 only. End with approximately 84 sc. This creates the broad upper wing.
Rows 17 through 24: Work even in sc. The fabric should now measure about 8 to 9 inches below the yoke.
Rows 25 through 34: Begin outer-edge shaping only. On every 2nd row, dec once at the outer edge while keeping the center-front/inner edge straight. Work the alternate rows even.
Rows 35 through 44: Dec at outer edge every row. On Rows 38, 41, and 44 also dec once at the inner edge. The wing starts to taper into the lower long cell area.
Rows 45 through 54: Dec at both edges on every 2nd row. Work even on alternate rows.
Rows 55 through 62: Dec at both edges every row until 26 to 30 stitches remain.
Rows 63 through 68: Work even in sc or until total wing length from pickup is approximately 24 to 25 inches.
Lower tip shaping: Next row, dec, sc to last 2 sts, dec. Repeat this row until 8 stitches remain. Next row, dec 4 times. Fasten off.
Shape rather than count rigidly. The cape is intentionally garment-sculptural. If your gauge differs slightly, prioritize the target dimensions and the smooth teardrop silhouette. Keep a written record of every shaping row so the second wing can match exactly.
Wing Cell Layout and Raspberry Veins
The rose wing remains one solid fabric. The butterfly cells are created afterward with CC1 (raspberry) surface slip stitch. Mark the following lines with removable markers before crocheting:
Surface crochet method: Hold CC1 beneath the fabric. Insert the 3.5 mm hook from RS to WS at the starting point, catch yarn, and pull a loop to the RS. Then work loose surface slip stitches along the marked path. Skip approximately one row or stitch space at a time so the line lies smooth. Do not cinch. Fasten each vein separately and weave ends on the WS.
Part 3: Right Wing Panel
Work the right wing exactly as the left wing, mirrored. Use the same pickup count, the same increase rows, and the same shaping-row sequence.
Before adding veins, stack the wings with wrong sides together and compare length, upper width, outer curve, and lower tip. Correct any discrepancy of more than 1/2 inch before proceeding.
Part 4: Upper Outer Puff Stitch Accents
With MC or a slightly deeper blush and RS facing, work one decorative row only across the upper outer arc of each wing. Begin 2 to 3 inches below the yoke and end before the midpoint of the outer edge.
Join yarn, ch 1, sc in first st, skip 1 st, puff in next st, sc in next 2 sts; repeat from across the marked upper arc. Adjust the final repeat so the last stitch is sc. Fasten off.
The puffs should form a restrained raised band rather than cover the wing. If they make the edge buckle, use a 4.5 mm hook for the puff row or space them farther apart.
Part 5: Dusty Plum Outer Border and Scalloped Hem
With CC2 (dusty plum) and 4.0 mm hook, join at one front/yoke corner and work around the outer edge of one wing to the back/yoke join. Repeat for the second wing. Keep the yoke neckline and open center front separate until Part 7.
Border Round 1: Sc evenly around the wing edge. Along row ends, work approximately 2 sc per 2 rows. Add extra stitches around deep curves so the edge lies flat. Join or fasten off at the yoke.
Border Round 2: Ch 1, sc in each st around, placing 2 sc in the deepest points of the lower curves and working occasional decs along convex upper curves if needed to keep the edge flat.
Scallop Round: Skip 2 sts, 5 dc in next st, skip 2 sts, sl st in next st; repeat from around the lower and outer wing edge. Along the straighter upper edge, use smaller scallops: skip 1, 3 dc in next, skip 1, sl st in next. Adjust spacing at the end so the scallops finish symmetrically.
Part 6: Tiny Cream Border Dots
With CC4 (cream) and 3.5 mm hook, add one tiny cream accent to the center of every second plum scallop around the outer and lower edge. Use one of these two methods:
Surface-knot dot: Pull a loop to the RS through the center stitch of a scallop, ch 2, sl st in same point, fasten off on WS.
Mini bobble dot: Join, ch 1, work a 3-loop mini puff in the same stitch, ch 1 to close, sl st in same point, fasten off.
Keep the dots tiny. They should read as small cream speckles in the plum border, not as dangling picots or large flowers.
Part 7: Neckline, Front Edges, and Plum Tie Cords
1. With CC2 and 3.5 mm hook, join at lower right front edge. Work sc evenly up the right front edge, around the rounded neckline, and down the left front edge. Fasten off.
2. Work a second row of sc over the same path if the edge needs more structure. Do not overwork because the center front must remain open and fluid.
3. For the right tie, join CC2 at the neckline corner. Ch 72 to 84 (about 18 to 21 inches), sl st in 2nd ch from hook and each ch back to neckline. Fasten off securely.
4. Repeat for left tie. At each tie tip, optionally make a tiny 3-sc nub by working 3 sc into the last chain before returning with slip stitches. Do not add tassels or dangling decorations.
Part 8: Assembly, Weaving Ends, and Blocking
1. Inspect the join between each wing and yoke. If any gap is visible, close it from the WS with matching yarn and a tapestry needle using small mattress-style stitches.
2. Weave each tail at least 2 inches through stitches of the same color, change direction, and weave back. Trim only after blocking.
3. Soak the cape in cool water with a small amount of wool wash or mild detergent appropriate for your yarn. Press out water without wringing.
4. Lay flat on blocking mats. Pin the yoke neckline to a smooth rounded curve. Spread both wings to equal wingspan and mirror the vein geometry.
5. Pin every lower scallop individually so the hem forms a gentle butterfly outline rather than sharp points.
6. Allow to dry completely before unpinning. Steam only if permitted by the yarn label, and never press an iron directly on puff stitches or surface crochet veins.
Resizing the Cape
| Adjustment | Modification |
|---|---|
| Smaller S/M | Start yoke with 89 to 93 ch; target 66 to 70 sc per wing; wing length 22 to 23 inches |
| Standard M/L | Use written counts; target 72 sc wing pickup; wing length 24 to 25 inches |
| Larger XL/2XL | Start yoke with 101 to 109 ch; add yoke depth as needed; target 78 to 84 sc per wing; wing length 25 to 27 inches |
| More arm coverage | Add 4 to 8 plain upper-wing rows before beginning outer-edge decreases |
| Shorter cape | Remove equal numbers of plain rows from Rows 17 through 24 and 63 through 68, not from the shaping sequence |
| Longer cape | Add plain sc rows immediately before the lower tip shaping, adding the same number to both wings |
Symmetry Checklist Before Finishing
Run through this checklist before you call the project complete:
Troubleshooting Common Issues
Wing curls inward: Your surface crochet is too tight. Remove the vein and rework with a larger hook or looser loops.
Wing ruffles at border: You have too many edge stitches. Remove the border and reduce pickup stitches along curved areas.
Upper wing looks narrow: Add plain sc rows with edge increases before starting the decrease phase.
Cape slips backward: Shorten the neckline slightly with a final sc row using a 3.5 mm hook. Keep the ties snug but comfortable.
Scallops look pointed: Block each shell into a rounded fan and avoid oversized chains or picots.
Two wings do not match: Use the first wing as a physical tracing template. Mark the shaping rows directly on a printed checklist before reworking the second side.
Care Instructions
Hand wash or use the gentlest cycle recommended for your yarn. Reshape flat while damp. Store folded rather than on a narrow hanger so the weight of the wings does not stretch the neckline. If the scallops relax over time, simply re-block the cape flat.
Quick Reference: Make Sequence
1. Swatch to 18 sc x 20 rows = 4 inches
2. Work rounded dusty rose yoke
3. Mark equal wing pickup zones
4. Crochet left blush wing with broad top and tapered lower tip
5. Mirror for right wing
6. Mark and surface crochet raspberry veins
7. Add restrained puff band to upper outer wings
8. Work plum structural border and scalloped hem
9. Add tiny cream dots
10. Edge neckline/front and add plum tie cords
11. Weave ends, wet block, and pin symmetrical
This butterfly cape is the kind of project that makes people stop and stare. It takes time, patience, and careful attention to symmetry, but the result is wearable art. When you spread your arms and those wings unfold, you will understand exactly why this pattern is worth every single stitch.
I hope you love making this Rose Quartz Butterfly Cape as much as I loved putting this pattern together. If you make one, please save this pattern to your Pinterest boards so you can find it again, and leave a comment below. I would absolutely love to see your finished wings!
Want a Quick & Easy Printable Version?
Get a clean, beautifully formatted PDF of this pattern — easy to follow step by step, ready to print or save on any device. No scrolling, no distractions, just the pattern.
Get the Printable PDF →You Might Also Like
- Lavender Wildflower Barrel Purse Free Crochet Pattern
- Mint Green Bohemian Ruffle Dress Free Crochet Pattern
- Modern Monstera Crochet Plant for Home Office Desk
- Soft Pink Floral Baby Cardigan Free Crochet Pattern
