
I don’t know about you, but I absolutely love when a single crochet project can make an entire table feel elegant. There’s no complicated sewing, no fussy assembly, just gorgeous stitches radiating outward into something that looks like it belongs in a magazine.
Get the Ad-Free PDF Pattern
You can find the free pattern below, or you can purchase the ad-free printable PDF from my shop.
Get the Printable PDF →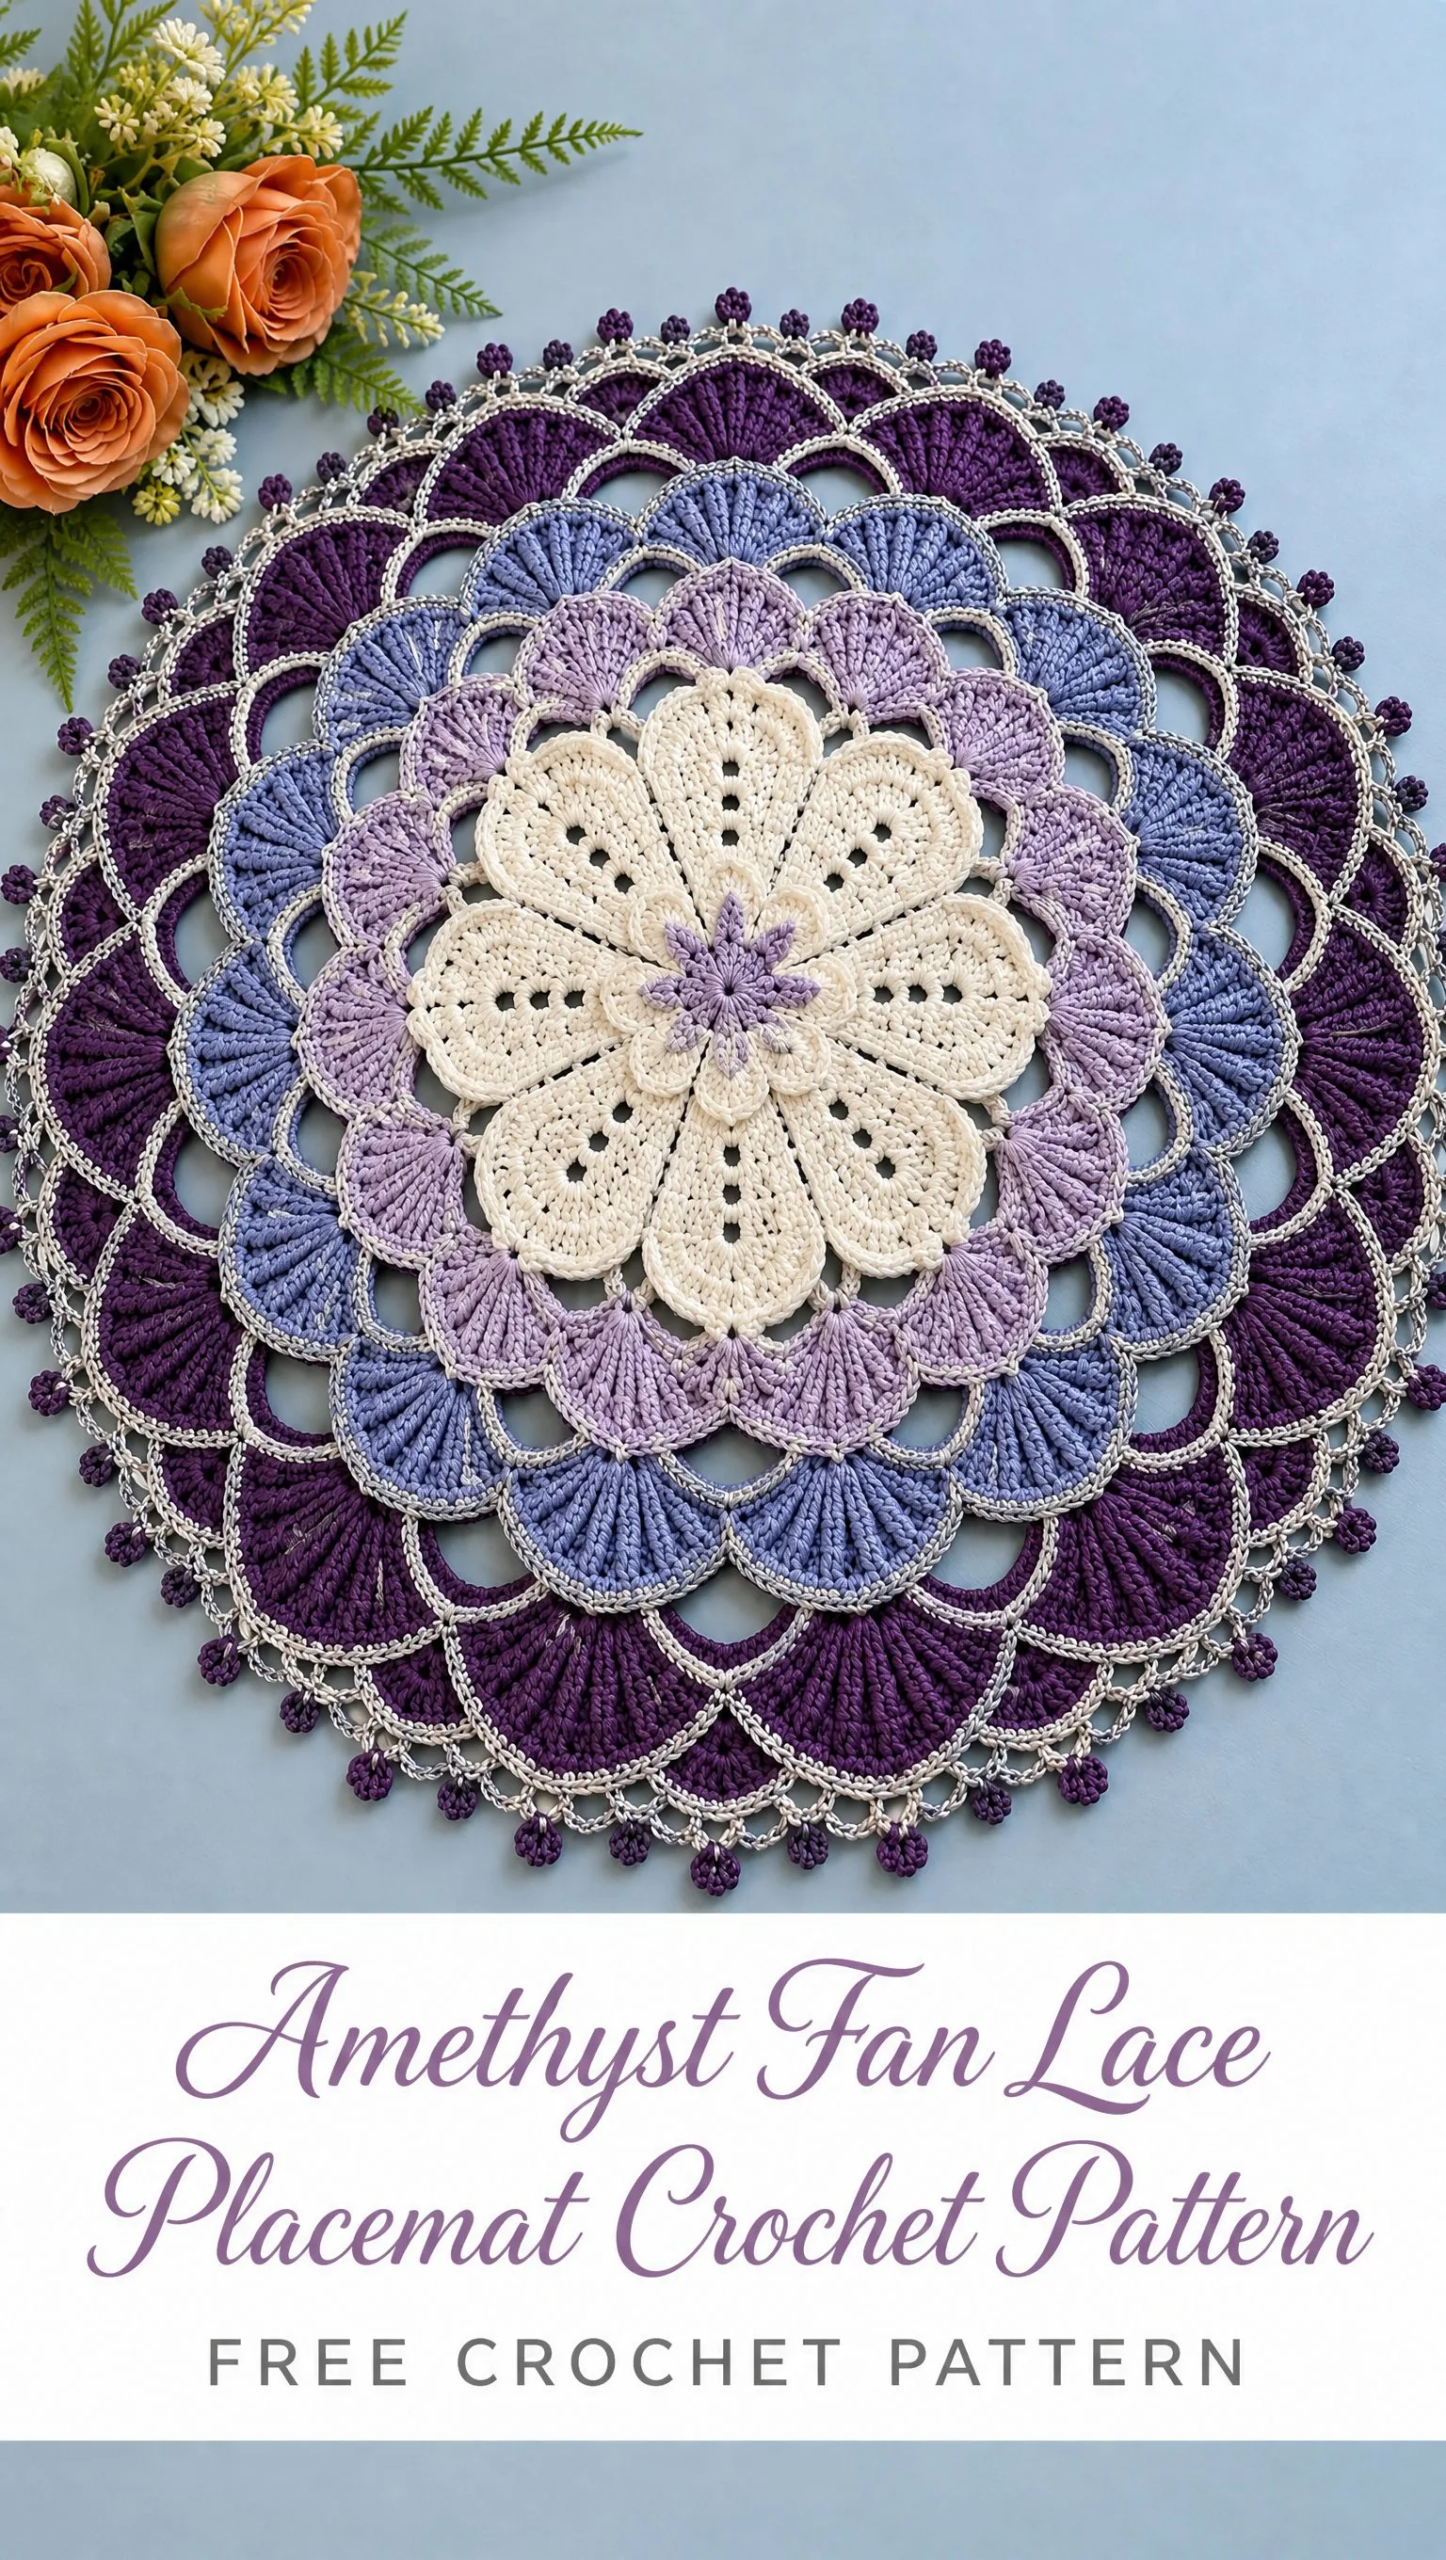
This Amethyst Fan Lace Placemat delivers all that beauty with a construction method that’s more approachable than it appears. Those stunning ribbed fans? They’re built on simple front post double crochets. The delicate silver outlines? Just relaxed slip stitches tracing the curves you’ve already made.
If you’ve been wanting to try something beyond basic doilies but felt intimidated by intricate lace patterns, this is your perfect next step. The 12 repeat symmetry keeps you oriented, the color changes break the work into satisfying chunks, and the finished piece is genuinely stunning.
About This Pattern
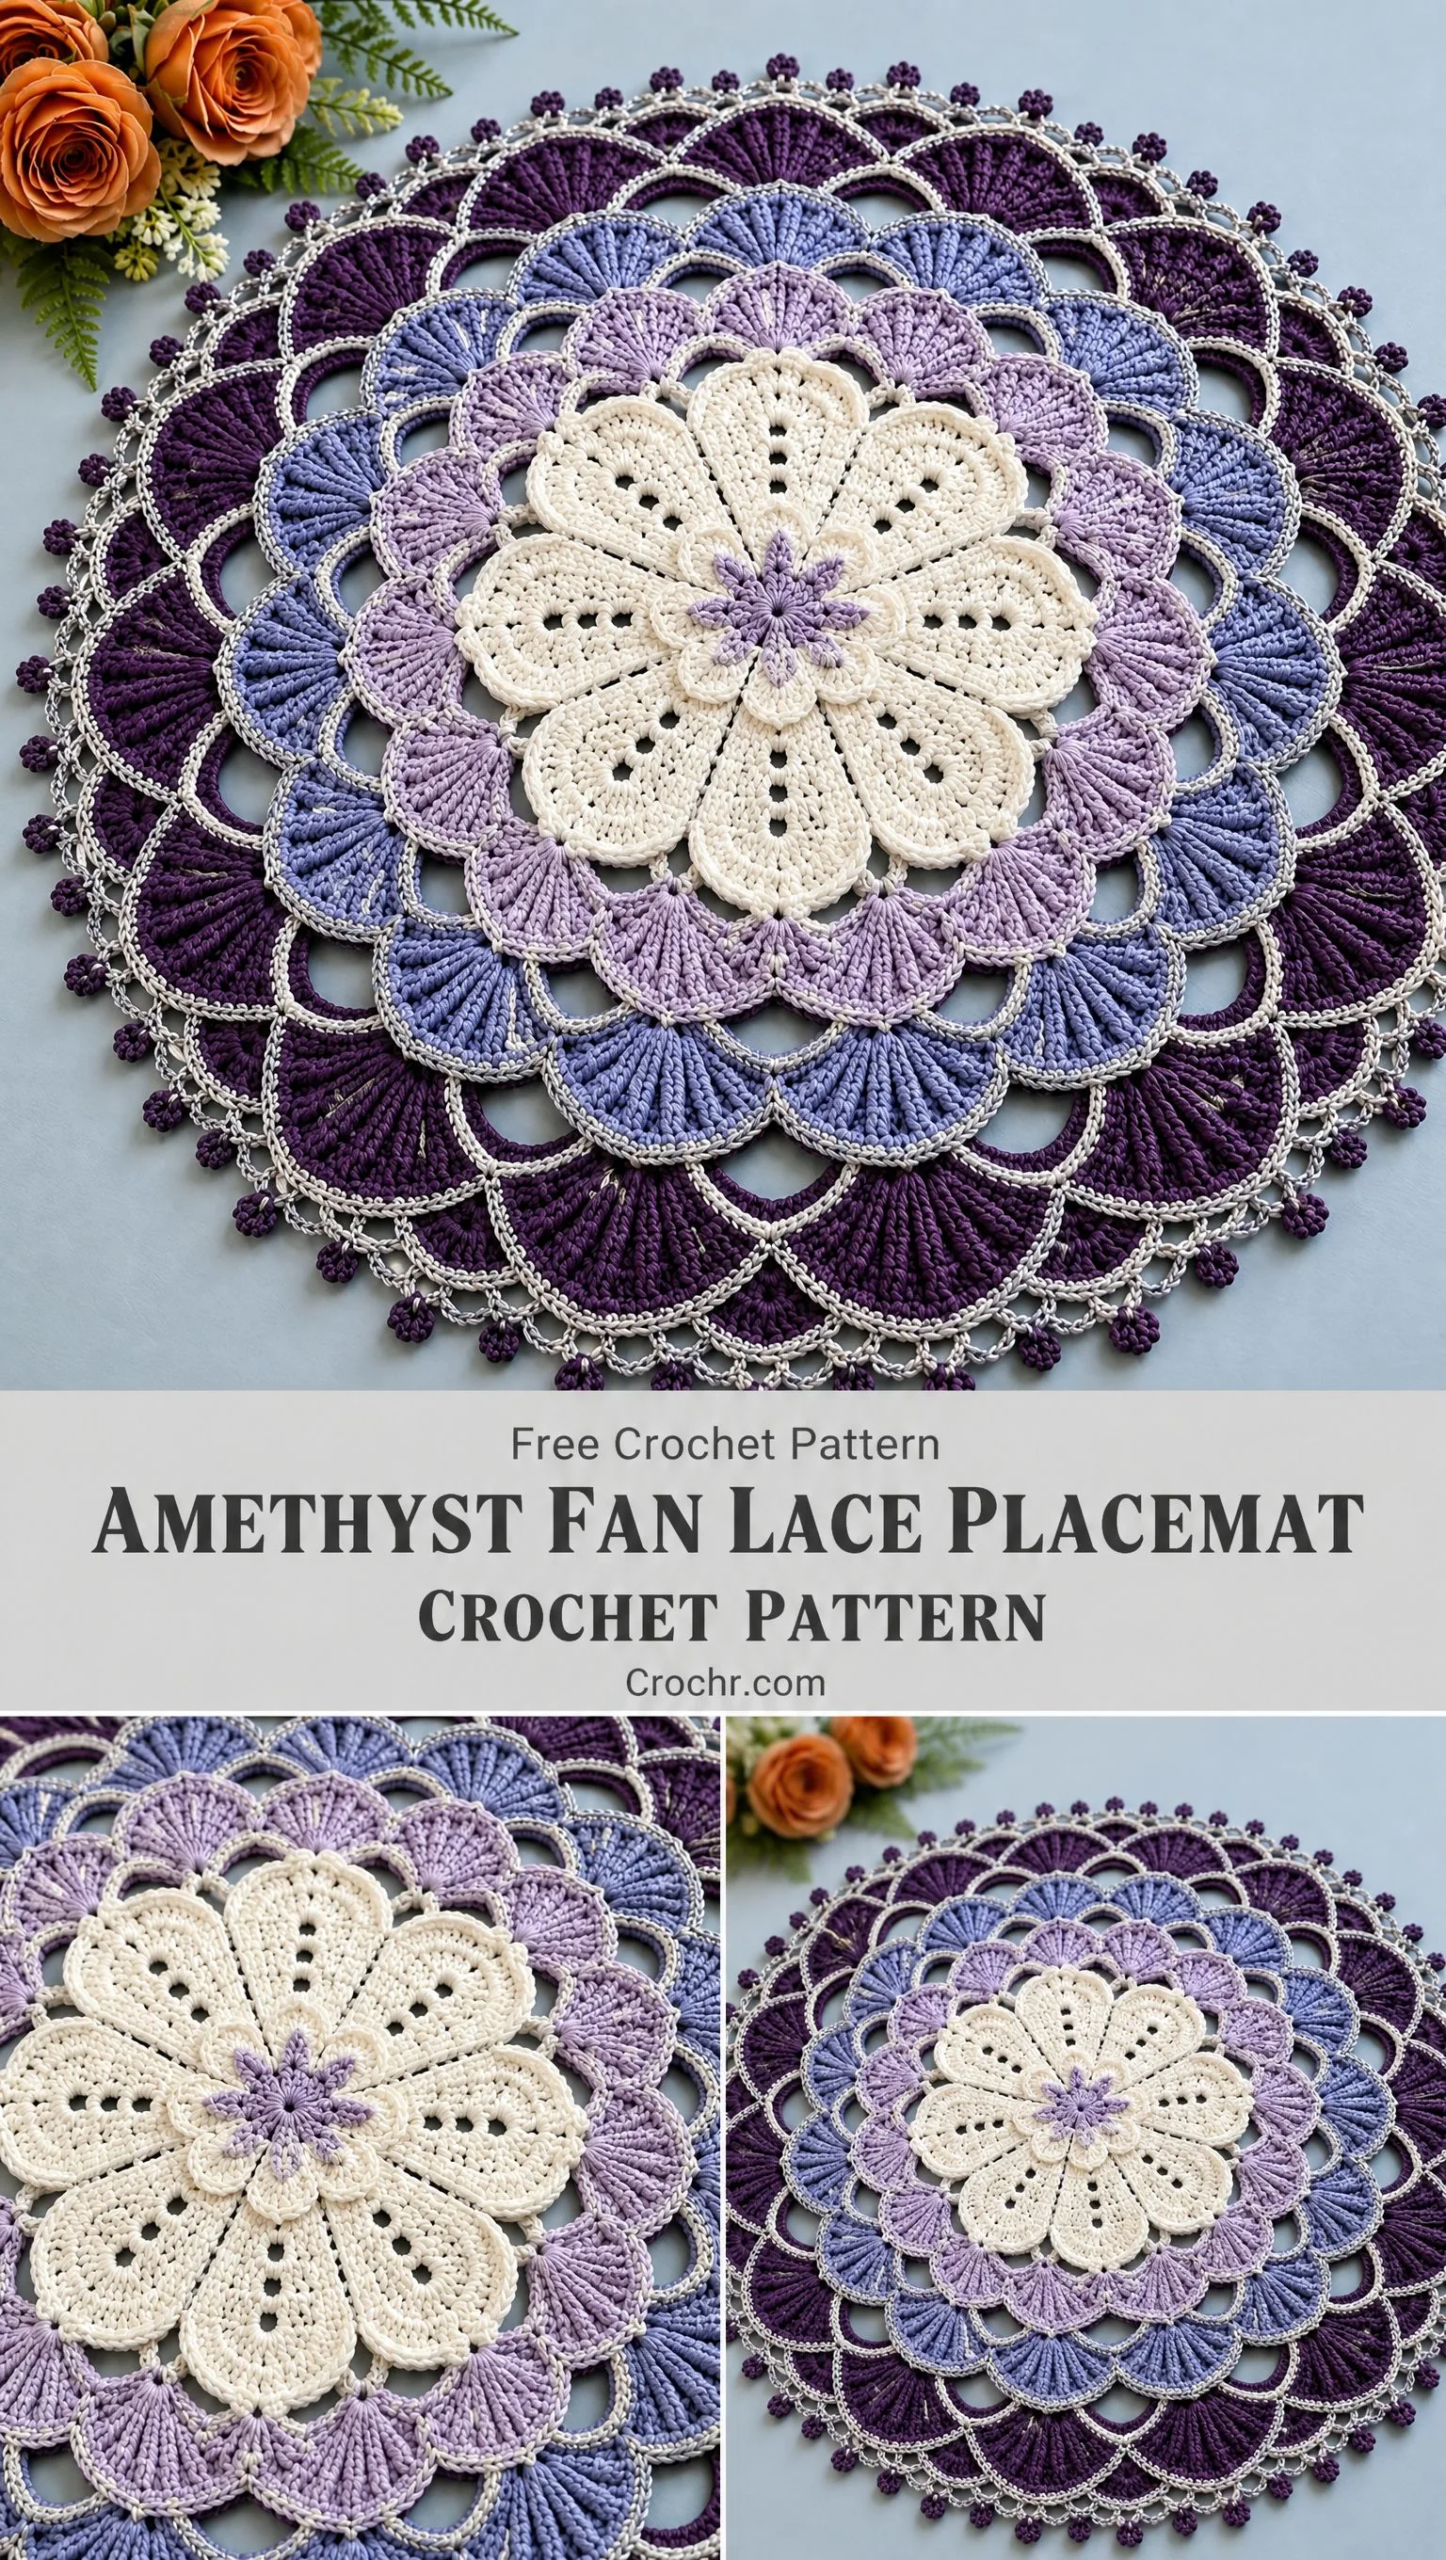
This placemat is constructed as a dense floral medallion surrounded by four staggered rings of ribbed shell fans. Each fan layer anchors to the previous round at two points, which creates those beautiful oval windows you see beneath each shell. A fine silver metallic outline emphasizes every curve, and a chain mesh edging with violet picots keeps the perimeter airy and flat.
Skill level: Intermediate to advanced
Finished size: Approximately 38 to 42 cm (15 to 16.5 inches) after blocking
Center medallion: About 21 to 23 cm (8.25 to 9 inches)
Main repeats: 12 around
Construction: Worked in joined rounds from the center outward
The visual rhythm comes from consistent 12 part symmetry. The lavender fans attach directly around the white medallion, and every later layer anchors in the valleys of the preceding layer. This creates that gorgeous staggered effect rather than fans stacking directly on top of each other.
Materials You’ll Need
Yarn: Sport weight or light DK cotton (category 2 to 3). Smooth, firmly plied cotton gives the clearest ribbing and keeps the openwork crisp.
Here’s the color breakdown with approximate yardage:
For the metallic accent, choose a soft crochet thread or a cotton and metallic blend rather than a stiff craft cord. The softer thread will trace your fan curves without puckering.
Hook: 3.25 mm (US D) or size needed for gauge
Additional tools: Tapestry needle, rust proof blocking pins, blocking mat, scissors, stitch markers
Gauge and Tension
After Round 8, the dense white medallion should measure approximately 20 to 21 cm (8 to 8.25 inches) across when lightly flattened.
Here’s the good news: gauge is less important than keeping the piece flat. If your work cups upward, use a larger hook or loosen your tension. If it ripples, use a smaller hook or tighten your tension. Focus on flatness first, exact measurements second.
Abbreviations (US Terms)
Let me walk you through every stitch abbreviation you’ll encounter:
Special Stitches
Picot: Chain 3, then slip stitch in the first chain made. This creates a small decorative loop.
Ribbed fan: A shell worked into one arch, with selected stitches worked as FPdc around stitches of the preceding setup row. The post stitches create those beautiful folded paper fan ridges you see in the photos.
Silver tracing round: This is a surface like edging worked into the top loops along the outer curve of each fan. Use relaxed tension so the metallic thread does not pull the fan inward.
Invisible join: After the last stitch, cut your yarn and pull the tail through. Thread the tail on a needle, pass under the top loops of the first stitch, and back through the center of the last stitch. This produces a cleaner round edge than a visible slip stitch.
Color Sequence at a Glance
| Section | Colors |
|---|---|
| Center | A pearl white + B lilac star |
| Fan layer 1 | C misty lavender + G silver |
| Fan layer 2 | D periwinkle + G silver |
| Fan layer 3 | E violet + G silver |
| Fan layer 4 | F dark plum + G silver |
| Border | G silver mesh + E violet picots |
Part I: Lilac Star and Pearl White Flower Medallion
Work with the right side facing throughout this section. Join each round with a slip stitch to the first stitch unless an invisible join is specified.
Round 1: With B (Soft Lilac), make a magic ring. Ch 1, work 12 sc in ring. Join. (12 sc)
Round 2: Ch 1, sc in next st, ch 3, sl st in first ch (picot), sc in next st; rep around. Join. Fasten off B. This forms a compact six point lilac star.
Round 3: Join A (Pearl White) in any sc that does not hold a picot. Ch 3 (counts as dc), 2 dc in same st, ch 1, 3 dc in next non picot sc; rep around, placing each 3 dc group between star points. Join. (6 groups)
Round 4: Sl st to first ch 1 sp. Ch 3, 6 dc in same sp, sc in center dc of next 3 dc group, 7 dc in next ch 1 sp; rep around. Join. (6 rounded petals)
Round 5: Ch 1, sc in same st. Ch 5 behind next petal, sc around the sc between petals; rep around. Join. (6 ch 5 back arches)
Round 6: Sl st into first ch 5 sp. Ch 3, 8 dc in same sp, sc around next anchoring sc, 9 dc in next ch 5 sp; rep around. Join. (6 larger petals)
Round 7: Ch 1. Working evenly around the outside of the six petals, place 2 sc in the top of each outer petal stitch and 1 sc in each valley, increasing only as needed to reach 72 sc total. Join. The circle should lie flat.
Round 8: Ch 3, dc in same st, dc in next 4 sts, 2 dc in next st, dc in next 5 sts around; adjust the final repeat if needed so the count is 84 dc. Join with an invisible join. Fasten off A. (84 dc)
Checkpoint: The dense flower medallion should now be smooth, round, and approximately 20 to 21 cm (8 to 8.25 inches) across. The exact stitch placement in Rounds 7 and 8 is intentionally forgiving. Prioritize flatness and finish with 84 stitches so the 12 repeat lace section divides evenly.
Part II: Fan Layer 1 (Misty Lavender)
Each lace layer uses 12 repeats. Before beginning Round 9, mark every 7th stitch around Round 8. These markers are your fan anchors.
Round 9: Join C (Misty Lavender) at any marker. Ch 1, sc in same st, ch 7, sk 6 sts, sc in next marked st; rep around. Join. (12 ch 7 arches)
Round 10: Sl st into first arch. Ch 3, work 11 dc in same arch, 12 dc in next arch around. Join. (12 fans of 12 dc)
Round 11: Ch 3. Dc in next dc, FPdc around next dc, dc in next 2 dc, FPdc around next dc, dc in next 2 dc, FPdc around next dc, dc in next 3 dc; repeat this 12 stitch rib sequence across each remaining fan. Join. Keep the FPdc tall and relaxed so the ribs rise without narrowing the shell.
Round 12: Ch 1, sc in same st, ch 4, sk 2 sts, sc in next st across the first fan, ending with a sc in the last stitch of the fan; ch 5, skip the valley between fans, sc in first stitch of next fan. Continue around, keeping the top curve softly scalloped. Join; fasten off C.
Round 13: With G (Soft Silver Metallic), join at the first sc of any fan. Work 1 sl st loosely in each sc and each ch across the fan top; over the ch 5 valley, work ch 5 instead of slip stitching into the lavender chain. Continue around. Invisible join and fasten off. This silver round traces the fan curves without filling the oval windows.
Part III: Fan Layer 2 (Periwinkle)
This layer is offset, meaning each new fan sits over a valley between two lavender fans.
Round 14: Join D (Periwinkle) around the center ch of any silver ch 5 valley. Ch 1, sc in same sp, ch 9, sc around the center ch of next silver valley; rep around. Join. (12 ch 9 arches)
Round 15: Sl st into first ch 9 arch. Ch 3, work 13 dc in same arch, 14 dc in next arch around. Join. (12 fans of 14 dc)
Round 16: Ch 3, dc in next dc, FPdc around next dc, dc in next 2 dc four times, then dc in final dc of fan; repeat across all 12 fans. Join.
Round 17: Ch 1, sc in same st. Across each fan: ch 4, sk 2 sts, sc in next st until 1 to 2 sts remain; sc in final stitch. Between fans ch 5. Repeat around. Join; fasten off D.
Round 18: With G, trace each periwinkle fan exactly as in Round 13, working loose slip stitches along the fan curve and ch 5 across each valley. Invisible join; fasten off.
Part IV: Fan Layer 3 (Violet)
Round 19: Join E (Violet) around the center ch of any silver valley from Round 18. Ch 1, sc in same sp, ch 11, sc in next valley; rep around. Join. (12 ch 11 arches)
Round 20: Sl st into first arch. Ch 3, work 15 dc in same arch, 16 dc in next arch around. Join. (12 fans of 16 dc)
Round 21: Ch 3, dc in next dc, FPdc around next dc, dc in next 2 dc four times, FPdc around next dc, dc in last 2 dc; repeat across each fan. Join.
Round 22: Across each fan work a flexible top edging: ch 1, sc in same st, ch 4, sk 2 sts, sc in next st across. Between fans ch 5. Repeat around. Join; fasten off E.
Round 23: With G, trace each violet fan as before. Work ch 5 across each valley. Invisible join; fasten off.
Part V: Fan Layer 4 (Dark Plum)
The outer fan layer is the deepest color and slightly taller than the previous rings. Keep the same 12 repeat rhythm.
Round 24: Join F (Dark Plum) around the center ch of any silver valley from Round 23. Ch 1, sc in same sp, ch 13, sc in next valley; rep around. Join. (12 ch 13 arches)
Round 25: Sl st into first arch. Ch 3, work 17 dc in same arch, 18 dc in next arch around. Join. (12 fans of 18 dc)
Round 26: Ch 3, dc in next dc, FPdc around next dc, dc in next 2 dc five times, FPdc around next dc, dc in final st; repeat across each fan. Join.
Round 27: Ch 1, sc in same st. Across each fan, ch 4, sk 2 sts, sc in next st to the final few stitches, adjusting the last spacing so the final sc lands at the fan edge. Between fans ch 5. Repeat around. Join; fasten off F.
Round 28: With G, trace the plum fan tops as in prior silver rounds. Instead of a plain ch 5 over each valley, work ch 7 so the final mesh has room to open. Invisible join; do not fasten off.
Part VI: Silver Chain Mesh Border with Violet Picots
Round 29: Continuing with G, sl st to the center of the next fan top chain space. Ch 1, sc in same sp, ch 5, sc in next available fan top ch 4 sp around, treating each fan and each valley as part of one continuous mesh. Aim for evenly spaced ch 5 loops. Join. If a section begins to ruffle, substitute ch 4 for one loop; if it pulls tight, substitute ch 6.
Round 30: Sl st into first ch 5 sp. Ch 1, 3 sc in each ch 5 sp around. Join with an invisible join. Fasten off G.
Round 31: Join E (Violet) in the center sc of any 3 sc group from Round 30. Sl st in center sc, ch 3, sl st in first ch (picot), sl st in next 2 sc to reach the center of the next group; rep around. Keep each picot compact and vertical. Invisible join and fasten off.
Optional Sharper Silver Outline
For a stronger metallic contour, thread a tapestry needle with G and run a loose surface chain or couching stitch along the outermost curve of each colored fan. Do not pull tight. This is decorative only and can be omitted if your silver tracing rounds are already prominent.
Finishing Your Placemat
Weave in ends: Split the cotton yarn plies slightly with the tapestry needle and weave each tail back through at least 4 to 5 cm (1.5 to 2 inches) of matching color stitches. Reverse direction once. Trim only after blocking.
Wet block: Soak the placemat in cool water for 10 to 15 minutes. Roll in a towel to remove excess moisture. Do not wring.
Pin: On a blocking mat, first pin the center circle at 12 evenly spaced points. Then pin the outer point of every dark plum fan. Finally pin every second or third silver mesh loop and each violet picot so the circle is symmetrical.
Dry completely: Allow to air dry flat. Remove pins only when fully dry. If the metallic thread is heat sensitive, do not steam it.
Final shape: The finished placemat should lie flat with the white medallion a little larger than half the total diameter and four clearly offset fan layers radiating outward.
Troubleshooting Common Issues
| Problem | Solution |
|---|---|
| Center cups upward | Increase hook size 0.25 to 0.5 mm or add a few increases in Round 7 before returning to 84 sts in Round 8 |
| Center ruffles | Reduce increases in Round 7 or use a smaller hook |
| Fan arches pull tight | Add 1 to 2 chains to that layer’s setup arch |
| Fan layer waves | Remove 1 chain from setup arches or work the fan dc more firmly |
| Silver outline puckers | Redo with looser slip stitches or a hook 0.5 mm larger for metallic rounds only |
| Outer edge ruffles | Use ch 4 instead of ch 5 in selected mesh loops of Round 29 |
| Outer edge draws in | Use ch 6 in selected Round 29 mesh loops or block more firmly |
Pattern Checklist
Before calling your placemat complete, run through this list:
Size Adjustments
For a larger centerpiece, use DK yarn and a 3.75 to 4.0 mm hook. For a smaller plate mat, use sport cotton and a 2.75 to 3.0 mm hook while keeping the same round sequence.
Care Instructions
Hand wash or machine wash on a gentle cycle inside a mesh bag if your yarn labels permit it. Reshape while damp and dry flat. Avoid high heat on metallic thread. A light re blocking after washing restores the crisp fan geometry.
Final Thoughts on This Amethyst Fan Lace Placemat Pattern
This pattern rewards patience with truly stunning results. The combination of the creamy white flower center, the gradient purple fans, and those delicate silver outlines creates something that looks far more complicated than it actually is to make. Once you understand the rhythm of the fan layers and silver tracing rounds, you’ll find yourself moving through the pattern with confidence.
Thank you so much for choosing this pattern. I hope you enjoy every round of this beautiful project.
If you make this placemat, I would absolutely love to see it. Tag me on Instagram or share a photo in my Facebook group. There’s nothing better than seeing these designs come to life in your hands.
Save this Amethyst Fan Lace Placemat crochet pattern to your Pinterest boards so you can find it whenever you’re ready to start. And please drop a comment below if you make one. I’d love to hear how it turns out for you!
Want a Quick & Easy Printable Version?
Get a clean, beautifully formatted PDF of this pattern — easy to follow step by step, ready to print or save on any device. No scrolling, no distractions, just the pattern.
Get the Printable PDF →You Might Also Like
- Sage Green Textured Slipper Socks Free Crochet Pattern
- Sage Green Botanical Shell Purse Free Crochet Pattern
- Autumn Harvest Bow Handbag Free Crochet Pattern
- Cream and Peach Ombre Baby Dress Free Crochet Pattern
