
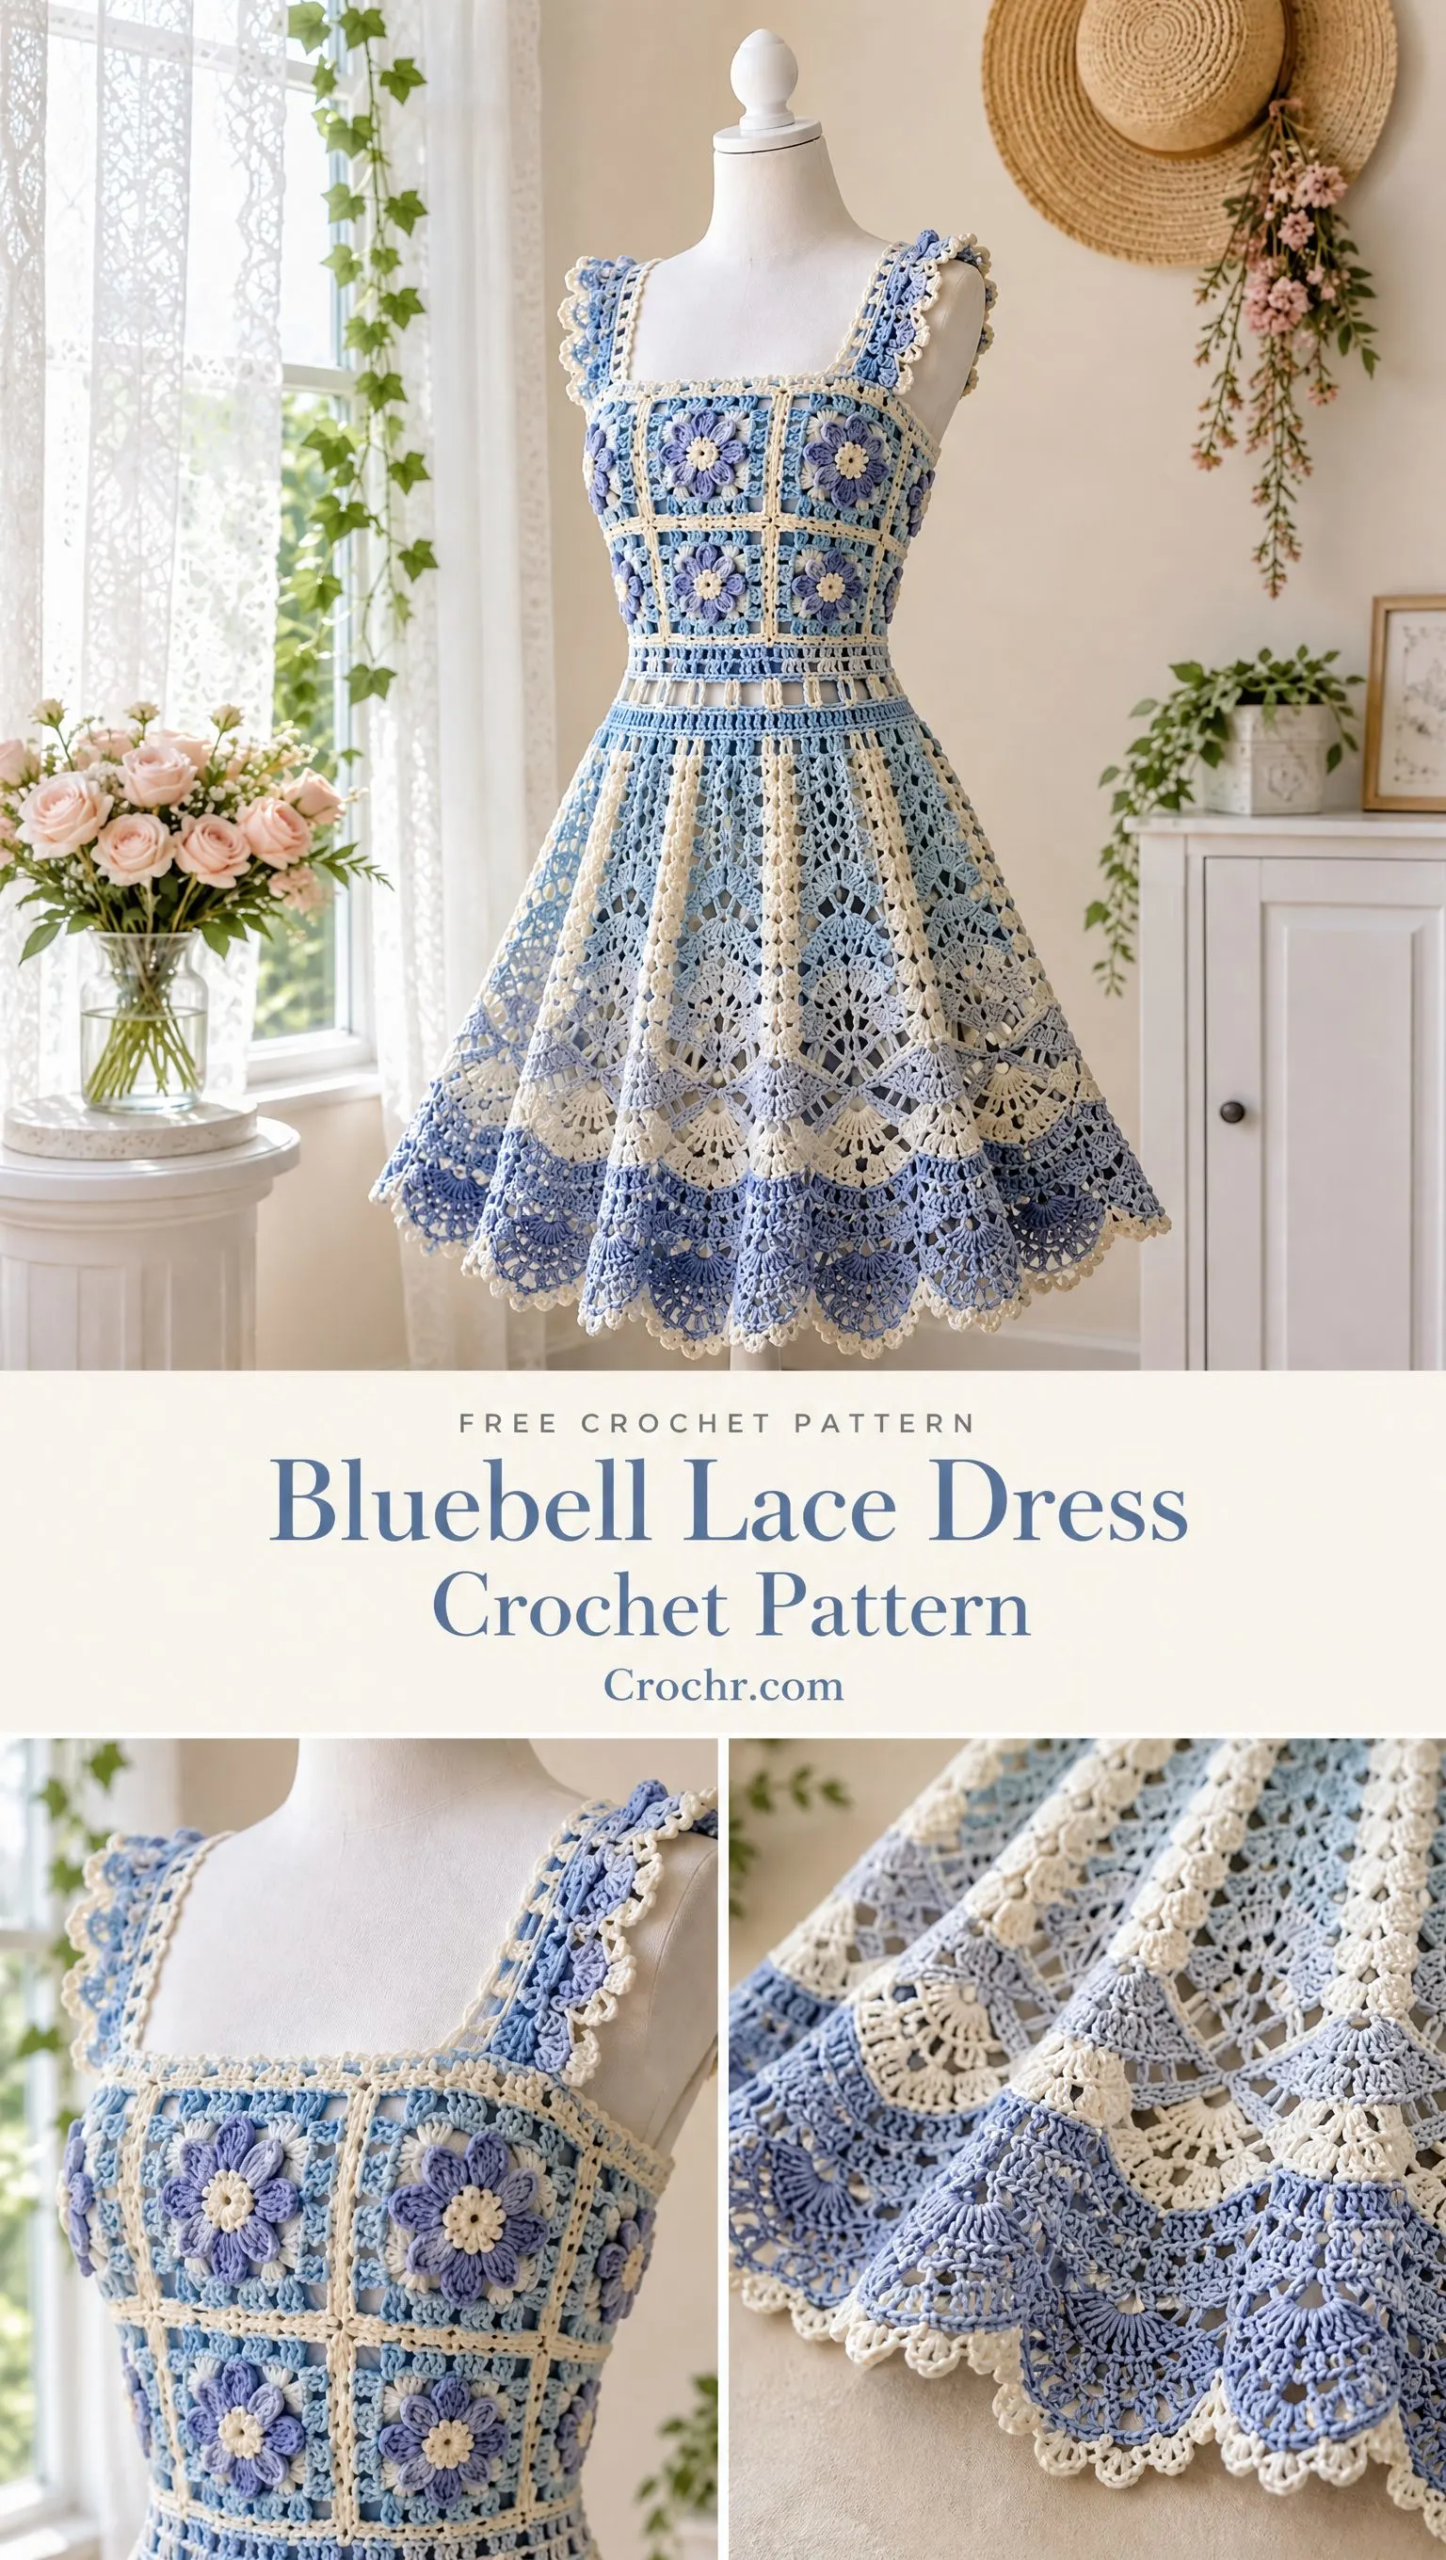
I’ve been searching for the perfect summer dress pattern for ages, and this one stopped me in my tracks. The combination of dimensional flowers, delicate lace panels, and that gorgeous scalloped hem creates something truly special.
Get the Ad-Free PDF Pattern
You can find the free pattern below, or you can purchase the ad-free printable PDF from my shop.
Get the Printable PDF →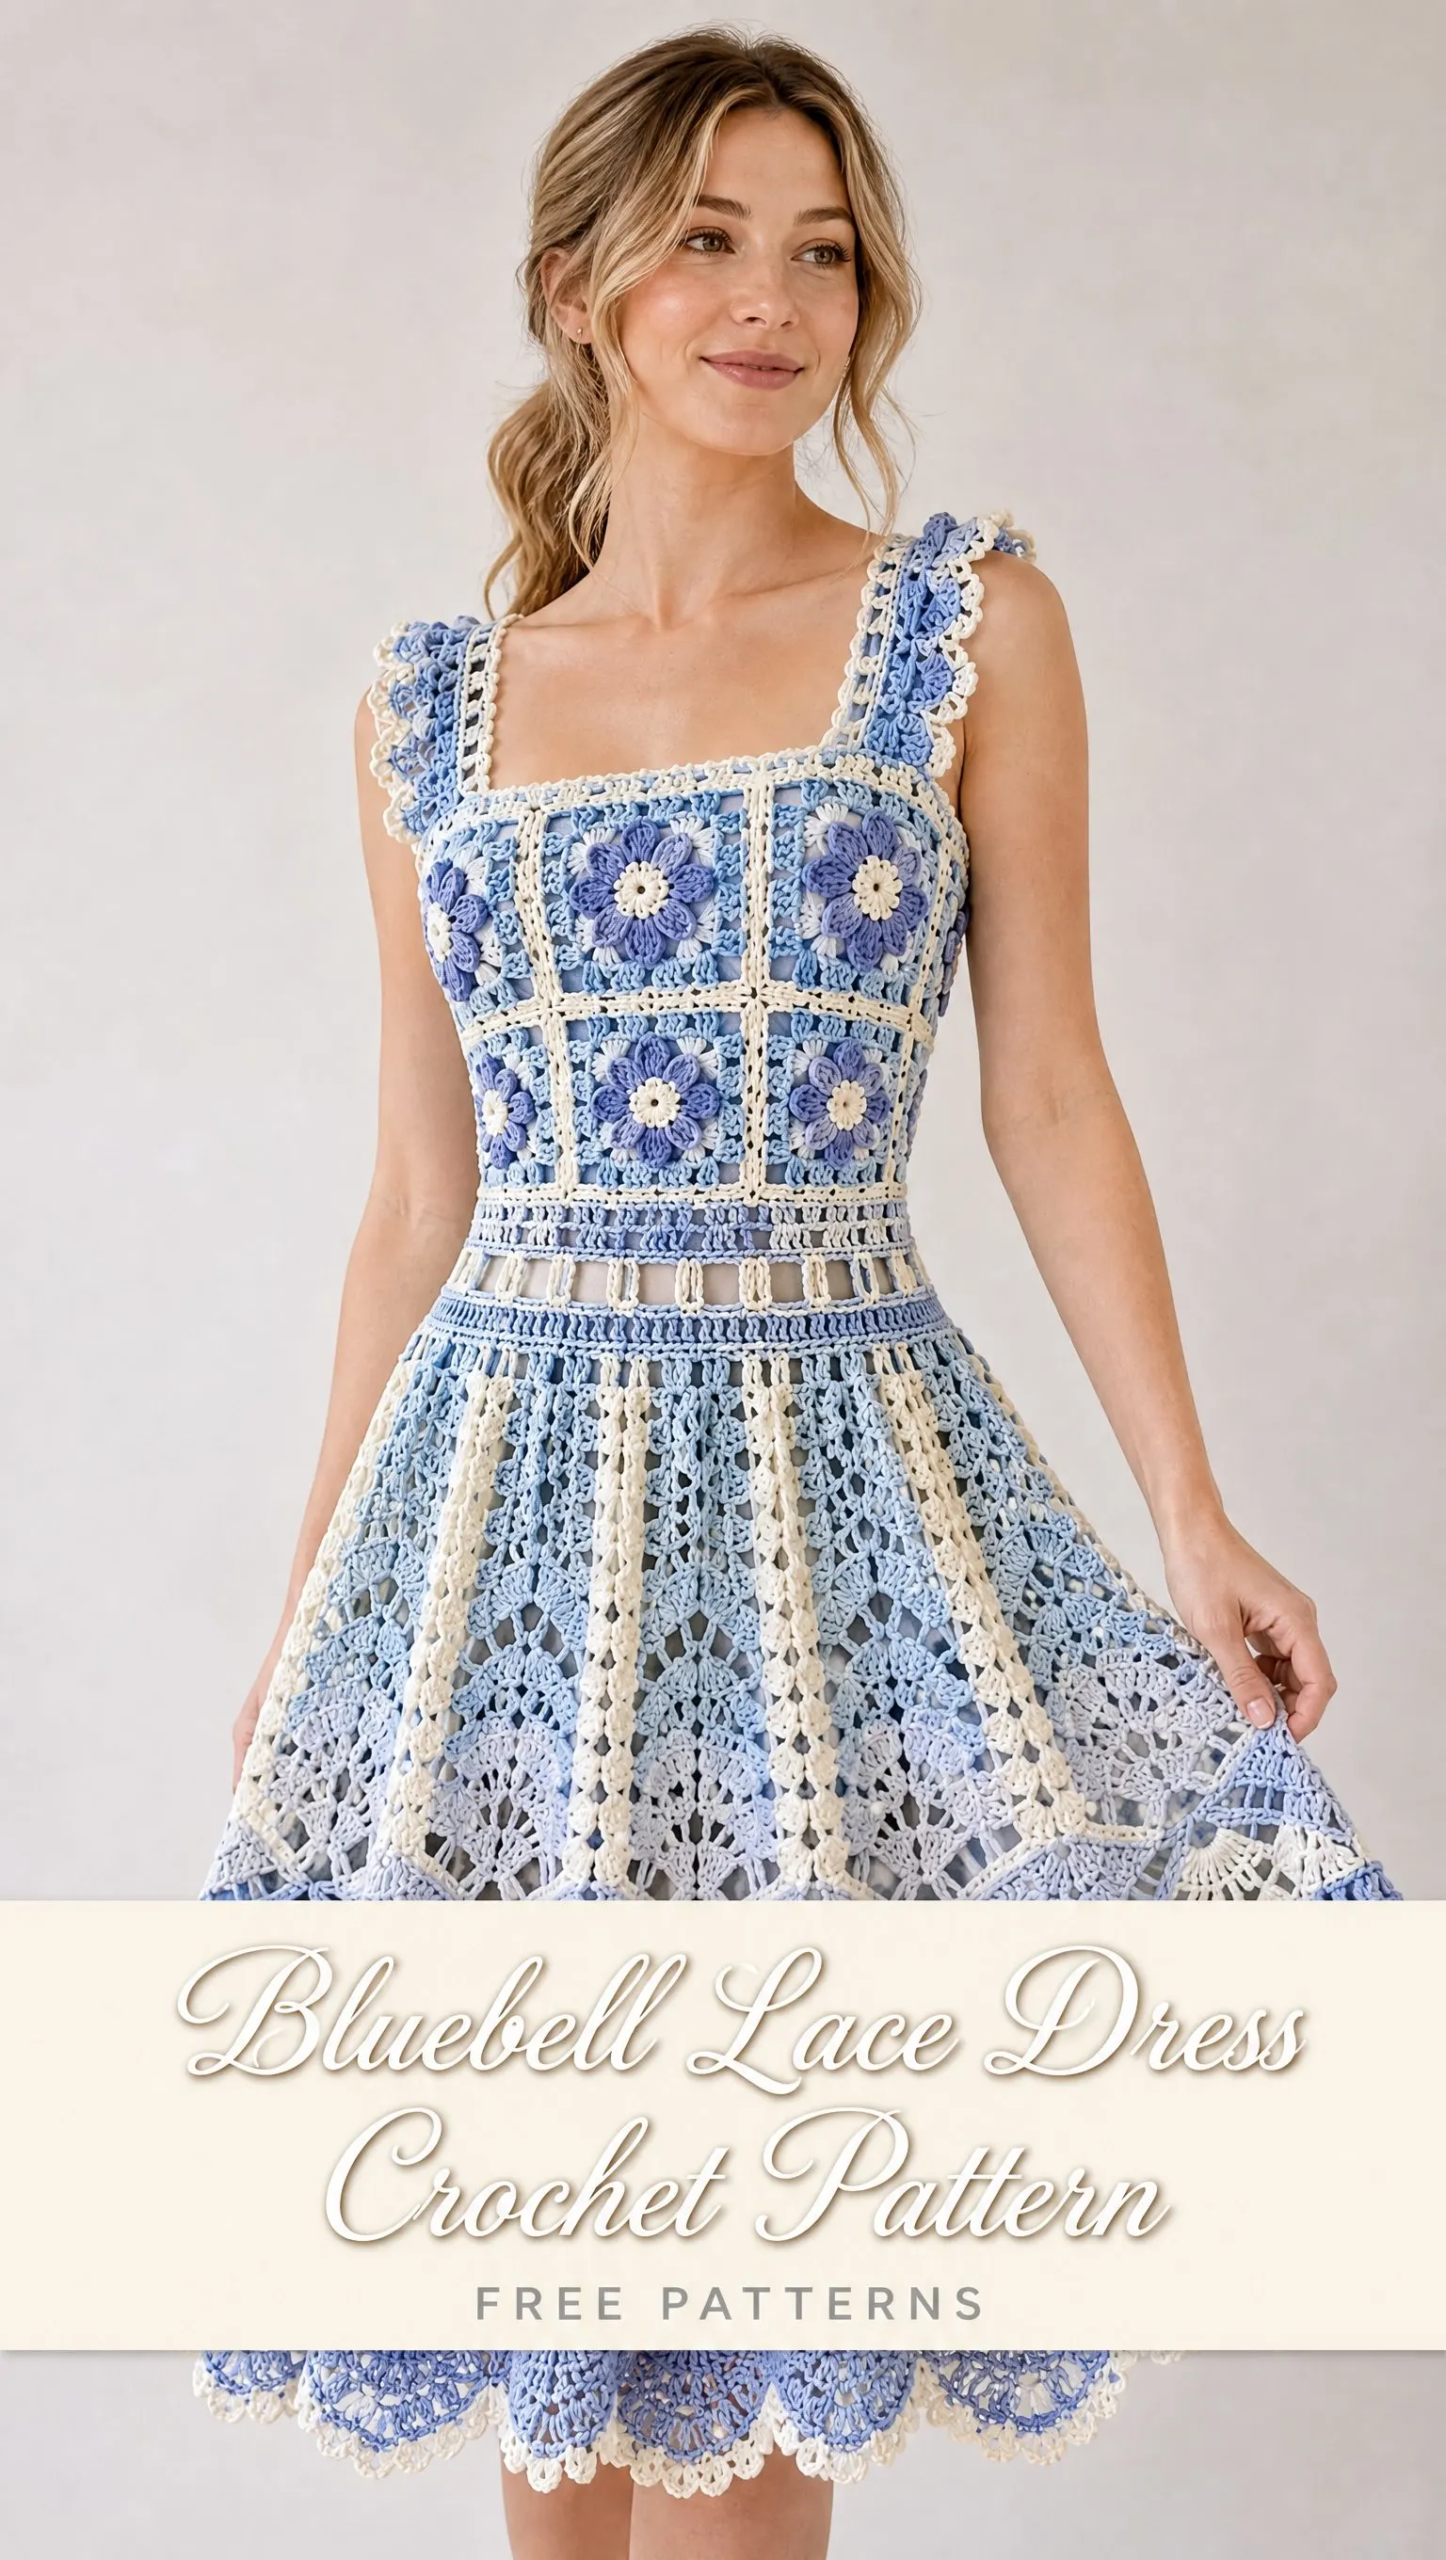
This is my favourite kind of project. It looks incredibly intricate and impressive, but the construction is actually modular and manageable. You make individual floral squares, join them together, then work the skirt downward in rounds.
If you’ve been wanting to try garment construction or level up your lace skills, the Bluebell Lace Dress is an ideal challenge. The powder blue, ivory, and periwinkle color palette gives it a romantic cottage feel that’s perfect for garden parties, beach days, or just feeling beautiful on a summer afternoon.
About This Pattern
The Bluebell Lace Dress is a fitted, openwork sundress built from six distinct modules: dimensional floral squares for the bodice, ivory joining seams, a structured open lattice waistband, broad ruffled straps, a flared 16 panel lace skirt, and a bluebell shell and picot hem finish.
This pattern is written for an adult Medium with a finished bust of approximately 88 cm (34.5 inches) and a gently fitted waist. The modular construction makes resizing straightforward. You can adjust the bodice by changing your motif size or adding side panels.
Important note: This dress is intentionally unlined and openwork. Plan to wear it over a slip, bodysuit, swimsuit, or lining of your choice. Always check opacity and stretch before wearing.
Finished Measurements for Size Medium
Here are the key measurements for the sample size:
Skill Level
This pattern is rated Intermediate. You should be comfortable working in rounds and rows, joining motifs, changing colors, counting stitch multiples, making clusters and shells, and modifying fit based on your gauge.
Don’t let that intimidate you though. If you’ve made granny squares and worked any lace patterns before, you have the skills for this dress. The pattern breaks everything into manageable steps.
Materials You Will Need
Yarn: Fine matte cotton or cotton bamboo yarn, sport weight (category 2), approximately 1,250 to 1,450 meters total for size Medium.
Break down by color:
Hooks:
Notions:
Gauge
Getting gauge right is essential for garment fit. Here is what you are aiming for:
One blocked floral square = 11 x 11 cm / 4.3 x 4.3 inches using the stated yarn and 2.5 mm hook.
In the skirt lace: 4 fan panel repeats across 22 cm / 8.7 inches after light blocking.
Row gauge is less critical than matching the overall lengths listed in the measurements section.
Fit rule: Block one complete square before making the rest. Eight squares around the torso make the sample 88 cm bust. If your square measures 10.5 cm, the same arrangement gives 84 cm. If it measures 11.5 cm, you get 92 cm. Adjust your hook size accordingly.
Abbreviations Used (US Terms)
Let me define every abbreviation before we dive into the pattern:
Construction Overview
The dress is built in six modules, and you will work them in this order:
1. 16 floral squares for the main bodice
2. Ivory joining seams to connect the squares
3. Upper neckline shaping and broad straps
4. Fitted waistband
5. 16 panel flared skirt worked downward
6. Bluebell shell and picot finishing
Bodice Layout for Size Medium
Make 16 identical floral squares. Arrange 8 squares for the front and 8 for the back. Each panel uses 4 squares across by 2 squares high.
Join the front and back at the side seams to create a tube. The square neckline is built upward from the upper row, leaving the center two motifs open at front and back.
Floral Square Motif Pattern (Make 16)
Colors: Periwinkle for the flower, ivory for the center and seam accents, powder blue for the openwork frame. Work with the RS facing unless stated otherwise.
Step 1: Center (ivory)
Make a magic ring.
Round 1: Chain 1, work 6 single crochet into the ring. Join with a slip stitch to the first sc. Fasten off. (6 sc)
Step 2: Petals (periwinkle)
Join periwinkle in any sc.
Round 2: Chain 3, work 3 treble crochet in the same stitch, chain 3, slip stitch in same stitch; slip stitch in next sc. Repeat around for 6 rounded petals. Fasten off.
Gently roll each petal edge outward for dimension. This gives your flowers that beautiful 3D look you see in the photos.
Step 3: Flower Foundation (powder blue)
With the flower RS facing, join powder blue into the back loop or rear base of any center sc between two petals.
Round 3: Chain 1, sc at petal base, chain 4 around, placing one sc behind each petal. Join. (6 ch-4 spaces)
Step 4: Building the Square Frame
Round 4: Slip stitch into the first ch-4 space. Chain 3 (counts as dc), 2 dc, ch 2, 3 dc in same space; (ch 1, 3 dc in next space) twice, ch 1, (3 dc, ch 2, 3 dc) in next space. Repeat to create 4 corner groups, distributing the 6 original spaces evenly. Join to top of beginning ch-3.
Round 5: Slip stitch to corner ch-2 space. Chain 3, 2 dc, ch 2, 3 dc in corner; ch 2, 3 dc in each ch-1 or ch-2 side space to next corner, ch 2; (3 dc, ch 2, 3 dc) in corner. Repeat around. Join.
Step 5: Ivory Outline
Round 6: Join ivory in any corner. Chain 1, (sc, ch 2, sc) in corner; ch 2, sc in each side space across, ch 2, (sc, ch 2, sc) in next corner. Repeat around. Join and fasten off.
Step 6: Blocking
Pin each square to exactly 11 x 11 cm, keeping corners square and the flower centered. Steam lightly without pressing the raised petals flat.
Troubleshooting tip: The frame should remain airy. If the square cups, loosen Round 5 or increase a side chain from ch 2 to ch 3. If it ruffles, reduce a side chain from ch 2 to ch 1.
Joining the Bodice
Use ivory yarn and a flat slip stitch join for the neat raised seams you see in the reference photos. Keep the motifs RS together while joining so the seam ridge appears subtly on the outside when opened.
1. Lay four squares in a row for the first front row. Join adjacent vertical edges through corresponding back loops with loose slip stitches.
2. Join the second row of four squares in the same way, then join the two rows along their long horizontal edge.
3. Repeat for the back panel.
4. With panels RS together, join the left and right side edges from underarm to lower bodice edge. Turn RS out.
5. Try on over your intended underlayer. The tube should be fitted but not strained. The motif corners should remain square rather than diamond shaped.
Square Neckline and Upper Bodice
The neckline is formed by building narrow side extensions above the outer top motifs while leaving the center two motifs open. This keeps the neckline visibly square and supports the wide straps.
Front Neckline Side Extensions
Join powder blue at the top outer corner of the leftmost front motif. Work across the top edge of that motif only.
Row 1 (RS): Chain 3, dc evenly across the top of the outer motif, placing 2 dc in each corner space and 1 to 2 dc in each side space so the edge lies flat. Turn.
Row 2: Chain 3, dc in next 2 dc, ch 1, skip 1 dc across; end with dc in last 2 to 3 stitches. Turn.
Row 3: Chain 3, dc in each dc and 1 dc in each ch-1 space. Fasten off.
Repeat on the rightmost front motif and on both outer top motifs of the back.
Neckline Stabilizing Round
Join ivory at a back side edge. Single crochet evenly around both arm openings and the square front/back neckline edges, placing 2 sc in each inside neckline corner and 3 sc in each outside corner. Keep tension firm but not tight. Fasten off.
Broad Straps (Make 2)
Each strap measures about 6.5 to 7 cm / 2.5 to 2.75 inches wide and 28 to 31 cm / 11 to 12.25 inches long before attaching. Adjust length on the mannequin or wearer.
Foundation: Chain 18 in powder blue.
Row 1: Dc in 4th chain from hook and across. (16 dc including turning chain)
Row 2: Chain 3, turn, dc in next 2 stitches, ch 2, skip 2 stitches, dc in next 2 stitches across, ending with dc in final stitch.
Row 3: Chain 3, turn, dc in each dc and 2 dc in each ch-2 space.
Repeat Rows 2 and 3 until the strap reaches the required length, ending after a solid row.
Pin one end to the outer front neckline extension and the other to the matching back extension. Try on. Shorten if the bodice drops or lengthen if the armhole pulls.
Sew in place securely with ivory yarn, catching multiple rows rather than only the edge stitches.
Tiny Shell Ruffle on Straps
With ivory and RS facing, join at the lower front edge of one strap. Work along the outer long edge only: slip stitch in next edge point, 5 dc in next edge point, slip stitch in next edge point. Repeat evenly to the back. Fasten off.
Repeat on the opposite outer edge of the same strap, then on the second strap. Keep the shells small and close so they read as a delicate flutter rather than a heavy frill.
Waistband
The waistband begins directly below the lower motif row. Its purpose is to draw the 88 cm bodice to about 74 to 76 cm at the natural waist, while alternating powder blue cluster texture with ivory rectangular windows.
Before starting: Count the usable spaces around the lower motif edge. The sample is adjusted to a multiple of 16. If your count differs, decrease evenly in the setup round until you have 128 dc equivalent positions (8 positions per skirt panel x 16 panels).
Setup Round (powder blue): Join at a side seam. Chain 3, dc evenly around the lower bodice edge, decreasing as needed to create a smooth fitted circumference. Join. Aim for 112 to 128 dc depending on your waist. The sample uses 128 before the cluster decrease.
Round 1, blue clusters: Chain 3, dc in next stitch, dc-cl over next 3 stitches, dc in next 2 stitches around. Join. Adjust the final repeat discreetly at the side seam.
Round 2, ivory windows: Change to ivory. Chain 3, dc in next stitch, ch 4, skip 4 stitches, dc in next 2 stitches around. Join.
Round 3, ivory window cap: Chain 1, sc in each dc and 4 sc in each ch-4 space around. Join.
Round 4, blue cluster row: Change to powder blue. Chain 3, dc-cl over next 3 stitches, ch 1, dc in next stitch around, spacing clusters evenly. Join.
Round 5: Chain 1, sc evenly around. On this round, adjust to exactly 128 stitches for the skirt setup. Join and do not fasten off.
Flared Lace Skirt
The skirt uses 16 vertical fan panels. Each panel begins narrow at the waist and expands gradually so the lace opens toward the hem. Mark every 8th stitch of the 128 stitch waistband. Each 8 stitch section becomes one panel.
Panel Repeat Key
Work all rounds continuously joined unless instructed otherwise.
Skirt Rounds 1 through 8
Round 1, powder blue: Chain 4 (counts as dc + ch 1), skip 1 stitch, dc in next stitch, ch 1 around. Join. (64 dc + 64 ch-1 spaces)
Round 2, powder blue: Slip stitch into first ch-1 space. Chain 3, 4 dc in same space, sc in next ch-1 space, 5 dc in next ch-1 space around. End with sc in final space; join. This creates the first narrow fan rhythm.
Round 3, ivory: Join ivory in center dc of any fan. Chain 5 (dc + ch 2), sc in next sc, ch 2, dc in center dc of next fan, ch 2, sc in next sc, ch 2 around. Join.
Round 4, powder blue: Join blue in any dc. Chain 3, 2 dc in same stitch, ch 2, 3 dc in same stitch; sc in next sc, split fan in next dc around. Join.
Round 5, powder blue: Slip stitch to first ch-2 center of split fan. Chain 3, 4 dc in same space; ch 2, sc in next sc, ch 2, 5 dc in next split fan center around. Join.
Round 6, periwinkle accent: Join periwinkle in center dc of first fan. Sc in center dc, ch 5, sc in next sc, ch 5 around. Join.
Round 7, powder blue: Slip stitch into ch-5 space. Chain 3, 4 dc in same space, sc in next ch-5 space, 5 dc in next ch-5 space around. Join.
Round 8, ivory openwork: Join ivory at center of a fan. Chain 4, dc in next sc, ch 2, dc in center of next fan, ch 2 around. Join.
Skirt Rounds 9 through 16: Adding Flare
Round 9, powder blue expansion: In every other ch-2 space work 5 dc; in alternating ch-2 spaces work sc. At each marked panel line, work 7 dc instead of 5 dc. This adds controlled flare once per panel.
Round 10: Repeat Round 3 using powder blue.
Round 11: Repeat Round 4 using powder blue, working 7 dc in each split fan at the marked panel line.
Round 12: Repeat Round 5 using ivory, using 7 dc fans over the marked panel expansions.
Round 13: Repeat Round 6 using periwinkle.
Round 14: Repeat Round 7 using powder blue, working a 7 dc large fan into every marked panel space.
Round 15: Repeat Round 8 using ivory.
Round 16, second expansion: Repeat Round 9, adding one extra ch-2 space on each side of the marked panel line. Each panel now visibly widens toward the lower skirt.
Rounds 17 through 32
Rounds 17 through 24: Repeat the lace logic of Rounds 10 through 16 once more, preserving the 16 vertical panel lines. Use powder blue for structural fan rounds, ivory for open chain rounds, and periwinkle for accent chain rounds.
Rounds 25 through 32: Repeat again if needed for length. For the sample, stop when the skirt measures about 42 cm / 16.5 inches from the waistband, leaving 7 cm / 2.75 inches for the decorative hem.
Length adjustment: The skirt is designed to be roughly twice the visual height of the square motif bodice. Add or omit one 8 round repeat before the hem. Always end after an openwork round so the hem fans can be placed cleanly.
Bluebell Scalloped Hem
Hem Round 1 (bluebell/periwinkle): Join in an open chain space. Chain 3, 6 dc in same space; sc in next open space, 7 dc in next open space around. Join.
Hem Round 2 (powder blue): Slip stitch to center dc of first 7 dc fan. (sc in center dc, ch 5, sc in same dc), ch 3, sc in next valley sc, ch 3 around. This outlines each large shell.
Hem Round 3 (ivory picot): Join ivory in any ch-5 loop. 3 sc in loop, picot, 3 sc in same loop; 3 sc in next ch-3 space, picot, 3 sc in next ch-3 space around, easing as necessary so the edge lies flat. Join invisibly.
Neckline, Armhole, and Final Picot Edging
For the crisp ivory outline shown in the reference, finish all exposed upper edges after the straps are sewn in.
Round 1: With ivory and 2.25 to 2.5 mm hook, sc evenly around neckline and armholes. Work 2 sc in each inside square neck corner and 3 sc around each outside shoulder corner.
Round 2: Sc in next 3 stitches, picot around, spacing picots consistently. At inside corners, omit one picot if needed to prevent bunching.
Fasten off with an invisible join. Weave the tail through at least 4 cm / 1.5 inches of dense stitches.
Finishing and Blocking
1. Weave in all ends securely, splitting the cotton plies with the needle on the final pass so slick yarn cannot work loose.
2. Wash gently in cool water with a small amount of mild detergent. Do not wring.
3. Roll in a towel to remove excess water. Lay flat on blocking mats.
4. Pin the square neckline exactly square, smooth the waist to the target circumference, and arrange all 16 skirt panels evenly.
5. Pin the hem scallops individually and shape the flower petals with fingertips. Allow to dry completely.
6. If desired, hand sew clear elastic inside the upper back edge or waistband using loose catch stitches. Do not stretch the elastic more than 5 to 8 percent while sewing.
Sizing Guide: XS to 2XL
Because the bodice is modular, fit is controlled mainly by motif width and optional side inserts. Measure the wearer over the intended underlayer. For a fitted cotton crochet bodice, target 2 to 6 cm / 0.75 to 2.5 inches of negative ease depending on yarn stretch and personal preference.
| Size | Target Body Bust | Suggested Finished Bust | Square Target | Notes |
|---|---|---|---|---|
| XS | 76 to 81 cm | 74 to 78 cm | 9.3 to 9.8 cm | 8 squares around |
| S | 82 to 87 cm | 80 to 84 cm | 10.0 to 10.5 cm | 8 squares around |
| M | 88 to 94 cm | 86 to 90 cm | 10.8 to 11.3 cm | 8 squares around; sample 11 cm |
| L | 95 to 102 cm | 92 to 98 cm | 11.5 to 12.25 cm | 8 squares around or small side inserts |
| XL | 103 to 112 cm | 100 to 108 cm | 10.0 to 10.8 cm | Use 10 squares around: 5 front + 5 back |
| 2XL | 113 to 122 cm | 110 to 118 cm | 11.0 to 11.8 cm | Use 10 squares around: 5 front + 5 back |
Calculating your size: Desired finished bust ÷ number of squares around = blocked square width.
Troubleshooting Common Issues
Squares cup inward: The outer rounds are too tight. Add one chain to side spaces or move up 0.25 mm in hook size for the frame rounds.
Squares ruffle: The frame has too many chains or stitches. Shorten ch-2 spaces to ch-1 on the final frame round.
Bodice stretches downward: Cotton is heavy when worn. Shorten straps, add a firmer ivory sc round around the upper edge, or sew clear elastic into the back/waist.
Waist is loose: Work one additional sc decrease round before beginning the skirt, decreasing evenly at side seams and between panels.
Skirt forms points instead of a smooth flare: Your expansion is concentrated too heavily. Distribute extra ch spaces on both sides of each panel line instead of adding all stitches in one fan.
Hem ruffles excessively: Use fewer stitches in the ivory picot round, skip every 5th picot, or switch to the smaller hook.
Hem pulls inward: Increase the final shell count or add 1 extra dc to every fourth shell.
Care Instructions
Hand wash or use a delicate machine cycle in a mesh bag if your yarn label permits. Use cool water and mild detergent. Reshape flat to dry. Store folded rather than on a hanger to prevent the cotton lace from lengthening.
Final Thoughts on the Bluebell Lace Dress Crochet Pattern
This dress is truly a labor of love, and the finished result is absolutely stunning. The dimensional flowers, the delicate lace panels, and that gorgeous scalloped hem come together to create a wearable work of art. Yes, it takes time. Yes, you need to pay attention to your gauge and blocking. But when you slip this dress on for the first time, you will understand exactly why it was worth every stitch.
Thank you so much for choosing this pattern. I really hope you love making it as much as I loved designing it.
If you make this dress, I would absolutely love to see it! Tag me on Instagram or share your photos in my Facebook group. Seeing your creations is honestly the best part of my day.
Don’t forget to save this Bluebell Lace Dress crochet pattern to your Pinterest boards so you can find it whenever you’re ready to start. And if you have any questions or want to share your progress, please leave a comment below. I always love hearing from you!
Want a Quick & Easy Printable Version?
Get a clean, beautifully formatted PDF of this pattern — easy to follow step by step, ready to print or save on any device. No scrolling, no distractions, just the pattern.
Get the Printable PDF →You Might Also Like
- Cream Lace Bridal Barrel Bag Free Crochet Pattern
- Sunflower Summer Mesh Bag Free Crochet Pattern
- Sunflower Garden Cropped Cardigan Free Crochet Pattern
- Lavender and Lilac Baby Dress Free Crochet Pattern
