
Last spring my niece turned two, and I found myself scrolling through photo after photo of store-bought party dresses that all looked exactly the same. Tulle. Sequins. More tulle. Nothing felt special enough for this little girl who loves chasing butterflies in her grandmother’s garden. So I grabbed my hook and a few skeins of the prettiest mint green cotton I could find, and I started stitching.
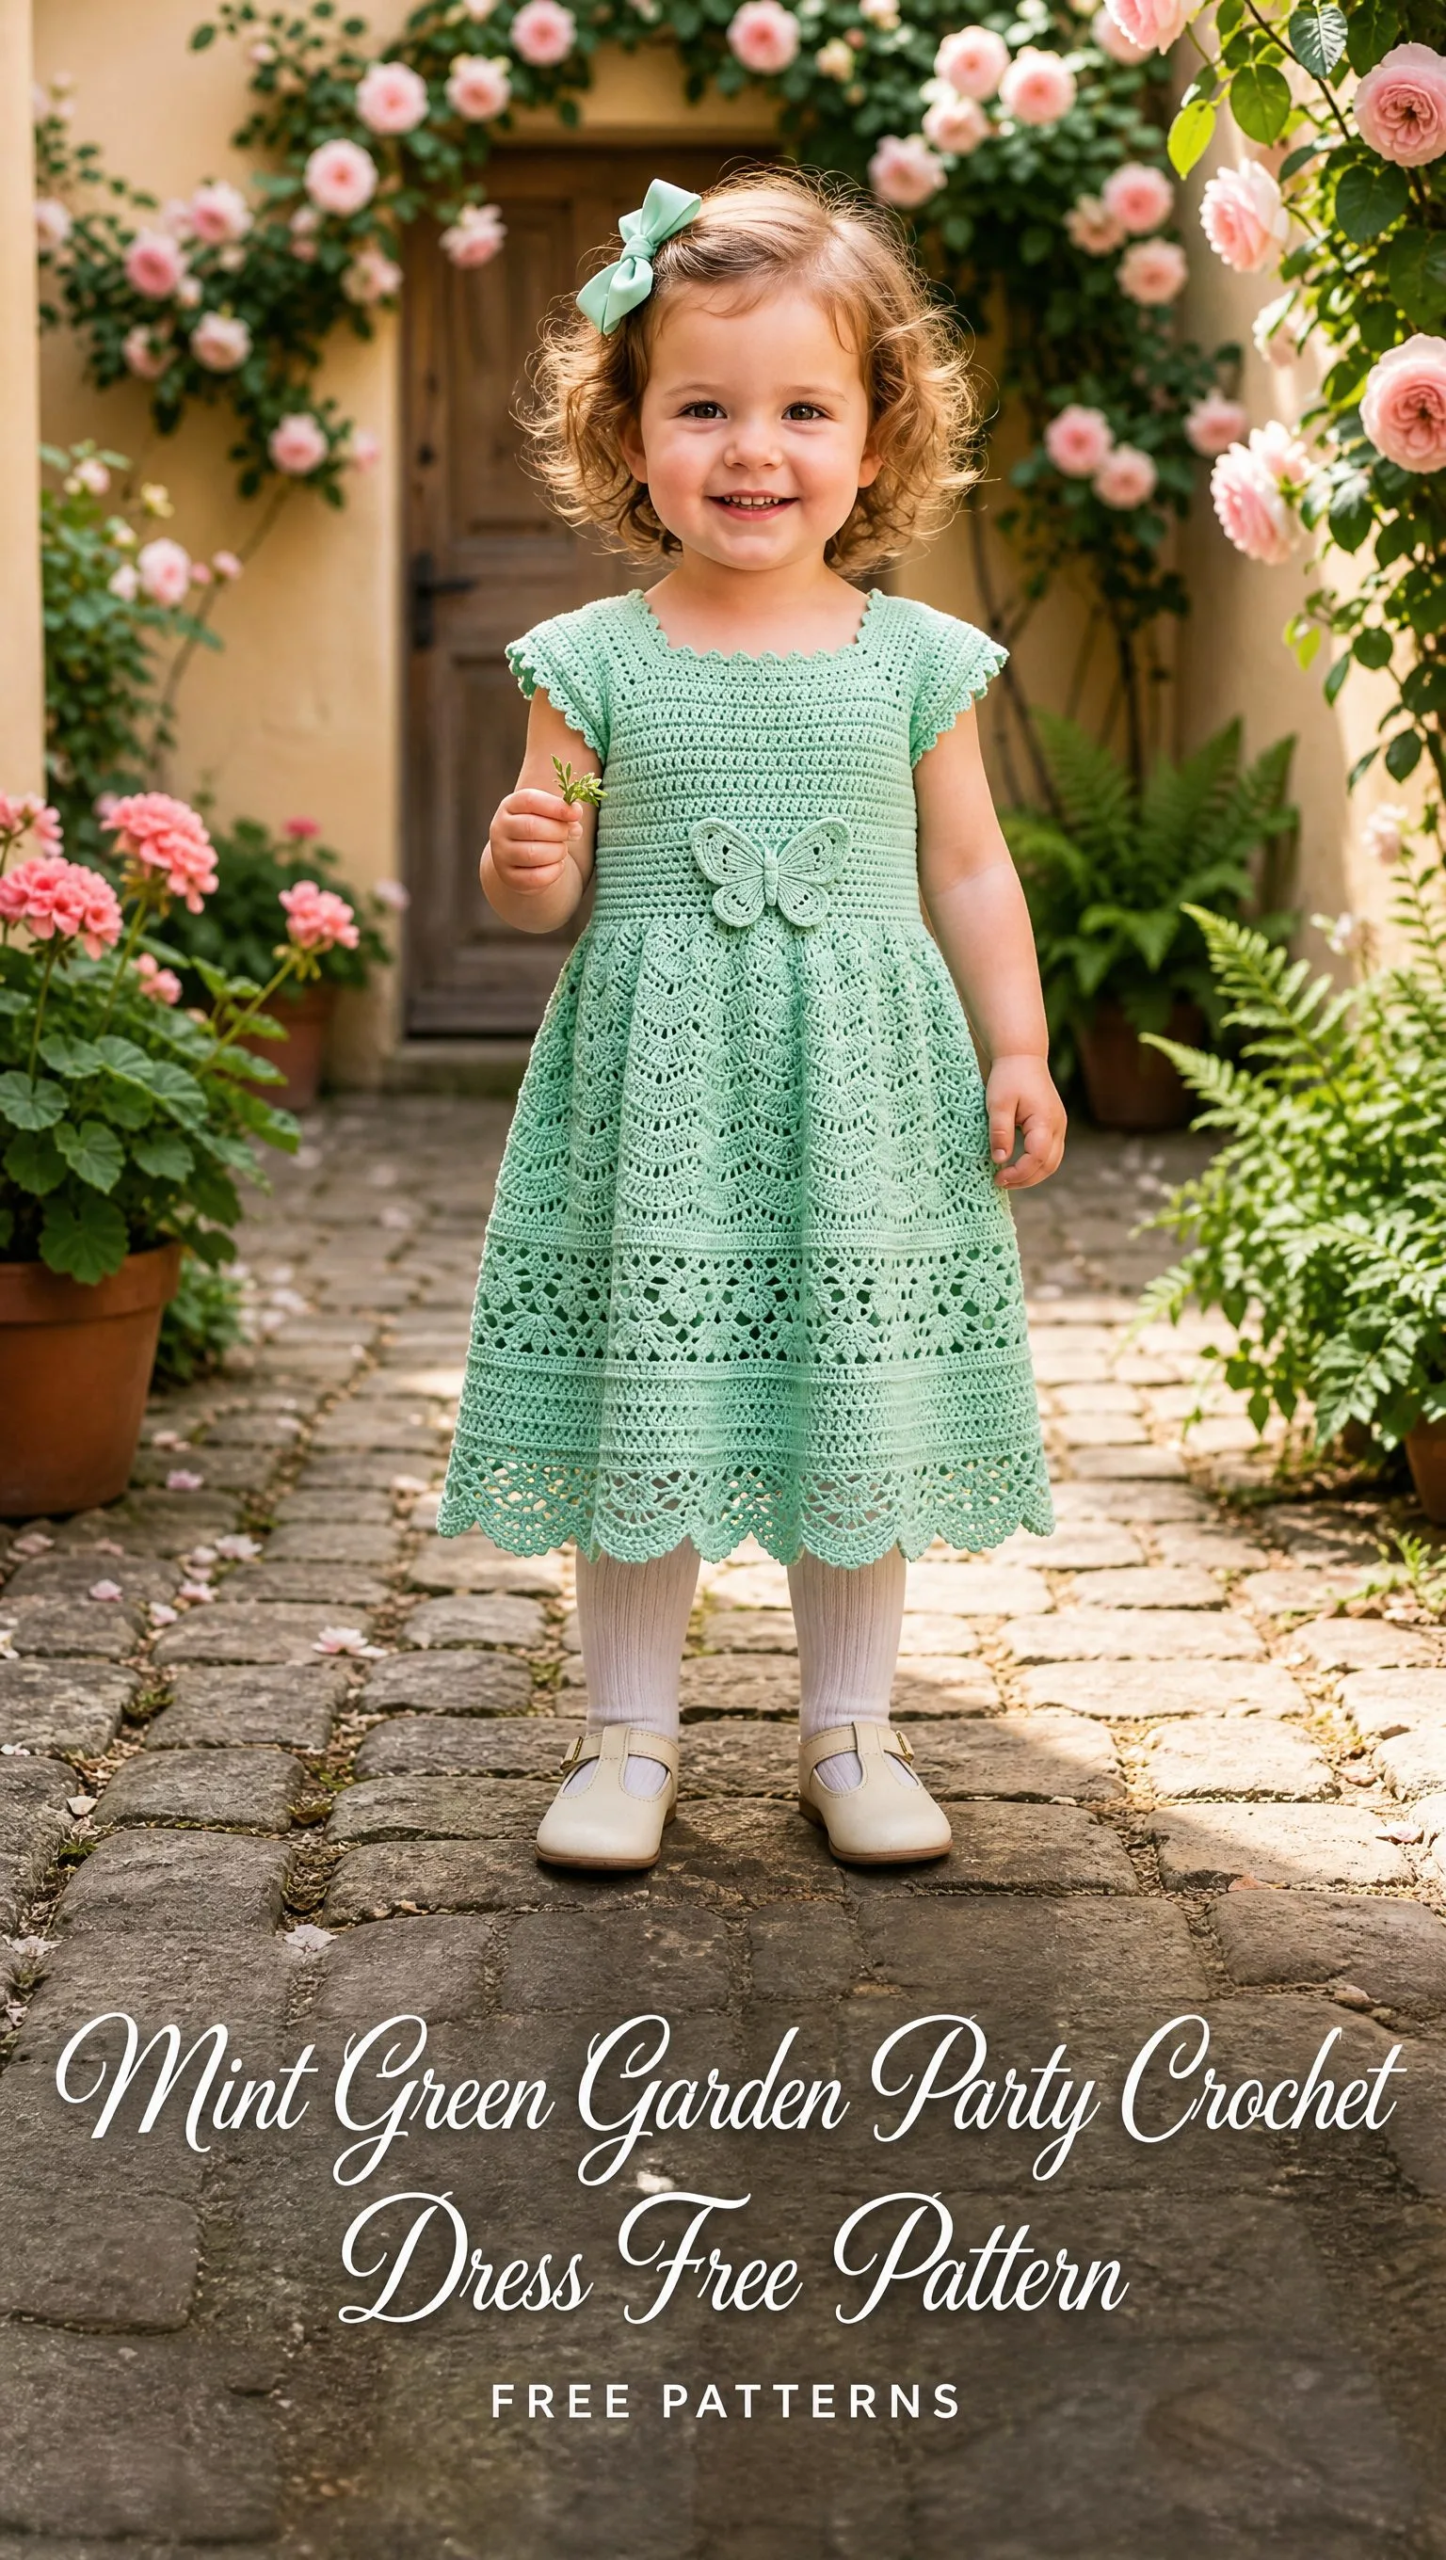
What came out of that week of designing is this dress. A proper heirloom piece with texture you can feel, a sweet butterfly at the waist, and a skirt that twirls just right. She wore it to her party, got frosting all over it, and I washed it right back to perfect. That’s the beauty of cotton yarn and solid construction.
I’m so excited to share this pattern with you. Whether you’re making it for your own little one, a grandchild, or a friend’s baby shower, this dress will become a keepsake. Let me walk you through every single step.
Why This Crochet Dress Pattern Works
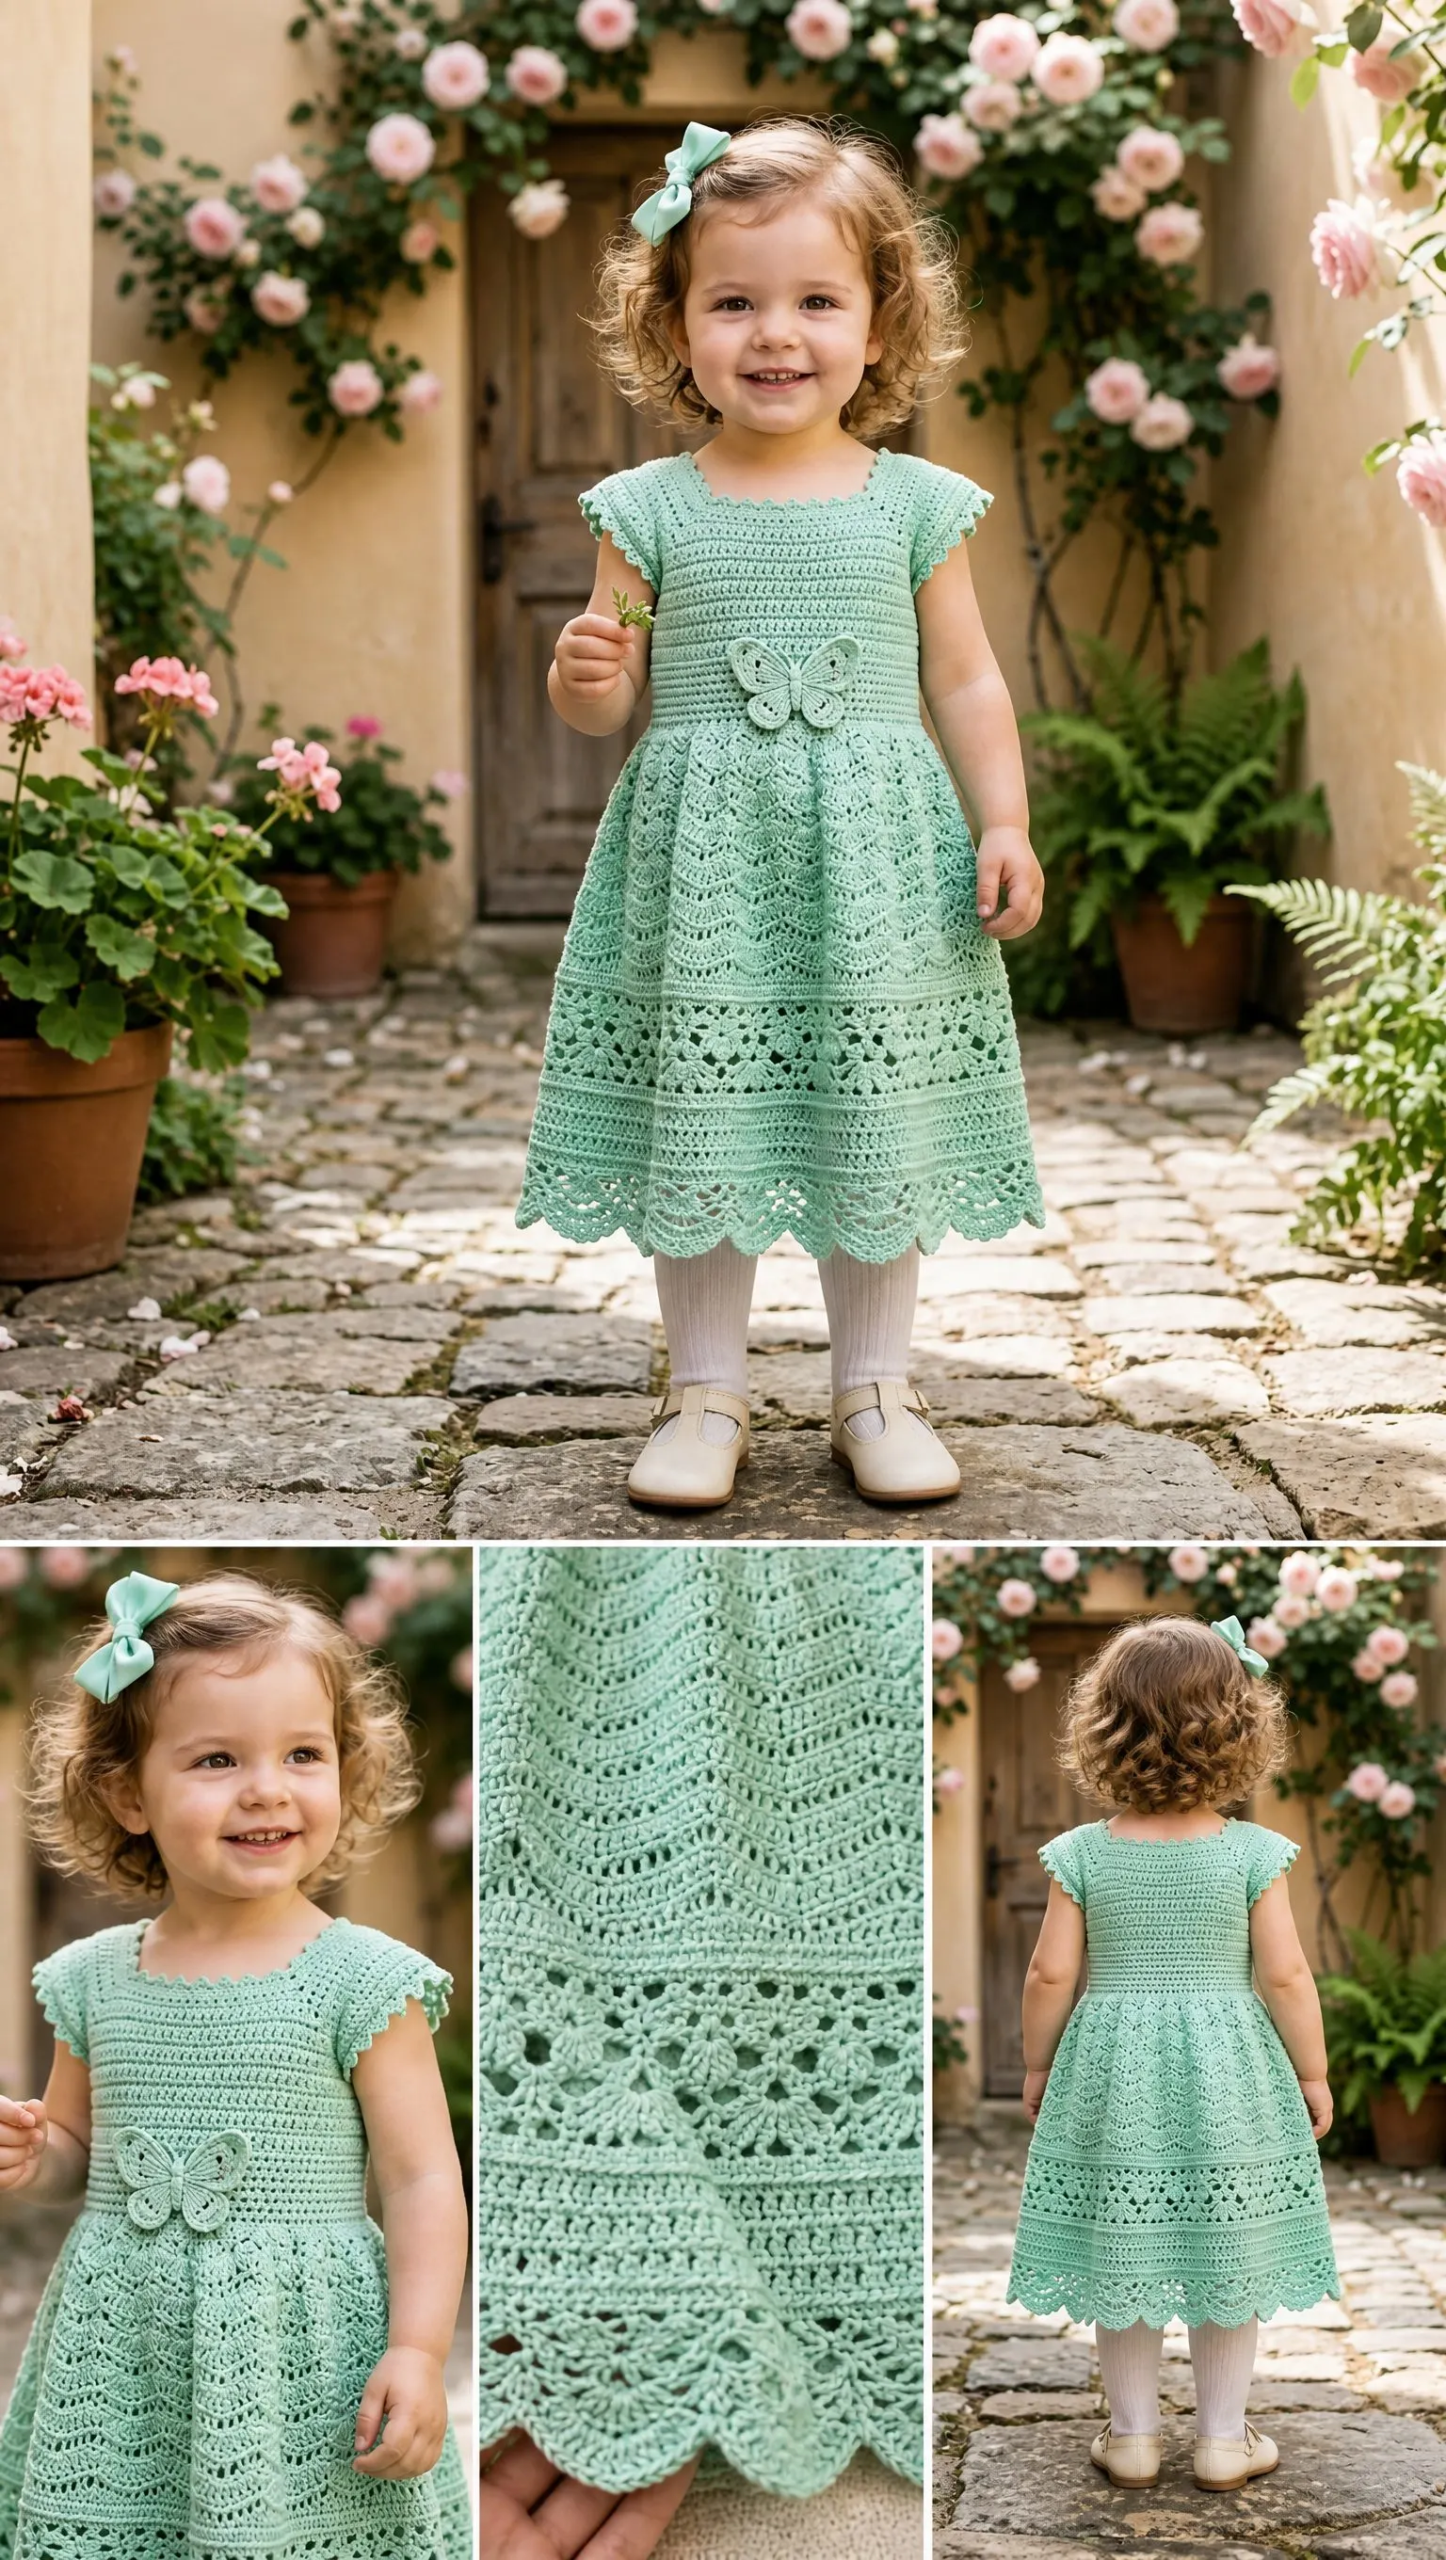
This isn’t just a pretty dress. It’s a well-engineered garment designed to fit properly and last through washes. The bodice uses simple single crochet (sc) throughout, which creates a smooth, sturdy fabric that won’t stretch out of shape. The skirt combines three distinct stitch textures: a fan stitch panel, an open diamond band, and a scalloped hem. These textures give the dress visual interest and that lovely drape you see in the photos.
The construction is smart too. You work the bodice flat in pieces, seam at the shoulders, then join everything at the empire waist and work the skirt in the round. The back has a button closure, so you can actually get the dress on and off a wiggly toddler without a fight.
Skill Level and Time Estimate
I’d call this Advanced Beginner to Intermediate. If you’ve made a garment before and you’re comfortable following stitch counts, you’ll do great. The bodice is beginner-friendly single crochet. The skirt introduces fan stitches and an open diamond pattern, but I’ll explain both clearly.
Expect to spend 12 to 18 hours depending on your experience and which size you’re making.
Finished Sizes for This Crochet Toddler Dress
This pattern includes four sizes:
Size 12 months: chest 19 inches (48 cm), total length 16 inches (41 cm)
Size 2T: chest 21 inches (53 cm), total length 17.5 inches (44 cm)
Size 3T: chest 22 inches (56 cm), total length 18.5 inches (47 cm)
Size 4T: chest 24 inches (61 cm), total length 20 inches (51 cm)
Instructions are written for 12 months with changes for larger sizes in parentheses in this order: 12m (2T, 3T, 4T). When you see only one number, it applies to all sizes.
Materials You’ll Need
Yarn: Approximately 350 (420, 490, 560) yards of DK weight yarn (CYCA 3). I recommend 100 percent cotton or a cotton blend for the best drape and stitch definition.
Here are three yarns that work beautifully:
1. Paintbox Yarns Simply DK in Spearmint (100% cotton, 137 yards per 50g skein). Excellent stitch definition in lace panels.
2. Drops Safran in Mint (70% cotton, 30% polyamide, 175 yards per 50g skein). The nylon adds durability for kids’ wear.
3. Lion Brand 24/7 Cotton in Mint (100% mercerized cotton, 186 yards per 100g skein). Widely available and machine washable.
Avoid acrylic-only yarns. They won’t block to show off those gorgeous lace panels in the skirt.
Hooks:
Additional materials:
Gauge (Please Check This)
Gauge matters a lot for garments. A difference of even one stitch per 4 inches can change the chest measurement by up to 2 inches across the finished dress.
With E-4 / 3.5 mm hook in single crochet:
18 sc = 4 inches (10 cm)
20 rows = 4 inches (10 cm)
With F-5 / 3.75 mm hook in Fan Stitch:
One 12-stitch fan repeat = 2 inches (5 cm) wide
4 rows = 2 inches (5 cm) tall
Swatch both gauges before starting. Adjust your hook size if needed.
Abbreviations and Stitch Definitions
Let me define every abbreviation you’ll encounter:
Special Stitches Explained
Fan Stitch
This creates those beautiful scalloped waves in the skirt. Each fan is 5 double crochets worked into the same stitch or space.
The basic rhythm: skip 2 stitches, work 5 dc in the next stitch, skip 2 stitches, work 1 sc in the next stitch. This uses 6 stitches per fan repeat.
Open Diamond Stitch
This creates the horizontal band of openwork between the two fan panels. It’s worked over a multiple of 6 stitches plus 3.
The pattern alternates between rows of chain-1 spaces separated by double crochets, and rows of chain-3 arches connecting single crochets.
Scallop Edging
A simple finishing round: sc in one stitch, skip 2 stitches, 5 dc in the next stitch, skip 2 stitches, repeat around. This needs a stitch count divisible by 6.
Butterfly Applique
Wings (make 2): Ch 10. Sc in 2nd ch from hook, hdc in next, dc in next 3, hdc in next, sc in next, sl st in last 2 ch. Fasten off leaving a 6 inch tail.
Body: Ch 8. Sc in 2nd ch from hook and in each ch to end. (7 sc) Fasten off.
Assembly: Overlap the flat ends of both wings and whipstitch together at the center. Lay the body strip vertically over the join and sew through all layers. Curl the body slightly for dimension.
Step-by-Step Pattern Instructions
Bodice Front
With E-4 hook, ch 43 (47, 51, 55).
Row 1 (WS): Sc in 2nd ch from hook and in each ch across. Turn. (42, 46, 50, 54 sc)
Rows 2 through 12: Ch 1, sc in each sc across. Turn. (42, 46, 50, 54 sts) after each row.
Checkpoint: After Row 12, your front bodice panel should measure approximately 2.4 inches tall and 9.3 inches wide for size 12m.
Armhole Shaping (Front)
Row 13: Ch 1, sl st across first 4 sts, ch 1, sc in same st as last sl st, sc across to last 4 sts, leave last 4 sts unworked. Turn. (34, 38, 42, 46 sc)
Row 14: Ch 1, sc2tog, sc across to last 2 sts, sc2tog. Turn. (32, 36, 40, 44 sts)
Row 15: Ch 1, sc2tog, sc across to last 2 sts, sc2tog. Turn. (30, 34, 38, 42 sts)
Rows 16 through 22: Ch 1, sc in each sc across. Turn. (30, 34, 38, 42 sts) after each row.
Checkpoint: After Row 22, the front bodice should measure approximately 5 inches tall for size 12m.
Neckline Shaping (Front)
Row 23 (left shoulder): Ch 1, sc across first 9 (10, 11, 12) sts only. Turn. Leave remaining sts unworked.
Row 24: Ch 1, sc2tog, sc across. Turn. (8, 9, 10, 11 sts)
Row 25: Ch 1, sc across to last 2 sts, sc2tog. Turn. (7, 8, 9, 10 sts)
Row 26: Ch 1, sc in each sc across. Turn. (7, 8, 9, 10 sts)
Fasten off. This is your left front shoulder strap.
For the right shoulder: Skip center 12 (14, 16, 18) sts for the neckline opening.
Row 23R: Join yarn in next st, ch 1, sc across remaining 9 (10, 11, 12) sts. Turn.
Row 24R: Ch 1, sc across to last 2 sts, sc2tog. Turn. (8, 9, 10, 11 sts)
Row 25R: Ch 1, sc2tog, sc across. Turn. (7, 8, 9, 10 sts)
Row 26R: Ch 1, sc in each sc across. Turn. (7, 8, 9, 10 sts)
Fasten off. This is your right front shoulder strap.
Bodice Back (Left Half)
With E-4 hook, ch 23 (25, 27, 29).
Row 1 (WS): Sc in 2nd ch from hook and in each ch across. Turn. (22, 24, 26, 28 sc)
Rows 2 through 12: Ch 1, sc in each sc across. Turn. (22, 24, 26, 28 sts) after each row.
Armhole Shaping (Back Left Half)
Row 13: Ch 1, sl st across first 4 sts, ch 1, sc in same st, sc across to end. Turn. (18, 20, 22, 24 sc)
Row 14: Ch 1, sc in each sc to last 2, sc2tog. Turn. (17, 19, 21, 23 sts)
Row 15: Ch 1, sc in each sc to last 2, sc2tog. Turn. (16, 18, 20, 22 sts)
Rows 16 through 22: Ch 1, sc in each sc across. Turn. (16, 18, 20, 22 sts) after each row.
Neckline Shaping (Back Left Half)
Row 23: Ch 1, sc across first 7 (8, 9, 10) sts. Turn. Leave remaining 9 (10, 11, 12) sts for back neckline.
Row 24: Ch 1, sc2tog, sc across. Turn. (6, 7, 8, 9 sts)
Row 25: Ch 1, sc in each sc across. Turn. (6, 7, 8, 9 sts)
Row 26: Ch 1, sc in each sc across. Turn. (6, 7, 8, 9 sts)
Fasten off leaving a 12 inch tail for seaming.
Bodice Back (Right Half)
Work same as Back Left Half but mirror all shaping.
With E-4 hook, ch 23 (25, 27, 29).
Row 1: Sc in 2nd ch from hook and in each ch across. Turn. (22, 24, 26, 28 sc)
Rows 2 through 12: Ch 1, sc in each sc across. Turn. (22, 24, 26, 28 sts)
Row 13 (armhole): Ch 1, sc across to last 4 sts, leave last 4 sts unworked. Turn. (18, 20, 22, 24 sts)
Row 14: Ch 1, sc2tog, sc across. Turn. (17, 19, 21, 23 sts)
Row 15: Ch 1, sc2tog, sc across. Turn. (16, 18, 20, 22 sts)
Rows 16 through 22: Ch 1, sc in each sc across. Turn. (16, 18, 20, 22 sts)
Row 23: Ch 1, skip first 9 (10, 11, 12) sts, join in next st, sc across remaining 7 (8, 9, 10) sts. Turn. (7, 8, 9, 10 sts)
Row 24: Ch 1, sc across to last 2, sc2tog. Turn. (6, 7, 8, 9 sts)
Row 25: Ch 1, sc in each sc across. Turn. (6, 7, 8, 9 sts)
Row 26: Ch 1, sc in each sc across. Turn. (6, 7, 8, 9 sts)
Fasten off leaving a 12 inch tail.
Shoulder Seams
Hold front and back left shoulders with RS together. Whipstitch or sl st seam across the 7 (8, 9, 10) shoulder stitches. Repeat for right shoulder. Weave in ends.
Neckline Edging
With RS facing and E-4 hook, join yarn at right back neckline edge.
Round 1: Ch 1, sc evenly around entire neckline, working approximately 1 sc per row end on straight sections and 1 sc per stitch across held neckline stitches. Work sc2tog at inner corners. Sl st to first sc. (Approximately 54, 58, 62, 66 sc)
Round 2: Ch 1, sc in each sc around. Sl st to first sc. Fasten off.
Cap Sleeve Edging (work on each armhole)
With RS facing and E-4 hook, join yarn at underarm.
Round 1: Ch 1, sc evenly around armhole opening. (24, 26, 28, 30 sc)
Round 2: Ch 1, sc in first sc, hdc in next 2 sc, sc in next sc, sl st in next sc. Repeat this sequence around for a scalloped cap sleeve effect. Sl st to first sc. Fasten off.
Empire Waist Join Round
With RS facing and E-4 hook, join yarn at right back lower bodice edge.
Round 1: Ch 1, sc evenly across the entire lower edge of the bodice. Target counts: (84, 96, 108, 120 sc)
Adjust in the underarm sections if needed to reach the target. These numbers are divisible by 12, which is required for the fan stitch. Sl st to first sc. Do not fasten off.
Skirt: Upper Fan Panel
Switch to F-5 hook.
Round 1 (RS): Ch 3 (counts as dc), 4 dc in same st, skip 2 sts, sc in next st, skip 2 sts, 5 dc in next st, skip 2 sts, sc in next st, skip 2 sts. Repeat around. Sl st to top of ch-3. Turn. (7, 8, 9, 10 fans)
Round 2 (WS): Ch 1, turn, sc in first sc, ch 2, sc in top of center dc of fan, ch 2, sc in next sc, ch 2, sc in center dc of next fan, ch 2. Repeat around. Sl st to first sc. Turn.
Round 3 (RS): Ch 3, 4 dc in same ch-2 sp, sc in next sc, 5 dc in next ch-2 sp, sc in next sc. Repeat around. Sl st to top of ch-3. Turn.
Rounds 4 through 9: Repeat Rounds 2 and 3 alternately.
Checkpoint: The skirt from empire waist through the upper fan panel should measure approximately 4 inches for size 12m.
Increase Round
Round 10: Ch 1, sc in each sc and in each center dc, sc 2 in each ch-2 sp. Work until you have (87, 99, 111, 123 sc). Sl st to first sc. Turn.
Open Diamond Band
Round 11 (RS): Ch 4 (counts as dc + ch 1), skip 1 st, dc in next st, ch 1, skip 1, dc in next st. Repeat around. Sl st to 3rd ch of ch-4. Turn.
Round 12 (WS): Ch 1, sc in same st, ch 3, sc in next ch-1 sp, ch 3, sc in next dc, ch 3, sc in next ch-1 sp. Repeat around. Sl st to first sc. Turn.
Rounds 13 through 16: Alternate Rounds 11 and 12.
Checkpoint: From empire waist through diamond band should measure approximately 7.5 inches for size 12m.
Lower Fan Panel Transition
Round 17: Ch 1, sc in each sc and fill each ch-3 sp with 2 sc. Work until you have (108, 120, 132, 144 sc). Sl st to first sc. Turn.
Rounds 18 through 27: Work fan and bridge rounds as in the upper fan panel. (9, 10, 11, 12 fans)
Scallop Hem
Round 28: Ch 1, sc in each sc around the last bridge round, working 3 sc into each ch-2 sp. Adjust to (108, 120, 132, 144 sc). Sl st to first sc. Do not turn.
Round 29 (RS): Ch 1, sc in first st, skip 2 sts, 5 dc in next st, skip 2 sts, sc in next st. Repeat around. Sl st to first sc. Fasten off. (18, 20, 22, 24 scallops)
Back Opening and Button Loops
Work a single sc edging up the left back center edge (approximately 26 sc for 12m). Fasten off.
For the right back edge, join yarn at lower edge, ch 1, sc for 6 rows, then work button loop: ch 4, skip 2 sts, sc in next st. Work 6 more sc, button loop, 6 more sc, button loop, then sc to top. (3 button loops evenly spaced) Fasten off.
Sew three buttons to left back edge aligned with loops.
Attach Butterfly
Block the butterfly flat. Center it on the front at the empire waist, approximately 1 inch below the center neckline. Sew securely with yarn needle.
Finishing and Blocking
Weave in all ends securely.
Wet block the dress by soaking in cool water for 20 minutes. Press out excess water gently in a towel. Do not wring. Lay flat on a blocking mat, pin the skirt hem to its full width to open the lace, and let dry completely. This may take 24 hours.
Blocking is essential. The fan and diamond panels will not show their true beauty without it.
Care Instructions
Machine wash gentle or hand wash in cool water. Lay flat to dry. Do not tumble dry. Store folded to prevent stretching.
Size Customization Tips
To size up beyond 4T: Add 12 stitches to the empire waist round per size (one full fan repeat). Add 4 stitches to the front bodice chain and 2 stitches to each back half per size step.
To lengthen: Work additional fan/bridge round pairs before the scallop hem.
To shorten: Eliminate 2 pairs of fan/bridge rounds from the lower fan panel.
For a taller child: Add rows to the straight bodice section (Rows 2 through 12) before armhole shaping.
Thank you so much for choosing this pattern. I hope you love making it as much as I loved designing it. If you finish one, I’d absolutely love to see it! Tag me on Instagram or share a photo in my Facebook group. Seeing your creations honestly makes my whole week.
If this pattern stole your heart, go ahead and save it to your Pinterest boards so you can find it when you’re ready to cast on. And please drop a comment below if you make one. I read every single comment and I can’t wait to hear how yours turns out!
You Might Also Like
- Soft Pink Floral Baby Cardigan Free Crochet Pattern
- Pastel Rainbow Dreamy Clutch Free Crochet Pattern
- Sage Green Boho Braided Bag Free Crochet Pattern
- Sage Green Ruffle Baby Dress Set Free Crochet Pattern
