
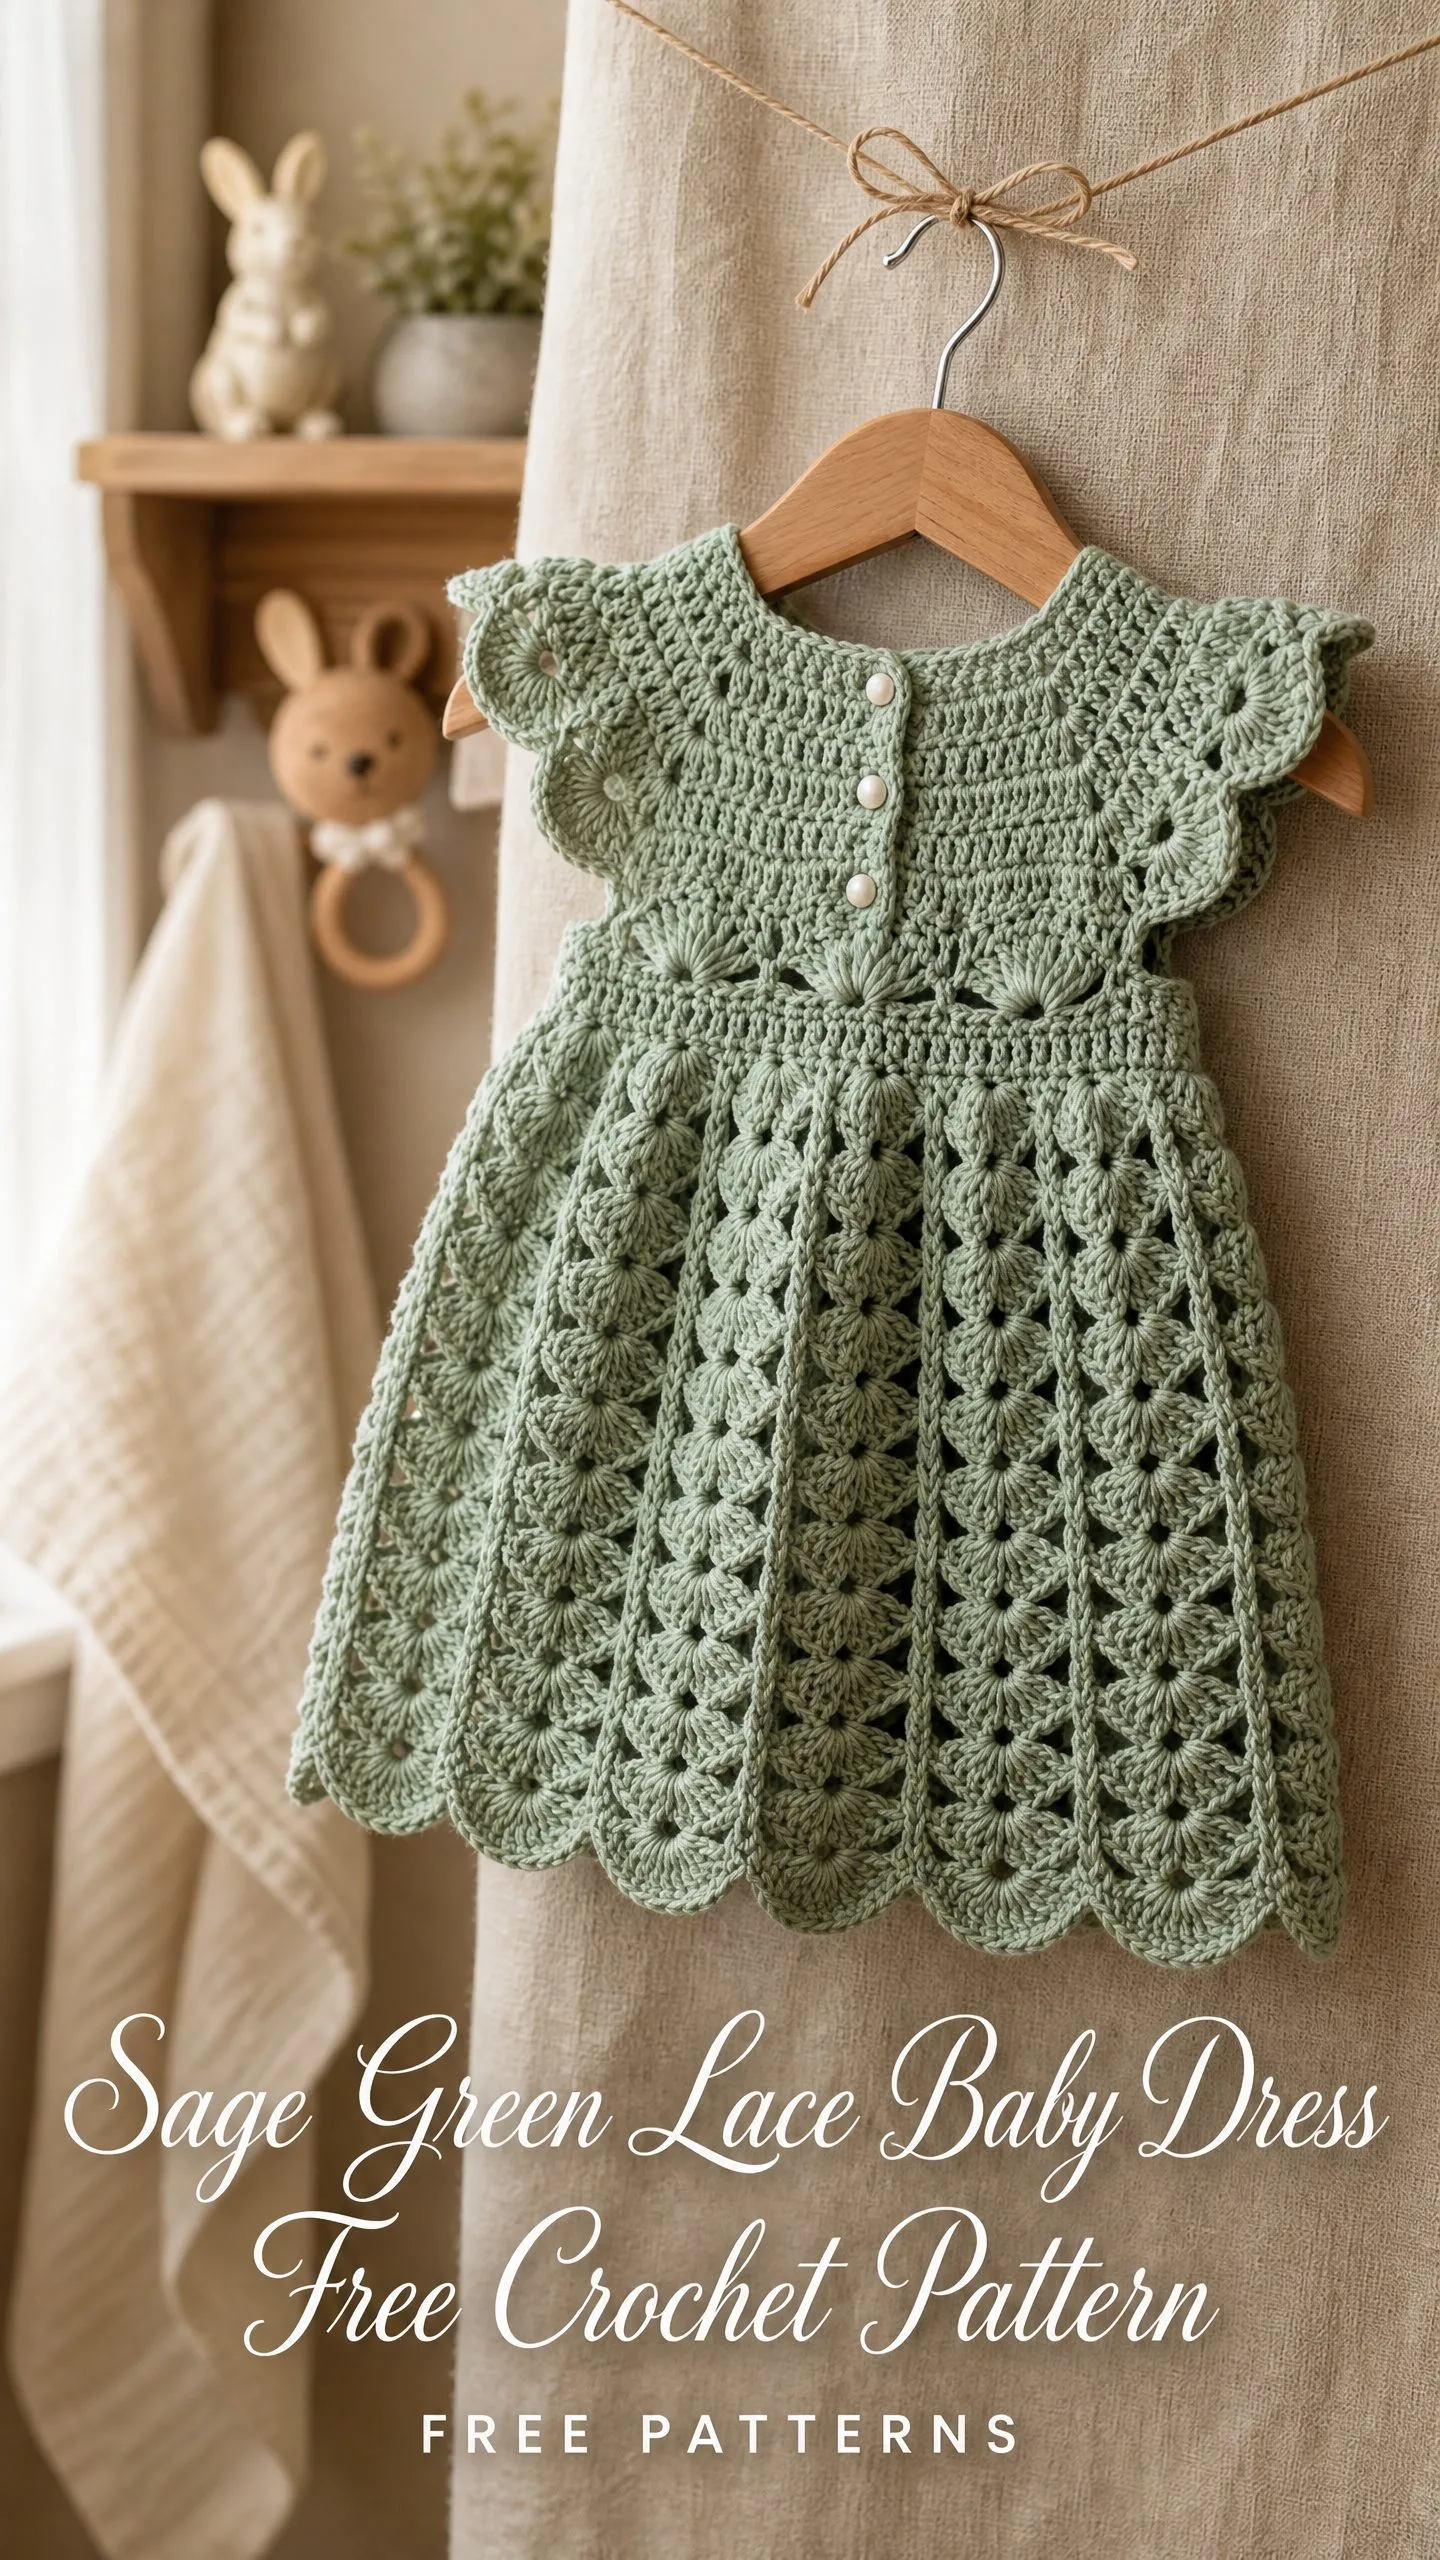
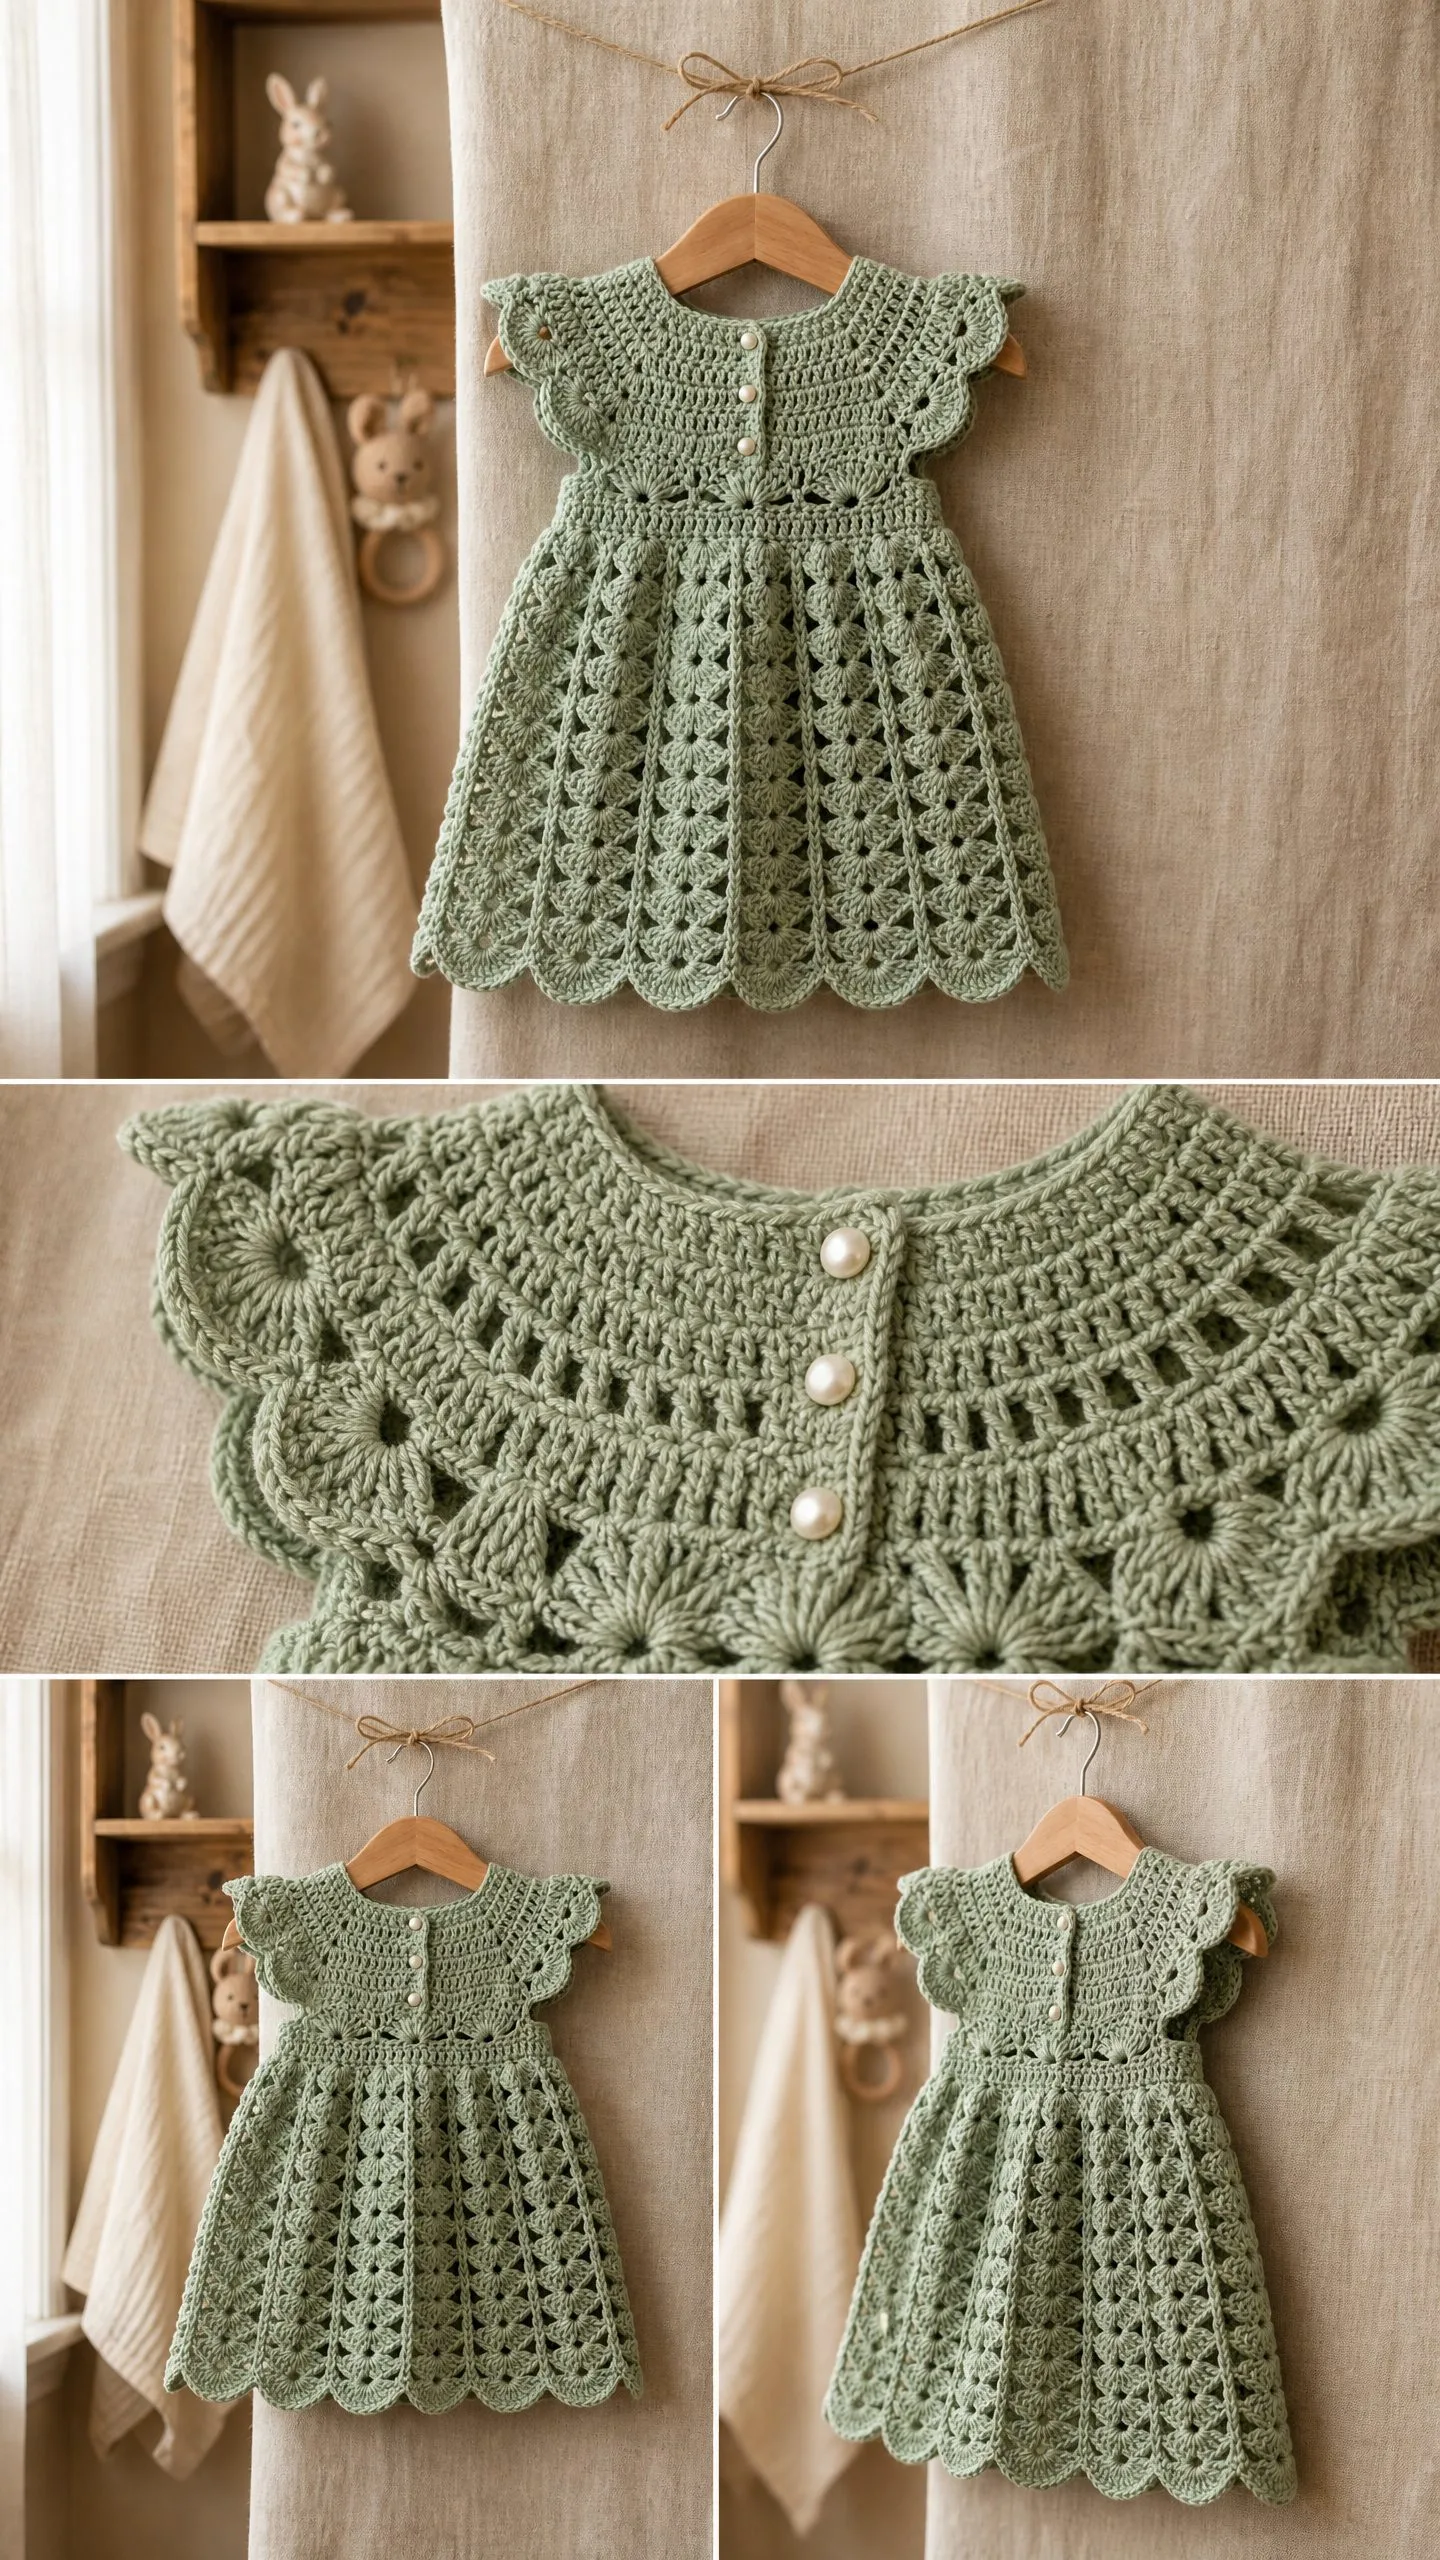
This is a top-down baby dress worked in DK weight cotton with shell lace stitches throughout the skirt. The yoke uses raglan shaping. The skirt features a repeating fan and arch motif that creates a beautiful diamond lattice effect. Three small buttons close the back opening.
The pattern is written for three sizes: 0-3 months, 6-12 months, and 12-18 months. You will need basic comfort with working in joined rounds, reading stitch repeats, and following size-specific instructions in parentheses.
If you have been wanting to try lace crochet but felt intimidated, this dress is a wonderful way to build confidence. The shell stitch is surprisingly straightforward once you understand the rhythm, and the construction is completely seamless.
Why This Baby Dress Pattern Works So Well
The genius of this design is in the construction method. You start at the neckline and work your way down, which means you can try the dress on as you go if you have a little one nearby. No seaming required at any point. The back opening is worked in rows during the yoke section, then everything joins into rounds for the bodice and skirt.
The shell stitch creates those gorgeous fan shapes you see cascading down the skirt. Each shell is simply 6 double crochet stitches worked into the same spot. That is the entire stitch. Nothing tricky about it at all.
The scalloped edges on the collar, sleeves, and hem tie everything together visually. They mirror each other perfectly, giving the dress that polished heirloom quality that makes handmade baby items so special.
Materials You Will Need
Yarn: DK weight, Light #3. You will need approximately 200 yards for 0-3 months, 250 yards for 6-12 months, or 300 yards for 12-18 months. The pattern calls for sage green, but any soft color would be beautiful. Choose 100% cotton or a cotton blend for the best stitch definition and drape.
Recommended Yarn Options:
Hook: US size D-3, which is 3.25 mm. Adjust if needed to match gauge.
Notions:
Gauge
Getting gauge right matters for clothing, so please make a swatch before starting.
20 single crochet stitches = 4 inches or 10 cm
10 single crochet rows = 4 inches or 10 cm
One full fan repeat in the skirt section measures approximately 1.25 inches or 3.2 cm wide.
If your swatch is too small, you have too many stitches per inch and need to go up a hook size. If your swatch is too large, you have too few stitches per inch and should go down a hook size.
Finished Measurements
Size 0-3 months:
Size 6-12 months:
Size 12-18 months:
All instructions are written for 6-12 months as the primary size. Numbers for 0-3 months appear in parentheses before the slash, and 12-18 months appear after the slash where they differ.
Skill Level and Time Estimate
This pattern is rated intermediate. You should be comfortable with joined rounds, working in rows with turning chains, raglan increases, and reading lace stitch repeats.
Expect to spend approximately 8 to 12 hours completing the 6-12 month size if you are an experienced intermediate crocheter.
Abbreviations and Stitch Definitions
Let me walk you through every stitch and abbreviation used in this pattern.
ch = chain. Wrap yarn over hook and pull through the loop on your hook.
sl st = slip stitch. Insert hook, yarn over, pull through both the stitch and the loop on your hook in one motion.
sc = single crochet. Insert hook into stitch, yarn over and pull up a loop, yarn over and pull through both loops.
dc = double crochet. Yarn over, insert hook into stitch, yarn over and pull up a loop, yarn over and pull through 2 loops, yarn over and pull through remaining 2 loops.
hdc = half double crochet. Yarn over, insert hook, yarn over and pull up a loop, yarn over and pull through all 3 loops at once.
sk = skip. Pass over the indicated number of stitches without working into them.
st(s) = stitch or stitches
sp = space
ch-sp = chain space. The gap created by a chain in the previous row or round.
RS = right side. The side of the fabric that faces outward.
WS = wrong side. The side of the fabric that faces inward.
rep = repeat
rem = remaining
rnd = round
Special Stitches for This Pattern
Shell: Work 6 double crochet stitches all into the same stitch or chain space. This creates the beautiful fan motif throughout the skirt.
Scallop: Work (sc, hdc, 3 dc, hdc, sc) all into the same stitch or chain space. This creates the rounded bumps at the collar, sleeve, and hem edges.
V-stitch (V-st): Work (dc, ch 2, dc) all into the same stitch or chain space.
Raglan increase (Rag-inc): Work 2 dc into the marked stitch. This adds 2 stitches at each of the four raglan marker positions, for 8 total stitches gained per increase round.
Pattern Notes Before You Begin
1. The dress is worked top-down from the neckline. The yoke is worked in rows to create a back opening, then joined into rounds for the bodice and skirt.
2. Place stitch markers at the four raglan points when you begin the yoke. Move them up each round as you work increases.
3. All ch-3 at the beginning of rounds that start with double crochet count as the first dc of that round.
4. The skirt motif repeat requires a multiple of 12 stitches. The pattern includes adjustment instructions to get your stitch count right before starting the skirt.
5. Right side should always face you during round sections. Mark the RS before you begin.
6. When working the back rows of the yoke, chain 3 at the start of each right-side row and chain 1 at the start of each wrong-side row.
Crochet Pattern Instructions
Neckline Foundation
Using sage yarn and your 3.25 mm hook, chain 68 (60 / 76).
Do not join into a ring yet. The back opening will be worked flat in rows through the yoke section.
The starting chain includes 2 extra chains that form the back overlap bands. When joining into rounds later, these edges will overlap by 4 stitches.
Yoke Section (Worked in Rows)
Row 1 (RS): Ch 3 (counts as dc), dc in each ch across, turn. (68 / 60 / 76 dc)
Row 2 (WS): Ch 1, sc in each dc across, turn. (68 / 60 / 76 sc)
Row 3 (RS, Raglan increase row): Ch 3, dc in next 5 (4 / 6) sts, place marker, 2 dc in next st (Rag-inc), dc in next 10 (9 / 11) sts, 2 dc in next st (Rag-inc), dc in next 22 (20 / 26) sts, 2 dc in next st (Rag-inc), dc in next 10 (9 / 11) sts, 2 dc in next st (Rag-inc), dc in rem 6 (5 / 7) sts, turn. (72 / 64 / 80 dc)
Row 4 (WS): Ch 1, sc in each st across, turn. (72 / 64 / 80 sc)
Row 5 (RS, Raglan increase row): Ch 3, dc in next 5 (4 / 6) sts, 2 dc in next st, dc in next 12 (11 / 13) sts, 2 dc in next st, dc in next 24 (22 / 28) sts, 2 dc in next st, dc in next 12 (11 / 13) sts, 2 dc in next st, dc in rem 6 (5 / 7) sts, turn. (76 / 68 / 84 dc)
Row 6 (WS): Ch 1, sc in each st across, turn. (76 / 68 / 84 sc)
Row 7 (RS, Raglan increase row): Ch 3, dc in next 5 (4 / 6) sts, 2 dc in next st, dc in next 14 (13 / 15) sts, 2 dc in next st, dc in next 26 (24 / 30) sts, 2 dc in next st, dc in next 14 (13 / 15) sts, 2 dc in next st, dc in rem 6 (5 / 7) sts, turn. (80 / 72 / 88 dc)
Row 8 (WS): Ch 1, sc in each st across, turn. (80 / 72 / 88 sc)
Row 9 (RS, Raglan increase row): Ch 3, dc in next 5 (4 / 6) sts, 2 dc in next st, dc in next 16 (15 / 17) sts, 2 dc in next st, dc in next 28 (26 / 32) sts, 2 dc in next st, dc in next 16 (15 / 17) sts, 2 dc in next st, dc in rem 6 (5 / 7) sts, turn. (84 / 76 / 92 dc)
Row 10 (WS): Ch 1, sc in each st across, turn. (84 / 76 / 92 sc)
Row 11 (RS, Raglan increase row): Ch 3, dc in next 5 (4 / 6) sts, 2 dc in next st, dc in next 18 (17 / 19) sts, 2 dc in next st, dc in next 30 (28 / 34) sts, 2 dc in next st, dc in next 18 (17 / 19) sts, 2 dc in next st, dc in rem 6 (5 / 7) sts, turn. (88 / 80 / 96 dc)
Row 12 (WS): Ch 1, sc in each st across, turn. (88 / 80 / 96 sc)
Checkpoint: After Row 12, the yoke should measure approximately 3 inches or 7.5 cm from the foundation chain. The piece should have a gentle trapezoid shape.
Joining the Yoke and Separating Sleeves
Row 13 (RS, joining and sleeve separation): This row closes the back opening and separates the sleeve stitches.
Ch 3, dc across 8 (7 / 9) back sts (left back panel). Skip next 20 (19 / 21) sleeve sts and ch 4 (ch 3 / ch 5) over the gap for the underarm. Dc across next 32 (30 / 36) front sts. Skip next 20 (19 / 21) sleeve sts and ch 4 (ch 3 / ch 5) over the gap for the second underarm. Dc across remaining 8 (7 / 9) back sts.
Align the two back edges so they overlap by approximately 4 stitches. Join with a sl st through both layers at the center back to close into a round. Place marker at this join. Do not turn. (64 / 56 / 72 working sts in the round)
Bodice Section (Worked in Joined Rounds)
Rnd 1: Ch 1, sc in each st and each ch around, sl st to first sc to join. (64 / 56 / 72 sc)
Rnd 2: Ch 3 (counts as dc), dc in each sc around, sl st to top of ch-3 to join. (64 / 56 / 72 dc)
Rnd 3: Ch 1, sc in each dc around, sl st to first sc to join. (64 / 56 / 72 sc)
Rnd 4: Ch 3, dc in each sc around, sl st to top of ch-3 to join. (64 / 56 / 72 dc)
Rnd 5: Ch 1, sc in each dc around, sl st to first sc to join. (64 / 56 / 72 sc)
Rnd 6 (Waist increase rnd): Ch 1, sc in first 3 sc, 2 sc in next sc, (sc in next 3 sc, 2 sc in next sc) rep around, sl st to first sc to join. (80 / 70 / 90 sc)
Checkpoint: After Rnd 6, the bodice should measure approximately 3 inches or 7.5 cm from the joining row.
Skirt Transition Round
The skirt motif requires a stitch count that is a multiple of 12. Adjust your count as follows:
Transition Rnd: Ch 1, work sc around incorporating size adjustments above, sl st to first sc. (72 / 84 / 96 sc)
Skirt Section (Worked in Joined Rounds)
Skirt Rnd 1 (Setup mesh): Ch 1, sc in same st, ch 5, sk 5 sc, (sc in next sc, ch 5, sk 5 sc) rep around, sl st to first sc. (12 / 14 / 16 ch-5 arches)
Skirt Rnd 2: Ch 1, sc in first sc, (Shell of 6 dc in ch-5 arch, sc in next sc) rep around, sl st to first sc. (12 / 14 / 16 Shells)
Skirt Rnd 3: Sl st across to center dc of first Shell (3rd dc), ch 5 (counts as dc + ch 2), dc in same dc, ch 2, sc in next sc, ch 2, (V-st in 3rd dc of next Shell, ch 2, sc in next sc, ch 2) rep around, sl st to 3rd ch of beg ch-5. (12 / 14 / 16 V-sts)
Skirt Rnd 4: Ch 3 (counts as dc), 2 dc in same sp as join, ch 2, sc in next sc, ch 2, (Shell in ch-2 sp of V-st, ch 2, sc in next sc, ch 2) rep around, 3 dc in same sp as beg ch-3 to complete the opening Shell, sl st to top of beg ch-3. (12 / 14 / 16 Shells)
Skirt Rnd 5: Rep Rnd 3. (12 / 14 / 16 V-sts)
Skirt Rnd 6: Rep Rnd 4. (12 / 14 / 16 Shells)
Continue alternating Rnds 3 and 4 (V-st rounds and Shell rounds) until skirt measures:
Hem Border
End on a Shell round before starting the border.
Hem Border Rnd 1: Ch 1, sc in first sc, ch 3, (sc in 3rd dc of next Shell, ch 3, sc in next sc, ch 3) rep around, sl st to first sc. (24 / 28 / 32 ch-3 sp)
Hem Border Rnd 2 (Scallop): Ch 1, (Scallop of (sc, hdc, 3 dc, hdc, sc) in next ch-3 sp) rep around, sl st to first sc. (24 / 28 / 32 Scallops)
Fasten off and weave in end.
Collar and Sleeve Scallop Edging
Collar Edging: With RS facing, join yarn to the right back neckline edge. Ch 1, sc evenly around the entire neckline, working approximately 1 sc per chain of the foundation, sl st to first sc.
Next rnd: Ch 1, (Scallop in every 3rd sc) rep around, sl st to first sc. Fasten off.
Sleeve Cap Edging: Join yarn to the edge of one sleeve opening. Ch 1, sc evenly around the sleeve opening edge, working 1 sc in each skipped sleeve dc and 1 sc in each underarm chain, sl st to first sc.
Next rnd: Ch 1, (Scallop in every 3rd sc) rep around, sl st to first sc. Fasten off.
Repeat for second sleeve opening.
Button Band and Button Loops
Right Back Band: With RS facing, join yarn to the top right corner of the back opening. Ch 1, work 1 sc in each row-end stitch down the right back edge, turn. Ch 1, sc in each sc across, fasten off.
Left Back Band: Join yarn to bottom of left back edge. Work 1 sc in each row-end st up the left back edge, turn.
Button loop row: Ch 1, sc in first 2 sc, (ch 3, sk 2 sc, sc in next 4 sc) 3 times, sc to end. Fasten off.
Sew the 3 buttons onto the right back band to align with the loops.
Finishing Your Sage Green Lace Baby Dress
Weave in all ends securely using your tapestry needle. Draw tails through the backs of stitches in multiple directions to prevent unraveling. Trim all tails close to the fabric.
Blocking
Blocking is essential for this lace dress. The shell fans will not open to their full beauty without it.
Hand wash the finished dress in cool water with a small amount of gentle soap. Gently press out excess water in a clean towel without wringing. Lay the dress flat on a blocking mat. Gently stretch the skirt fans open and pin each scallop point of the hem individually with rustproof pins. Smooth the bodice flat and align the collar and sleeve scallops. Allow to dry completely, which may take 8 to 24 hours depending on your environment.
Tips for Customizing This Pattern
To add length to the skirt: Work additional pairs of V-st and Shell rounds before the hem border. Each pair adds approximately 0.75 inches or 2 cm.
To make a larger size (24 months and up): Increase the starting foundation chain by 8 stitches and add one additional raglan increase row to the yoke. Adjust the skirt stitch count to the next multiple of 12 by adding 12 stitches in the transition round. This gives you one more Shell repeat.
To make a newborn size: Reduce the foundation chain by 8 stitches and omit the last raglan increase row.
You Did It!
Thank you so much for choosing this sage green lace baby dress crochet pattern for your next project. I hope the instructions were clear and that you enjoyed watching the beautiful shell lace take shape under your hook. This dress makes such a thoughtful gift for baby showers, christenings, or just because.
If you found this pattern helpful, I would love it if you saved it to your Pinterest boards so you can find it again later. And please drop a comment below if you make one. I always love seeing your finished projects and hearing which color you chose!
You Might Also Like
- Sunset Ombre Pompom Crochet Tank Free Crochet Pattern
- Dusty Rose Romantic Lace Belt Free Crochet Pattern
- Cozy Pumpkin Couple Amigurumi Free Crochet Pattern
- Moonlight Snake Plant Amigurumi Free Crochet Pattern
