
I don’t know about you, but I have a serious soft spot for baby clothes that feel like tiny works of art. The kind that makes everyone at the baby shower gasp and ask "did you really make that yourself?" This dress is exactly that project.
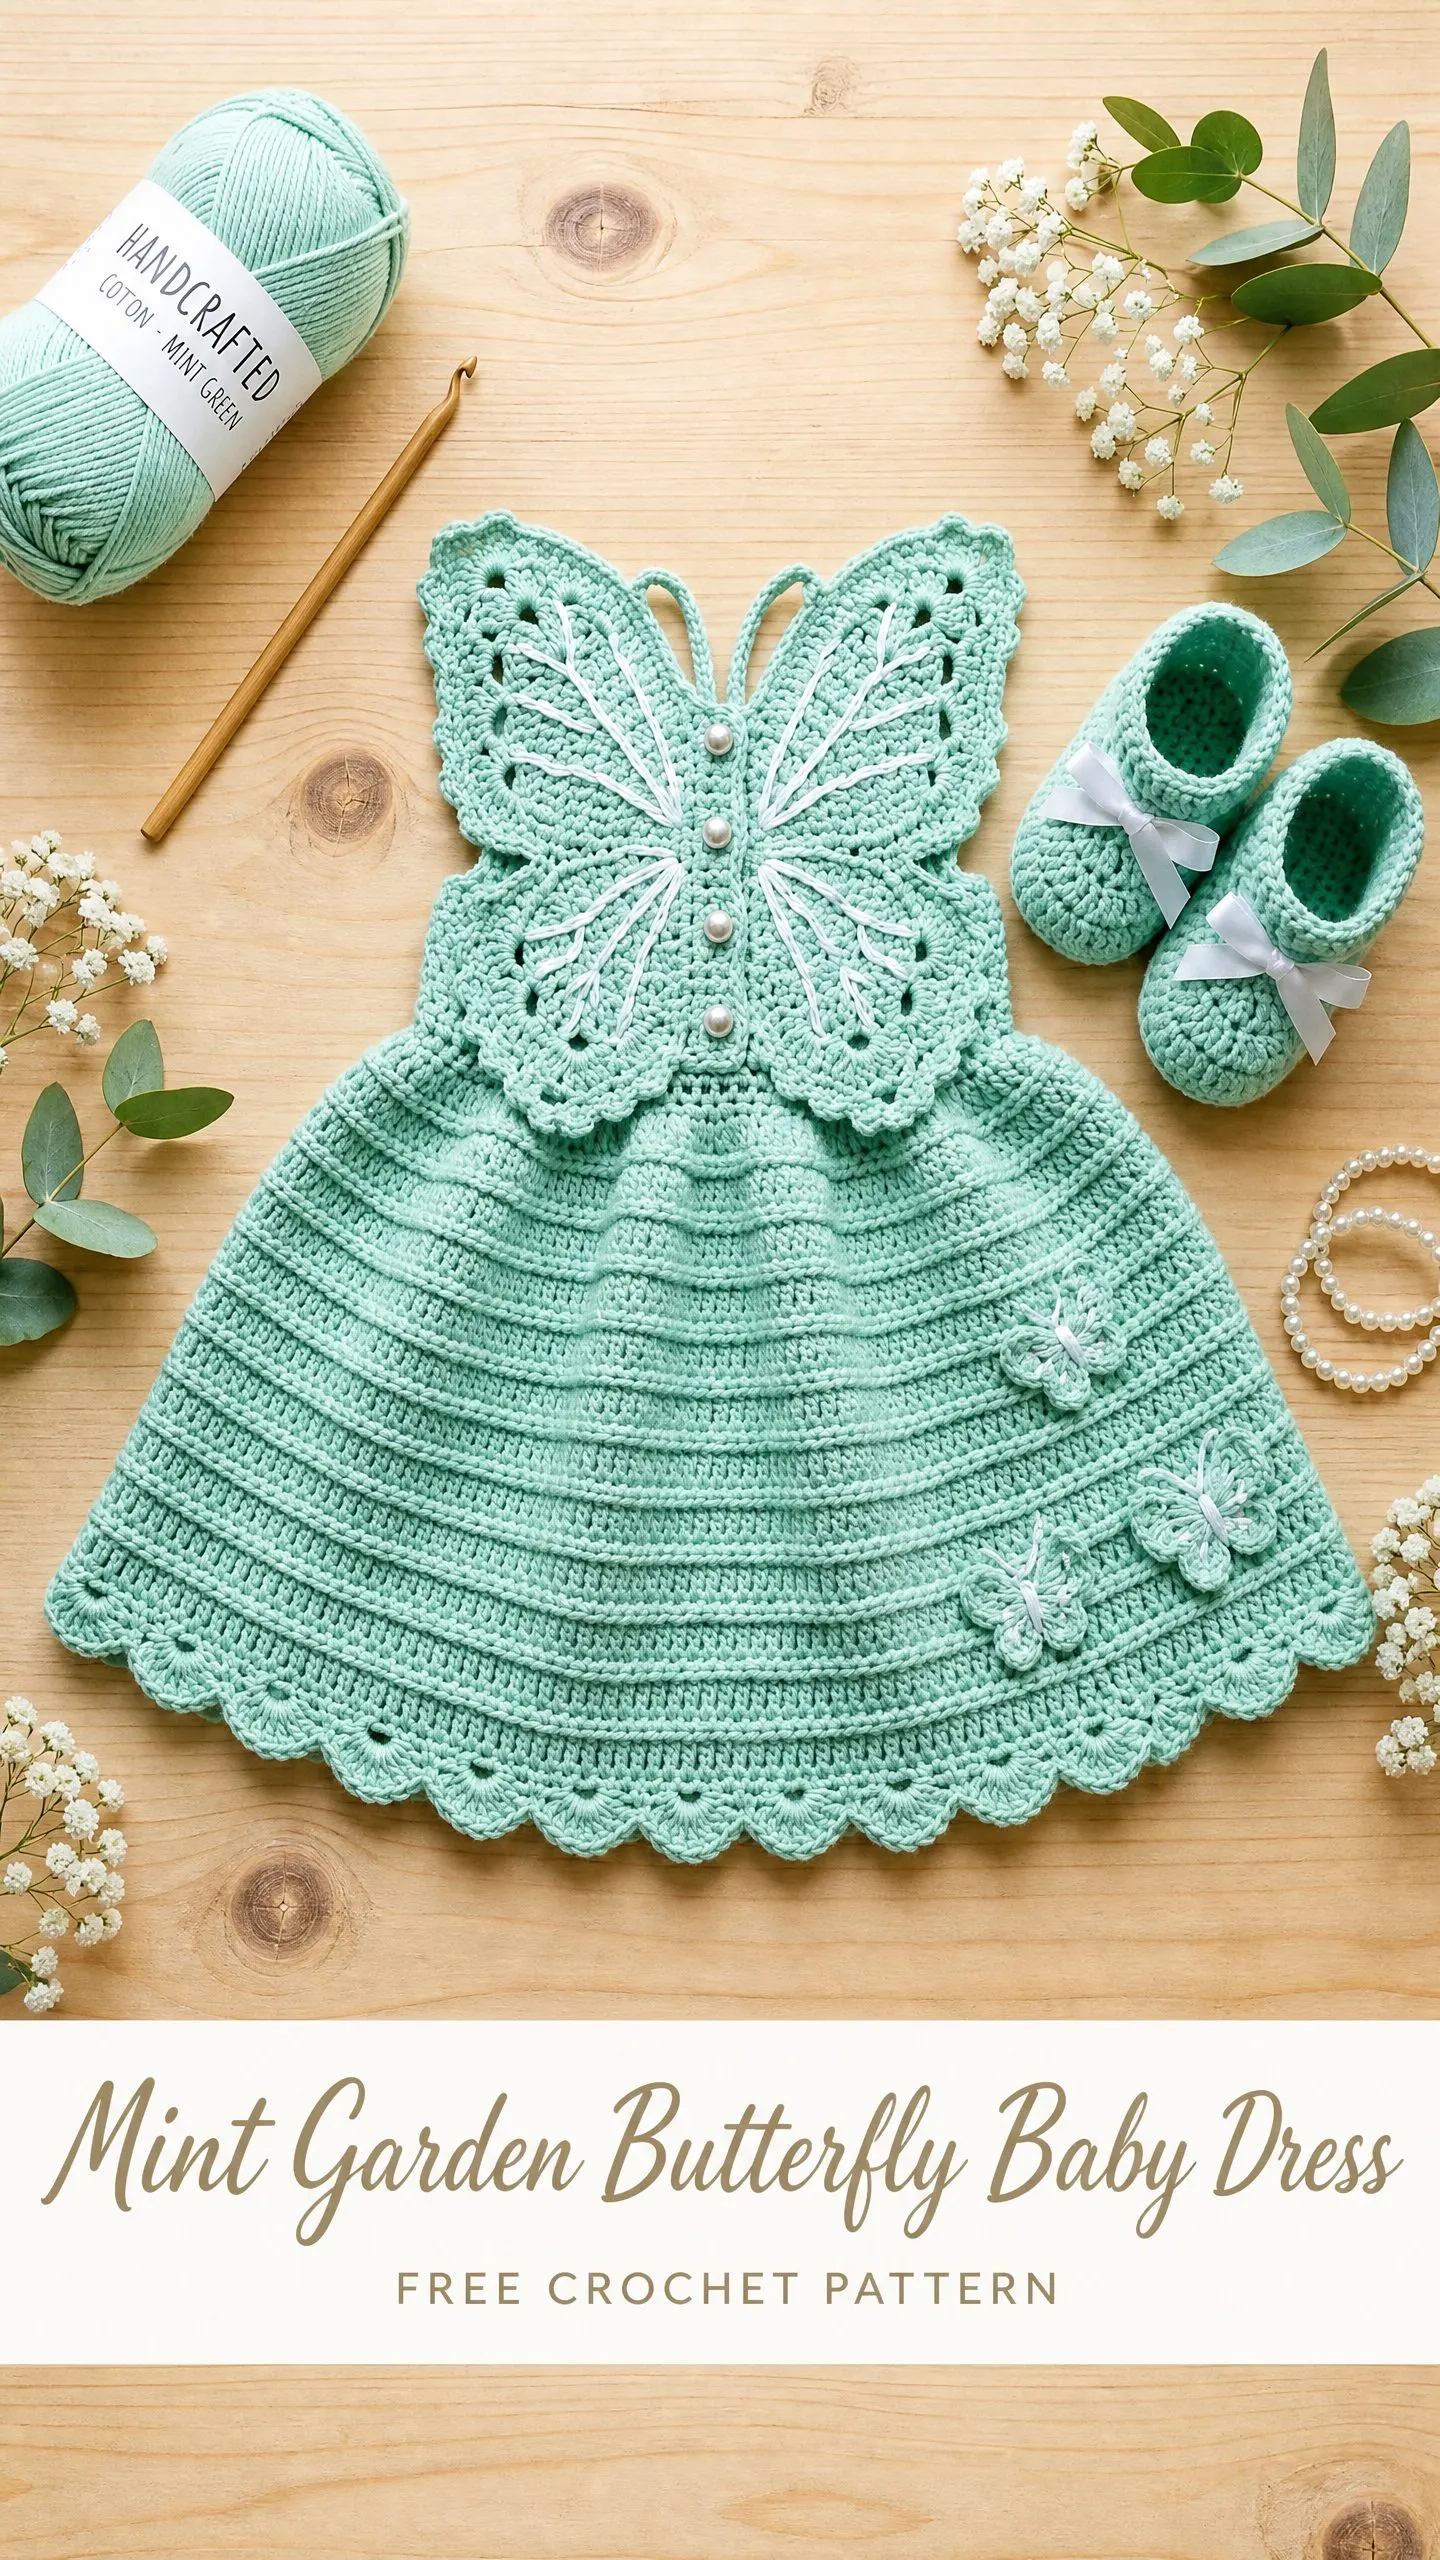
When I first came across this butterfly bodice design, I knew it was something special. The way the wings form the entire top of the dress, creating shoulder straps and a dramatic front panel all in one piece, it just feels clever and beautiful at the same time. Plus, that mint green cotton paired with delicate white embroidery gives it an heirloom quality that photographs like a dream.
Fair warning though. This is not a weekend project for someone brand new to crochet. But if you have tackled a few lace motifs and worked in the round before, you can absolutely do this. I am going to walk you through every single step, explain the tricky bits, and make sure you feel confident from foundation chain to final scallop.
About This Crochet Pattern
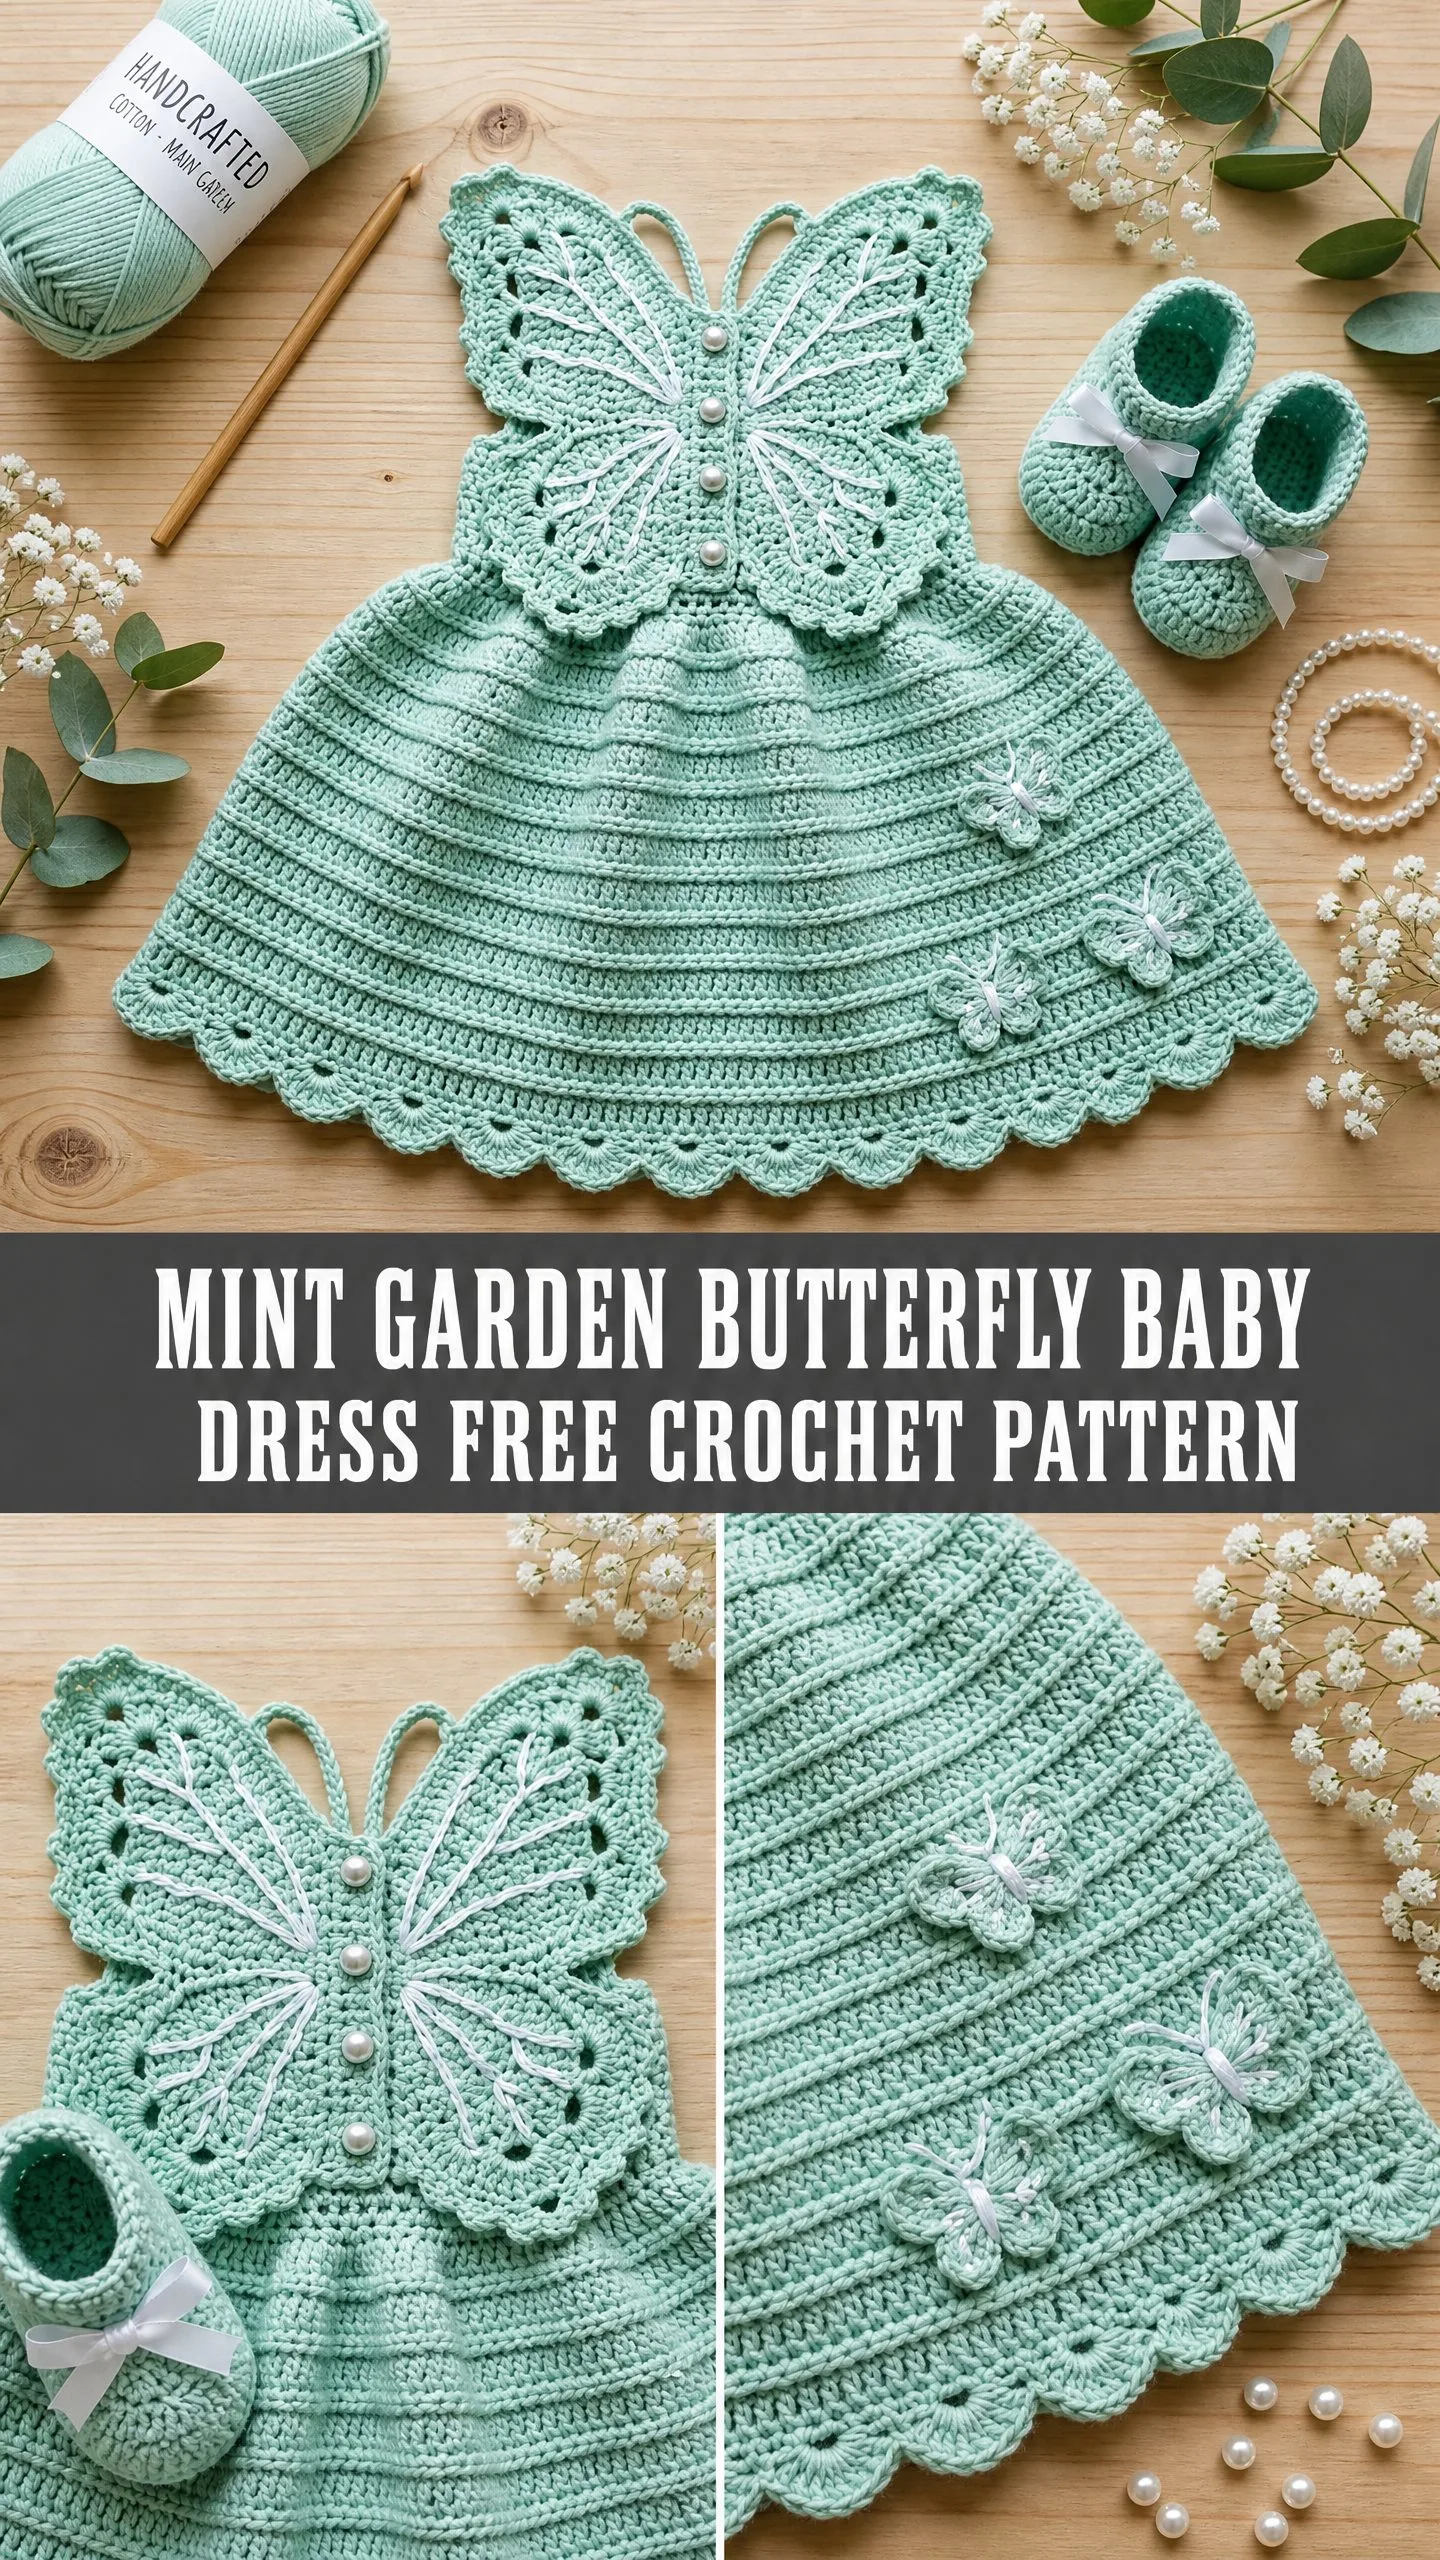
The Mint Garden Butterfly Baby Dress is a fully crocheted infant dress featuring a show-stopping butterfly-shaped bodice worked in open lacework. The structured ribbed skirt is worked in the round with graduated increases, finished with a scalloped hem border. Three-dimensional butterfly appliques are scattered across the skirt for extra whimsy.
Here is what makes this design unique. The butterfly wings form both the shoulder straps and the entire bodice front simultaneously. There is no separate strap construction or traditional armhole shaping. The antenna chains at the top create loops that tie at the back for closure. Pearl buttons run down the center front for decoration only, and white surface embroidery creates those gorgeous wing veins you see in the photos.
The matching booties share the same mint green cotton yarn with white ribbon accents. Everything coordinates beautifully for gift giving or special occasion photos.
Skill Level: Intermediate to Advanced
This pattern requires comfort with lace stitches, picot edges, working in the round, shaping by increase, surface embroidery for wing veining, making three-dimensional appliques, and joining flat-worked bodice sections to a circular skirt. Beginners who have completed at least three or four projects with lace motifs and basic in-the-round garments can attempt this with patience.
Time Estimate:
Finished Measurements
Newborn to 3 months (fits chest 14 to 16 inches / 35.5 to 40.5 cm)
Size Customization Tips
For 3 to 6 months (chest 16 to 18 inches / 40.5 to 45.5 cm): Work the bodice foundation chain as 56 stitches instead of 48. Add 4 additional increase rounds at the base of the skirt, working each increase round as (sc, inc) across. The finished dress will measure approximately 15 inches / 38 cm long.
For 6 to 9 months (chest 18 to 20 inches / 45.5 to 51 cm): Work the bodice foundation chain as 64 stitches. Add 8 additional increase rounds at the base of the skirt. The finished dress will measure approximately 17 inches / 43 cm long.
To lengthen the skirt without resizing the bodice, simply add additional plain single crochet rounds before the hem border. You will add approximately 0.5 inches / 1.3 cm per 2 rounds at the recommended gauge.
Materials Needed
Yarn:
Hook:
Notions:
Yarn Recommendations
Lion Brand 24/7 Cotton in Mint: DK weight, 100% mercerized cotton, 186 yards / 170 meters per 3.5 oz / 100 g skein. Purchase 2 skeins MC, 1 skein CC (white). This yarn has a smooth twist that shows lace detail clearly and blocks beautifully flat.
Paintbox Yarns Simply DK in Spearmint Green: 100% cotton, 137 yards / 125 meters per 1.76 oz / 50 g ball. Purchase 3 balls MC, 1 ball CC (white). This yarn has a tight twist that holds stitch definition well and is machine washable.
Drops Safran in color 13 (Mint): 100% Egyptian cotton, 175 yards / 160 meters per 1.76 oz / 50 g ball. Purchase 2 balls MC, 1 ball CC (white). This yarn is slightly lighter than the other two and gives a delicate heirloom appearance.
Substitution Note: Any DK weight (CYCA 3) 100% cotton or cotton blend yarn can be substituted. Avoid yarn with more than 20% synthetic content as the finished garment will not block flat and lace detail will be lost. Always work a gauge swatch when substituting.
Gauge
With MC and US E-4 / 3.5 mm hook:
For lace sections:
Gauge is critical for correct sizing. Work a 5 inch / 13 cm gauge swatch in single crochet before beginning. Block the swatch before measuring.
Abbreviations (US Terms)
Let me walk you through every abbreviation you will encounter in this pattern. I am defining them on first use so you never have to guess.
Special Stitches for the Butterfly Baby Dress
These are the unique stitch combinations used throughout this crochet pattern. Take time to practice them before diving into the bodice.
Shell Stitch
When the pattern says "shell in [stitch or space]," here is what to do:
1. Insert hook into designated stitch or space.
2. Yarn over and pull up a loop.
3. Yarn over and draw through 2 loops (1 double crochet made).
4. Work 4 more double crochet into the same stitch or space (5 dc total in same location).
5. The shell is complete. All 5 dc share the same base stitch or space.
Picot
When the pattern says "picot," follow these steps:
1. Chain 3.
2. Slip stitch into the first chain made (the chain closest to the work).
3. The picot loop is complete. Continue as directed.
Scallop Border
This is used at the hem edge. When the pattern says "scallop":
1. Skip 2 stitches.
2. Work 5 double crochet into the next stitch.
3. Skip 2 stitches.
4. Slip stitch into the next stitch.
Repeat these four steps across or around.
V-Stitch
When the pattern says "V-st in [stitch or space]":
1. Insert hook into designated stitch or space.
2. Work 1 double crochet.
3. Chain 1.
4. Work 1 double crochet into the same stitch or space.
5. The V-stitch is complete. The chain-1 forms the center of the V.
Butterfly Wings Join
This connects the bodice wings at center front:
1. Lay the left wing and right wing flat with RS facing up, inner edges touching at center.
2. With yarn needle and MC, using whip stitch, join the two inner straight edges for 1.5 inches / 3.8 cm down from the top (antenna chain) to the base of the upper wing lobe.
3. Continue joining the lower inner edges for 1 inch / 2.5 cm forming the butterfly body center.
4. The joined seam becomes the center spine of the butterfly bodice. Pearl beads are sewn along this seam.
Wing Vein Embroidery
This surface embroidery creates the beautiful white vein details:
1. Thread yarn needle with CC (white).
2. Bring needle up from WS to RS at the center body seam, approximately 0.5 inch / 1.3 cm from the top.
3. Draw a straight line of chain stitch or running stitch diagonally out toward the wing tip, using the natural direction of the lace stitches as a guide.
4. Return to center and work additional veins in a fan pattern, 4 to 5 veins per wing pair.
5. Secure on WS and trim.
Important Pattern Notes
Before you begin, read through these notes. They will save you confusion later.
1. The dress is constructed in this order: Right Wing (flat), Left Wing (flat), wings joined at center body seam, skirt worked in the round attached to the lower edge of the joined wings, hem border worked in rounds, three applique butterflies worked separately and sewn on, surface vein embroidery added, pearl buttons sewn on, booties worked separately.
2. The bodice butterfly wings form both the shoulder straps (the antenna chain loops at the top) and the entire bodice front. There is no separate strap construction.
3. The skirt begins by picking up stitches along the straight lower edge of the joined bodice butterfly and then expanding in diameter through evenly placed increase rounds.
4. All turning chains count as the first stitch of the row unless otherwise specified. Ch-3 at the start of a dc row counts as 1 dc.
5. Work lace sections loosely. If gauge is running tight on lace rows, go up one hook size for the bodice sections only, then return to the main hook for the skirt.
6. The back of the bodice is open. The butterfly wings wrap around to the back with the antenna chains meeting at center back to tie. This creates the closure. There are no buttons on the back.
7. Pearl buttons are sewn along the center front seam of the butterfly body, evenly spaced from top to bottom, for decoration only. They are not functional closures.
8. The skirt is worked with the RS consistently facing outward. Use a locking stitch marker to mark the beginning of each round.
9. Block the bodice butterfly flat before attaching the skirt to set the lace detail.
10. Stitch counts in parentheses at the end of each row or round reflect the total number of working stitches in that row or round, not counting turning chains unless specified.
Step by Step Crochet Instructions
Part 1: Right Wing
The right wing is worked flat, from the outer wing tip inward to the center body edge.
Foundation: With MC and E-4 hook, ch 37. Turn.
Row 1 (WS): Sc in 2nd ch from hook and in each ch across. Turn. (36 sc)
Row 2 (RS): Ch 3 (counts as dc), dc in next st, ch 1, sk 1 st, (shell in next st, ch 1, sk 2 sts) 5 times, shell in next st, ch 1, sk 1 st, dc in each of last 2 sts. Turn. (6 shells, 2 edge dc pairs, 7 ch-1 sps)
Note on Row 2 stitch architecture: The row consumes all 36 sc. Reading left to right: 2 dc at left edge (ch-3 + 1 dc), ch 1, sk 1, then 5 repeats of (shell consuming 3 sts = 5 dc into 1 st, sk 2 sts, ch 1), then 1 final shell, ch 1, sk 1, 2 dc at right edge.
Row 3 (WS): Ch 3 (counts as dc), dc in next dc, ch 1, (V-st in ch-sp of shell center dc, ch 1) 6 times, dc in 2nd dc of beg edge pair, dc in top of ch-3. Turn. (2 edge dc, 6 V-sts, 7 ch-1 sps)
Row 4 (RS): Ch 3, dc in next dc, ch 1, sk ch-sp, (shell in V-st ch-sp, ch 1, sk V-st dc, sk ch-1, sk V-st dc) across, ending shell in last V-st ch-sp, ch 1, dc in each of last 2 dc. Turn. (6 shells, 7 ch-1 sps, 4 edge dc)
Row 5 (WS): Rep Row 3. (same structure as Row 3)
Row 6 (RS): Rep Row 4. (same structure as Row 4)
Row 7 (WS): Ch 1 (does not count as st), sc in first dc, sc in next dc, (2 sc in ch-sp, sc in each dc of shell, 2 sc in ch-sp) 6 times, 2 sc in final ch-sp, sc in 2nd dc, sc in top of ch-3. (58 sc)
At this point the wing has been worked for the main wing body. Now the upper wing lobe is shaped.
Upper Wing Lobe Shaping
This section is worked on the first 30 sts of Row 7 only, creating the rounded upper wing lobe.
Row 8 (RS): Ch 3, turn, dc in next 4 sts, (ch 1, sk 1, shell in next st, ch 1, sk 1) 3 times, dc in next 5 sts. Leave rem sts unworked. Turn. (3 shells, 10 dc, 6 ch-1 sps)
Row 9 (WS): Ch 3, dc in next 4 dc, ch 1, (V-st in shell center ch-sp, ch 1) 3 times, dc in next 4 dc, dc in top of ch-3. Turn. (10 dc, 3 V-sts, 4 ch-1 sps)
Row 10 (RS): Ch 3, dc in next 4 dc, ch 1, (shell in V-st ch-sp, ch 1) 3 times, dc in next 4 dc, dc in top of ch-3. Turn. (3 shells, 10 dc, 4 ch-1 sps)
Row 11 (WS, upper lobe rounding): Ch 1, sc2tog (first 2 dc), sc in next 3 dc, 2 sc in ch-sp, sc in each dc of shell, 2 sc in ch-sp, sc in 5 dc of center, 2 sc in ch-sp, sc in each dc of shell, 2 sc in ch-sp, sc in 3 dc, sc2tog (last 2 dc). Turn. (29 sc)
Row 12 (RS): Ch 1, sc2tog, sc across to last 2 sts, sc2tog. Turn. (27 sc)
Row 13 (WS): Ch 1, sc2tog, sc across to last 2 sts, sc2tog. Turn. (25 sc)
Row 14 (RS): Ch 1, sc2tog, sc across to last 2 sts, sc2tog. Turn. (23 sc)
Row 15 (WS): Ch 1, sc2tog, sc across to last 2 sts, sc2tog. Turn. (21 sc)
Row 16 (RS): Ch 1, sc2tog, sc across to last 2 sts, sc2tog. Turn. (19 sc)
Fasten off. The upper lobe tip is complete.
Lower Wing Lobe Shaping
Return to Row 7 and rejoin MC at stitch 31 with RS facing.
Rejoin Row (RS): Attach MC at st 31 of Row 7 with sl st. Ch 3 (counts as dc), dc in next 27 sts. Turn. (28 dc, including ch-3)
Lower Lobe Row 1 (WS): Ch 3, dc in next 2 dc, ch 1, sk 1, (shell in next st, ch 1, sk 2 sts) 3 times, shell in next st, ch 1, sk 1, dc in next 2 dc, dc in top of ch-3. Turn. (4 shells, 8 edge dc, 5 ch-1 sps)
Lower Lobe Row 2 (RS): Ch 3, dc in next 2 dc, ch 1, (V-st in shell center ch-sp, ch 1) 4 times, dc in next 2 dc, dc in top of ch-3. Turn. (8 edge dc, 4 V-sts, 5 ch-1 sps)
Lower Lobe Row 3 (WS): Ch 3, dc in next 2 dc, ch 1, (shell in V-st ch-sp, ch 1) 4 times, dc in next 2 dc, dc in top of ch-3. Turn. (4 shells, 8 edge dc, 5 ch-1 sps)
Lower Lobe Row 4 (RS): Rep Lower Lobe Row 2. (same structure)
Lower Lobe Row 5 (WS): Ch 1, sc2tog, sc in next 2 dc, 2 sc in ch-sp, (sc in 5 dc of shell, 2 sc in ch-sp) 4 times, sc in 2 dc, sc2tog. Turn. (40 sc)
Lower Lobe Rows 6 through 13: Ch 1, sc2tog, sc to last 2 sts, sc2tog. Turn.
Row 6: (38 sc) | Row 7: (36 sc) | Row 8: (34 sc) | Row 9: (32 sc) | Row 10: (30 sc) | Row 11: (28 sc) | Row 12: (26 sc) | Row 13: (24 sc)
Fasten off.
Right Wing Inner Edge
With RS facing, rejoin MC at the foundation chain edge of the right wing at the inner (center body) straight edge. Work 1 row of sc evenly along the entire straight inner edge of the wing from base to top, picking up approximately 1 sc per row end or 1 sc per stitch as appropriate to keep the edge flat. The inner edge should measure approximately 4 inches / 10 cm. Work approximately 20 sc along this edge. Do not fasten off. This edge will be seamed to the left wing.
Antenna Chain (Right Wing): With RS facing, at the top of the right wing (upper tip area), rejoin MC and ch 18. Sl st back along ch to form loop. Fasten off. This forms the right shoulder strap and back tie.
Part 2: Left Wing
Work the Left Wing as a mirror image of the Right Wing. All row directions are reversed (begin Row 1 at the opposite end of the foundation chain). Work the upper lobe on the last 28 sts and the lower lobe on the first 30 sts of Row 7. The inner edge and antenna chain are worked identically.
Part 3: Joining the Wings
Place the right wing and left wing with RS facing up, inner straight edges together. Using MC and a yarn needle, whip stitch the two inner edges together for the full 4 inches / 10 cm length. Pull stitches snugly but do not pucker. This seam forms the butterfly body center spine.
Wing Vein Embroidery: Following the Wing Vein Embroidery special stitch instructions, embroider 4 to 5 veins per wing using CC (white) in a fan pattern radiating from the center seam. Work veins on both front-facing sides.
Pearl Button Embellishment: Sew 5 pearl buttons evenly spaced along the center body seam, approximately 0.5 inch / 1.3 cm apart, starting approximately 0.5 inch / 1.3 cm from the top antenna base.
Checkpoint: After completing the joined bodice, the butterfly should measure approximately 10 inches / 25.5 cm at its widest wingspan and approximately 6 inches / 15 cm from the top antenna base to the bottom edge. Block the bodice before proceeding to the skirt.
Part 4: Skirt
The skirt is worked in the round, beginning by picking up stitches along the bottom straight edge of the joined bodice butterfly.
Foundation Round for Skirt: With RS facing and MC and E-4 hook, join yarn at the bottom right corner of the joined bodice bottom edge. Work sc evenly across the entire bottom edge of the bodice, picking up approximately 1 sc per stitch and 1 sc per row end. Work a total of 72 sc across. Join with sl st to first sc to form a ring. Do not turn. Place marker at join. (72 sc)
The skirt is worked in joined rounds from this point. The RS always faces outward.
Round 1: Ch 1 (does not count as st), sc in each st around. Join with sl st to first sc. (72 sc)
Round 2 (increase round): Ch 1, (sc in next 8 sts, inc) around. Join. (80 sc)
Round 3: Ch 1, sc in each st around. Join. (80 sc)
Round 4 (increase round): Ch 1, (sc in next 9 sts, inc) around. Join. (88 sc)
Round 5: Ch 1, sc in each st around. Join. (88 sc)
Round 6 (increase round): Ch 1, (sc in next 10 sts, inc) around. Join. (96 sc)
Round 7: Ch 1, sc in each st around. Join. (96 sc)
Round 8 (increase round): Ch 1, (sc in next 11 sts, inc) around. Join. (104 sc)
Round 9: Ch 1, sc in each st around. Join. (104 sc)
Round 10 (increase round): Ch 1, (sc in next 12 sts, inc) around. Join. (112 sc)
Round 11: Ch 1, sc in each st around. Join. (112 sc)
Round 12 (increase round): Ch 1, (sc in next 13 sts, inc) around. Join. (120 sc)
Rounds 13 and 14: Ch 1, sc in each st around. Join. (120 sc each round)
Round 15 (increase round): Ch 1, (sc in next 14 sts, inc) around. Join. (128 sc)
Rounds 16 and 17: Ch 1, sc in each st around. Join. (128 sc each round)
Round 18 (increase round): Ch 1, (sc in next 15 sts, inc) around. Join. (136 sc)
Rounds 19 and 20: Ch 1, sc in each st around. Join. (136 sc each round)
Round 21 (increase round): Ch 1, (sc in next 16 sts, inc) around. Join. (144 sc)
Rounds 22 and 23: Ch 1, sc in each st around. Join. (144 sc each round)
Round 24 (increase round): Ch 1, (sc in next 17 sts, inc) around. Join. (152 sc)
Rounds 25 and 26: Ch 1, sc in each st around. Join. (152 sc each round)
Round 27 (final increase round): Ch 1, (sc in next 18 sts, inc) around. Join. (160 sc)
Rounds 28 and 29: Ch 1, sc in each st around. Join. (160 sc each round)
Checkpoint: After Round 29, the skirt should measure approximately 6.5 inches / 16.5 cm in length from the bodice attachment edge. The circumference should measure approximately 35.5 inches / 90 cm. The skirt should lie flat without cupping or ruffling. If the skirt is cupping inward, you have not increased enough. Add one more increase round following the established pattern. If it is ruffling outward, you have increased too much. Rip back and reduce the frequency of increase rounds.
Part 5: Hem Border
The hem border is worked directly onto Round 29 of the skirt. It consists of two preparation rounds and one scallop round.
Hem Round 1 (eyelet round): Ch 4 (counts as dc + ch 1), sk 1 st, (dc in next st, ch 1, sk 1 st) around. Join with sl st to 3rd ch of beginning ch-4. (80 dc, 80 ch-1 sps)
Adjusted Hem Round 2: Ch 1, (sc in dc, sc in ch-sp) around to last 4 sts, sc in dc, 2 sc in ch-sp, sc in dc, 2 sc in ch-sp. Join. (162 sc)
Hem Round 3 (Scallop Border): Ch 1, sl st in first st, (sk 2 sts, 5 dc in next st, sk 2 sts, sl st in next st) 27 times. Join. Fasten off. (27 scallops)
Checkpoint: The finished hem should have 27 evenly spaced scallops with no puckering. Measure the hem circumference. It should be approximately 22 inches / 56 cm around the scallop tips.
Part 6: Applique Butterflies (make 3)
Each applique butterfly is worked flat in two wing pairs (upper pair and lower pair), joined at center, and finished with surface embroidery.
Upper Wing Pair (make 1 per butterfly):
Foundation: Ch 2.
Row 1: 6 sc in 2nd ch from hook. Do not join. Turn. (6 sc)
Row 2: Ch 3 (counts as dc), 2 dc in same st, ch 1, sk 1, (dc in next st, ch 1) 2 times, 3 dc in last st. Turn. (9 dc, 3 ch-1 sps)
Row 3: Ch 1, sc in first dc, hdc in next 2 dc, (2 dc in ch-sp, dc in dc) 2 times, 2 dc in last ch-sp, hdc in next 2 dc, sc in last dc. Fasten off.
Work the lower wing pair similarly but slightly smaller. Join both pairs at center with whip stitch. Add white embroidered veins using the same technique as the bodice. Sew appliques to skirt at varying heights as shown in photos.
Finishing Your Butterfly Baby Dress
Once all pieces are complete, weave in all remaining ends using your yarn needle. Block the entire dress flat on your blocking board, pinning out the scallops at the hem and the wing tips on the bodice. Spray lightly with water and allow to dry completely.
Thread the white satin ribbon through the eyelet round at the hem if desired for additional decoration. Tie the antenna chain loops at the back into a bow for closure.
This dress is hand wash only in cool water. Lay flat to dry. Store carefully to preserve the lace detail and embellishments.
Tips for Success with This Crochet Tutorial
If you are nervous about the lace sections: Practice the shell and V-stitch pattern on a small swatch first. Once you get the rhythm, it moves quickly.
If your bodice seems too tight: Go up one hook size for the lace rows only. The open lacework needs room to breathe.
If your skirt is cupping or ruffling: Your increase rounds are off. Cupping means not enough increases. Ruffling means too many. Trust the checkpoint measurements.
If you have never done surface embroidery: The wing veins are surprisingly forgiving. Simple running stitches or chain stitches both work beautifully. Follow the natural lines of the lace.
For gift giving: Pair the dress with the matching booties and present in a clear gift box. Include care instructions for the recipient.
I really hope you love making this little dress as much as I enjoyed writing out these instructions for you. It is such a rewarding project, and the finished piece looks absolutely stunning in photos. If you make one, I would love to see it! Tag me on Instagram or share in my Facebook group. Your creations always brighten my day.
Save this pattern to your Pinterest boards so you can find it when you are ready to start, and drop a comment below to let me know if you are adding this to your project list. Happy crocheting!
You Might Also Like
- Sage Green Garden Wrap Free Crochet Pattern
- Dusty Rose Knitted Baby Snowsuit Set Free Crochet Pattern
- Autumn Harvest Sunflower Granny Tote Free Crochet Pattern
- Mint Garden Granny Square Bag Free Crochet Pattern
