
Last summer, I found myself standing in a craft market, completely mesmerized by a woman carrying the most beautiful crocheted tote. I must have stared a little too long because she caught my eye and smiled. That bag had everything I love: classic granny squares, soft green tones, and those gorgeous bamboo handles that give a handmade piece such a polished look.
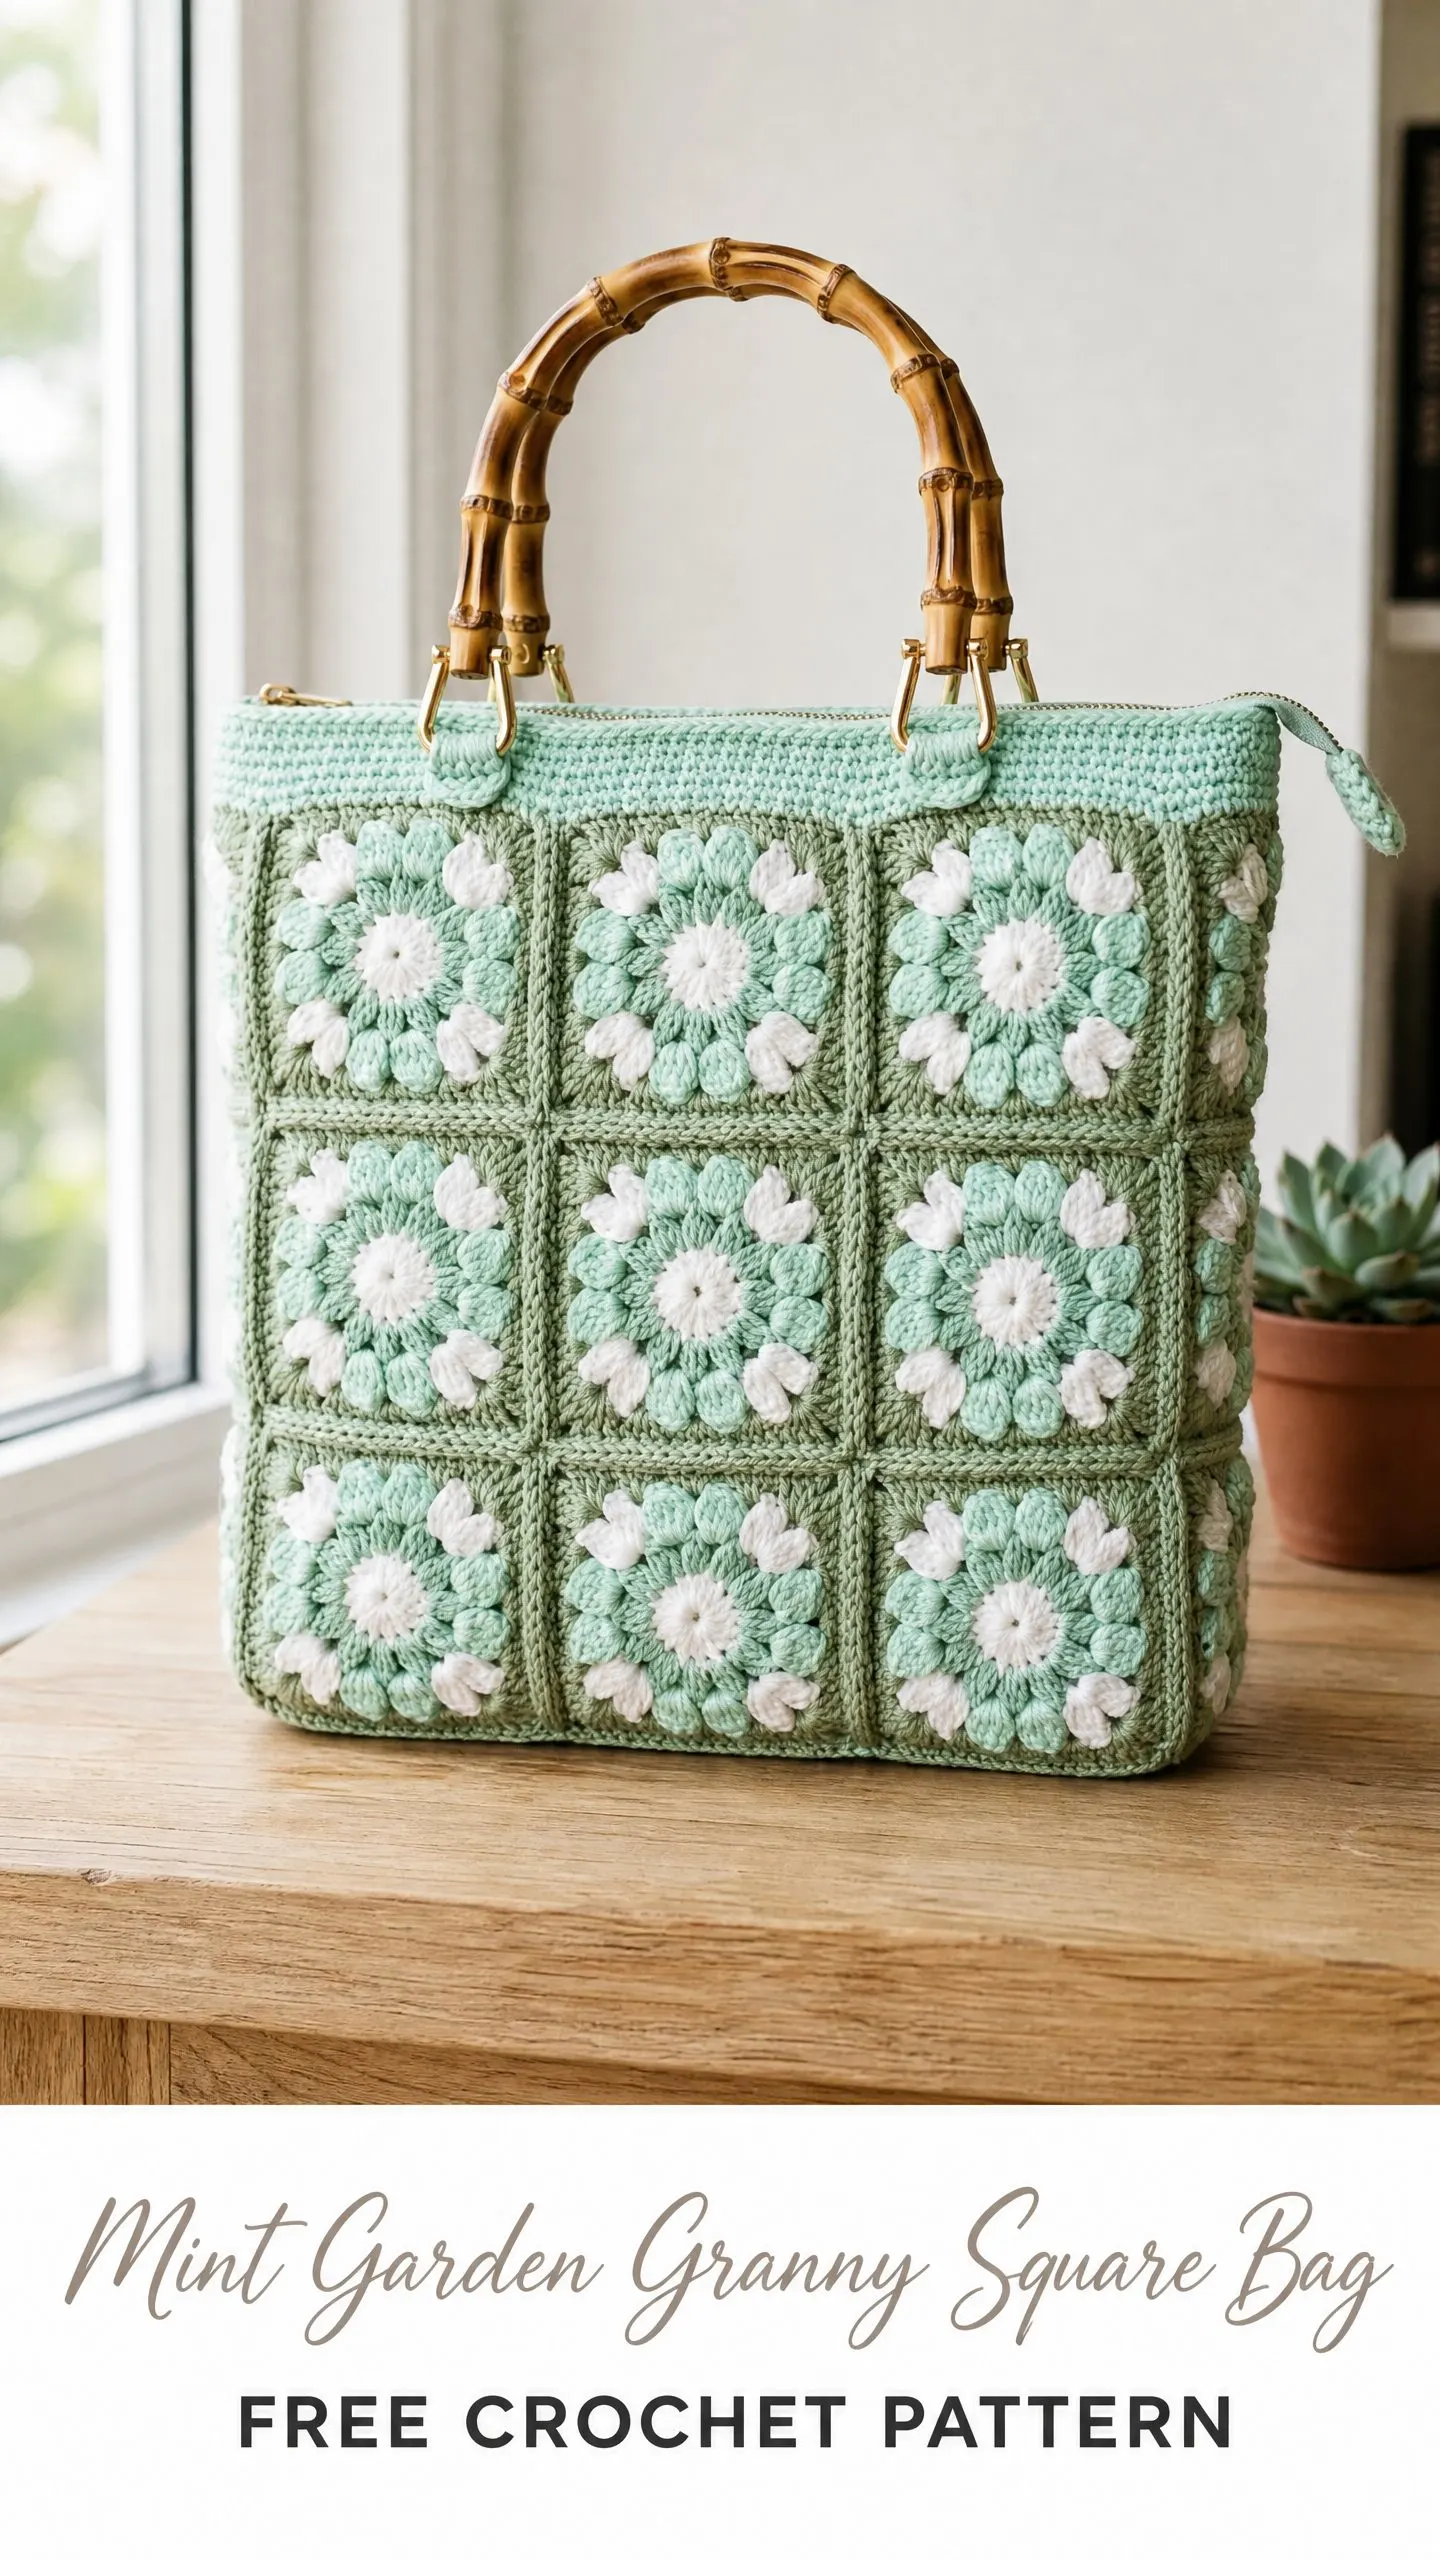
I went home determined to make my own version. After sketching out ideas, swatching different flower centers, and testing several shades of green, this Mint Garden Granny Square Bag was born. The puff stitch flowers in the center of each square give it that raised, textured look that caught my attention in the first place.
If you have been wanting to try a granny square bag but felt intimidated by all the joining and finishing, this is your project. I am walking you through every single step, from making your first square to attaching those bamboo handles. You have got this.
Why You Will Love This Crochet Bag Pattern
This bag combines vintage charm with modern structure. The granny squares create that beloved retro aesthetic, while the firm top band and optional lining make it genuinely functional for everyday use. It is roomy enough to hold your essentials but not so large that it becomes overwhelming.
The mint and sage color palette feels fresh and springy, though you could absolutely swap in your favorite colors. Each square works up quickly once you get into a rhythm, making this a satisfying project that shows visible progress with every completed motif.
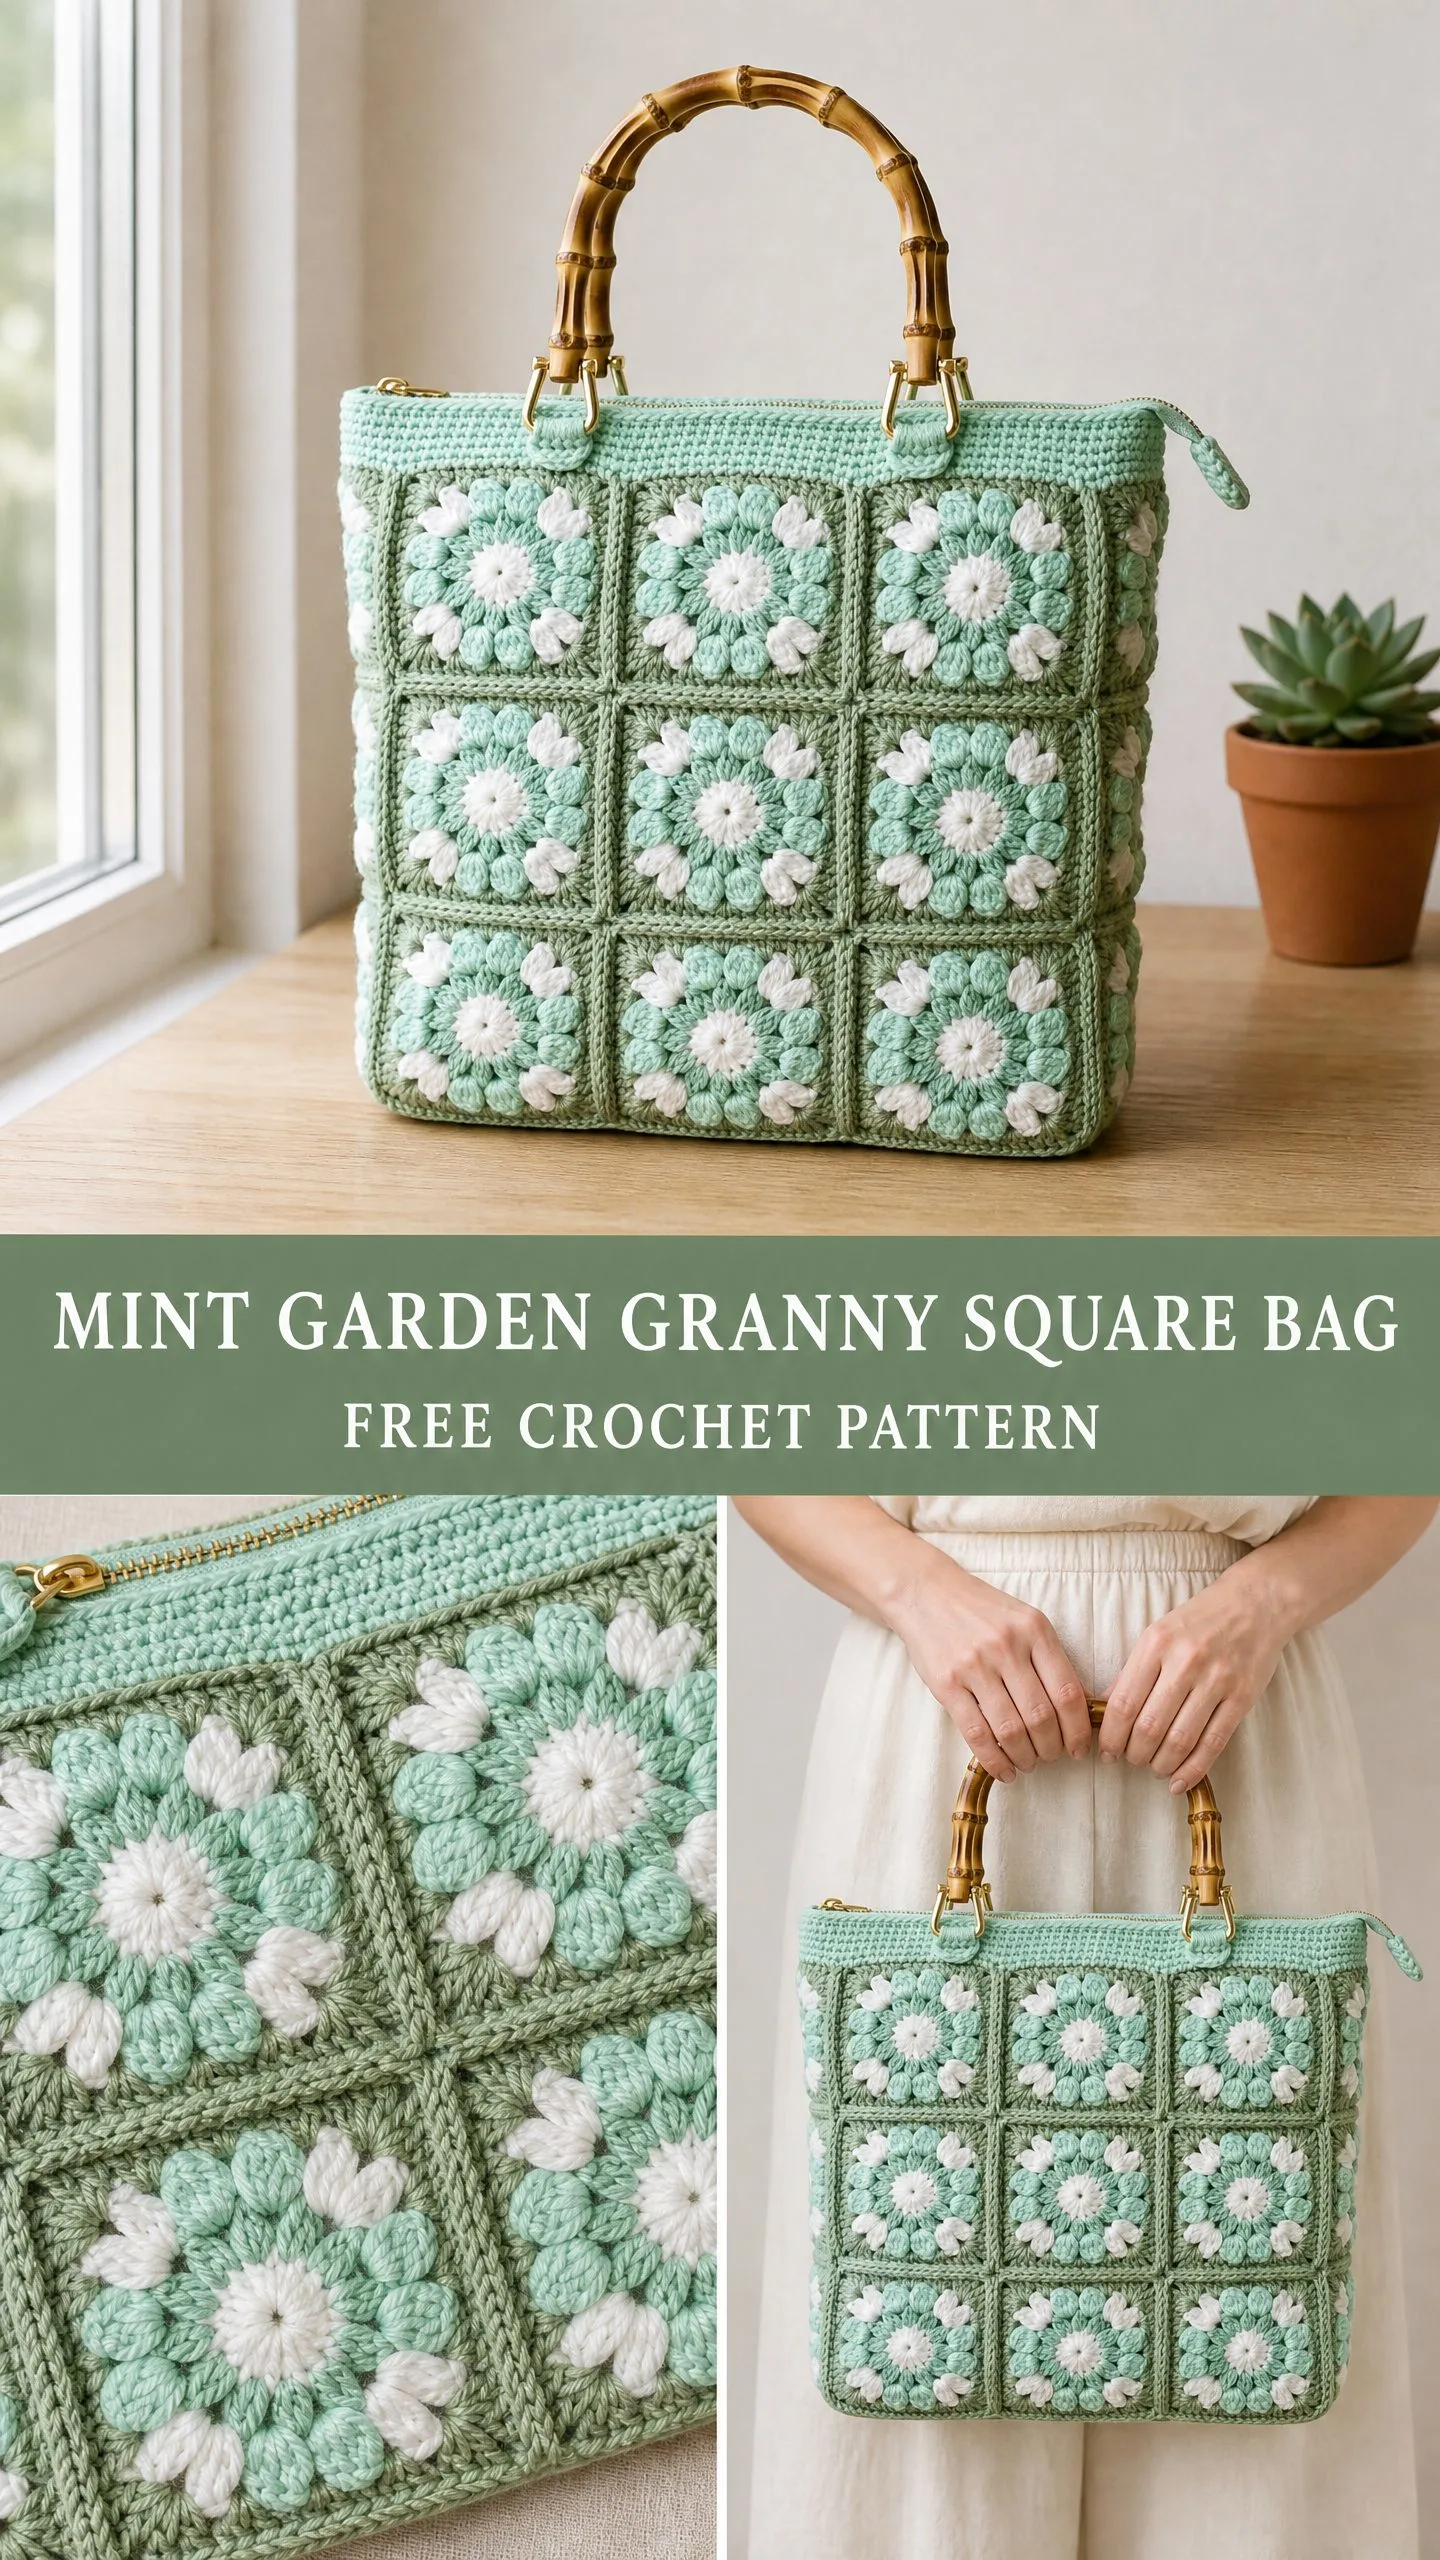
The finished bag measures approximately 13 inches wide by 12 inches tall by 4 inches deep, not including the handles. That is a generous size for carrying books, a small project, your wallet, phone, and all the random things that accumulate in a tote.
Skill Level and Time Estimate
This pattern is rated intermediate. You should be comfortable working granny squares, reading stitch counts, and following motif construction. The puff stitch (PS) adds texture to the flower centers, and the join as you go (JAYG) method connects your squares with minimal bulk.
Do not worry if you have never tried join as you go before. I explain exactly how it works, and once you join your first two squares, you will wonder why you ever sewed granny squares together the old way.
Expect to spend 20 to 28 hours on this project from start to finish. That includes making all 27 squares, joining them into panels, working the top band, attaching the zipper, and adding the handles. Spread it out over a few weeks or tackle it during a crafty weekend marathon.
Materials You Will Need
Yarn
You will need worsted weight yarn in three colors. I recommend 100% cotton or a cotton-acrylic blend for the best stitch definition and structure.
Color A (Sage Green): approximately 350 yards (320 m)
Color B (Mint Green): approximately 250 yards (229 m)
Color C (White): approximately 150 yards (137 m)
Yarn suggestions that work beautifully:
1. Lion Brand 24/7 Cotton in Sage, Mint, and White. This mercerized cotton gives crisp stitch definition and holds its shape well in bags.
2. Paintbox Yarns Simply DK Cotton in Grass Green, Spearmint, and Pure White. This one runs slightly lighter than worsted, so use a tighter gauge with a size F hook.
3. Scheepjes Cahlista in Sage Green, Chrystalline, and Old Lace. Excellent color retention and stitch clarity.
Avoid fuzzy or textured yarns. They will obscure your beautiful puff stitch flower detail.
Hook and Notions
Hook: US Size G-6 (4.0 mm)
Additional supplies:
Gauge
One completed granny square should measure 4 inches by 4 inches (10 cm by 10 cm) after light blocking.
Work one square through Round 4 and measure it. If your square is smaller than 4 inches, go up a hook size. If it is larger, go down a hook size. Because the final bag dimensions depend on how many squares you join together, getting accurate gauge on each individual square matters more than row gauge.
Abbreviations (US Crochet Terms)
Let me define every abbreviation you will encounter:
Special Stitches Explained
Puff Stitch (PS)
The puff stitch creates those raised, pillowy flower centers. Here is exactly how to work one:
Step 1: Yarn over, insert hook into indicated stitch or space.
Step 2: Pull up a loop to the height of a double crochet. You now have 3 loops on hook.
Step 3: Yarn over again, insert hook into the same stitch or space, pull up another loop to double crochet height. You now have 5 loops on hook.
Step 4: Yarn over again, insert hook into the same stitch or space, pull up another loop. You now have 7 loops on hook.
Step 5: Yarn over and draw through all 7 loops on hook.
Step 6: Chain 1 to close and secure the puff. This closing chain does not count as a stitch.
The key is keeping all your pulled-up loops the same height. If they are uneven, your puff will look lopsided.
Join As You Go (JAYG) for Granny Squares
When working the final round of a new square and attaching it to an adjacent completed square, you replace the ch-2 corner space or the ch-1 side space with a slip stitch join into the corresponding space on the finished square. Then continue with the pattern. Full instructions are in the Assembly section below.
Standing Double Crochet
This technique lets you begin a round in a new color without a starting chain:
Step 1: Make a slip knot in new color and place on hook.
Step 2: Yarn over, insert hook into indicated stitch or space.
Step 3: Pull up a loop (3 loops on hook).
Step 4: Yarn over and draw through first 2 loops (2 loops on hook).
Step 5: Yarn over and draw through remaining 2 loops.
Pattern Notes Before You Begin
1. All granny squares are worked in the round on the right side. Do not turn unless instructed.
2. The bag uses 27 total squares arranged as: front panel (9 squares), back panel (9 squares), left side panel (3 squares), right side panel (3 squares), and base panel (3 squares).
3. Work all color changes at the end of the last step of the final stitch before the change. Draw the new color through the last 2 loops.
4. Ch-3 at the beginning of rounds counts as the first double crochet throughout.
5. Corner spaces are ch-2 spaces. Side spaces between clusters are ch-1 spaces.
6. Block each square lightly before or after joining by misting with water and pinning to measurements.
Granny Square Instructions (Make 27 Total)
Each square uses this color breakdown:
Round 1 (Color C)
Make a magic ring or ch-4 and join with sl st to form a ring.
Ch-3 (counts as first dc), work 2 dc into ring, ch-2, [3 dc into ring, ch-2] 3 times, join with sl st to top of beginning ch-3. Fasten off Color C.
(12 dc, 4 ch-2 corner spaces)
Round 1 Puff Version (Optional, Color C)
If you want the raised puff stitch flower center visible in the photos, work Round 1 this way instead:
Make a magic ring. Ch-2 (does not count as stitch). Work 8 PS into ring, drawing each closed before beginning the next. After last PS, ch-1. Join with sl st to top of first PS. (8 puff stitches)
Do not fasten off. Ch-1. Sc into top of each PS around. Join with sl st to first sc. (8 sc)
Now work the flower surround: Ch-3 (counts as dc). Dc into same st. Ch-1. [2 dc into next sc, ch-1] 7 times. Join with sl st to top of beginning ch-3. (16 dc, 8 ch-1 spaces)
Fasten off Color C. Continue with Round 2 Puff Version below.
Round 2 (Color B, Standard Version)
Join Color B with sl st into any ch-2 corner space.
Ch-3 (counts as dc), work 2 dc into same corner space, ch-2, 3 dc into same corner space for first corner. Ch-1. [3 dc, ch-2, 3 dc into next ch-2 corner space, ch-1] 3 times. Join with sl st to top of beginning ch-3. Fasten off Color B.
(24 dc, 4 ch-2 corner spaces, 4 ch-1 side spaces)
Round 2 Puff Version (Color B)
Join Color B into any ch-1 space.
Ch-3, 2 dc into same space, ch-2, 3 dc into same space (corner made). Ch-1. 3 dc into next ch-1 space. Ch-1. [3 dc, ch-2, 3 dc into next ch-1 space, ch-1, 3 dc into next ch-1 space, ch-1] 3 times. Join with sl st to top of beginning ch-3. Fasten off Color B.
(24 dc, 4 ch-2 corners, 4 ch-1 side spaces)
Continue with Round 3 as written below. Both versions produce the same structure from this point forward.
Round 3 (Color B)
Join Color B with sl st into any ch-2 corner space.
Ch-3, 2 dc into same corner space, ch-2, 3 dc into same corner space (first corner made). Ch-1. 3 dc into ch-1 side space. Ch-1. [3 dc, ch-2, 3 dc into next corner space, ch-1, 3 dc into next ch-1 side space, ch-1] 3 times. Join with sl st to top of beginning ch-3. Fasten off Color B.
(36 dc, 4 ch-2 corner spaces, 8 ch-1 spaces)
Round 4 (Color A, Standard Non-Joining Square)
Join Color A with sl st into any ch-2 corner space.
Ch-3, 2 dc into same corner space, ch-2, 3 dc into same corner space (corner made). [Ch-1, 3 dc into next ch-1 space] twice. Ch-1. [3 dc, ch-2, 3 dc into next corner space, ch-1, (3 dc into next ch-1 space, ch-1) twice] 3 times. Join with sl st to top of beginning ch-3. Fasten off Color A.
(48 dc, 4 ch-2 corner spaces, 12 ch-1 spaces)
Checkpoint
Each completed square should measure 4 inches by 4 inches (10 cm by 10 cm) after a light misting and pinning. Adjust your hook size if needed before continuing.
Assembly Using Join As You Go
Panel Layout
Lay out your squares in this arrangement:
Total: 27 squares
JAYG Round 4 Instructions
Work Round 4 of each new square as written until you reach the side(s) to be joined to an existing square.
Joining one side:
When you reach the side edge to be joined, instead of ch-1 between cluster groups, work: ch, sl st into adjacent ch-1 space of finished square (this replaces the full ch-1).
At corners shared between squares: instead of ch-2, work ch-1, sl st into corresponding ch-2 corner space of adjacent square, ch-1.
Continue around remaining sides in standard Round 4 format.
Joining two sides (corner square joining to two finished squares):
Work the two non-joining sides in standard Round 4 format. At the first joining side, use the one-side method above. At the corner where both joined sides meet, sl st into the corner ch-2 space of the first adjacent square, then sl st into the corner ch-2 space of the second adjacent square. Continue along the second joining side.
Build each panel by working across rows. Start with the top-left square unjoined. Join the second square in each row to the right side of the first. Join the first square of each subsequent row to the bottom of the square above it. Join interior squares to both the square above and the square to the left.
Joining Panels Together
After all five panels are assembled individually, join them into a box shape:
Step 1: Join front panel to left side panel along their shared vertical edge.
Step 2: Join front panel to right side panel along their shared vertical edge.
Step 3: Join back panel to left side panel.
Step 4: Join back panel to right side panel.
Step 5: Join base panel to bottom edge of front panel.
Step 6: Join base panel to bottom edge of back panel.
Step 7: Join base panel side edges to bottom edges of side panels.
For panel-to-panel joins, use the flat slip stitch join method: Hold two panels with right sides facing each other. Join Color A with sl st through both corresponding corner spaces. Work sc through both layers into each stitch and space along the edge. Fasten off. Turn bag right side out.
Checkpoint
After all panels are joined, the bag should measure approximately 13 inches wide, 12 inches tall, and 4 inches deep. It should stand on its own on a flat surface.
Top Band
The top band is worked in joined rounds of single crochet around the opening. You will work approximately 96 sc around the top.
Round 1 of Top Band (Color B)
Join Color B with sl st to any top corner of the bag opening.
Ch-1. Sc evenly around entire top opening, working 1 sc into each dc, 1 sc into each ch-1 space, 2 sc into each ch-2 corner space, and 1 sc into each joining seam point. Join with sl st to first sc. (96 sc)
Rounds 2 and 3 of Top Band (Color B)
Ch-1. Sc in each sc around. Join with sl st to first sc. (96 sc)
Round 4 of Top Band (Handle Loop Placement)
This round creates the attachment tabs for your bamboo handles. Position two attachment points on the front and two on the back, each pair approximately 3 to 4 inches apart and centered.
Ch-1. Sc in each sc to 3 sts before first attachment point. [Sc in next 3 sc. Ch-6. Skip 3 sc. Sc in next 3 sc.] Continue to second attachment point on same panel. [Sc in next 3 sc. Ch-6. Skip 3 sc. Sc in next 3 sc.] Continue sc to beginning of side panel, sc across full side panel, repeat handle tabs on back panel in same positions, sc across remaining side panel. Join with sl st to first sc.
(96 working stitches counting each ch-6 loop as 3 sts)
Round 5 of Top Band
Ch-1. Sc in each sc and work 6 sc into each ch-6 loop from Round 4. Join with sl st to first sc. (96 sc)
Round 6 of Top Band
Ch-1. Sc in each sc around. Join with sl st to first sc. Fasten off Color B. (96 sc)
Finishing Your Bag
Zipper Attachment
Lay the bag flat. Open the zipper fully. Pin the zipper tape to the inside of the top band, aligning the zipper teeth just below the top edge. Using a sewing needle and coordinating thread, whipstitch through the zipper tape and through Round 1 of the top band all the way around.
Bamboo Handle Attachment
Thread the hardware connector (D-ring tab or swivel clasp) through each ch-6 loop. Secure by sewing through the tab multiple times with a yarn needle and matching yarn. Slide each bamboo ring over the connector hardware and clip or screw into place.
Base Reinforcement (Optional)
Cut a piece of stiff interfacing or plastic canvas to 13 inches by 4 inches. Place inside the bag at the base to prevent sagging.
Lining (Optional)
Cut two pieces of cotton fabric 14 inches by 13 inches for front and back, two pieces 5 inches by 13 inches for sides, and one piece 14 inches by 5 inches for the base. Sew together with 0.5-inch seam allowance. Insert lining wrong side out, fold top edge under, and whipstitch to inside of top band.
Blocking and Care
Weave in all yarn ends securely, burying each tail through at least 1 inch of stitches on the wrong side.
Block each square before assembly by misting lightly with water and pinning to measurements. After full assembly, lightly mist the exterior and stuff with tissue or bubble wrap to hold the box shape while drying.
Care instructions: Hand wash in cool water with gentle detergent. Do not wring. Reshape while damp and lay flat to dry. Remove bamboo handles before washing if they are attached with removable hardware.
Size Customization Tips
To make the bag wider: Add one more square per row on front and back panels (4 squares wide). This adds approximately 4 inches to the width.
To make the bag taller: Add one more row of squares to front and back (4 rows). This adds 4 inches to the height.
To make the bag deeper: Add one more square to the side panels (2 squares wide instead of 1). This doubles the depth to approximately 8 inches.
Adjust your yarn quantities accordingly. Each square uses approximately 15 yards of Color A, 8 yards of Color B, and 6 yards of Color C.
Thank you so much for choosing this pattern for your next crochet project. I genuinely cannot wait to see your finished bags. Tag me on Instagram or share your photos in my Facebook group so I can admire your work and your color choices.
If you loved making this Mint Garden Granny Square Bag, save this pattern to your Pinterest boards so you can find it easily when you want to make another one as a gift. And please drop a comment below if you make it. I read every single one, and your feedback helps other crafters decide to give it a try too.
You Might Also Like
- Sunshine Yellow Duckling Granny Square Blanket Free Pattern
- Sunset Glow Sunburst Hobo Bag Free Crochet Pattern
- Navy Blue Chunky Round Purse Free Crochet Pattern
- Sage Green Natural Minimalist Braided Bag Free Crochet Pattern
