Last summer, I found myself standing in front of my closet at 7 AM, already sweating, desperately trying to find something cute that wouldn’t turn me into a walking sauna. You know that feeling? I wanted a light layer for overly air-conditioned coffee shops and breezy summer evenings, but everything I owned was either too heavy or too casual. That frustration sent me straight to my yarn stash with a mission. I wanted something feminine, breathable, and just a little bit romantic. The kind of piece that makes you feel put-together without trying too hard. After sketching out a few ideas and frogging more times than I care to admit, this dusty rose grid tie cardigan was born. And honestly? I think I might wear it every single day this season.
About This Dusty Rose Grid Tie Cardigan Crochet Pattern
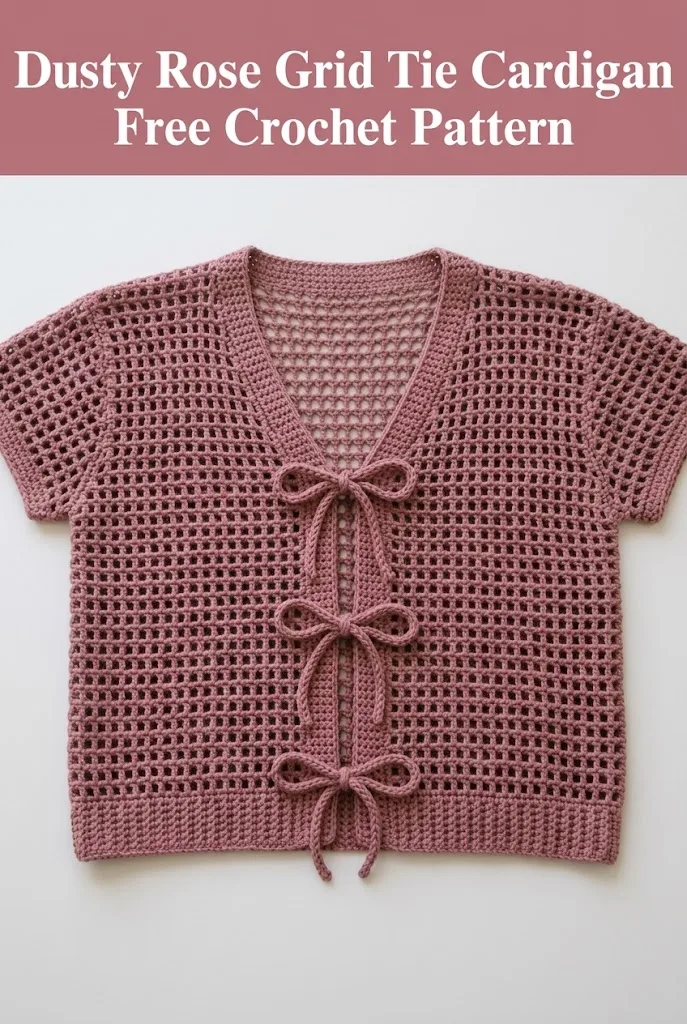
This cardigan features an open mesh grid stitch pattern that creates beautiful drape and breathability. The construction is surprisingly straightforward, even if you have never made a garment before. You will work the body in two flat panels, then join them at the shoulders and add simple short sleeves. The standout detail is the front tie closures, which are just crocheted chains tied into sweet little bows. No buttonholes, no zippers, no fuss.
The grid stitch (sometimes called filet mesh) creates those lovely little square openings you see throughout the body. It is nothing more than double crochet stitches separated by chain spaces. If you can chain and double crochet, you can absolutely make this cardigan.
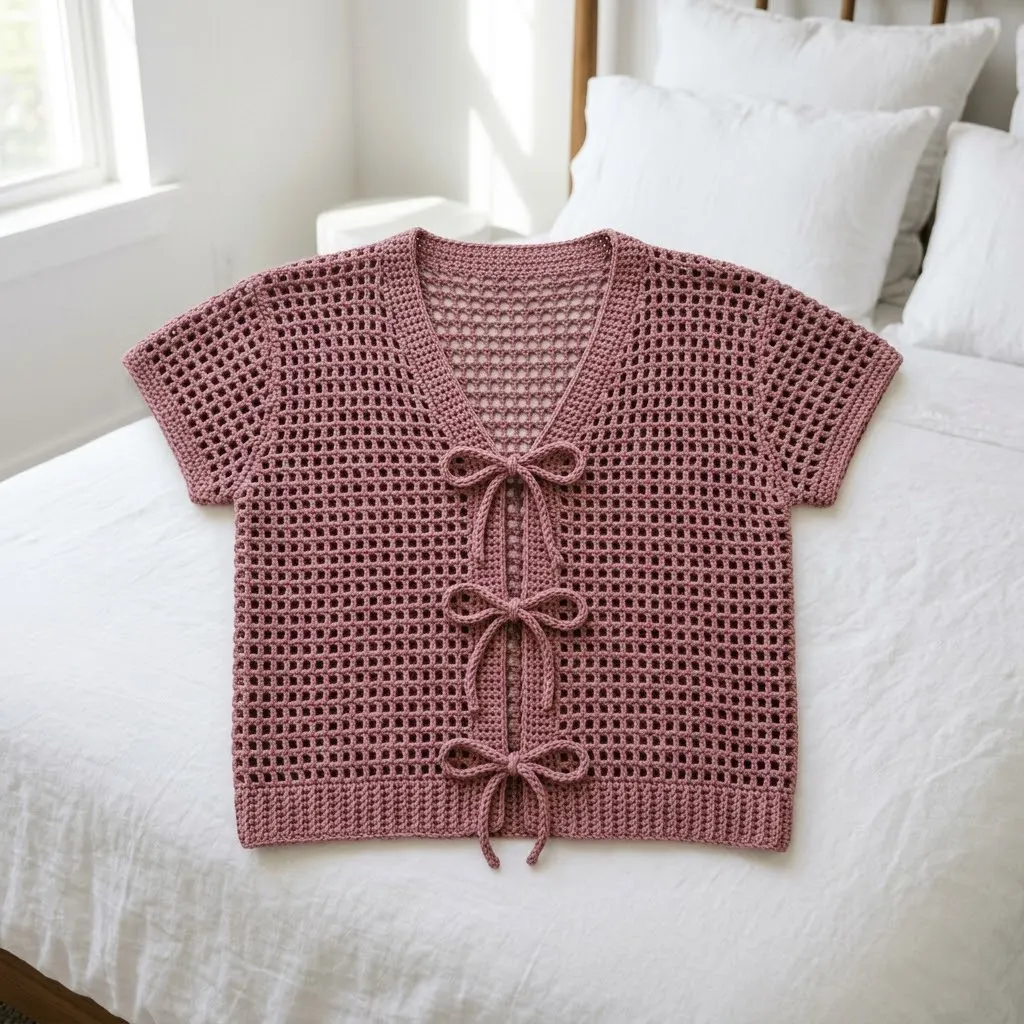
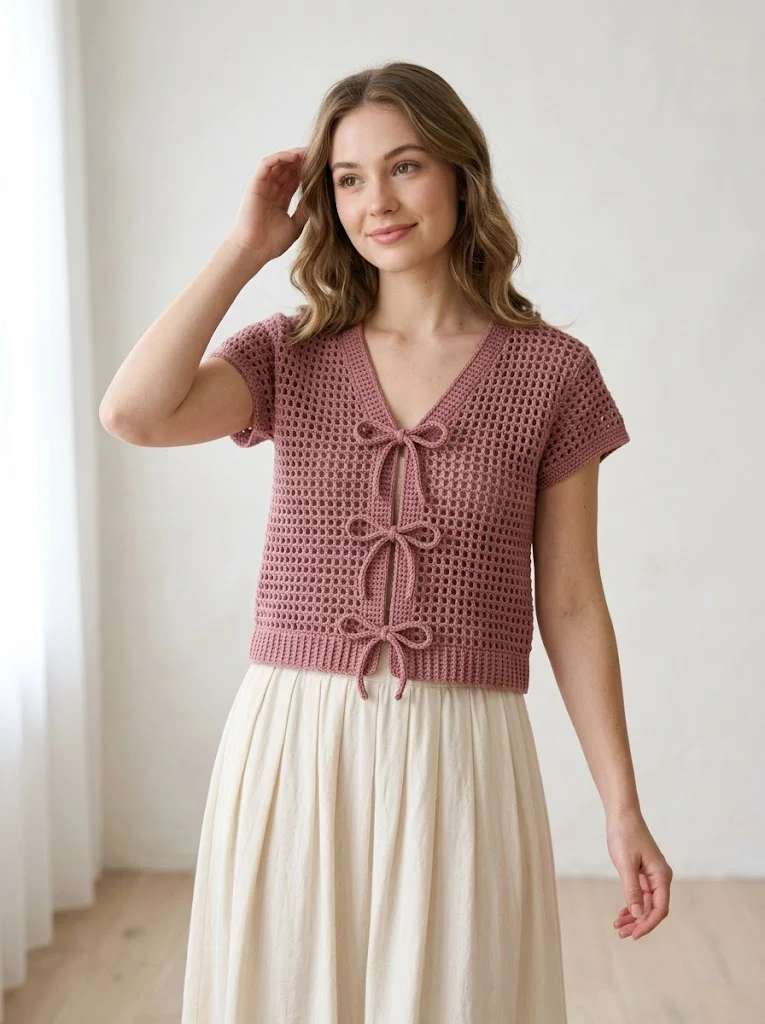
The finished piece has a relaxed, slightly cropped fit that sits right at the natural waist. It is perfect for layering over tank tops, sundresses, or even a simple t-shirt. The dusty rose color gives it a soft vintage vibe, but this pattern would look stunning in any solid shade.
Skill Level
Confident Beginner to Intermediate
If you have made a few scarves or blankets and feel comfortable with basic stitches, you are ready for this project. The grid stitch pattern is repetitive and easy to memorize after just a few rows. The construction involves simple shaping and seaming, which I will walk you through step by step.
Materials Needed
Yarn:
Hook:
Notions:
Gauge
18 stitches and 10 rows = 4 inches in grid stitch pattern
Please check your gauge. This is a garment, and fit matters. If your gauge is off, your cardigan will be too big or too small. Make a quick swatch before starting. If you have too many stitches per inch, go up a hook size. Too few stitches? Go down a hook size.
Finished Measurements
This pattern is written for size Small/Medium with notes for adjustments.
The tie closures allow for flexible fit across several sizes. For a larger size, add additional grid repeats to your starting chain (each repeat is 2 chains).
Abbreviations and Stitch Definitions
Ch = Chain: Wrap yarn over hook, pull through loop on hook.
Sl st = Slip Stitch: Insert hook, yarn over, pull through stitch and loop on hook in one motion.
Sc = Single Crochet: Insert hook in stitch, yarn over and pull up a loop (2 loops on hook), yarn over and pull through both loops.
Dc = Double Crochet: Yarn over, insert hook in stitch, yarn over and pull up a loop (3 loops on hook), yarn over and pull through 2 loops, yarn over and pull through remaining 2 loops.
Sk = Skip: Pass over the indicated stitch or space without working into it.
Sp = Space: The gap created by a chain in the previous row.
Grid Stitch Pattern: (Dc, ch 1, sk 1) repeated across the row. This creates the mesh/grid appearance with small square openings.
Pattern Notes
Step by Step Crochet Pattern
Right Panel (Front and Back)
This panel creates the right front, shoulder, and right back in one piece.
Foundation:
Ch 82 (or a multiple of 2 plus 2 for your desired width).
Row 1: Dc in 4th ch from hook (skipped chains count as first dc), *ch 1, sk 1 ch, dc in next ch*, repeat from * across. Turn. (40 dc, 39 ch-1 spaces)
Row 2: Ch 3 (counts as dc), *dc in next ch-1 sp, ch 1*, repeat from * to last dc, dc in top of turning chain. Turn.
Rows 3 through 20: Repeat Row 2.
Your panel should measure approximately 8 inches at this point.
Begin V-Neck Shaping (Right Front):
Row 21: Ch 3, work in pattern across first 18 grid spaces only. Turn, leaving remaining stitches unworked. (This creates the right front neckline)
Rows 22 through 35: Continue in grid pattern on these 18 spaces, decreasing 1 grid space at neck edge every other row by simply not working the last dc at the neck side. (14 grid spaces remain at Row 35)
Rows 36 through 45: Work even in grid pattern on remaining stitches. Fasten off.
Right Back:
Join yarn at armhole edge where you left off on Row 21.
Row 21B: Ch 3, work in grid pattern across remaining 18 spaces. Turn.
Rows 22B through 45B: Work even in grid pattern. Fasten off.
Left Panel (Front and Back)
Work exactly as Right Panel, reversing all shaping. The V-neck decreases will be on the opposite side.
Joining Shoulders
Place right front and right back pieces with right sides together. Using a yarn needle and a length of yarn, whip stitch or mattress stitch the shoulder seams together, joining approximately 4 inches at each shoulder.
Repeat for left front and left back.
Side Seams
With right sides together, seam each side from the bottom hem up, stopping approximately 7 to 8 inches from the shoulder to leave armhole openings. Your armholes should be about 7 to 8 inches deep.
Sleeves (Make 2)
The sleeves are worked directly into the armhole openings, working in the round.
Round 1: Join yarn at underarm seam. Ch 3, work approximately 34 dc evenly around the armhole opening, placing stitches into row ends and any available spaces. Sl st to top of ch 3 to join. (Approximately 34 dc)
Rounds 2 through 6: Ch 3, dc in each dc around. Sl st to join.
Round 7 (Edging): Ch 1, sc in each st around. Sl st to join. Fasten off.
The finished sleeve should measure approximately 4 inches from shoulder to cuff.
Neckline and Front Edging
This edging creates a clean finished look along the entire front opening and neckline.
Row 1: Join yarn at bottom right front corner. Ch 1, sc evenly up the right front edge, around the V-neck, and down the left front edge. Work approximately 3 sc for every 2 rows along straight edges. At the V-neck point, work 3 sc in the center stitch to turn the corner smoothly.
Row 2: Ch 1, turn. Sc in each sc around, working 3 sc in corner points. Fasten off.
Bottom Hem Edging
Row 1: Join yarn at one side seam. Ch 1, sc evenly across the entire bottom hem. Sl st to join.
Row 2: Ch 1, sc in each sc around. Sl st to join. Fasten off.
Tie Closures (Make 4 Pairs, 8 Total)
Each tie is a simple chain.
Ch 60. Fasten off, leaving a 6-inch tail for attaching.
These ties will be attached in pairs at four points along the front opening. Space them evenly, approximately 3 to 4 inches apart, starting just below the V-neck and ending near the bottom hem.
Attaching Ties:
Using your yarn needle, thread the tail through the front edging at your chosen attachment point. Secure with a few stitches, then weave in the end. Attach one tie on the left front and one directly across on the right front to create a pair that ties into a bow.
Repeat for all four pairs.
Finishing
Weave in all remaining ends using your yarn needle. For a polished look, weave ends back through the same stitches for at least 2 inches before trimming.
Blocking:
For best results, gently wet block your finished cardigan. Soak in cool water with a drop of wool wash or gentle soap for 15 minutes. Roll in a towel to remove excess water. Lay flat on a blocking mat or clean towel, shaping to measurements. Allow to dry completely.
Blocking will even out your stitches, soften the fabric, and help the grid pattern open up beautifully.
Styling Tips
This dusty rose grid tie cardigan is incredibly versatile. Pair it with high-waisted jeans and a fitted tank for a casual daytime look. Layer it over a sundress for summer weddings or outdoor dinners. The romantic bow details make it special enough for date nights but simple enough for everyday wear.
The open grid stitch provides sun protection while still keeping you cool. It is the perfect travel piece because it packs small and does not wrinkle.
Customization Ideas
Change the length: Add more rows to the body before beginning the V-neck shaping for a longer cardigan that hits at the hips.
Skip the ties: Leave off the tie closures for an open-front kimono style.
Add length to sleeves: Continue working rounds on the sleeves for three-quarter or full-length sleeves. Just add more yarn to your materials list.
Try different colors: This pattern looks gorgeous in cream, sage green, dusty blue, or even a bold terracotta.
Thank you so much for choosing this pattern and trusting me to guide you through it. I genuinely cannot wait to see your finished cardigans. If you make one, please tag me on Instagram or share a photo in my Facebook group. Seeing your creations honestly makes my whole week.
If you loved making this dusty rose grid tie cardigan, save this pattern to your Pinterest boards so you can find it again later or share it with your crochet-loving friends. And please drop a comment below when you finish yours. I would love to hear which color you chose and how the ties turned out for you.
