
Introduction
Let me guess. You saw this adorable ruffled top and butterfly shorts set and thought, "That looks way too complicated for me." I hear you. The cascading tiers, the delicate straps, those sweet little 3D butterflies. It seems like expert-level territory.
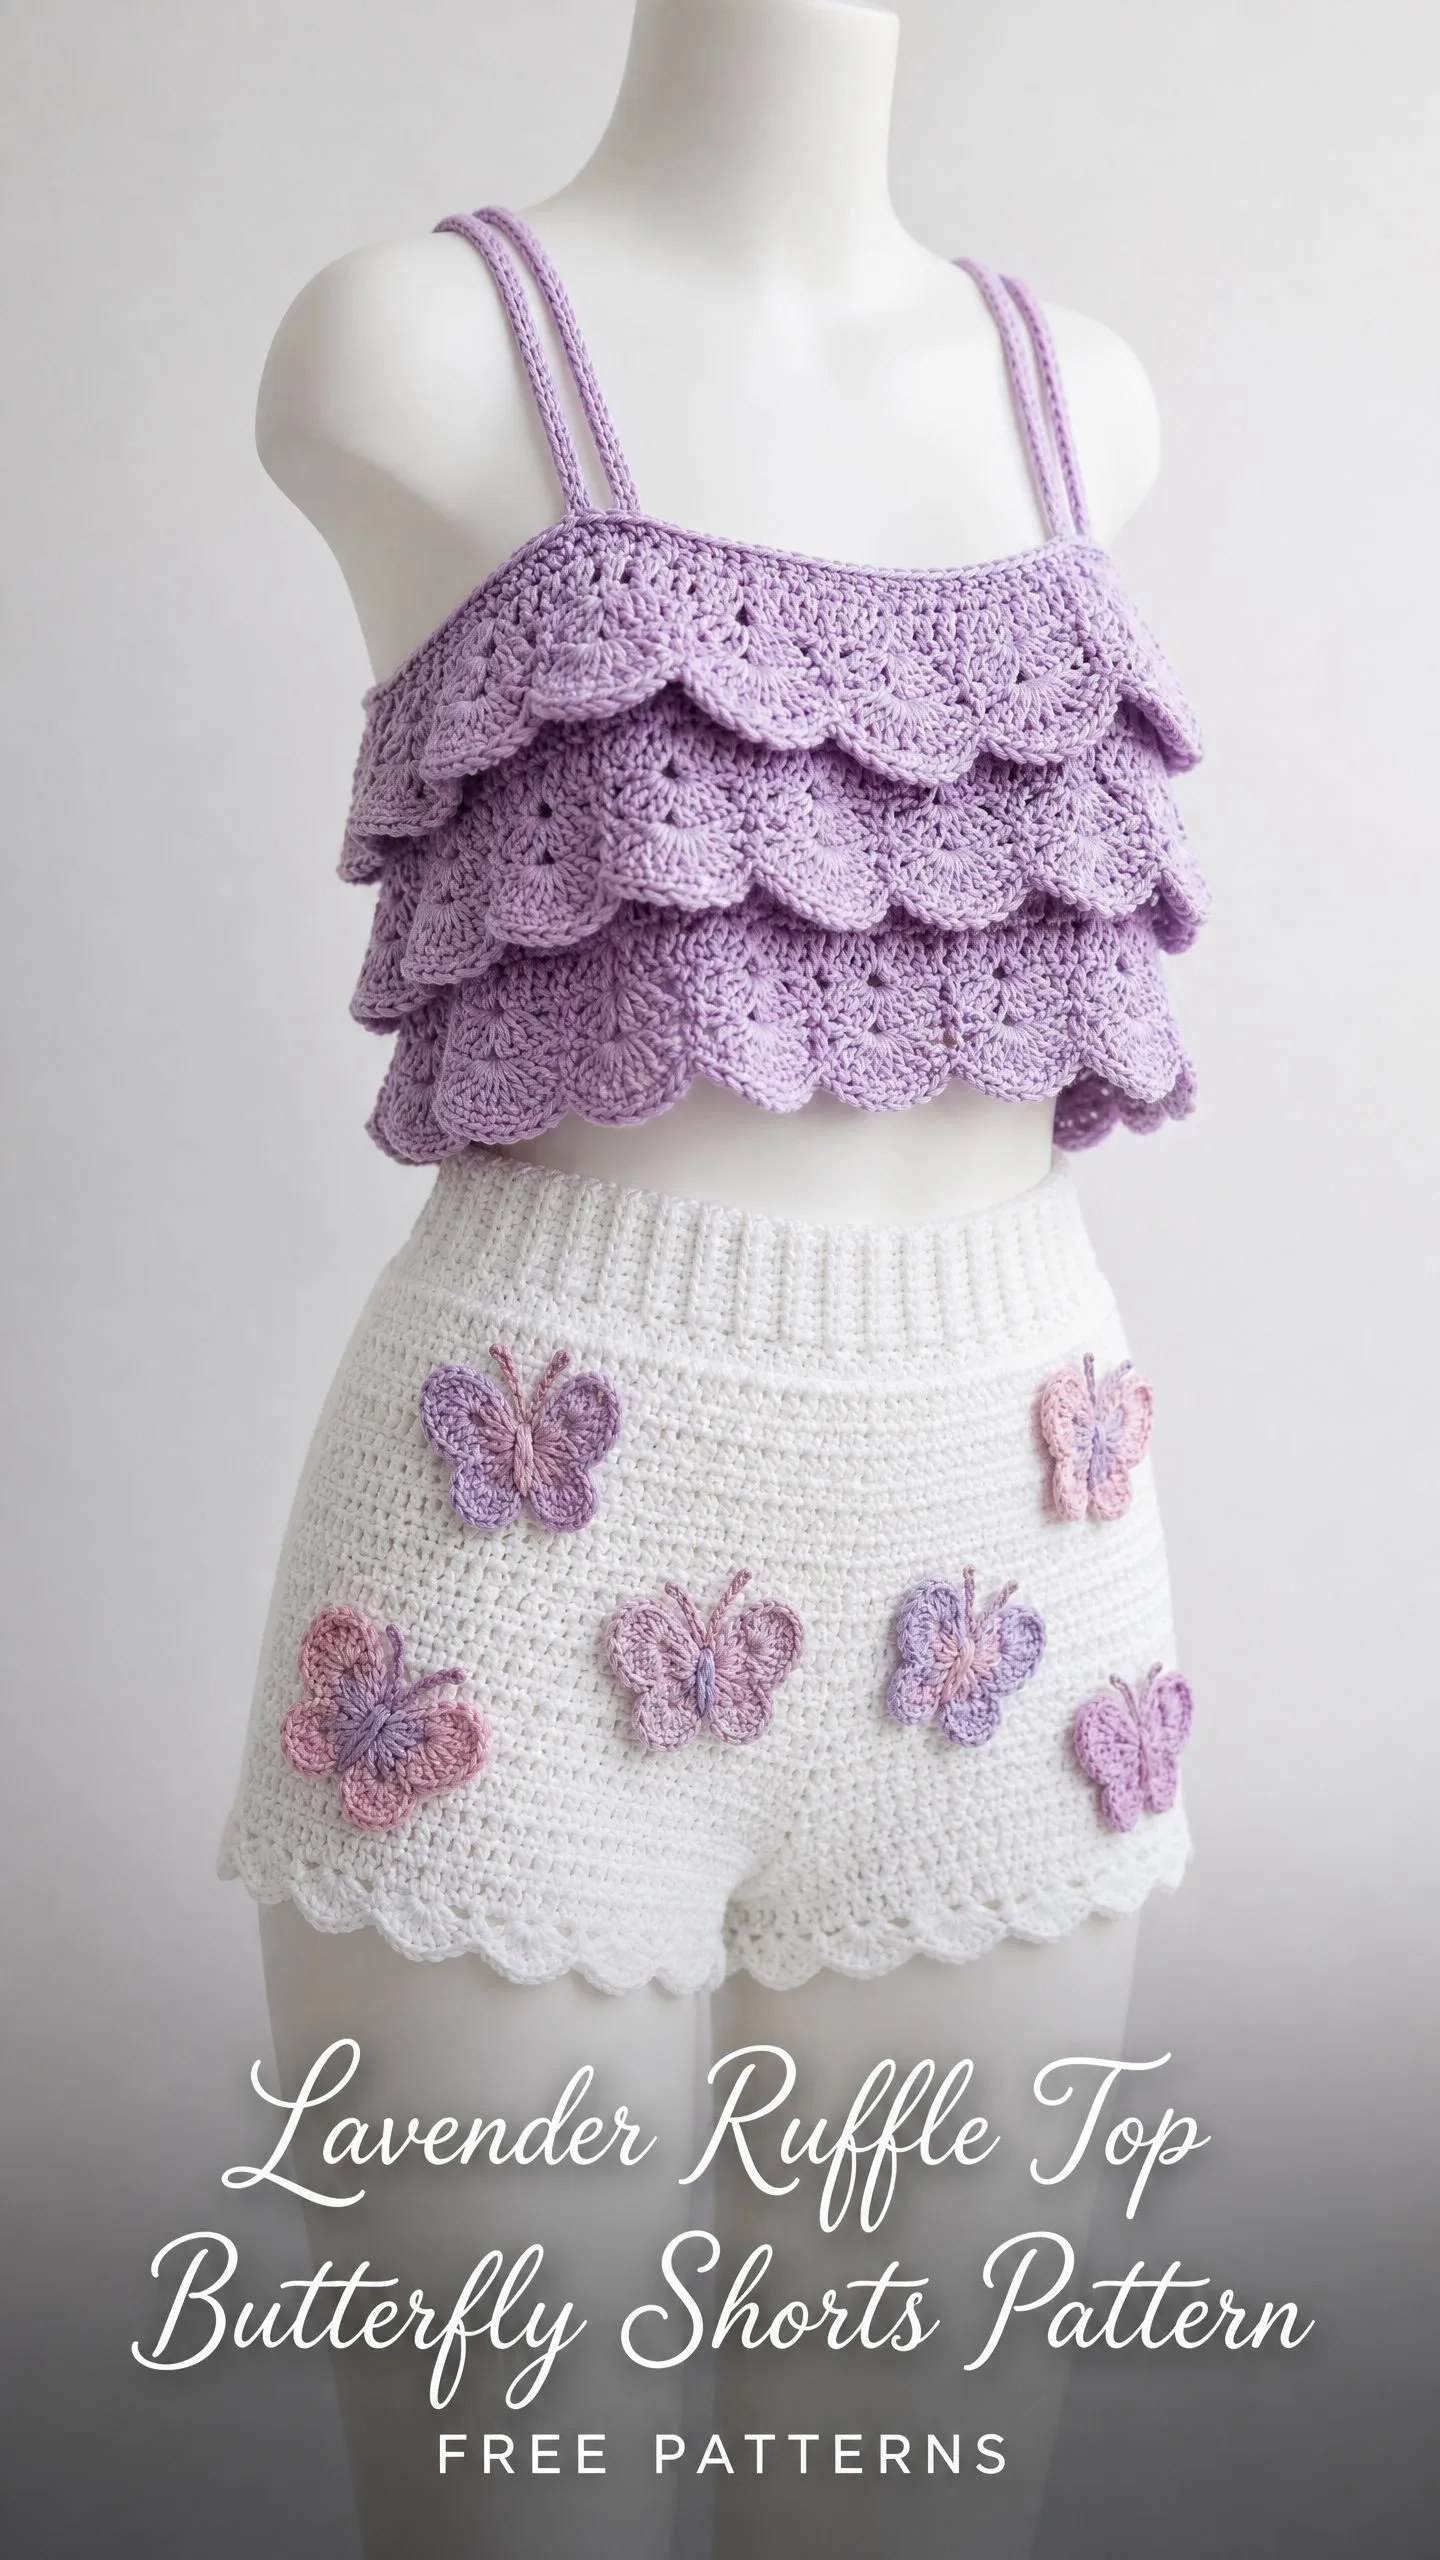
But here is the truth. This entire set uses basic stitches you probably already know. Single crochet forms the foundation. Double crochet creates every single ruffle. The butterflies are just tiny circles with a few clever folds. If you can chain, single crochet, and double crochet, you can absolutely make this.
The secret is construction order. You build a simple tube first. Then you go back and add the pretty ruffles into the front loops you left behind. One layer at a time. No complicated shaping. No confusing charts. Just straightforward rounds with clear stitch counts. I promise this crochet pattern is far more approachable than it appears, and by the end of this tutorial, you will have a stunning handmade outfit that looks like it came from a boutique.
About This Crochet Pattern
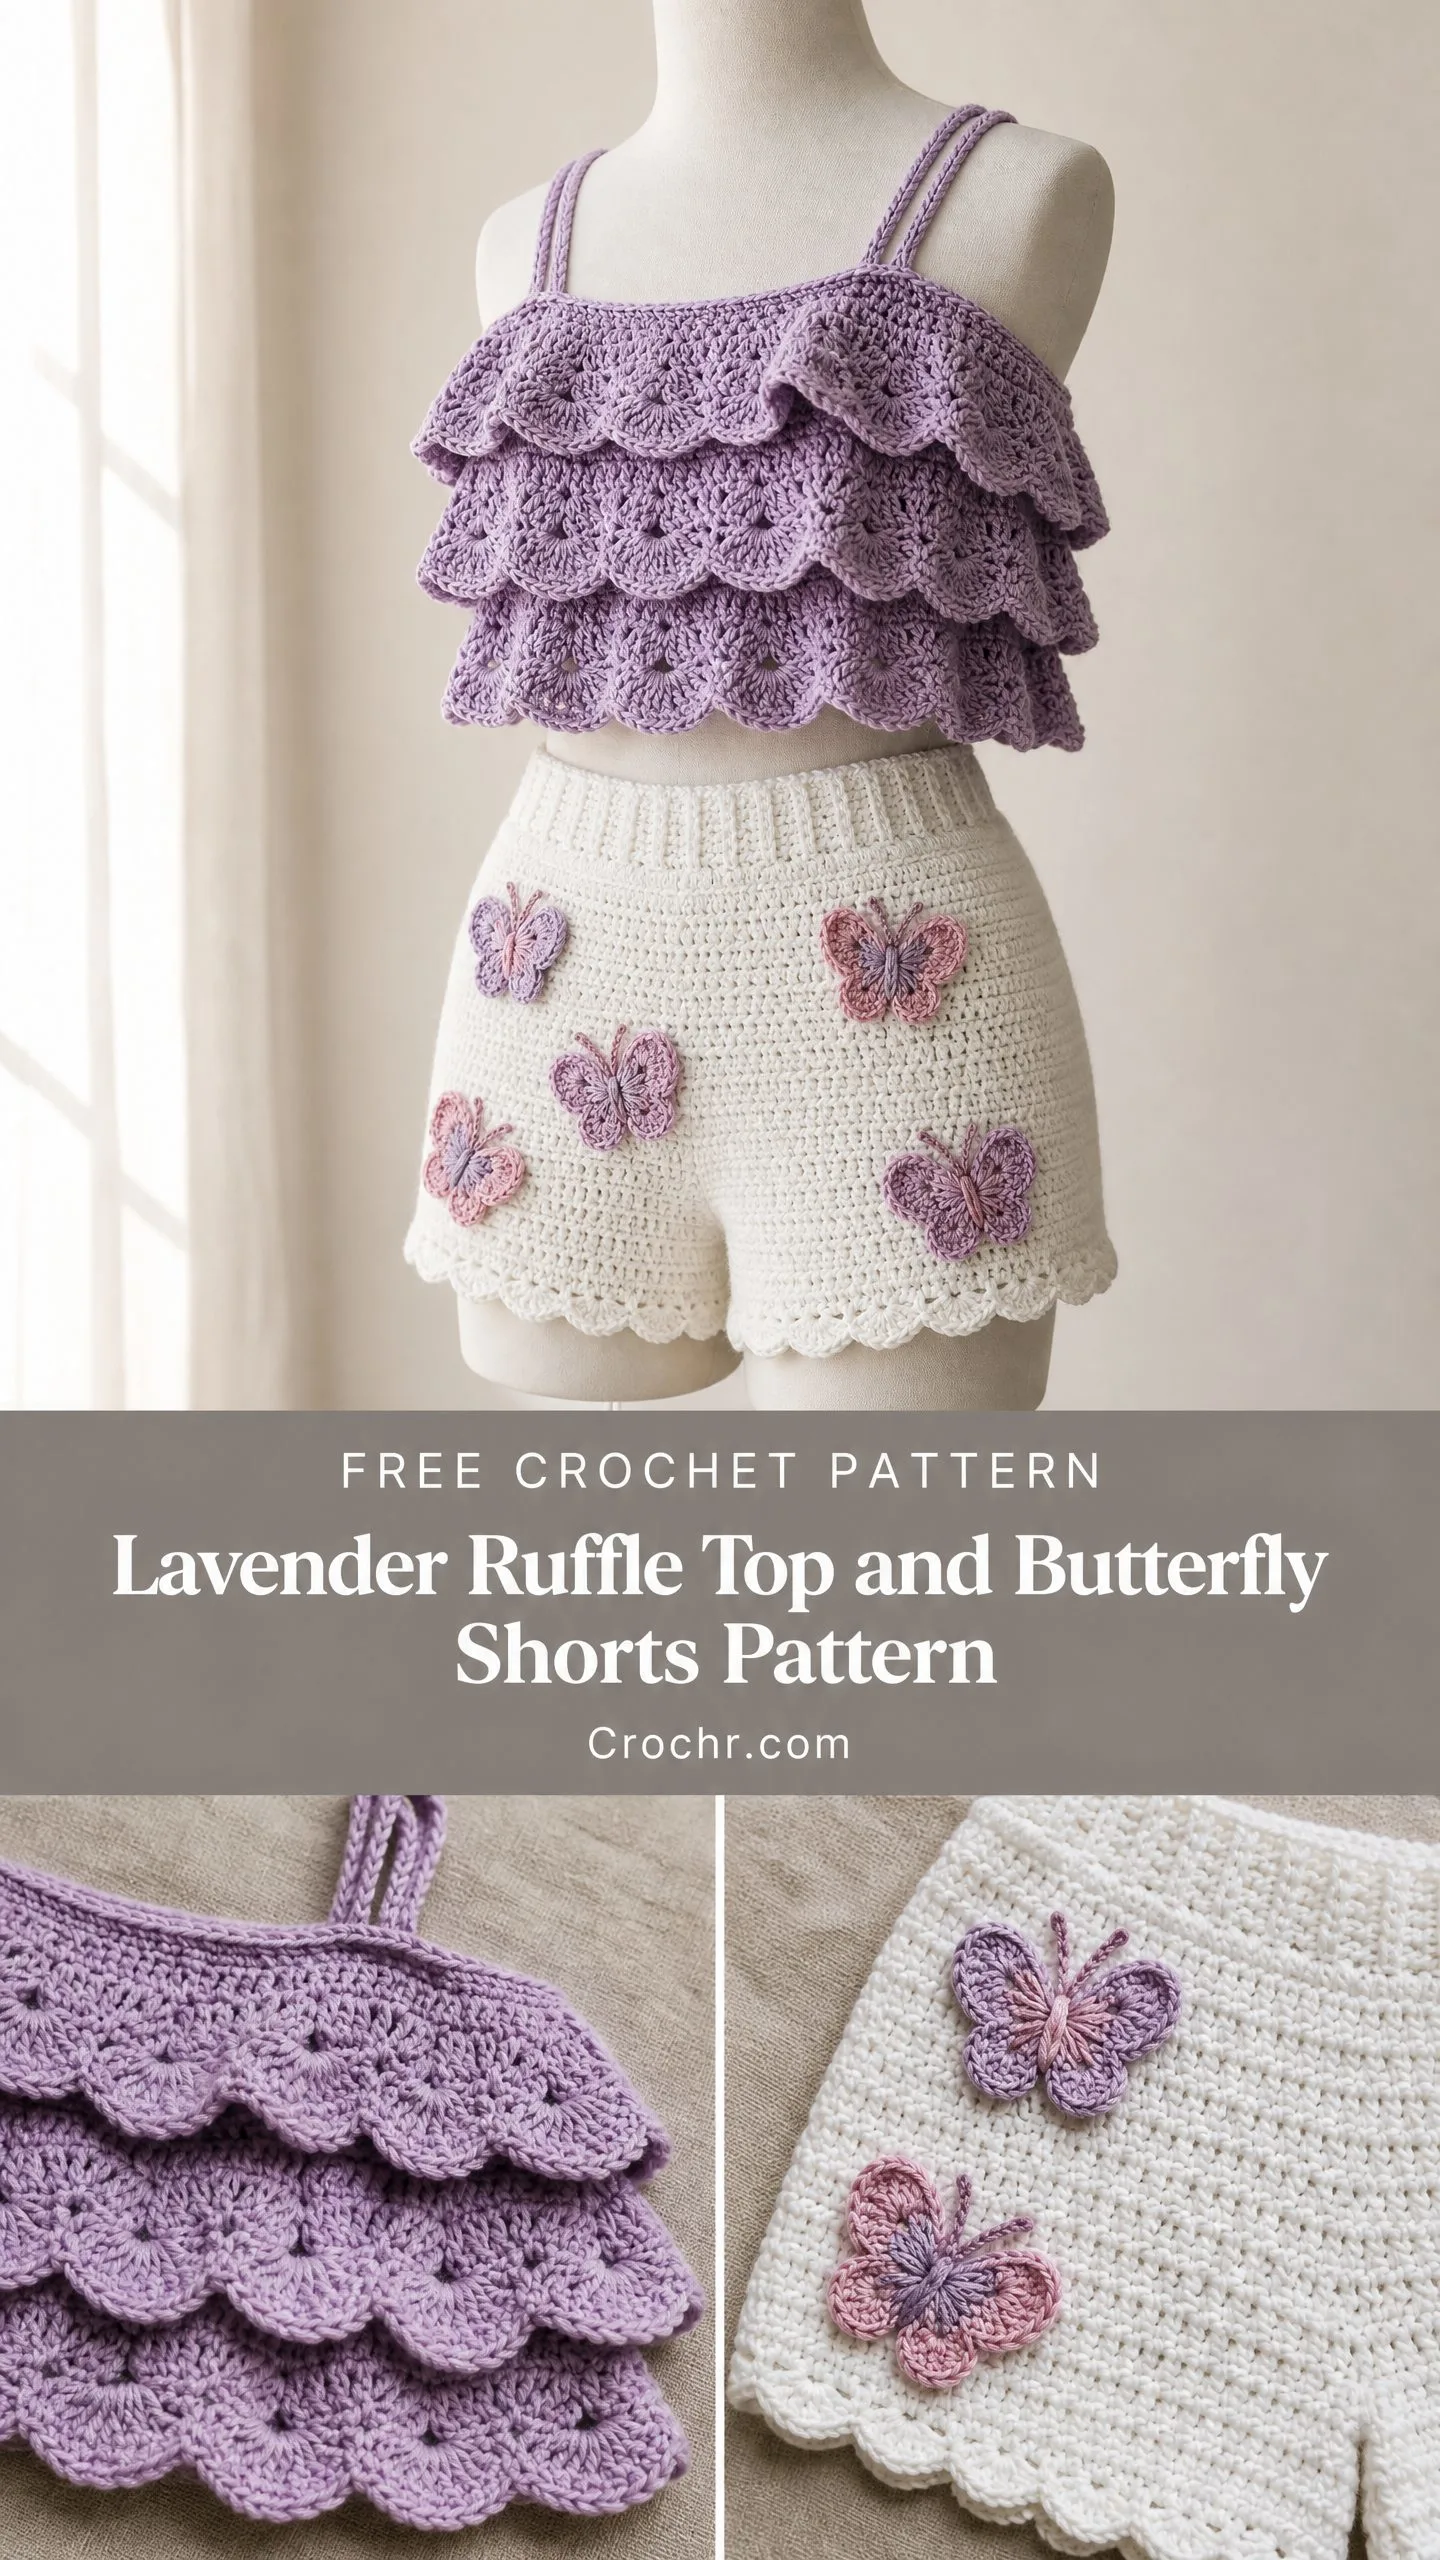
This two-piece Lavender Ruffle Top and Butterfly Shorts set is designed for toddlers and young children. The pattern includes three sizes: 12-18 months, 2T, and 3T. The top features a fitted bodice base worked in joined rounds, with three cascading ruffle tiers created using a shell-based fan stitch. Thin spaghetti straps attach at the front and can cross or tie at the back.
The shorts are worked in the round from the waistband down. They feature a stretchy elastic waist, a simple body section, and a sweet scalloped hem on each leg. Multiple crocheted 3D butterfly appliques in lavender, lilac, and pink get sewn onto the white fabric for that whimsical finishing touch.
Skill Level: Intermediate. You should be comfortable working in joined rounds, reading stitch counts, and seaming pieces together. The stitches themselves are basic, but precise placement matters for the ruffles.
Time Estimate: Plan for 12 to 18 hours total. The top takes approximately 6 to 8 hours. The shorts take 4 to 5 hours. Each butterfly applique takes about 15 to 20 minutes. Assembly and finishing require additional time.
Finished Measurements
All measurements are listed as 12-18 months (2T, 3T).
Ruffle Top:
Butterfly Shorts:
Materials Needed
Yarn:
Recommended Yarn Options:
Hooks:
Notions:
Gauge
Getting gauge right is essential for this fitted garment. A difference of even one stitch per 4 inches will change your finished chest measurement by 1 to 1.5 inches.
With US E-4 / 3.5 mm hook in single crochet:
20 stitches x 24 rows = 4 in / 10 cm, blocked
In fan stitch pattern:
One 5-dc fan + 1 ch-1 space = approximately 1 in / 2.5 cm wide
One fan stitch repeat row = approximately 0.75 in / 1.9 cm tall
To make a gauge swatch: Chain 26. Work single crochet for 28 rows. Block flat. Measure the center 20 stitches and center 24 rows. Adjust your hook size up or down until your gauge matches exactly.
Abbreviations
Here are all the abbreviations used in this crochet tutorial, with plain-English definitions:
Special Stitches Explained
Fan Stitch (Shell Stitch)
This is the stitch that creates all those gorgeous ruffles. Work 5 double crochet stitches into the same stitch or space. This creates a fan-shaped shell. One fan counts as 5 dc.
Fan Stitch Round for Ruffle Tiers
Here is exactly how to work the fan stitch pattern for the ruffles:
1. Identify your foundation round. The fan stitch round is always worked into the front loops only of the designated foundation round below.
2. Slip stitch into the first stitch. Chain 3 (this counts as your first dc).
3. Work 4 more dc into the same stitch. You now have 5 dc total in one stitch. Your first fan is complete.
4. Skip 2 stitches. Slip stitch into the next stitch.
5. Skip 2 stitches. Work 5 dc into the next stitch. Second fan complete.
6. Repeat steps 4 and 5 around.
7. Join with slip stitch to the top of the beginning ch-3.
Important note: The foundation must have a stitch count divisible by 6 for the fan pattern to work evenly. All counts in this pattern are already calculated for you.
Scallop Edging
This creates the pretty hem on the shorts:
1. Join yarn with slip stitch. Chain 1. Single crochet in first stitch.
2. Skip 1 stitch. Work 5 dc into the next stitch.
3. Skip 1 stitch. Single crochet into the next stitch.
4. Repeat steps 2 and 3 around.
5. Join with slip stitch to the first sc.
3D Butterfly Applique
Each butterfly has upper wings, lower wings, and a body center.
Upper Wings:
With butterfly color and D-3 hook, ch 4. Join to form a ring.
Round 1: Ch 3 (counts as dc). Work 2 dc in ring. Ch 2. Work 3 dc in ring. Ch 2. Work 3 dc in ring. Ch 2. Work 3 dc in ring. Ch 2. Join with sl st to top of ch-3. (12 dc, 4 ch-2 spaces)
Round 2: Sl st into next dc. Sl st into ch-2 sp. Ch 3. Work 4 dc in same ch-2 sp. Ch 1. Work 5 dc in next ch-2 sp. Leave remaining stitches unworked. Fasten off. (10 dc, 1 ch-1 sp)
Lower Wings:
Join yarn with sl st into the third ch-2 sp of Round 1. Work 5 dc in same ch-2 sp. Ch 1. Work 5 dc in next (fourth) ch-2 sp. Fasten off. (10 dc, 1 ch-1 sp)
Body Center:
With a contrasting or matching color, ch 8. Sc across. Fasten off. Fold in half and pinch center gently to create a body. Sew through center to cinch.
Assembly: Pinch wings at center ring. Wrap body piece around center. Sew through all layers to join upper and lower wings at center. Flatten wings slightly. Finished butterfly measures approximately 1.5 in / 3.8 cm across.
Make 5 (5, 6) butterflies total, varying colors as desired.
Pattern Notes Before You Begin
1. The top bodice base is worked in joined rounds. You do not turn your work. The right side always faces you.
2. Ruffle tiers are worked into the front loops only of their designated anchor rounds.
3. The shorts are worked in joined rounds from the waistband down.
4. Block all pieces before assembling. This is particularly important for ruffles, which tend to curl before blocking.
5. Stitch markers are your best friends in this project. Use them to mark round beginnings and move them up as you work.
6. When working fan stitches, the ch-3 at the beginning of the round counts as the first dc of the first fan.
Part One: Lavender Ruffle Top Step by Step
Bodice Base
The bodice base is your structural foundation. It is worked in joined rounds of single crochet using Yarn A (lavender). The ruffle tiers will attach to Rounds 2, 4, and 6 of this base later.
Foundation Chain:
This gives you 90 (102, 108) working stitches. These numbers are divisible by 6 to support the fan stitch repeats on your ruffle tiers.
Round 1 (RS): Ch 1. Sc in each ch around. Join with sl st to first sc. (90, 102, 108 sc)
Round 2: Ch 1. Sc in each st around. Join with sl st to first sc. Place a stitch marker on this round. This is your Tier 3 anchor round (bottom ruffle). (90, 102, 108 sc)
Round 3: Ch 1. Sc in each st around. Join with sl st to first sc. (90, 102, 108 sc)
Round 4: Ch 1. Sc in each st around. Join with sl st to first sc. Place a stitch marker on this round. This is your Tier 2 anchor round (middle ruffle). (90, 102, 108 sc)
Round 5: Ch 1. Sc in each st around. Join with sl st to first sc. (90, 102, 108 sc)
Round 6: Ch 1. Sc in each st around. Join with sl st to first sc. Place a stitch marker on this round. This is your Tier 1 anchor round (top ruffle). (90, 102, 108 sc)
Rounds 7-9: Ch 1. Sc in each st around. Join with sl st to first sc. (90, 102, 108 sc)
Checkpoint: After Round 9, your bodice base tube should measure approximately 3 in / 7.5 cm tall and 18 in / 46 cm in circumference (flat: 9 in / 23 cm wide). If your measurement differs by more than 0.5 in / 1.25 cm, check your gauge now.
Round 10: Ch 1. Working in BLO, sc in each st around. Join with sl st to first sc. (90, 102, 108 sc)
This BLO round creates a visual fold line at the top of the bodice. The front loops are left free for the upper edge.
Round 11 (Neckline and Strap Setup): Ch 1. Sc across first 42 (48, 51) sts. Ch 6 (strap base right side). Skip 6 sts. Sc across next 42 (48, 51) sts. Ch 6 (strap base left side). Skip 6 sts. Join with sl st to first sc. (84, 96, 102 sc + 2 ch-6 strap loops)
The 6 skipped stitches on each side form the underarm gap. The ch-6 bridges this gap.
Round 12: Ch 1. Sc around, working sc in each sc and 6 sc over each ch-6 bridge. Join with sl st to first sc. (96, 108, 114 sc)
Round 13: Ch 1. Sc in each st around. Join with sl st to first sc. (96, 108, 114 sc)
Fasten off, leaving a 12-in / 30.5-cm tail for later finishing. Your bodice base is now complete.
Adding the Ruffle Tiers
Work the three ruffles from bottom to top: Tier 3 first (largest), then Tier 2, then Tier 1.
Tier 3 (Bottom Ruffle)
Join Yarn A with sl st into any front loop of Round 2.
Ruffle Round 3A: Ch 3 (counts as dc). Work 4 dc in same FLO st (first fan complete). Skip 2 FLO sts. Sl st in next FLO st. Skip 2 FLO sts. Work 5 dc in next FLO st. Repeat from to around. Join with sl st to top of beginning ch-3. (15, 17, 18 fans)
Ruffle Round 3B: Without turning, sl st into each dc of the first fan from the previous round (4 sl sts). Then work 5 dc in the top of the sl st anchor from the previous round. Continue working 5 dc into each sl st anchor of the previous round, with sl sts traveling through each fan top between. Join with sl st. (15, 17, 18 fans)
Fasten off Yarn A. Weave in ends. Tier 3 should measure approximately 1.5 in / 3.8 cm tall.
Tier 2 (Middle Ruffle)
Join Yarn A with sl st into any front loop of Round 4.
Ruffle Round 2A: Ch 3 (counts as dc). Work 4 dc in same FLO st. Skip 2 FLO sts. Sl st in next FLO st. Skip 2 FLO sts. Work 5 dc in next FLO st. Repeat from to around. Join with sl st to top of beginning ch-3. (15, 17, 18 fans)
Ruffle Round 2B: Same as Ruffle Round 3B above. (15, 17, 18 fans)
Fasten off. Weave in ends.
Tier 1 (Top Ruffle)
Join Yarn A with sl st into any front loop of Round 6.
Ruffle Round 1A: Ch 3 (counts as dc). Work 4 dc in same FLO st. Skip 2 FLO sts. Sl st in next FLO st. Skip 2 FLO sts. Work 5 dc in next FLO st. Repeat from to around. Join with sl st to top of beginning ch-3. (15, 17, 18 fans)
Ruffle Round 1B: Same method as previous tiers. (15, 17, 18 fans)
Fasten off. Weave in ends.
Checkpoint: With all three tiers attached, the ruffle section should measure approximately 3 in / 7.5 cm in height with the ruffles draping downward.
Top Edge Ruffle
Join Yarn A with sl st into any front loop of Round 12.
Top Ruffle Round A: Ch 3 (counts as dc). Work 4 dc in same FLO st. Skip 2 FLO sts. Sl st in next FLO st. Skip 2 FLO sts. Work 5 dc in next FLO st. Repeat from to around. Join with sl st to top of beginning ch-3. (16, 18, 19 fans)
Top Ruffle Round B: Same as previous ruffle second row method. (16, 18, 19 fans)
Fasten off. Weave in ends.
Straps
Each strap is worked as a simple chain cord reinforced with slip stitches.
With Yarn A and E-4 hook, ch 55 (60, 65).
Row 1: Sl st in each ch back to start. Fasten off leaving a 12-in tail. (54, 59, 64 sl sts)
Make 2 straps.
Strap Attachment:
Part Two: Butterfly Shorts Step by Step
Waistband
The waistband is worked flat in rows using Yarn B (white), then seamed to form a tube. Elastic will be threaded through.
Foundation Chain: Ch 17.
Row 1: Hdc in 3rd ch from hook and in each ch across. Ch 2, turn. (15 hdc)
Rows 2-80 (90, 96): Hdc in each st across. Ch 2, turn. At end of last row, do not turn.
The waistband is a long horizontal strip. 80 rows creates approximately 16 in / 40.5 cm for size 12-18 months.
Seam the short ends together with yarn needle using mattress stitch. This creates your waistband tube ring.
Thread elastic through the waistband tube using a safety pin. Overlap elastic ends by 0.5 in / 1.25 cm and sew together securely.
Shorts Body
Join Yarn B to any seam point of the waistband with sl st, working along one long edge.
Setup Round: Ch 1. Work 90 (102, 108) sc evenly around the bottom edge of the waistband. Join with sl st to first sc. (90, 102, 108 sc)
Rounds 1-10 (12, 14): Ch 1. Sc in each st around. Join with sl st to first sc. (90, 102, 108 sc per round)
Checkpoint: After these rounds, the shorts body below the waistband should measure approximately 3 in / 7.5 cm (3.5 in / 9 cm, 4 in / 10 cm).
Crotch Shaping and Leg Separation
Mark the midpoint of the round to identify front and back halves.
Left Leg
Join Yarn B with sl st at stitch 1.
Round 1 (Left Leg): Ch 1. Sc in first 45 (51, 54) sts. Ch 4 (crotch bridge). Join with sl st to first sc. (45, 51, 54 sc + 4 ch)
Round 2: Ch 1. Sc in each sc and 4 sc over ch-4 bridge. Join with sl st to first sc. (49, 55, 58 sc)
Round 3: Ch 1. Sc2tog 1 (1, 4) time(s) evenly spaced. Sc in each remaining st. Join with sl st to first sc. (48, 54, 54 sc)
Rounds 4-8 (10, 12): Ch 1. Sc in each st around. Join with sl st to first sc. (48, 54, 54 sc)
Left Leg Scallop Hem: Ch 1. Sc in first st. Skip 2 sts. 5 dc in next st. Skip 2 sts. Sc in next st. Rep from to around. Join with sl st to first sc. Fasten off. (8, 9, 9 scallops)
Weave in ends.
Right Leg
Rejoin Yarn B with sl st at stitch 46 (one stitch past the left leg’s last stitch).
Round 1 (Right Leg): Ch 1. Sc in next 45 (51, 54) sts. Work 4 sc along the underside of the ch-4 bridge already made. Join with sl st to first sc. (49, 55, 58 sc)
Round 2: Ch 1. Sc in each st around. Join with sl st to first sc. (49, 55, 58 sc)
Round 3: Ch 1. Sc2tog 1 (1, 4) time(s) evenly spaced. Sc in remaining sts. Join with sl st to first sc. (48, 54, 54 sc)
Rounds 4-8 (10, 12): Ch 1. Sc in each st around. Join with sl st to first sc. (48, 54, 54 sc)
Right Leg Scallop Hem: Same as left leg. (8, 9, 9 scallops)
Fasten off. Weave in ends.
Checkpoint: The completed shorts should measure approximately 8 in / 20.5 cm (9 in / 23 cm, 10 in / 25.5 cm) from waistband top to lowest scallop point.
Attaching Butterfly Appliques
Make 5 (5, 6) butterflies following the 3D Butterfly Applique instructions in the Special Stitches section.
Suggested color combinations:
Placement: Scatter butterflies across the front and back of the shorts body below the waistband. Use at least 3 butterflies on the front panel and 2 on the back. For size 3T with 6 butterflies, add a third to the back panel.
Pin in place before sewing. Sew securely around the center body of each butterfly, leaving wing edges free for a 3D effect. Tack wing tips lightly if needed.
Size Customization Tips
To size up beyond 3T: Add 6 stitches (one fan repeat equivalent) to the bodice foundation chain. Add one stitch repeat group to the shorts foundation as well. Lengthen each section by 2 additional rounds per size increment.
To size down to 6-12 months: Subtract 6 stitches from the bodice foundation (84 sc base). Shorten all length sections by 2 rounds each.
To lengthen the top: Add rounds between Round 9 and Round 10 in the bodice base. Every 2 additional rounds adds approximately 0.33 in / 0.85 cm.
To lengthen the shorts: Add rounds to the body section before crotch separation. Each round adds approximately 0.17 in / 0.43 cm.
Strap length adjustment: Measure from the front bodice over the child’s shoulder to the back. Add 4 in / 10 cm for adjustment room. Modify the strap chain count before working.
Finishing Your Set
Block all pieces flat before final assembly. Pay special attention to the ruffles, which tend to curl before blocking. Pin them gently to encourage them to lay flat and fan out beautifully.
Weave in all remaining ends securely. For garments that will be washed frequently, I recommend the Russian join method or weaving each tail at least 1 inch in each direction.
Give everything a final steam or light press, being careful not to flatten the 3D butterfly wings.
You Made It!
Thank you so much for choosing this pattern for your little one. I know it looks like a lot of steps, but you have tackled it piece by piece, and I hope you are as proud of your finished set as I am of this design.
I would absolutely love to see your creations. Tag me on Instagram or share in our Facebook group so I can celebrate your work with you. Seeing these sweet outfits come to life in different colors and on different kiddos is truly the best part of sharing patterns.
If you found this crochet tutorial helpful, I would be so grateful if you saved it to your Pinterest boards so you can find it again later, and so other crafters can discover it too. And if you make this set, please leave a comment below. I read every single one, and your notes help other makers feel confident jumping in.
Happy hooking!
You Might Also Like
- Berry Sorbet Mesh Cropped Hoodie Free Crochet Pattern
- Neon Lime Snake Plant Amigurumi Free Crochet Pattern
- Modern Monstera Crochet Plant for Home Office Desk
- Sunflower Ear Climber Free Crochet Pattern
