I don’t know about you, but I have a soft spot for nature-inspired accessories that feel a little bit magical without being over the top. These delicate ivy leaf earrings hit that sweet spot perfectly. All the woodland charm with none of the complicated wirework or beading that usually comes with jewelry making.
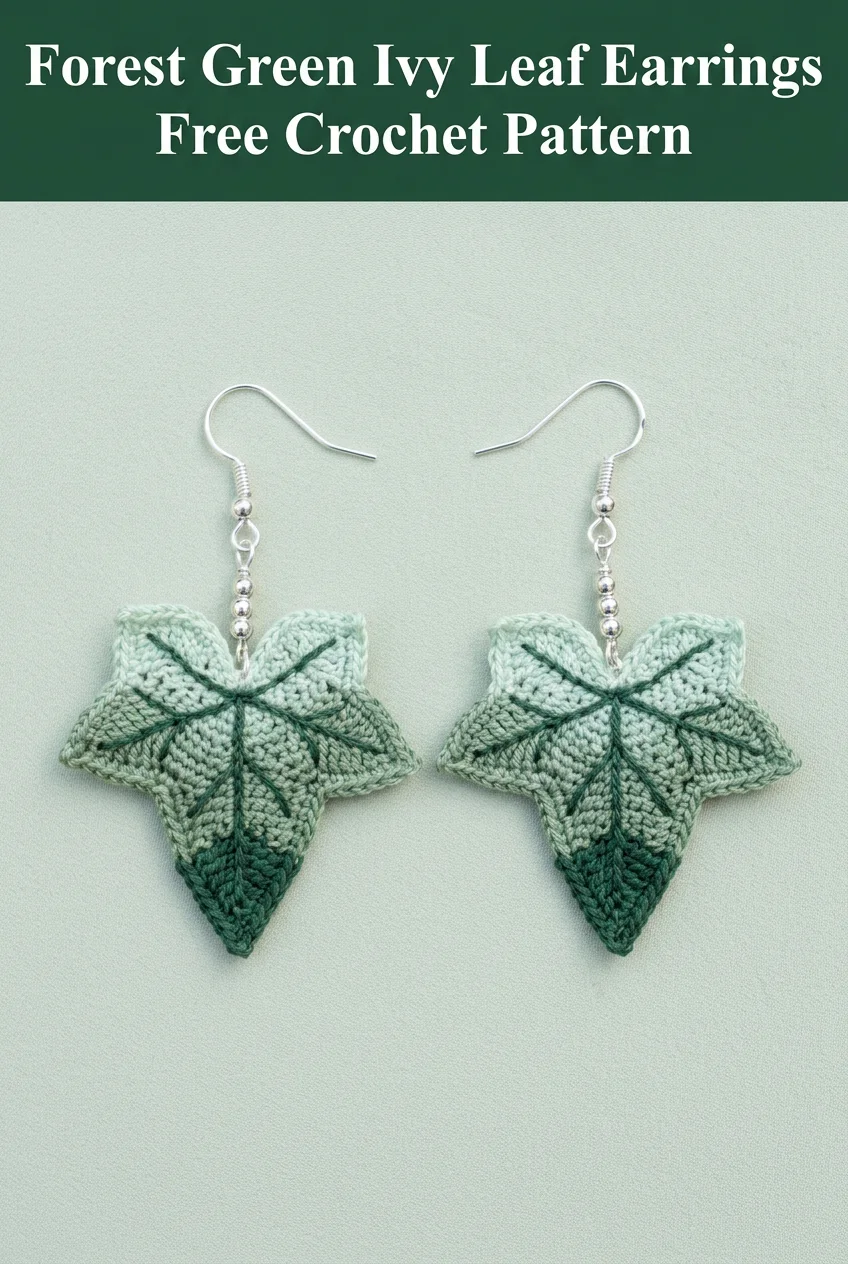
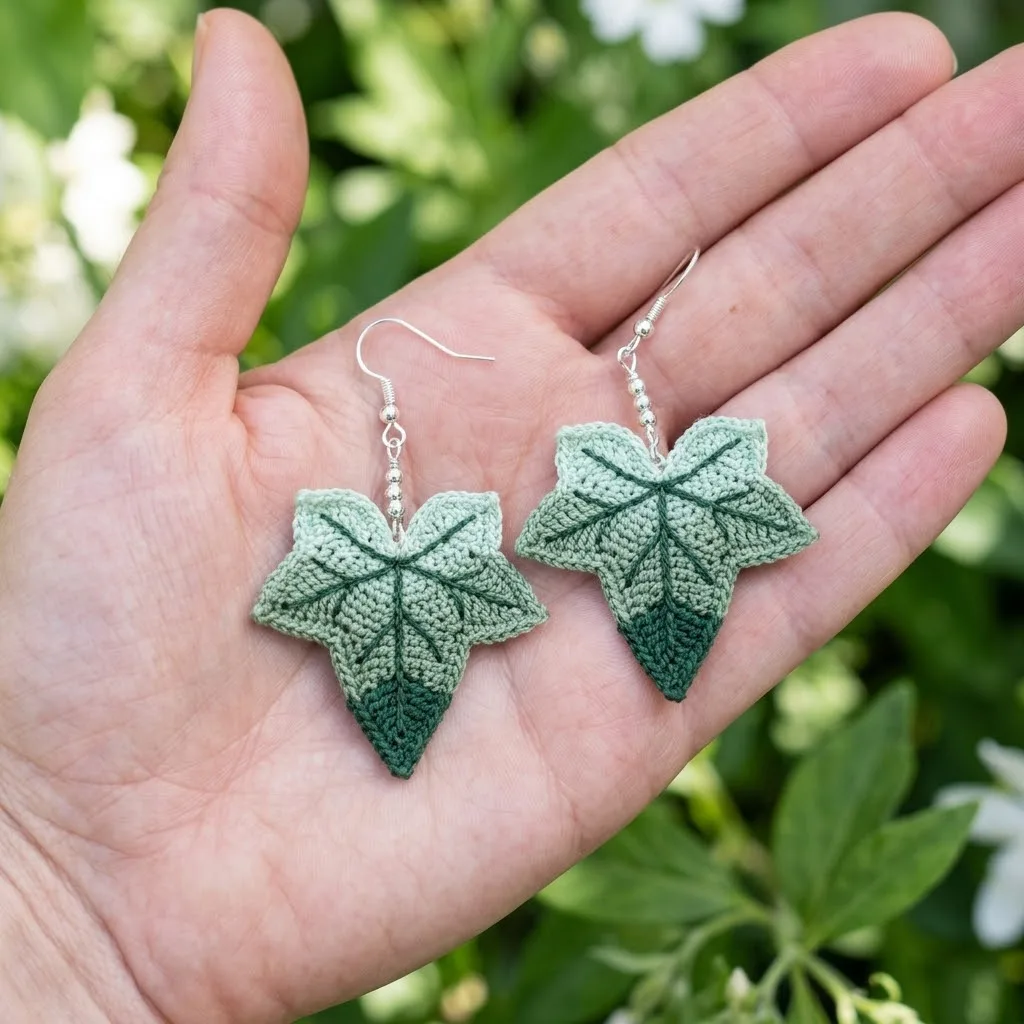
When I finished this pair, I actually gasped a little. The gradient effect from sage green at the top to deep forest green at the pointed tip creates such a realistic leaf look. And the embroidered veins? Chef’s kiss. They take these from "cute crochet project" to "wait, you MADE those?" territory.
These earrings work up in about 30 minutes each once you get the hang of the shaping. They make incredible gifts for the plant lovers, cottagecore enthusiasts, and fantasy fans in your life. Plus, they use such tiny amounts of thread that you can make dozens from a single ball.
Let me walk you through exactly how to create your own pair of these stunning ivy leaf earrings.
Why You’ll Love This Crochet Ivy Leaf Earrings Pattern
This crochet tutorial is perfect for crafters who want to try their hand at jewelry making without investing in expensive supplies. The leaves are worked flat using basic stitches, then finished with simple surface embroidery to create those gorgeous dimensional veins.
What makes this pattern special:
The finished leaves measure approximately 1.5 inches wide and 2 inches long, making them a statement piece without being heavy or cumbersome.
Skill Level
This crochet pattern is rated easy to intermediate. You should be comfortable with basic crochet stitches and working in small, tight gauges. The leaf shaping involves some increases and decreases that might challenge absolute beginners, but the pattern breaks everything down step by step.
If you’ve never worked with crochet thread before, I recommend practicing a small swatch first. Thread behaves differently than yarn, and a tighter tension is normal and expected.
Materials Needed
Thread:
I used mercerized cotton thread for that lovely sheen you see in the photos. Aunt Lydia’s Classic Crochet Thread works beautifully, as does DMC Cebelia. The mercerization gives the finished leaves a subtle glow that catches the light.
Hook:
Notions:
Abbreviations and Stitch Definitions
Let me break down every stitch you’ll need for this pattern. Even if you’re familiar with these terms, the definitions help ensure we’re on the same page.
ch = chain: Yarn over, pull through the loop on your hook. This creates the foundation of most crochet projects.
sl st = slip stitch: Insert hook into stitch, yarn over, pull through both the stitch and the loop on your hook in one motion. This creates a flat, nearly invisible stitch used for joining and moving across stitches.
sc = single crochet: Insert hook into stitch, yarn over and pull up a loop (2 loops on hook), yarn over and pull through both loops. This is your shortest basic stitch.
hdc = half double crochet: Yarn over, insert hook into stitch, yarn over and pull up a loop (3 loops on hook), yarn over and pull through all 3 loops at once. This stitch is slightly taller than single crochet.
dc = double crochet: Yarn over, insert hook into stitch, yarn over and pull up a loop (3 loops on hook), yarn over and pull through 2 loops (2 loops remain), yarn over and pull through remaining 2 loops. This creates a taller, more open stitch.
sc2tog = single crochet 2 together (decrease): Insert hook into first stitch, yarn over and pull up a loop, insert hook into next stitch, yarn over and pull up a loop (3 loops on hook), yarn over and pull through all 3 loops. This decreases your stitch count by 1.
inc = increase: Work 2 stitches into the same stitch. This adds 1 stitch to your count.
Gauge
Gauge isn’t critical for this decorative project, but your fabric should be tight and firm with no holes visible between stitches. If your leaves look loose or floppy, try going down a hook size. If you’re struggling to insert your hook, go up a size.
A finished leaf should measure approximately 1.5 inches at the widest point and 2 inches from top to bottom tip.
Step by Step Crochet Pattern for Ivy Leaf Earrings
Center Lobe (Make 2)
The ivy leaf is constructed by first creating the center pointed lobe, then adding the two side lobes. We’ll start with the sage green thread.
Row 1: Ch 2, sc in 2nd ch from hook. (1 st)
Row 2: Ch 1, turn, 2 sc in the sc. (2 sts)
Row 3: Ch 1, turn, 2 sc in first st, sc in last st. (3 sts)
Row 4: Ch 1, turn, sc in first st, 2 sc in next st, sc in last st. (4 sts)
Row 5: Ch 1, turn, sc in first 2 sts, 2 sc in next st, sc in last st. (5 sts)
Row 6: Ch 1, turn, sc in first 2 sts, 2 sc in next st, sc in last 2 sts. (6 sts)
Row 7: Ch 1, turn, sc in each st across. (6 sts)
Row 8: Ch 1, turn, sc in each st across. (6 sts)
Don’t fasten off. We’ll continue directly into the first side lobe.
First Side Lobe
Working from the right side of your center lobe:
Row 1: Ch 1, turn, sc in first 3 sts only. Leave remaining 3 sts unworked. (3 sts)
Row 2: Ch 1, turn, sc in first st, sc2tog over last 2 sts. (2 sts)
Row 3: Ch 1, turn, sc2tog. (1 st)
Row 4: Ch 1, sc in st, sl st in side edge of center lobe to join.
Fasten off and weave in end.
Second Side Lobe
Join sage green thread to the 4th stitch of Row 8 on the center lobe (the first unworked stitch from the first side lobe).
Row 1: Ch 1, sc in same st and next 2 sts. (3 sts)
Row 2: Ch 1, turn, sc2tog over first 2 sts, sc in last st. (2 sts)
Row 3: Ch 1, turn, sc2tog. (1 st)
Row 4: Ch 1, sc in st, sl st in side edge of center lobe to join.
Fasten off and weave in end.
Edging
The edging creates that beautiful finished look and helps define the leaf shape. Join sage green thread at the bottom point of the center lobe.
Round 1: Ch 1, work sc evenly around the entire leaf, placing 3 sc in each outer point of the three lobes and sc2tog at each inner valley between lobes. Work approximately 8-10 sc along each lobe edge. Sl st to first sc to join.
Tip: Count your stitches as you go around each side to keep them even. The exact number will depend on your tension, but aim for symmetry between the two sides.
For the ombre effect shown in the photo, switch to forest green thread when you reach the bottom third of the center lobe during your edging round. This creates that gorgeous gradient from light to dark.
Fasten off and weave in all ends securely.
Surface Embroidery for Leaf Veins
This step transforms your flat leaf into something truly special. Thread your embroidery needle with forest green thread, leaving a tail of about 12 inches.
Center Vein:
Starting at the bottom point of the center lobe, bring your needle up through the fabric. Work a straight line of backstitch or chain stitch up through the center, ending at the top edge between the two side lobes.
Side Veins:
From the center vein, create 2-3 diagonal veins branching outward toward each side lobe point. Space them evenly and curve them slightly to mimic natural leaf veins.
Secondary Veins:
For extra realism, add smaller veins branching off from the main side veins. Keep these subtle, just 3-4 stitches each.
Secure your thread on the back of the leaf and weave in the end. The back doesn’t need to be perfectly neat since you can add a small felt backing later if desired.
Optional Stiffening
For leaves that hold their shape better, apply fabric stiffener or a thin coat of clear nail polish to the back of each leaf. Let dry completely before handling. This step is optional but recommended for earrings that will see regular wear.
Attaching Earring Findings
Using your jewelry pliers, open a jump ring by twisting it sideways (never pull it apart). Thread the jump ring through the top edge of your leaf, between the two side lobe points. Add any decorative beads to the earring finding, then attach the finding to the jump ring. Close the jump ring securely by twisting it back together.
Repeat for the second earring.
Helpful Tips for Success
Working with thread: Crochet thread can be slippery. Wax your thread lightly or work in good lighting to see your stitches clearly.
Keeping leaves identical: Count your stitches religiously. Even one stitch difference between leaves will be noticeable when worn as a pair.
Tension troubles: If your leaves curl, try blocking them with steam or pinning them flat while damp.
Color variations: Try autumn colors like rust, gold, and brown. Or go fantasy with deep purple fading to black. The pattern works beautifully in any palette.
Customization Ideas
These ivy leaves are versatile beyond earrings. Consider making them into:
You can also adjust the size by using different thread weights. Sport weight yarn with a 4mm hook creates leaves perfect for appliqués on sweaters or bags.
Wrapping Up Your Ivy Leaf Earrings Crochet Pattern
I hope this detailed tutorial gives you everything you need to create your own pair of these gorgeous forest green ivy leaf earrings. They really are one of my favorite quick projects, and every time I wear mine, someone asks where I got them.
The combination of simple stitches, strategic color placement, and that surface embroidery detail creates something that looks far more complicated than it actually is. That’s my favorite kind of crochet project.
Thank you so much for choosing this pattern. I truly appreciate you being here, and I cannot wait to see your finished leaves. If you make these earrings, please tag me on Instagram or share a photo in my Facebook group. Seeing your creations genuinely makes my day.
If you loved this crochet ivy leaf earrings pattern, I’d be so grateful if you saved it to your Pinterest boards so you can find it again later. And please drop a comment below if you give these a try. I love hearing which colors you choose and who you’re making them for!
