
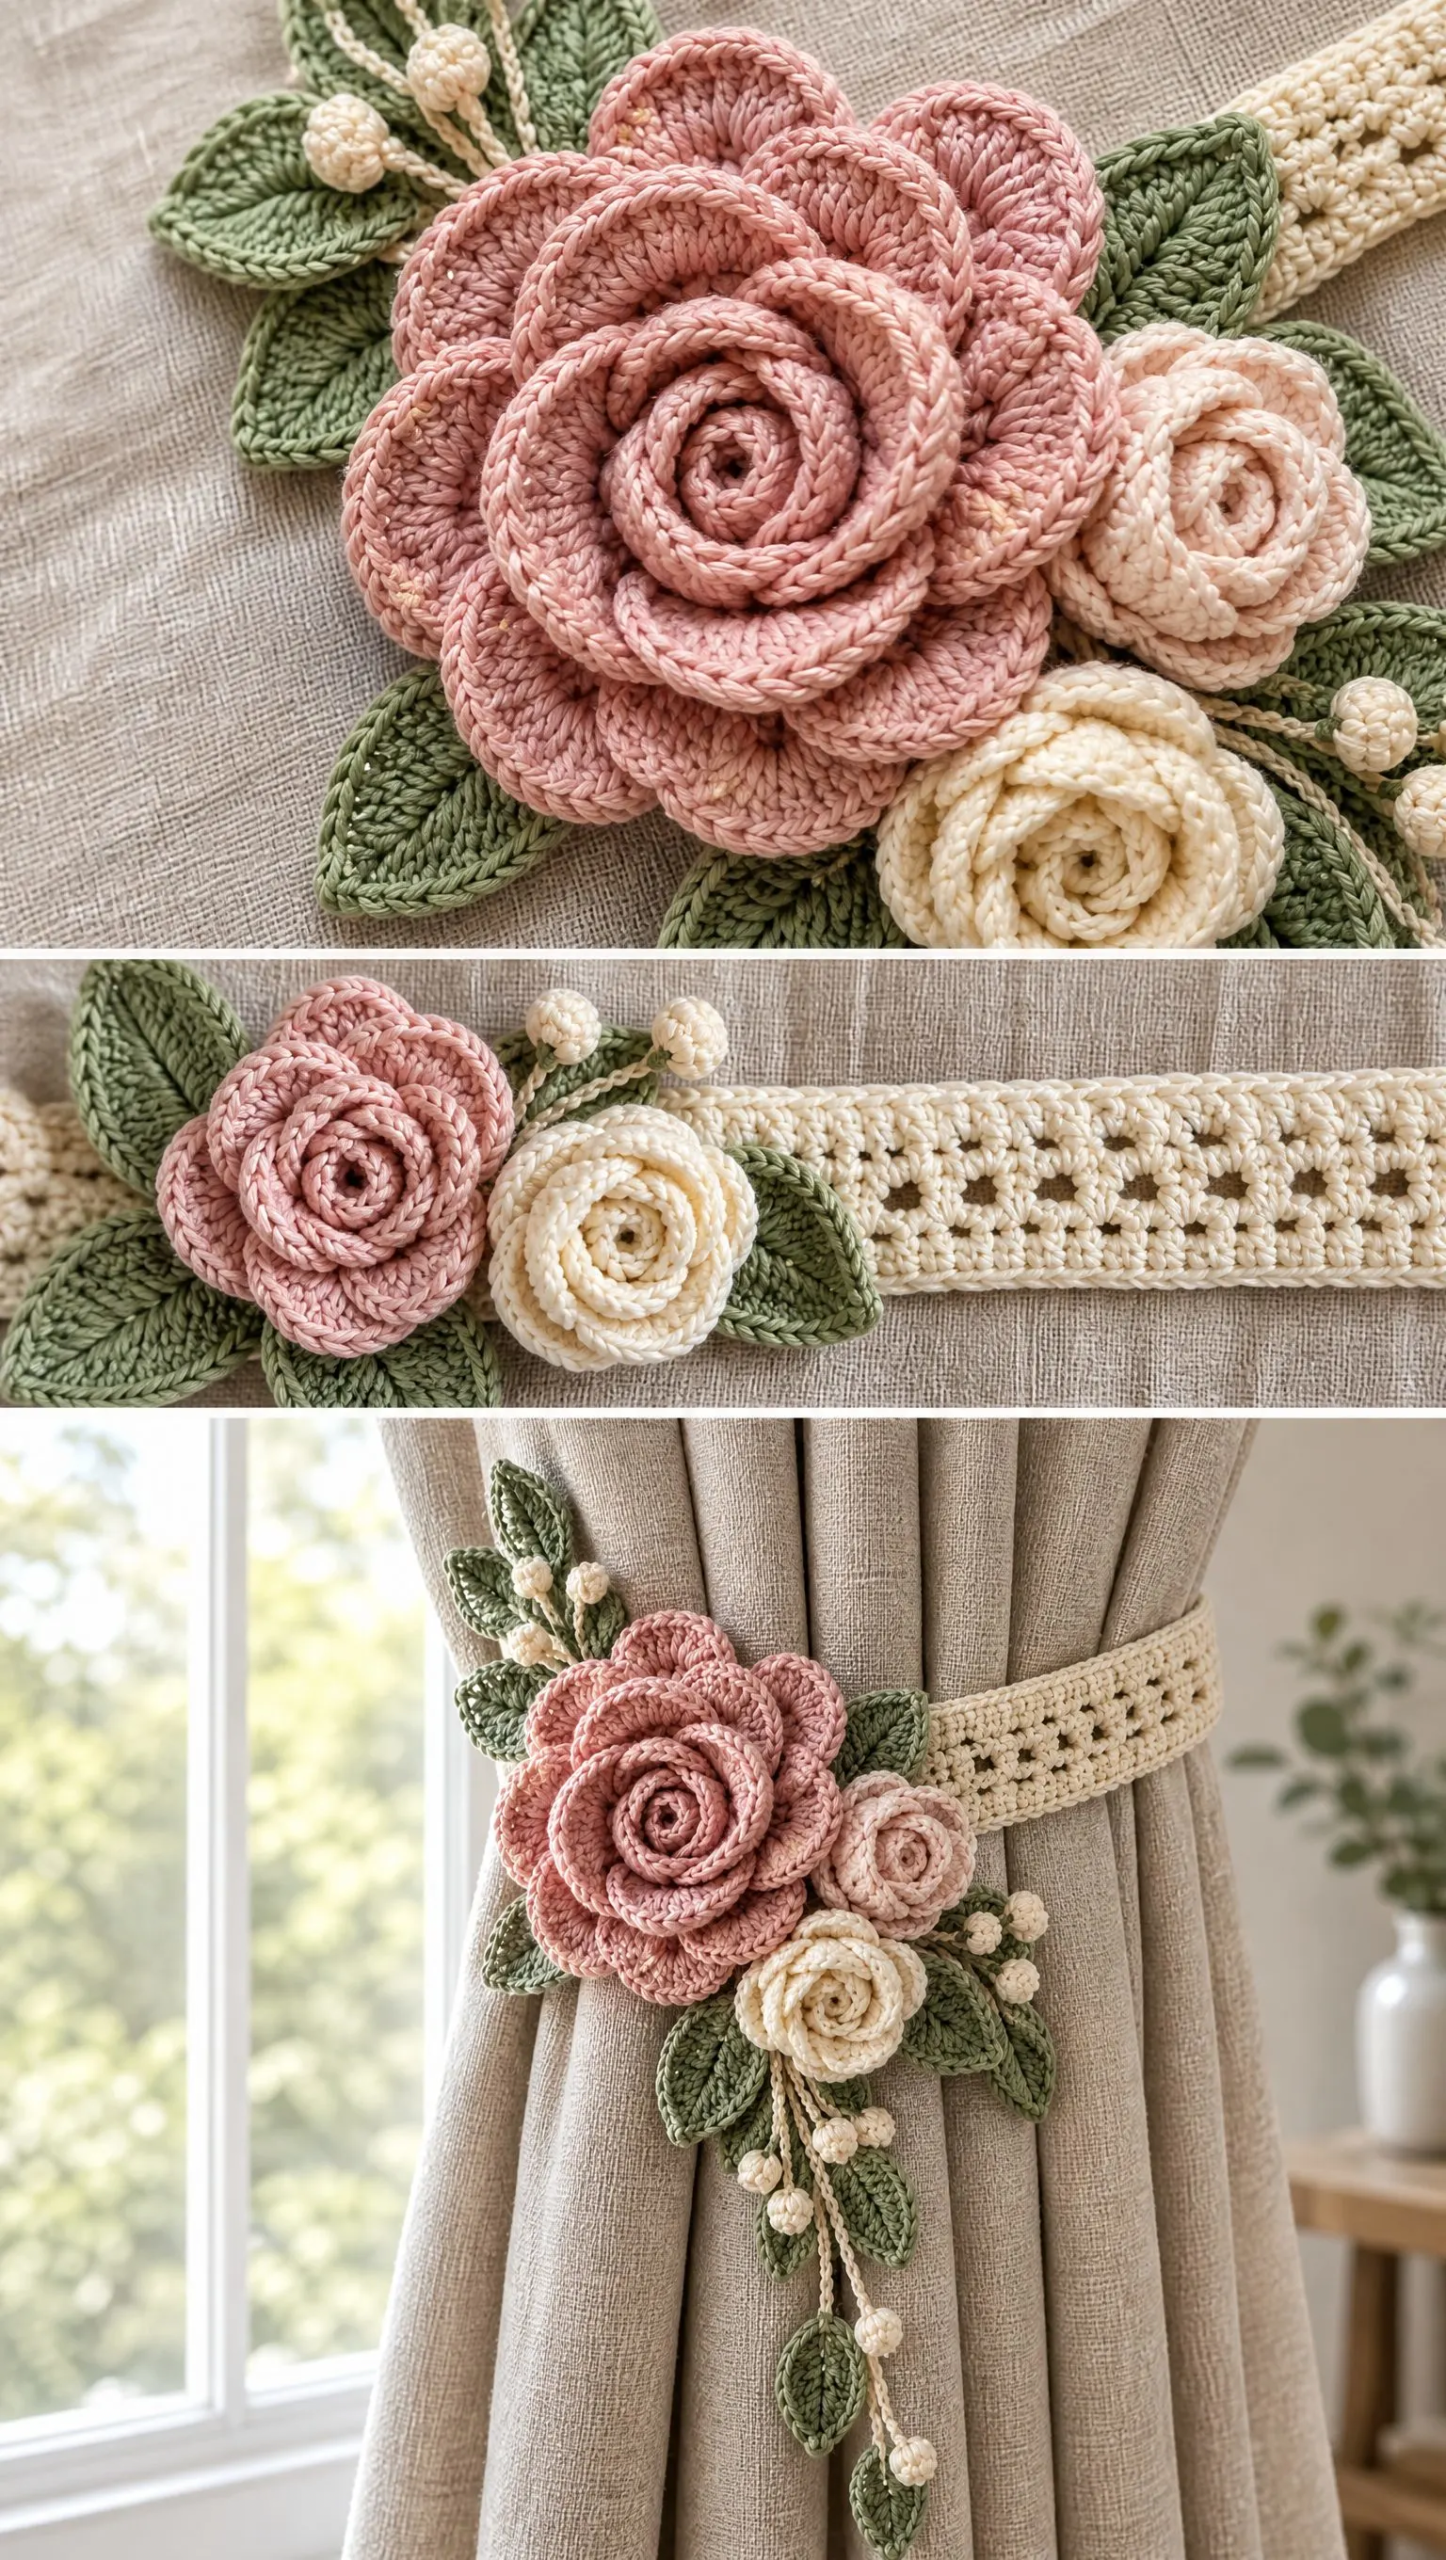
A beautiful handmade curtain tieback can completely transform a room. This romantic floral design features three rolled spiral roses, delicate eucalyptus leaves, tiny bobble buds, and trailing cords that drape elegantly against your curtains. Whether you want to add a soft, feminine touch to your bedroom or create a thoughtful housewarming gift, this project delivers stunning results.
Get the Ad-Free PDF Pattern
You can find the free pattern below, or you can purchase the ad-free printable PDF from my shop.
Get the Printable PDF →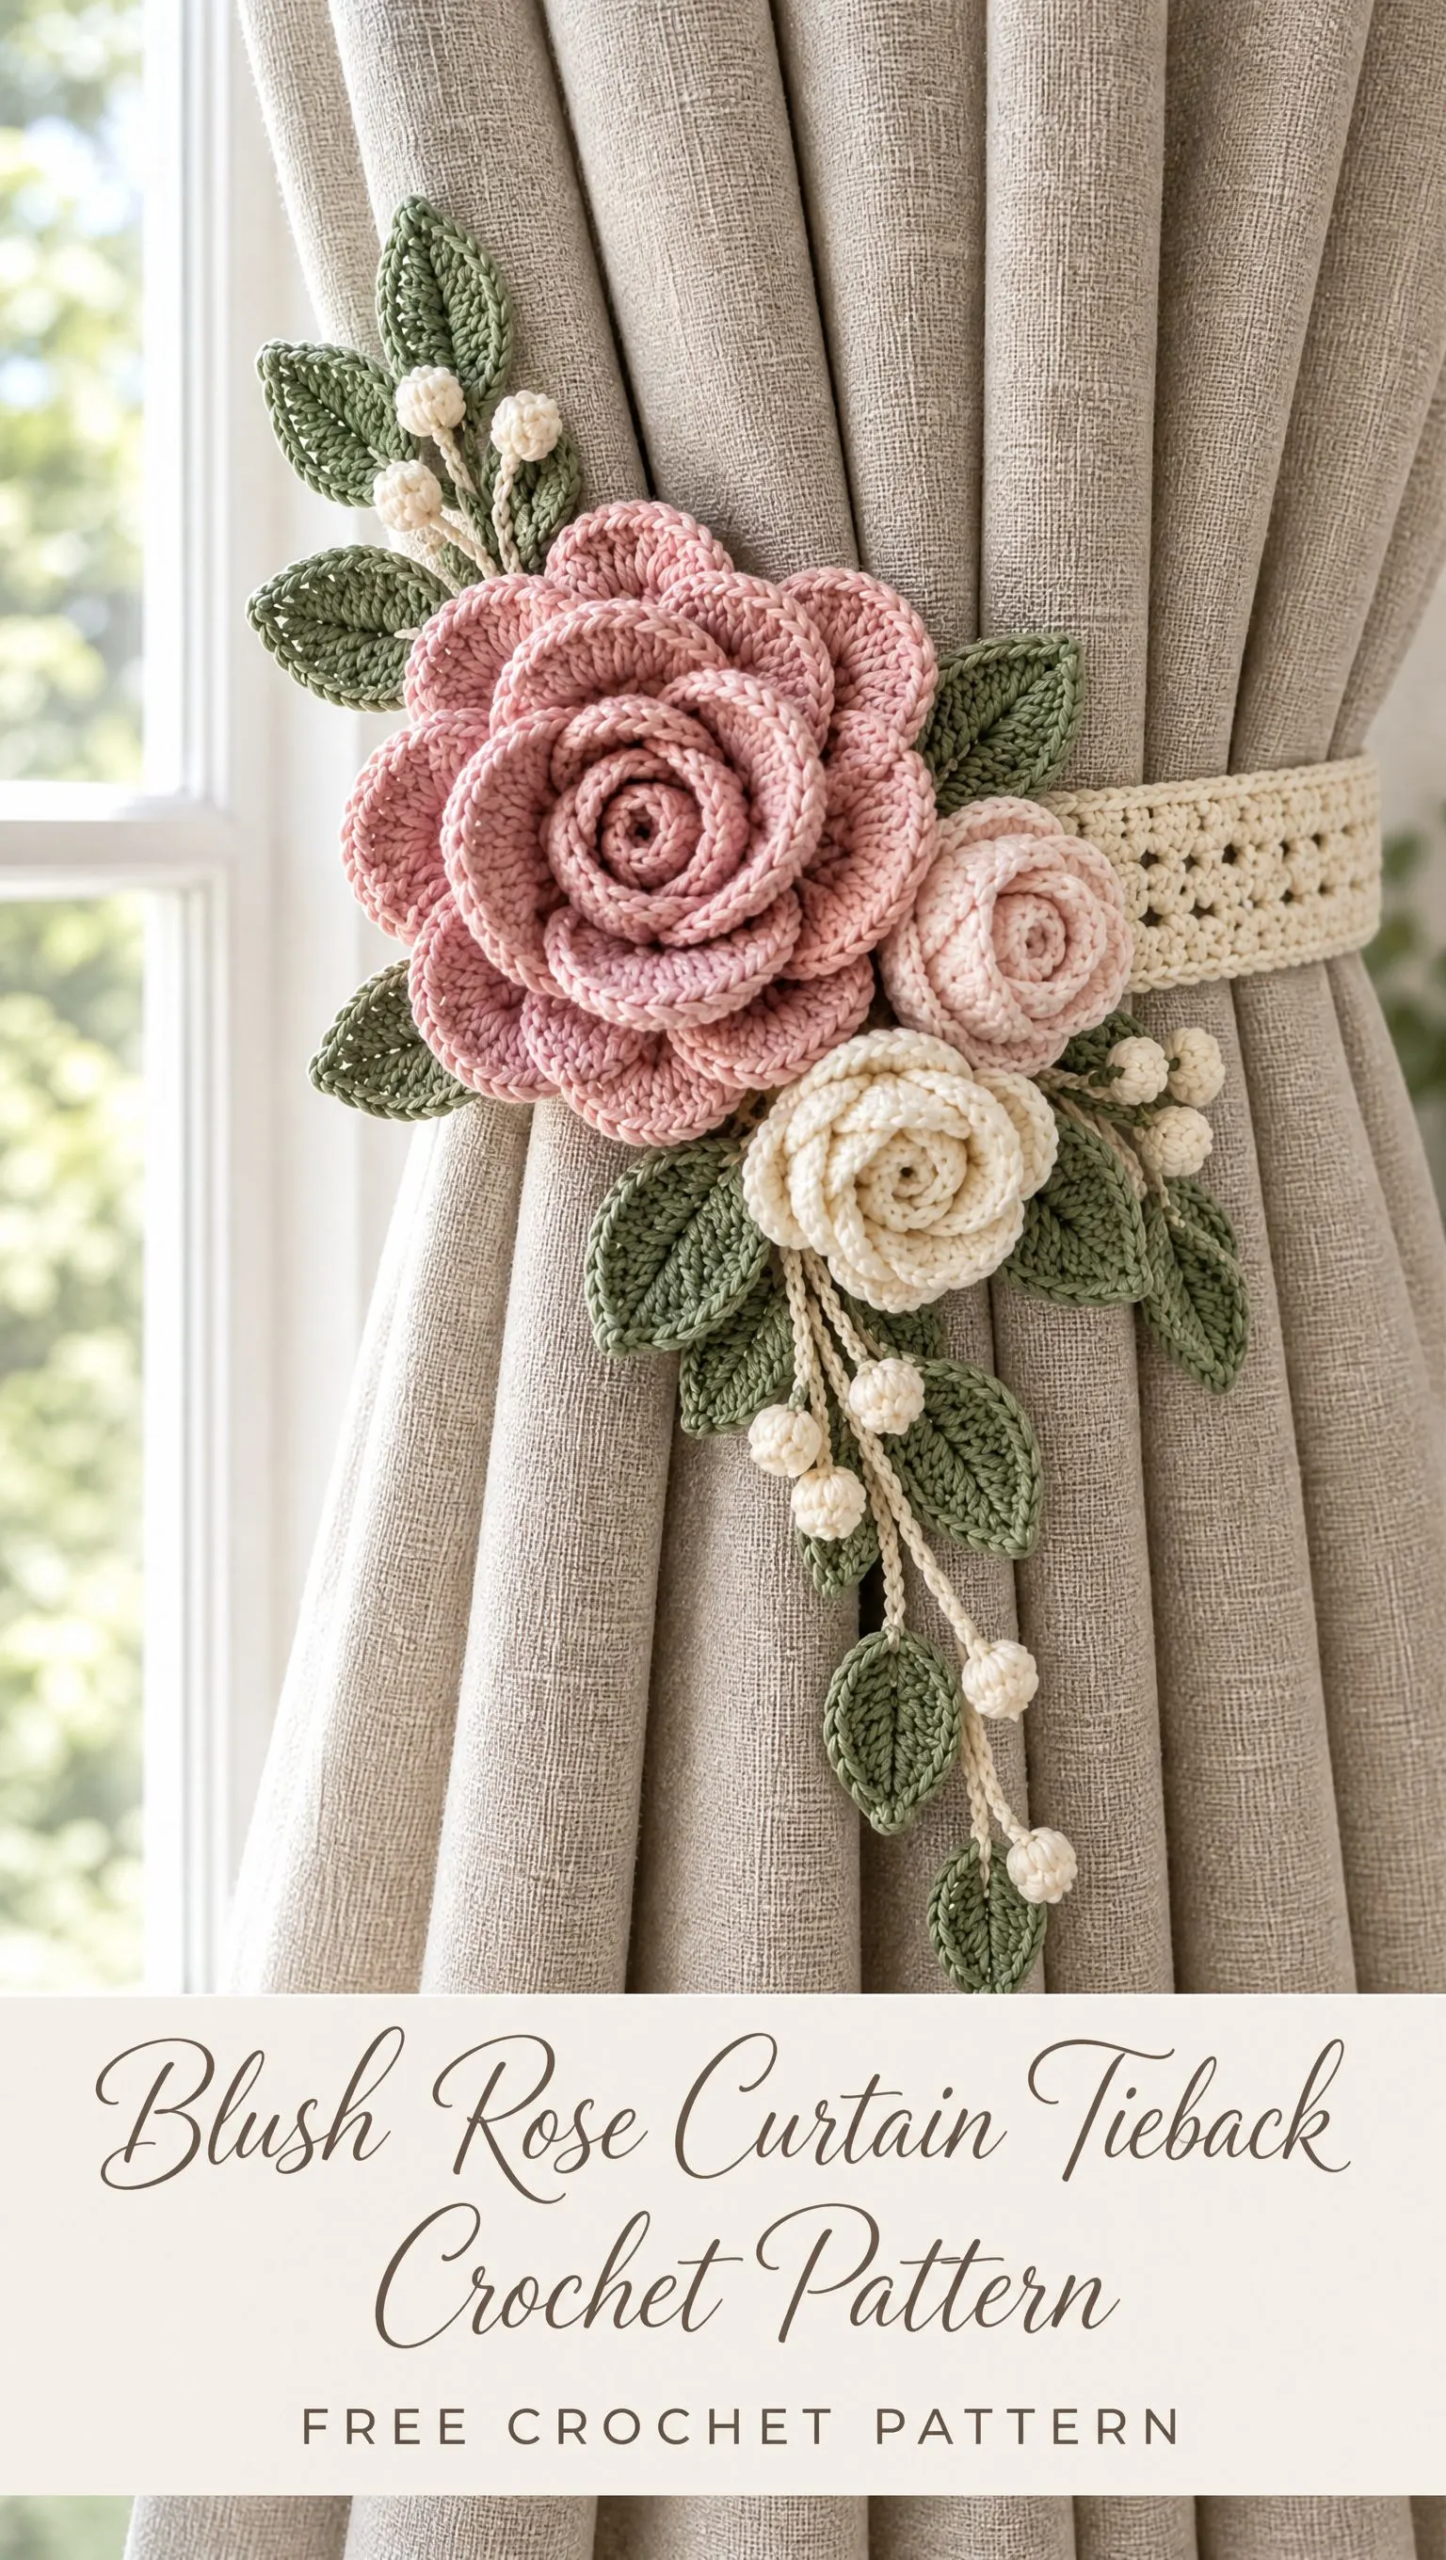
The construction is simpler than it looks. You will work basic stitches like single crochet, half double crochet, double crochet, and treble crochet. The roses are made as flat strips that you roll into spirals, which is much easier than working in complicated rounds. The whole tieback comes together in manageable pieces that you assemble at the end.
This pattern suits confident beginners and intermediate crocheters. If you can chain, work basic stitches, and sew pieces together, you have everything you need. The finished tieback measures approximately 42 cm long and fits most standard curtains with room for adjustment.
Materials You Will Need
Gathering your supplies before you start makes the whole process smoother. Here is everything the pattern calls for:
Yarn:
Tools:
Fastening Hardware:
Optional:
Finished Dimensions
Understanding the sizes helps you plan your project:
| Component | Size |
|---|---|
| Tieback band | Approximately 42 cm long x 3.5 to 4 cm wide |
| Large dusty pink rose | Approximately 10 to 11 cm diameter |
| Small blush rose | Approximately 5.5 to 6.5 cm diameter |
| Small ivory rose | Approximately 5.5 to 6.5 cm diameter |
| Leaves | Approximately 4.5 to 6 cm long |
Gauge Information
Gauge is not critical for this project, but here is a reference point. Working in half double crochet (hdc), you should get approximately 20 stitches and 12 rows per 10 cm with DK weight cotton and a 3.5 mm hook.
If your band turns out slightly longer or shorter, do not worry. You will wrap it around your specific curtain and adjust the fastener placement to fit perfectly.
Abbreviations and Stitch Definitions
Let me walk you through each abbreviation used in this pattern:
Part 1: Crochet the Cream Tieback Band
The band forms the foundation of your tieback. It wraps around gathered curtain fabric and fastens invisibly at the back. You work it lengthwise in rows so it lies flat and smooth.
Foundation: With cream yarn and your 3.5 mm hook, ch 86 loosely. This gives approximately 42 cm with the suggested yarn and hook.
Row 1: Hdc in 2nd ch from hook and in each ch across. Ch 1, turn. (85 hdc)
Row 2: Working through the back loop only, hdc in each st across. Ch 1, turn.
Rows 3 through 6: Repeat Row 2. Your band should measure about 3.5 to 4 cm wide after these rows.
Edging Round: Ch 1. Sc evenly around all four sides, placing 2 sc in each corner. Join with sl st to first sc. Fasten off and weave in ends.
Adding the Fastener: Wrap the band around your curtain at the height where you want it to sit. Mark where the ends overlap. Sew one flat snap or a small hook and eye pair to the wrong side so the fastening hides completely behind the curtain. If you prefer a button closure, make a tiny chain loop at one end and sew the button inside the opposite end.
Fit Check Tip: The band should hold the curtain gently without crushing the folds. If it feels too tight, add a crocheted chain loop at one end for extra length. If it feels too loose, move the snap inward.
Part 2: Large Dusty Pink Spiral Rose
This gorgeous focal flower looks intricate, but you simply crochet a long strip with graduated shells and roll it up. The shells start small and grow larger, creating natural petal layers.
Foundation: With dusty pink yarn, ch 61.
Row 1: Sc in 2nd ch from hook and in each ch across. (60 sc) Turn.
Row 2 (Petal Base): Ch 1, sc in first st. Ch 2, sk 1 st, sc in next st. Repeat from to across, ending with sc in last st. You should have a line of ch 2 spaces.
Row 3 (Graduated Shells): Work into each ch 2 space as follows:
Sl st into each intervening sc as needed to keep shells distinct. Fasten off with a 60 cm sewing tail.
Rolling the Rose: Beginning at the small shell end (the hdc shells), coil the strip tightly for the first 2 to 3 turns. Then slightly loosen the roll so the outer petals open naturally and look like real rose petals. Keep the straight foundation edge aligned at the base as you roll.
Securing the Rose: Thread the long tail through the foundation edge from side to side, catching every layer. Make several firm passes across the base. Knot securely and weave in the end.
Part 3: Small Blush and Ivory Roses (Make 2)
These smaller roses use the same technique with a shorter strip. Make one in blush pink and one in ivory.
Foundation: Ch 41.
Row 1: Sc in 2nd ch from hook and across. (40 sc)
Row 2: Ch 1, sc in first st, ch 2, sk 1, sc in next st across.
Row 3:
Fasten off with a long sewing tail.
Finishing: Roll tightly from the smaller petal end, loosen slightly toward the outside, and sew securely through all foundation layers.
Part 4: Eucalyptus Style Oval Leaves
Make approximately 10 to 14 leaves in eucalyptus green, mixing small and large sizes. These leaves work around both sides of the foundation chain, creating a lovely dimensional oval shape.
Small Leaf
Ch 9. Starting in 2nd ch from hook: sc, hdc, dc, tr, dc, hdc, sc, 3 sc in last ch. Rotate your work and continue along the unused loops on the opposite side: sc, hdc, dc, tr, dc, hdc, sc. Join with sl st. Fasten off with sewing tail.
Large Leaf
Ch 11. Starting in 2nd ch from hook: sc, hdc, dc, dc, tr, tr, dc, hdc, sc, 3 sc in last ch. Rotate your work: sc, hdc, dc, tr, tr, dc, dc, hdc, sc. Join with sl st. Fasten off.
Optional Vein Detail
With the same green yarn, surface sl st from the leaf base to the tip, or embroider one loose chain stitch line down the center. Keep it subtle so the leaf stays soft and natural looking.
Part 5: Cream Bobble Buds
Make 7 to 10 buds. These tiny textured balls add beautiful dimension to your arrangement. Leave long tails so you can arrange them in little sprays.
Bud Head: Make a magic ring. Ch 1, work 5 sc into ring, join with sl st.
Ch 1. In each st, work a 3 dc bobble: Yarn over, insert hook, pull up loop, yarn over and draw through 2 loops. Repeat this 3 times total in the same stitch, then yarn over and draw through all loops on hook. Sl st to next st. Repeat around for 5 bobbles total.
Closing the Bud: Draw the starting ring firmly closed. Use the tail to gather the outer edge slightly so the bud becomes rounded rather than flat.
Adding a Stem: Join cream or green yarn to the underside and ch 6 to 12 depending on your desired stem length. Sl st back along the chain for a firm cord. Fasten off.
Part 6: Thin Trailing Crochet Cords
Make 3 cords in cream and/or green, using different lengths: approximately 12 cm, 16 cm, and 20 cm.
Ch to the desired length. Sl st in the 2nd ch from hook and in each ch back to the start. For a finer, more delicate look, use a 3.0 mm hook. You can attach a tiny bobble bud or one small leaf to selected cord ends for extra charm.
Part 7: Floral Assembly
Now comes the fun part. You will arrange all your pieces into a beautiful botanical cluster.
Step 1: Lay the band flat with the right side facing you and fastening ends at left and right. Mark the visual center, then shift your floral placement about 2 to 3 cm to the left.
Step 2: Place the large dusty pink rose slightly left of center. Sew through the rose base and band only. Avoid pulling stitches through the visible petals. Make at least 8 to 10 secure passes around the base.
Step 3: Place the blush rose to the lower right or right edge of the large rose. Place the ivory rose just below or slightly overlapping it. Sew each firmly at the base.
Step 4: Tuck 3 to 4 leaves behind the top left and upper edge of the large rose. Add 2 to 3 cream buds on narrow stems so they rise above the flowers.
Step 5: Arrange 4 to 6 leaves beneath the roses, pointing downward and diagonally. Keep the largest leaves close to the flower cluster and the smallest toward the ends.
Step 6: Sew 2 to 3 cords beneath the lower flowers. Let them hang at staggered lengths. Attach buds or leaves to the tips if you have not already.
Step 7: Steam very lightly from a distance or mist with water and hand shape the petals and leaves. Do not flatten the roses. Let everything dry completely before use.
Placement Guide at a Glance
| Element | Suggested Placement |
|---|---|
| Large dusty pink rose | Main focal point, slightly left of band center |
| Blush rose | Right side of large rose, a little higher or level |
| Ivory rose | Lower right of large rose, slightly overlapping |
| Upper leaves | Fan upward behind the large rose toward the window |
| Lower leaves | Cascade down from the underside of the cluster |
| Bobble buds | Two or three above, several along lower stems |
| Trailing cords | Drop from lower center/left in uneven lengths |
Customization Tips
Every curtain and every crocheter is different. Here are some adjustments you might want to make:
For thick curtains: Add 8 to 16 chains to the starting chain of the band, maintaining the same number of rows.
For a slimmer tieback: Work only 4 rows of hdc instead of 6.
For a fuller rose: Add 10 to 20 chains to the flower strip and repeat additional 7 dc or 9 dc shells at the outer edge.
For softer petals: Use a hook 0.5 mm larger than recommended. For crisper petals, use a smaller hook.
For washable curtains: Use washable cotton and a plastic snap. Gently hand wash the tieback separately and reshape while damp.
Finishing Checklist
Before you call your tieback complete, run through this list:
Care Instructions
Hand wash gently in cool water with mild detergent. Press out water in a towel without wringing. Reshape the roses and leaves and dry flat. Avoid high heat, which can damage the cotton fibers and flatten your beautiful dimensional flowers.
Final Thoughts on This Blush Rose Curtain Tieback Crochet Pattern
This tieback proves that small home decor projects can make a big impact. The combination of romantic roses, natural greenery, and delicate trailing elements creates something truly special. Once you master the rolled rose technique, you will find yourself adding these flowers to everything from headbands to gift toppers.
I hope this crochet pattern brings you joy as you make it. The step by step construction keeps things manageable, and the final assembly lets you get creative with your arrangement. Trust your instincts when placing the leaves and buds. Nature is not perfectly symmetrical, and neither should your floral cluster be.
Thank you so much for choosing this pattern for your next project. I would absolutely love to see how your tieback turns out! Tag me on Instagram or share a photo in my Facebook group. Your makes always brighten my day, and they inspire other crocheters to try new things.
If you loved this romantic floral design, save this pattern to your Pinterest boards so you can find it easily when you are ready to start. And please leave a comment below if you make one. I read every single comment and love hearing how projects turn out in your hands!
Want a Quick & Easy Printable Version?
Get a clean, beautifully formatted PDF of this pattern — easy to follow step by step, ready to print or save on any device. No scrolling, no distractions, just the pattern.
Get the Printable PDF →You Might Also Like
- Lavender Rose Granny Square Purse Free Crochet Pattern
- Sunset Ombre Granny Square Bag Free Crochet Pattern
- Sunset Ombre Pompom Crochet Tank Free Crochet Pattern
- Mustard Yellow Wildflower Granny Tote Free Pattern
