
I’ve been looking for the perfect baby dress pattern for months now. Something sweet but not too fussy. Something that looks impressive but actually makes sense when you sit down to crochet it. This mint green bunny dress is my favourite find, and I’m so excited to share it with you today.
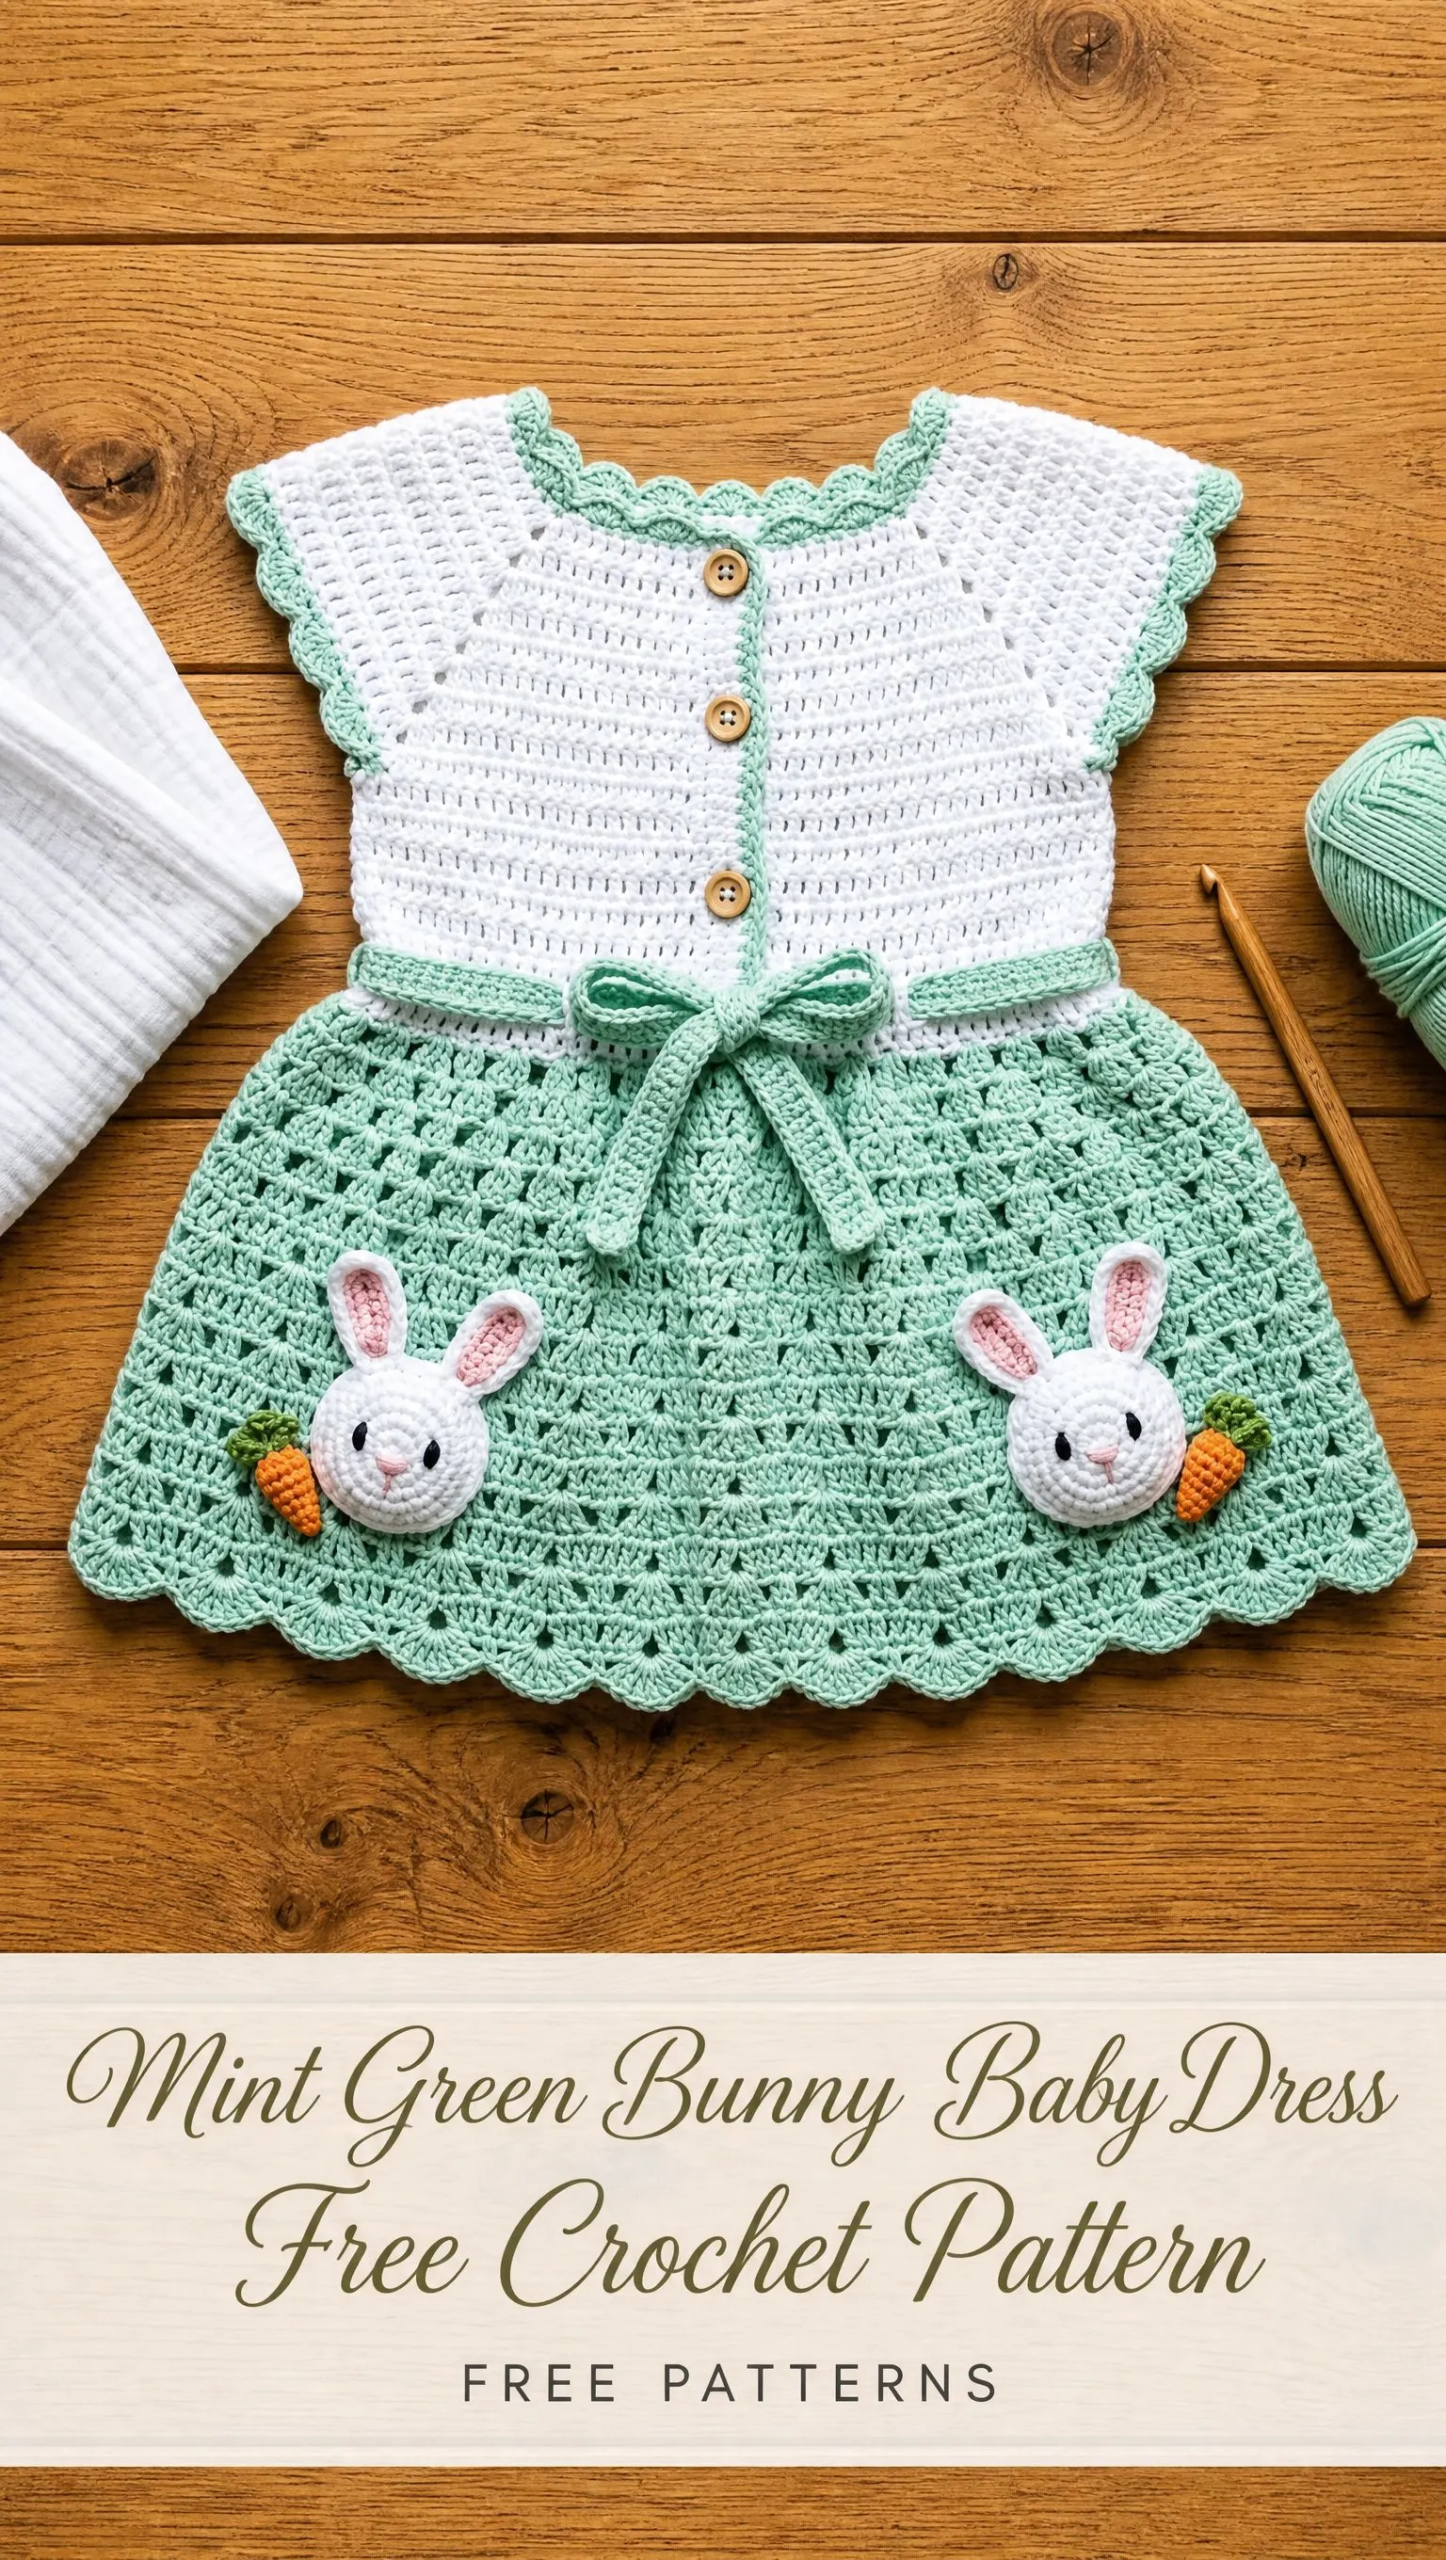
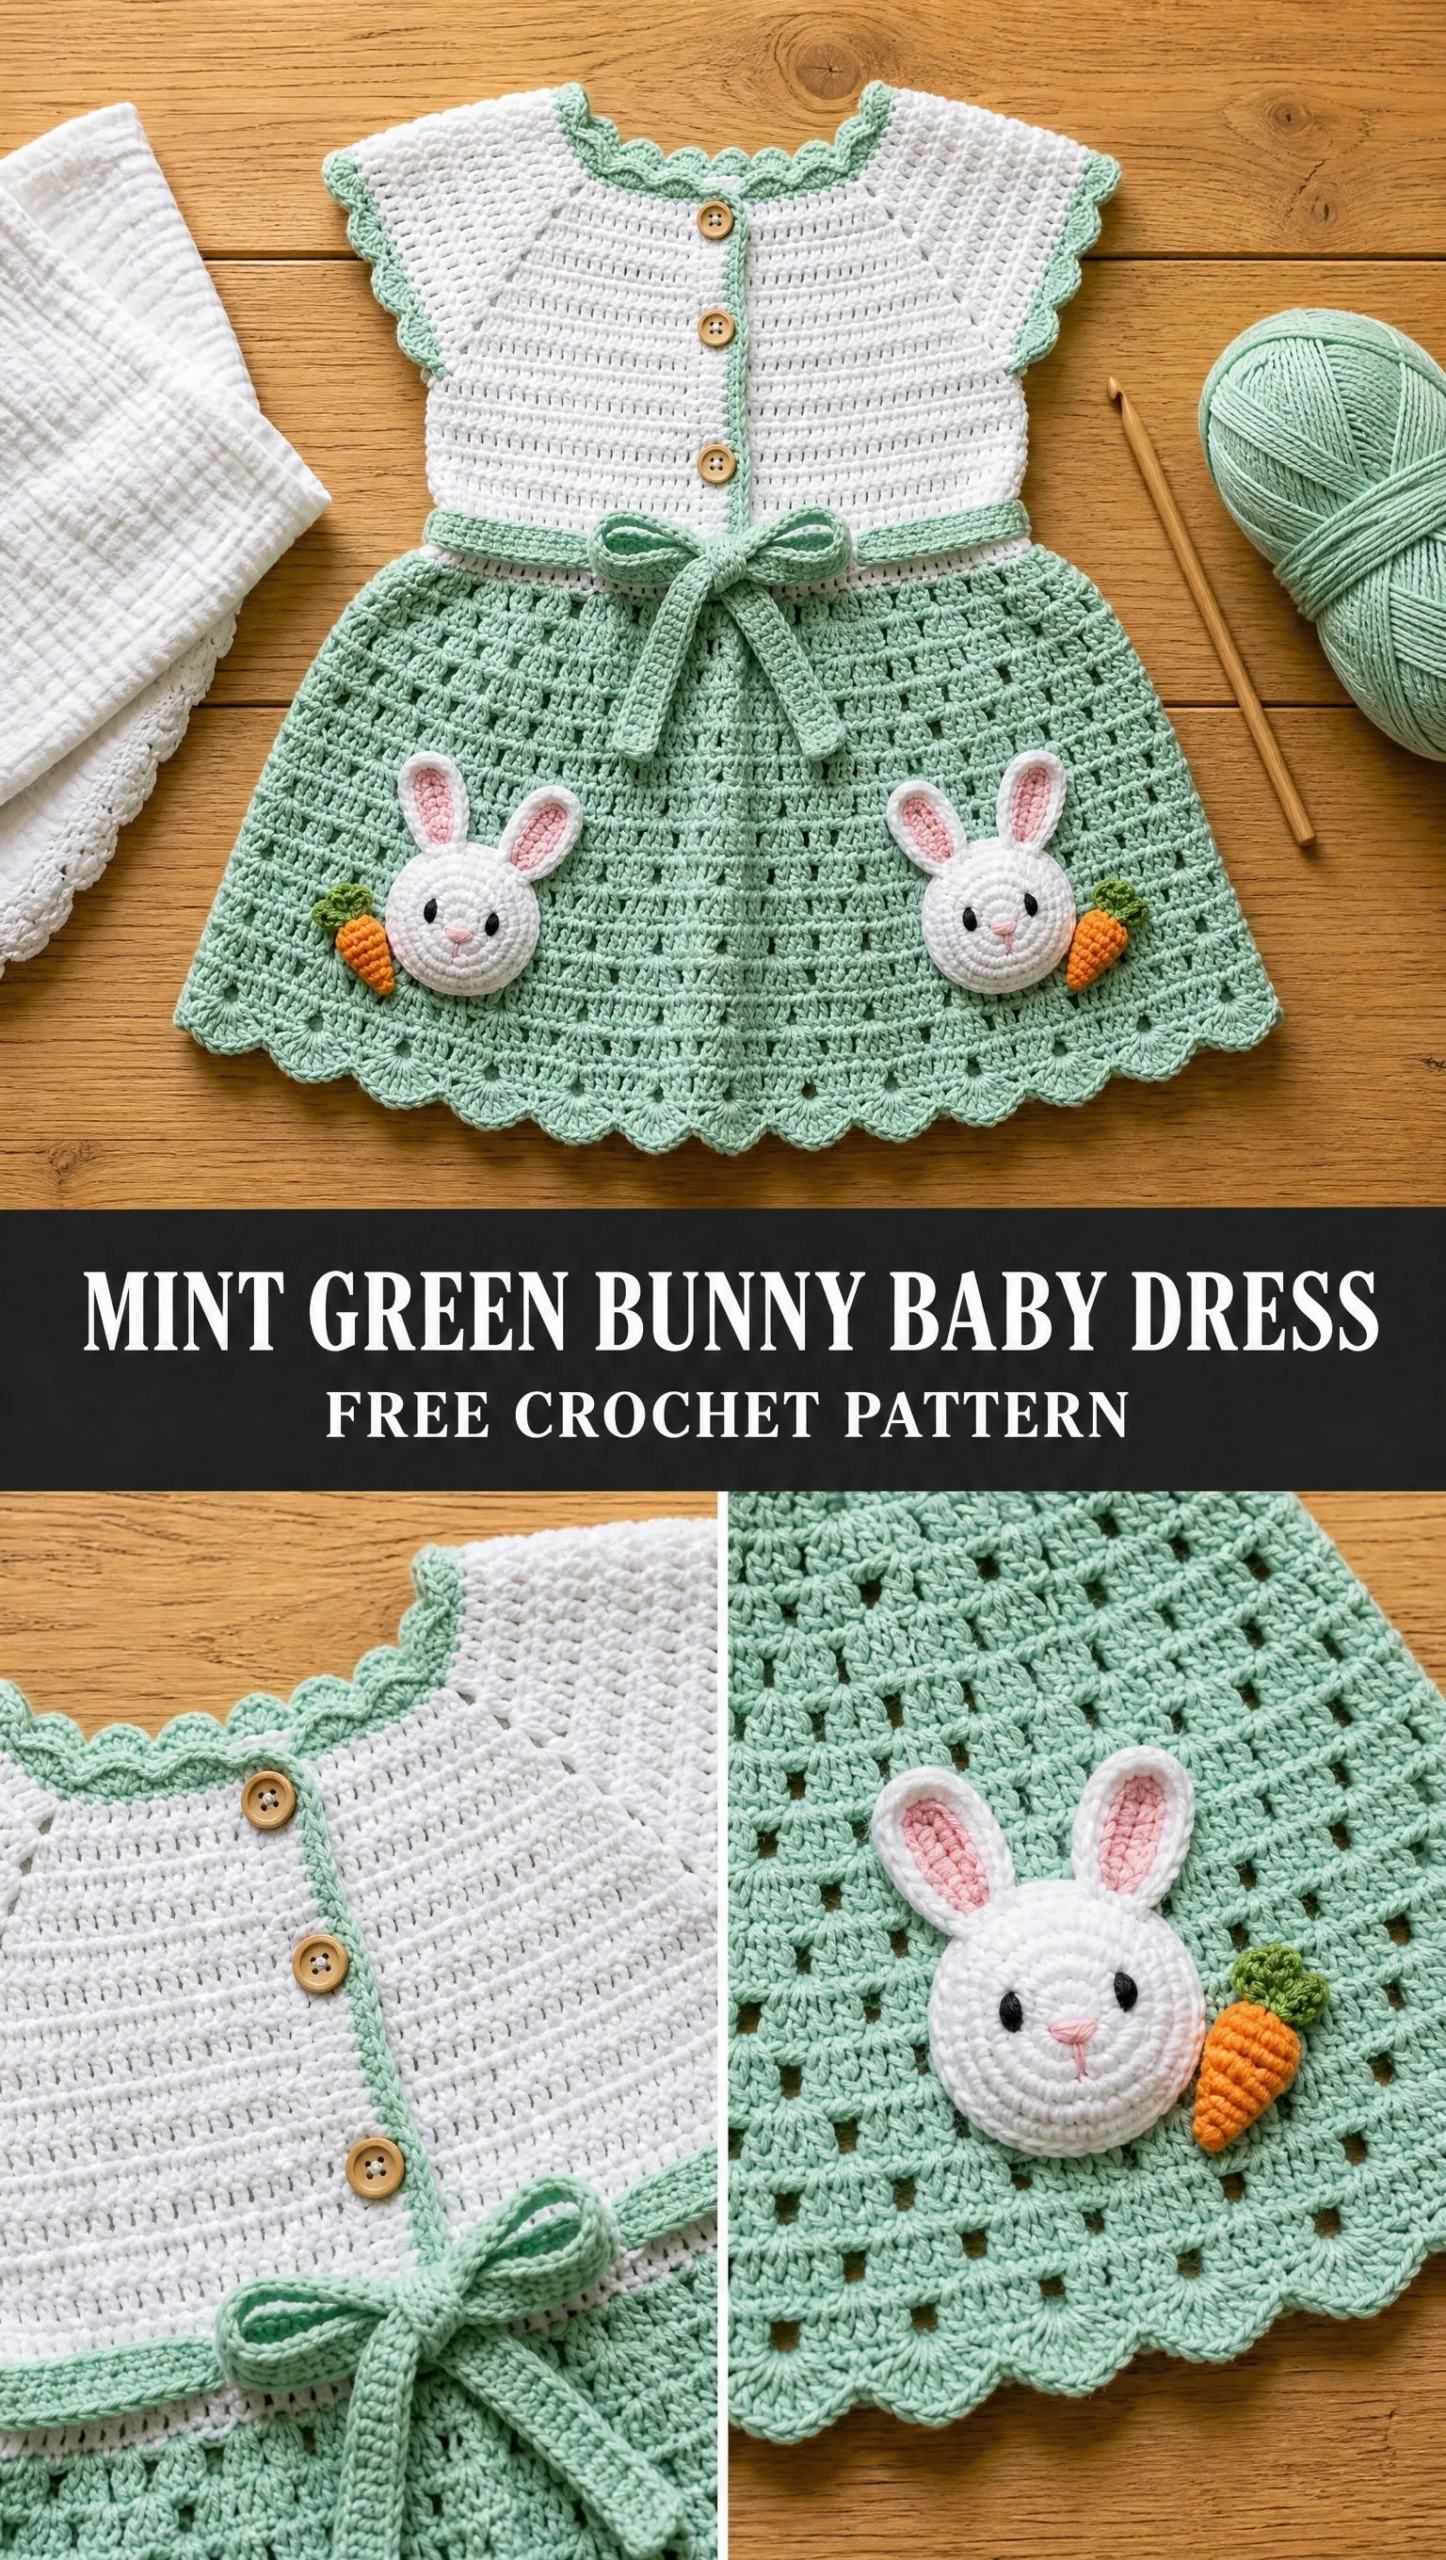
The combination of the crisp white bodice and that soft mint skirt just works. And those little bunny faces with their tiny carrots? Absolutely adorable without being over the top.
Whether you’re making this for a baby shower gift, a first birthday outfit, or your own little one, this dress delivers. It’s the kind of project that looks like it took forever but actually comes together in a reasonable timeframe once you understand the construction.
Why This Baby Dress Pattern Works So Well
This dress is designed for a 12 month size with an 18 inch chest circumference and approximately 14 inches total length from shoulder to hem. The construction is smart and logical. You work the bodice flat in two panels, seam the shoulders, then pick up stitches along the bottom edge and work the skirt downward in the round.
The bodice uses simple single crochet (sc) throughout, which means you get a nice sturdy fabric that holds its shape. The skirt transitions into a beautiful open shell stitch pattern that gives the dress movement and that pretty, flared silhouette you see in the photos.
Those scalloped edges in mint green? They’re easier than they look. The same edging technique appears at the neckline, sleeve caps, and hem, which gives the whole piece a polished, coordinated finish.
Skill Level and Time Commitment
I’d call this an intermediate pattern. You need to be comfortable working flat and in the round, reading stitch counts, seaming pieces together, and making small amigurumi style appliques for the bunny faces.
If you’ve made a few garments before and you’re not afraid of picking up stitches along an edge, you’ll do great here. If this is your first baby garment, take it slow and trust the process.
Time estimate: approximately 12 to 18 hours total, including the appliques and finishing work. The bodice goes quickly. The skirt takes a bit longer because of the shell pattern, but it’s rhythmic and relaxing once you get going.
Materials You’ll Need
Gather everything before you start. There’s nothing worse than getting halfway through a project and realizing you’re short on yarn.
Yarn:
Hook: US size G-6 / 4.0 mm
Notions:
Yarn suggestions that work beautifully: Lion Brand Pound of Love in White and Sage gives you plenty of yardage and washes like a dream. Paintbox Yarns Simply DK held double also works well if you want excellent stitch definition. Avoid fuzzy or bouclé yarns since stitch definition matters for the shell pattern and applique details.
Gauge (Please Don’t Skip This)
I know, I know. Gauge swatches aren’t the fun part. But with a garment, especially a baby garment that needs to fit, gauge matters.
With US G-6 / 4.0 mm hook:
18 stitches x 20 rows = 4 inches x 4 inches in single crochet
If your swatch is too big, go down a hook size. Too small? Go up. Getting gauge right means your finished dress will match the measurements listed.
Abbreviations and Stitch Definitions
Let me walk you through every stitch and abbreviation you’ll encounter. I’m defining them all upfront so you won’t have to guess later.
Special Stitches:
Shell Stitch: Work 5 dc all into the same stitch or chain space. This creates a fan shaped cluster that forms the open mesh of the skirt.
Scallop Edging: Sl st into first st, (ch 3, 2 dc) into the same st, sk 2 sts, sl st into next st, (ch 3, 2 dc) into the same sl st, sk 2 sts, rep across, ending sl st into last st. This produces the decorative scalloped mint border.
Pattern Notes Before You Begin
Read through these before you pick up your hook. They’ll save you confusion later.
Section 1: Back Bodice Panel
Start with Yarn A (white).
Foundation: Ch 42.
Row 1 (WS): Sc in 2nd ch from hook and in each ch across. Turn. (41 sc)
Row 2 (RS): Ch 1, sc in each st across. Turn. (41 sc)
Rows 3 through 20: Rep Row 2. Turn after each row. (41 sc each row)
After Row 20, your back panel should measure approximately 4 inches wide and 4 inches tall.
Armhole Shaping (Back)
Row 21 (RS): Ch 1, sl st in first 4 sts, sc in next 35 sts, leave last 3 sts unworked. Turn. (35 sc)
Row 22: Ch 1, sc2tog, sc to last 2 sts, sc2tog. Turn. (33 sc)
Row 23: Ch 1, sc2tog, sc to last 2 sts, sc2tog. Turn. (31 sc)
Row 24: Ch 1, sc across. Turn. (31 sc)
Row 25: Ch 1, sc2tog, sc to last 2 sts, sc2tog. Turn. (29 sc)
Rows 26 through 30: Ch 1, sc across. Turn. (29 sc each row)
Shoulder Shaping (Back)
Row 31: Ch 1, sc in first 8 sts only. Fasten off. This is the right back shoulder. (8 sc)
Rejoin Yarn A to the 22nd stitch from the right edge (leaving center 13 sts for back neck).
Row 31 left shoulder: Ch 1, sc in last 8 sts. Fasten off. (8 sc)
The center 13 sts remain unworked for the back neck opening.
Checkpoint: Your back bodice panel should measure approximately 9 inches wide at the widest point and 6 inches tall from foundation to shoulder.
Section 2: Front Bodice Panel
The front is divided into left and right panels that meet at center front. The right panel carries the buttons. The left panel has the buttonholes.
Right Front Panel
Foundation: With Yarn A, ch 24.
Row 1 (WS): Sc in 2nd ch from hook and in each ch across. Turn. (23 sc)
Rows 2 through 20: Ch 1, sc across. Turn. (23 sc each row)
Armhole Shaping (Right Front)
Row 21 (RS): Ch 1, sl st in first 4 sts, sc in rem 19 sts. Turn. (19 sc)
Row 22: Ch 1, sc2tog, sc to end. Turn. (18 sc)
Row 23: Ch 1, sc2tog, sc to end. Turn. (17 sc)
Row 24: Ch 1, sc across. Turn. (17 sc)
Row 25: Ch 1, sc2tog, sc to end. Turn. (16 sc)
Rows 26 through 30: Ch 1, sc across. Turn. (16 sc each row)
Shoulder Shaping (Right Front)
Row 31: Ch 1, sc in first 8 sts. Fasten off. (8 sc)
Center Front Button Band (Right Front): Rejoin Yarn A to the right hand edge of the right front panel along the center front vertical edge. With RS facing, work sc evenly down the 30 row edge, placing 1 sc per row end. (30 sc along edge)
Fasten off Yarn A.
Left Front Panel
Foundation: With Yarn A, ch 24.
Row 1 (WS): Sc in 2nd ch from hook and in each ch across. Turn. (23 sc)
Rows 2 through 9: Ch 1, sc across. Turn. (23 sc each row)
Buttonhole Row (Row 10, RS): Ch 1, sc in first 2 sts, (ch 1, sk 1 st, sc in next 8 sts) 2 times, ch 1, sk 1 st, sc in last 2 sts. Turn. (20 sc + 3 ch-1 spaces = 23 sts worked)
Row 11: Ch 1, sc across, working 1 sc into each ch-1 space from previous row. Turn. (23 sc)
Rows 12 through 20: Ch 1, sc across. Turn. (23 sc each row)
Armhole Shaping (Left Front)
Row 21 (RS): Ch 1, sc in first 19 sts, leave last 4 sts unworked. Turn. (19 sc)
Row 22: Ch 1, sc to last 2 sts, sc2tog. Turn. (18 sc)
Row 23: Ch 1, sc to last 2 sts, sc2tog. Turn. (17 sc)
Row 24: Ch 1, sc across. Turn. (17 sc)
Row 25: Ch 1, sc to last 2 sts, sc2tog. Turn. (16 sc)
Rows 26 through 30: Ch 1, sc across. Turn. (16 sc each row)
Shoulder Shaping (Left Front)
Row 31: Ch 1, sc in first 8 sts. Fasten off. (8 sc)
Center Front Button Band (Left Front): Rejoin Yarn A to left hand edge of left front panel along the center front vertical edge. With RS facing, work sc evenly up the 30 row edge, 1 sc per row end. (30 sc along edge)
Fasten off Yarn A.
Section 3: Joining Shoulders
With RS together, align right front shoulder to right back shoulder (8 sts each). Using Yarn A and a yarn needle, whipstitch or sl st seam through both layers. Fasten off.
Repeat for left shoulder.
Turn piece RS out. The armhole openings are now visible on each side.
Section 4: Sleeve Cap Edging
This is where we add that pretty mint scallop trim. There’s no actual sleeve tube, just a decorative cap edging.
Join Yarn B to the underarm point of one armhole with a sl st.
Rnd 1: Ch 1, work 36 sc evenly around the armhole opening. Join with sl st to first sc. (36 sc)
Rnd 2 (Scallop): Sl st into first st, (ch 3, 2 dc) into the same st, sk 2 sts, sl st into next st, rep around. End with sl st into the base of first ch 3. Fasten off Yarn B. (12 scallops)
Repeat for second armhole.
Section 5: Neckline Edging
Join Yarn B to the right back neck corner with a sl st, RS facing.
Rnd 1: Ch 1, work 51 sc evenly around the entire neckline (13 sc across back neck, 8 sc down left back shoulder slope, 10 sc down left front neck edge, 3 sc across left front top, 10 sc down right front neck edge, 8 sc up right back shoulder slope, adjusting to reach 51 total). Join with sl st to first sc. (51 sc)
Rnd 2 (Scallop): Sl st into first st, (ch 3, 2 dc) into the same st, sk 2 sts, sl st into next st, rep around. End sl st into base of first ch 3. Fasten off. (17 scallops)
Section 6: Skirt
Now comes the fun part. The skirt is worked downward from the bodice lower edge.
Picking Up for Skirt
Join Yarn B to the lower right corner of the right front panel at the foundation edge, RS facing.
Pick-up Row: Ch 1, work sc across the full lower edge of the bodice: 23 sc across right front foundation edge, 3 sc across right underarm base, 41 sc across back foundation edge, 3 sc across left underarm base, 23 sc across left front foundation edge. Turn. (93 sc)
Waistband Eyelets Row
This creates the channel for your belt.
Row 1 (WS): Ch 1, sc in first 2 sts, (ch 1, sk 1 st, sc in next 5 sts) across to last 3 sts, ch 1, sk 1 st, sc in last 2 sts. Turn. (93 sts)
Row 2 (RS): Ch 1, sc in each st and each ch-1 space across. Turn. (93 sc)
Skirt Increase Row
Row 3 (RS): Ch 3 (counts as first dc), dc across with 29 evenly spaced increases (2 dc into the same stitch 29 times, evenly distributed). Turn. (122 dc)
Shell Pattern (Rows 4 through 19)
Row 4 (WS): Ch 3 (= first dc, edge), sk first 2 dc, shell (5 dc) into next dc, sk 2 dc, (dc into next dc, sk 2 dc, shell into next dc, sk 2 dc) rep 19 times, dc into top of t-ch. Turn. (20 shells)
Row 5 (RS): Ch 3 (= first dc, edge), sk 2 sts, shell into center dc of next shell, sk 2 sts, (dc into separator dc, sk 2 sts, shell into center dc of next shell, sk 2 sts) rep 19 times, dc into top of t-ch. Turn.
Rows 6 through 19: Rep Rows 4 and 5 alternately.
After Row 19, the skirt measures approximately 7.5 inches from the waistband.
Hem Edging
Row 20 (Hem Setup, RS): Ch 1, sc across working 1 sc into each dc and 1 sc into each chain space of the final shell row. Aim for 120 sc. (120 sc)
Row 21 (Scallop Hem, RS): Sl st into first sc, (ch 3, 2 dc) into the same sc, sk 2 sc, sl st into next sc, (ch 3, 2 dc) into the same sl st, sk 2 sc, rep across, ending with sl st into the last sc. Fasten off. (40 scallops)
Section 7: Belt
With Yarn B, ch 5.
Row 1: Sc in 2nd ch from hook and in each ch across. Turn. (4 sc)
Rows 2 through 55: Ch 1, sc across. Turn. (4 sc)
Fasten off, leaving a 6 inch tail.
Thread the belt through the waistband eyelet row from right front to left front. Tie in a bow at center front.
Section 8: Button Placement
Lay the dress flat with RS up. Overlap the right front button band over the left front button band at center front. Pin in place.
Using sewing needle and thread, sew 3 wooden buttons to the right front band directly behind each buttonhole. Fasten off securely on WS.
Section 9: Bunny Face Appliques (Make 2)
Using Yarn C (white):
Round 1: Make a MR, ch 1, 6 sc into ring, join with sl st to first sc. (6 sc)
Round 2: Ch 1, 2 sc in each st around, join with sl st. (12 sc)
Round 3: Ch 1, (sc in next st, 2 sc in next st) around, join with sl st. (18 sc)
Round 4: Ch 1, (sc in next 2 sts, 2 sc in next st) around, join with sl st. (24 sc)
Round 5: Ch 1, sc in each st around, join with sl st. (24 sc)
Before closing, insert a small amount of fiberfill or yarn scraps to lightly stuff the circle. Fasten off leaving a long tail for sewing.
Ears (Make 4)
With Yarn C, ch 7.
Row 1: Sc in 2nd ch from hook and in next 4 chs, 3 sc in last ch (tip of ear), cont along opposite side of foundation ch, sc in next 5 chs, sl st to first sc. (13 sc around the ear)
Fasten off leaving a sewing tail.
With pink embroidery thread, work 2 to 3 straight stitches down the center of each ear for the inner ear detail.
Fold each ear slightly inward and sew to the top of each bunny face, angled outward. Attach safety eyes or embroider eyes with black thread. Embroider a small pink nose.
Carrots (Make 2)
Using Yarn D (orange), make a small cone shape in sc with decreases. Add a few green chains (Yarn E) at the top for the carrot leaves.
Sew one bunny face and one carrot to each side of the front skirt, positioning them as shown in the reference images.
Size Adjustment Tips
This pattern is written for 12 months. To adjust:
Always check gauge and measure as you go.
You Did It!
I really hope you enjoy making this sweet little dress as much as I enjoyed putting this pattern together for you. It’s the kind of project that makes you feel like a real garment maker when you’re done.
If you make this mint green bunny baby dress, I would absolutely love to see it! Tag me on Instagram or share a photo in my Facebook group. Seeing your finished projects is honestly the best part of sharing patterns.
Go ahead and save this crochet pattern to your Pinterest boards so you can find it when you’re ready to start. And if you have any questions or just want to share your progress, drop a comment below. I always love hearing from you!
You Might Also Like
- Butter Yellow Chunky Bag on Bed Free Pattern
- Ocean Blue Pineapple Crochet Crop Top Free Pattern
- Monarch Butterfly Autumn Cardigan Free Crochet Pattern
- Strawberry Sweet Bow Crochet Vest Free Crochet Pattern
