
I’ve been looking for the perfect hooded cape pattern for ages, and this one checks every single box. The Sunset Glow Hooded Cape has quickly become my favorite project to recommend for gift-giving, costume season, or just making something truly special for a little one in your life.
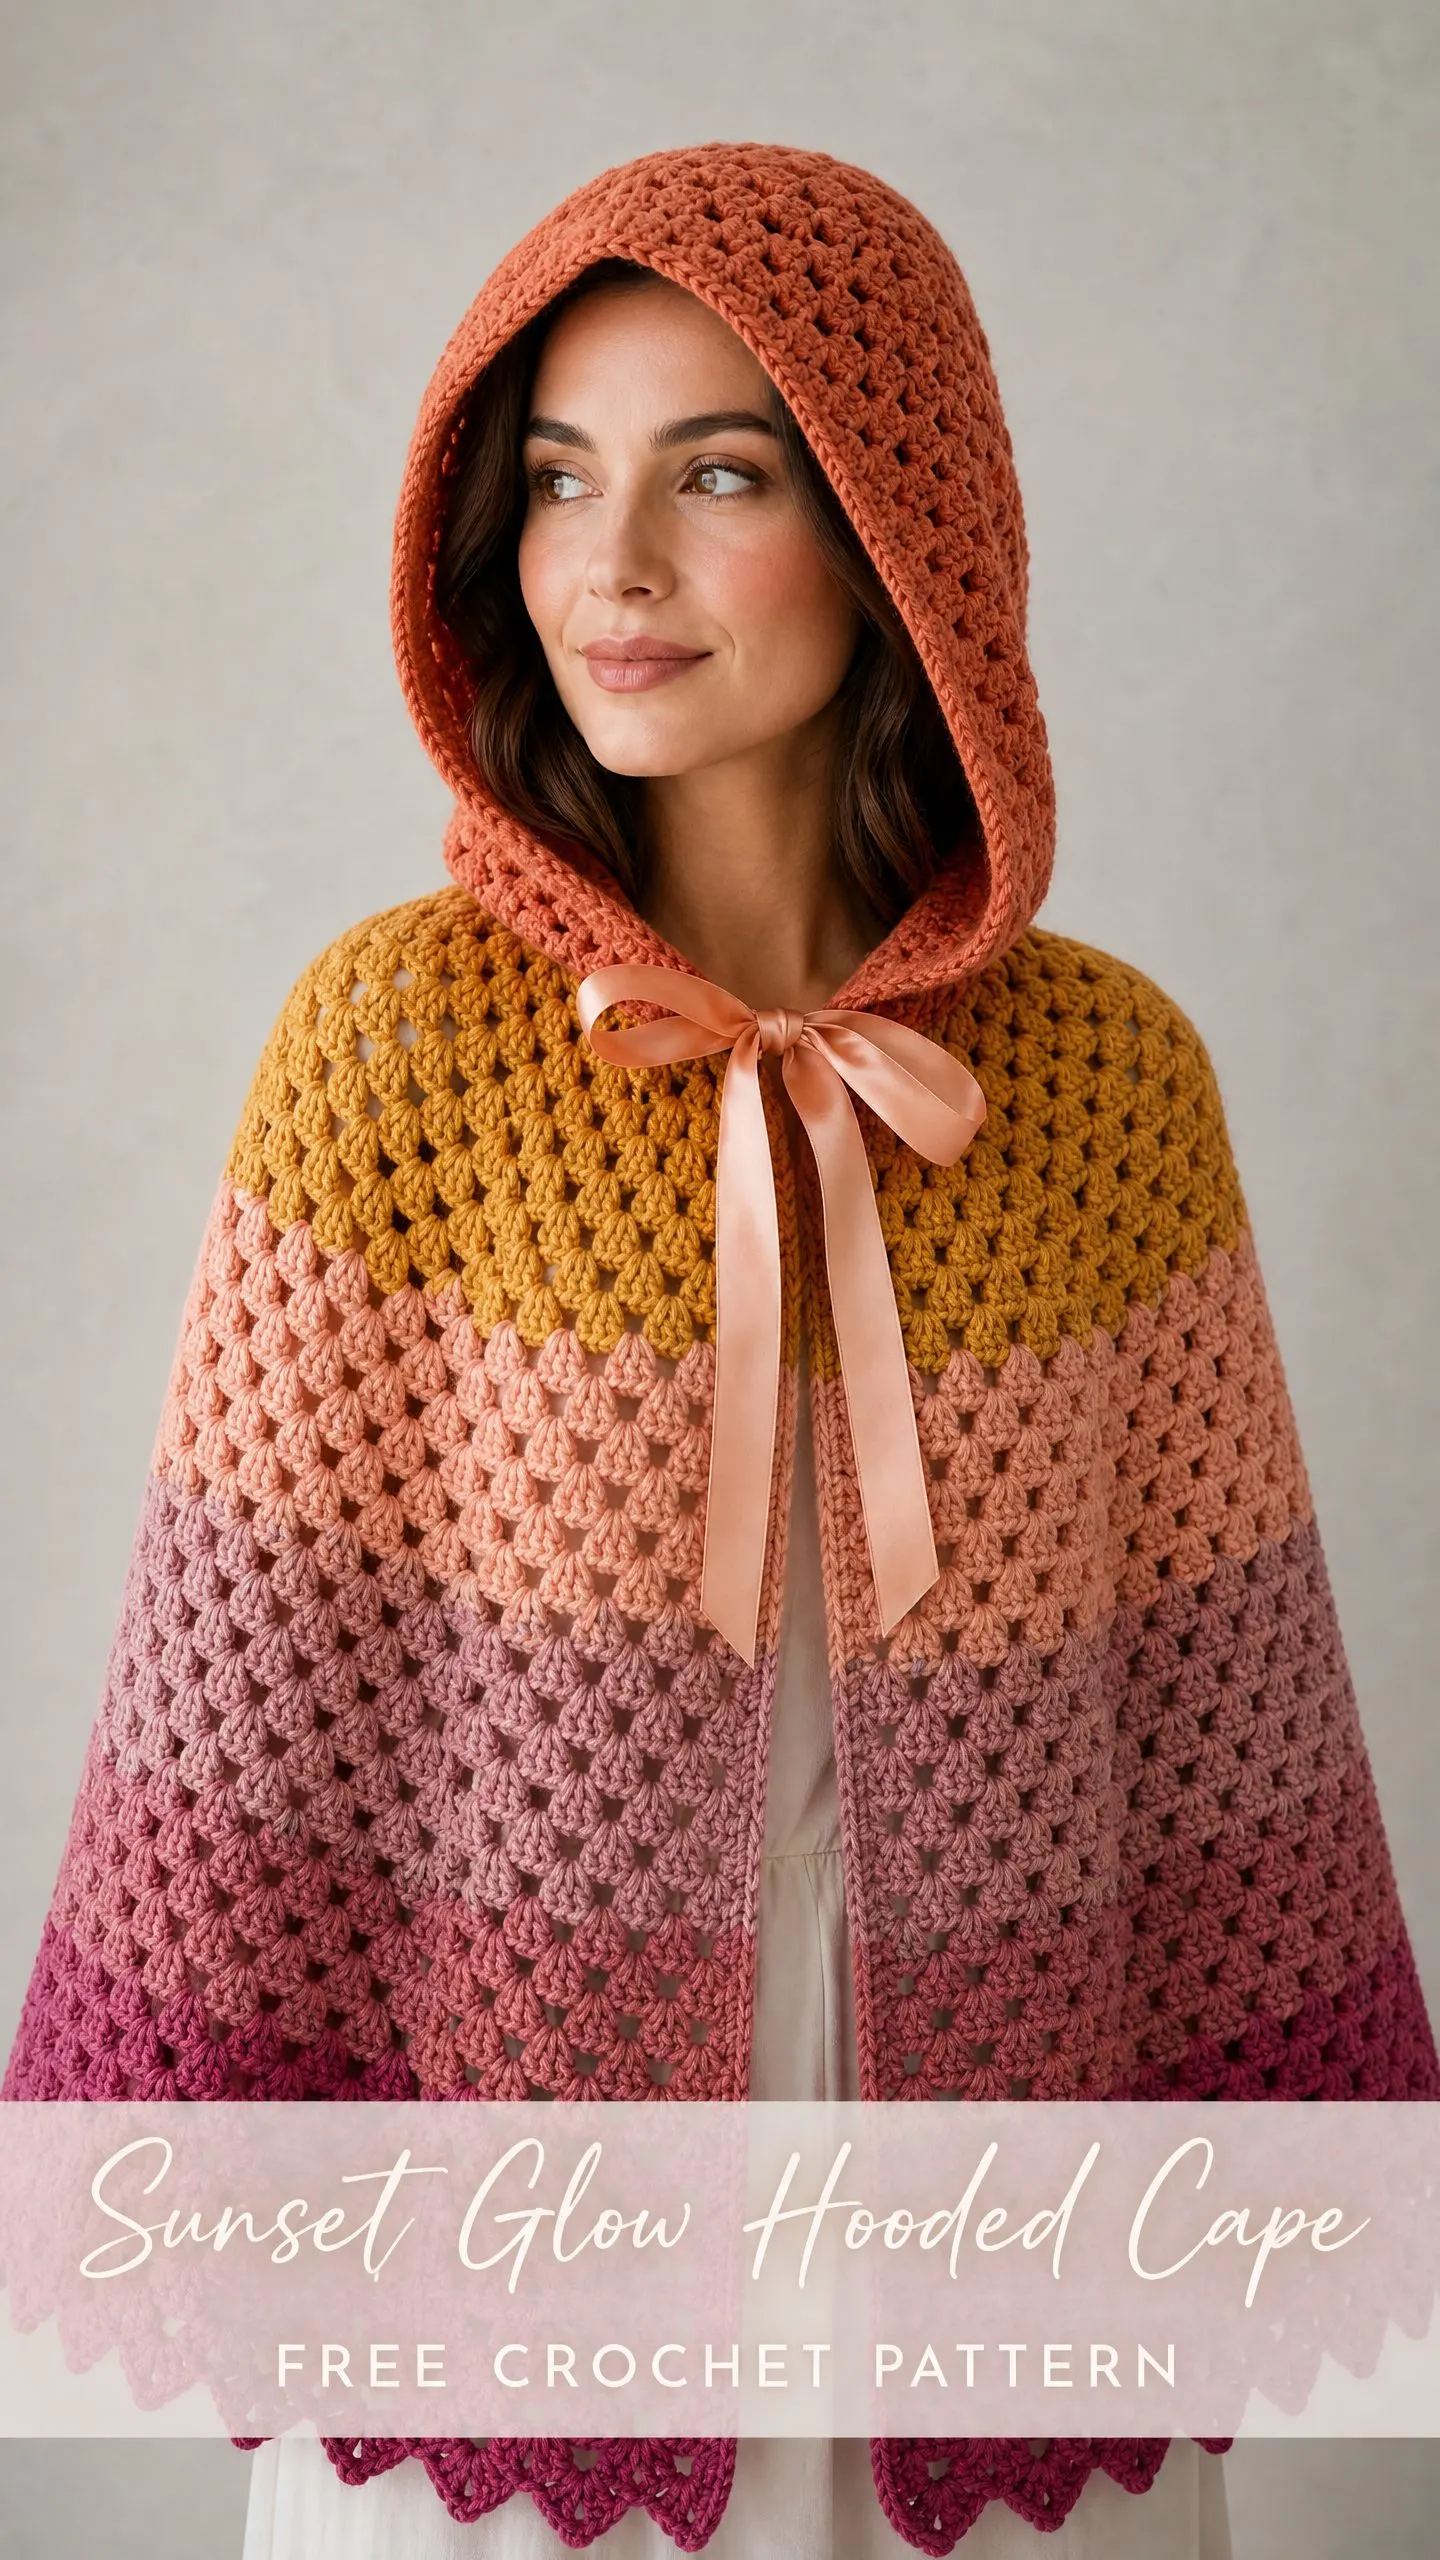
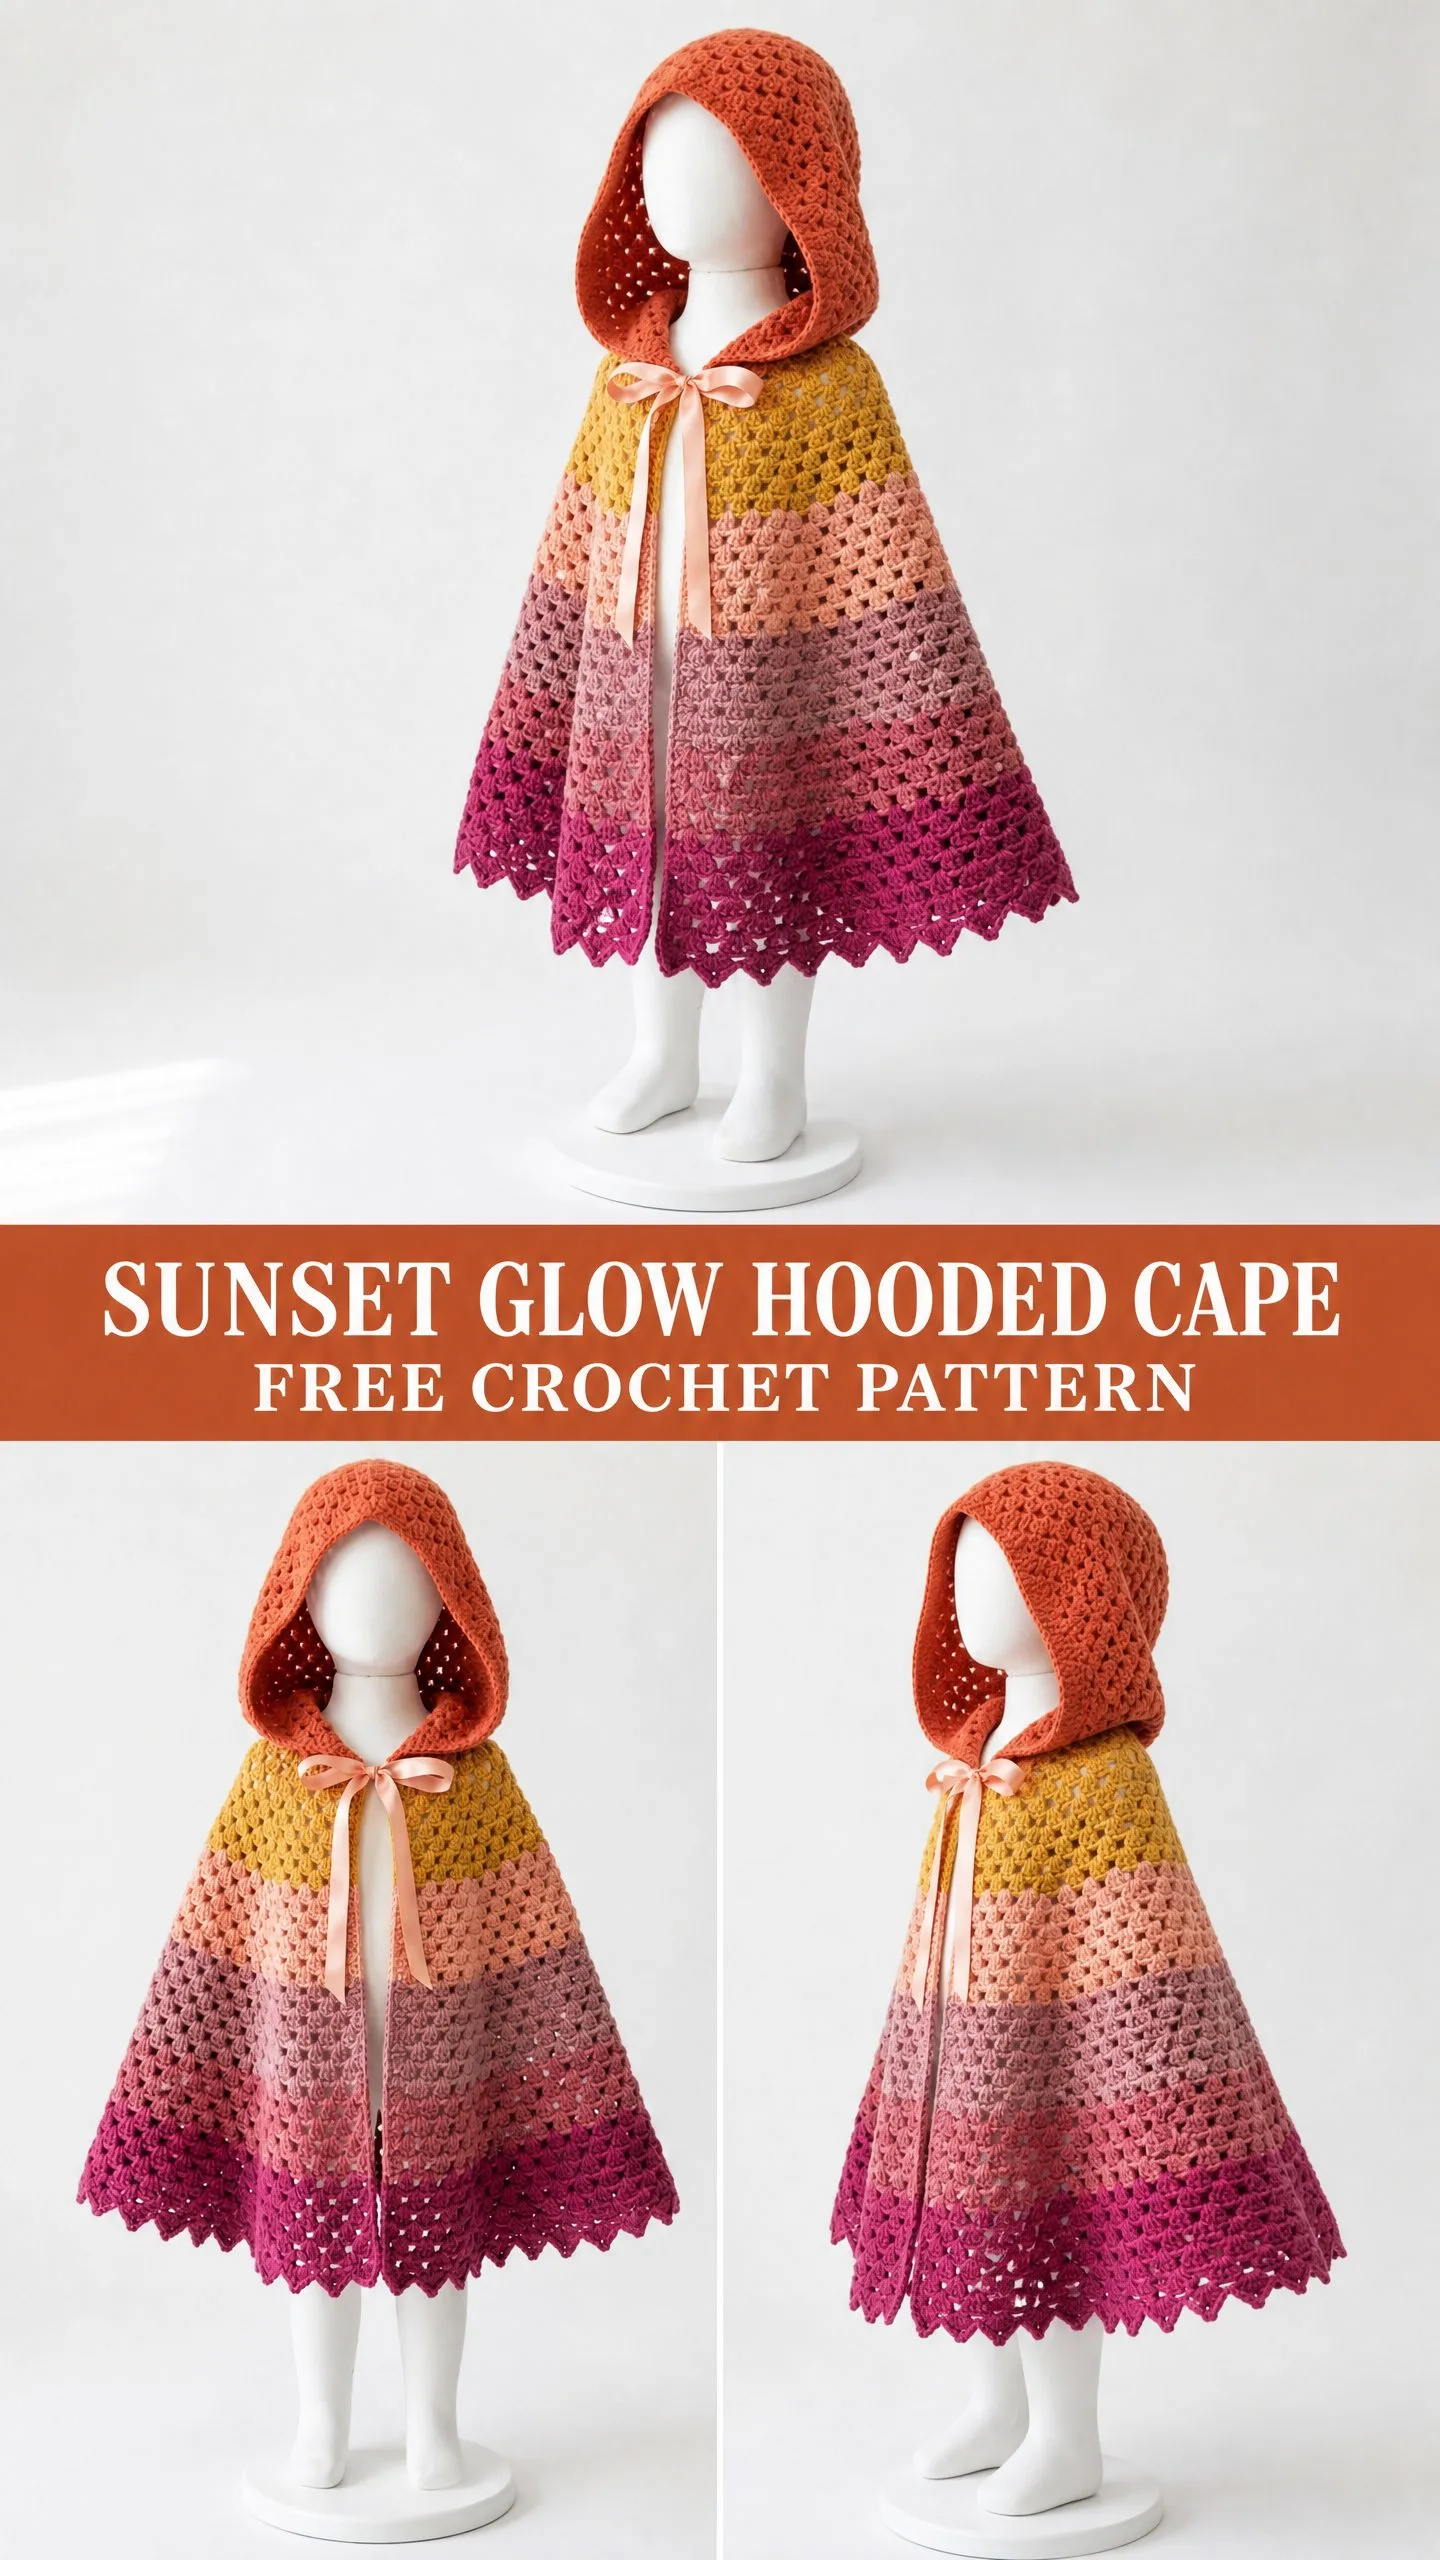
This child-sized cloak works up from the neck down using a gorgeous granny cluster stitch that creates an airy, textured fabric. The color palette moves through six stunning shades, from burnt orange at the hood all the way down to fuchsia magenta at the hem. It looks like a sunset wrapped around tiny shoulders.
If you love projects that look impressive but rely on techniques you already know, this cape is calling your name. Let me walk you through everything you need to bring it to life.
Why This Hooded Cape Pattern Works So Well
The construction on this cape is genuinely clever. You start at the neckline and work outward in joined rounds, which means the fabric naturally flares into that dreamy full-circle silhouette. No complicated shaping, no seaming the body pieces together. The cape just grows as you go.
The hood gets worked separately in simple rows, then folded and seamed along the top. You attach it to the neckline at the end. A satin ribbon threaded through the neckline creates the closure, so there are no buttons or zippers to fuss with.
The granny cluster stitch pattern is straightforward once you get the rhythm. If you can work a double crochet and chain one, you can absolutely make this cape. The trick is staying consistent with your tension so the fabric lies flat as it expands.
Finished Measurements
This pattern fits a child size 4 to 6 years, with a chest measurement of 22 to 24 inches (56 to 61 cm).
Cape length from neck to hem: approximately 18 inches (46 cm)
Hood height: approximately 9 inches (23 cm)
Hem circumference: approximately 80 inches (203 cm)
The finished cape has that beautiful full drape you see in fairy tale illustrations. It swings and moves with the wearer, which kids absolutely love.
Materials You’ll Need
Yarn: Worsted weight (weight 4), approximately 900 yards (823 meters) total across all six colors
Here’s the breakdown by color:
Hook: US size J-10 / 6.0 mm
Notions:
Yarn Suggestions
Lion Brand Pound of Love works beautifully here. It’s 100% premium acrylic, machine washable, and perfect for children’s garments.
Paintbox Yarns Simply DK used doubled creates a worsted-weight equivalent with excellent color options.
Cascade 220 Superwash gives you gorgeous stitch definition if you prefer working with wool.
Whatever you choose, avoid fuzzy or highly textured yarns. The granny cluster detail will get lost in the fuzz.
Gauge
Getting gauge right matters a lot with this pattern. The cape needs to lie flat as it grows, and your gauge controls that.
1 granny cluster repeat (3 dc cluster plus 1 ch-1 space) = approximately 1 inch (2.5 cm) wide
4 rows of granny cluster stitch = approximately 2 in (5 cm) tall
To check your gauge, work a flat granny cluster rectangle of 6 repeats wide by 8 rows tall. Your swatch should measure approximately 6 inches wide by 4 inches tall (15 cm by 10 cm) before blocking.
If your gauge is tighter, go up a hook size. If it’s looser, go down. Trust your swatch, not the yarn label.
Abbreviations
Let me define every stitch you’ll encounter in this pattern.
ch = chain
sl st = slip stitch (insert hook, yarn over, pull through both loops)
sc = single crochet (insert hook, yarn over, pull up loop, yarn over, pull through both loops)
dc = double crochet (yarn over, insert hook, yarn over, pull up loop, yarn over, pull through 2 loops, yarn over, pull through remaining 2 loops)
sp = space
ch-sp = chain space
rep = repeat
sk = skip
st(s) = stitch(es)
RS = right side
WS = wrong side
yo = yarn over
cl = cluster (special stitch defined below)
CU = cluster unit (one cluster plus its following ch-1 space)
t-ch = turning chain
Special Stitches
Granny Cluster (cl)
This is the star of the show. Here’s how to work it:
Yarn over, insert hook into the designated stitch or space, yarn over and pull up a loop, yarn over and pull through 2 loops on hook. You now have 2 loops on your hook.
Repeat that sequence 2 more times, all in the same stitch or space. You’ll have 4 loops on your hook.
Yarn over and pull through all 4 remaining loops. One cluster made.
Increase Unit
At increase points, you’ll work (1 cl, ch 1, 1 cl) into the same ch-1 space. This creates two cluster units where there was one, adding one complete pattern repeat.
Hem Shell
Work (2 dc, ch 1, 2 dc) all into the same stitch or space. This creates the fan-shaped shell used in the hem border.
Picot
Chain 3, then slip stitch into the first chain of that ch-3 you just made. One picot complete.
Border Shell
Work 2 dc, picot, 2 dc all into the designated stitch or space.
Cape Body Instructions
Foundation Chain
With Color A and your J-10 hook, chain 60. Being careful not to twist, slip stitch into the first chain to form a ring.
Round 1 (Color A)
Ch 3 (counts as first dc of first cluster throughout). Work 2 more dc into the ring to complete first cluster. Ch 1. [Work 1 cl into the ring, ch 1] 19 times. Sl st into the top of the beginning ch-3 to join. (20 CU)
All 20 clusters go into the center of the ring, not into individual chains. This creates your tight neckline foundation.
Round 2 (Color A)
Sl st into the first ch-1 sp. Ch 3, 2 dc into same ch-1 sp (first cl made). Ch 1. [1 cl into next ch-1 sp, ch 1] 19 times. Sl st to join. (20 CU)
Round 3 (Color A, increase round)
From this point forward, you’ll work with a ch-2 gap at center front on every round. This gap creates the open front of the cape.
Sl st into first ch-1 sp. Ch 3, 2 dc in same sp, ch 1 (first cl made). [(1 cl, ch 1, 1 cl) into next ch-1 sp, ch 1] 4 times. [1 cl into next ch-1 sp, ch 1] 10 times. [(1 cl, ch 1, 1 cl) into next ch-1 sp, ch 1] 4 times. [1 cl into next ch-1 sp, ch 1] to last sp before gap. Ch 2 (front gap). Sl st to join into top of beginning ch-3. (28 CU plus 1 ch-2 gap)
Round 4 (Color A, increase round)
Sl st into first ch-1 sp. Ch 3, 2 dc in same sp, ch 1. [1 cl into next ch-1 sp, ch 1] across to first marked increase sp. (1 cl, ch 1, 1 cl) into marked sp, ch 1. Continue in pattern around, placing (1 cl, ch 1, 1 cl) into every 7th ch-1 sp 4 times total. Work 1 cl with ch 1 into each remaining sp. Ch 2 at front gap. Sl st to join. (36 CU plus ch-2 gap)
Checkpoint: After Round 4, your neckline should measure approximately 14 inches (35.5 cm) around the outer edge.
Continuing the Body (Simplified Method)
From Round 5 onward, you’ll add 8 cluster units every round to keep the fabric flat. Place increases evenly spaced, shifting their position by about half a repeat each round. This prevents increase lines from stacking and creating a cupped effect.
Round 5: Start with 36 CU. Place 8 increases evenly (alternate every 4 and 5 CU). End count: (44 CU)
Round 6: Start with 44 CU. Place 8 increases (approximately every 5.5 CU). End count: (52 CU)
Round 7: Start with 52 CU. Place 8 increases (alternate every 6 and 7 CU). End count: (60 CU)
Round 8: Start with 60 CU. Place 8 increases (approximately every 7.5 CU). End count: (68 CU)
Round 9: Start with 68 CU. Place 8 increases (approximately every 8.5 CU). End count: (76 CU)
Round 10: Start with 76 CU. Place 8 increases (approximately every 9.5 CU). End count: (84 CU)
Checkpoint: After Round 10, your cape body should measure approximately 5 inches (12.7 cm) from neckline to current hem. The fabric should lie completely flat when spread on a table.
Color Change Schedule
Change colors at the beginning of the specified round:
When changing colors, work the last yarn over of the last stitch with the new color for a clean transition.
Continuing the Increase Rounds
Round 11 (Color D): Start with 84 CU. Place 8 increases (alternate every 10 and 11 CU). End count: (92 CU)
Round 12 (Color E): Start with 92 CU. Place 8 increases (every 11.5 CU). End count: (100 CU)
Round 13 (Color E): Start with 100 CU. Place 8 increases (every 12.5 CU). End count: (108 CU)
Round 14 (Color E): Start with 108 CU. Place 8 increases (every 13.5 CU). End count: (116 CU)
Round 15 (Color F): Start with 116 CU. Place 8 increases (every 14.5 CU). End count: (124 CU)
Round 16 (Color F): Start with 124 CU. Place 8 increases (every 15.5 CU). End count: (132 CU)
Round 17 (Color F): Start with 132 CU. Place 8 increases (every 16.5 CU). End count: (140 CU)
Checkpoint: After Round 17, your cape body should measure approximately 17 inches (43 cm) from neckline to current edge.
Hem Border (Color F, Rounds 18 to 20)
This is where the beautiful scalloped edge comes to life.
Round 18 (setup round)
Sl st into first ch-1 sp. Ch 1. Sc into every cl and every ch-1 sp around. Work 2 sc into each ch-2 front gap corner. Sl st to join. (Approximately 280 sc)
Round 19 (shell round)
Ch 1. Sc into first sc. [Sk 2 sc, work 1 hem shell (2 dc, ch 1, 2 dc) into next sc, sk 2 sc, sc into next sc] rep around. At corners, adjust spacing as needed to keep scallops even. Sl st to join. (Approximately 46 hem shells plus 46 sc)
Round 20 (picot round)
Ch 1. Sc into first sc. [Work border shell (2 dc, picot, 2 dc) into ch-1 sp of next hem shell, sc into next sc] rep around. Sl st to join. Fasten off. Weave in end.
Hood Instructions
The hood is worked flat in rows with Color A.
Hood Foundation
With Color A, ch 37.
Row 1 (WS): Dc into 4th ch from hook (beginning ch-3 counts as first dc). Dc into each ch across. Turn. (35 dc)
Row 2 (RS): Ch 3 (counts as first dc). Dc into each dc across. Dc into top of t-ch. Turn. (35 dc)
Rows 3 through 18: Repeat Row 2. Do not change stitch count. (35 dc each row)
After Row 18, your hood panel should measure approximately 9 inches (23 cm) wide and 9 inches (23 cm) tall.
Hood Seaming
Fold the hood panel in half with right sides together so the two short ends align. Seam across the top using a yarn needle and Color A with whipstitch or mattress stitch. Turn right side out. The seam runs along the top of the head.
Hood Edging
With RS facing, Color A, and J-10 hook, join yarn at the bottom left corner of the hood opening.
Edging Round 1: Ch 1. Work sc evenly around the face opening of the hood (approximately 60 sc). Sl st to join.
Edging Round 2: Ch 1. Sc into each sc around. Sl st to join. Fasten off.
Attaching the Hood
Pin the base edge of the hood evenly to the neckline of the cape body, centering the hood at the back. The front edges of the hood align with the front edges of the cape opening. Using Color A and a yarn needle, seam the hood to the cape neckline with mattress stitch.
Ribbon Closure
Thread the satin ribbon through the ch-1 spaces at the neckline on either side of the center front gap. Bring both ends to the front center and tie in a bow. Trim ribbon ends at a 45-degree angle to prevent fraying.
Size Customization Tips
For toddler size (2 to 3 years): Reduce foundation ring to 50 chains. Begin with 16 CU in Round 1. Stop after Round 14 before the hem border. Total cape length will be approximately 14 to 15 inches.
For larger child (8 to 10 years): Increase foundation ring to 70 chains. Begin with 24 CU in Round 1. Work through Round 22 before the hem border. Total cape length will be approximately 21 to 22 inches.
For adult size: Begin with 80 chains and 28 CU. Continue until the cape reaches your desired length.
For all size adjustments, the hood width should equal approximately half the adjusted neckline circumference.
Blocking and Finishing
Weave in all ends securely, especially at color joins.
For acrylic yarns, wet blocking works best. Soak the finished cape in cool water for 20 minutes. Gently squeeze out water without wringing. Roll in a clean towel and press to remove excess moisture. Lay flat on a blocking mat and pin to finished dimensions. Allow to dry completely before unpinning.
For wool or wool-blend yarns, steam blocking with a damp pressing cloth is preferable.
Care Instructions
For acrylic yarns, machine wash cold on gentle cycle. Lay flat to dry. Do not tumble dry on high heat.
Store folded, not hung, to prevent stretching at the neckline.
This Sunset Glow Hooded Cape pattern creates something truly magical that any child would treasure. The gradient colors, the swishing hem, the cozy hood. It all comes together into a piece that looks far more complicated than it actually is to make.
If you’re excited to try this hooded cape crochet pattern, save it to your Pinterest boards so you can find it when you’re ready to cast on. And if you do make one, I would absolutely love to see it! Drop a comment below or tag me on social media. Seeing your finished projects is hands down the best part of sharing patterns.
You Might Also Like
- Sage Green Boho Halter Dress Free Crochet Pattern
- Orange Ginger Cat Velvet Bow Sweater Free Crochet Pattern
- Blueberry Baby Hat and Pants Set Free Crochet Pattern
- Bunny Rabbit Baby Dress Set Free Crochet Pattern
