
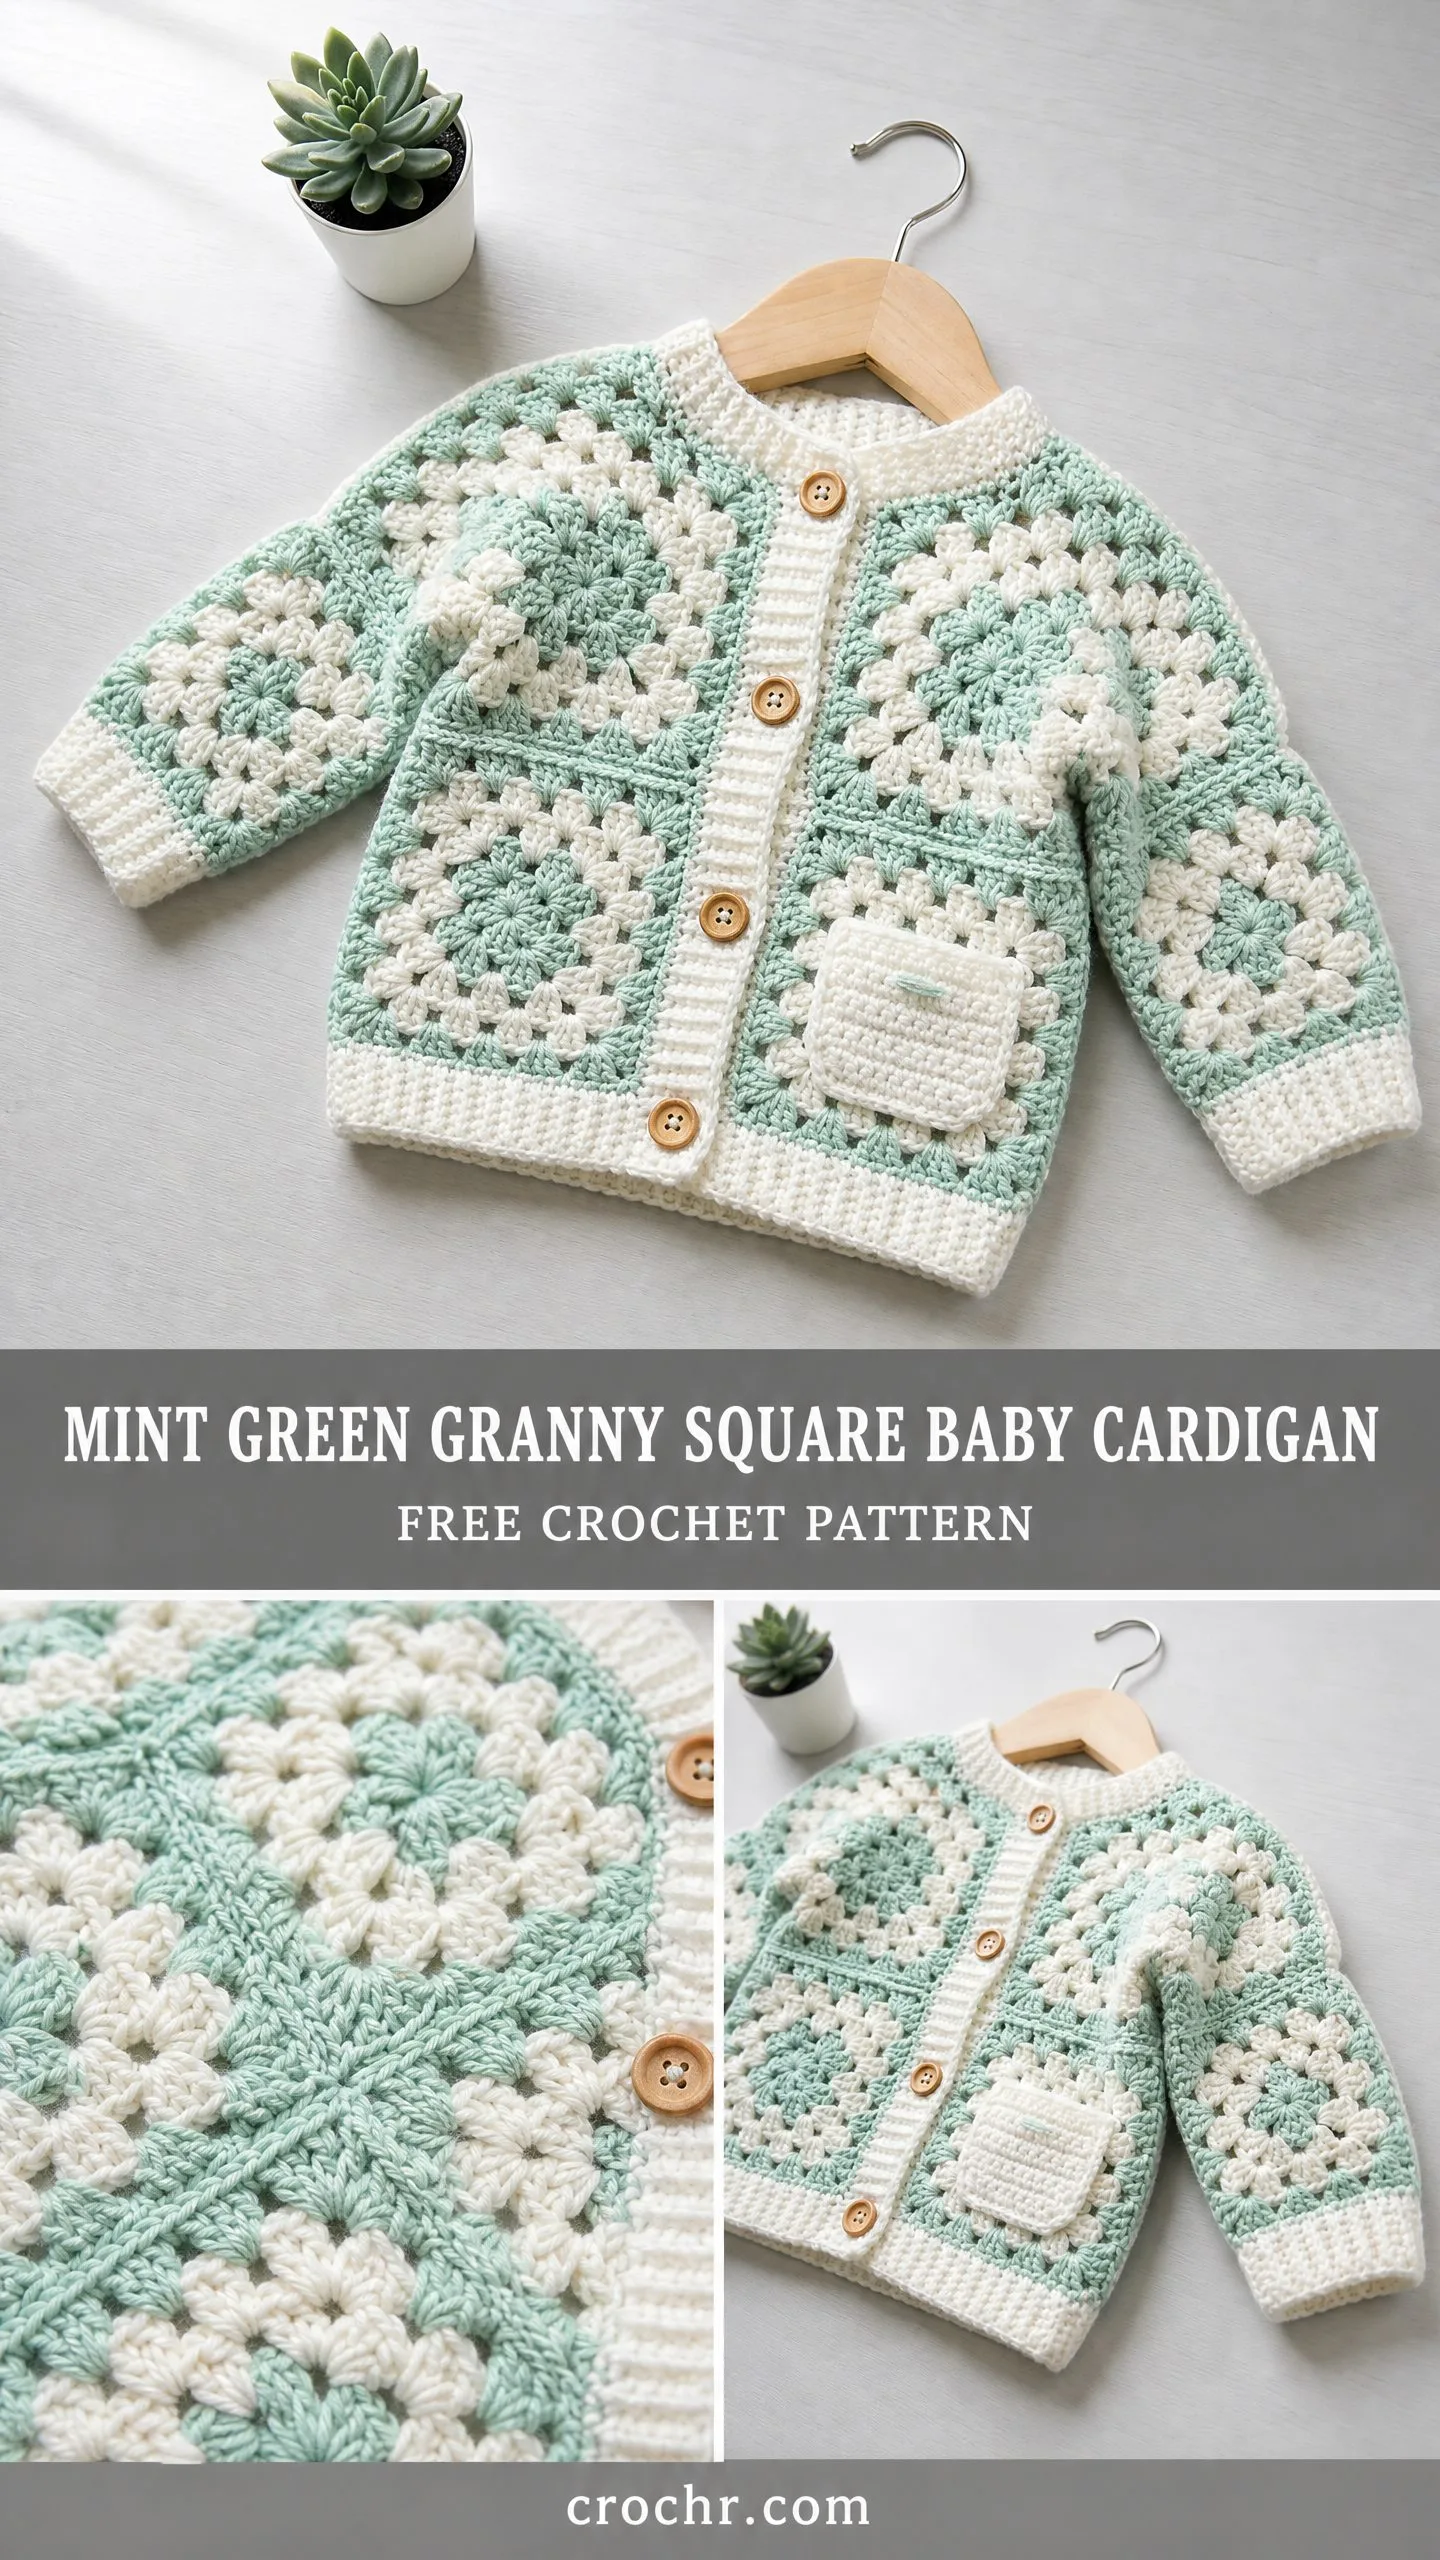
When I sat down to design this cardigan, I had a very specific vision in mind. I wanted something that felt vintage and handmade but still looked polished enough to gift at a baby shower. I wanted the classic granny square to shine without the finished piece looking like a patchwork project gone wrong. And honestly? I am SO pleased with how this turned out.
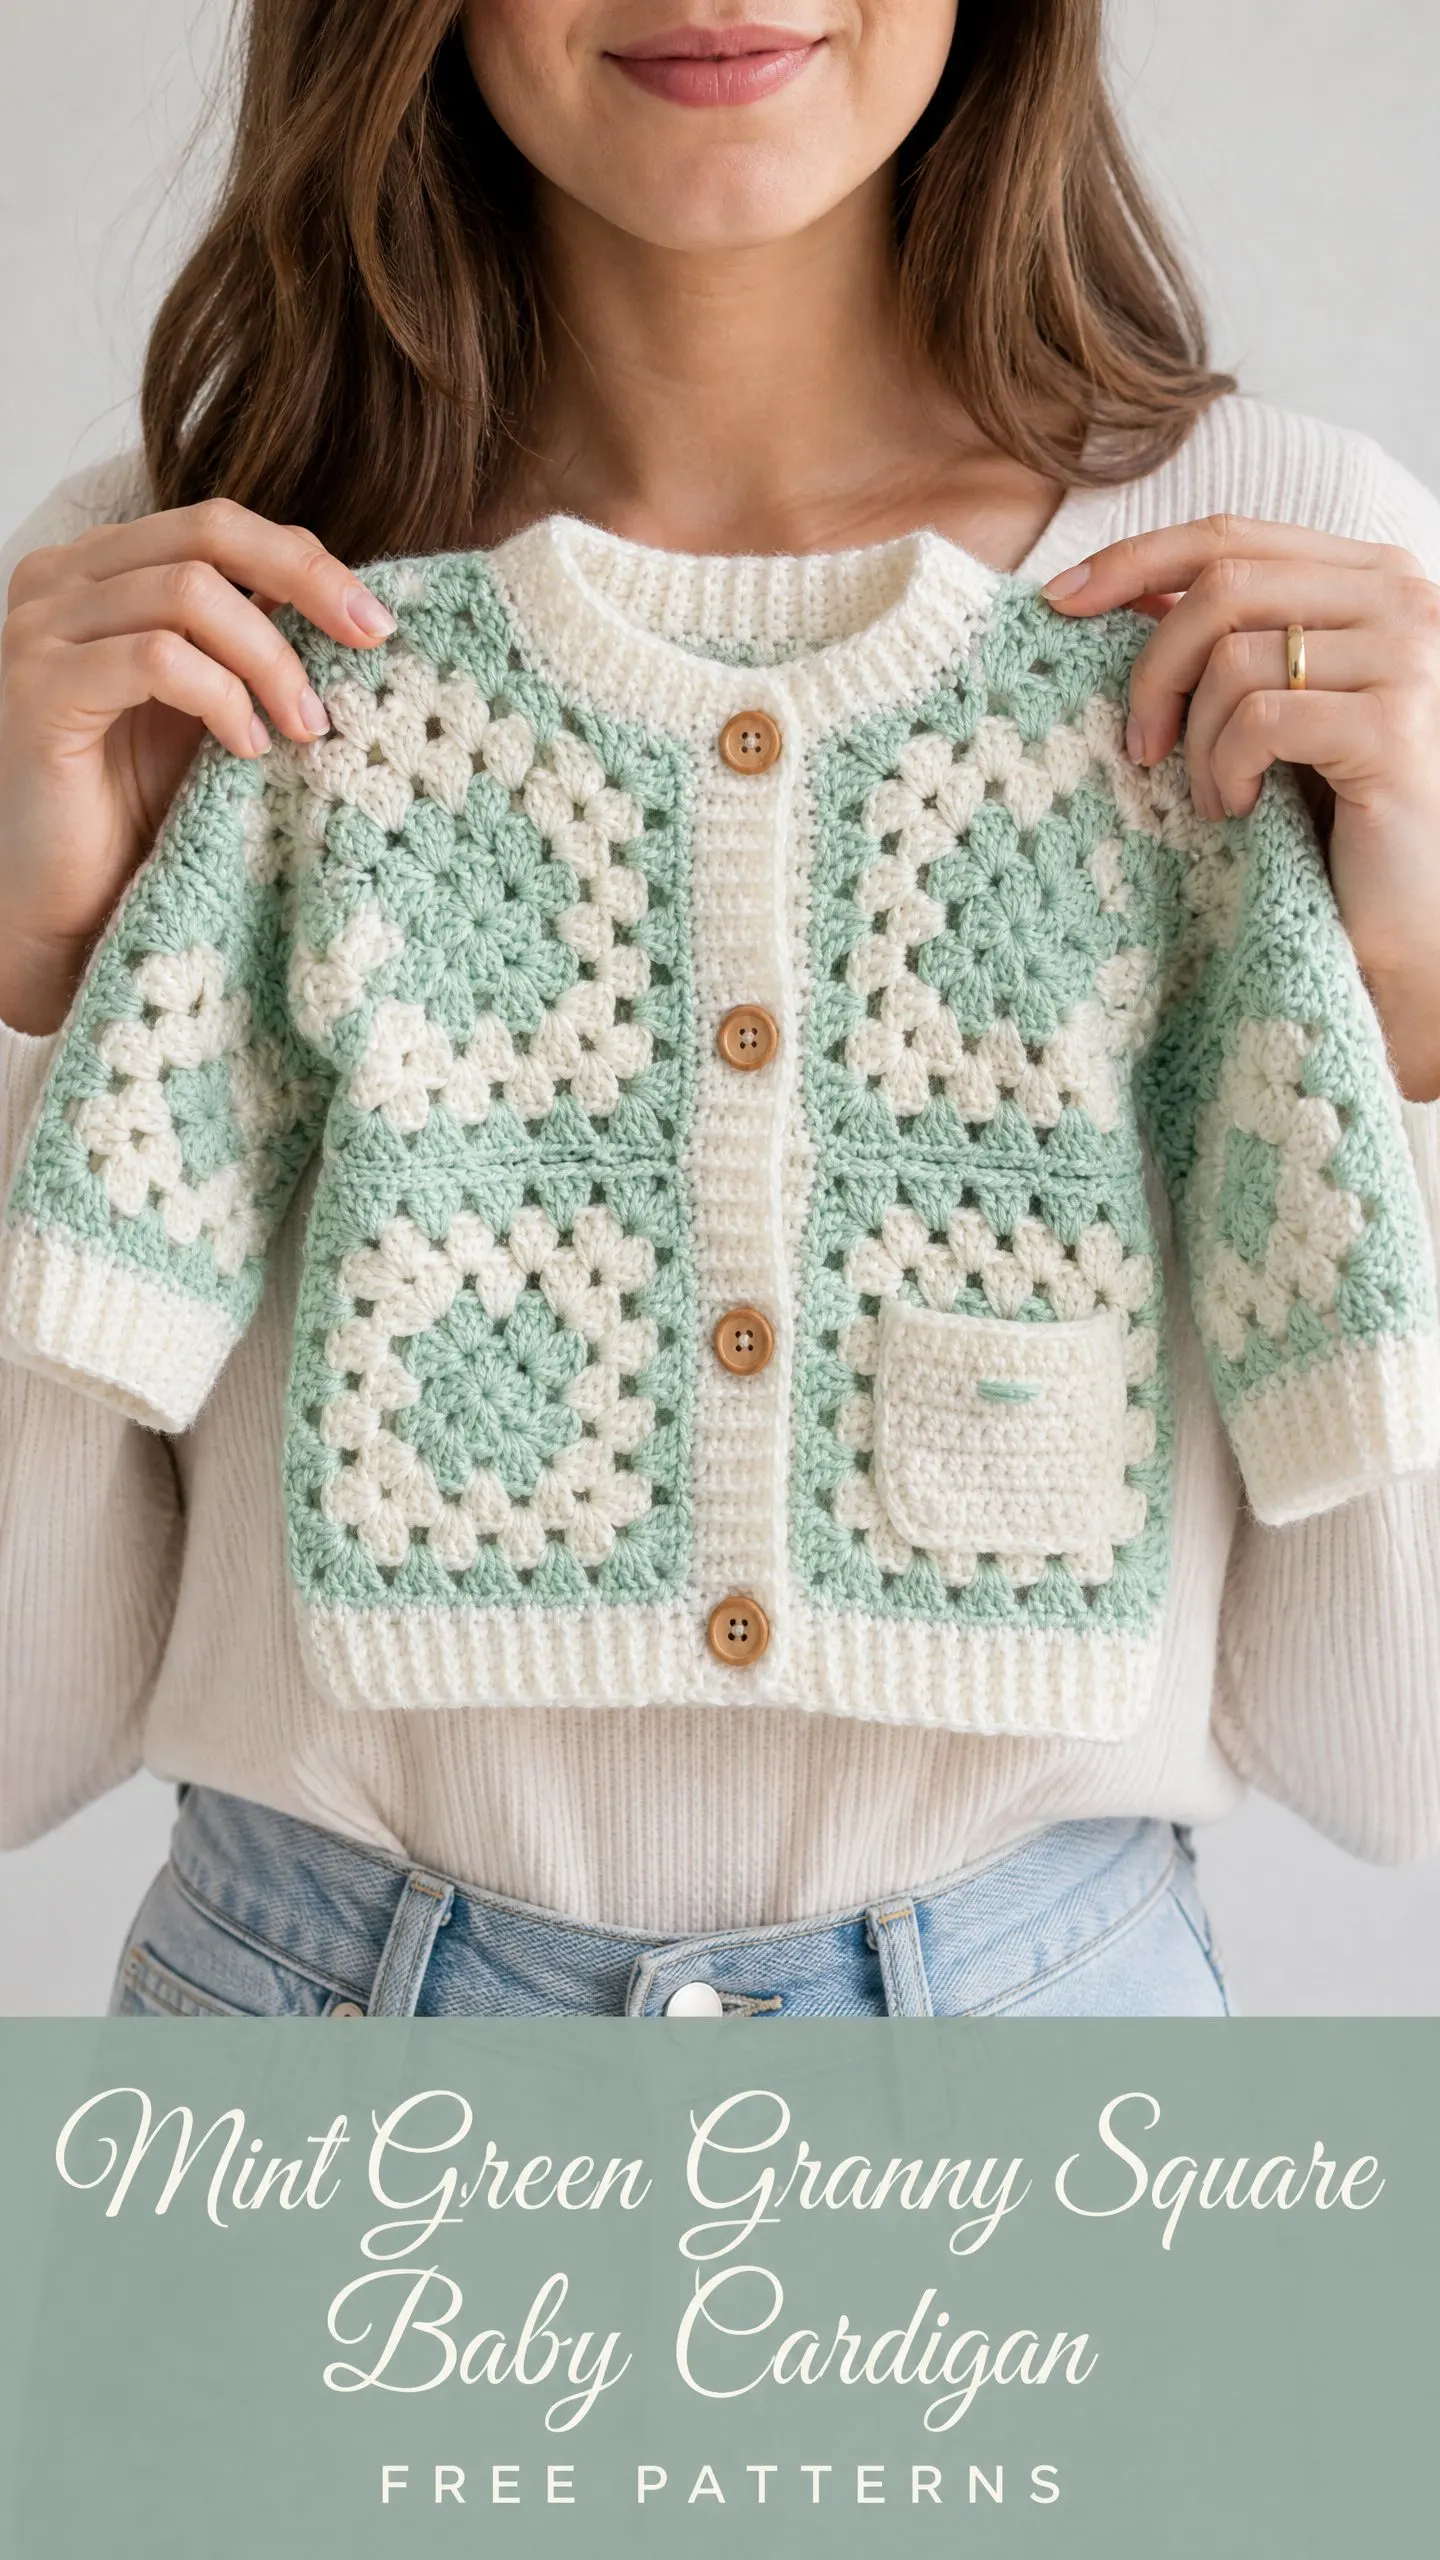
The mint and cream color combination gives it that fresh, modern feel while the wooden buttons add just the right amount of warmth. Every time I look at this little cardigan hanging on its tiny hanger, I get a little flutter of excitement.
If you have been wanting to try a garment project but felt intimidated, this is your sign. The construction is straightforward once you understand how the pieces fit together. You make squares, you join them, you add borders. That is really the whole thing broken down to basics.
Why This Baby Cardigan Pattern Works So Well
This cardigan uses the granny square, which is one of the most versatile motifs in crochet. If you have ever made a granny square blanket, you already have the main skill needed for this project. The difference here is that instead of making one giant blanket, you are making 37 smaller squares and arranging them into a garment shape.
The two-tone effect comes from switching colors partway through each square. The mint green forms the center clusters while the cream creates the outer border. This gives every square a consistent look that creates that beautiful lattice pattern when joined together.
I designed this for the 12 to 18 month size range, which is perfect for gift giving. Babies grow fast, so this size gives parents a nice window to actually use the cardigan before their little one outgrows it.
Materials You Will Need
Gather these supplies before you start:
Yarn:
Hook: US size G-6 / 4.0 mm crochet hook
Additional Materials:
Yarn Suggestions
Lion Brand Pound of Love works beautifully for this project. It is machine washable, budget-friendly, and has excellent stitch definition.
Paintbox Yarns Simply DK offers a superb color range if you want to match specific mint and cream shades.
Cascade 220 Superwash Sport is my pick for an heirloom-quality piece. The merino wool feels luxurious but is still machine washable on a gentle cycle.
Whatever yarn you choose, make sure it is machine washable. Baby items need to survive frequent washing without falling apart.
Finished Measurements
Gauge
This is critical, so please do not skip it.
After blocking:
Even a small deviation per square multiplies across the joined panels. Make and block a sample square before starting. Adjust hook size up if your square measures under 3 inches, or down if over 3 inches.
Abbreviations and Stitch Definitions
Let me walk you through every abbreviation you will encounter in this pattern:
Special Stitches Explained
Granny Cluster
This is the heart of your granny square. It is simply three double crochet stitches worked into the same chain space.
Step 1: Yarn over, insert hook into the designated chain space.
Step 2: Yarn over and pull up a loop (3 loops on hook).
Step 3: Yarn over and draw through 2 loops (2 loops on hook).
Step 4: Yarn over, insert hook into same chain space again.
Step 5: Yarn over and pull up a loop (4 loops on hook).
Step 6: Yarn over and draw through 2 loops (3 loops on hook).
Step 7: Yarn over, insert hook into same chain space a third time.
Step 8: Yarn over and pull up a loop (5 loops on hook).
Step 9: Yarn over and draw through 2 loops (4 loops on hook).
Step 10: Yarn over and draw through all 4 remaining loops on hook.
Throughout this pattern, "cluster" means this 3-dc cluster unless otherwise stated.
Flat Slip Stitch Join
This joining method creates a beautiful visible ridge on the right side that complements the granny square aesthetic.
Hold two squares with wrong sides together. Insert hook through the back loop of the stitch on the front square and through the back loop of the corresponding stitch on the back square simultaneously. Yarn over with joining yarn and pull through both loops and the loop on hook. Continue across all edge stitches.
Single Crochet Through Back Loop Only (sc tbl)
Insert hook into the back loop only of the stitch (the loop farthest from you). Yarn over and pull up a loop. Yarn over and draw through both loops on hook. This creates the horizontal ridge texture used for all ribbing borders in this pattern.
Pattern Notes Before You Begin
1. All granny squares are made individually and blocked before joining. This ensures accurate sizing and clean joins.
2. The cardigan back panel is 4 squares wide by 3 squares tall (12 squares total). Each front panel is 2 squares wide by 3 squares tall (6 squares each). Each sleeve is 2 squares wide by 3 squares tall (6 squares each).
3. Color A (mint) is used for rounds 1 and 2 of each square. Color B (cream) is used for rounds 3 and 4.
4. When joining yarn for a new round or color, join with a standing stitch rather than slip-stitching into a chain. This reduces bulk at join points.
5. Chain 3 at the beginning of each round counts as one dc throughout the granny square pattern.
6. Weave in all ends from granny squares before joining panels. Trust me on this one. It is much easier than weaving ends after assembly.
7. Total square count: 12 (back) + 6 (left front) + 6 (right front) + 6 (left sleeve) + 6 (right sleeve) + 1 (pocket) = 37 granny squares total
Skill Level
This pattern is intermediate. The individual granny square is a beginner skill, but this pattern requires understanding of garment construction, seaming multiple motifs, picking up stitches for ribbing borders, and managing yarn ends from many squares. If you are comfortable with joining motifs and basic garment finishing, you will find this achievable.
Time Estimate: Approximately 18 to 25 hours total depending on your joining and finishing speed.
Step-by-Step Instructions
Section 1: Granny Square (Make 37 Total)
Using Color A, make a magic ring or ch 4 and join with sl st to form a ring.
Round 1 (Color A): Ch 3 (counts as dc), work 2 dc into ring, ch 2, (work 3 dc into ring, ch 2) 3 times, join with sl st to top of beg ch-3. Fasten off Color A.
Stitch count: 4 clusters of 3 dc, 4 corner ch-2 spaces. (12 dc, 4 ch-2 sp)
Round 2 (Color A): Join Color A with standing dc into any corner ch-2 sp. Work (2 dc, ch 2, 3 dc) into same corner sp (first corner made). Ch 1. Work (3 dc, ch 2, 3 dc) into each remaining corner ch-2 sp, placing ch 1 between each corner group, ending ch 1, join with sl st to top of first dc. Fasten off Color A.
Stitch count: 4 corner groups (each with 2 clusters and ch-2 sp), 4 side ch-1 spaces. (24 dc, 4 ch-2 sp, 4 ch-1 sp)
Round 3 (Color B): Join Color B with standing dc into any corner ch-2 sp. Work (2 dc, ch 2, 3 dc) into same corner sp. Ch 1. Work 3 dc into next ch-1 sp. Ch 1. Work (3 dc, ch 2, 3 dc) into next corner ch-2 sp. Ch 1. Work 3 dc into next ch-1 sp. Ch 1. Rep from corner to corner around. Join with sl st to top of first dc. Do not fasten off.
Stitch count: 4 corner groups, 2 side clusters per side, 8 ch-1 side spaces. (36 dc, 4 ch-2 sp, 8 ch-1 sp)
Round 4 (Color B): Sl st into next 2 dc and into corner ch-2 sp. Ch 3 (counts as dc), work (2 dc, ch 2, 3 dc) into same corner sp. Ch 1. (Work 3 dc into next ch-1 sp, ch 1) twice. Work (3 dc, ch 2, 3 dc) into corner ch-2 sp, ch 1. (Work 3 dc into next ch-1 sp, ch 1) twice. Rep from corner to corner around. Join with sl st to top of beg ch-3. Fasten off Color B.
Stitch count: 4 corner groups, 3 side clusters per side, 12 ch-1 side spaces. (48 dc, 4 ch-2 sp, 12 ch-1 sp)
Weave in all ends. Block each square to 3 x 3 inches / 7.5 x 7.5 cm.
CHECKPOINT: Each blocked square should measure exactly 3 inches x 3 inches. All 37 squares should be uniform before proceeding.
Section 2: Joining the Panels
All panels are joined using the flat slip stitch join method. Use Color B for all joins. Join squares into rows first (horizontal joins), then join rows together (vertical joins). Always join with wrong sides held together so the ridge sits on the right side.
For each edge, you will work through: ch-2 corner sp, 3 dc tops, ch-1 sp, 3 dc tops, ch-1 sp, 3 dc tops, ch-2 corner sp. This gives 11 working points per edge join.
BACK PANEL: Join 4 squares across by 3 squares tall. Make 3 horizontal strips of 4 squares each, joining along the horizontal seams. Then join the 3 strips along their horizontal edges. The back panel measures 12 inches wide x 9 inches tall after joining (before borders).
LEFT FRONT PANEL: Join 2 squares across by 3 squares tall. This panel measures 6 inches wide x 9 inches tall.
RIGHT FRONT PANEL: Join 2 squares across by 3 squares tall. This panel measures 6 inches wide x 9 inches tall.
CHECKPOINT: Back panel width should be 12 inches. Each front panel should be 6 inches wide. All panels should be 9 inches tall before borders.
Section 3: Sleeve Panels (Make 2)
For each sleeve, join 2 squares across by 3 squares tall, creating a flat rectangle 6 inches wide x 9 inches tall. This will be seamed into a tube after the underarm seam is worked.
Section 4: Shoulder and Side Seams
Lay the back panel flat with right side up. Place the right front panel alongside the back panel, right sides together, aligning at the top right corner. Using Color B and the flat slip stitch join method, seam the outer 4 squares’ worth of top edge on each side (approximately 3.5 to 4 inches per shoulder). Leave approximately 4 to 5 inches of the back top center and the inner edge of each front top open for the neckline.
Repeat for the left front panel.
Side seams: With wrong sides together, align the side edges of the back panel with the side edges of the front panels. Work the flat sl st join from the hem edge upward, stopping approximately 3.5 inches from the top edge to leave the armhole opening.
CHECKPOINT: The armhole opening should measure approximately 3 to 3.5 inches on each side. The overall body circumference at the chest, buttoned, should be approximately 20 inches.
Section 5: Attaching Sleeves
Fold each sleeve panel in half along the long edge and seam the side edges together using the flat sl st join to form a tube. The tube should be 3 inches wide x 9 inches tall (circumference 6 inches at this stage).
With wrong sides facing, pin the top edge of the sleeve tube into the armhole opening of the body, easing evenly. Seam the sleeve into the armhole using the flat sl st join, working around the armhole opening. Repeat for the second sleeve.
Section 6: Hem Ribbing
With right side facing and Color B, begin at the lower right front corner edge. Work 1 sc into each dc top, 1 sc into each ch-1 sp, and 1 sc into each corner ch-2 sp along the bottom edge. With 8 squares across the bottom edge, work 10 sc across each square bottom edge. Total pickup = 80 sc.
Row 1 (pickup row, RS facing): Work 80 sc evenly across the entire bottom edge. Turn. (80 sc)
Row 2 (WS): Ch 1, sc tbl in each st across. Turn. (80 sc)
Row 3 (RS): Ch 1, sc tbl in each st across. Turn. (80 sc)
Row 4 (WS): Ch 1, sc tbl in each st across. Turn. (80 sc)
Row 5 (RS): Ch 1, sc tbl in each st across. Turn. (80 sc)
Row 6 (WS): Ch 1, sc tbl in each st across. Turn. (80 sc)
Fasten off. Weave in ends.
CHECKPOINT: Hem ribbing should be approximately 1 inch deep.
Section 7: Cuff Ribbing (Work on Both Sleeves)
With right side facing and Color B, join yarn at the sleeve seam at the lower edge.
Round 1 (pickup rnd, RS): Work 1 sc into each working point around the lower edge of the sleeve tube. Work 10 sc per square edge = 20 sc total around. Join with sl st to first sc. (20 sc)
Round 2: Ch 1, sc tbl in each st around. Join with sl st to first sc. (20 sc)
Round 3: Ch 1, sc tbl in each st around. Join with sl st to first sc. (20 sc)
Round 4: Ch 1, sc tbl in each st around. Join with sl st to first sc. (20 sc)
Round 5: Ch 1, sc tbl in each st around. Join with sl st to first sc. (20 sc)
Round 6: Ch 1, sc tbl in each st around. Join with sl st to first sc. (20 sc)
Fasten off. Weave in ends. Repeat for second sleeve.
CHECKPOINT: Each cuff should measure approximately 3 inches in circumference and approximately 1 inch in depth.
Section 8: Button Bands and Neckband
With right side facing and Color B, join yarn at the lower right corner of the right front panel.
Right front band: Work 42 sc evenly up the right front edge from hem to neckline. (42 sc)
Neckline: Work approximately 36 sc across the back neckline and front neckline shaping. (36 sc)
Left front band: Work 42 sc downward along the left front edge. (42 sc)
Total after setup row: 120 sc around the entire front and neckline opening. Do not join. Work in rows.
Row 1 (WS): Ch 1, turn, sc tbl in each st across entire band. (120 sc)
Row 2 (RS, buttonhole row): Ch 1, turn. Work sc tbl across the left front band section (sts 1 through 42), then work sc tbl across the neckline section (sts 43 through 78).
For the right front band section (sts 79 through 120), work buttonholes as follows:
Sc tbl in 3 sts, ch 2, skip 2 sts, sc tbl in 6 sts, ch 2, skip 2 sts, sc tbl in 6 sts, ch 2, skip 2 sts, sc tbl in 6 sts, ch 2, skip 2 sts, sc tbl in 6 sts, ch 2, skip 2 sts, sc tbl in 5 sts.
Row 3 (WS): Ch 1, turn, sc tbl across, working 2 sc into each ch-2 buttonhole space. (120 sc)
Row 4 (RS): Ch 1, turn, sc tbl across. (120 sc)
Fasten off. Weave in ends.
Section 9: Pocket
Take the one remaining granny square (already blocked to 3 x 3 inches).
Along the top edge of the pocket square, work a finishing row: Join Color B with sl st at top left corner. Ch 1, work approximately 10 sc across the top edge. Fasten off. (10 sc)
Pin the pocket to the lower right area of the left front panel (as worn), positioning it so the bottom aligns with the top edge of the hem ribbing. Using a yarn needle and Color B, whip stitch the pocket to the cardigan body along the bottom and two side edges, leaving the top edge open.
Section 10: Button Attachment
Mark button positions on the left front band corresponding to each buttonhole on the right front band. Thread a sewing needle with thread matching Color B. Sew each wooden button securely through both button band layers. Create a thread shank that allows the button to pass easily through the crocheted buttonhole. Knot securely on the wrong side.
Finishing and Blocking
Wet block the completed cardigan by soaking in cool water for 15 minutes. Gently press out water without wringing. Lay flat on blocking mats and pin to the finished measurements. Allow to dry completely (12 to 24 hours depending on humidity and yarn fiber content).
For acrylic yarns, steam blocking with a damp cloth placed over the fabric and a warm iron held above (not touching) is effective after shaping is confirmed correct.
Weave in all remaining ends on the wrong side, working each end in at least two directions through the back loops of stitches.
Size Customization Tips
To size up to 2T (approximately 22 inch chest): Add 1 additional square to the width of the back panel, making it 5 squares wide by 3 squares tall. Add half a square equivalent of width to each front panel. For length, add a fourth row of squares to all panels.
To size down to 6-12 months (approximately 18 inch chest): Reduce each square to 2.75 inches by using a smaller hook (size F-5 / 3.75 mm) and sport weight yarn. Recheck all border stitch counts accordingly.
General rule: Each granny square adds 3 inches in the given gauge. Plan garment dimensions in multiples of 3 inches.
Care Instructions
Machine wash on gentle cycle in cold water if using superwash or acrylic yarn. Use a mesh laundry bag to protect the garment. Lay flat to dry. Do not tumble dry on high heat. Do not hang to dry as the weight of wet yarn will distort the shape. Store folded, not on a hanger.
For non-superwash wool, hand wash only in cool water with wool-safe soap.
You Did It!
Thank you so much for choosing this pattern for your next project. I hope the step-by-step instructions made the whole process feel manageable and maybe even fun. There is something really satisfying about watching those little squares come together into a wearable piece.
If you make this mint green granny square baby cardigan, I would absolutely love to see it! Tag me on Instagram or share a photo in our Facebook group. Seeing your finished projects is honestly the best part of sharing patterns.
Go ahead and save this pattern to your Pinterest boards so you can find it again when you are ready to start. And if you have any questions or want to share how yours turned out, drop a comment below. I read every single one and love hearing from you!
You Might Also Like
- Mint Green Spring Purse Free Crochet Pattern
- Lavender Rose Granny Square Purse Free Crochet Pattern
- Black and White Shearling Crochet Cardigan Free Pattern
- Blush Pink Octopus Toilet Paper Cozy Free Crochet Pattern
