
Last summer, my best friend called me in a panic. She had a garden party in three weeks, nothing in her closet felt right, and she wanted something that looked like it belonged in a vintage boutique. "Something flowy," she said. "Something romantic but not fussy." I told her I could make her a dress. She laughed. I was not joking. That phone call turned into late nights, dozens of granny squares spread across my living room floor, and one of the most satisfying garment projects I have ever completed.
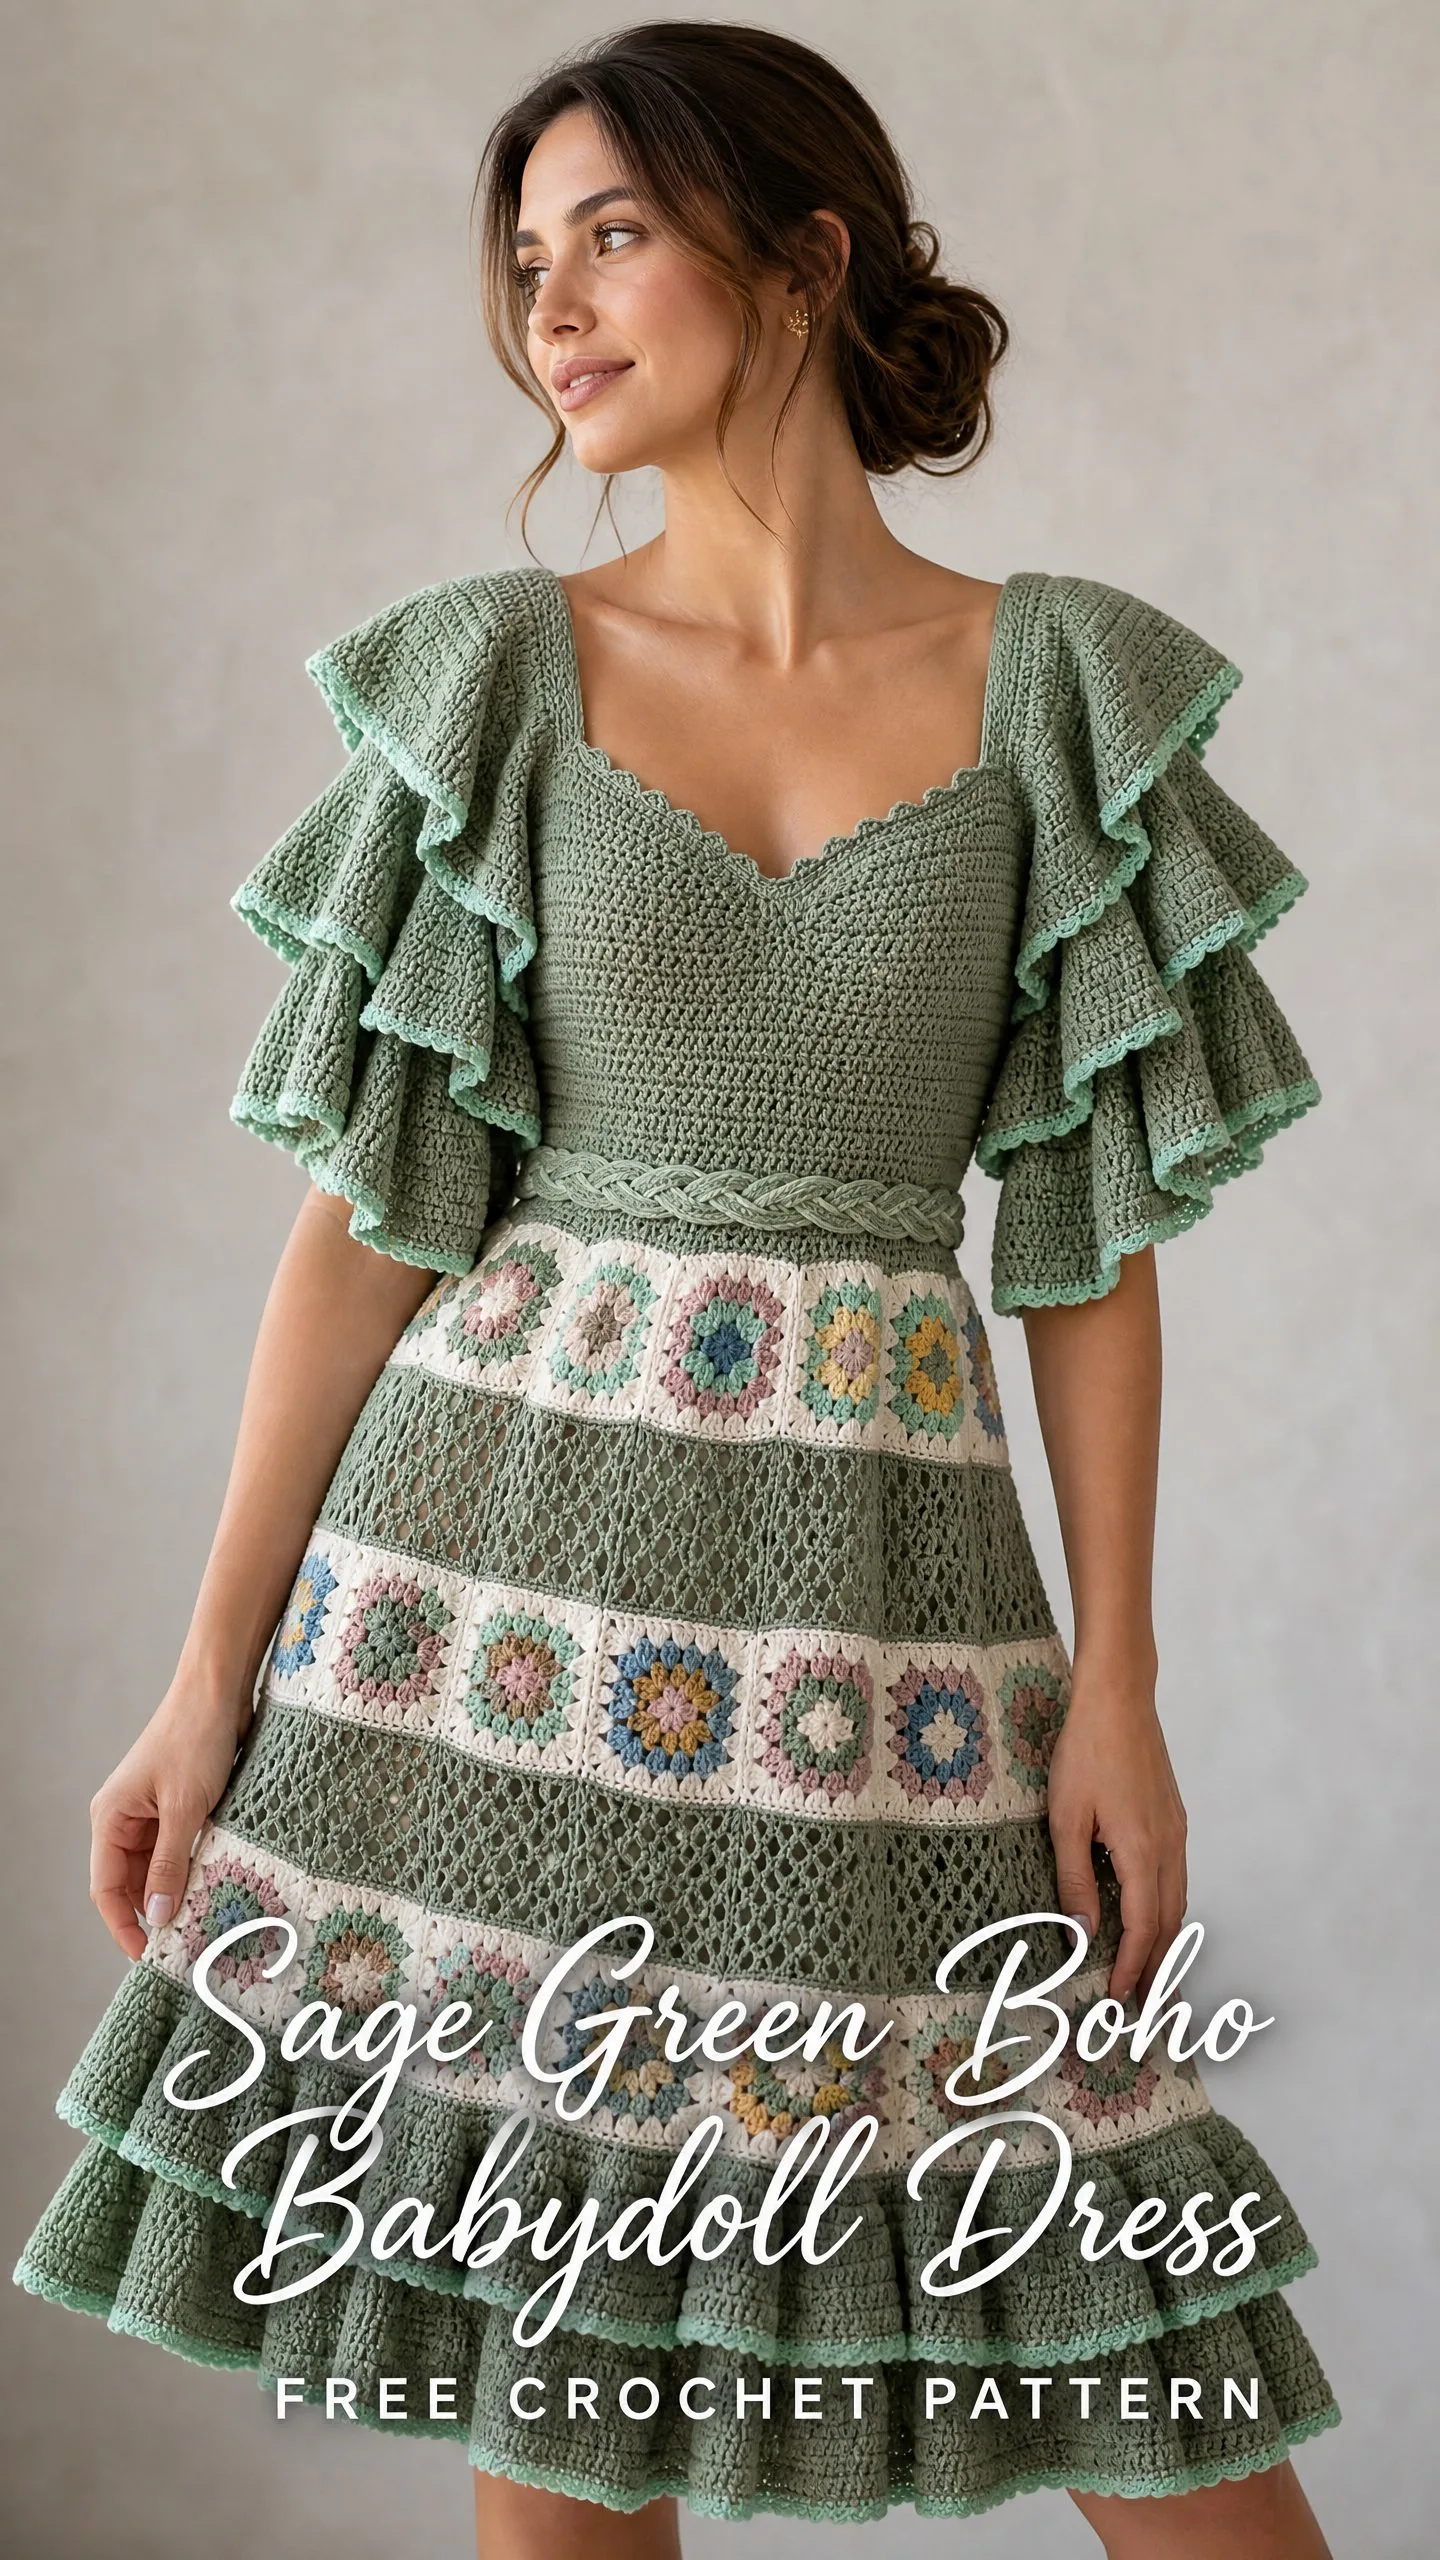
This sage green boho babydoll dress became my obsession for those three weeks. The sweetheart neckline, the dramatic triple-tiered ruffle sleeves, the alternating bands of delicate mesh and colorful granny squares. Every element came together into something that genuinely made me proud. My friend wore it to her party and got so many compliments that two other people asked me to make one for them.
Now I am sharing this pattern with you. Fair warning: this is not a weekend project. This dress takes time, patience, and some garment construction experience. But if you have been craving a challenge that results in something truly wearable and stunning, keep reading. I am going to walk you through every single step.
Why This Boho Babydoll Dress Pattern Is Worth the Effort
Let me be honest with you. This crochet pattern sits firmly in the advanced intermediate to advanced skill level. You will work flat sections and rounds. You will construct and join 30 individual granny squares. You will shape a sweetheart neckline with careful decreases. You will build triple-tiered ruffle sleeves that cascade beautifully over the shoulders.
Does that sound intimidating? Good. It should sound like exactly the kind of project that pushes your skills forward while creating something absolutely gorgeous.
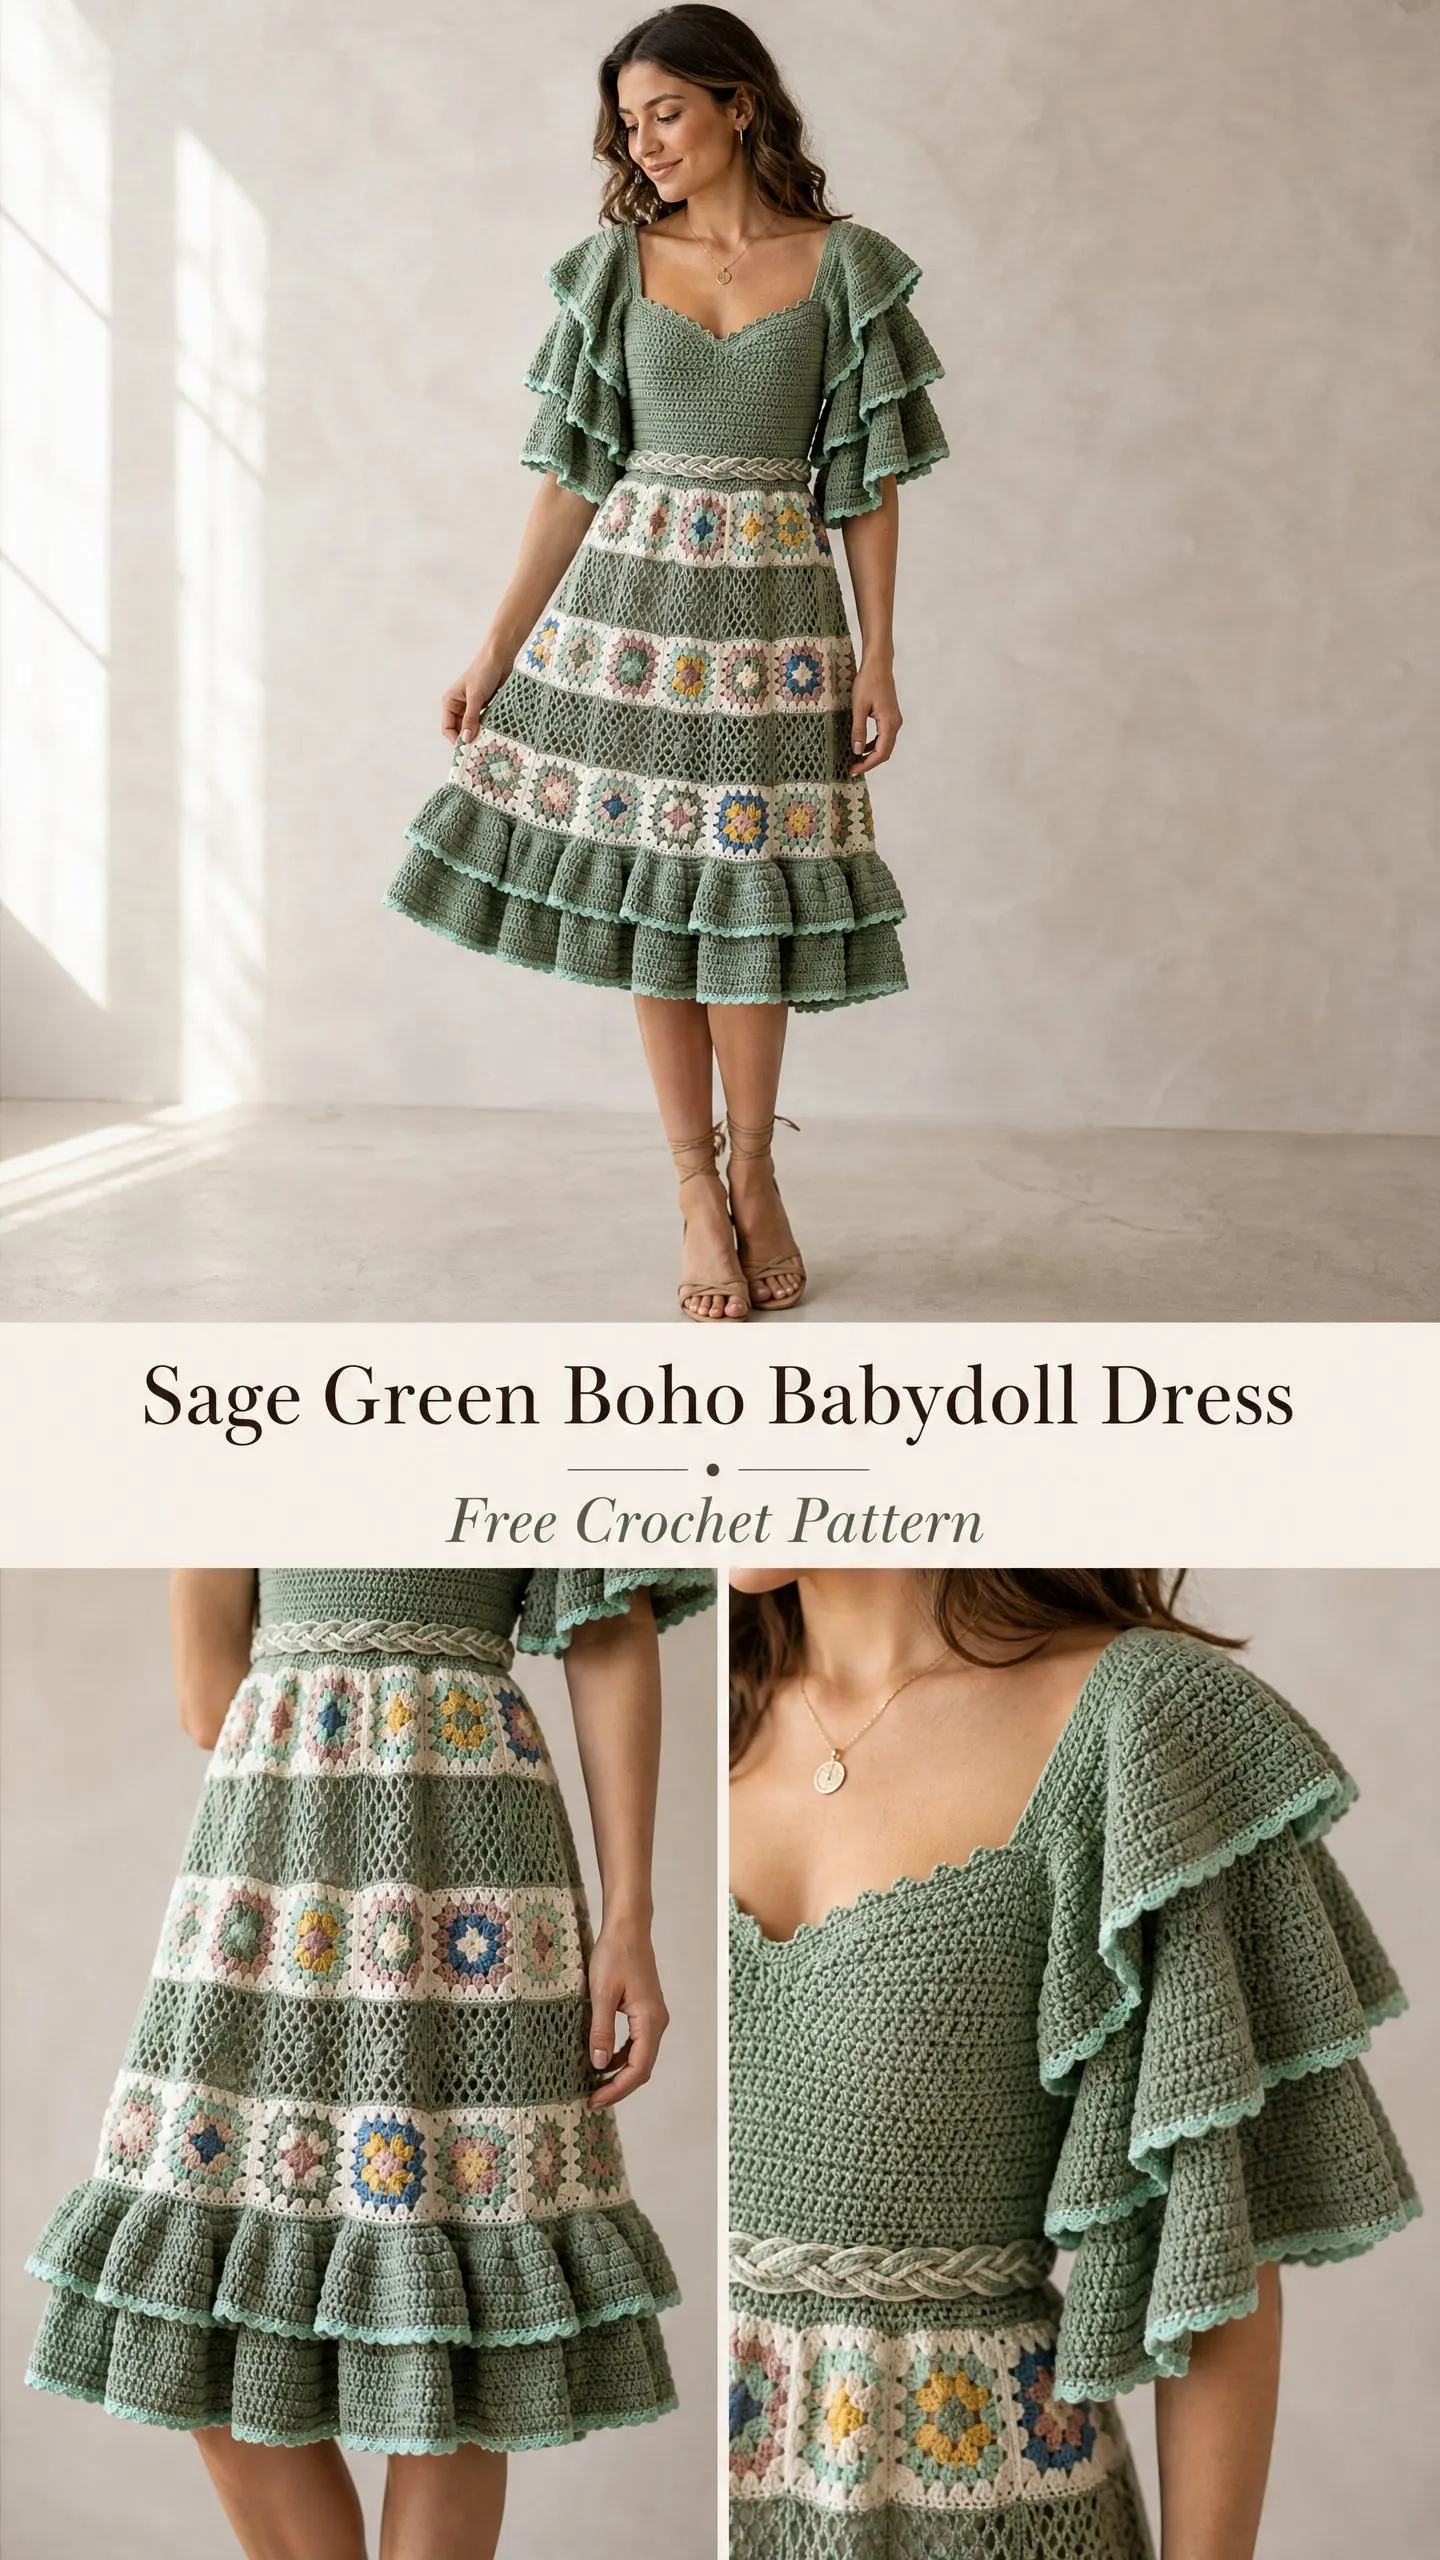
The finished dress features a fitted bodice in dense single crochet (sc), which creates a structured fabric that holds its shape. The skirt flows from the waist in alternating sections of airy mesh stitch and joined granny square bands in pastel colors. The overall silhouette is a relaxed babydoll shape with plenty of ease at the waist and hips. It hits at midi length, right below the knee.
The color palette keeps things sophisticated. Sage green dominates as the main color, with pops of dusty pink, butter yellow, sky blue, and cream appearing exclusively in the granny square motifs. A braided belt detail at the waist adds texture and visual interest. The lighter sage trim on the ruffle edges creates subtle dimension.
Materials You Will Need
Before you begin this crochet tutorial, gather everything on this list. Having your materials organized makes a project of this scale much more manageable.
Yarn (DK Weight, Light 3):
Recommended Yarn Brands:
Lion Brand 24/7 Cotton works beautifully for this project. The mercerized cotton gives excellent stitch definition and holds the ruffle structure without drooping. Paintbox Yarns Cotton DK is a budget-friendly alternative that is machine washable. Drops Safran offers a cotton-viscose blend with lovely drape, though the skirt may lengthen slightly after blocking.
Hooks:
Notions:
Gauge Information
Gauge matters enormously for garments. Even half a stitch off per inch shifts your finished bust measurement by nearly 2 inches across the full circumference. Please swatch, wash, and block before starting.
Bodice Gauge (E-4 hook, MC):
20 sc x 24 rows = 4 inches x 4 inches blocked
Mesh Stitch Gauge (F-5 hook, MC):
18 mesh stitches x 10 rows = 4 inches x 4 inches blocked
Granny Square Gauge (E-4 hook):
One completed 4-round granny square = 3.5 inches x 3.5 inches blocked
Finished Measurements
This pattern is written for size Small/Medium, fitting a bust of 34 to 36 inches.
Abbreviations and Special Stitches
Let me define every abbreviation you will encounter. If you are new to garment crochet, bookmark this section.
Granny Square Cluster
This forms the heart of each granny square. Yarn over, insert hook in ring or chain space, yarn over, pull up a loop, yarn over, draw through two loops. You now have two loops remaining. Repeat this two more times in the same space. You have four loops on your hook. Yarn over and draw through all four loops. This creates a 3-dc cluster.
Mesh Stitch
Chain 3 (counts as dc plus ch-1), skip 1 stitch, double crochet in next stitch. Repeat the sequence of chain 1, skip 1, double crochet across the round. Each dc plus ch-1 pair counts as 2 stitches.
Ruffle Stitch
Work 3 double crochets into each stitch across the row. This triples your stitch count and creates full, gathered ruffles.
Step by Step Pattern Instructions
Section 1: Bodice Front Panel
Using MC and your E-4 hook, chain 92.
Row 1 (RS): Sc in 2nd ch from hook and in each ch across. Turn. (91 sc)
Row 2: Ch 1, sc in each st across. Turn. (91 sc)
Rows 3 through 14: Repeat Row 2 twelve more times. (91 sc each row)
Your bodice front should now measure approximately 2.25 inches tall.
Sweetheart Shaping: Left Cup
Row 15 (RS): Ch 1, sc in first 42 sts, sc2tog over next 2 sts, sc in next 2 sts. Place marker in stitch 43. Turn, leaving remaining sts unworked. (45 sts on left cup section)
Row 16: Ch 1, sc2tog over first 2 sts (neckline edge), sc to end. Turn. (44 sts)
Row 17: Ch 1, sc to last 2 sts, sc2tog. Turn. (43 sts)
Row 18: Ch 1, sc2tog, sc to end. Turn. (42 sts)
Rows 19 through 24: Ch 1, sc across. Turn. (42 sts each row)
Cut yarn and fasten off left cup.
Sweetheart Shaping: Right Cup
Return to Row 14. Join MC to stitch 48, skipping 5 center stitches. These form the V base of the sweetheart dip.
Row 15R (RS): Ch 1, sc in first 2 sts after join, sc2tog (toward center), sc to end. Turn. (44 sts)
Row 16R: Ch 1, sc to last 2 sts, sc2tog. Turn. (43 sts)
Row 17R: Ch 1, sc2tog, sc to end. Turn. (42 sts)
Rows 18R through 24R: Ch 1, sc across. Turn. (42 sts each row)
Cut yarn and fasten off right cup.
Checkpoint: Your completed bodice front should measure approximately 5 inches tall at the sides and 3.5 inches at the center front dip.
Section 2: Bodice Back Panel (Two Halves)
Left Back Half:
Using MC and E-4 hook, chain 47.
Row 1 (RS): Sc in 2nd ch from hook and in each ch across. Turn. (46 sc)
Rows 2 through 24: Ch 1, sc across. Turn. (46 sc each row)
Work 1 row of sc edging along the center back edge for the lace-up panel. Fasten off.
Right Back Half:
Repeat as for Left Back Half, mirroring the center back edge.
Section 3: Joining the Bodice
Place your front panel right side facing up. Align the left back half with the left side edge. Using MC and a yarn needle, seam the left side using mattress stitch for approximately 5.5 inches. Leave the top 2 inches open as the armhole. Repeat for the right side seam.
Work 1 round of sc around the sweetheart neckline edge and square back neckline. Join front and back shoulder edges by working sc across left back shoulder top (42 sts), then sc across front shoulder top (42 sts), joining at the right shoulder with sl st.
Section 4: Back Lace-Up Closure
With E-4 hook and MC, work 1 row of sc evenly down the left center back edge. Repeat for the right edge.
On the left back edge only, create the lace-up loops. With RS facing, join MC to the bottom of the left center back edge.
Ch 1, sc in first 3 sts, [ch 3, sk 2 sts, sc in next 3 sts] 5 times, sc to top edge. (6 loops created)
Cut a 36-inch length of MC yarn. Thread it through the 6 loops and matching positions on the right back edge in a criss-cross lace pattern. Tie in a bow at the top.
Section 5: Triple-Tiered Ruffle Sleeves (Make 2)
Each sleeve creates a dramatic fan shape with three cascading ruffle tiers. The armhole opening has approximately 60 stitches around.
Tier 1:
With E-4 hook and MC, join yarn at the underarm point. Work 1 round sc evenly around the entire armhole opening. Adjust to 60 sc.
Ruffle Tier 1 Setup Round: Ch 3 (counts as dc), 2 dc in same st, 3 dc in each remaining st around. Join. (180 dc)
Ruffle Tier 1 Edge: With CE and E-4 hook, sl st in each st around the outer edge. Fasten off.
Tier 2:
Join MC at the base of Tier 1, picking up stitches from the original 60-st pickup row. Increase to 90 sc as follows: [2 sc in next st, sc in next st] repeat around. (90 sc)
Ruffle Tier 2 Setup Round: Ch 3, 2 dc in same st, 3 dc in each st around. Join. (270 dc)
Ruffle Tier 2 Edge: With CE, sl st around outer edge. Fasten off.
Tier 3:
Join MC to the same 60-st base, picking up remaining stitches evenly distributed between Tiers 1 and 2. Work 1 round sc. (60 sc)
Increase: [2 sc in next st, sc in next 2 sts] repeat around, adjusting to reach 80 sc. (80 sc)
Ruffle Tier 3 Setup Round: Ch 3, 2 dc in same st, 3 dc in each st around. Join. (240 dc)
Ruffle Tier 3 Edge: With CE, sl st around outer edge. Fasten off.
Checkpoint: Each completed sleeve should span approximately 10 inches from shoulder to longest ruffle tip.
Section 6: Granny Squares (Make 30 Total)
Work 10 squares with CB (dusty pink) center, 10 with CC (yellow) center, and 10 with CD (blue) center. All squares use CA (cream) for Rounds 2 and 3, and MC (sage green) for Round 4.
Granny Square Instructions:
With accent color and E-4 hook, make a magic ring.
Round 1: Ch 3 (counts as dc), 2 dc in ring, ch 2, [3 dc in ring, ch 2] 3 times. Join with sl st to top of beg ch-3. Fasten off accent color. (12 dc, 4 ch-2 corner spaces)
Round 2: Join CA to any corner ch-2 sp. Ch 3, 2 dc in same sp, ch 2, 3 dc in same sp (corner made), ch 1, [3 dc in next corner sp, ch 2, 3 dc in same sp, ch 1] 3 times. Join with sl st to top of beg ch-3. (24 dc, 4 corners, 4 ch-1 side spaces)
Round 3: Sl st to corner sp. Ch 3, 2 dc in same sp, ch 2, 3 dc in same sp, ch 1, 3 dc in next ch-1 sp, ch 1, [3 dc in next corner sp, ch 2, 3 dc in same sp, ch 1, 3 dc in side sp, ch 1] 3 times. Join. Fasten off CA. (36 dc, 4 corners, 8 side spaces)
Round 4: Join MC to any corner sp. Ch 3, 2 dc in same sp, ch 2, 3 dc in same sp, [ch 1, 3 dc in next side sp] twice, ch 1, [3 dc in corner sp, ch 2, 3 dc in same sp, ch 1, 3 dc in side sp, ch 1, 3 dc in side sp, ch 1] 3 times. Join. Fasten off. (48 dc, 4 corners, 12 side spaces)
Block all 30 squares to 3.5 inches x 3.5 inches.
Joining Squares into Bands:
Hold two squares with wrong sides together. Slip stitch through both loops of each matching edge stitch using MC. Join 10 squares into a horizontal band, then join the end squares to form a ring. Repeat for all three bands.
Section 7: Skirt Construction
The skirt works in the round from the waist down, alternating mesh sections with granny square bands.
Waist Attachment Round:
With RS of bodice facing, join MC and E-4 hook to the waist edge. Work 1 round sc evenly around, reaching 160 sc. (160 sc)
Skirt Round 1 (Mesh Setup): Switch to F-5 hook. Ch 4 (counts as dc plus ch 1), sk 1 st, [dc in next st, ch 1, sk 1 st] around, join with sl st to 3rd ch of beg ch-4. (80 dc, 80 ch-1 spaces)
Mesh Panel 1 (Rounds 2 through 7):
Round 2: Sl st to first ch-sp, ch 4, dc in next dc, [ch 1, dc in next dc] around, ch 1, join to 3rd ch of beg ch-4. (80 dc, 80 ch-1 spaces)
Rounds 3 through 7: Repeat Round 2. (80 dc, 80 ch-1 spaces each round)
Work 1 round sc with E-4 hook, placing 1 sc in each dc and 1 sc in each ch-sp around. (160 sc)
Attaching Granny Band 1:
Slip the first granny band over the skirt, aligning with the sc round just worked. With MC and E-4 hook, sl st the top edge of the band to the 160 sc round, spacing squares evenly. Work 1 round sc along the lower edge of the band. (approximately 160 sc)
Mesh Panel 2 (5 rounds):
Switch to F-5 hook. Work 5 rounds of mesh stitch. Work 1 round sc with E-4 hook. (160 sc)
Attaching Granny Band 2:
Attach second granny band as before. Work 1 round sc along lower edge. (approximately 160 sc)
Mesh Panel 3 (5 rounds):
Work 5 rounds mesh. Work 1 round sc. (160 sc)
Attaching Granny Band 3:
Attach third granny band. Work 1 round sc along lower edge. (approximately 160 sc)
Mesh Panel 4 (3 rounds):
Work 3 rounds mesh. Work 1 round sc. (160 sc)
Section 8: Double Ruffle Hem
Hem Ruffle Tier 1:
With E-4 hook and MC, ch 3, 2 dc in same st, 3 dc in each remaining st around. Join to top of beg ch-3. (480 dc)
With CE, sl st around the outer edge. Fasten off.
Hem Ruffle Tier 2:
Return to the 160 sc base round. Join MC and work [2 sc in each of 2 sts, sc in next st] around, adjusting to reach 200 sc. (200 sc)
Ch 3, 2 dc in same st, 3 dc in each remaining st around. Join. (600 dc)
With CE, sl st around the outer edge. Fasten off.
Section 9: Braided Waistband
Cut 24 strands of MC, each 36 inches long. Divide into 3 groups of 8 strands. Attach all groups at the left side seam using a lark’s head knot looped through a stitch at the waist join.
Braid the three groups tightly for the full circumference of the waist, approximately 32 inches. As you braid, tack the braid to the waistline every 2 inches using a yarn needle threaded with MC. When complete, sew the end securely to the starting point and trim excess.
Finishing and Blocking
Weave in all ends using your yarn needle. At granny square color-change points, weave at least 1 inch in two directions for security.
Block in sections. Wet-block granny squares before joining if you have not already. After assembly, mist the bodice and skirt with water, lay flat on blocking mats, and pin to finished measurements. Allow 12 to 24 hours to dry.
Block ruffle sleeves by pinning each tier in a fan shape, stretching ruffles outward evenly.
Lightly steam the braided belt through a damp pressing cloth on low heat to flatten and set without crushing.
Time Estimate
This dress takes approximately 80 to 120 hours depending on your experience level and working speed. The granny squares alone require significant time. Blocking and final assembly add another 4 to 6 hours.
Plan this as a multi-week project. I worked on mine during evening TV time and weekend crafting sessions. Breaking it into sections keeps the project manageable and satisfying.
Size Customization Tips
To increase bust by 2 inches: Add 10 sc to the bodice front foundation (ch 102 instead of ch 92). Adjust each back half to ch 52. Increase skirt waist attachment round to 170 sc. Mesh rounds become 85 dc and 85 ch-1 spaces.
To decrease bust by 2 inches: Remove 10 sc from foundation (ch 82). Adjust back halves to ch 42. Waist round becomes 150 sc. Mesh rounds: 75 dc, 75 ch-1 spaces.
For a longer skirt: Add 3 to 5 mesh rounds to Mesh Panels 2 and 3. Each 3 rounds adds approximately 1.2 inches.
For a shorter skirt: Remove 3 rounds from each mesh panel.
Final Thoughts on This Crochet Dress Pattern
This sage green boho babydoll dress represents everything I love about ambitious crochet garment making. It combines multiple techniques, creates stunning visual texture, and results in something genuinely wearable. When you slip this dress over your head and see those ruffle sleeves cascade and those granny squares catch the light, you will understand why the hours were worth it.
My friend still wears her dress every chance she gets. She texted me a photo from a wedding last month, standing in a garden with the sun behind her. The sage green practically glowed. That is the kind of project this is.
I hope you love making this dress as much as I loved designing and writing out every step for you. Thank you for trusting me with your time and your yarn stash. If you make this dress, I would absolutely love to see it. Tag me on Instagram or share a photo on Facebook. Your creations always make my day.
If this pattern caught your attention, go ahead and save it to your Pinterest boards so you can find it when you are ready to start. And please drop a comment below if you decide to make one. I love hearing which color combinations you choose and how the finished dress turns out. Happy crocheting!
You Might Also Like
- Christmas Peppermint Granny Square Blanket Free Crochet Pattern
- Soft Lavender Dream Slipper Boots Free Crochet Pattern
- Dusty Rose Romantic Crochet Dress Free Pattern
- Manta Ray Crochet Beach Carryall Free Pattern
